|
|
| Tribute Automotive Builds Discuss your Tribute kit build |

14th September 2014, 18:36
|
 |
Senior Member
|
|
Join Date: Jul 2011
Posts: 5,328
|
|
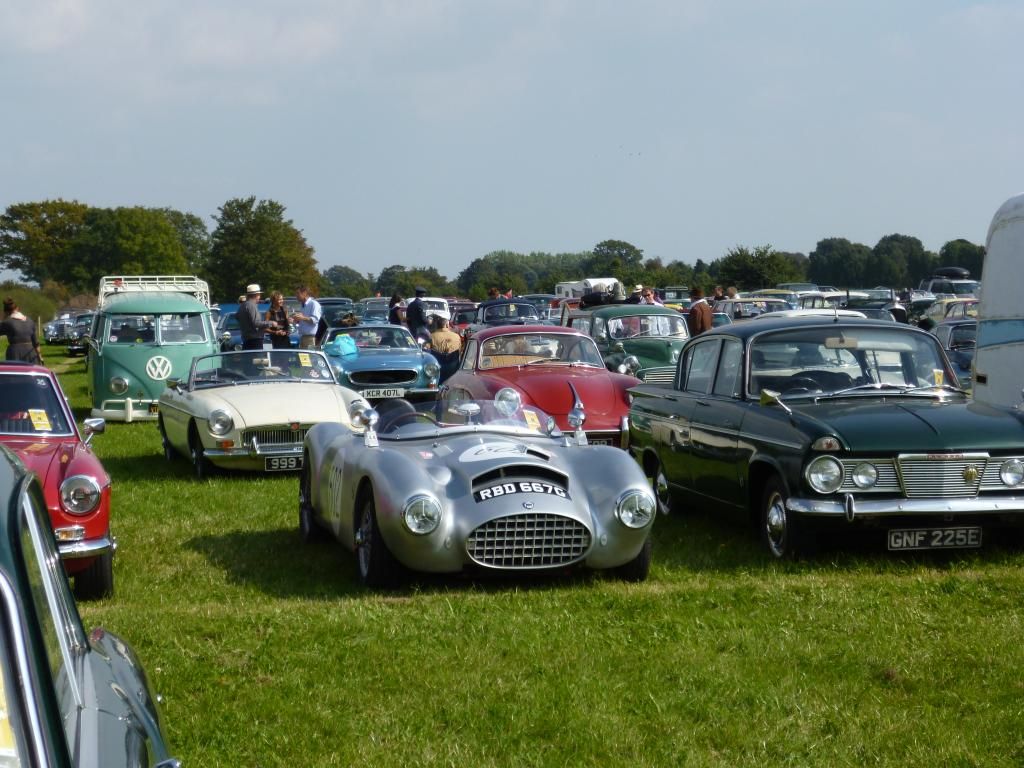
Hope your hand's healing Scottie, thought I'd post you a 'get well soon' inspirational picture -
'Field of Dreams'

Classic Jaguars as far as the eye can see. |
14th September 2014, 18:50
|
|
Senior Member
|
|
Join Date: May 2013
Posts: 2,161
|
|
Thank you Mr T, My hand is healing well BTW.
I bet you enjoyed yourself at Goodwood!
Did you dress up?
|
14th September 2014, 19:05
|
|
Senior Member
|
|
Join Date: Jul 2011
Posts: 5,328
|
|
Quote:
Originally Posted by Scottie22

Thank you Mr T, My hand is healing well BTW.
I bet you enjoyed yourself at Goodwood!
Did you dress up?
|
Had a great time at Goodwood. Went for period overalls with Lancia/Italian flag badges this year -
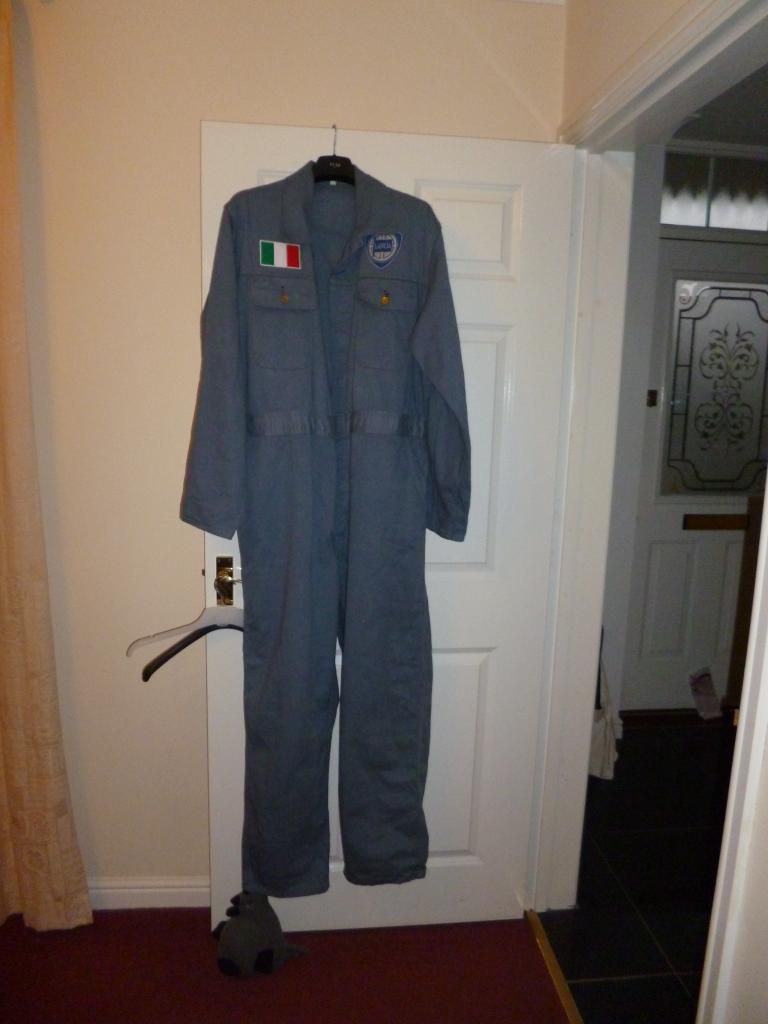
Bit cooler than tweeds and a collar and tie as it was really hot and humid this weekend.
Keep plugging away and this could be your car next year -
 |
14th September 2014, 19:21
|
|
Senior Member
|
|
Join Date: May 2013
Posts: 2,161
|
|
I will keep plugging away, as I can see how you are enjoying your finished car!
It really is a credit to you, it looks so coooool!
Steve McQueen would have wanted yours if he had seen it!
|
14th September 2014, 21:44
|
|
Senior Member
|
|
Join Date: Apr 2014
Location: Midlands
Posts: 405
|
|
Mr T I decided to read your build thread again but this time paid a lot more attention now that my project is no longer pipe dreams. Loved the videos too. Scottie you serve as reality and inspiration as to the determination required and focus needed to complete these projects.
|
14th September 2014, 23:08
|
|
Senior Member
|
|
Join Date: May 2013
Posts: 2,161
|
|
Thank you for the kind words jonesy!
When I first started my build, Mr Towed was still hard at work on his, and he inspired me, and still does.
His car is up and running and should act as inspiration for lots of people out there.
Mr Towed has seen it, done it, got the T shirt, and is currently living the dream!
I want the same deal, but its taking ages to get there.
|
15th September 2014, 08:08
|
|
Senior Member
|
|
Join Date: May 2013
Posts: 2,161
|
|
 Monday
I was thinking about the Lynx XKSS that was up for sale at Goodwood over the weekend, and it made me wonder what the definition of "kit" car actually was.
In the broader sense, a person has a dream car in mind, and does their best to re-create that car for real.
This can be done several ways, by buying a total "kit" of parts, or just a body-shell, or even make the shell themselves,
The end result is the same, the finished car is either a total "replica" in every sense, or a very very similar car to the original, (if trying to re-create an existing car)
Whatever it is, rightly or wrongly, it will usually be reffered to as a "kit car"
Lynx went through this process with their XKSS, which sold over the weekend for a staggering £384,540, remember this is not an original car!
Does anyone else know of a kit car that has sold for more than that?
[IMG]  [/IMG] |
15th September 2014, 09:23
|
|
Senior Member
|
|
Join Date: Jul 2011
Posts: 5,328
|
|
As Lynx make clones of the real thing that are accurate in every detail (including the faults) and the price realised is about 1/20th of the value of a genuine one, that hammer price looks like pretty good value for money.
It's a shame you weren't at the auction Scottie, you could've saved yourself a lot of cut fingers if you'd outbid the buyer...
|
15th September 2014, 10:53
|
|
Senior Member
|
|
Join Date: May 2013
Posts: 2,161
|
|
Normally with Lynx, that is the case, but in this particular instance, this car was fitted with a 3.8 litre engine which was not as original., and also it was built with an E Type chassis/floor-pan, which of course had not been designed when the XKSS's were in production.
That said, This car would most likely handle and be faster than the original anyway!
The reason I did not bid on it was that when it came time to pay,
I would have been in trouble finding the cash!
I shall have to to make do with my old sub-standard Spitfire based look alike!
But, I will be quite happy with that I'm sure.
|
16th September 2014, 17:09
|
|
Senior Member
|
|
Join Date: May 2013
Posts: 2,161
|
|
Tuesday
Well I got another half-days work done today.
I got the car out and put it up on my ramp as I had two jobs to do underneath it.
The last time I was under the car I noticed that the bridge that supports the gearbox rear end had two nut lose on one side and no bolts or nuts on the other.
Considering the car came to me with a years Mot, it makes you wonder......
So I sorted that out, and then made two metal panels to box in either side of the rear tail end, which I had been meaning to do for ages.
(When I bolted the body onto the car at the rear, I had left a 1 foot long gap at either side)
I did that, and now the complete underside, from one front wheel, right the way round the rear end of the car to the other front wheel is finished and watertight.
The only thing I have left to do at the front end is to make some sort of inner wheel arch to keep the water out of the battery box, right Mr Towed?
I have plans for this, and will get round to it.
When this is done, that is all the work to the under side finished, wow!
Here are pics of today's stuff.
[IMG]  [/IMG]
[IMG]  [/IMG]
[IMG]  [/IMG]
[IMG]  [/IMG]
[IMG]  [/IMG]
[IMG]  [/IMG]
[IMG]  [/IMG]

|
16th September 2014, 18:16
|
 |
Senior Member
|
|
Join Date: Feb 2012
Location: Wembley, London
Posts: 5,058
|
|
Scottie - Sounds like your "To Do" is getting shorter by the day. 
Good luck, Paul. 
|
17th September 2014, 18:22
|
|
Senior Member
|
|
Join Date: May 2013
Posts: 2,161
|
|
Wednesday
Today, I prepared and painted the boot lid, in its Connaught green topcoat.
I wanted: a: to see what Connaught green looked like on my car.
and b: had I done enough rubbing down and prep work?
Well I was very pleased with the colour, which is black with a touch of green,
just exactly what I want.
Was I pleased with the job? NO, I had not done enough prep, and I will have to rub in down a LOT more to get it perfect.
Well at least I know now what I have to do, which is as usual, a LOT more work!
The boot lid will be kind of hidden under the rear luggage rack, but the paint job has to be better than I've got it even so. It has to be Jaguar standard
at least, which right now its not.
Two pictures which don't really show the colour too well.
[IMG]  [/IMG]
[IMG]  [/IMG] |
17th September 2014, 18:47
|
|
Senior Member
|
|
Join Date: Jul 2011
Posts: 5,328
|
|
Scottie, don't look too closely at the finish you've got, nobody else will unless they're concours judges/anally retentive/w4nkers/all of the above. It's the overall effect of the car all in one colour, looking like it was painted in 1950 something that will blow people away, trust me 
Give it a damned good rubbing with G3 compound then polish it with Auto Glym super resin and it'll look more authentic than if you'd paid £10k for a pro spray job. |
17th September 2014, 19:14
|
 |
Senior Member
|
|
Join Date: May 2014
Location: Oxon
Posts: 1,124
|
|
Quote:
Originally Posted by Mister Towed
...Give it a damned good rubbing with G3 compound then polish it with Auto Glym super resin and it'll look more authentic than if you'd paid £10k for a pro spray job.
|
Agreed, get a good depth of paint on it and compound it carefully- you don't think those glassy Ferrari finishes are straight from the gun do you?
Providing you have the depth of paint to play with, compound it until it looks right to you, then polish.
Most of the professional detailers, when faced with a poor, scratched surface, measure the depth of the paint and decide how much they can take off, go for it until smooth and then polish. |
17th September 2014, 19:34
|
|
Senior Member
|
|
Join Date: Feb 2012
Location: Wembley, London
Posts: 5,058
|
|
Scottie - I'm only just getting to grips with this "prepping for paint" lark.
So on the one hand I am interested in what level of rubbing down / prep work is required.
On the other I know that Mr T & Ian make good points about the work required after paint.
I posted this link on my build thread & although it is about hand painting, it does cover cleaning up the paint.
http://www.rodsnsods.co.uk/forum/tec...ting-car-98714
Good luck, Paul.
|
17th September 2014, 19:52
|
|
Senior Member
|
|
Join Date: May 2013
Posts: 2,161
|
|
Mr Towed, IanA and Paul, thank you for the support, I will try what you suggest, but the pics make the paint look better than it is believe me!
I will give it a try though, and post results!
|
18th September 2014, 08:27
|
|
Senior Member
|
|
Join Date: May 2013
Posts: 2,161
|
|
Thursday
Mr Towed and IanA, the advice you both gave was spot-on.
I remember some years back, a chap had a blue E Type, which he entered into a concours event and won it. He was complemented on the exemplary paint on the car, the judges were surprised to hear he had done in himself, but were blown away when he said he had used dozens of rattle cans, to put the paint on thickly, and mopped it back to perfection.
BUT, what was not apparent in the pictures of my boot lid , and I have to be brutally honest, were the ripples, dents, hollows, and also where I had to pull on a giant insect, (which had decided to go paddling) off the paintwork.
This morning on inspection all these things were easier to see, and really not acceptable, so with a heavy heart, back to the drawing board, BUT it is still better than it was, so I am closer to it!
[IMG]  [/IMG] |
18th September 2014, 08:33
|
|
Senior Member
|
|
Join Date: Jun 2011
Location: birchington, kent
Posts: 1,769
|
|
Nothings easy... but you can imagine the dark colour against the stainless steel.
|
18th September 2014, 09:02
|
|
Senior Member
|
|
Join Date: Nov 2011
Posts: 3,563
|
|
Keep the faith. When mine was red the paint was rough but I managed to polish some up so it didn't look too bad. I did wonder about polishing up the whole car but decided it would be better to sand it back donw, re-primer and build it up from scratch.
I am so glad I did. As soon as I started sanding the bonnet, allof the dips, bumps and scratches became apparent.

I bought an electric dual action sanded and loads of 180, 230 and 400 grit pads. These too off the paint and most of the surface imperfections showing me exactly where filler was needed.

I think the time and effort was well rewarded with the paint finish
 |
18th September 2014, 11:55
|
|
Senior Member
|
|
Join Date: May 2013
Posts: 2,161
|
|
Later Thursday
Gary its that thought of the shiny bits against the darker colour that keeps me going!
WCA, to be honest, I thought of those pics you've posted, (I saw them when you were doing it) and I kind of knew then that my boot-lid did not look like a Leopard, as your car did, and it should have.
Like you say, the work is worthwhile, and your cars paint work is excellent
because of it.
I have started ripping the boot lid back with 240 grit, and already the Leopard is appearing! Also, by the look of it now, I really skimped on the sanding back the first time round.
Well, at least I know what I need to do to the WHOLE car now!!!!
Also I know I will paint the car myself, and as Towed and IanA said:
Smother it in lots of paint and mop the living daylights out of it after.
Here's my new Leopard:
[IMG]  [/IMG] |
|
Currently Active Users Viewing This Thread: 3 (0 members and 3 guests)
|
|
|
 Posting Rules
|
You may not post new threads
You may not post replies
You may not post attachments
You may not edit your posts
HTML code is Off
|
|
|
All times are GMT +0. The time now is 07:31.
|


 Linear Mode

