|
|
| Tribute Automotive Builds Discuss your Tribute kit build |

4th November 2012, 22:00
|
 |
Senior Member
|
|
Join Date: Oct 2010
Posts: 1,622
|
|
mmm....like that Nick 
Some great ideas going on in your workshop, cold or not! |
5th November 2012, 09:23
|
|
Senior Member
|
|
Join Date: Jul 2012
Location: Near Penzance cnwll
Posts: 146
|
|
 Fuelcap
That's a very nice fuel cap you have ! And a very good idea to sit it down as per the car it came off. Do you need the big rubber boot it sits in ?
|
5th November 2012, 19:20
|
 |
Senior Member
|
|
Join Date: Nov 2011
Location: Emsworth
Posts: 810
|
|
Hi Peep s, yup nice cap, with a key, 20 squids. I am not sure if I will need the rubber gaskeprobably make another, as my drain is now central, not on the side.
Not much time this eve, but took the plunge and made my take on the rear vents.....
will glass later and fill in from behind. I will connect them so they pull some air from the inner wheel arch.
Wadda you think? ?? (apart from mocha, whose opinion I am not interested in)
[IMG] 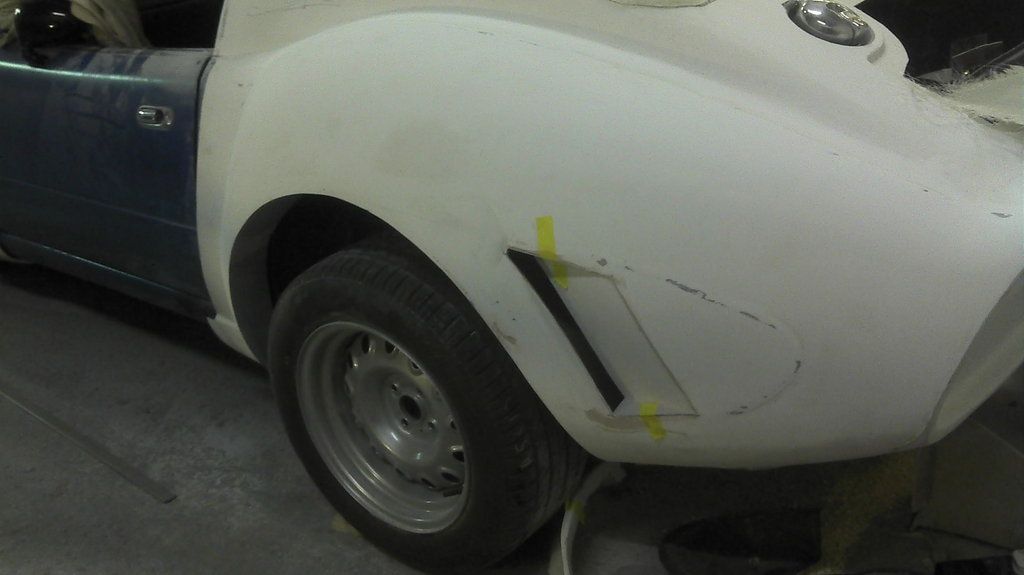 [/IMG] |
5th November 2012, 19:39
|
|
Senior Member
|
|
Join Date: Jan 2012
Location: Falkirk, Scotland
Posts: 100
|
|
Great looking filler....but I am biased as I have a coupe! Is yours restored? Doesn't look like it has any of the normal white oxidisation marks. £20 is a cracking price for a restored one too.
Good looking vents too mate.
|
5th November 2012, 19:45
|
|
Senior Member
|
|
Join Date: Oct 2010
Posts: 1,622
|
|
Quote:
Originally Posted by seanick

Hi Peep s, yup nice cap, with a key, 20 squids. I am not sure if I will need the rubber gaskeprobably make another, as my drain is now central, not on the side.
Not much time this eve, but took the plunge and made my take on the rear vents.....
will glass later and fill in from behind. I will connect them so they pull some air from the inner wheel arch.
Wadda you think? ?? (apart from mocha, whose opinion I am not interested in)
[IMG] [/IMG] |
Nick, you are doing a cracking job! Love the vent and love the speed of your progress!  |
5th November 2012, 20:08
|
|
Senior Member
|
|
Join Date: Nov 2011
Location: Emsworth
Posts: 810
|
|
The fillers are ex Fiat Coupe , a car I had not really looked at before, but its worth a look on Wiki. So its '92, and unrestore
Glad you like the vent, subject of a lot of umming and arring. I was going no-vent, but that rear quarter needs breaking up as its a big area, I think. However I found the existing vents too large, so heres my inbetweeny.
Re progress, thanks Chris, its just an hour after work, or two hours after eight when the kids are in bed  |
6th November 2012, 07:38
|
|
Senior Member
|
|
Join Date: Jul 2012
Location: Near Penzance cnwll
Posts: 146
|
|
Rear vents
I like the look, very slick. With the vent angled in like that its going to suck like a Dyson or maybe play tune like a Violin  |
6th November 2012, 18:30
|
|
Senior Member
|
|
Join Date: Nov 2011
Location: Emsworth
Posts: 810
|
|
Heres this eves result. Inspired by the 275, and imho a need to break up the rear quarter view. For a couple of hrs marking, snipping and pugging I am pleased. Still needs a bit of fettling.
[IMG] 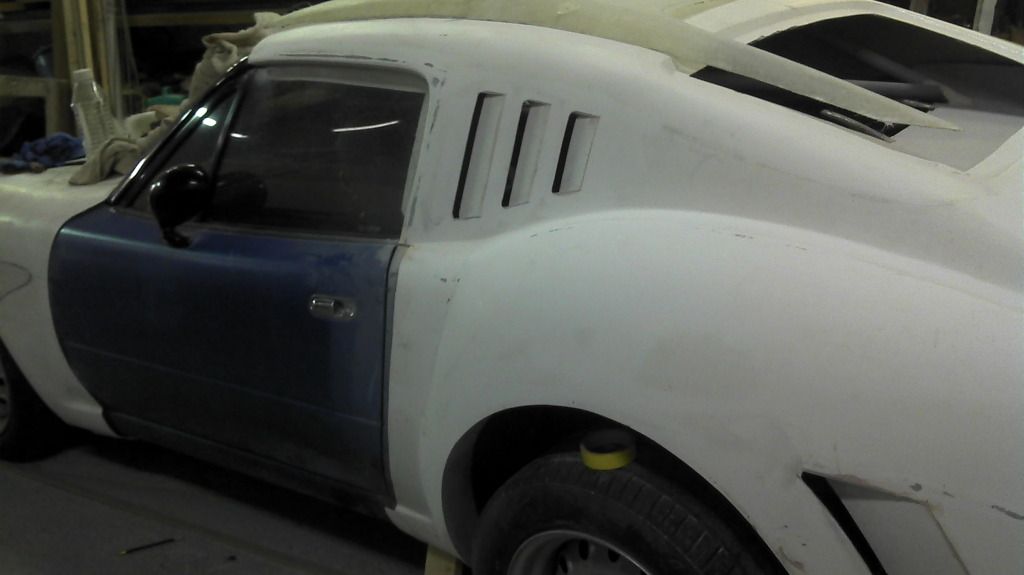 [/IMG]
[IMG] 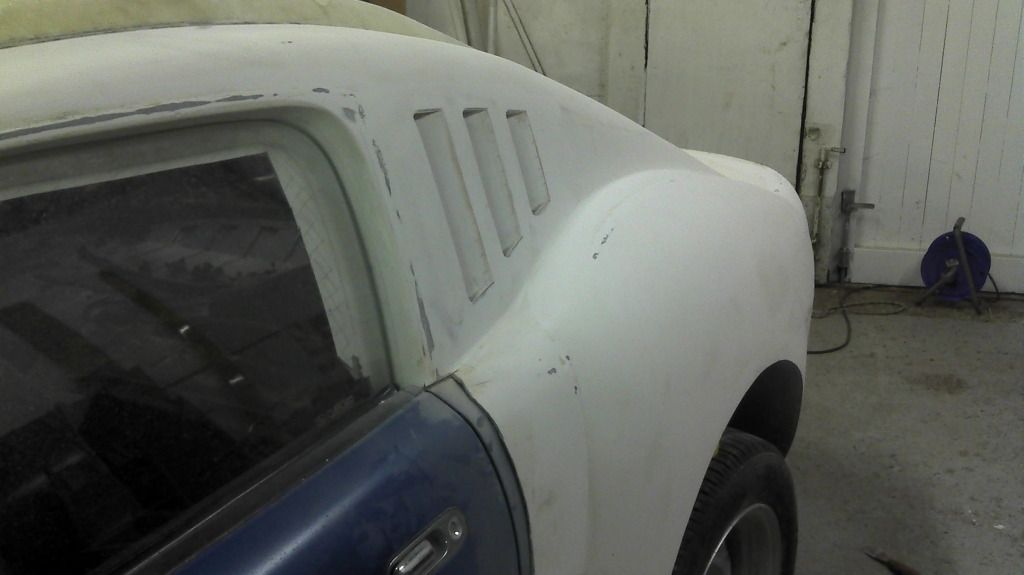 [/IMG]
[IMG] 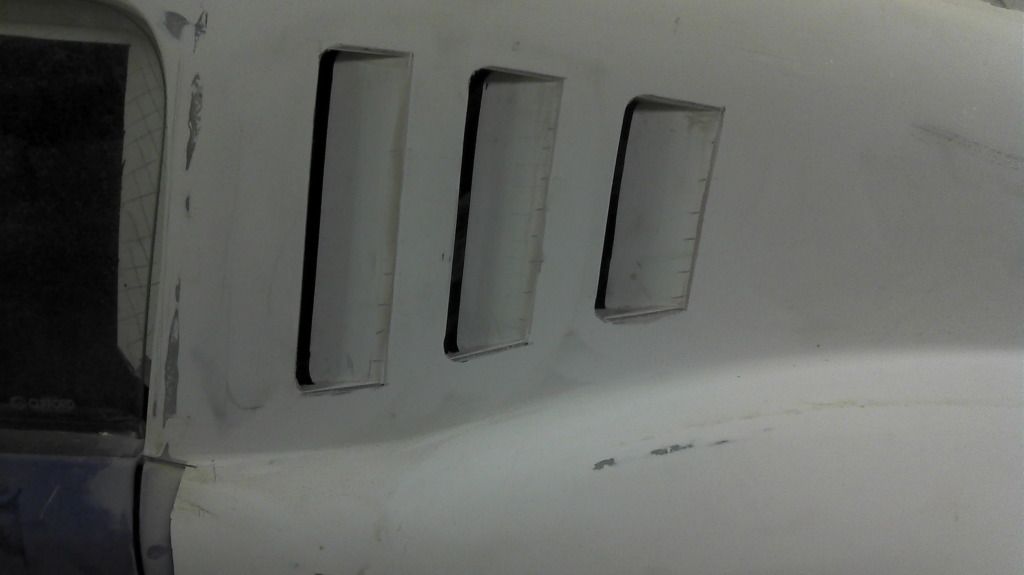 [/IMG]
 |
6th November 2012, 18:51
|
|
Senior Member
|
|
Join Date: Jul 2012
Posts: 576
|
|
Top, dallah! Love the look.
|
7th November 2012, 20:32
|
|
Senior Member
|
|
Join Date: Nov 2011
Location: Emsworth
Posts: 810
|
|
Done the vents in the other side. They are quite similar to the other side, so I am happy!
[IMG] 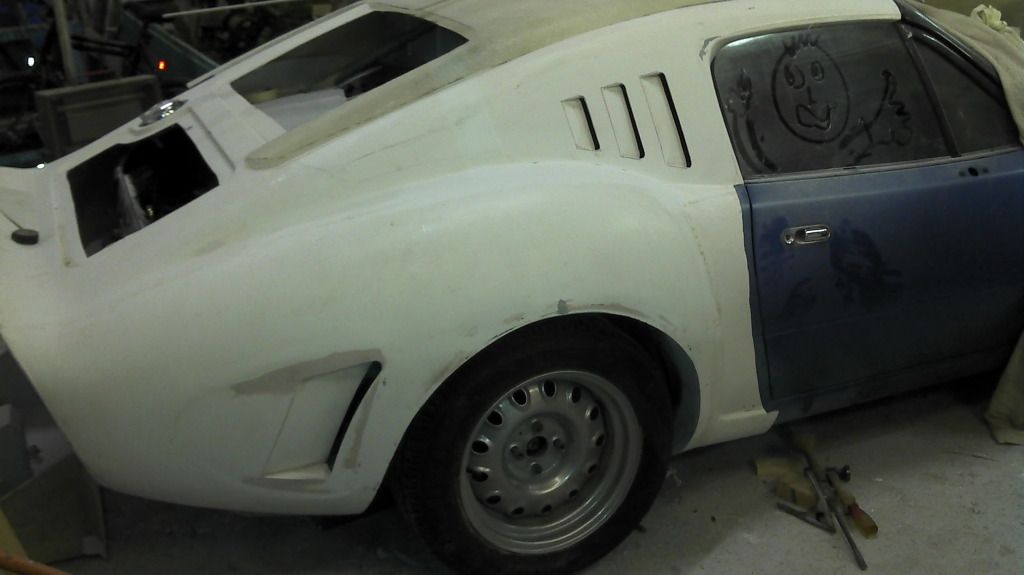 [/IMG]
And the view from the rear...
[IMG] 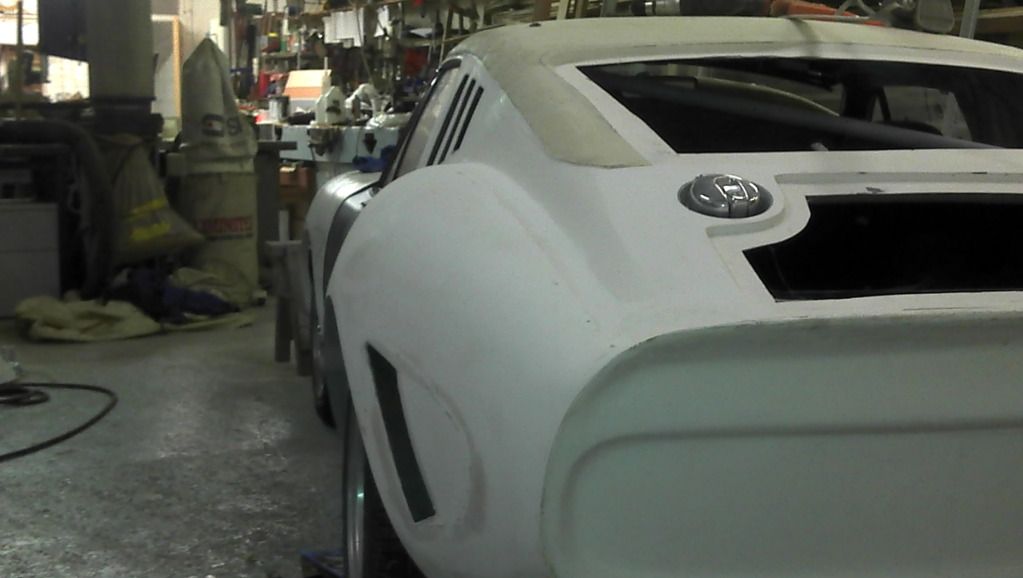 [/IMG] |
7th November 2012, 23:15
|
 |
Senior Member
Big Cheese
|
|
Join Date: Sep 2002
Posts: 1,080
|
|
Some really nice mods going on there. Great work |
8th November 2012, 06:45
|
|
Senior Member
|
|
Join Date: Jul 2012
Location: Near Penzance cnwll
Posts: 146
|
|
Vents look great, your so neat. Where do you get you GRP sheet from ?
|
8th November 2012, 10:49
|
|
Senior Member
|
|
Join Date: Nov 2011
Location: Emsworth
Posts: 810
|
|
Thanks Big Cheese
By GRP sheet do you mean mat or pre- made stuff?
The pre made stuff I either snipped bits off the window surrounds to make the small triangles that hold the vents in position, or I just made a bit on some flat plastic stuff.
For good GRP work use a consolodating roller for a better finish and avoiding a resin rich material. Either a paddle wheel or washer type roller.
If you want Chopped Strand Mat, there must be somewhere local to you. Just Google Fibreglass supplies. 2oz is a nice weight.
|
8th November 2012, 17:58
|
|
Senior Member
|
|
Join Date: Jul 2012
Location: Near Penzance cnwll
Posts: 146
|
|
Grp
I was referring to those nice pieces of 150mm wide gel coated strips you made your arches with ?  |
8th November 2012, 18:33
|
|
Senior Member
|
|
Join Date: Nov 2011
Location: Emsworth
Posts: 810
|
|
ah no, those are just bits of white plastic people use for 'For Sale' signs etc. The are just a temporary former. Gel goes on top, when its dried lay up the GRP. When its gone off they are removed to leave a smooth section of GRP.
Any thing thin and bendy can be used, eg perspex, Formica, even thin ply, but you have to cover that with brown parcel tape to stop the gel sticking to it.
|
8th November 2012, 20:29
|
|
Senior Member
|
|
Join Date: Jul 2012
Location: Near Penzance cnwll
Posts: 146
|
|
I can see that now. You do this for a living ?
|
8th November 2012, 21:09
|
|
Senior Member
|
|
Join Date: Nov 2011
Location: Emsworth
Posts: 810
|
|
Pay attention Bond!
No I don't do it for a living...I specialize in Wooden boat restoration and repair, but GRP was part of the course back in '86..........
There is a link to my site via my username if you are interested!
I've done a bit more this eve, hopefully making the former to mould the boot gutter around, so I can use the MX boot seal.
Pics coming via phone.......
|
8th November 2012, 21:20
|
|
Senior Member
|
|
Join Date: Nov 2011
Location: Emsworth
Posts: 810
|
|
Chopped out the boot return...[IMG] 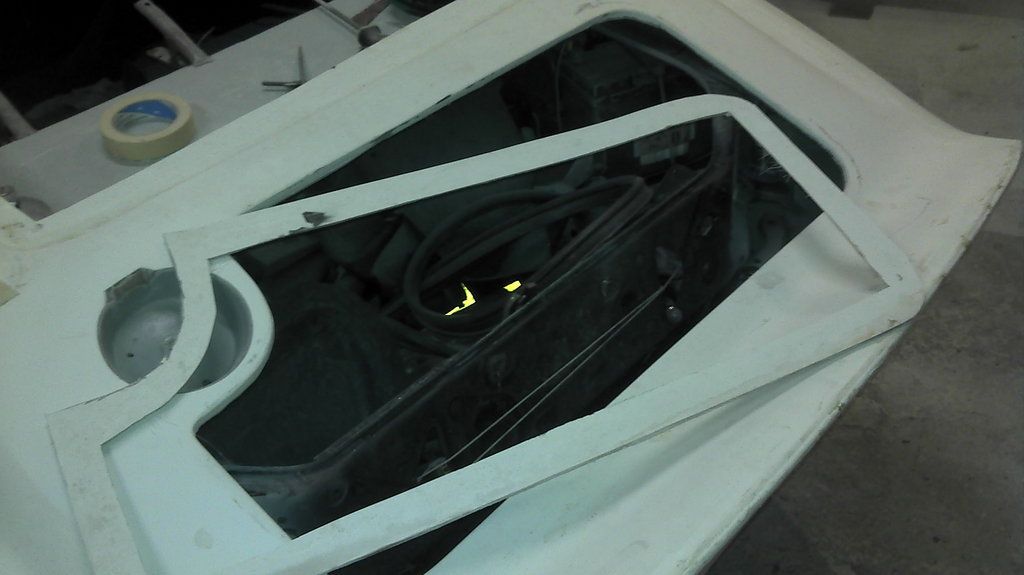 [/IMG]
Built up layers of plastic stuff to make a former for the grp.
[IMG] 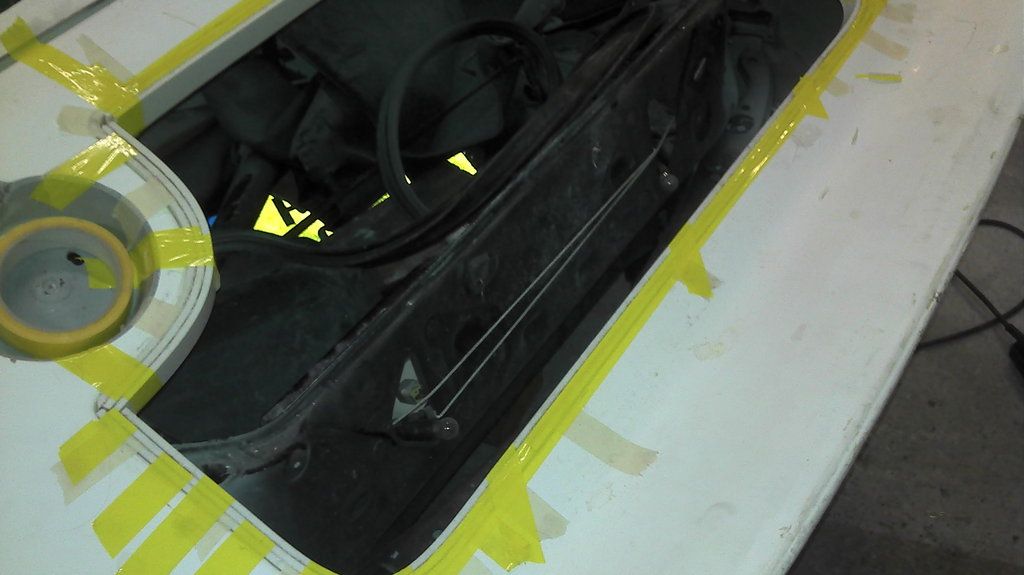 [/IMG]
Used smooth shiny tape to hold it there, and plastercine in the corners to provide a radius.
[IMG] 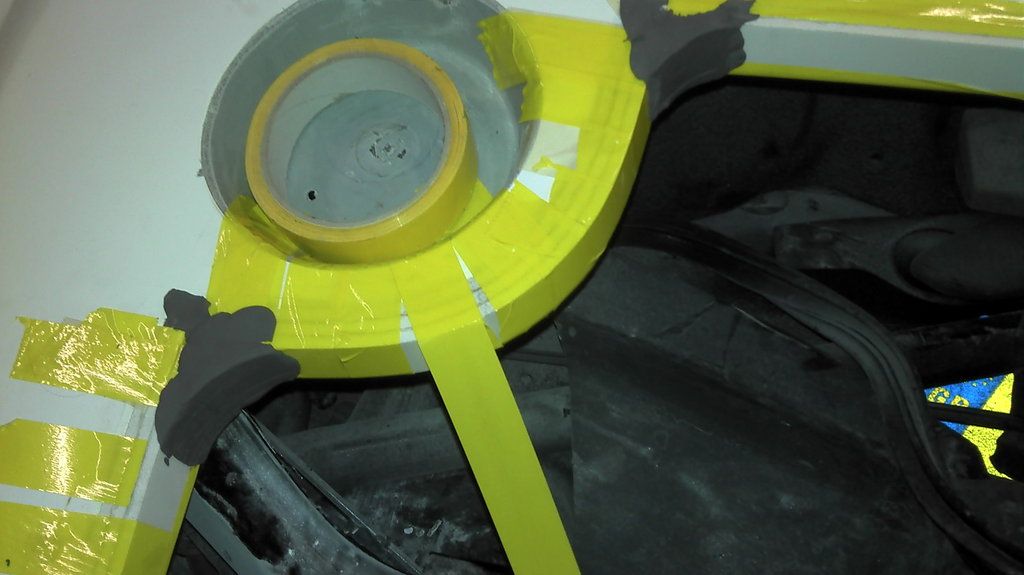 [/IMG]
I'll put a layer of gell coat on now, but will have to take the body off to glass under it properly tomorrow. |
9th November 2012, 19:02
|
|
Senior Member
|
|
Join Date: Nov 2011
Location: Emsworth
Posts: 810
|
|
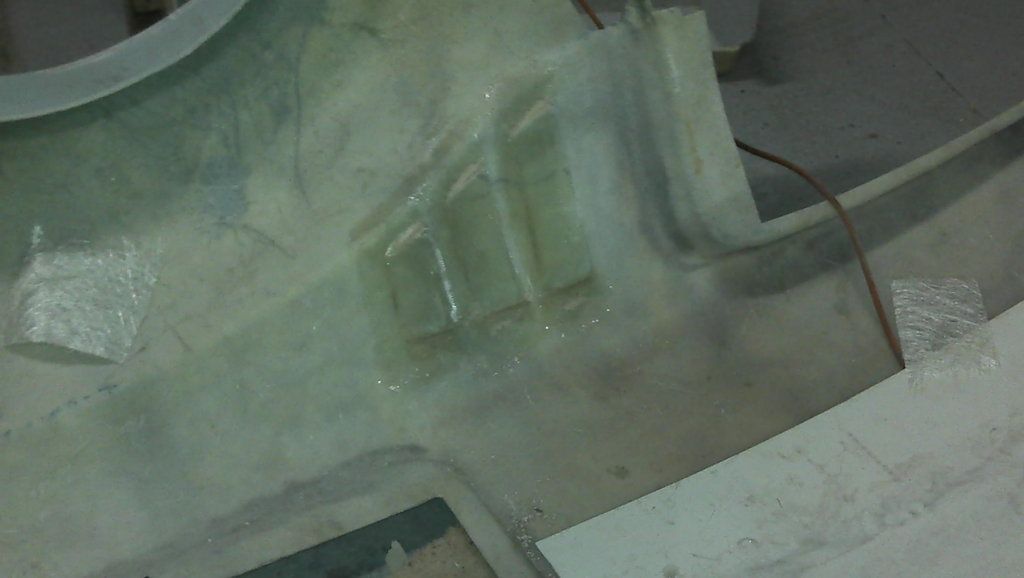
Boot gutter/seal mount
Put a coat of gell on this morning, and another at lunch today. Glassed over the lot this eve. Only had time for two layers. Hope to put a couple more on tomorrow. Also glassed over the inside of the vents after a clean up.
[IMG] 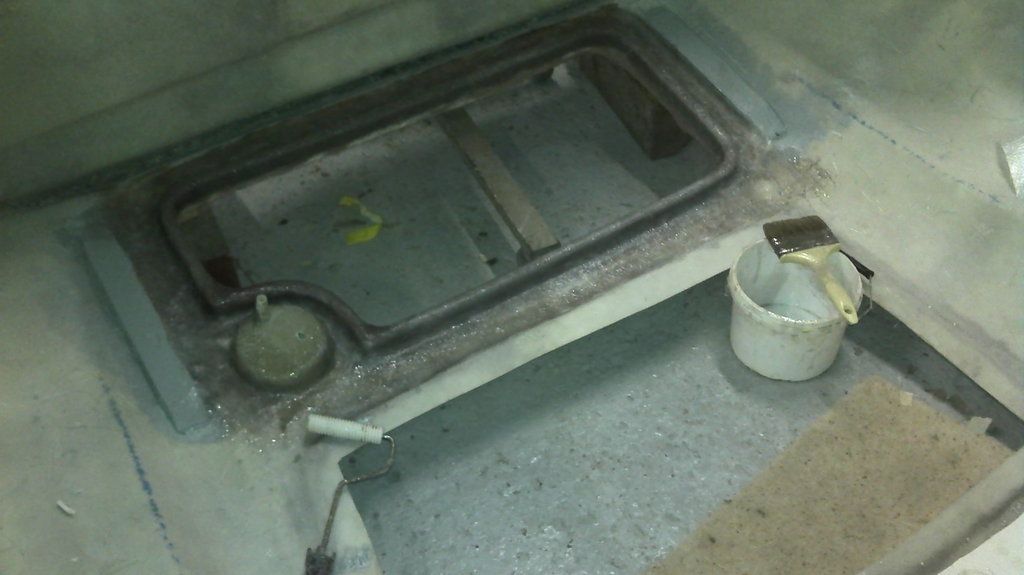 [/IMG]
 |
11th November 2012, 09:43
|
|
Senior Member
|
|
Join Date: Nov 2011
Location: Emsworth
Posts: 810
|
|
Oh xxxxxxxxx and xxxxx it!
The grp I did on fri eve still hasn't gone off. Silly me, I used a mixing pot and brush left overfrom epoxying a deck on a boat. Although I rinsed it well in acetone it has upset the polyester and its all still soft. I will havevto pull it off, clean it and  start again!
A sort of Mr Toad moment  !
On a brighter note an afternoon trip to the local scrappy yielded a new 'baby', spotted by my 3 year old daughter, and two vents from a Nissan primera, plus one from another nussan. Which was just too good to leave. Both went home muddy,  but happy.
[IMG] 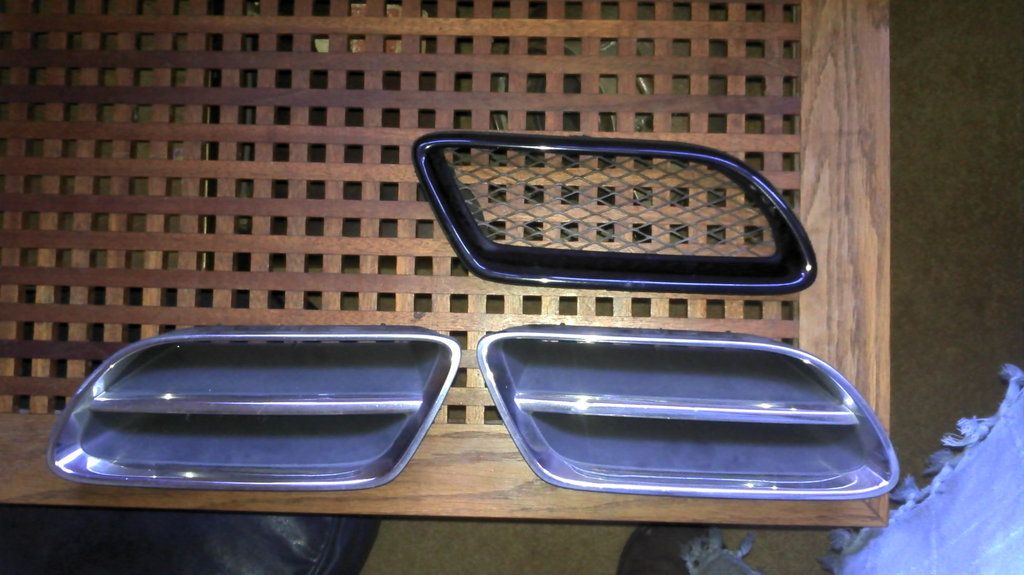 [/IMG] |
|
Currently Active Users Viewing This Thread: 1 (0 members and 1 guests)
|
|
|
 Posting Rules
|
You may not post new threads
You may not post replies
You may not post attachments
You may not edit your posts
HTML code is Off
|
|
|
All times are GMT +0. The time now is 10:33.
|


 Linear Mode

