|
|
| Sammio Builds and discussions Sammio bodied car builds and specials |

15th September 2013, 19:51
|
 |
Senior Member
|
|
Join Date: Jul 2011
Posts: 5,328
|
|
Well, that looks simple enough...
|
16th September 2013, 05:31
|
 |
Senior Member
|
|
Join Date: Feb 2012
Location: Wembley, London
Posts: 5,058
|
|
A very creative use of Excel for the wiring diagram. 
I used Power Point myself, but still needed 3 diagrams to cover everything.
Good luck, Paul.  |
17th September 2013, 10:39
|
 |
Member
|
|
Join Date: May 2013
Posts: 40
|
|
i love how c;ean this build is :-)
will you be keeping the mechanical fuel pump or using a separate electric unit?
|
18th September 2013, 05:13
|
|
Senior Member
|
|
Join Date: Mar 2012
Posts: 159
|
|
Hi Cabbage,
Speaking of clean, you are doing a great job yourself!
Just read your own thread again from the beginning. Looks like we have the same goal: creating a car that can fool anyone leaving all modern characteristics out. But to answer your question, I'm not aware of problems with the usage of the mechanical pump. That's probably why I never gave it even a thought of replacing it by a electric pump. I just bought a new mechanical pump, which was pretty cheap btw. Mmmm, do you tink that's is just the problem? I do want the car to be (relatively) reliable.
Last edited by christinedmc; 1st January 2014 at 18:22..
|
18th September 2013, 08:02
|
|
Member
|
|
Join Date: May 2013
Posts: 40
|
|
thanks although i haven't quite reached the level of detail you have.
a lot of triumph owners in the club upgrade to an electronic pump if they use there cars a lot or compete with them as it improves reliability considerably.
as you said, im trying to use old parts wherever i can to make it as authentic an experience as possible, however i also need it to be usable.
in short the mechanical pumps need a lot of tlc, create extra noise, and do not provide a stable fuel pressure whereas an electronic pump when run alongside a fuel pressure regulator can provide a stable constant pressure of fuel making it far easier to setup the carbs to be reliable, and also the electronic system is not effected by change in temperature.
a basic fuel pump and regulator isn't expensive so might be worth it.
in my case i will hide the new fuel pump under the fuel tank so it isn't visible in the engine bay.
i have a lot of progress to take photos of so i will try and post some pics tonight :-)
|
19th September 2013, 16:08
|
|
Senior Member
|
|
Join Date: Mar 2012
Posts: 159
|
|
Hi Cabbage,
I wondered if Canley or Rimmer would offer a kit for upgrading the mechanical pump to a electric pump. Neither. Moss, does however. Not quite a kit, but you can get pump and regulator. I asume it's not that common to make the change, but evidently there are advantages. Maybe I can prepare my car for a future upgrade by laying a fuel return pipe and a electric wire.
|
20th September 2013, 09:04
|
|
Member
|
|
Join Date: May 2013
Posts: 40
|
|
I think thats probably due to Rimmer and Canley catering for people doing restorations rather that people racing or time trialing there cars, so forums is more the place to get the info, and for buying the parts, just workout the fuel pressure range your engine requires (which is easily google'd) and get a pump and regulator to match that.
The most common mistake is people getting a big fuel pump and forcing far to much fuel in at a high pressure, our engines require relatively small pumps and low pressure.
I will be fitting my pump and regulator soon so i'll make sure to post it all on here for you. :-)
|
13th October 2013, 17:19
|
|
Senior Member
|
|
Join Date: Mar 2012
Posts: 159
|
|
Hi you all,
Today I test fitted the body after I had changed the rear. Finally I could see the result and I'm quite pleased with it.
I found it difficult to determin what hight to aim for. I think that the suspension will lower itself some bit after a few hundred miles. And offcourse some weight will be added.
The pictures tell the story I suppose.
This is the body how I got it from Poole.
[IMG] 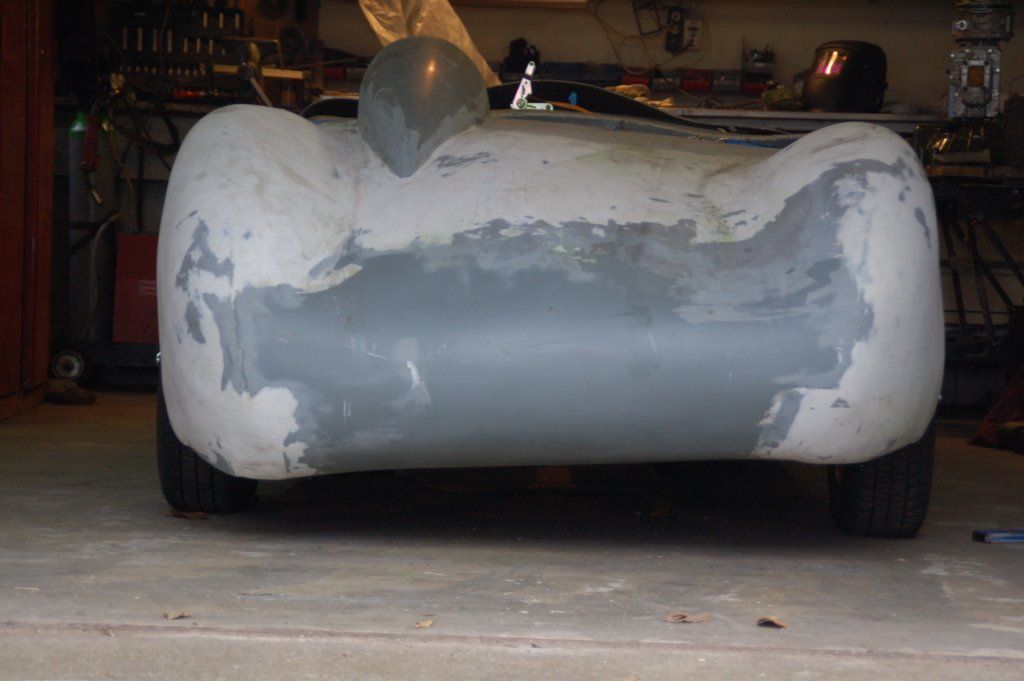 [/IMG]
[IMG] 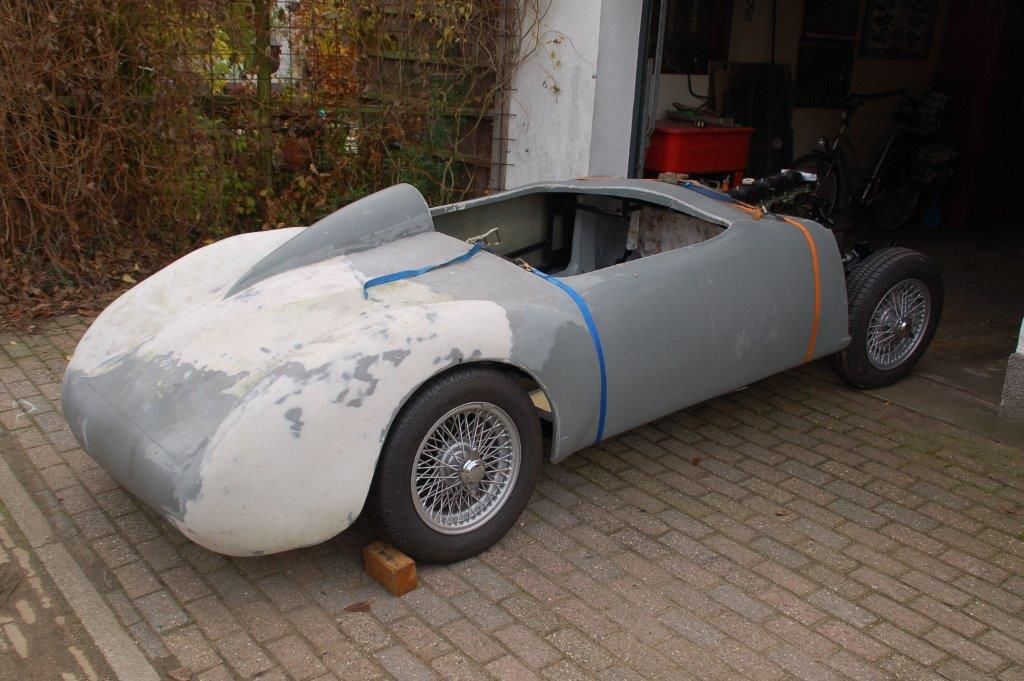 [/IMG]
There was quite some lumbness in this design and the left side seemed like it was melting.
I cut the rear to pieces and tried some techniques.
[IMG] 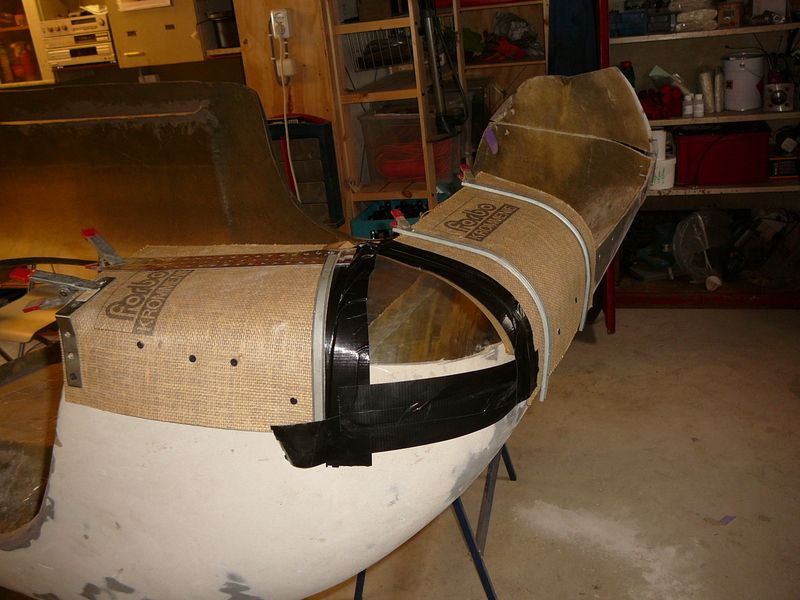 [/IMG]
This is the result. (I will use this exhaust, but cut it down a bit to a more suitable size).
[IMG] 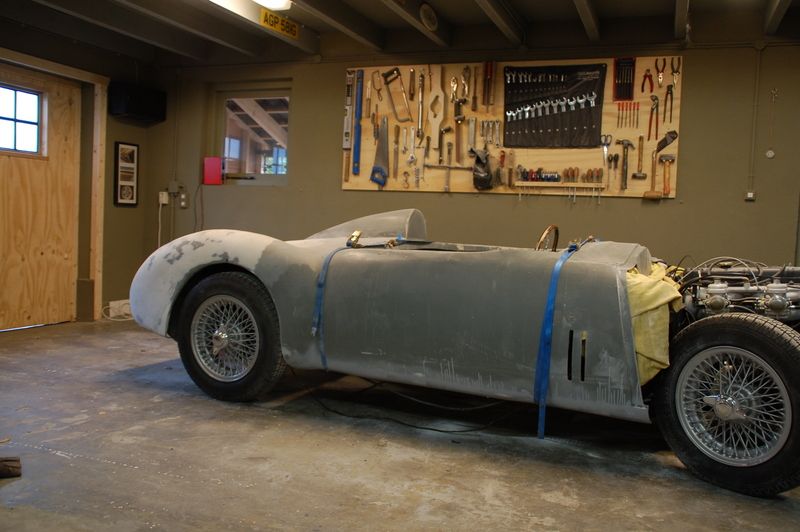 [/IMG]
[IMG] 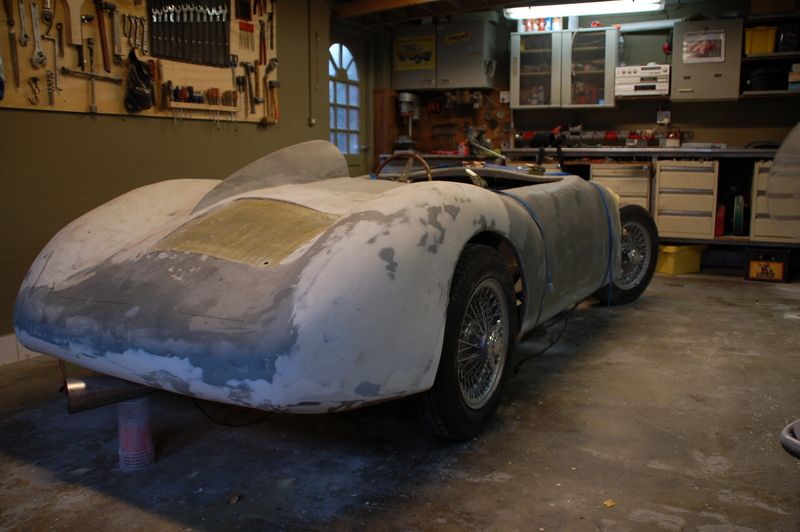 [/IMG]
[IMG]  [/IMG]
[IMG]  [/IMG]
Michiel |
13th October 2013, 17:37
|
|
Senior Member
|
|
Join Date: Apr 2012
Posts: 113
|
|
Hey Michiel,
Great job!looks much better,the longer trunk is nice.
Your exhaust looks a bit Golf Gti,but I know you will let it look more stylish.
Gr.Rob
|
13th October 2013, 17:45
|
|
Senior Member
|
|
Join Date: Mar 2012
Posts: 159
|
|
Hi Rob,
Thanks. BTW, this is the exhaust-look I'm aiming for:
[IMG]  [/IMG]
Michiel |
14th October 2013, 07:38
|
|
Senior Member
|
|
Join Date: Mar 2012
Posts: 1,152
|
|
Good to see somebody else cutting and making things better. It gives encouragement. That original back really did have an interesting shape.
I like the front vents.
|
14th October 2013, 16:17
|
|
Senior Member
|
|
Join Date: Feb 2012
Location: Wembley, London
Posts: 5,058
|
|
Michiel - Great job on the back of the car, it looks miles better.
|
20th October 2013, 09:01
|
|
Senior Member
|
|
Join Date: Mar 2012
Posts: 159
|
|

This is about the way I mount the body to the frame and chassis. I went a different way with this. If I'm correct, the general idea is to box the interior with plywood and bonding paste. I'm sure that treated plywood and the bonding paste could give a strong result and it is a fast and relatively easy way of achieving results. But I saw some disadvantages in that and that is why I tried an alternative.
Firstly I made a hole in the back off the body that would be my boot lit. After that I got acces to the frame underneath from above. Because I have a lenghtened tail, I have a longer frame that reaches the end of the outriggers at the back of the car. This Picture shows the extra frame length I'm speaking of.
[IMG] 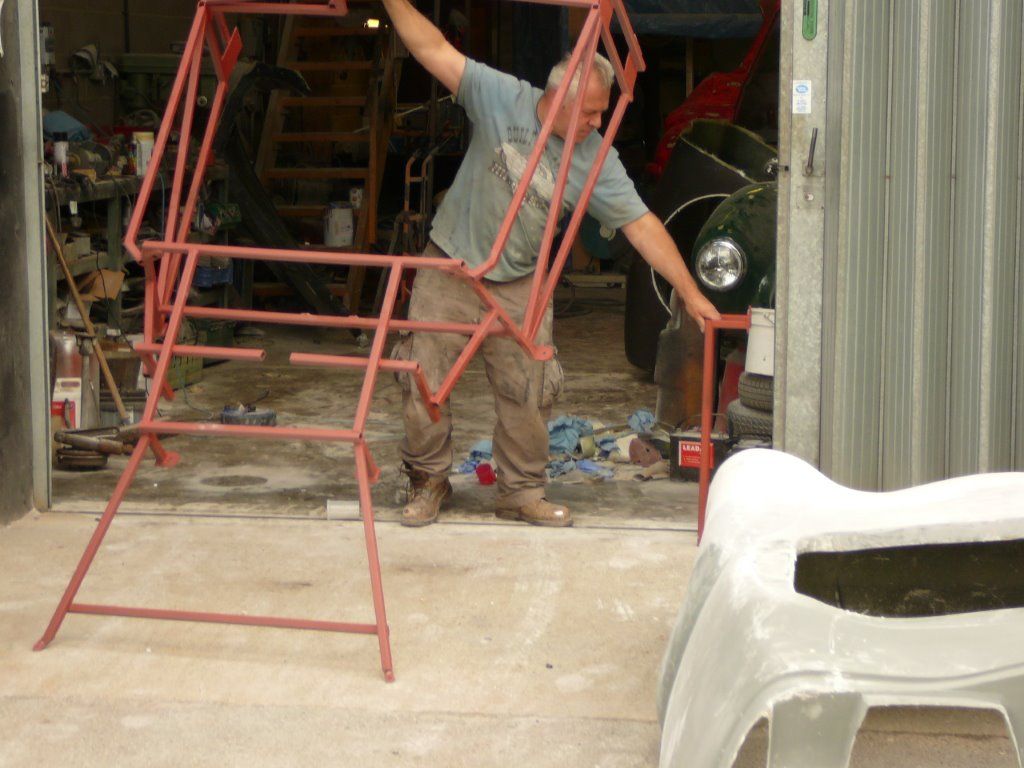 [/IMG]
I placed the body on the chassis and frame and outlined it just the way I want it. Basically by choosing the right hight bewteen the rear wheels and the top of the wheel arch. (difficult to choose because how much would it still drop with extra weight, usage and time?). I took suitable size blocks and layed them on top of the rear wheels supporting the body. Then I prepared the frame by using tape.
[IMG] 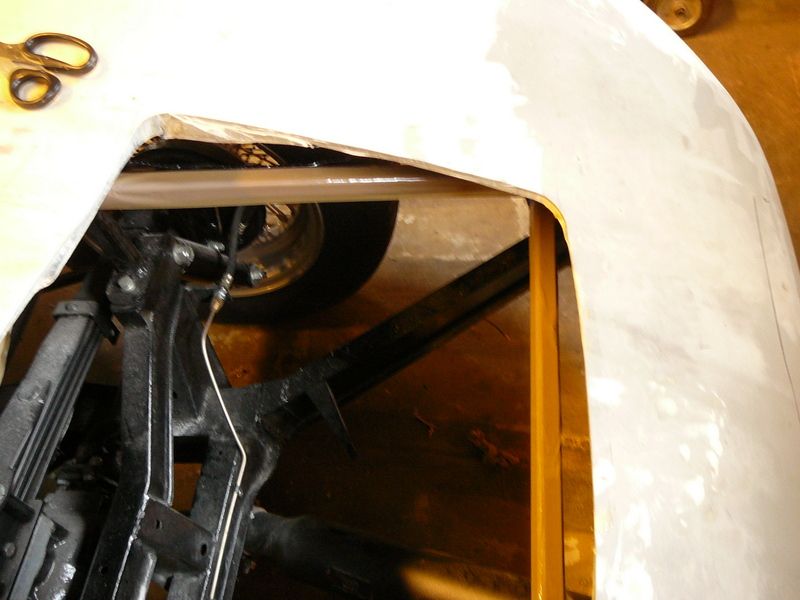 [/IMG]
After this, I used woven glass mat to pack the frame tubes creating a contra shape. The woven mats are stronger the standard glass fibre mat and keep the fibres together after using resin.
[IMG]  [/IMG]
After curing, I cut the edges back. With carton I made some moulds that I duplicated to glass fibre pieces I had no use for anymore.
[IMG] 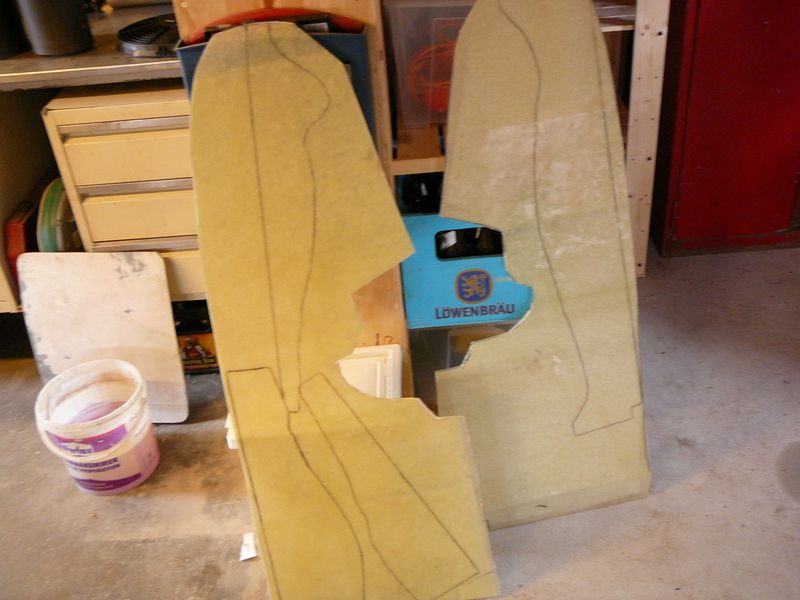 [/IMG]
After cutting them out, I glued them in. Using a bonding paste (based on strong Epoxy) with chopped glass fibres.
[IMG] 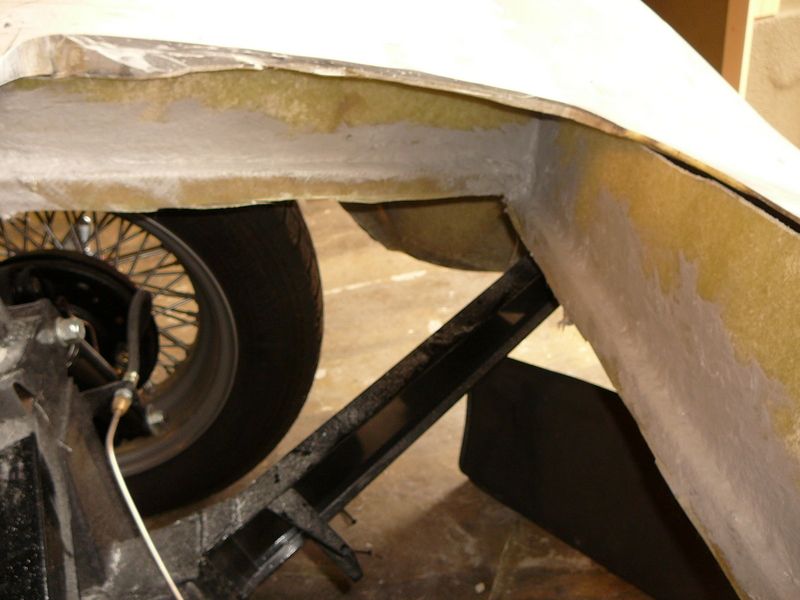 [/IMG]
In the end I could remove the body again. Turn it on it's back and take the time and effort to laminate this structure until it was very strong. The box shape makes it very stable and rigid.
[IMG] 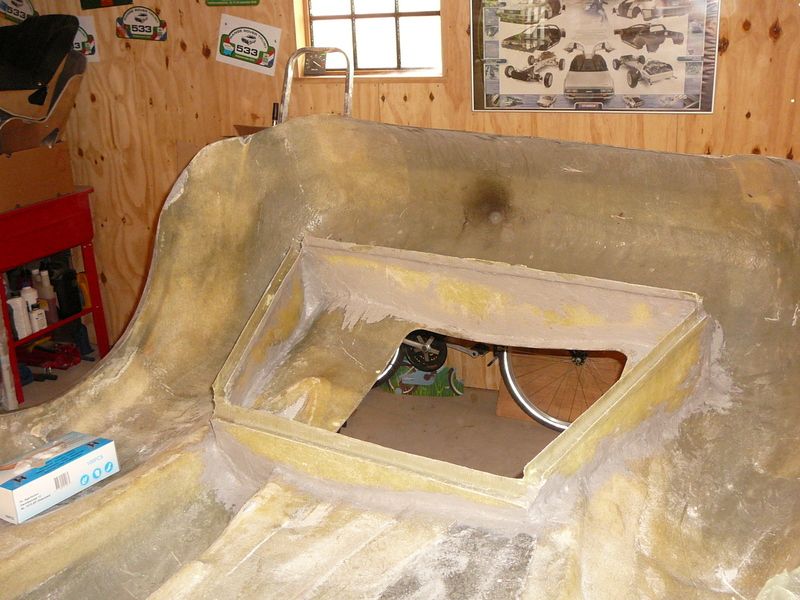 [/IMG]
[IMG] 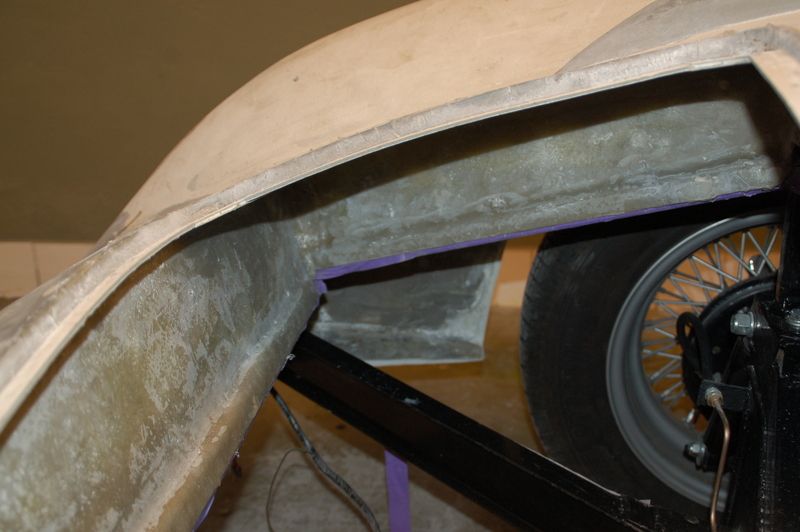 [/IMG]
The box section at the rear carries most of the weight, but offcourse isn't enought. I made stainless sills at the sides of the frame/chassis.
[IMG] 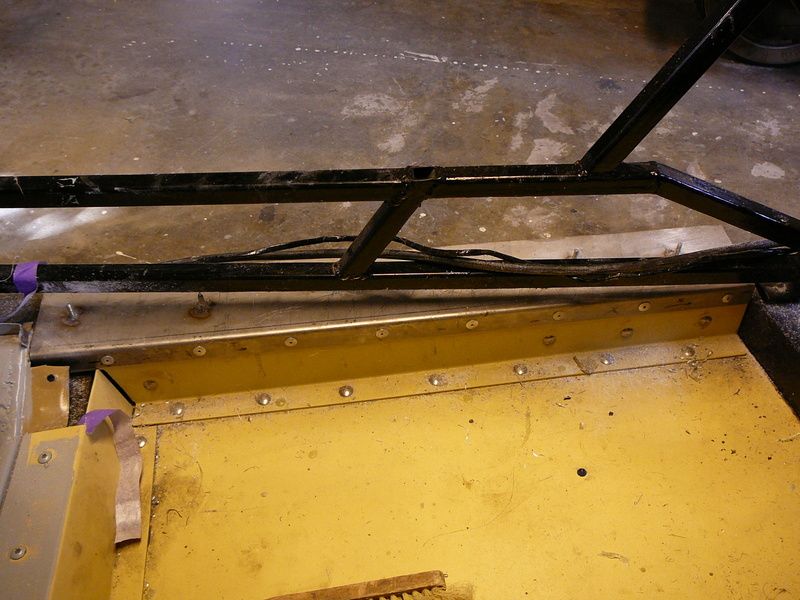 [/IMG]
With the body in place, I used the same technic. Using woven glass fibre mats to laminate a GRP lip that lies on top of the sills and is attached to the inside of the body. Some thread ends make it possible to mount a stainless strip on top of it, making a sandwich construction, fixing the lip firm.
[IMG] 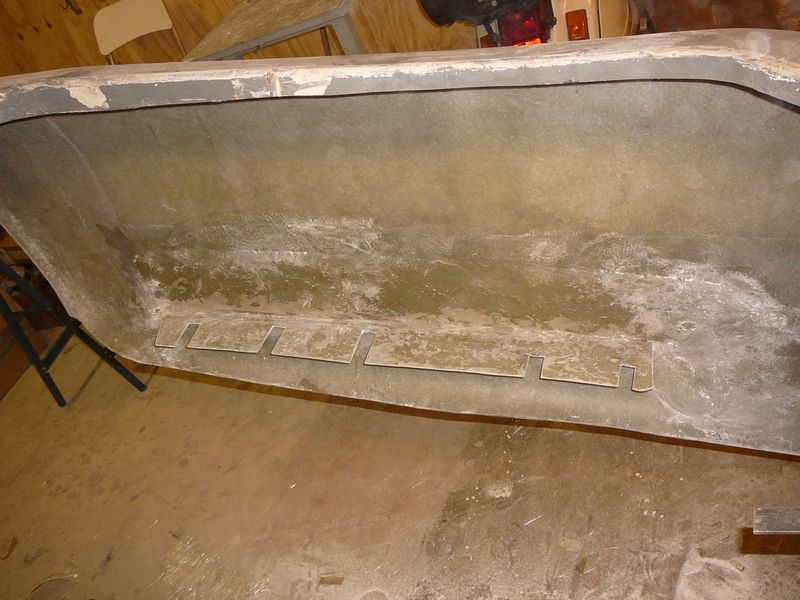 [/IMG]
[IMG] 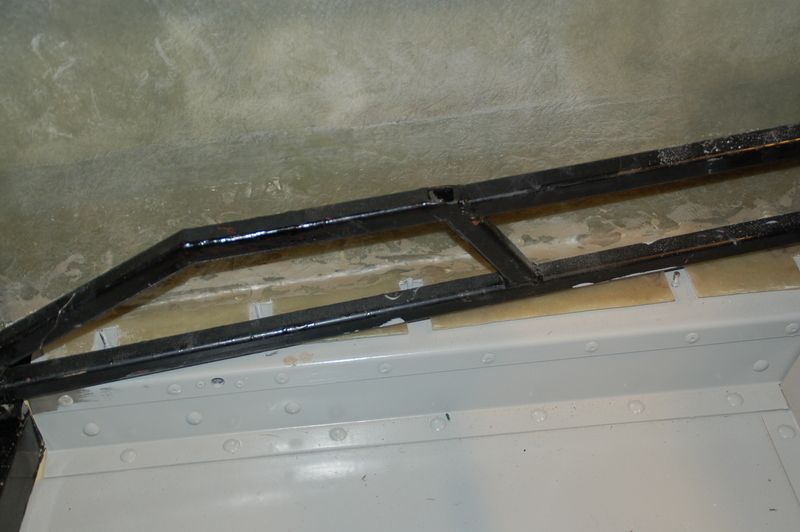 [/IMG]
It all works. I will add extra support under the dash, side of bulkhead and the back of the interior by glueing in some profiles which will be bolted to the frame/bulkhead. When I make the doors, I will add a upper sill aswell. That way I creat an other box like shape at the side sides.
Michiel
Last edited by christinedmc; 20th October 2013 at 12:54..
|
20th October 2013, 10:05
|
|
Member
|
|
Join Date: May 2013
Location: St Didier de formans FRANCE (Dept 01)
Posts: 76
|
|
Very good job !
|
20th October 2013, 14:35
|
 |
Member
|
|
Join Date: Sep 2013
Posts: 87
|
|
that's looking great there fella. I love the changes you are making and the improvements to what was an unfortunate rear body shape. I do feel a bit for gary sometimes when I read these comments , I popped into see him several times during the development of these cars and he is very much an ideas man with some hands on ability. when it came to the fiberglass side of the business he very much relyed on hired help and outside assistance. he didn't always get the help he had hoped for. not knocking anyone directly , just as the head honcho it always seems to be his fault even when stuff wasn't always.i know he was always frustrated by the lack of money in the pot to improve the kit above the starter level it had begun as. reading the ribble threads now it certainly looks like time and money is now being invested into what is at the days end , a fantastic kit.
|
20th October 2013, 15:49
|
|
Senior Member
|
|
Join Date: Mar 2012
Posts: 159
|
|
O dear,
By no means it is my intention to critisize Gary or Mike or others. The changes I make are my own choice. Just like the concept intended to be. I bought the body kit for a very low price and you can't expect it to be perfect. I really love the concept of a 50's racer. Inspired, instead of a replica. For me, that is worth gold. Combined with the usage of the body replacement strategy. We have to thank Gary for that.
The good thing is that it is affordable for many. And everyone has a choice to go for either Overspraying or Overengineering 
On the way I decided to achieve a more high quality result. That means you have to change some to get there. That's true. It is my impression that there are more builders that go for a quality build. There are lots of examples on this forum today!
It is good that Ribble has made improvements and I think they should ask more money so that they can survive.
I really respect the fast builds as well. Somehow these cars look good anyway.
Michiel
Last edited by christinedmc; 1st January 2014 at 18:29..
|
20th October 2013, 17:57
|
 |
Senior Member
|
|
Join Date: May 2011
Location: Somerset
Posts: 1,671
|
|
I can't believe that i've only just stumbled across this thread!
I've just read it from the start and you're doing a really good job there matey and I'm loving some of the changes you're making and the way you're approaching everything. I'm intrigued to see how this pans out.
Keep up the good work, i'm getting all nostalgic!
Dave
|
21st October 2013, 18:36
|
|
Senior Member
|
|
Join Date: Mar 2012
Posts: 159
|
|
Well thank you for the compliments. I try to keep it up. I enjoy the proces very much and that is what it is all about isn't it?
Michiel
|
21st October 2013, 19:09
|
|
Member
|
|
Join Date: Sep 2013
Posts: 87
|
|
Michel , whats the finished colour gonna be ?
|
|
Currently Active Users Viewing This Thread: 2 (0 members and 2 guests)
|
|
|
 Posting Rules
|
You may not post new threads
You may not post replies
You may not post attachments
You may not edit your posts
HTML code is Off
|
|
|
All times are GMT +0. The time now is 07:17.
|


 Linear Mode

