Time for a small update.......
Since the New Year, I've been focussing my efforts on fitting a badge bar with driving lights and preparing the hood frame before the new hood is fitted in the spring. More on the badge bar when I have some decent photos so this update is about the hood frame.
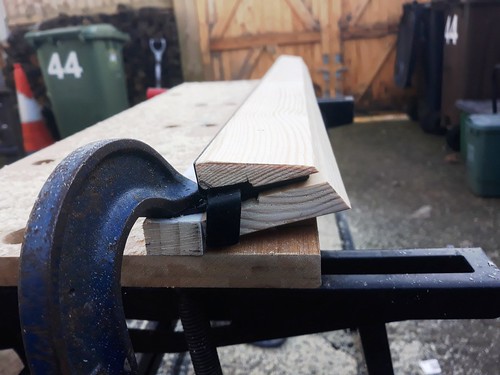
The wooden battens that form the hood windscreen rail were very rotten from being left out in all weathers for many years so had to be remade.
Following the instructions in the Royale build manual I started by cutting two battens according to the dimensions given. These are then screwed together either side of a steel spine.
 Hood header rail
 by
Sabrebuilder, on Flickr
You then have to make two cut outs in the lower baton for the Triumph hood catches.
 Hood header rail
 by
Sabrebuilder, on Flickr
Trial fitting the hood catch
 Hood header rail
 by
Sabrebuilder, on Flickr
Having screwed the two batons together you then have to plane a 15 degree slope to the top piece of wood and then chamfer the lower baton at 55 degrees. (Marked with a pencil line.)
 Hood header rail
 by
Sabrebuilder, on Flickr
Lower baton now chamfered.
 Hood header rail
 by
Sabrebuilder, on Flickr
The front corners and top ends are then rounded.
 Hood header rail
 by
Sabrebuilder, on Flickr
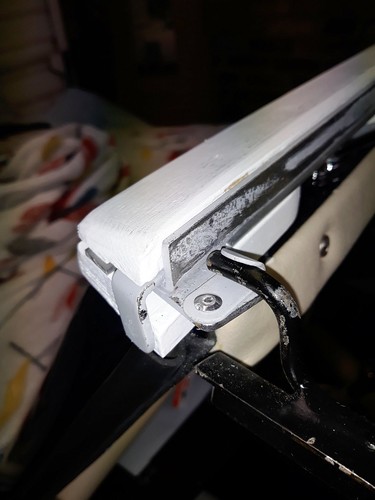
The next picture shows how the hood side rails are located on the cant rail. My timber battens are thinner than specified so I added a 2mm thick aluminium strip between the battens and the steel spine. (photo taken before final paint preparation.)
 Detail of hood side support
 by
Sabrebuilder, on Flickr
I then dismantled the frame for painting. Whilst preparing the hood hoops for a fresh coat of paint I discovered they were very rusty beneath the black Hammerite that I put on about 11 years ago. They had clearly suffered more under the leaking hood than I first thought and I suspect they were not particularly well painted when first built.
I decided they needed to be stripped back to bare metal. This is one of the hoops after stripping, sanding and having been treated with Rustin's rust converter.
 Hood hoops stripped for re-painting
 by
Sabrebuilder, on Flickr
I then applied the first coat of primer.
I'm trying out "Direct to metal" Epoxy primer. Apparently, this creates a barrier that prevents moisture from reaching the metal surface, thereby reducing the risk of rust formation. They also claim it forms a strong bond with the metal surface, which helps prevent the paint or coating from peeling or flaking off over time.
It went on very nicely and dried to a pleasing smooth finish.
 Hood hoops primed
 by
Sabrebuilder, on Flickr
Following the application of primer I will be finishing the hoops in Midnight Blue to match the bodywork.
...............peter