MadaboutKitcars

Build Stories are assembled automatically from a build thread's own author, in their own words and order — see all featured builds.

Royale Sabre - Take two!

By peterux · 372 updates · Sep 2012 to May 2025

Read the full original thread (with everyone's replies) in the archive →

November 2017

19 Nov 2017, 4:01pm Engine Mechanical Overhaul Chassis and Body
Amir - thanks again for your positive feedback. It's taking a while but every little job is one step closer to the finish.

-----------------------------------------------------------------------------

Not a lot of progress in the garage this week due to a bout of 'man-flu' but prior to that I had collected a useful addition to my back yard.

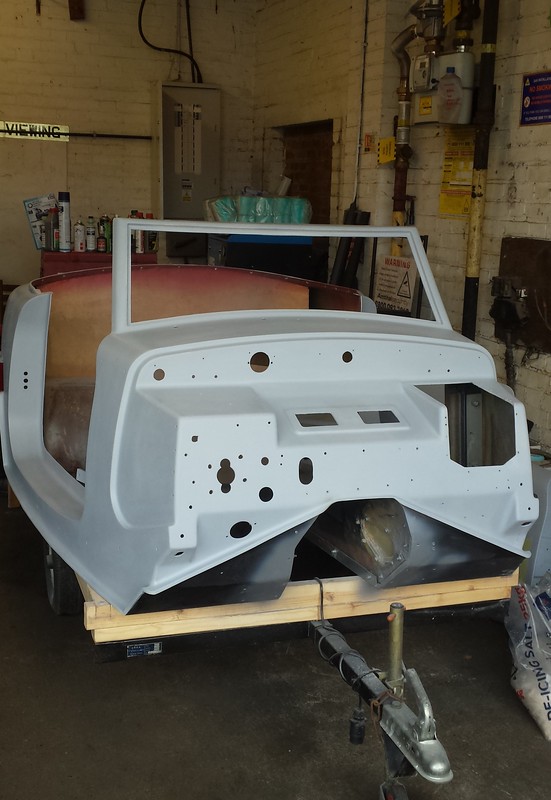
The established method of building a Royale Sabre is to have the central body tub painted prior to the final fitting to the chassis.
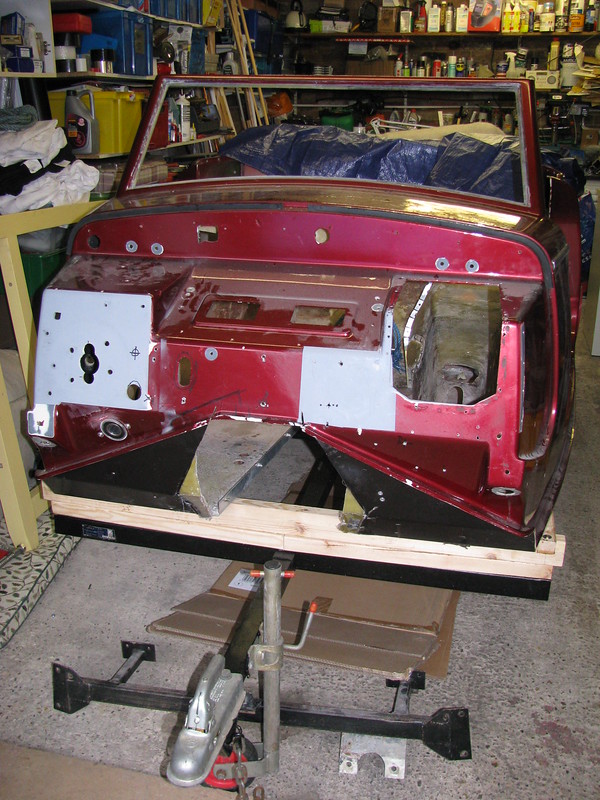
For those not familiar with the Sabre here is a picture of the body tub.
Body tub on trolley by Sabrebuilder, on Flickr

It's always been my intention to have the car professionally painted but I plan to do as much of the preparation work as possible bearing in mind the existing paint is in poor condition. I still have some work to do on the tub following the re-shaping of the transmission tunnel but that hasn't stopped me thinking about how I will transportit to and from the painters.
My initial thoughts were to buy a small car trailer and then sell it after I've finished with it so I've had a search running on ebay for some time.


One day this popped up and only about an hours drive from home.
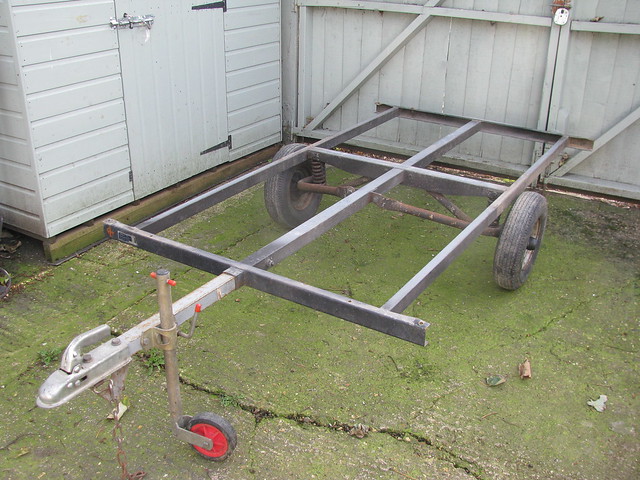
Trailer by Sabrebuilder, on Flickr

It is the remains of an old Trailer Tent and seems to be just about the perfect size. It's in good condition and has now had a coat of Hammerite to protect it from the elements as it has to live outside. I plan to build a wooden platform to support the tub during transport. But more on that next spring.

Hopefully i'll be back to my engine refurb once my cold subsides....:icon_rolleyes:


...peter
25 Nov 2017, 9:11pm Engine Mechanical Overhaul Electrics


Thanks, Barber. Glad you are enjoying my updates. Happy to be your surrogate builder :lol:


Thanks Amir for your best wishes!

Whilst staying in the warm waiting for my cold to pass I spent a good few hours studying the BMW wiring diagrams for my BMW 328i engine. :ranger:
The engine management wiring loom terminates at a 25 way circular multiplug known as the x20. This is very convenient but the details of the individual terminals are scattered across multiple pages of the wiring diagrams.

I've created my own x20 connection diagram from the BMW diagrams. I then checked my spreadsheet with my actual loom and I found only one discrepancy.

The picture below is the 'car side' of the connector that will be spliced into to the main wiring loom, although only 12 wires need to be connected.

BMW x20 connector by Sabrebuilder, on Flickr

I guess the proof of the pudding will be next year when I power up the engine :icon_rolleyes:

....peter
30 Nov 2017, 7:00pm Engine


Hi John,
I think Amir has answered the first part of your question. Thanks, Amir.

Are you thinking of buying a Sabre kit to build or a completed car?

I hadn't seen the 2+2 conversion before your comment but now I've had a chance to have a look it's a very interesting development. Some of the early Royale Motor Company adverts have a reference to a 2+2 model but I'm not aware of any cars or kits produced by the factory. It will be interesting to see what he does about the hood?

...peter

December 2017

1 Dec 2017, 9:33am General Update


Hi John,
I think the Sabre is an excellent choice for touring. It would be worth chatting to Peter Gibbons as he has done extensive Continental tours in his car. I'll PM you about the Build Manual.
Timescales to my IVA are really just as long as it takes :lol:

...peter
4 Dec 2017, 10:19pm Engine Chassis and Body
Near disaster

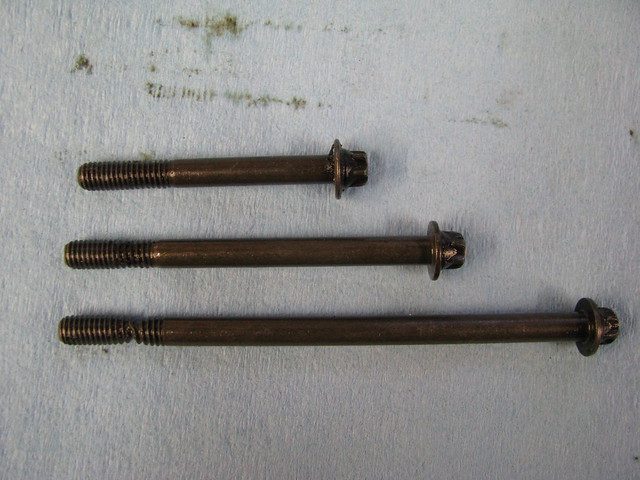
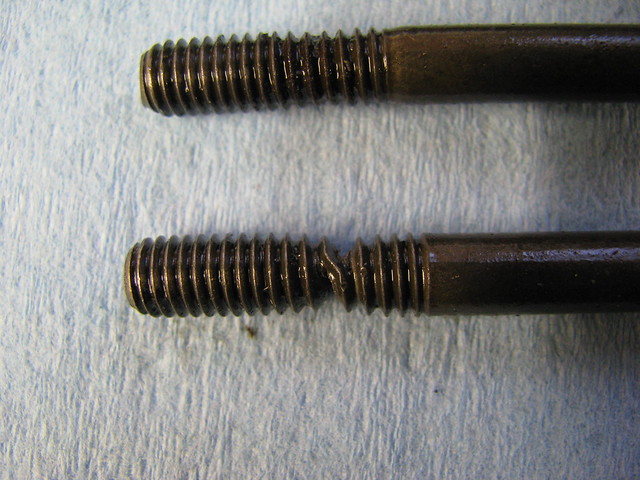
The timing cover on the BMW M52 engine has three M6 torx-head bolts that go down through the cylinder head into the top edge of the timing chain cover. I was refitting the cover and following the tightening procedure in the Bentley workshop manual. It said to tighten the M7 bolts to 15Nm. Without checking I assumed that the bolts were M7 and set my torque wrench to 15Nm. As I started to tighten the bolts it was odd that the bolts kept turning without the wrench reaching it's clicking point. At first I thought it was just the new gasket compressing when suddenly one of the bolts gave way and went loose.

Timing chain cover bolts by Sabrebuilder, on Flickr

TBH I thought I'd snapped the bolt and was amazed that when I removed the bolt it came out complete albeit stretched by a few mm.
It turned out that the bolts are M6 and the correct tightening torque for M6 bolts is 9-10 Nm but I'm still surprised that these bolts would stretch to the point of fracture before only 15Nm.

Anyway, no harm done and I now have a new set of bolts from BMW.:smile:

...peter
6 Dec 2017, 8:16pm General Update
John - yes, it was a very lucky escape!!

Robin - many thanks for the explanation :eusa_think:
20 Dec 2017, 10:30pm Chassis and Body Electrics Interior & Trim
Every little helps.....

With a combination of the very cold weather and the Christmas preparations now in full swing, I've had little time to do any major work on the Sabre.

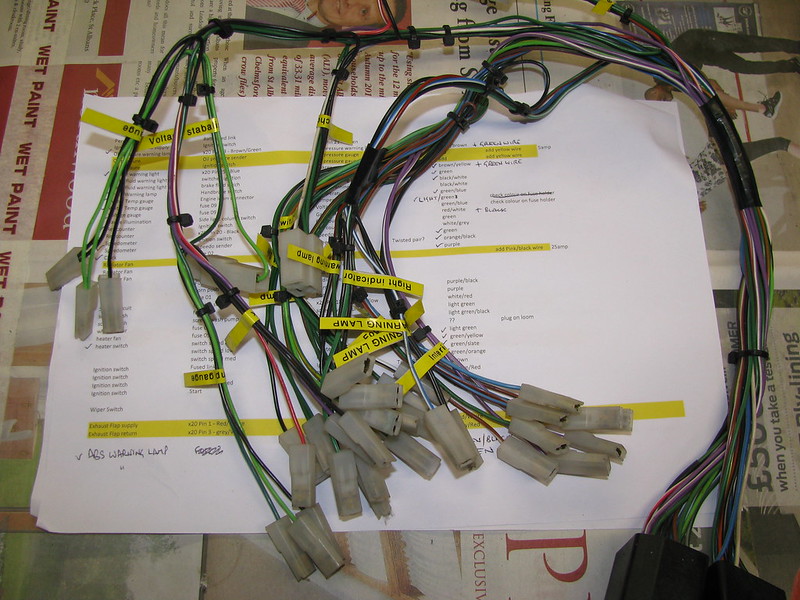
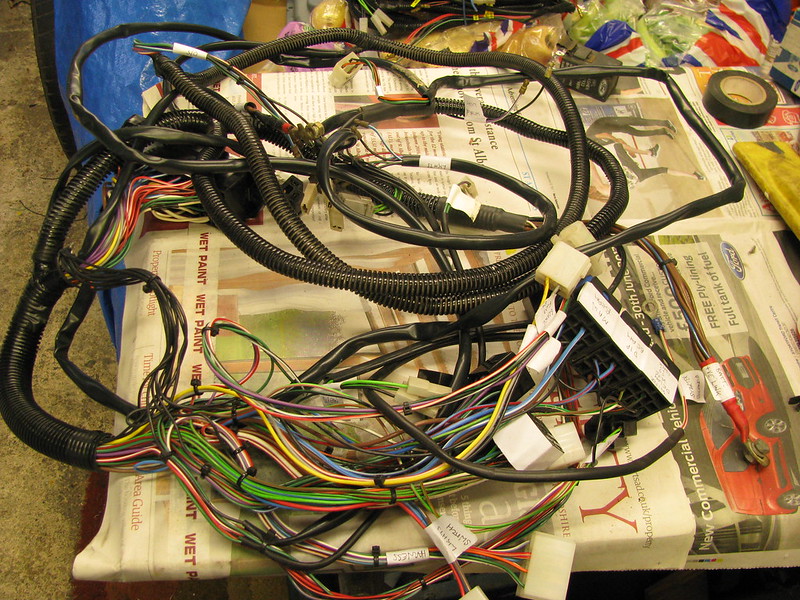
Grabbing the odd 1/2 hour here and there, I decide to dig out the Sabre's wiring loom and started to check it over and label it properly. The original builder's hand written labels on masking tape (that is now over 22 years old!) are all but unreadable. The wiring section of the build manual has the cable's colour codes so its a case of identifying which cable is which and then sticking a label on it.
I'm still a long way off installing the loom but it is a job that I can do as and when time allows. It should make the installation of the loom much faster when the time comes.

The Sabre's main loom has a number of subsections separated by large multi plugs.
I started with the dashboard subsection....

Dashboard wiring loom by Sabrebuilder, on Flickr

I have a small Brother labelling machine that works really well and is highly recommended.

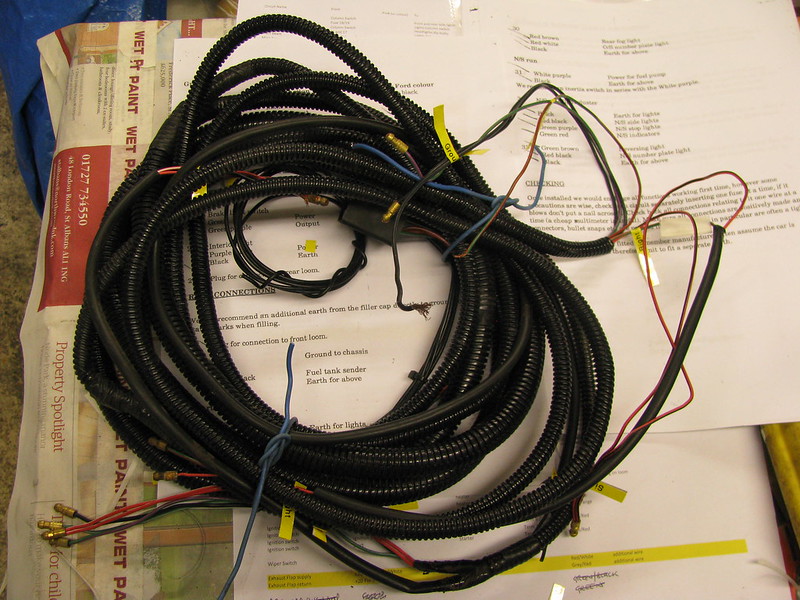
Next up will be the sub-loom that goes to the back of the car for lights and fuel pump, etc.


....peter

January 2018

13 Jan 2018, 7:55pm Chassis and Body Electrics
Just a few small updates...

The winter loom labelling exercise is now complete so it's all ready to go in once I reach that stage of the re-build.

Rear loom to rear lights and fuel tank all labelled up.

Rear Loom by Sabrebuilder, on Flickr

Main loom checked and labelled. Wiring for Intermittent wipers is an unexpected but useful feature!

Main Loom by Sabrebuilder, on Flickr

I seem to have collected quite a few stalk switches but Sierra parts are becoming somewhat harder to find so it's good to have a spare.

Lights and wiper stalks by Sabrebuilder, on Flickr

I've also been working outside to keep warm....
So I've built a frame on the tent trailer base. This is for transporting the Sabre's body tub.

Trailer frame by Sabrebuilder, on Flickr


......peter
16 Jan 2018, 10:46pm Engine Chassis and Body
A quick re-cap of some engine work I did last November......


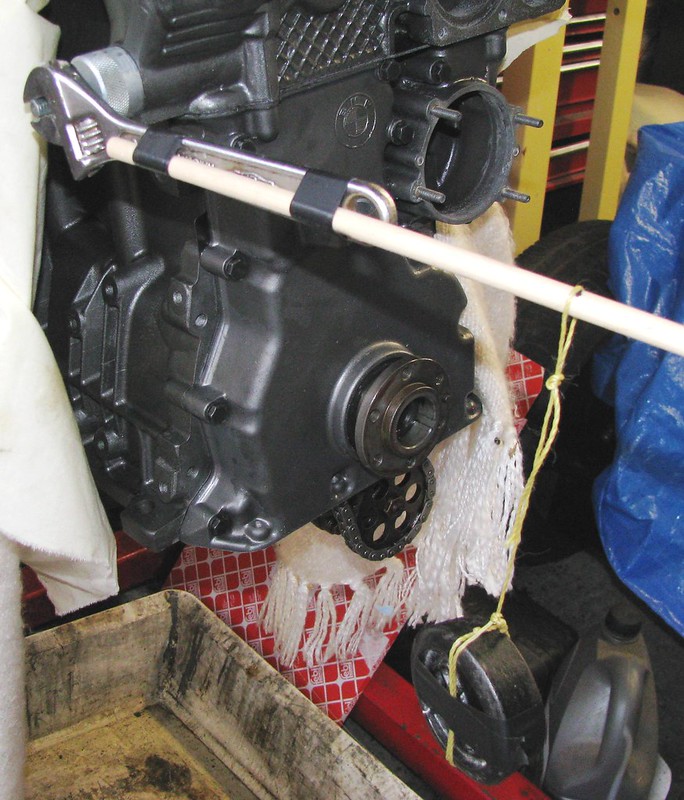
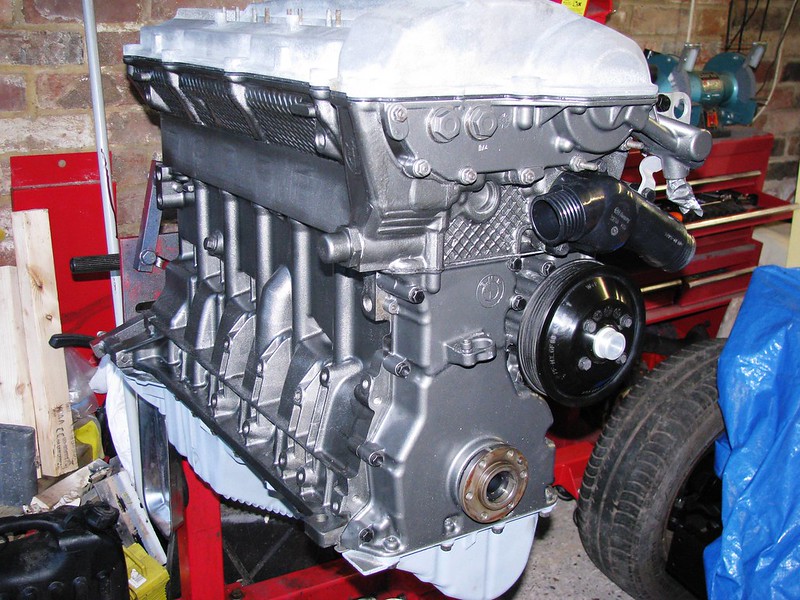
So after a bit of a pause I finally got round to re-assembling my engine after the refurbishment of the VANOS unit. Before tightening the exhaust camshaft sprocket bolts you need to pretension the timing chain with a tool that replaces the primary chain tensioner.

The chain tensioning tool has to be tightened to 11 inch lbs.
So I hung a 1 pound kitchen scales weight 11 inches from the pivot.

Engine assembly by Sabrebuilder, on Flickr

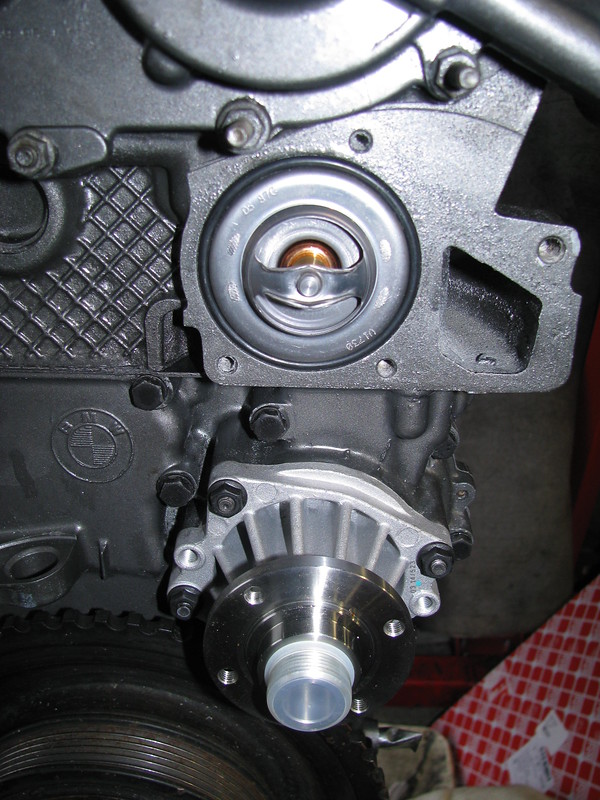
I've fitted a new water pump, thermostat and thermostat cover.

Engine assembly by Sabrebuilder, on Flickr

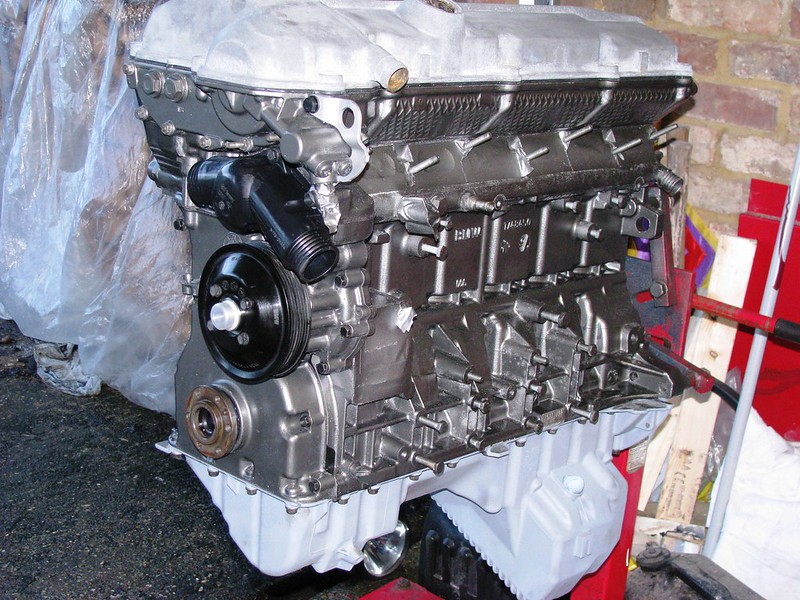
And I've re-installed the sump.....

Engine assembly by Sabrebuilder, on Flickr

Engine assembly by Sabrebuilder, on Flickr

The sump and head cover will be painted when the weather warms up as it's currently too cold.

......peter
20 Jan 2018, 6:53pm General Update


Thanks, chaps. With hindsight (which is always a wonderful thing!) I could have made it more accurate by using a small ring spanner as I didn't take into account the weight of the adjustable but its done now.
20 Jan 2018, 7:45pm Mechanical Overhaul Chassis and Body
Despite the cold weather, I've removed the body tub (again!!) which is now mounted on the trailer. I can now finish off the gearbox tunnel mods and prep the body tub before painting.

Gearbox tunnel by Sabrebuilder, on Flickr

I need to keep the body tub dry in the garage as it's prep'ed for paint so the chassis will have to live outside for a while.

Chassis under tarp by Sabrebuilder, on Flickr

( Note to self: a trip to the dump is overdue :icon_lol: )
Gearbox tunnel mods need to be bonded on this side and finished.

Gearbox tunnel by Sabrebuilder, on Flickr

More next week....


...peter
27 Jan 2018, 9:15pm Engine Mechanical Overhaul Chassis and Body Electrics Interior & Trim
Getting my body into shape....

This weeks report is a miscellany of updates but all with the same aim of getting the body tub in shape for the paint bodyshop.

Following on from last weeks update I've done some more work on the gearbox tunnel reshaping.
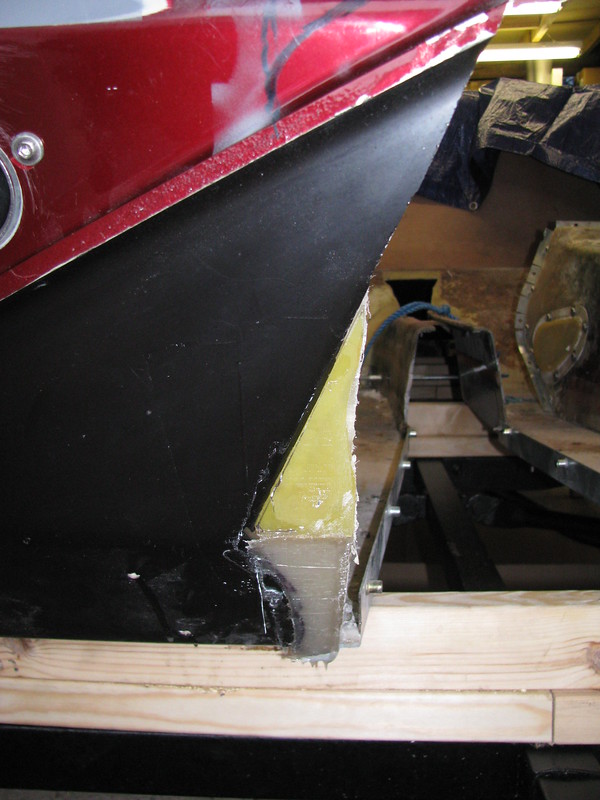
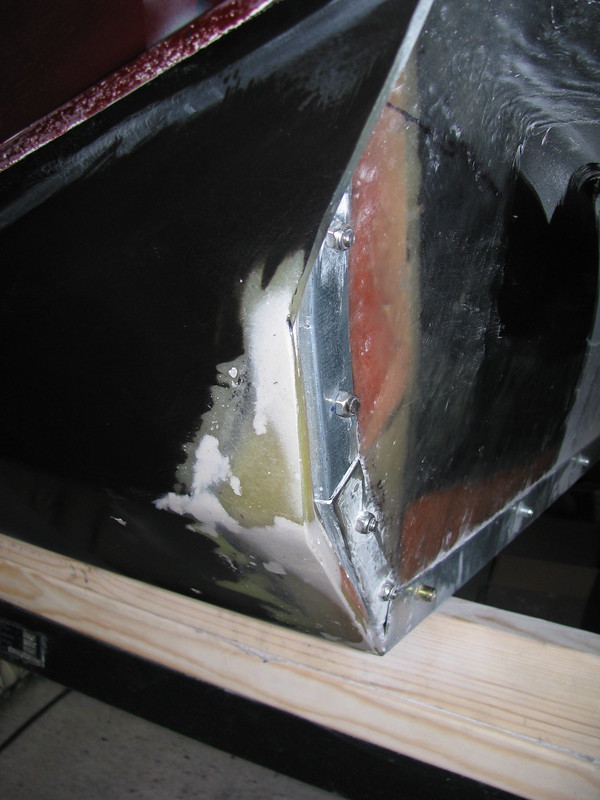
I reinforced the gearbox tunnel mods by first grinding back the gelcoat on the surrounding bodywork and then bonding on a layer of chopped strand mat followed by a layer of tissue. I then sanded back, smoothed out with a skim of P38 filler and then sanded smooth. It will be finished off by the bodyshop.

Gearbox tunnel mods by Sabrebuilder, on Flickr

The modified gearbox tunnel jointing angle doesn't quite fit flush to the body. My original idea was to fill this gap with a closed cell foam strip but I wasn't happy about the size of the gap. So I covered the angle in parcel tape and filled the gap with body filler. When I finally fit the gearbox tunnel it will only need a thin smear of mastic sealant.

Gearbox tunnel mods by Sabrebuilder, on Flickr

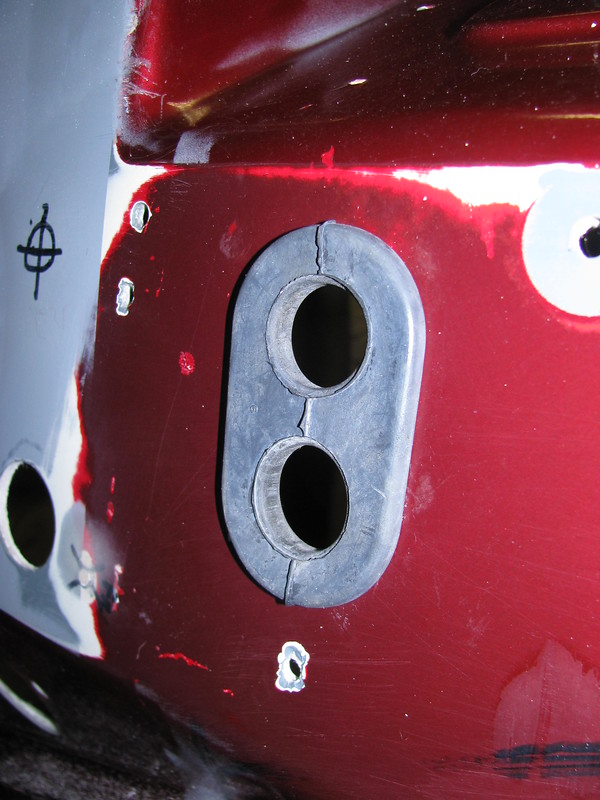
Another small job was to enlarge the heater hose hole to take this rubber grommet.

Heater Hose grommet by Sabrebuilder, on Flickr

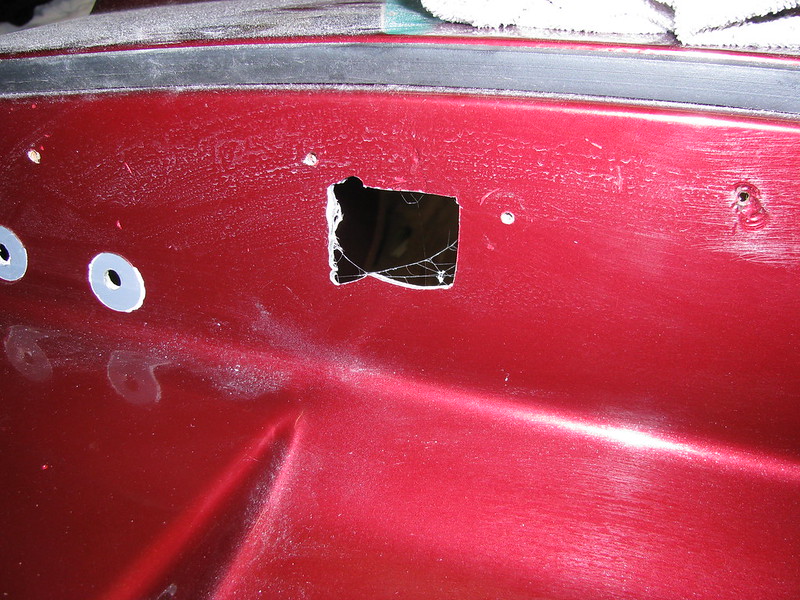
And the bulkhead had this rather ugly hole where the OB had cut a hole for the loom connector.

Body mods by Sabrebuilder, on Flickr

I have tidied up the hole by cutting a circular hole with a hole saw. An off-cut of MDF was screwed to the bulkhead to support the hole saw's central drill bit. The mounting holes will be filled and I'll fit a suitable grommet after the tub is painted.

Body mods by Sabrebuilder, on Flickr

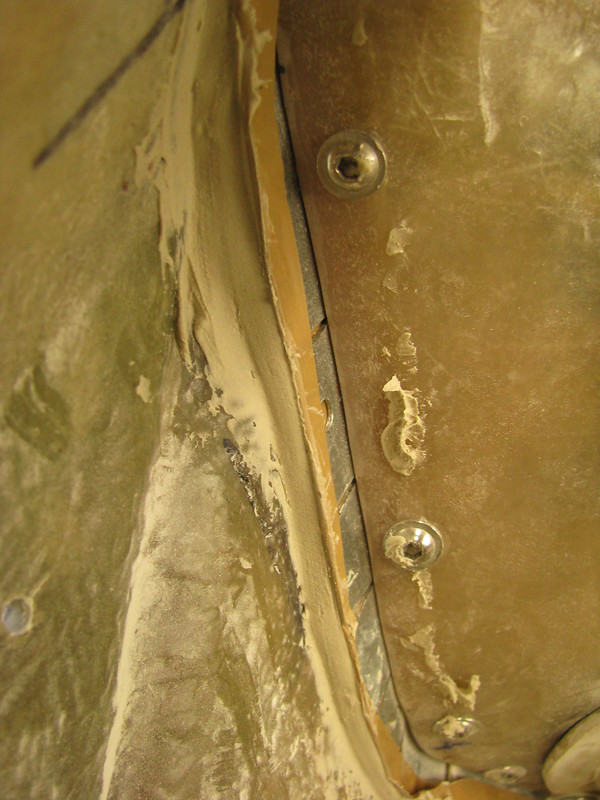
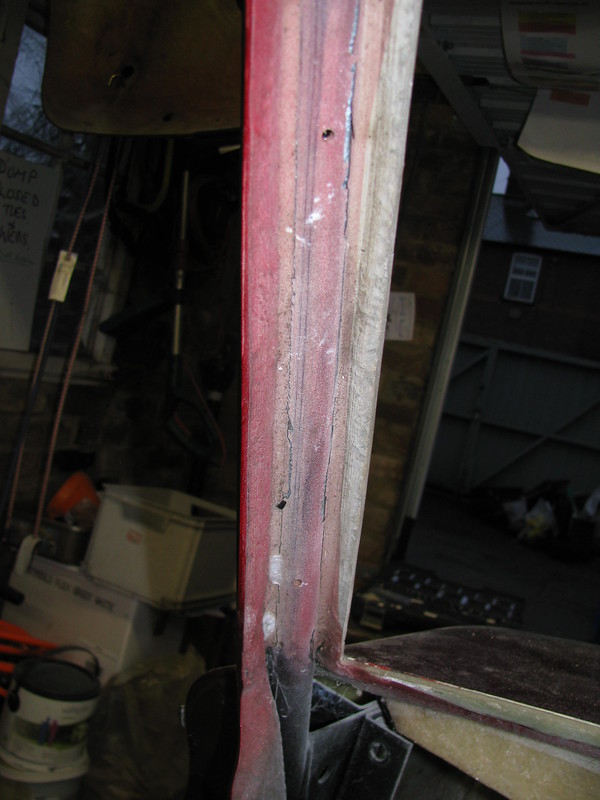
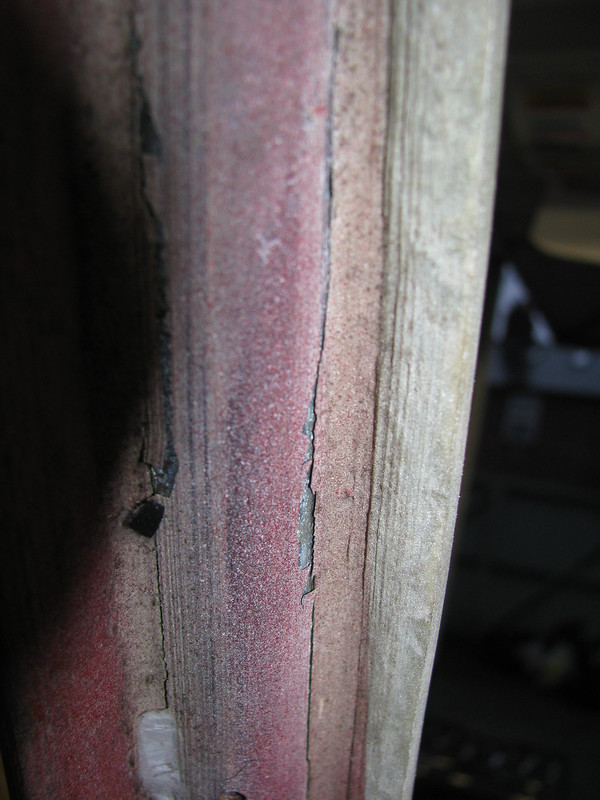
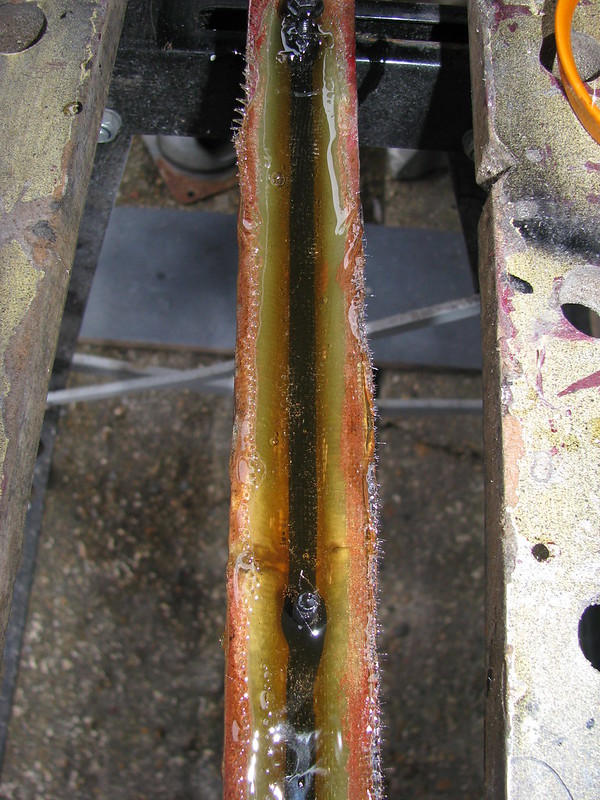
I then turned my attention to the windscreen surround sides which are supported by steel inserts. According to the Royale build manual these should be painted and then bonded to the GRP frame with body filler. On my car the filler has cracked and I wanted to see if the supports were still bonded securely.

'A' Post steel by Sabrebuilder, on Flickr

Close up of the cracks.

'A' Post steel by Sabrebuilder, on Flickr

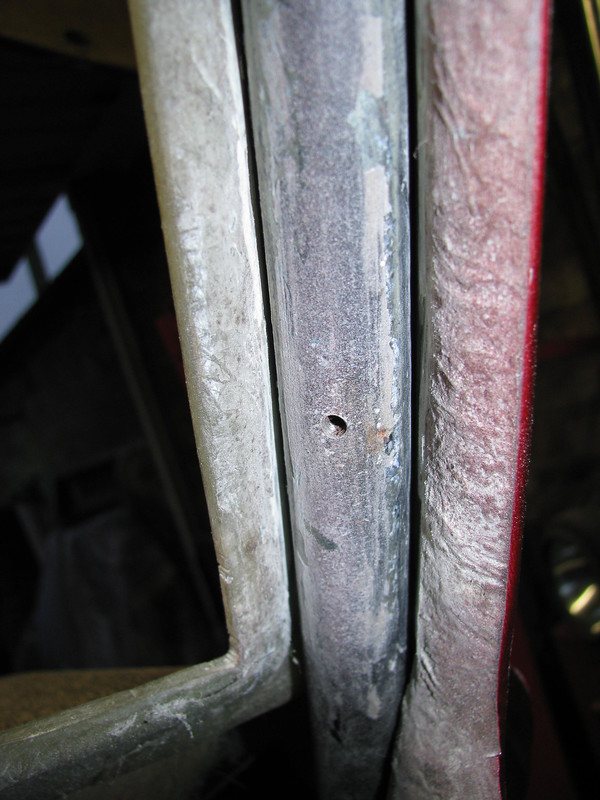
On the drivers side I had already removed the door hinge, so I cut out the filler with a plunge cutter multi-tool. The filler was really soft and came away easily. When I finished cutting out the filler, which only took about 5 minutes, the steel support fell out.
The bond between the steel and GRP had completely failed!!!!!!

'A' Post steel by Sabrebuilder, on Flickr

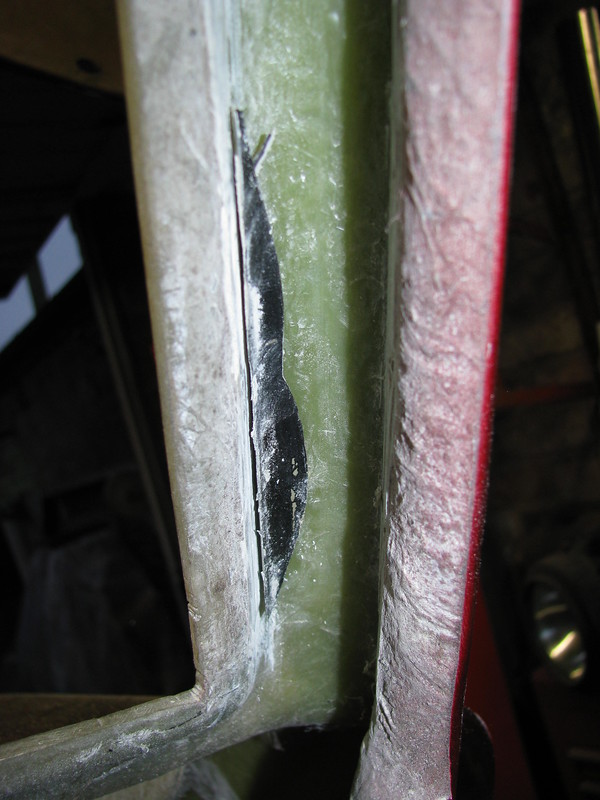
Here you can see the very little bonding used by the OB.

'A' Post steel by Sabrebuilder, on Flickr

And the bond between the 'A' post steel and the back of the hinge box had also failed.

'A' Post steel by Sabrebuilder, on Flickr

This photo shows where the windscreen surround steel bonding has failed.

'A' Post steel by Sabrebuilder, on Flickr

I'm thinking of using something like Tiger Seal to re-bond the 'A' post and windscreen surround but I'm open to expert advice:yo:


Hopefully more updates next week....

....peter
28 Jan 2018, 8:35pm Chassis and Body
Hi Paul,
many thanks for your feedback, but I had a 'free' day today and the weather was quite mild so I was keen to crack on whilst my motivation was high.

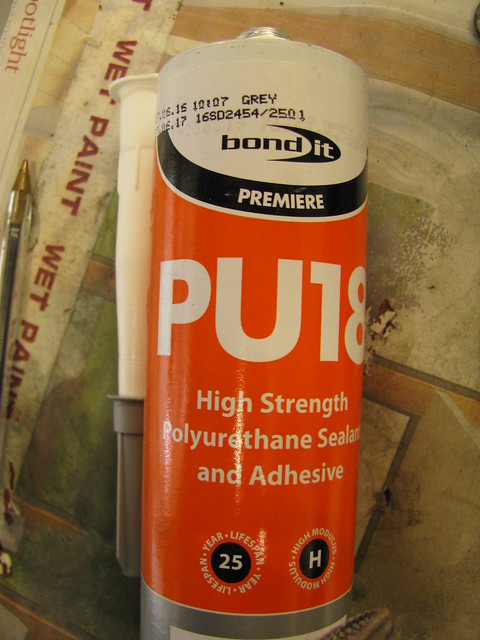
I found a couple of tubes of this stuff in my 'come-in-handy-one-day' box and a quick check on the manufacturers website confirmed it was suitable for bonding GRP to steel (amongst many other things). I can't remember why I bought it but its seemed to be suitable so I've used it on the first side.

Polyurethane Adhesive/filler by Sabrebuilder, on Flickr

The first side is setting over night so I'll see how strong it is tomorrow.....


....peter

P.S. I've watched your car building and I'm amazed at what you achieved on a slopping front drive. It's a great looking little car, well done!!
29 Jan 2018, 8:33pm Chassis and Body


That was my theory and hope.

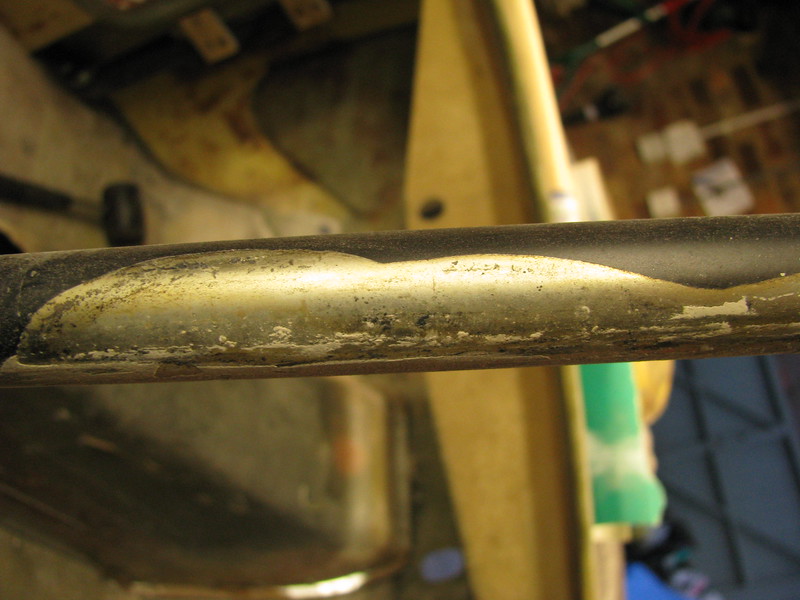
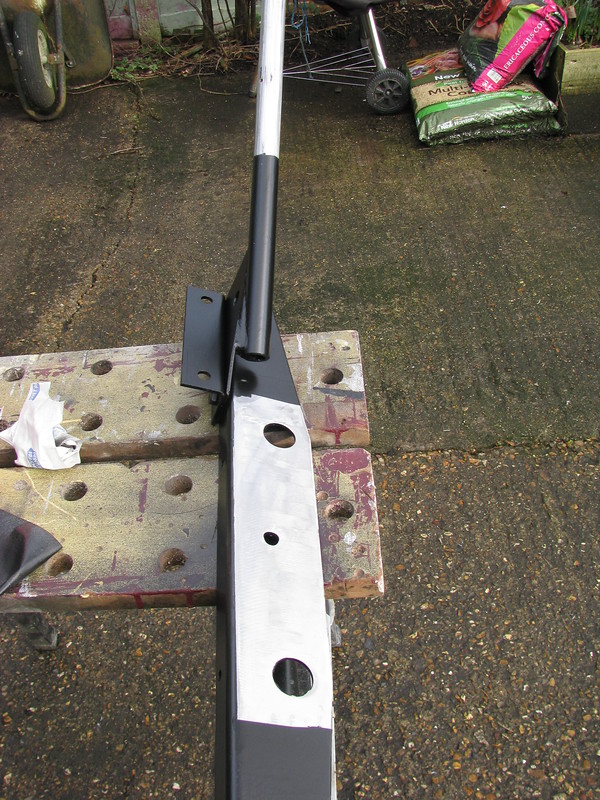
Looking closer at the steel parts I can see that the original parts were plated before they were painted black. (I don't know what kind of plating was used but it has a slight silver/yellowish tinge ). The paint scrapes off very easily. It appears that the body filler has adhered to the paint but the paint has come away from the plating.
So before refitting I abraded the steel surface with a flap disc in my angle grinder so that the PU sealant was in direct contact with roughened bare metal. I plan to paint any exposed metal after the PU has fully set.

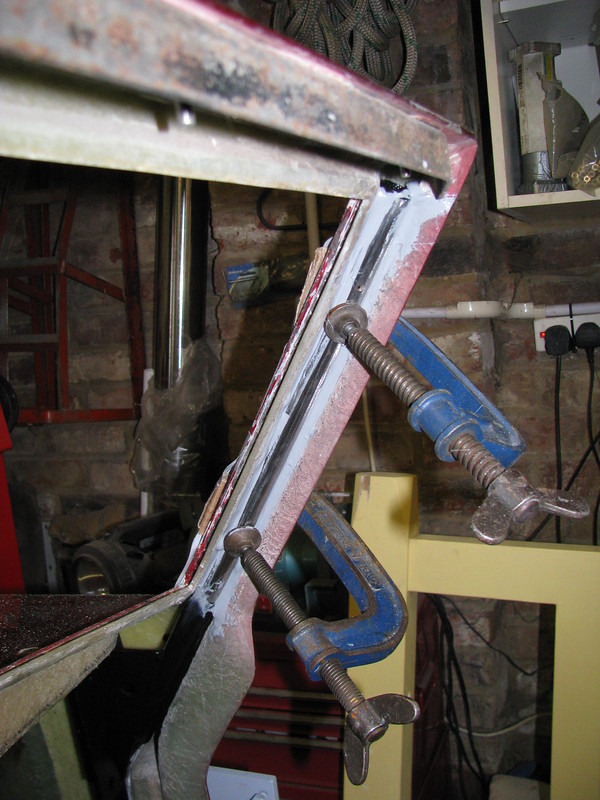
I checked the first side this morning and the adhesive was a bit softer than I expected. I'm hoping it is still curing due to the low temperatures in my garage overnight so I'll leave it clamped for a few days.

Oh the fun of re-building an old kit! :nerd:
31 Jan 2018, 9:05pm Chassis and Body Interior & Trim
Bonding......

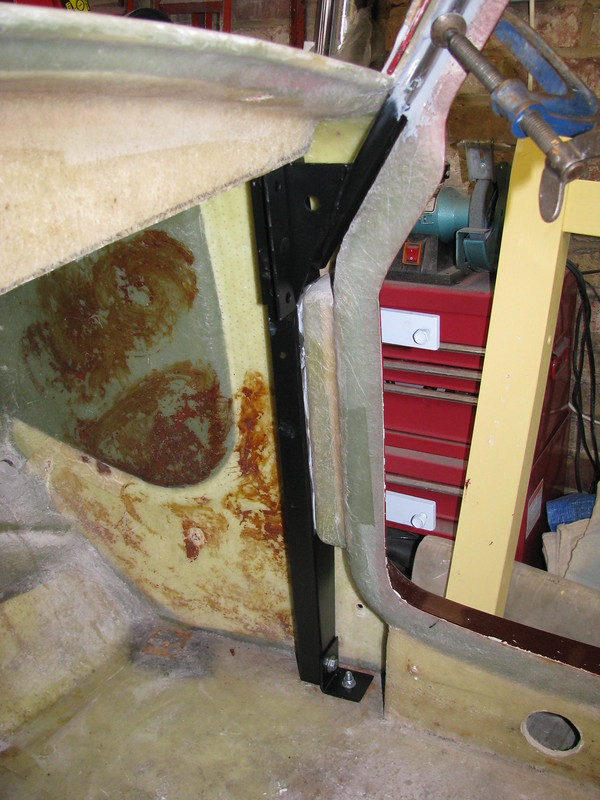
Here are some more pictures of re-bonding the drivers side 'A' post steel support.....

This is the 'A' post steel support after painting. I have abraded the areas that will be bonded to the GRP bodywork.

'A' post steel by Sabrebuilder, on Flickr

'A' post steel by Sabrebuilder, on Flickr

The windscreen support was clamped in place while the bonding is setting.

'A' post steel by Sabrebuilder, on Flickr

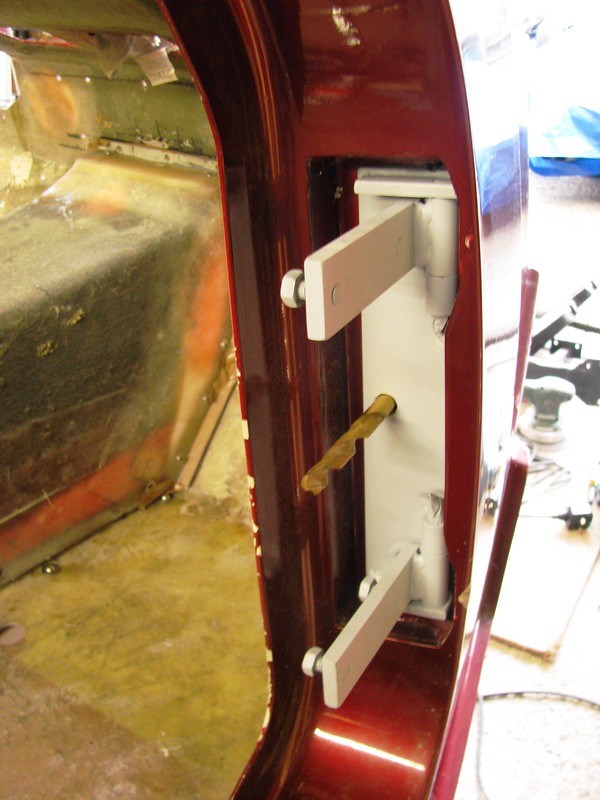
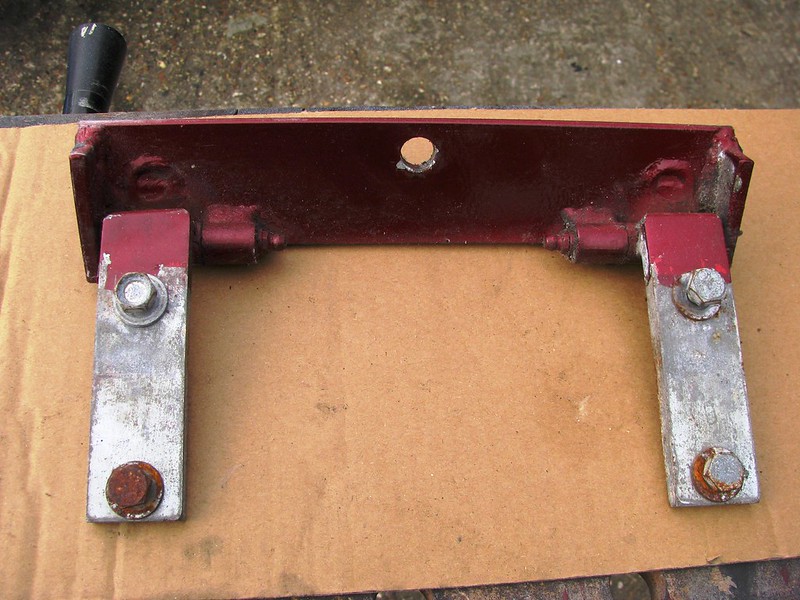
Drivers door hinge by Sabrebuilder, on Flickr


Passenger hinge by Sabrebuilder, on Flickr

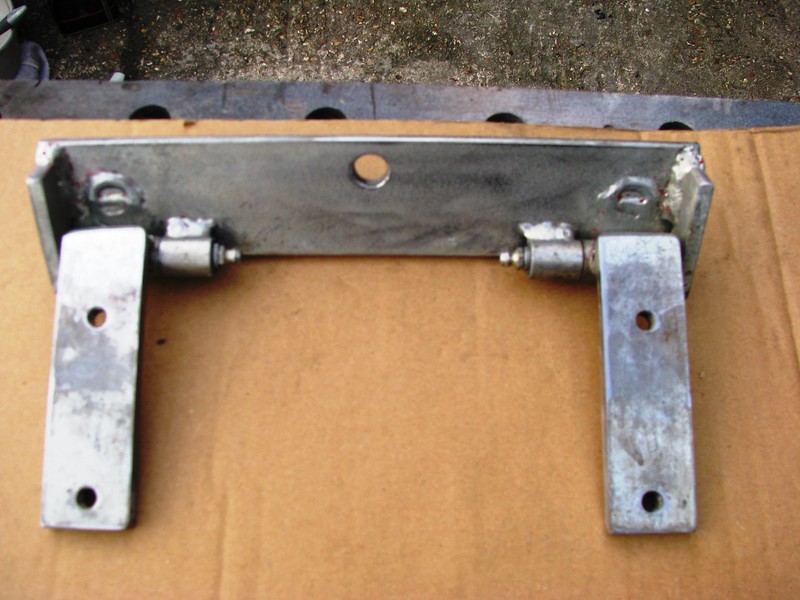
The hinges and doors must have been in place when the OB had the body painted. The hinges were primed and painted but the primer had not adhered well to the plated metal. I was able to scrape off all the paint with a hand chisel.

Passenger hinge by Sabrebuilder, on Flickr

Paint removed and degreased. I've painted it with and acid etch primer with the hope that this will stick better.


It was too cold in the garage today to do any more bonding so I did some woodwork....

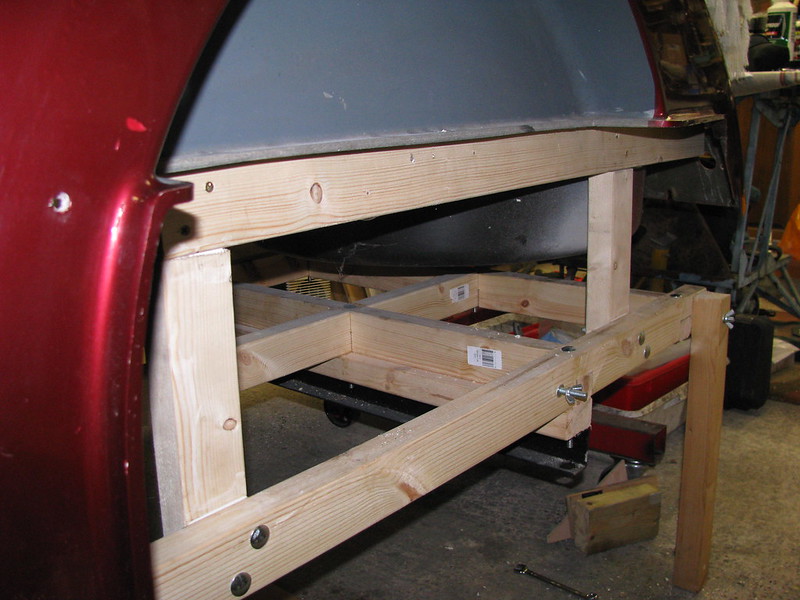
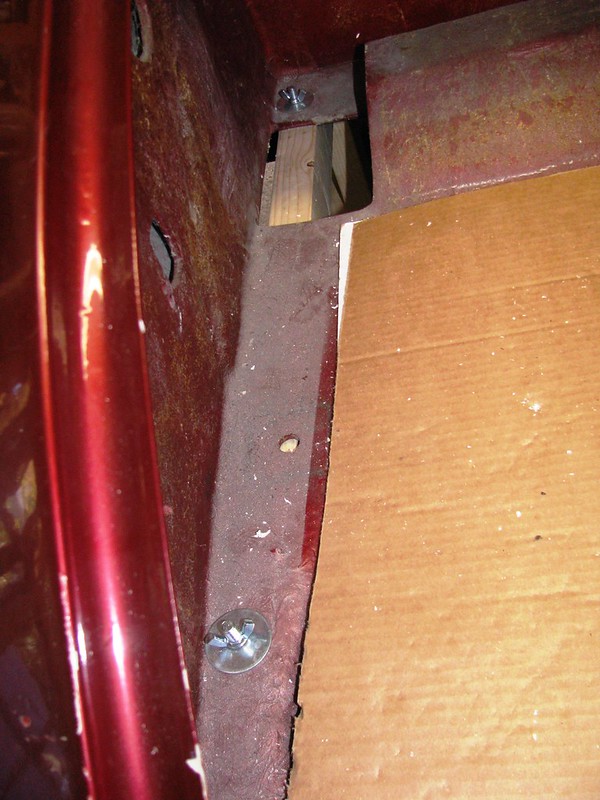
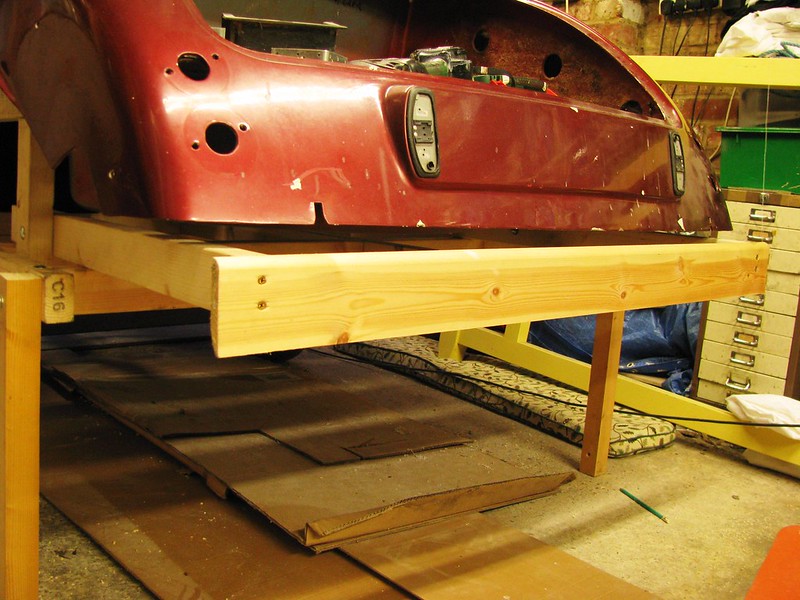
I've built an additional frame to support the rear of the body tub.

Body Support by Sabrebuilder, on Flickr

The body is now bolted down to the wooden frame on the trailer.

Body support by Sabrebuilder, on Flickr

I also added this support to take the trailer lightboard.

Trailer lightboard support by Sabrebuilder, on Flickr

Hopefully the weather will warm up a little next week so I can on with rebonding the passenger side post.:hail:


....peter

February 2018

7 Feb 2018, 8:05pm Chassis and Body Electrics
Cold winter work

The following update is not directly related to kitcar building but was a necessary step in my build plan......

The continued cold weather has stopped any more work on the body tub so I turned my attention to fitting a towbar.

To get the Sabre's body tub to the bodyshop I need a towbar fitted to my regular car.
I picked up a second hand towbar and electrics off ebay.
.
.
.

EDIT 19.02.2018
The towbar electrics are either faulty or not compatible with my BMW.
Either way I've decided to cut my losses and stop wasting anymore time on this activity.
As this is no longer part of my plan I've deleted the rest of this post.

Plan B to follow....


....peter
25 Feb 2018, 8:30pm Chassis and Body
And we're off....

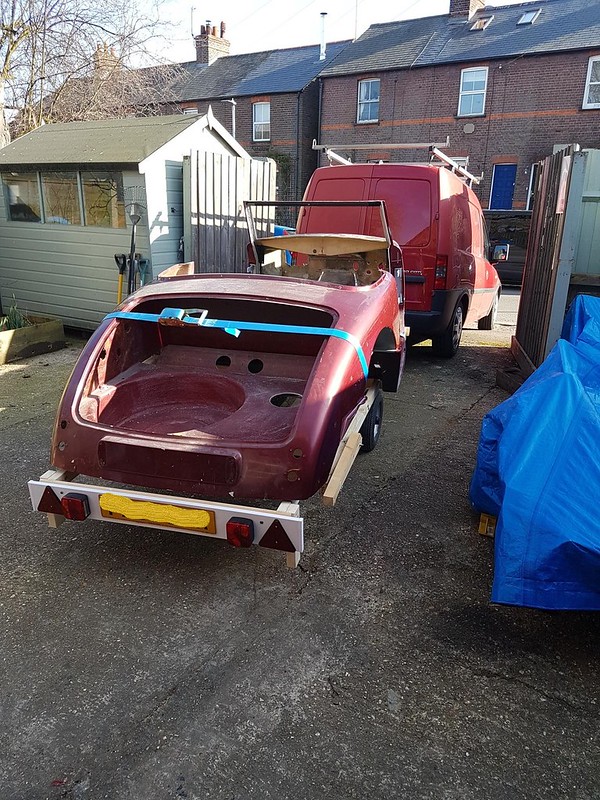
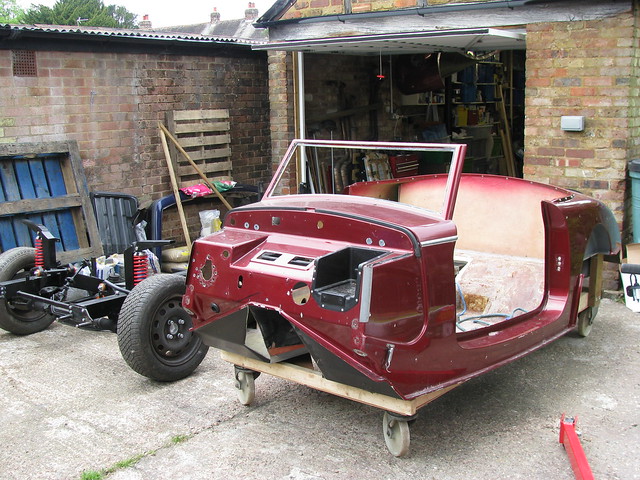
So after nearly five and a half years the body is off to the body-shop for a complete re-spray. The official tow vehicle is driven by my son-in-law James.

Off to the body-shop by Sabrebuilder, on Flickr

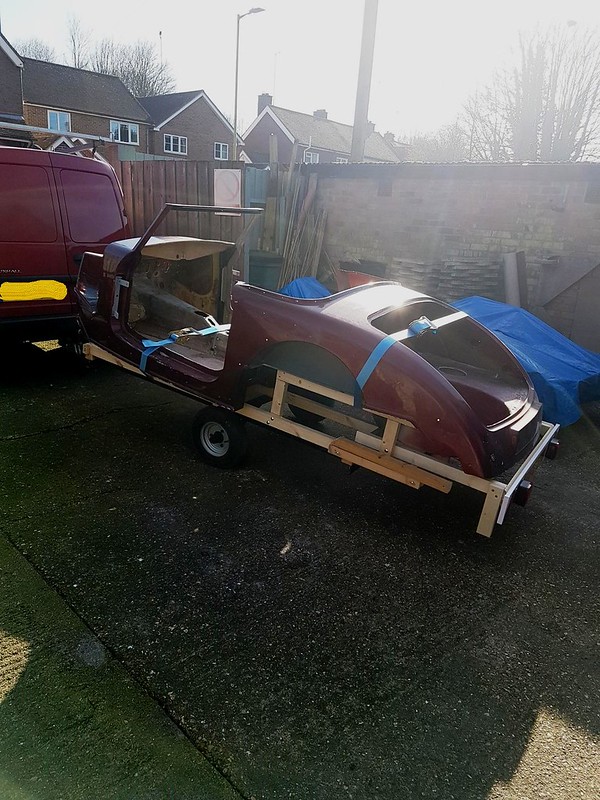
The bodytub was bolted down to the frame and a couple of ratchet straps added for safety. It'll be a couple of months before it's back which will give me time to finish off a few jobs on the chassis.

Off to the body-shop by Sabrebuilder, on Flickr

Exciting times!!:icon_biggrin::icon_biggrin:

March 2018

7 Mar 2018, 8:57pm Engine Chassis and Body
Radiator Cowl Repair

Whilst the bodytub is at the paintshop I've turned my attention to a number of smaller tasks. (actually quite a long list!)
First up is to repair the radiator cowl......

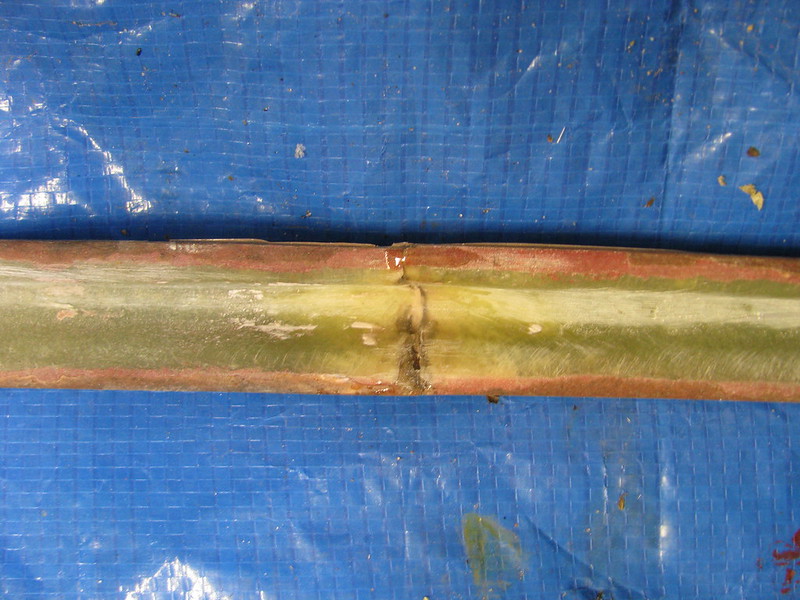
The radiator cowl had been damaged at some point before I purchased the kit. I think it had been rolled into a wall which had cracked the grills central bar. I first dug out the grill retaining bar and then Araldite'd the cracked GRP back together. This was just to hold it aligned.

Radiator Cowl repair by Sabrebuilder, on Flickr

The kit is supplied with what is called a grill retaining bar. It had been bonded into the radiator cowl but the resin had deteriorated so much that I could remove it by hand with an old chisel. Moisture had been absorbed by the bonding resin so the bar was quite rusty. After a good clean up, it was coated with rust converter to neutralise any rust left..

Radiator Cowl repair by Sabrebuilder, on Flickr

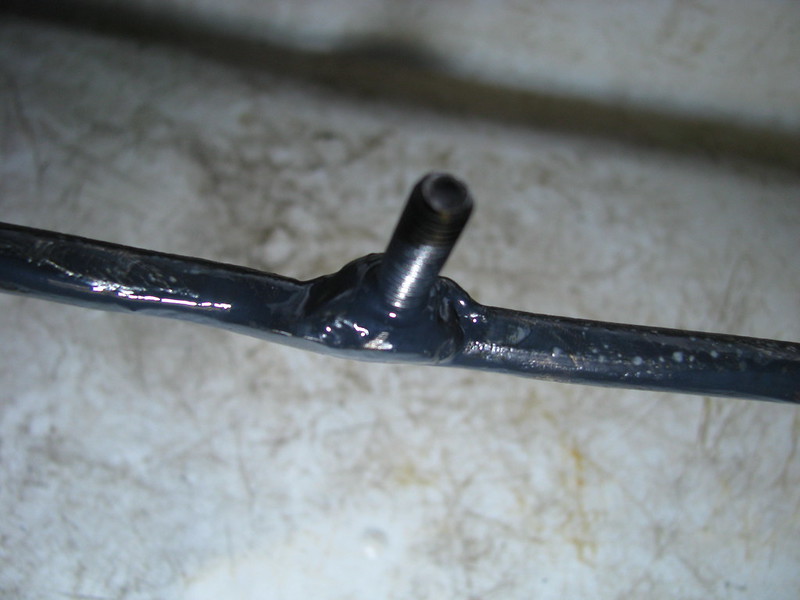
The grill retaining bar is a pretty rough bit of steel wire with threaded studs welded on.

Radiator Cowl repair by Sabrebuilder, on Flickr

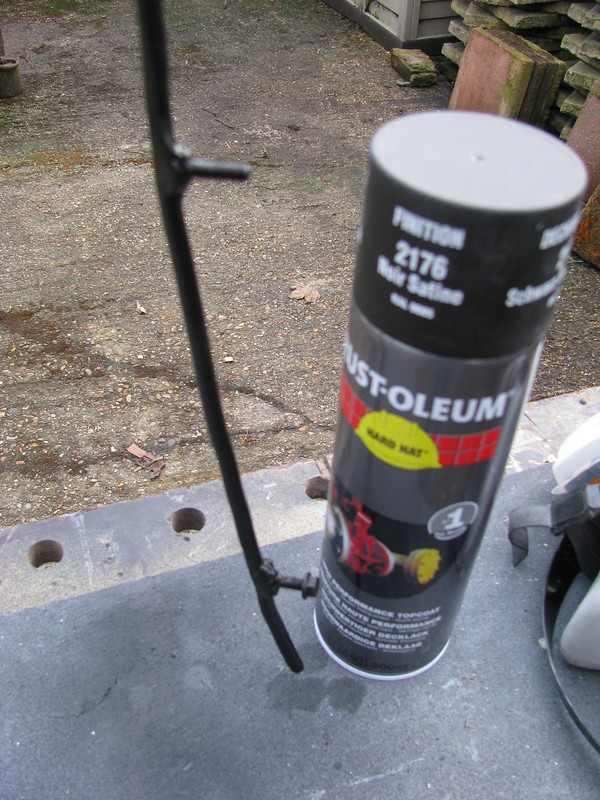
The grill retaining bar was then given a coat of black paint. I've been trying out this Rust-Oleum hard hat paint which covers well and drys in 15 mins.

Radiator Cowl repair by Sabrebuilder, on Flickr

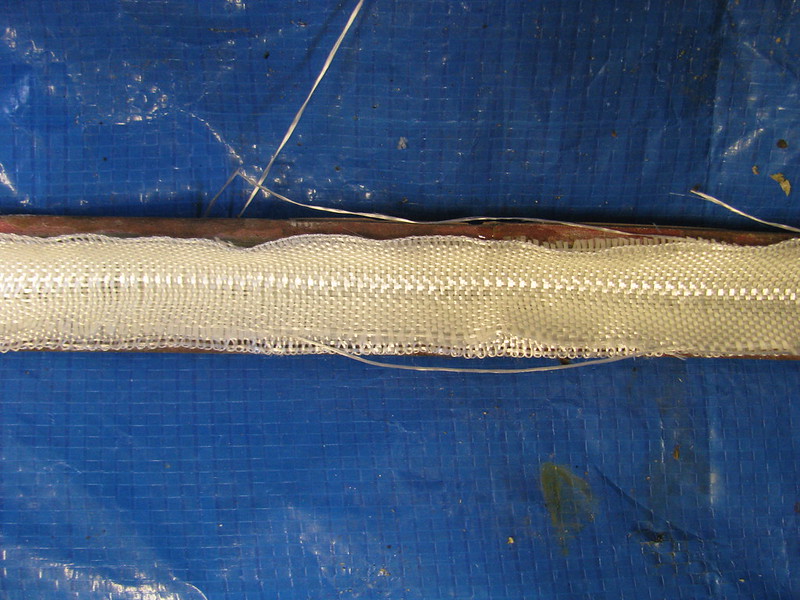
I then cut two lengths of woven glass tape. This has very high tensile strength and was chosen to strengthen the central bar.

Radiator Cowl repair by Sabrebuilder, on Flickr

I then embedded the glass tape and steel bar in resin. You can't see the tape after it is wetted but it is there!

Radiator Cowl repair by Sabrebuilder, on Flickr

I just need to pour some more resin to cover both ends of the bar. It should now be a lot stronger than before.

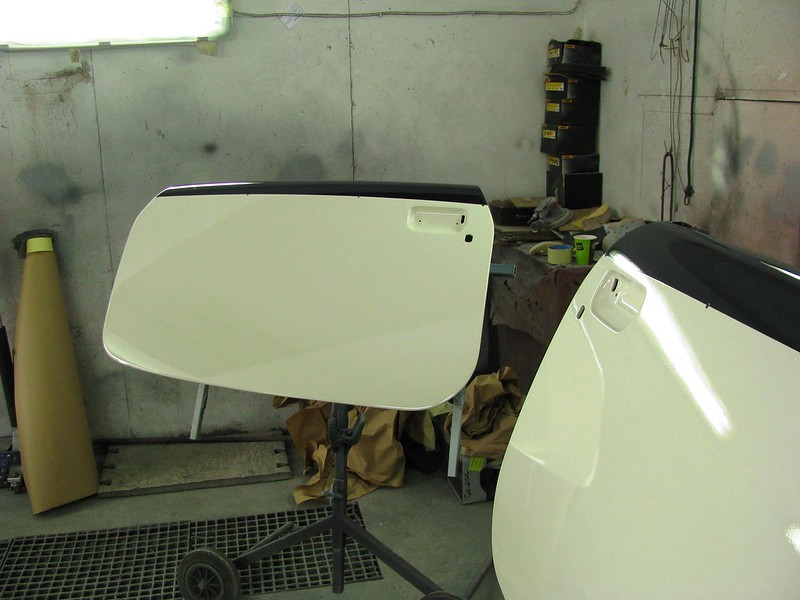
I had a call from the paintshop yesterday to say that the body tub had been baked, sanded and primed so I popped down to take some photo's. Not very exciting photos but really pleased with the progress so far....

Painting by Sabrebuilder, on Flickr

Painting by Sabrebuilder, on Flickr

Next up on the list is to modify the fuel tank sensor.....

....peter
13 Mar 2018, 8:28pm Chassis and Body
Another step forward....


Thanks for the feedback!

I popped over to the bodyshop today to check on the paint colours.

The body parts have now been flatted back and a second coat of primer applied. This will be followed by the base coats.

Painting by Sabrebuilder, on Flickr

Very pleased with the progress and finish.

....peter
14 Mar 2018, 8:20pm Chassis and Body
Exciting update!!!!!!!!1


I hope I can meet your expectations!!

------------------------------------------------------------------------------------


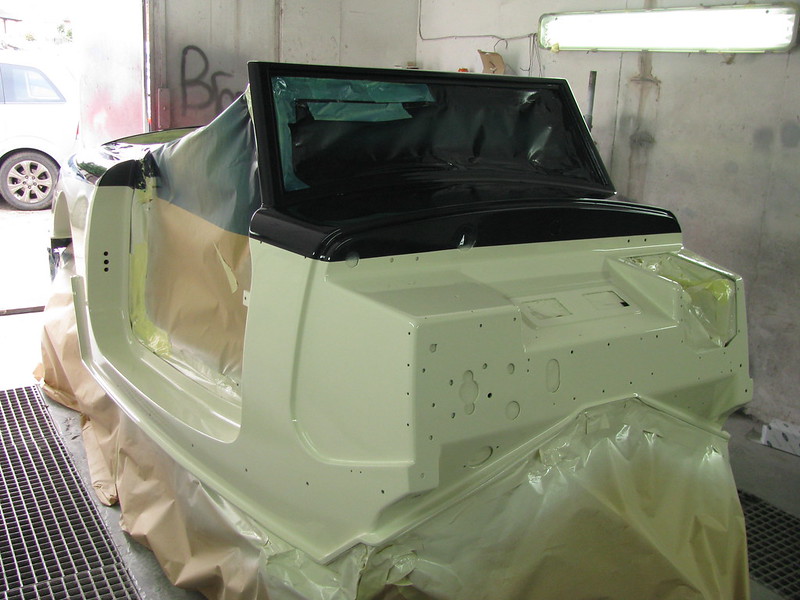
I was surprised to get a call today from Dave at the bodyshop.

He said 'bring your camera' ....so I did...........


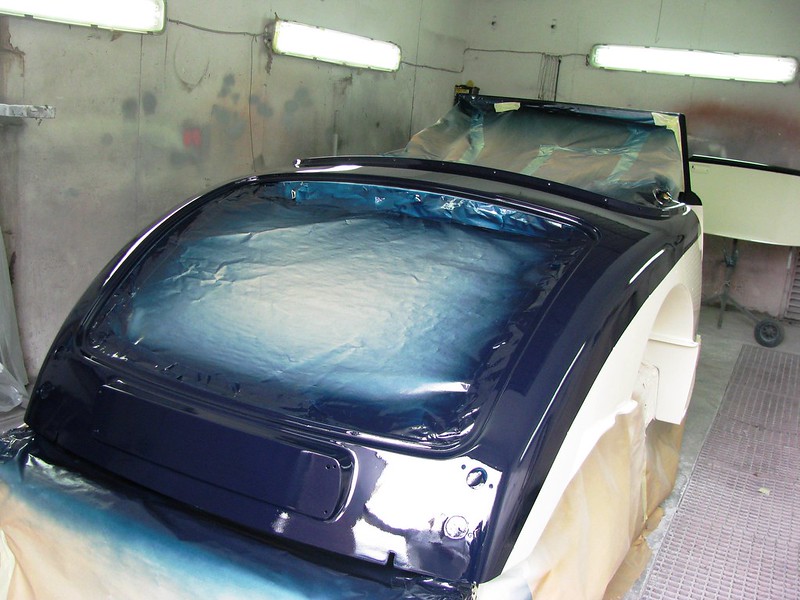
Painting by Sabrebuilder, on Flickr

Painting by Sabrebuilder, on Flickr

Painting by Sabrebuilder, on Flickr

Still a long way to go but a very significant milestone!!!!:party::party::party: