MadaboutKitcars

Build Stories are assembled automatically from a build thread's own author, in their own words and order — see all featured builds.

Royale Sabre - Take two!

By peterux · 372 updates · Sep 2012 to May 2025

Read the full original thread (with everyone's replies) in the archive →

November 2015

4 Nov 2015, 8:27pm Engine Chassis and Body


Hi Ed,
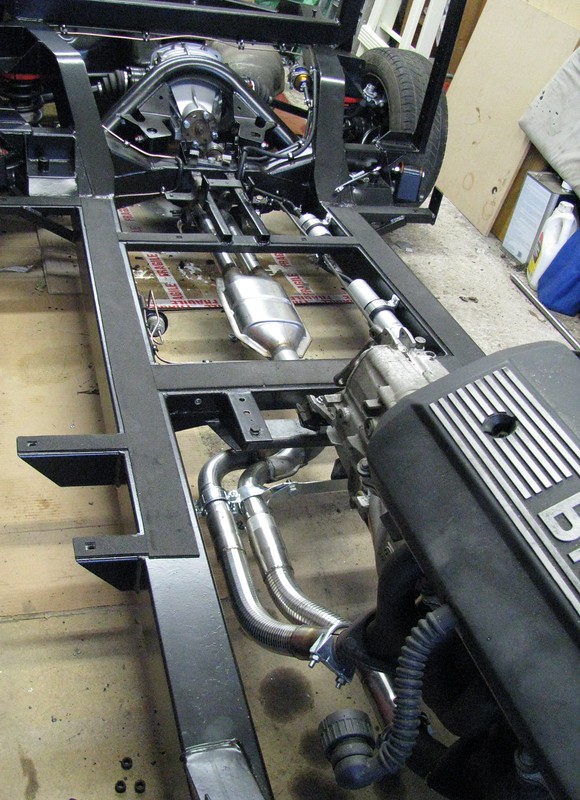
yes, thanks for the suggestions. I've been looking at these kind of options but BMW have built in some complex curves and bends that are not simple to cut and extended. (And difficult to photograph as well!) I'm sure if I had a very large tube bender and mig welder I could make something fit but I don't so I'm going to try and make some standard Jetex parts fit. It may not be very pretty but so long as it's gas tight I'll be happy.

My first cuts were to remove the only straight section of the rear section.
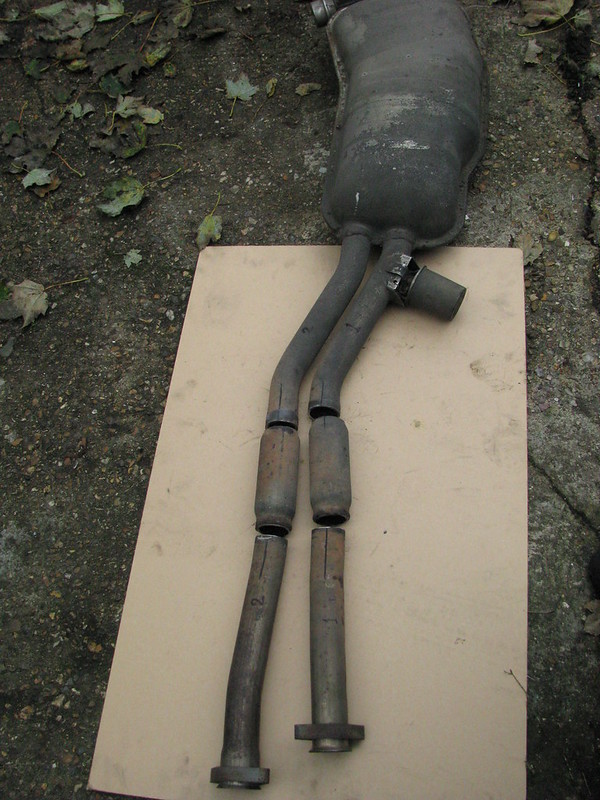
Exhaust shortening by marlinpeter, on Flickr

Exhaust modification by marlinpeter, on Flickr

These appear to be very small silencers, presumably designed to remove a particular frequency. I used a slitting cutting disc in an angle grinder. It was re-assuring to see how thick the pipes are.

I then rejoined them with some Jetex joining sleeves....
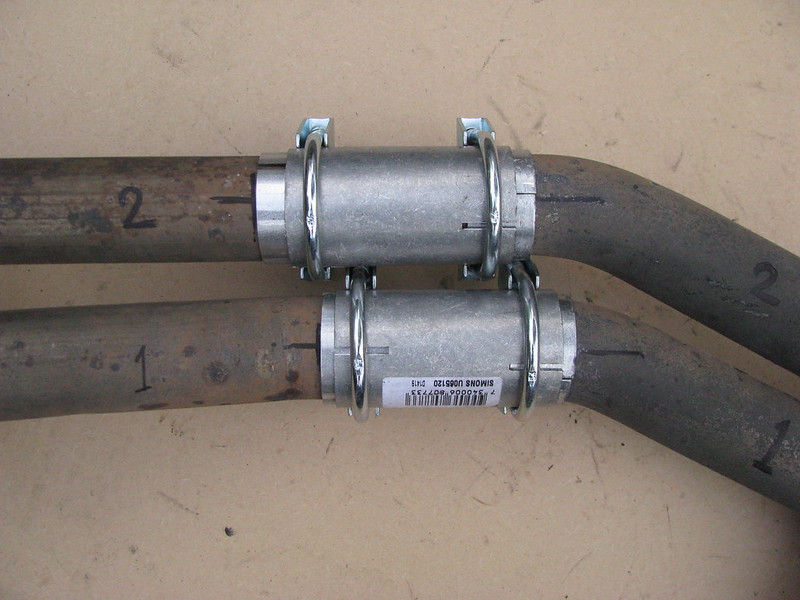
Exhaust shortening by marlinpeter, on Flickr

Cut sections re-joined with Jetex double ended sleeves. Plus 48->50.5mm spacers used to match the pipe sizes. These will be sealed with exhaust assembly paste when finally aligned.

Next, I've removed the front section to manifold pipes....

Front Exhaust modification by marlinpeter, on Flickr

The first step in modifying the front exhaust section was to slice off the front manifold connection bends to insert an 'S' bend made up of two 45 degree bends. I can't imagine why BMW built the exhaust with one pipe 46mm diameter and the other is 50mm?? Luckily Jetex do 46mm and 50.8mm bends and packing sleeves to convert from 50mm to 50.8mm.

Now I need to re-assemble the front and rear sections and offer it up to the chassis to see where I need to cut next. My current plan is to now get the rear box mounted in the right place and then try and sort out the front pipes to fit.

(I say'my current plan' because I often plan something in my head and then do it different when I get working on the car. I guess my brain is not very good at 3D modelling :shocked:)

...peter
8 Nov 2015, 9:07am Engine Mechanical Overhaul Chassis and Body


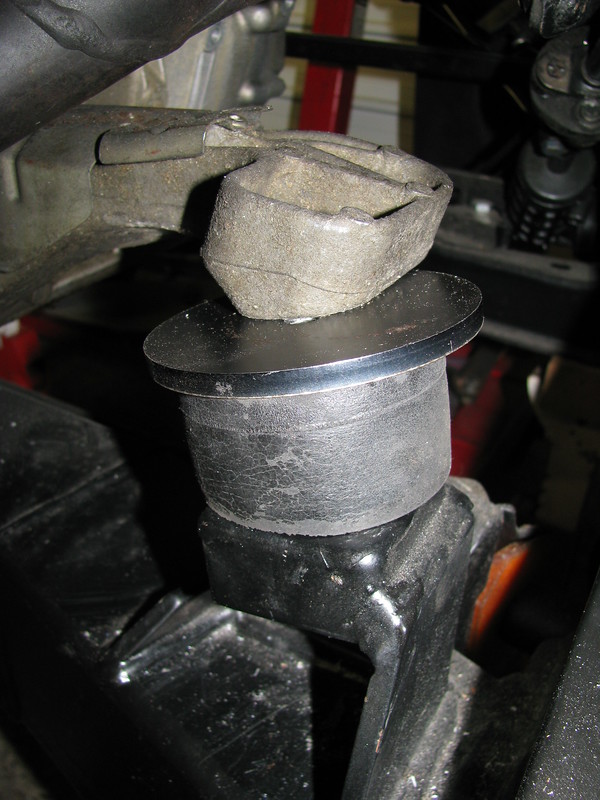
I while back I fitted these Volvo engine mounts.....

I've now replaced the temporary square washers with bespoke spacers discs that help to spread the load correctly. (they will be painted before final engine fitting)

Nearside engine mount by marlinpeter, on Flickr

Offside engine mount by marlinpeter, on Flickr

I've also slotted the engine mount chassis holes by about 10mm which means the mounts now sit better on the chassis mounts and has also solved the sump to chassis clearance issue.

I'm now happy (subject to another body tub check) that the engine and gearbox are in their final position.

....peter
13 Nov 2015, 8:46pm Engine Mechanical Overhaul
My current focus is on fabricating some brackets to support the rear exhaust silencer box. It's become a bit of a challenge as one of the brackets needs to go under the spare wheel well. I'll grab some pictures when I've finished....

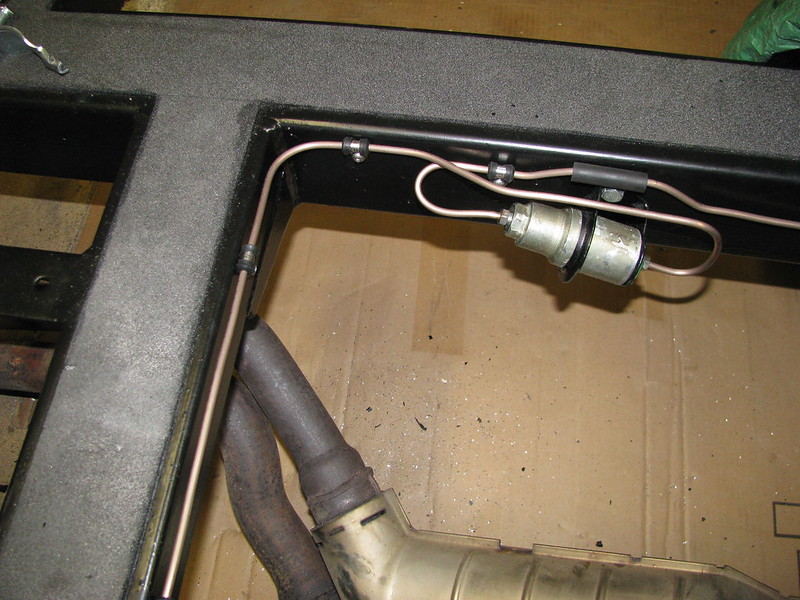
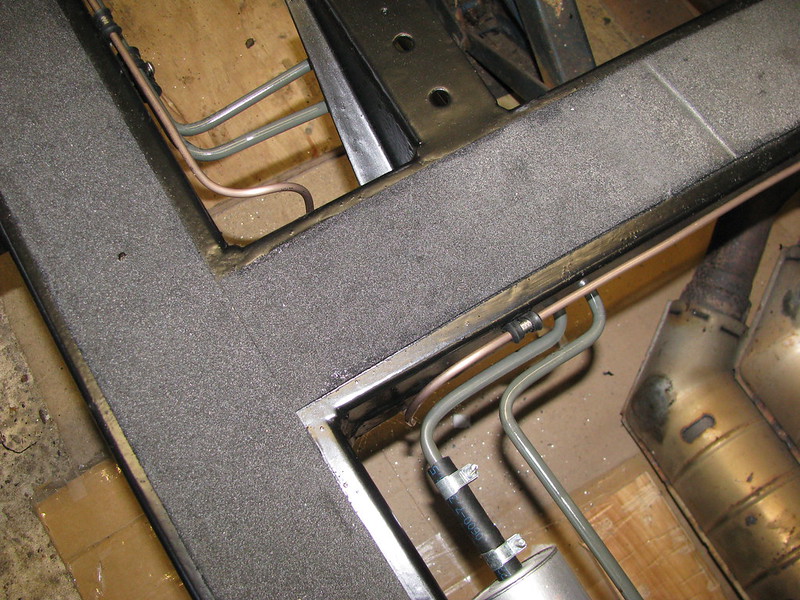
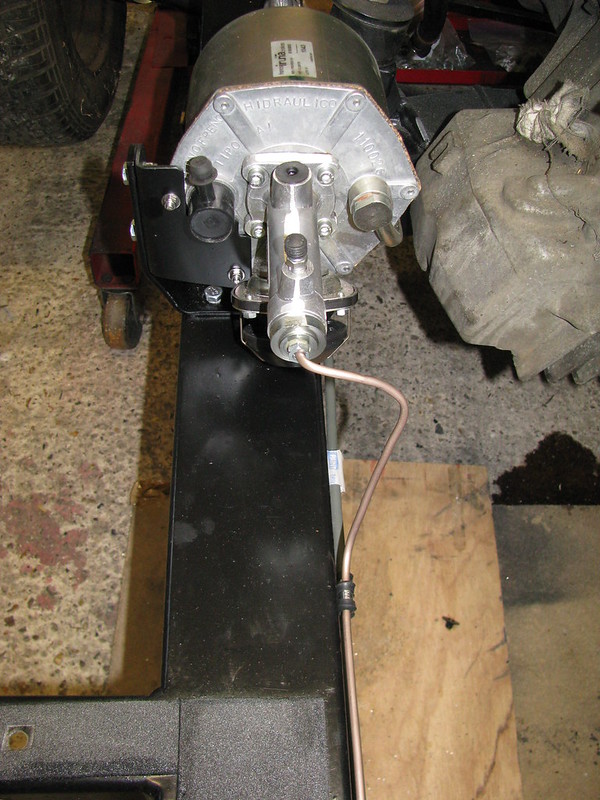
But in the meantime here are some pictures of the rear brake line, from the rear brake compensator valve up to the servo, that I fitted a couple of weeks ago.

Rear brake line by marlinpeter, on Flickr

Rear brake line by marlinpeter, on Flickr

Rear brake line to servo. by marlinpeter, on Flickr


...peter
22 Nov 2015, 7:25pm Engine Mechanical Overhaul Chassis and Body Interior & Trim
Exhausted.....

I've continued working on fitting the exhaust system over the last couple of weeks. It's been a lot of trial and error trying to find the best location.

So firstly, here is the rear silencer box clamps and hangers...
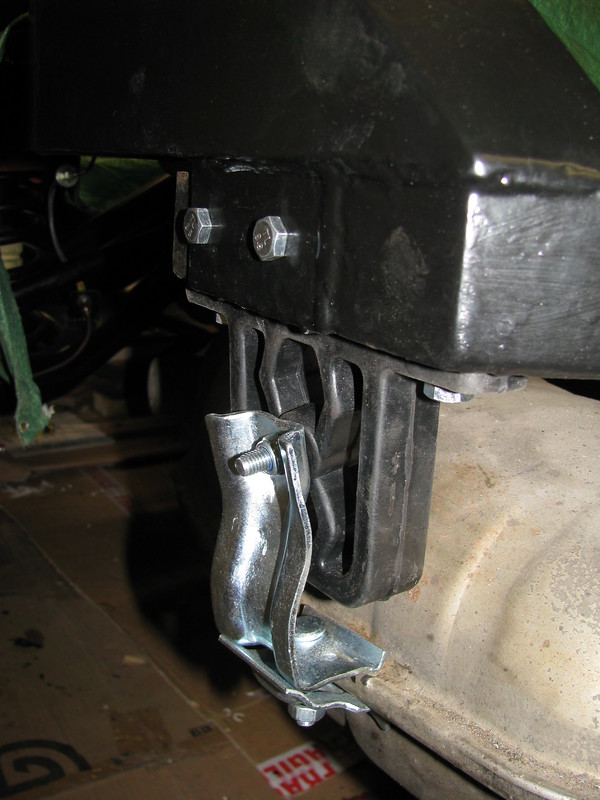
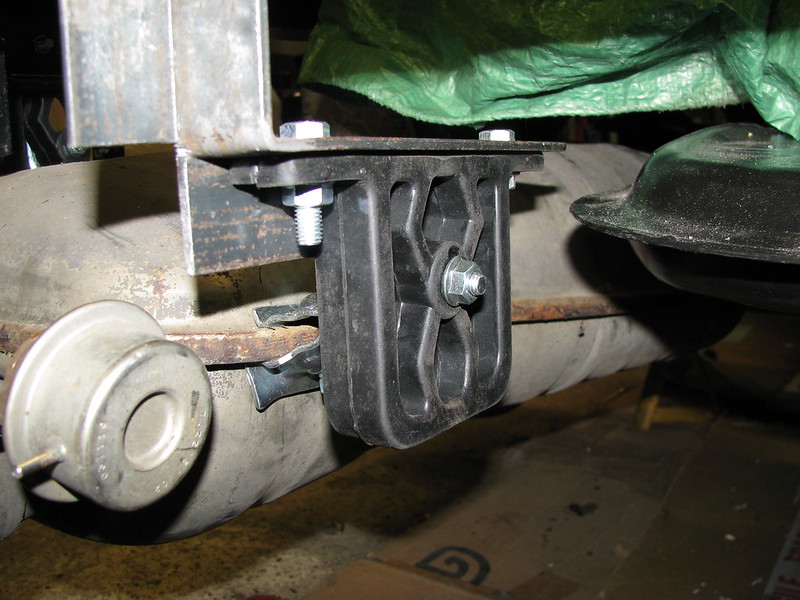
This is the nearside mounting. I've used standard BMW style silencer clamps and hangers. The hanger is bolted to the Sabre's exhaust mounting point and the rear chassis rail.
Rear Silencer N/S hanger by marlinpeter, on Flickr

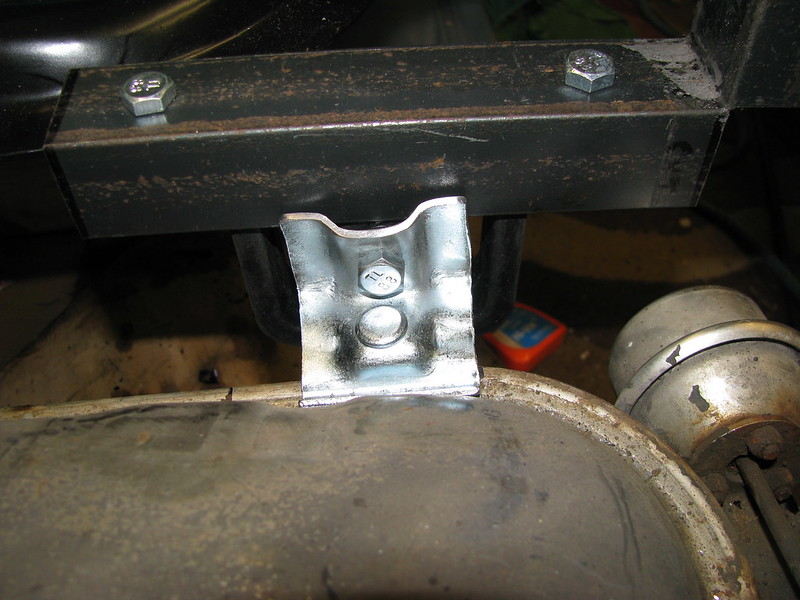
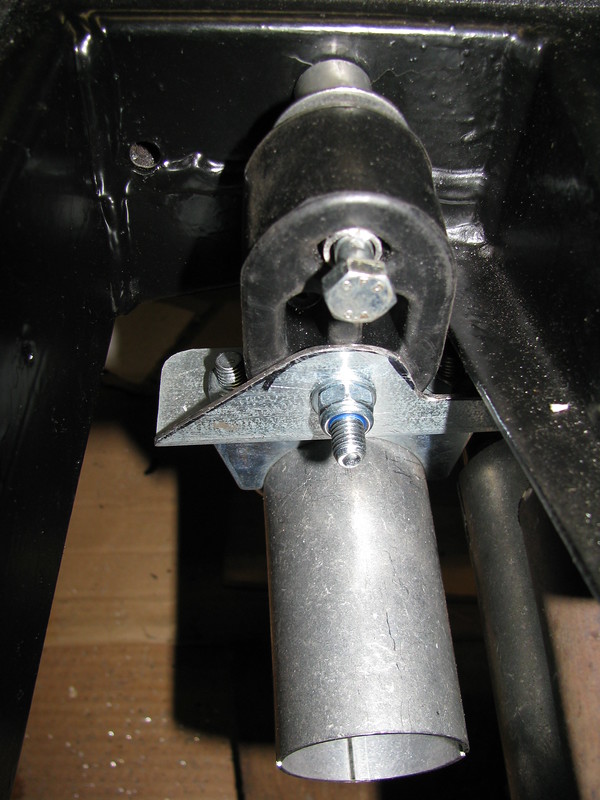
The offside mounting had to be bit more complicated as it has to hang from the rear chassis rail and clear the spare wheel well in the body tub. I modified the silencer clamp but the hanger is standard.

Rear Silencer O/S mount by marlinpeter, on Flickr

BMW style clamp had to be modified to get the hanger low enough to clear the spare wheel well.

Rear Silencer O/S mount by marlinpeter, on Flickr

Here's a view from under car. The cut in the angle bracket will be welded to stop it flexing if this design is successful.

Rear Silencer O/S mount by marlinpeter, on Flickr

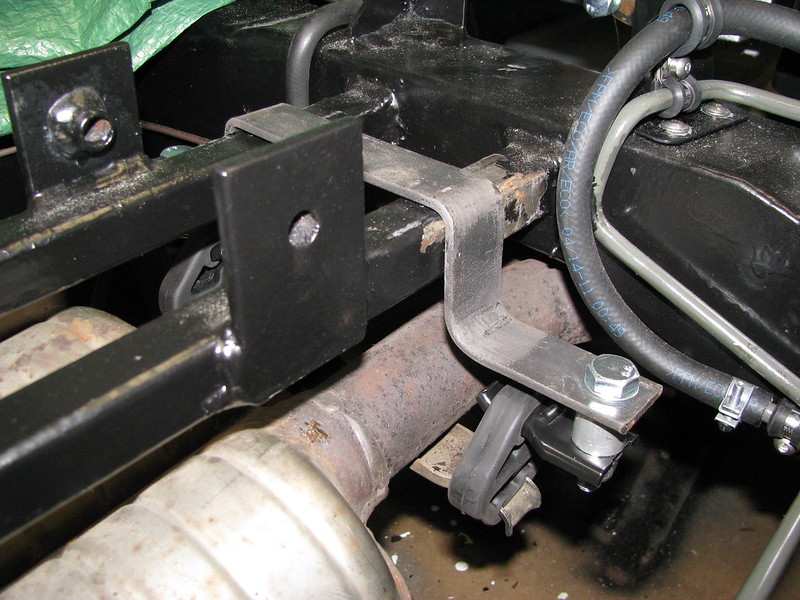
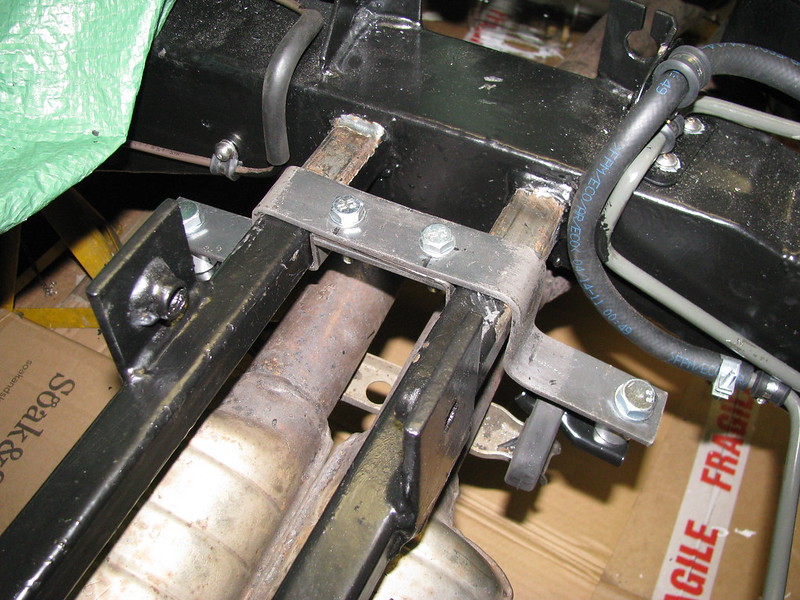
It was then on with making something to support the middle section of the exhaust system.....

Middle Exhaust system hanger by marlinpeter, on Flickr

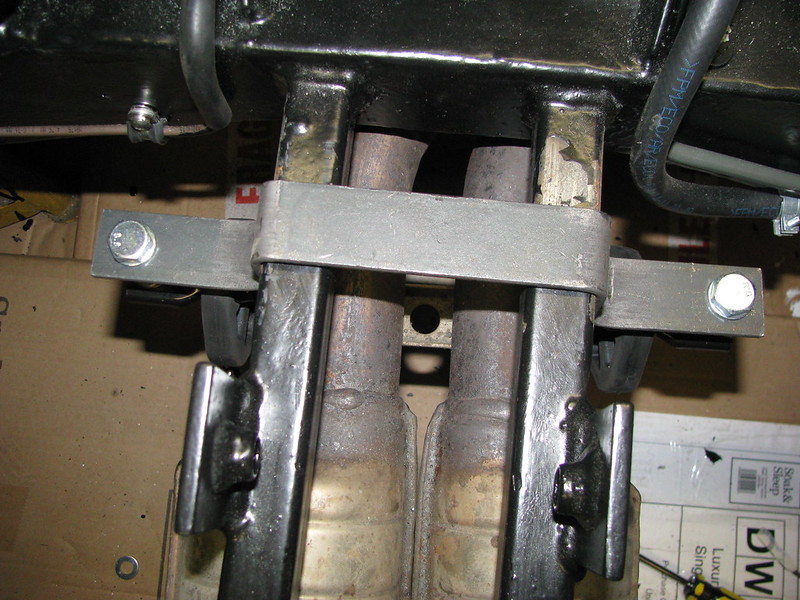
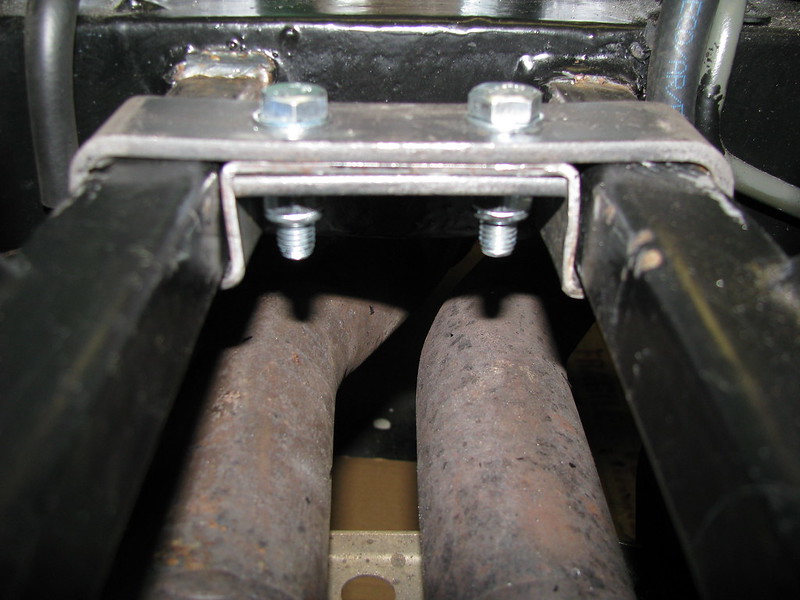
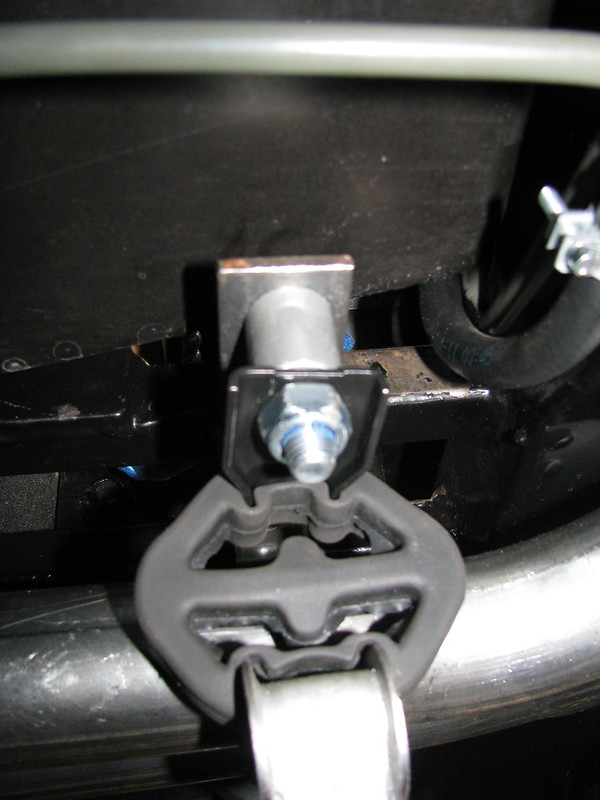
The hanger slots over the seat belt mounting rails. I didn't want to drill holes in the rails for fear of weakening them. The hanger bracket will be welded to the rails once I'm happy that it doesn't foul the body tub and I've finalised the front to back location of the whole exhaust system. This is the third version of this bracket so I hope it is the final.

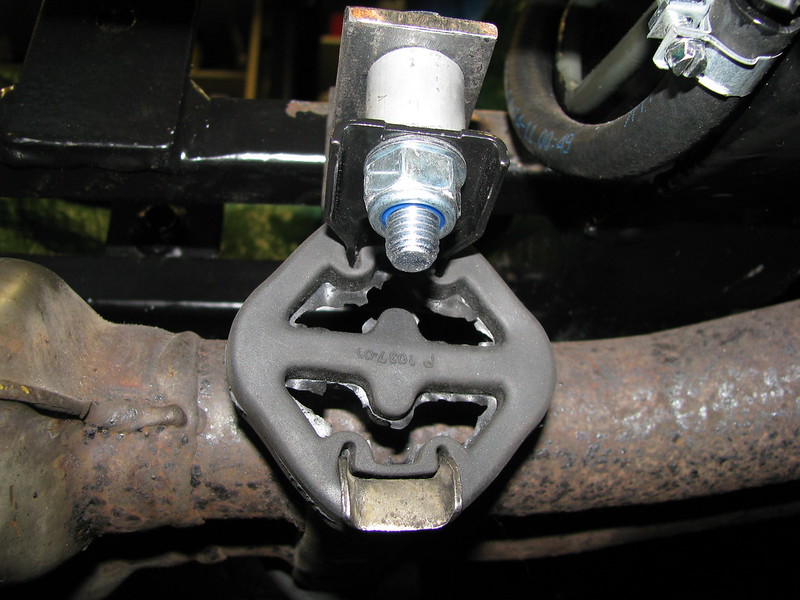
The upper mounting rubber brackets are standard BMW parts bolted to the hanger with M10 bolts and thick walled ali tube spacer.

Middle Exhaust system hanger by marlinpeter, on Flickr

View from under the car.......

Middle Exhaust system hanger by marlinpeter, on Flickr

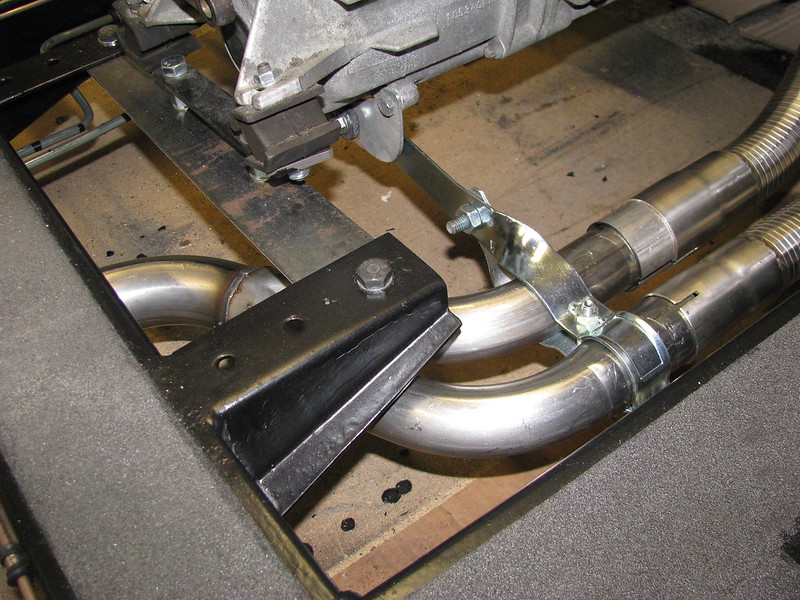
I've also added an extra support at the front of the 'cats' as I will be using flexi pipes between here and the front down pipes so the weight of the 'cats' can no longer be taken by the gearbox mounting bracket. (the idea of two 45 degree Jetex bends didn't work :sad:)

Exhaust System - front mount by marlinpeter, on Flickr

It's fixed to the gearbox cross-member chassis rail with an M8 steel rivnut. The angle bracket is fixed to the exhaust pipe with a standard exhaust clamp. (The M8 bolt in this shot is too long and will be replaced when I get some the right length!)

Exhaust System - front mount by marlinpeter, on Flickr

Next, I've ordered some flexi pipes to join the exhaust system to the down pipes from the exhaust manifold.

After I have finished fitting the exhaust system, I plan to refit the body tub again to check all the clearances between the tub and the fuel, brake lines and the exhaust mountings, etc. Fingers crossed that there won't be too much re-work needed :noidea:

.....peter
23 Nov 2015, 4:05pm Engine

Hi Amir,
thanks for the feedback, I think that is great idea! It also means it could be completely removed should I ever need to change the type of exhaust.
cheers, Peter
23 Nov 2015, 10:17pm Mechanical Overhaul Chassis and Body


You're right again....

Looking at this picture again, I certainly need to check the options with the body tub on, which was my next step...and I think I need to install the propshaft to check clearance.

Fuel/brake line planning by marlinpeter, on Flickr

I think I spoke too soon as I think version 4 may be next.....

(that will be after I've fixed my daily drive that has sprung a leak from the HP diesel pump :doh::doh:)

cheers, Peter
29 Nov 2015, 10:30pm Engine Mechanical Overhaul


I have made and fitted the clamp as suggested. I've decided to leave it all one piece and will worry about cutting it in half should I ever need to remove it.

Exhaust mid hanger clamp by marlinpeter, on Flickr

Exhaust mid hanger clamp by marlinpeter, on Flickr

The clamp is made from 2mm thick steel strip with a 4mm thick backing plate. (Sorry for the poor photo). It works really well!
Thanks again to Aamir for the suggestion.


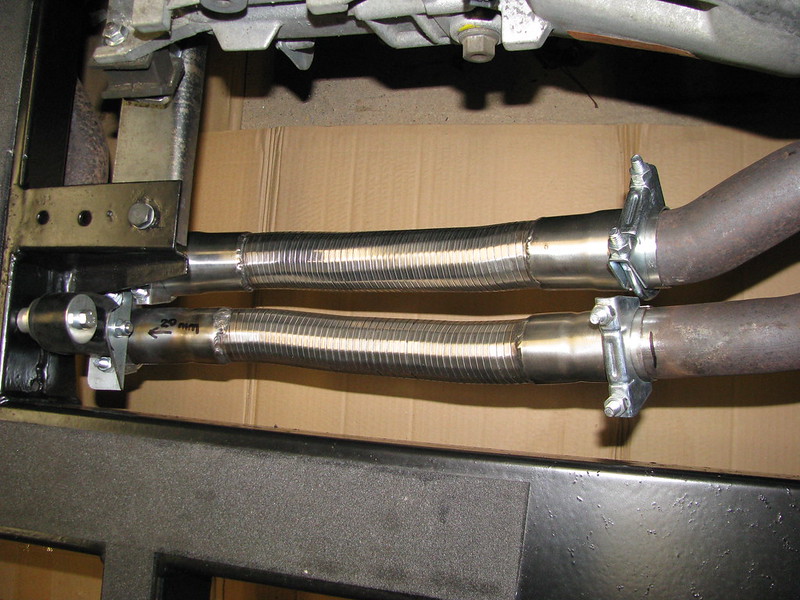
I've also 'completed' the exhaust system by using a couple of flexi pipes at the front.

Exhaust Flexi's by marlinpeter, on Flickr

My original plan was to use two rigid Jetex 45degree bends to bridge the change in levels as the exhaust system is slung lower than in the BMW. There wasn't sufficient space to accommodate the rigid bends so I'm using these Polylock flexible pipes from Rev motorstore on ebay.

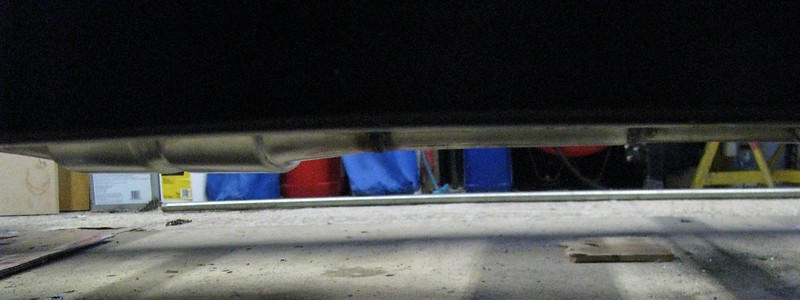
I said above 'completed' in quotes because I fear the front exhaust is too low and there is too little ground clearance.

Because the pipes that enter the cats pass under the side supports to the gearbox cross-member the exhaust is currently about 1.5" lower than it should be. I've been working on the car raised on axle stands for the past few months so hadn't realised how little ground clearance there is under the car at this point. It's also just about mid way between the two axles so the worst place for speed humps. There is currently only 3.25" ground clearance with the existing 14"wheels.
I'm planning on using 15" wheels which will raise the car by 1/2" and high profile tyres which will add a bit more but I think I need to find another way of routing these pipes nearer the centre of the car.

You can just about see the issue in this early photo....

Exhaust initial trial by marlinpeter, on Flickr

Thinking cap firmly back on.......:noidea:

....peter

December 2015

17 Dec 2015, 9:36pm General Update


Ever wondered what the regulations are related to speed bumps?
Well here it is....
https://www.gov.uk/government/uploads/system/uploads/attachment_data/file/329454/ltn-1-07_Traffic-calming.pdf

Page 47 onwards covers speed bumps specifications.....

"the Highways (Road Hump) Regulations 1999 still allow a maximum height of 100mm" but this document goes on to say...." a maximum height of 75 mm is recommended for individual road humps that are not raised junctions "


So my conclusion is that my 85-100mm unladen clearance is not enough so Plan B is currently being designed.......
22 Dec 2015, 11:01pm Engine Mechanical Overhaul Chassis and Body
Exhaust system - Plan B

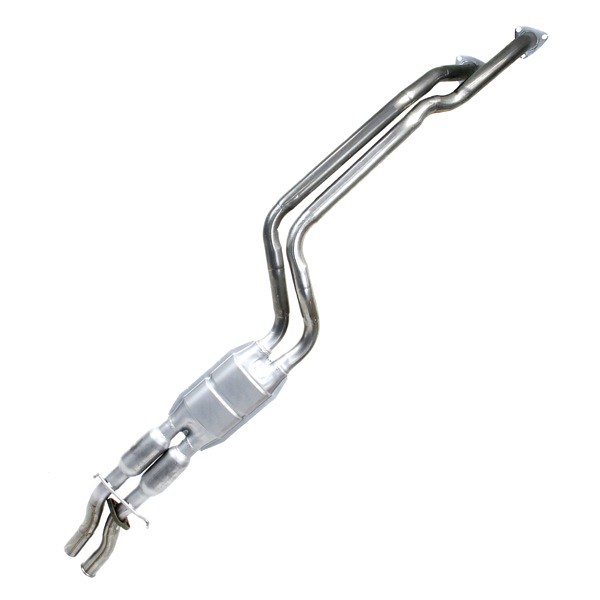
I've decided to ditch the original BMW front section of the exhaust system because the pipes in front of the cats clash with the Sabre's gearbox chassis crossmember. (It was kind of free with the donor and bit rusty so no great loss). Looking around for other options I found this aftermarket front section in Eurocarparts Black Friday sale.
Exhaust system - Plan B by marlinpeter, on Flickr
Looking at this picture I thought I could cut the pipes in front of the cats and use the flexi's to get round the chassis issues.

So I ordered the Eurocarparts aftermarket exhaust front section and this is what arrived.........

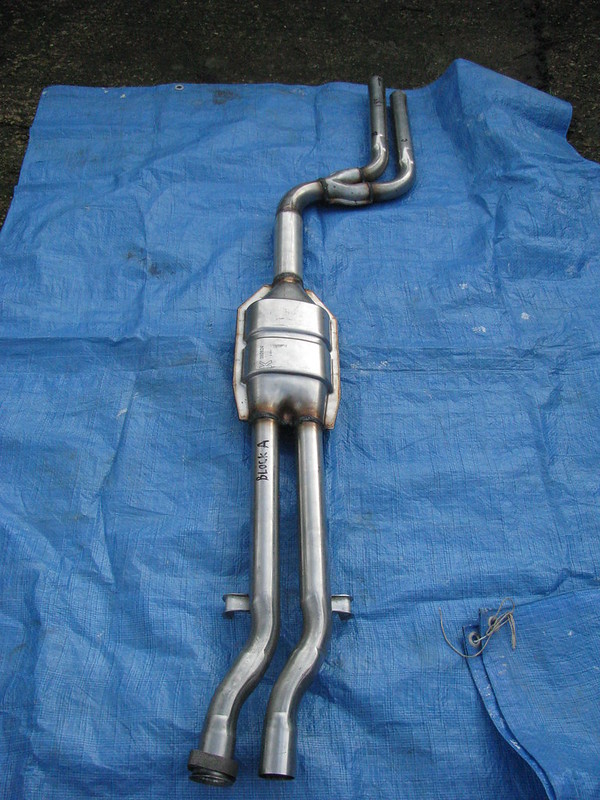
Exhaust system - Plan B by marlinpeter, on Flickr

Initially, I was quite disappointed that it was nothing like the one pictured on their website but offering it up under the car opened up some new options.
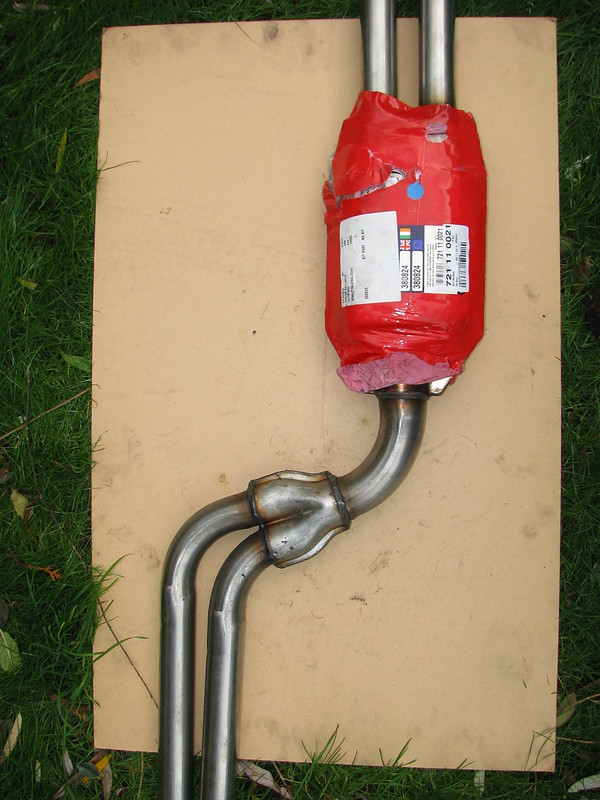
It is designed for the M50B28 engine but is quite different from the original OEM design. (Wrapper still on in this shot as I hadn't yet decided whether to keep it or take it back for a refund)

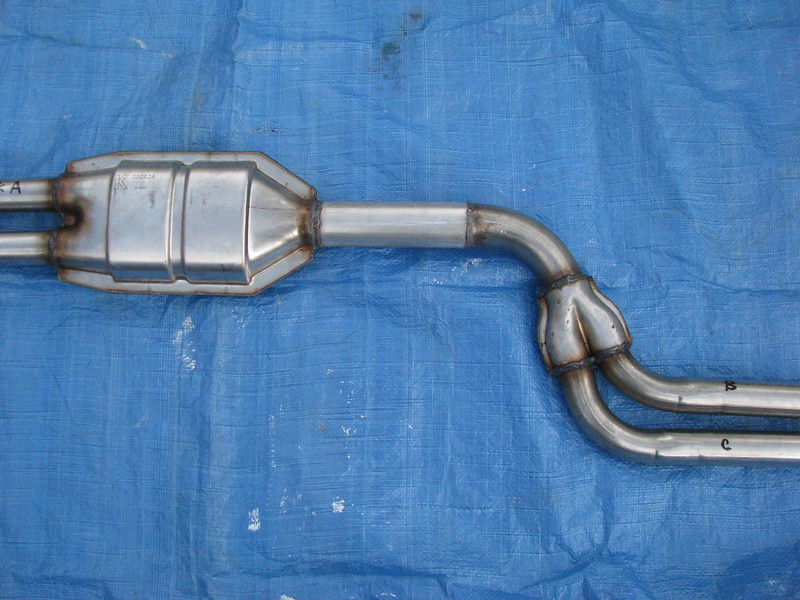
This is the Klarius (part # 380824) aftermarket front section. In this shot the front part of the pipes that join to the exhaust manifolds have been removed and a extension piece has been inserted in front of the catalytic converter.

Exhaust - Plan B by marlinpeter, on Flickr

A 185mm length of 57mm diameter exhaust pipe TIG welded by a local engineering firm between the 'cat' and the two into one joint.

Exhaust - Plan B by marlinpeter, on Flickr

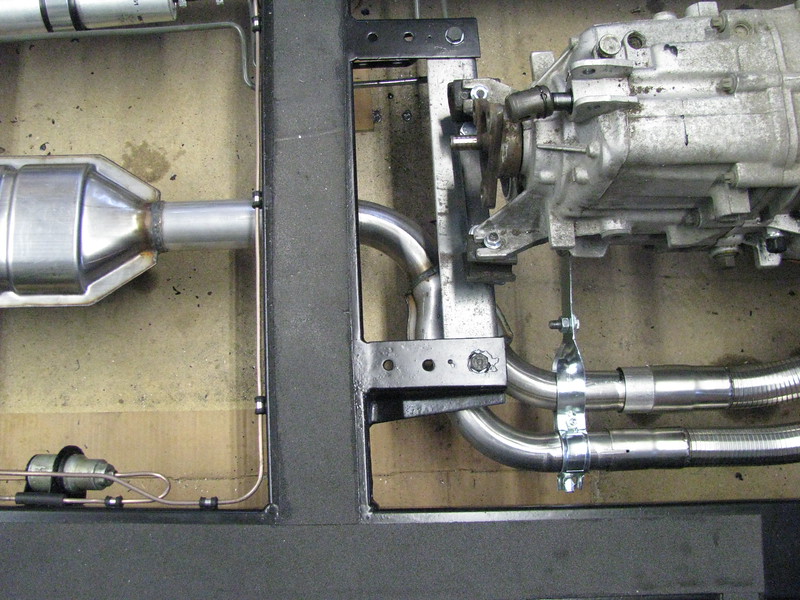
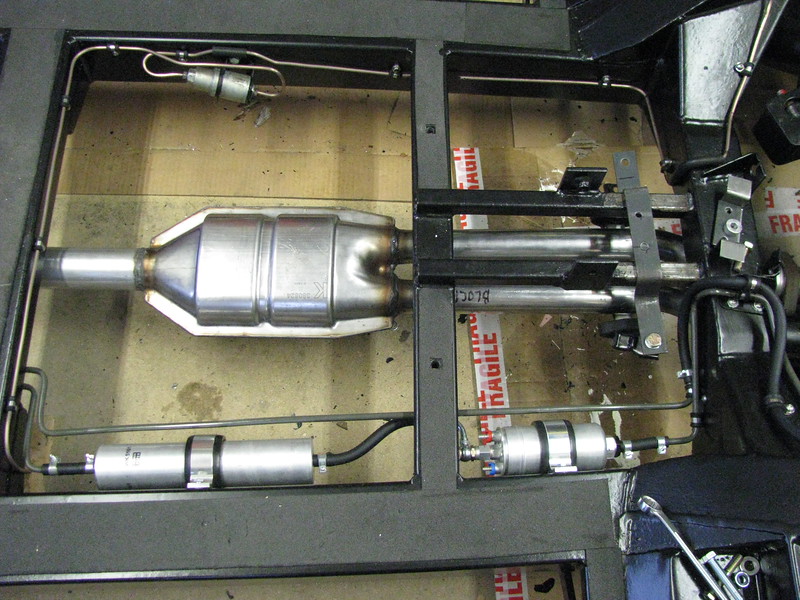
'Cat' and front curved pipes now clear the gearbox chassis crossmember.

Exhaust - Plan B by marlinpeter, on Flickr

'Cat' now sits neatly between the chassis crossmembers. (Center hanger not yet fitted in this shot).

Exhaust - Plan B by marlinpeter, on Flickr

I think I can also use the standard BMW gearbox support brackets. (This is the first fitting trial and the bracket needs a bit of 'adjustment' to get the pipes in the right position.)

Exhaust - Plan B by marlinpeter, on Flickr

Stainless steel Polylock flexi's used to connect up to the exhaust manifolds.

Exhaust - Plan B by marlinpeter, on Flickr

Overall view of the front section.

Exhaust - Plan B by marlinpeter, on Flickr

Exhaust - Plan B by marlinpeter, on Flickr

And now ground clearance maximised with very little below the the chassis!

:rapture::rapture::rapture:

This will be my last update this year so Merry Christmas and happy new car building for 2016!!

...peter
26 Dec 2015, 1:02pm General Update


Thanks to you and Amir for your Christmas wishes.
I think your so right about it looking right.
really wasn't happy with my first attempt so getting the Klarius was a lucky moment!

atb, Peter
27 Dec 2015, 10:43am General Update


Hi Ben,
Automotive Creations Ltd ( http://www.automotivecreation.com/) are the current manufacturers of Royale Sabres, spares and support to existing owners. Malcolm Badger is the owner and I believe he can supply hoods for existing cars and new builds. I have always found Malcolm very helpful with Sabre specific technical questions. You can contact Malcolm through the ACL website.
There is also an active owners club that has a wealth of knowledge and experience going back to the launch of the Sabre is 1994.
http://royaleownersclub.org.uk/index.asp Peter Gibbons is the chairman and contact numbers for the club committee members listed on the 'Club Officers' button.
cheers, Peter
28 Dec 2015, 5:31pm Mechanical Overhaul


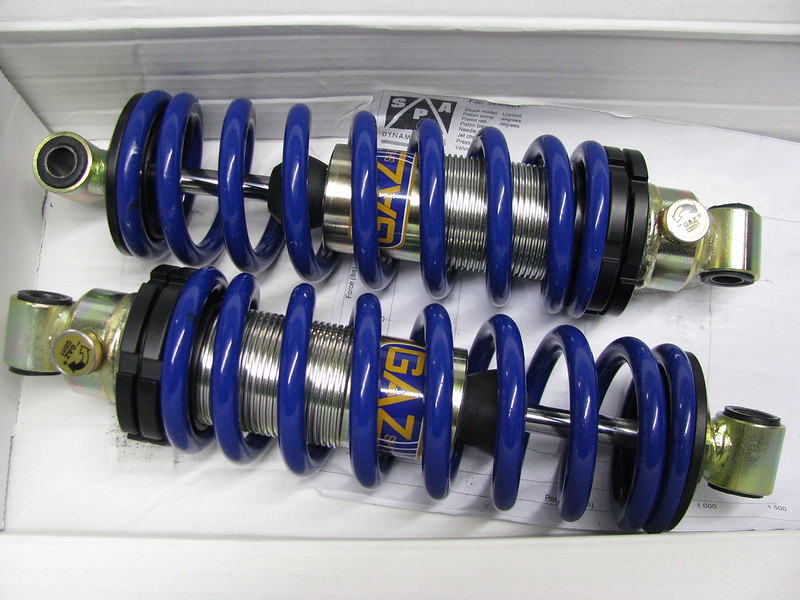
Well I thought it was until Santa arrived with these in his sack....:lol:

New Front shocks and springs by marlinpeter, on Flickr

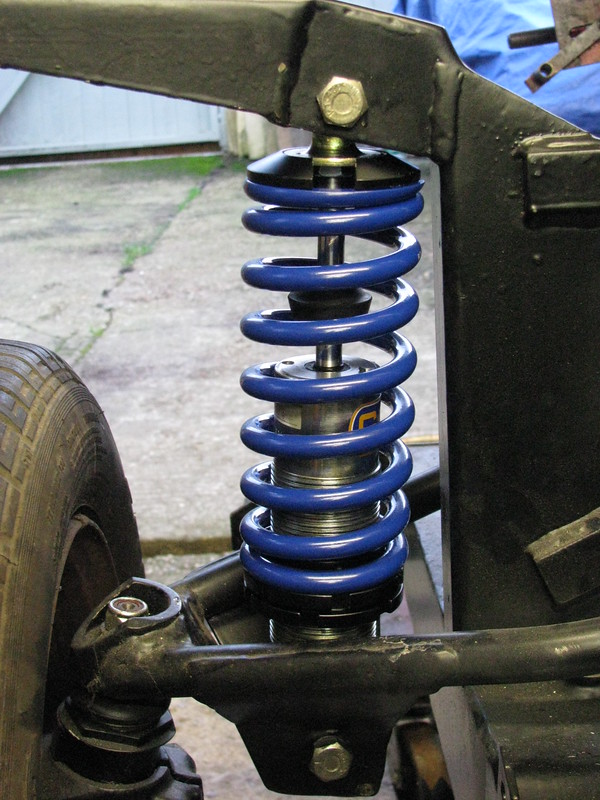
And I couldn't resist popping down to my garage this afternoon to make sure they fit OK.

New Front shocks and springs by marlinpeter, on Flickr

Temporarily fitted today just to check the bush sizes are correct, etc. The coils are much shorter than the original ones which are prone to being coil bound on compression.

Happy New Year......peter
January 2016

15 Jan 2016, 9:47pm Chassis and Body


Amir,
so you really have got the Royale bug!!
Would love to see you start a new thread following your Drophead refurbishment.
cheers, Peter
15 Jan 2016, 10:04pm Engine Mechanical Overhaul Chassis and Body


Well.....I said that back in November last year before I decided to rework the exhaust system.
That's now all finished so last weekend I got my son to help me refit the main body tub to check the clearances, etc.

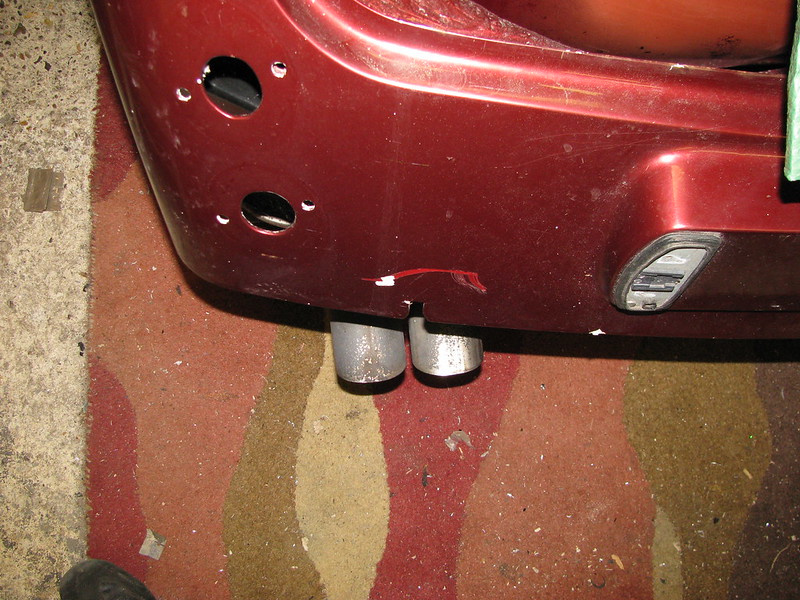
Firstly, the tail pipes exit nicely just beyond the rear tub.

Body fit Jan 2016 by marlinpeter, on Flickr

And the good news is that all the fluid lines and the exhaust hanger brackets are clear of the body tub.

Body fit Jan 2016 by marlinpeter, on Flickr

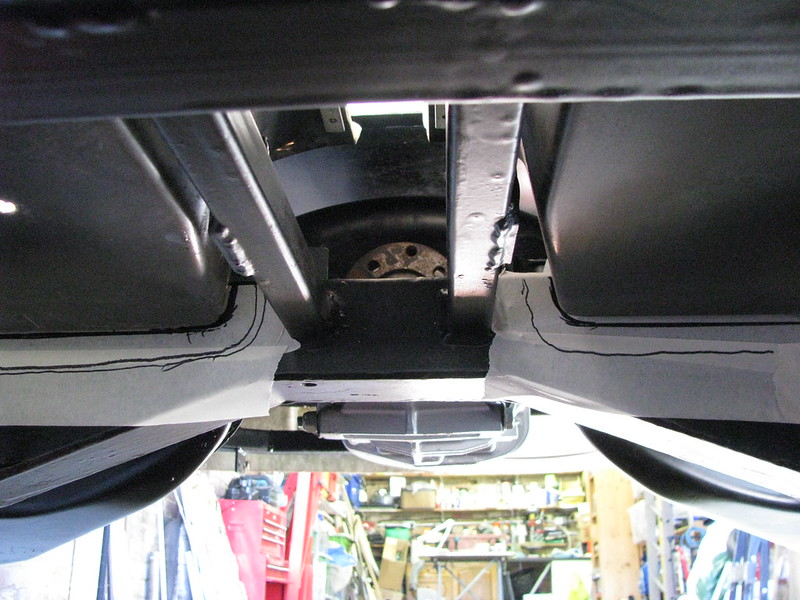
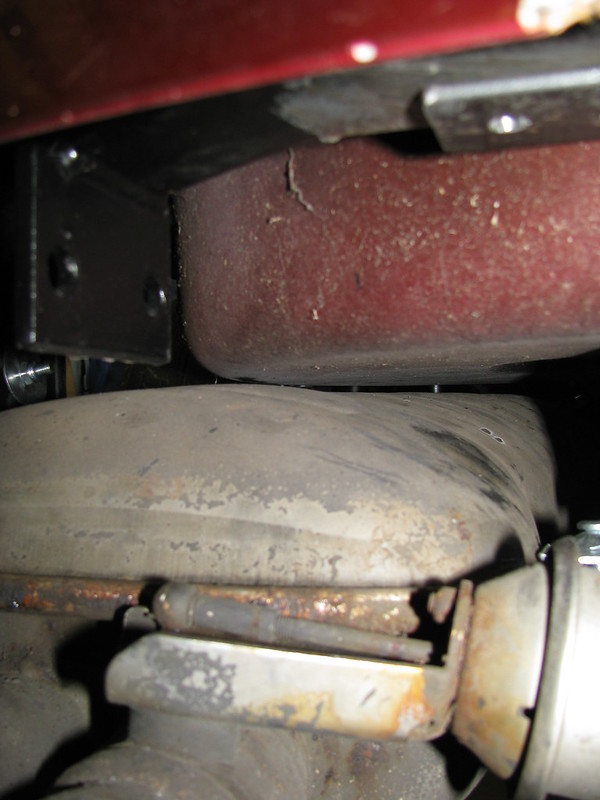
But,,,,,there is currently about a 6mm gap between the bottom of the spare wheel well and the top of the exhaust rear silencer box. I think I will drop the rear box by about 14mm to give a 20mm gap and for safety glue a heat reflective shield on the wheel well.

Body fit Jan 2016 by marlinpeter, on Flickr

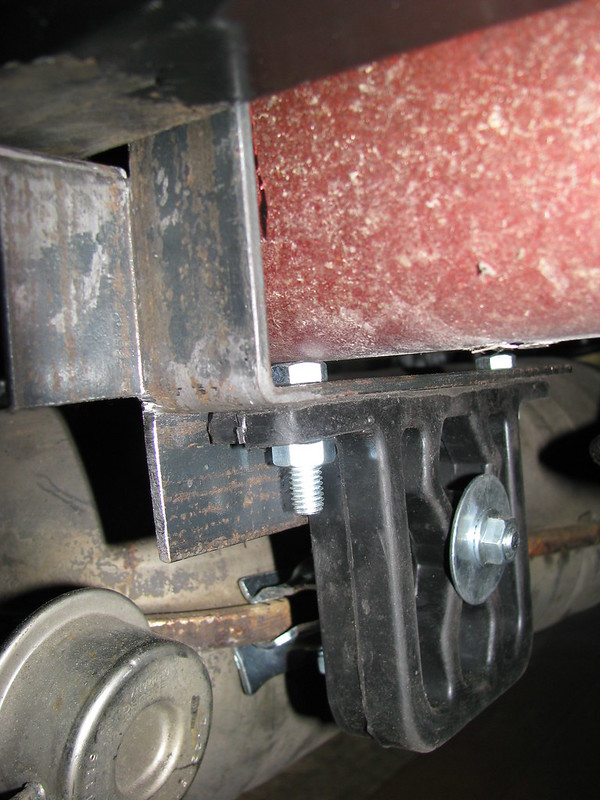
....and the body tub is currently resting on this bracket which is another good reason for dropping the rear silencer.

Body fit Jan 2016 by marlinpeter, on Flickr

So one new bracket to make but otherwise every looks OK.

...peter
March 2016

5 Mar 2016, 6:23pm Engine Mechanical Overhaul Chassis and Body
Having fun with some fibreglass

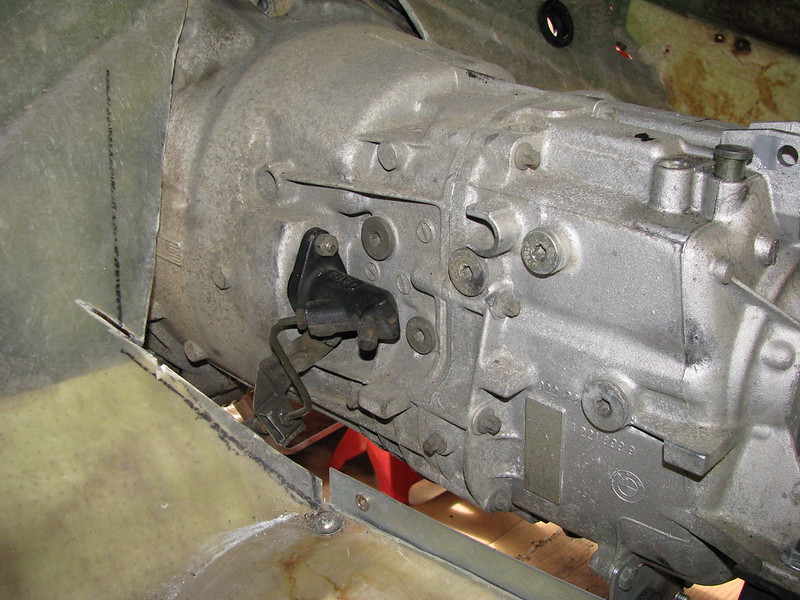
Progress since Christmas slowed to a crawl but I'm now returning to finishing the gearbox tunnel modification. Just to recap the Royale Sabre was designed for Ford engines and gearboxes but I'm fitting a BMW 2.8 litre M52 straight six engine and its matching gearbox. The BMW gearbox is slightly fatter than the Ford 'box so the GRP tunnel needed to be modified.
Back in March 2013 (gulp!!) I started modifying the tunnel but didn't finish it because I hadn't finalised the position of the engine and gearbox. That's all done now so time to crack on and finish the tunnel.

N/S side extension by marlinpeter, on Flickr
I need to modify the tunnel to clear the sides of the gearbox and the clutch slave cylinder. The idea is the insert a hump on each side to improve clearance.

Gearbox tunnel mods by marlinpeter, on Flickr

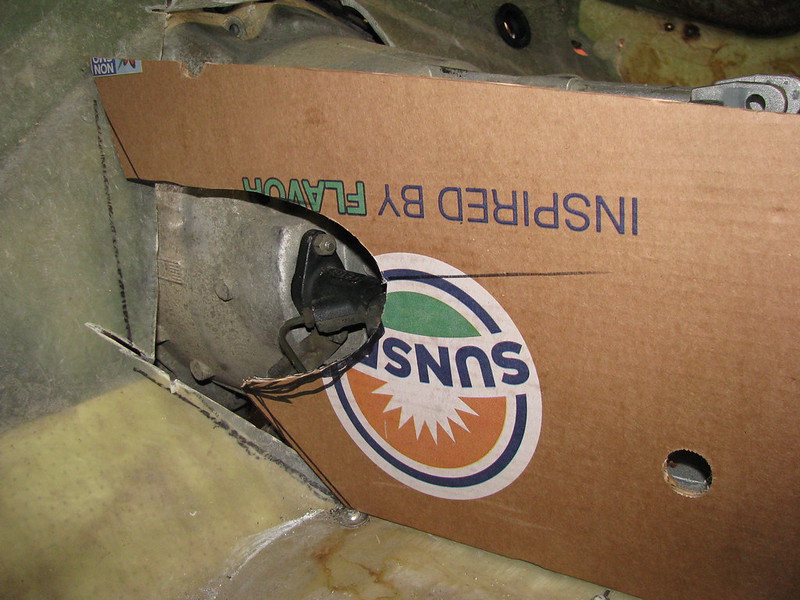
I cut a cardboard template to replicate the side of the tunnel and then cut an ellipse to let in a curved tear-drop shaped 'hump'

Gearbox tunnel mods by marlinpeter, on Flickr

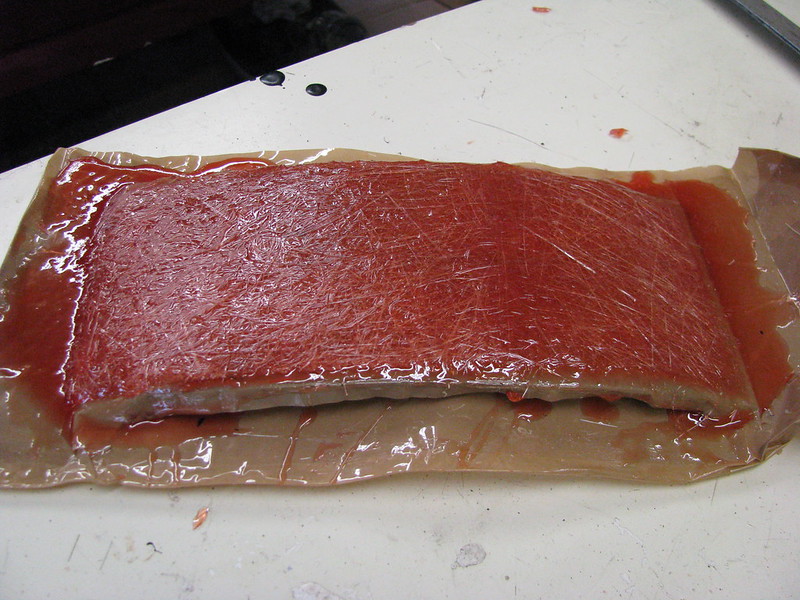
I then made up some curved sections of GRP using the side of an old plastic washing up bowl as a former.

Gearbox tunnel mods by marlinpeter, on Flickr

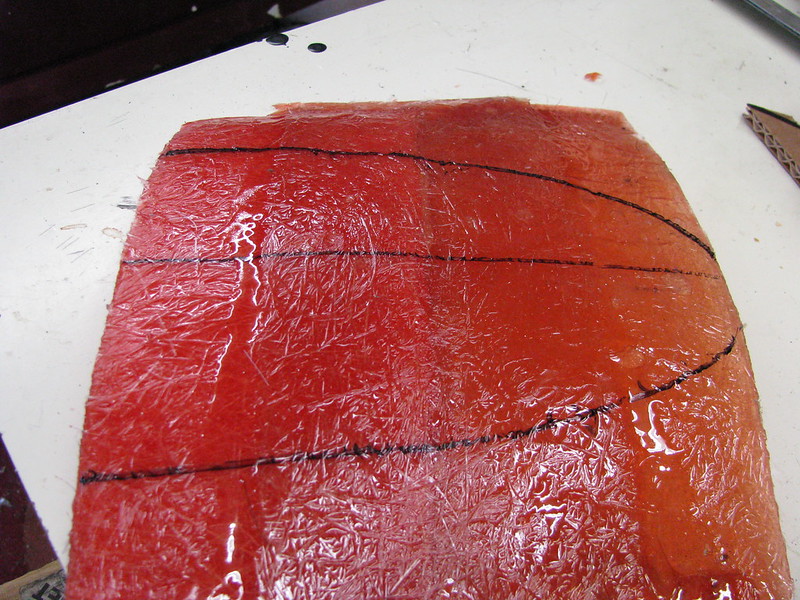
I glassed two sections together and then marked out the shape.

Gearbox tunnel mods by marlinpeter, on Flickr

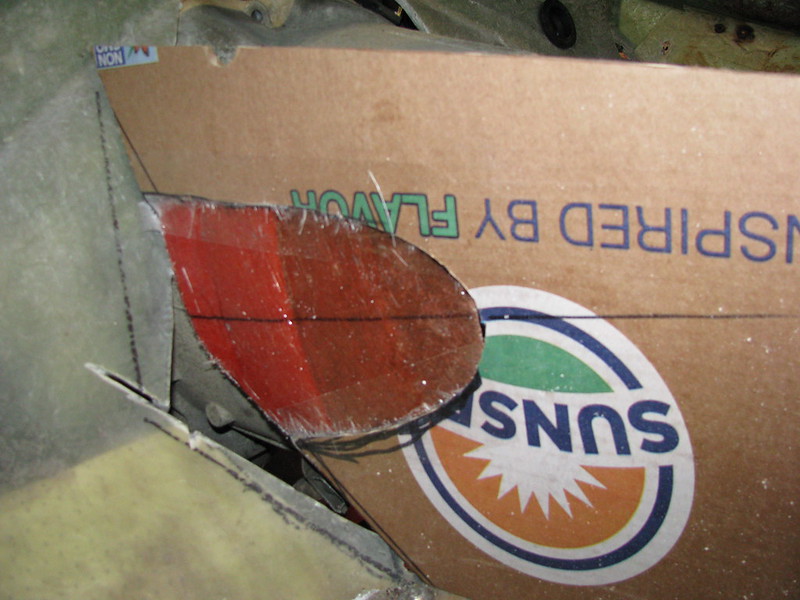
I cut the shape out with a jigsaw with a metal cutting blade and cellotaped it to the cardboard to check the shape. Unfortunately my first attempt is too shallow and it doesn't give sufficient clearance to the clutch slave cylinder pipe. I'm now making up some more sections with a deeper profile.

Gearbox tunnel mods by marlinpeter, on Flickr

Hopefully it won't be another 3 years before the next step!!

....peter
7 Mar 2016, 8:49pm Chassis and Body Interior & Trim


Hi Robin,
to be honest, no I hadn't thought of using aluminium. The bulge doesn't need to be very pretty as it will be covered in carpet but, I'll bear it in mind if it doesn't work out with the GRP.
thanks, Peter
24 Mar 2016, 8:40pm Engine Mechanical Overhaul
Propshaft

Now my engine and gearbox are mounted in their final positions I could turn my attention to writing a specification for a propshaft. This needed to have a suitable flange at the front to match the BMW gearbox and a standard four bolt flange to match the Ford Sierra diff at the back. Royale specified a 2" tube to allow the 'shaft to be removed through the top of the transmission tunnel. Alternatively, you have to remove the engine and gearbox to get the propshaft out. I hope I will never have to replace the propshaft in my lifetime but I still wanted to retain the ability to remove it without taking the engine and gearbox out.
I sent my spec to four suppliers and made my decision based on the quality of their response and price. Bailey Morris and D&F (Dunning and Fairbank) both raised an eyebrow about building it with a 2" tube but when supplied with with further details about the gearbox, diff, tyre diameter, etc they both confirmed that this would be safe up to 85mph cruising in fifth gear.
In the end I chose D&F who were very helpful, knowledgeable and came back with a keen price.
It arrived last week and I'm very pleased with the quality and finish.

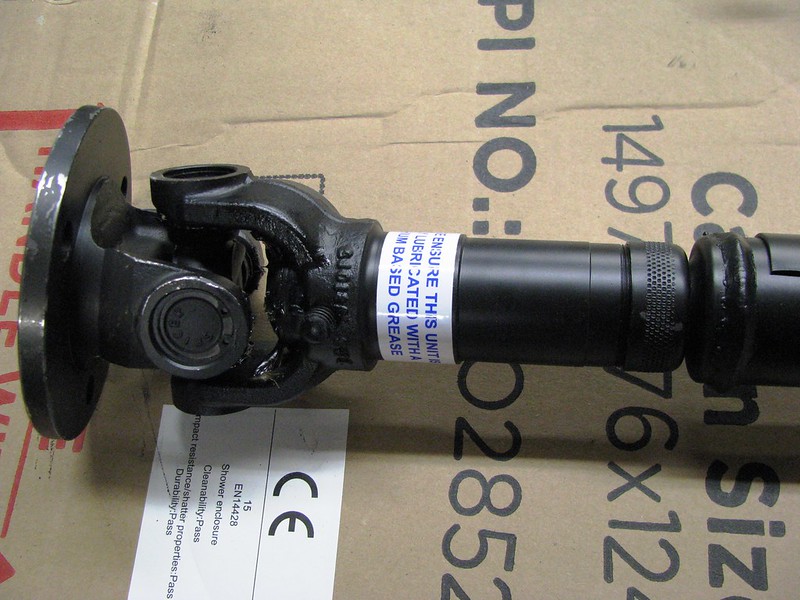
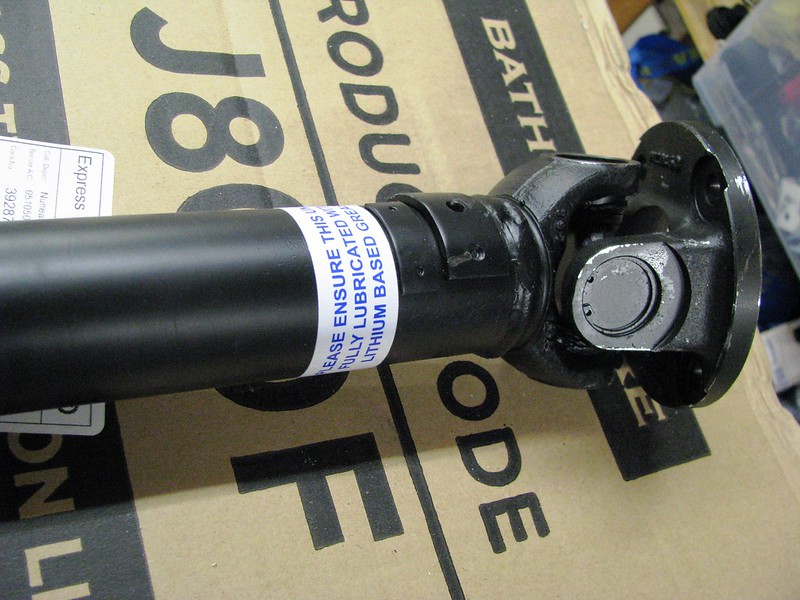
Front end is a flange to match the BMW gearbox. Sliding joint to allow variation in length under acceleration.
Propshaft by marlinpeter, on Flickr

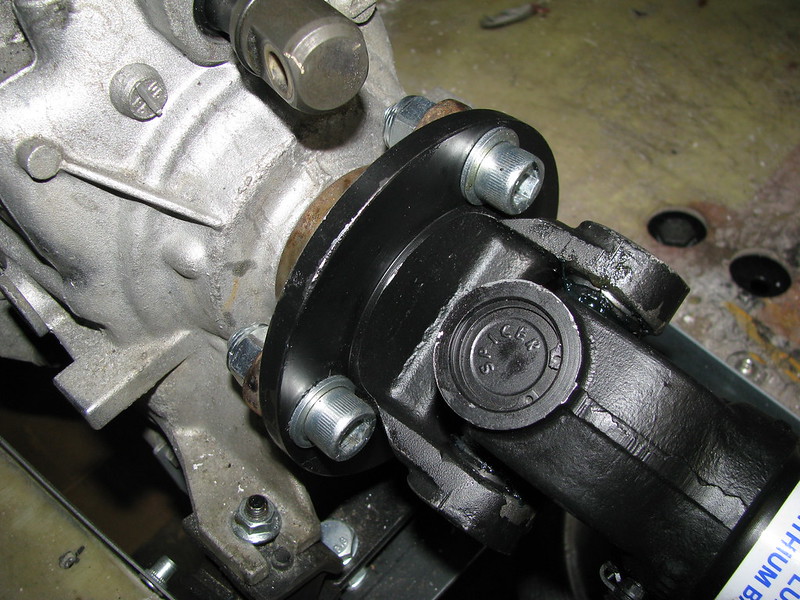
Final drive/diff flange to match Ford Sierra diff.
Propshaft by marlinpeter, on Flickr

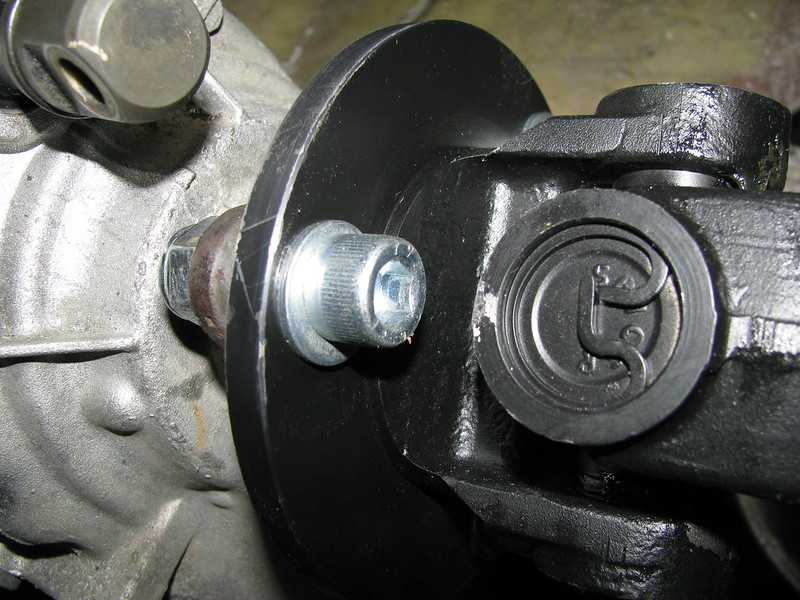
Propshaft bolts fitted.
Propshaft bolts by marlinpeter, on Flickr

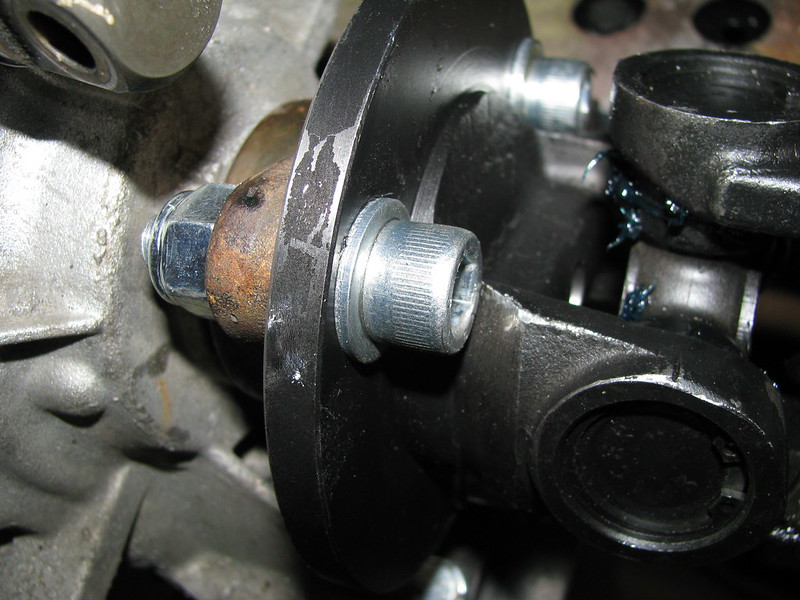
These M12x40mm cap head screws just fitted past the yokes without any modification.
Propshaft bolts by marlinpeter, on Flickr

This bolt needs to be fitted through the flange before offering it up to the gearbox.
Propshaft bolts by marlinpeter, on Flickr

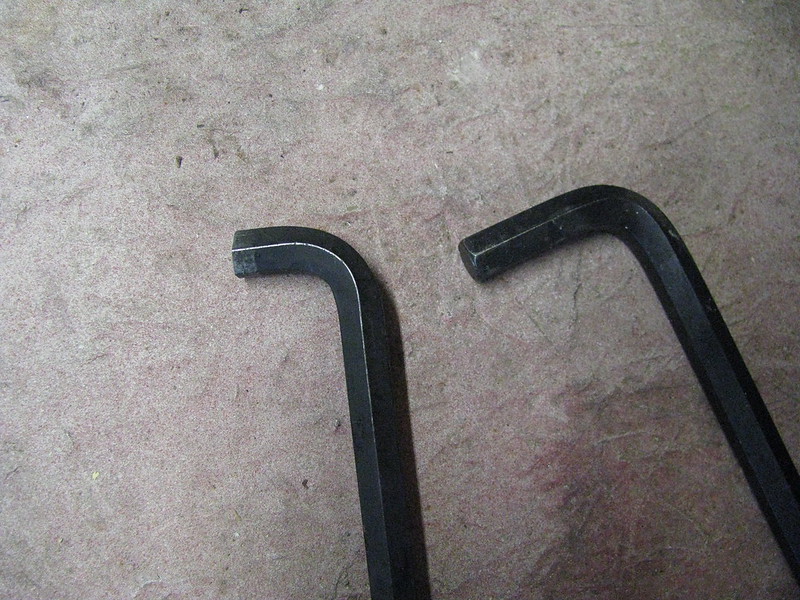
And, I had to modify one of my allen keys to fit the bolt that is opposite the U/J.
Propshaft bolts by marlinpeter, on Flickr

All in I'm very pleased and would highly recommend D&F propshafts. :smile:


...peter

September 2016

3 Sep 2016, 7:00pm Mechanical Overhaul Chassis and Body
Pedaling along.....

I've been working on the pedal box and brake master cylinder mounting.

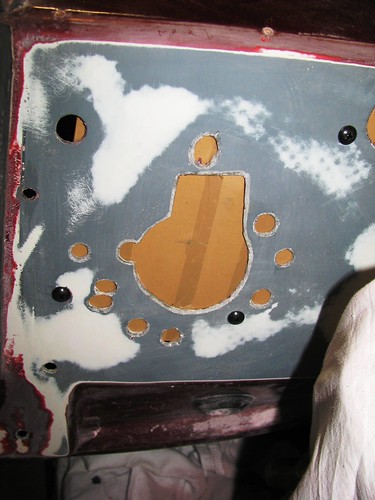
Before mounting the pedal box and brake master cylinder, I needed to clean up this area of bodywork. It was a bit of a mess from the original builders holes plus some holes I made trial fitting other types of brake servos. First I sanded off all the original paint and primer. I chamfered the holes and screwed a piece of MDF covered in packing tape behind the holes.

Brake M/C mounting area repair by marlinpeter, on Flickr

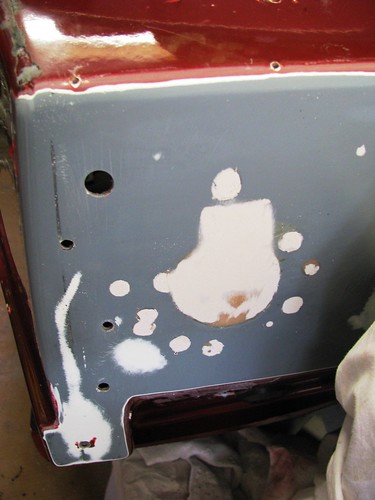
I filled the holes roughly with Isopon P40 fibre filler, sanded down and filled with Isopon P38 and then sand flat and smooth.

Brake M/C mounting area repair by marlinpeter, on Flickr

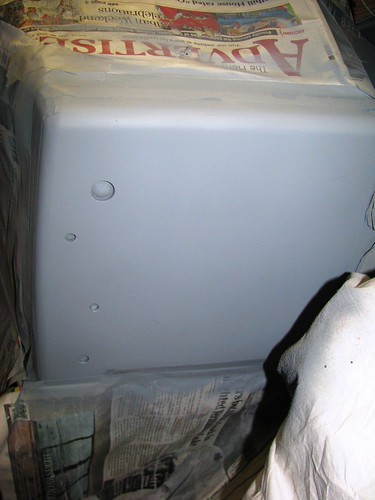
Primed and then filled some small indents with a fine surface filler. Then sanded flat with wet and dry and then another coat of primer.

Brake M/C mounting area repair by marlinpeter, on Flickr

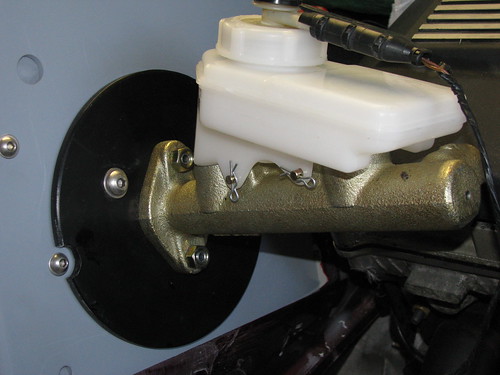
I've mounted the brake master cylinder on a 6mm thick steel disc (from Lasermaster.co.uk). The holes for all the bolts are threaded so that I don't have to be Houdini and get to both sides at the same time. The bolts will be threadlocked in the disc during final assembly. There are three M8 bolts that go through the GRP bulkhead and connect with the Sierra pedal box. Longer m/c bolts will be used during final assembly.
The m/c reservoir isn't quite at the right angle but I think it will work OK.

Brake Master Cylinder mounting by marlinpeter, on Flickr

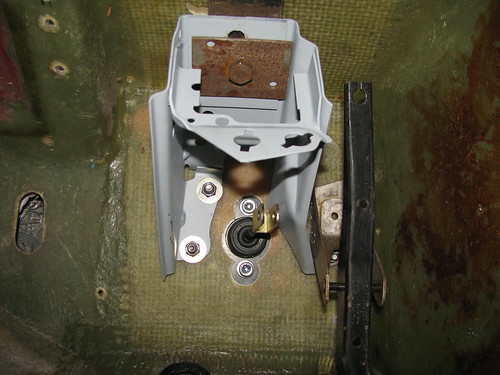
The pedal box is fixed by three M8 bolts through the bulkhead to the steel disc plus a single M12 bolt to the substantial scuttle bar. I need to replace that rusty rectangular spreading plate.

Pedal box mounting by marlinpeter, on Flickr

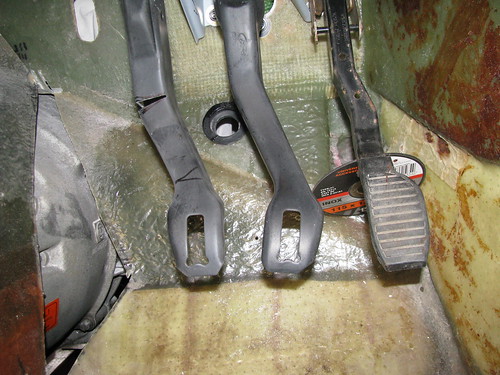
The pedal spacing is a bit weird so I've started work on cutting the clutch pedal to reshape it.

Pedal Spacing by marlinpeter, on Flickr

...peter
5 Sep 2016, 8:31pm Mechanical Overhaul

Hi Amir,
progress on the Sabre has been unfortunately slow due to too many other projects!
And yes, my plan is to make the gearbox cover removable but things were not going to well with the re-shaping, so I've decided to leave it for now and come back to it later.
best regards,
Peter

October 2016

10 Oct 2016, 7:36pm Mechanical Overhaul Chassis and Body


Thanks, Patrick, it came out better than expected.

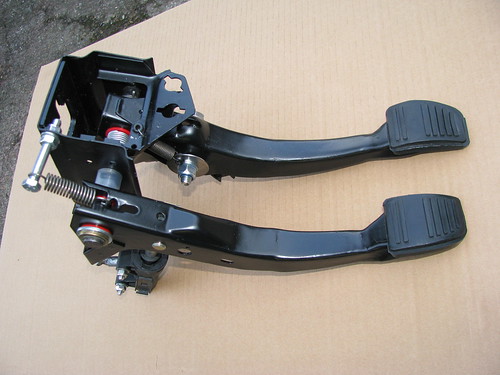
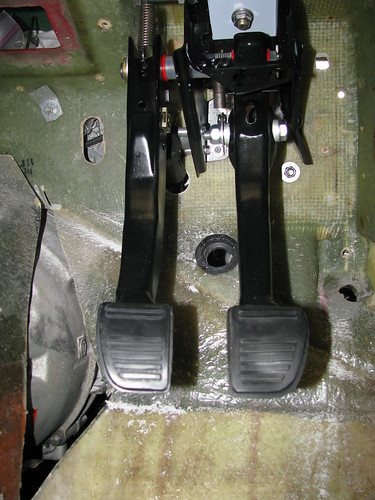
I've now finished modifying the pedals to improve the spacing, painted all the parts and rebuilt the pedal box.

Pedal Box by marlinpeter, on Flickr

And here it is back in the car....

Pedal Box by marlinpeter, on Flickr

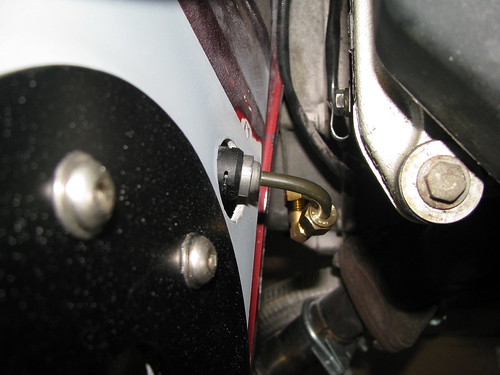
The clutch master cylinder hydraulic connection exits here. I'm using a regular 6mm plumbing fitting to join onto the BMW pipe.

Clutch M/C by marlinpeter, on Flickr

Next on the plan is the brake lines from the master cylinder to the servo and the clutch hydraulic line to the slave cylinder.


...peter