Well, I haven't actually been building the Sabre but I have been doing some preparation work.
I've bought another 328 MS41 ECU and sent it off to have the EWS immobiliser deleted so that I don't have to transfer the BMW key sensor and associated gubbens. The ECU was from a 1997 328 Coupe which was still a single VANOS M52, so it should have similar engine Maps to mine. It also need its ABS signal limiter fixed so that the ECU doesn't limit the rpm without an ABS installed.
It's now installed in the car, in place of the original ECU, and works just fine with the EWS module removed and with the ABS disabled. With the new ECU installed and the EWS module removed you have to bridge Pins 1 and 3 to complete the starter motor circuit.
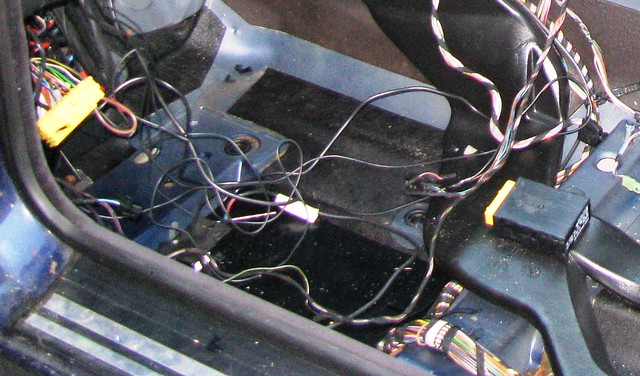 Engine running without the EWS module
 by
marlinpeter, on Flickr
In the picture above you can spot the brown coloured bridging link in the yellow EWS module connector. The EWS module is lying on the floor to the right of the picture.
I had a bit of a worry when it was first installed because I was getting hunting of the idle between 300 to 700rpm. After some troubleshooting and head scratching I discovered it was a poor connection at the engine coolant temperature sensor plug. It just coincidently started when I changed the ECU. The troublesome coolant sensor has been replaced just in case it was on it's way out although I think it was just a poor connection.
Both my original ECU and the new one were flagging up a faulty Camshaft Sensor. After clearing the fault a few times it always came back after running the engine. I've swapped it out for a used BMW part as I had read that some of the aftermarket sensors aren't very good quality. The used sensor cost me £10 (inc. postage) and works fine so far. What was surprising was the unusually loud 'ticking' from the injectors has really quietened down and my exhaust is much cleaner and almost odourless. Ever since I've had the car it has had a very smelly exhaust which filled my garage with fumes even though the car is parked about 10 foot from the door. What i realise now is that with the camshaft sensor not working the ECU was effectively overfuelling at idle. (I had previously assumed the CAT was knackered).
I will continue to check over the engine and ancillaries until I'm ready to remove the engine and gearbox....
I've also been busy removing and selling parts that will not be needed for the Sabre. When I built my Marlin Sportster, I dismantled the donor car and then sold off the unwanted parts. This time i'm selling all the unwanted parts first so I am not have to store them all and have them getting in the way, etc. I've sold the alloy wheels, seats, door cards, armrest, glovebox, hood motors and a variety of other small parts. So far I've made £600 (not including ebay fees) so I'm on track to fully recover the cost of my donor car.

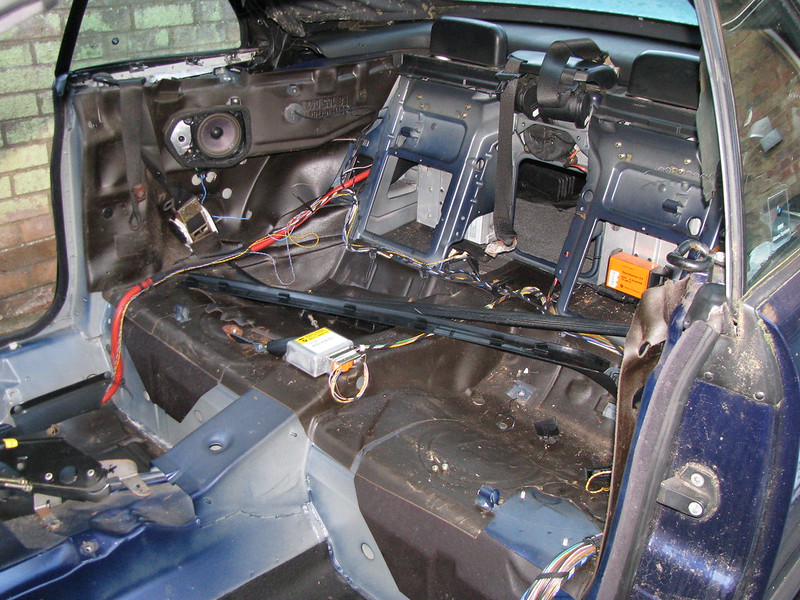 e36 Donor car dismantling
 by
marlinpeter, on Flickr
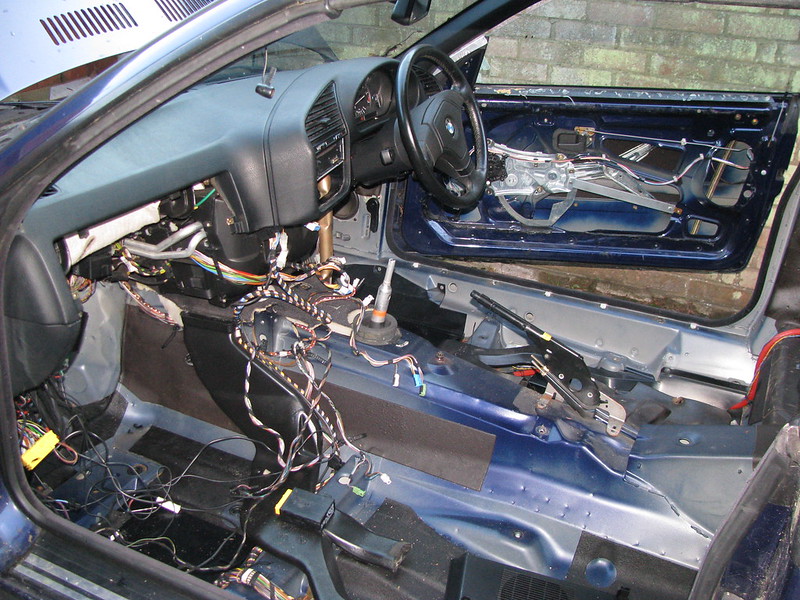 e36 Donor car dismantling
 by
marlinpeter, on Flickr
...peter
Hi Amir,
that is an ingenious idea. I had not considered using the spaces under the front wings!
Do you have a particular servo in mind?
...peter
The beginning of the end....
...or is it the end of the beginning?
Whatever, it's time to finish stripping down my donor car for the engine and ancillaries for my Royale Sabre build.
I thought it best to start underneath the car so raised it on axle stands and ran the engine for the last time to warm it up before draining the oil. I also disconnected and removed the battery for safety.
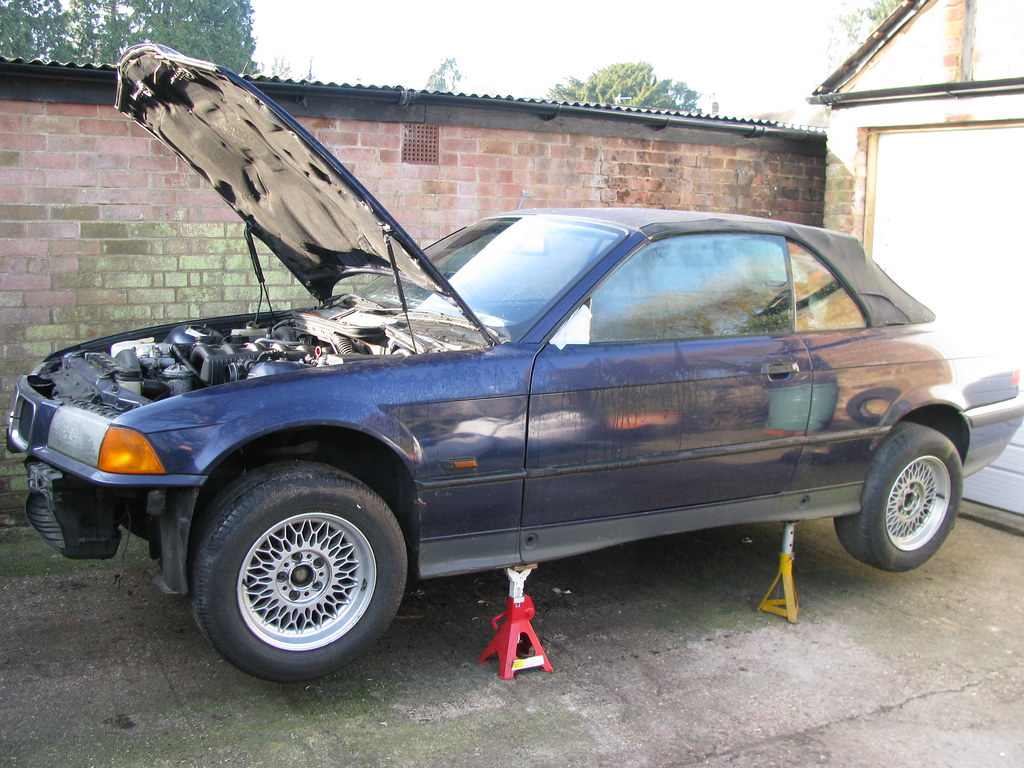 e36 Donor Strip down
 by
marlinpeter, on Flickr
After dosing all the exhaust mounting nuts with penetrating oil spray I stopped for lunch while the oil did its stuff. Upon return I moved underneath the car and removed the entire exhaust system in one piece. The usual arguments with a load of rusty nuts but no major dramas.
I'm not yet sure if I will use this exhaust system (suitably shortened) on the Sabre but it is in good condition and has some interesting features.
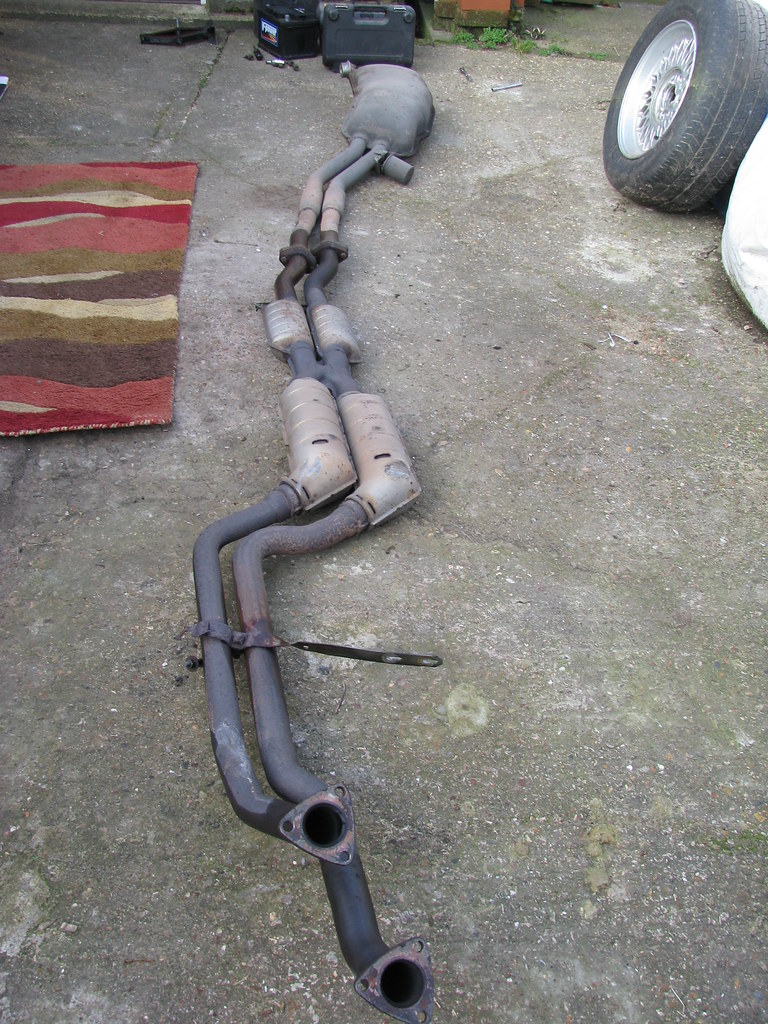 e36 Donor Exhaust system
 by
marlinpeter, on Flickr
Cat heat shields in good nick but a bit loose so will need to be re-fixed if this system is used.
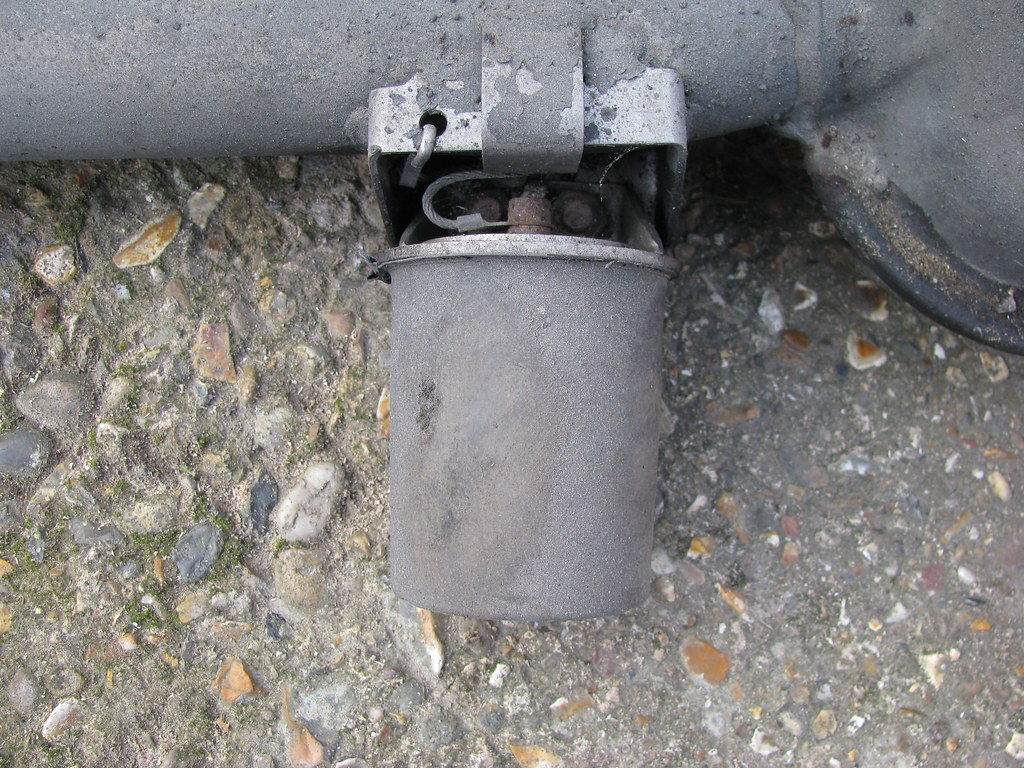 e36 Donor Exhaust system
 by
marlinpeter, on Flickr
Strange device at the back which is a Vibration Absorber according to realoem
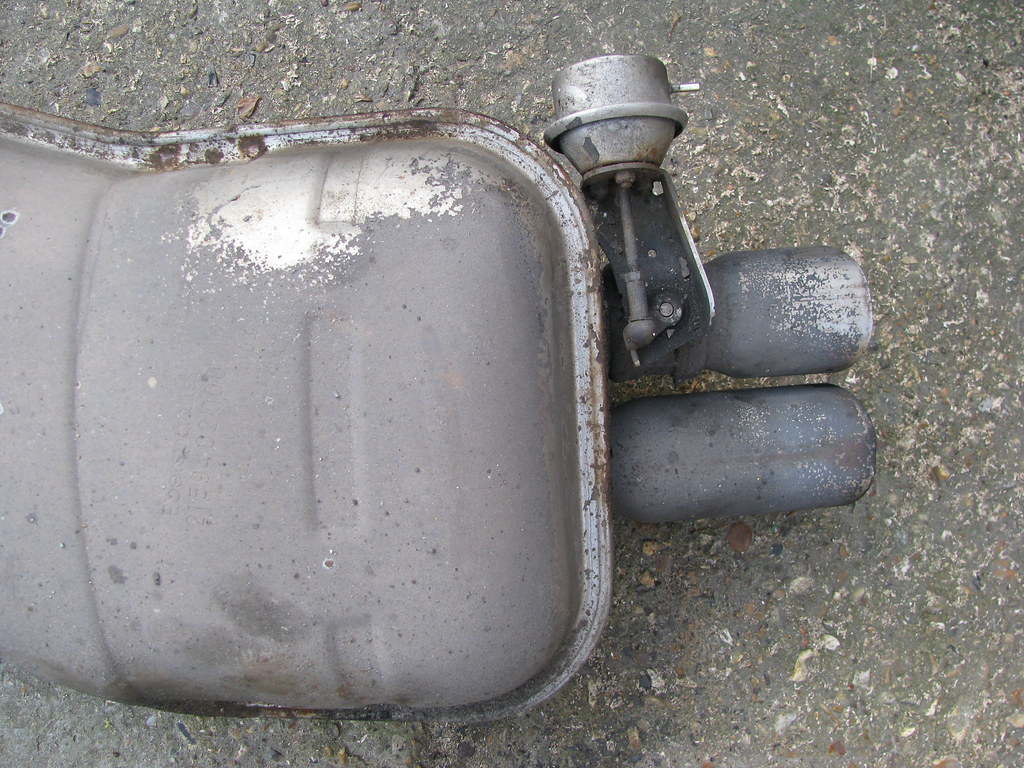 e36 Donor Exhaust system
 by
marlinpeter, on Flickr
Back box has two routes to the tailpipes. One is only opened by a neat little flap controlled by vacuum from the inlet manifold and the ECU above 2500rpm. I believe it is to make the car quieter at low rpm.
I then made a start on removing the propshaft but ran out of light (and heat!!) so that's all for now but hopefully updates will be more frequent this year
....peter
Thanks for the welcome back, I'm hoping to make better progress this year! Thanks for the tip about water leaks around the wiper spindles. I had not heard about this issue on Sabres. I'll try to remember when I get to that part of my build which is some way off

Famous last words!!
But dismantling now under-way again....
A shot of the engine and ancillaries after removing front grill, radiator, rad fan and aircon radiator, etc.
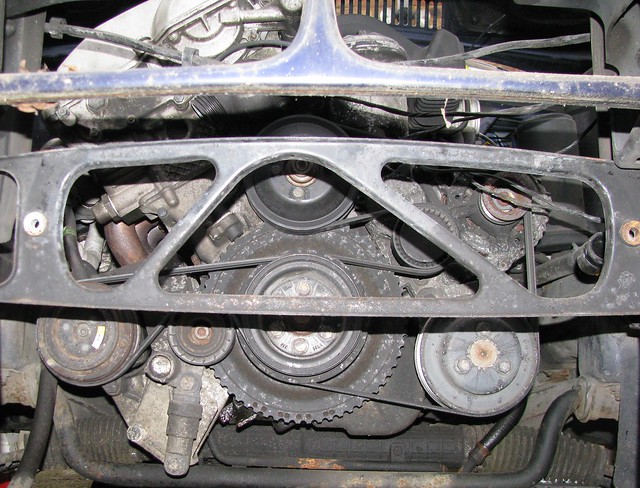 M52B28 Reference photo
 by
marlinpeter, on Flickr
 M52B28 Reference photo
 by
marlinpeter, on Flickr
I've been carefully labelling up the engine loom and taking lots of refrence photo's as I remove parts.
...peter
Slowly, slowly.....
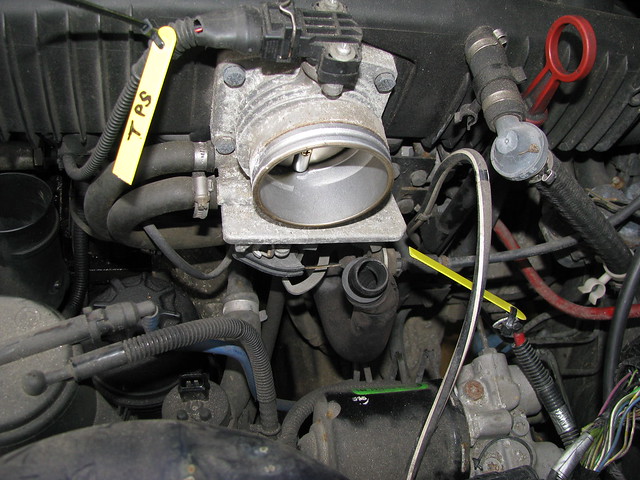
This week I've been focussing on labelling and removing the engine loom taking the opportunity to collect any useful parts for the rebuild. I've also been taking copious reference photo's to help my memory when it comes to re-assembly. From experience I know it can be months or years before the engine will be re-installed so just relying on your memory of where things go is not a good idea.
First to be removed was the throttle body and associated hoses....
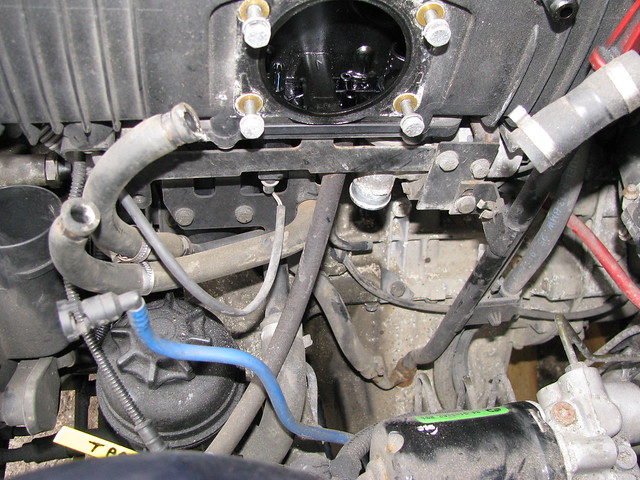 Reference photo
 by
marlinpeter, on Flickr
Next it was attacking the inlet manifold. You have to remove the heater fresh air scoop to be able to get to the rear manifold nuts and the fuel lines which are tucked right at the back of the engine bay.
 Reference photo
 by
marlinpeter, on Flickr
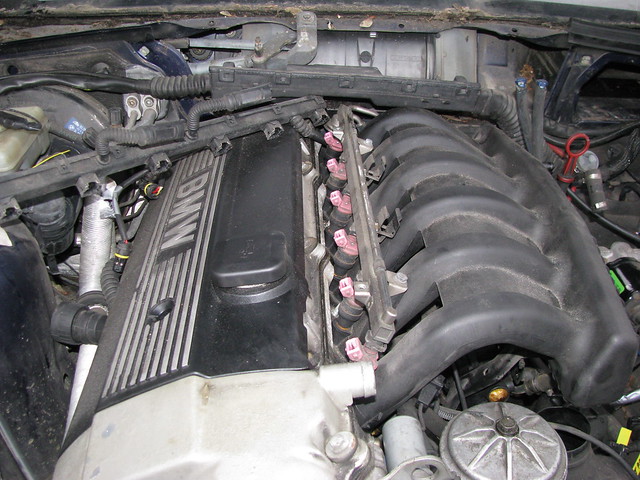 Reference photo
 by
marlinpeter, on Flickr
 Reference photo
 by
marlinpeter, on Flickr
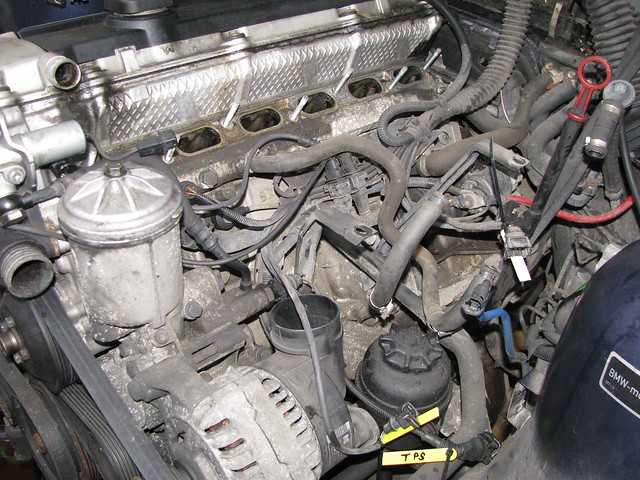 Reference photo
 by
marlinpeter, on Flickr
With the inlet manifold removed I could remove all the remaining engine loom connections....The last was the reverse light switch which is mounted on the side of the gearbox and the lead is clipped to the top edge of the gearbox which makes it tricky to remove.
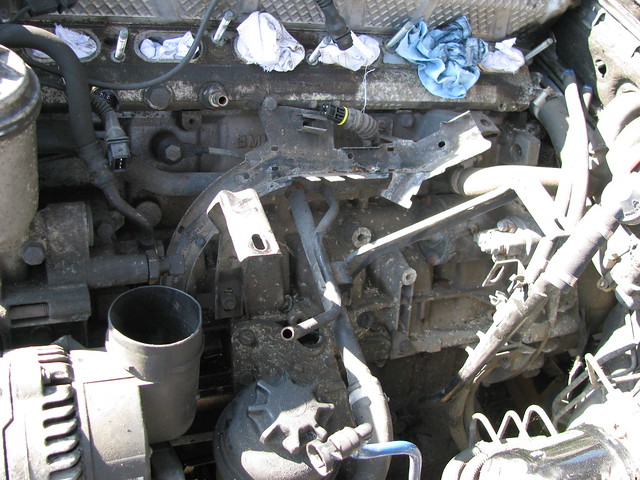 Engine loom removed
 by
marlinpeter, on Flickr
And finally it was a spell back under the car to finish removing the propshaft....
 Engine Loom and propshaft
 by
marlinpeter, on Flickr
Getting closer to removing the engine in a couple of weeks time...
...peter
Sales of the unwanted parts from my donor car have been very slow since Christmas but with the sale of the front foglights this weekend I have now recovered the full cost of the car and still have a small box of parts to sell. (Including an allowance for ebay and shipping fees)
So I've got my engine for free and would highly recommend buying a cabriolet donor as there is so much more to sell

Engine and Gearbox out!
My good friend Robin (aka Martinclan) came over last Friday to help remove my BMW engine and and gearbox.
With the engine hoist at the ready it didn't take us long before the engine and gearbox was out.
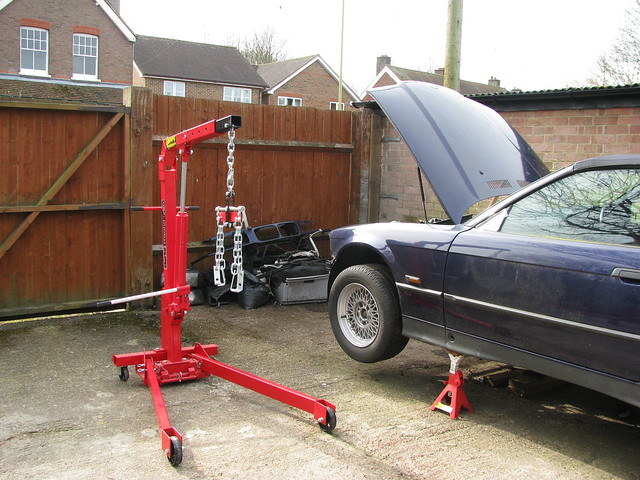 Engine crane and balance bar
 by
marlinpeter, on Flickr
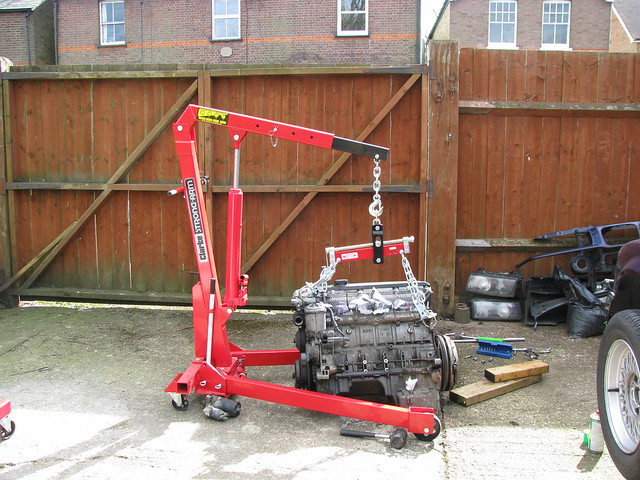 Engine out
 by
marlinpeter, on Flickr
(Forgot to take a picture before we separated the gearbox)
The engine and gearbox are now safely stored in my garage pending the clean-up.
 Engine stored in garage
 by
marlinpeter, on Flickr
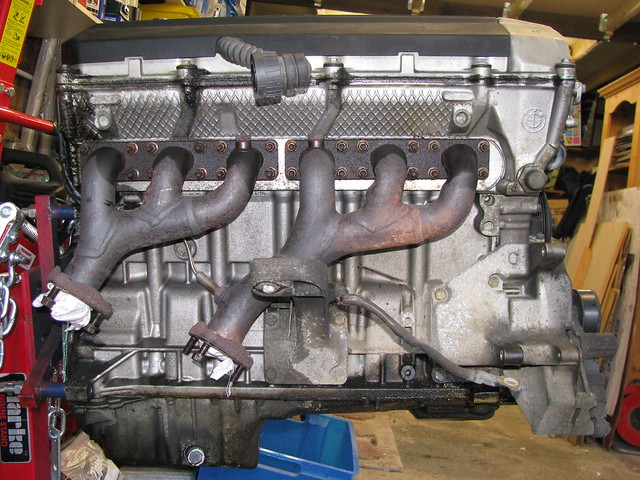 M52B28 Engine
 by
marlinpeter, on Flickr
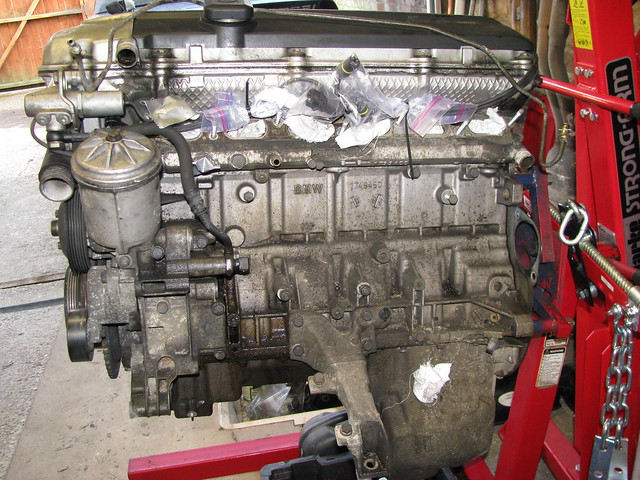 Engine safely stored on stand
 by
marlinpeter, on Flickr
We spent the rest of the day retrieving all remaining saleable parts. I've just got a few small parts left to remove and then it will be call to the local scrap yard to remove what's left.
...peter
Engine Donor gone!
Finished stripping the engine donor car of any useful parts....
 Donor car stripped and ready to go..
 by
marlinpeter, on Flickr
....and there it was gone!
 Donor car gone.....
 by
marlinpeter, on Flickr
Thanks to the local dissmantler.
Now onto organising the move of the Sabre chassis and bodywork from the lock-up.
....peter
Well not a lot of car building progress but I have managed to get the Sabre transported from it's lock-up garage to my own garage at home. This is about 18 months after I moved house and it means my house move is now complete and it's finally goodbye to the lock-up garage I've had for over 11 years.
First job was bolt the main body tub and the front wings back on to the rolling chassis so that I could get the whole lot transported in one journey. I'd forgotten how many nuts and bolts there are but here it is just prior to collection and transportation.
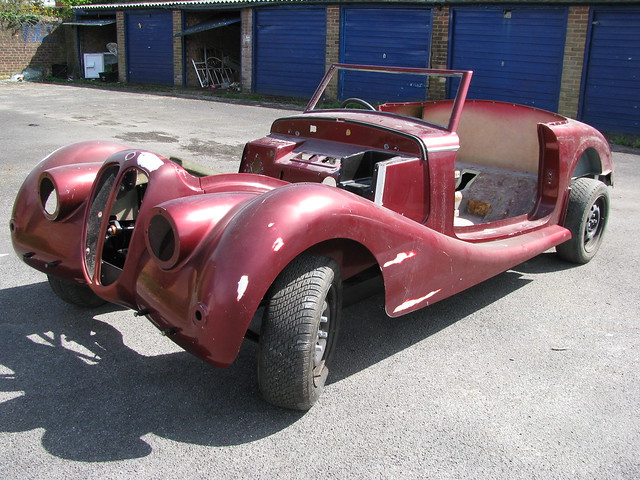 Re-assembled for transporting
 by
marlinpeter, on Flickr
I found a nice man on ebay that promptly collected the car and delivered it back home. Excellent service!
And here it is back home.....
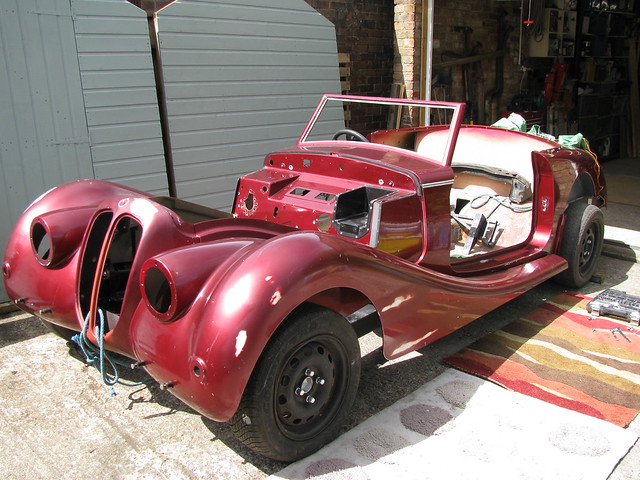 Relocated from lock-up to home garage
 by
marlinpeter, on Flickr
Then it was time to remove the front wings again.....
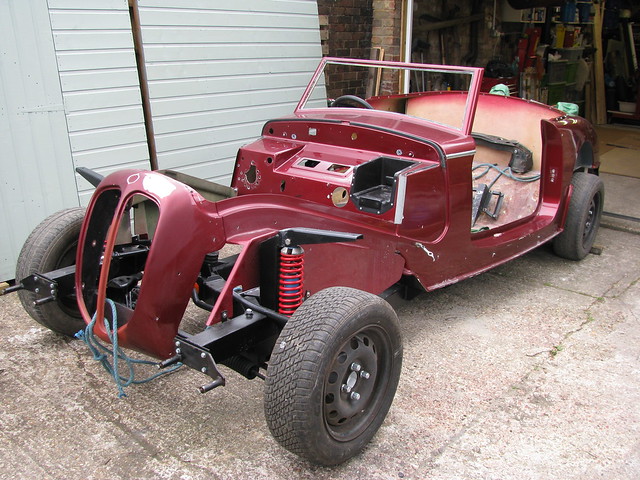 Wings removed again.
 by
marlinpeter, on Flickr
And store the wings in the roof space of my garage.....
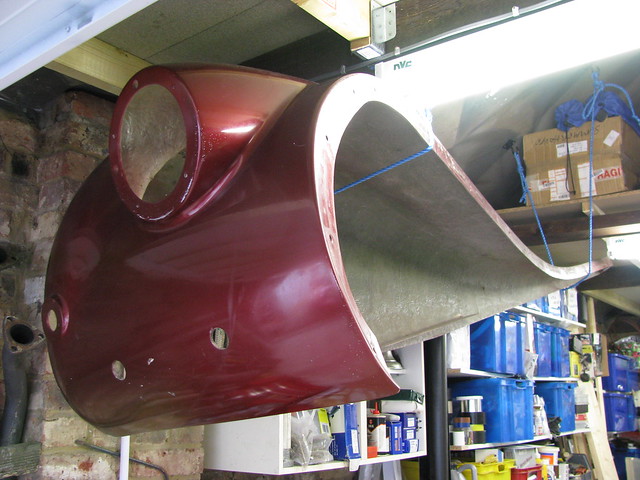 Nearside wing
 by
marlinpeter, on Flickr
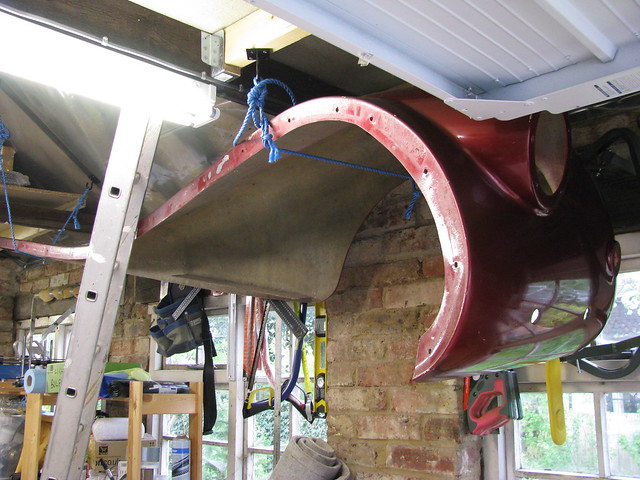 Offside wing
 by
marlinpeter, on Flickr
Finally, it was birthday time again and my wife got me some of these...
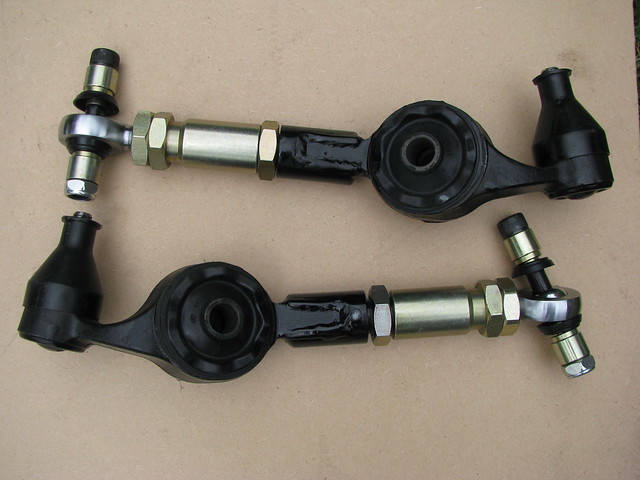 Birthday present time!
 by
marlinpeter, on Flickr
....more soon....
...Peter
Progress Report and a remarkable discovery....
The next job was to hoist the central body tub off the rolling chassis on to a trolley that I built from surplus timber and some old supermarket wheels that I've used before during my Marlin Sportster build.
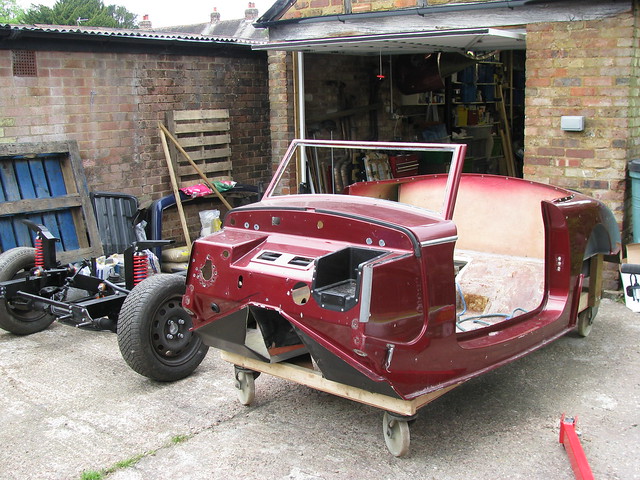 Body tub on trolley
 by
marlinpeter, on Flickr
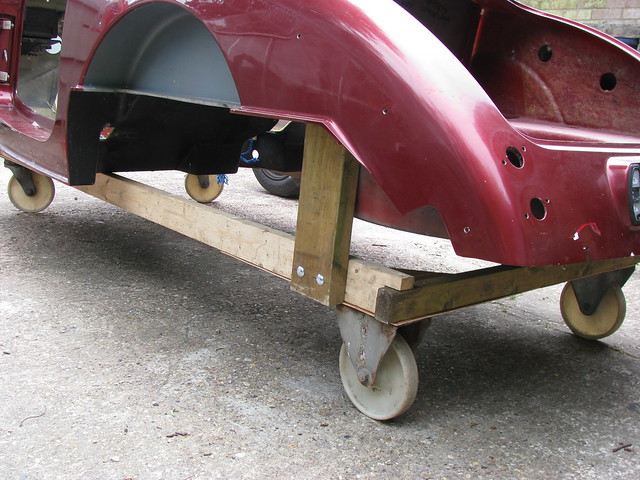 Body tub trolley
 by
marlinpeter, on Flickr
Which got me back to the rolling chassis stage where i was in January 2013

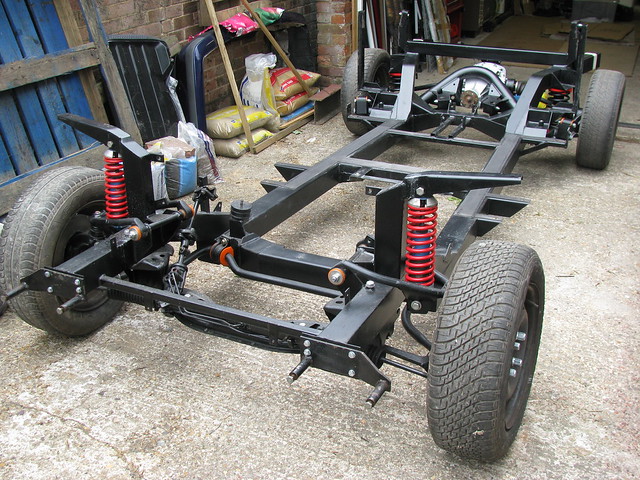 Rolling chassis May 2015
 by
marlinpeter, on Flickr
It has faired reasonably well in my damp unheated lockup garage but there is some surface rust on unpainted parts. It is also covered in spiders 'poo' which is surprisingly hard to remove.
 Rolling Chassis May 2015
 by
marlinpeter, on Flickr
I next moved on to thinking about the engine mounts so thought I would try the BMW M52 mounts and amazingly discovered they are a near perfect fit

(Now the chassis was built in 1994 and designed for a Ford DOHC engine and the BMW was not built until August 1995 - how weird?)
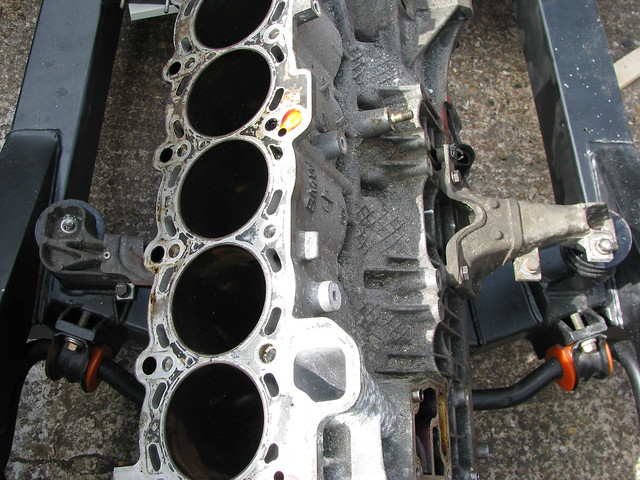 M52TU block with M52 engine mounts
 by
marlinpeter, on Flickr
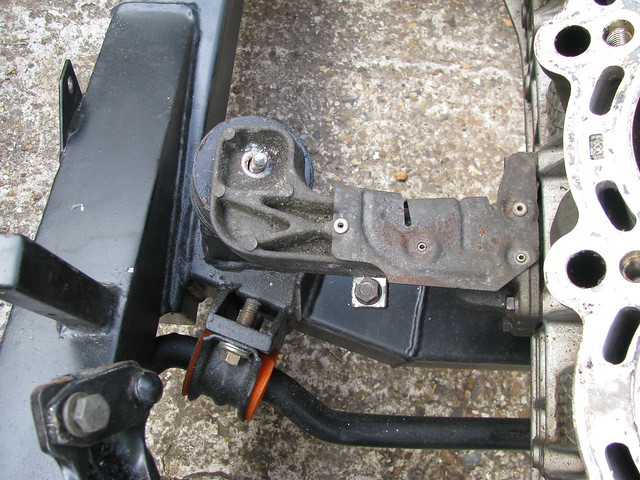 M52 OS engine mount
 by
marlinpeter, on Flickr
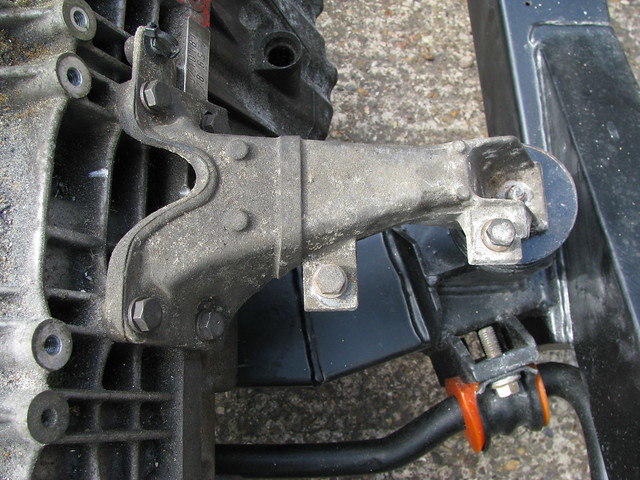 M52 NS engine mount
 by
marlinpeter, on Flickr
The sump is pefectly horozontal and the only issues are a slight angular mis-alignment.....
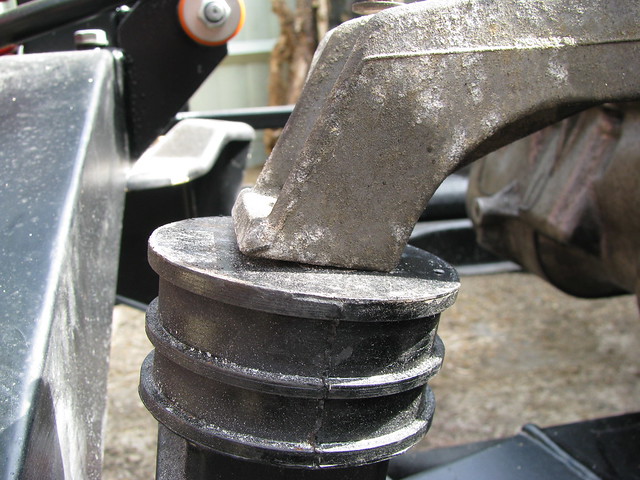 Slight angular misalignment
 by
marlinpeter, on Flickr
....and I have about 25mm clearance around the top and back of the crossmember which is a little too much as I want to get the engine as low and as far forward as I can get it.
Next job is to check the clearance with the 'real' engine as I've noticed a difference between the 1995 and 1998 sumps.
More updates soon.......
....peter
Hi Robin,
Well it's certainly no light weight sports car chassis!!
Being able to use the standard engine mounts is certainly a real bonus (and a big surprise :shock
so I'm going try them with the full weight of the engine before making any other mods.
....peter
Yes, I did find some of those 'I-Beam' tapered washers on ebay but like you thought I'd have a bash at making some, so I have ordered some thick square washers.
The material around the bolt hole in the mounts is are about 10 mm thick so I may just take a bit off the 'heel'
Drivetrain trial fitting
So having discovered that the standard BMW engine mounts appear to work it was time to try the 'real' M52B28 engine, rather than my bits and pieces of a gash engine.
First job though was to clean up the engine and gearbox....
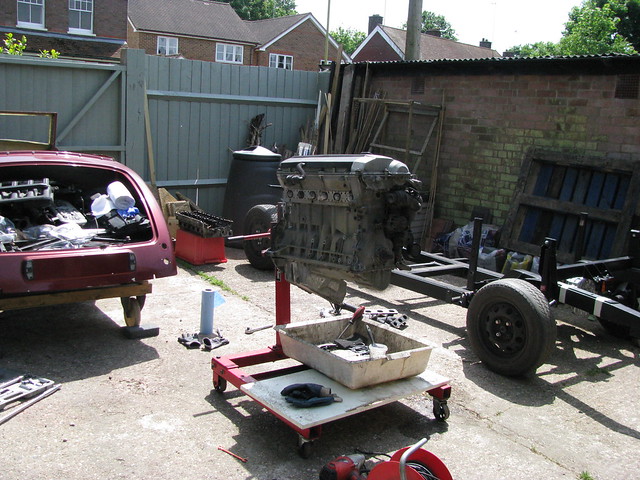 Engine cleaning is progress
 by
marlinpeter, on Flickr
Then it was out with the engine hoist and in with the engine....
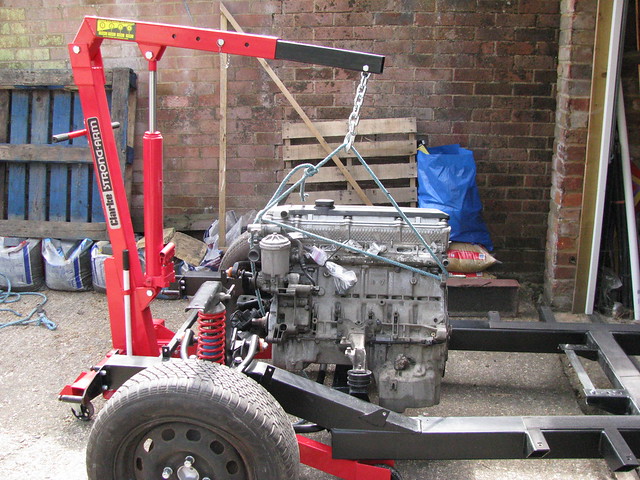 M52B28 engine installation.
 by
marlinpeter, on Flickr
The engine will be cleaned up properly and painted before final fitting.
It was then a relatively simple task of bolting on the gearbox.....
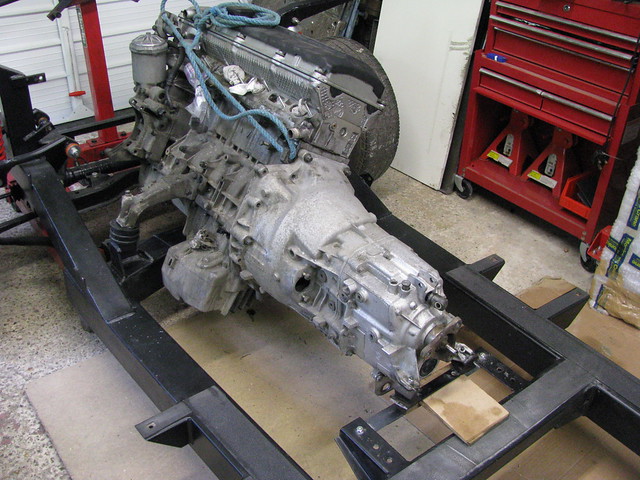 M52B28 and gearbox
 by
marlinpeter, on Flickr
So far so good, but I still felt I needed to find a way of moving the engine forward a bit to clear the central body tub. The body tub is very heavy and is a three man lift so not easy to keep trail fitting.
To move the whole drivetrain forward a bit I bought some of these Volvo engine mounting rubbers that have offset mounting studs. The studs are offset by 35mm.
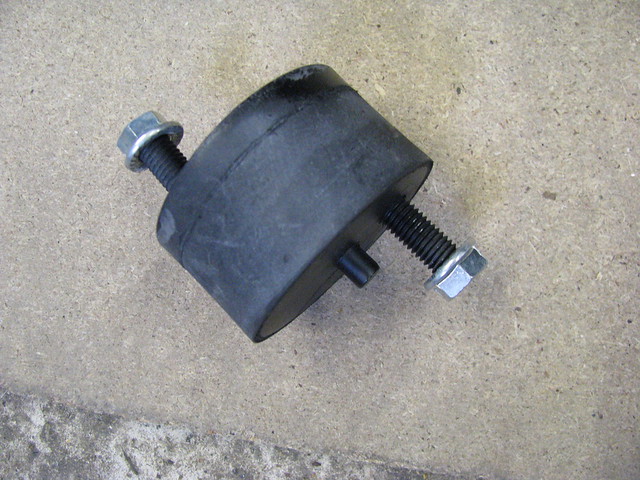 Volvo engine mount
 by
marlinpeter, on Flickr
They look a bit odd but seem to work OK.....
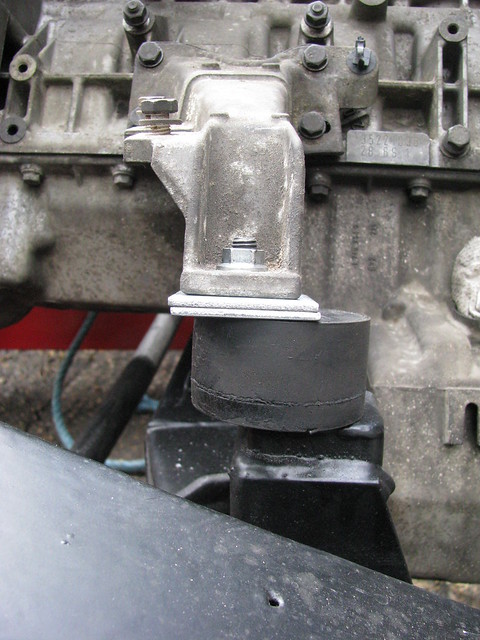 Volvo engine mounts
 by
marlinpeter, on Flickr
....more fitting trials this week......
....peter
Hi Robert,
Yup, it's coming on nicely and not having to make some engine mounts is a real bonus.
I didn't notice too much change to the suspension but it's not at all optimised yet. I'm planning to rebuild the front suspension using Granada hubs, adjustable track control arms and Cosworth brakes. (Providing the brakes fit within the steel wheels that I've bought). New coilovers and springs are also planned as the old shocks are probably now 20 years old although zero miles
I am assuming the springs were supplied by the Royale Motor Company when the kit was purchased but they are an odd spec as they look like they will become coil bound before the suspension bottoms out? The old back copies of the Royale Owners Club magazine have a variety of conflicting advice!!
I've also got some wierd positive camber on the rear wheels that I haven't figured out the cause of yet

All part of the fun of building or rebuilding these old kits, ....as you know
....peter
Engine movement?
One drawback of moving my engine mounting forward by 35mm is that I now have a point where there is only a small clearance between the sump and the chassis.
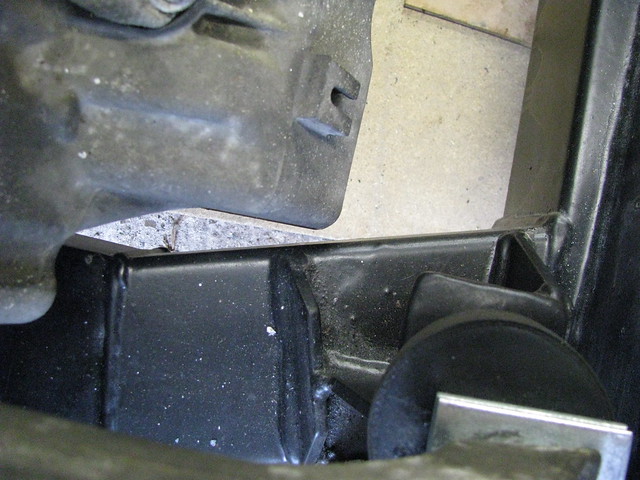 Sump Clearance
 by
marlinpeter, on Flickr
(This photo was taken looking down from above the chassis just behind the nearside engine mount)
The gap is about 6mm and I'm wondering how much the engine and gearbox will move forward under hard braking.
I know this is a 'how long is a piece of string' question and it depends on the weight of the engine plus the stiffness of the rubber in engine mounts and the gearbox mounts, but just wondering what the views of forum members based on their combined experience.
I think it would be possible to cut off the corner of the sump and have a flat plate welded over the hole but don't want to go to that expense if it's not necessary. Also, any advice on where you would get an alloy oil sump welded would be appreciated.
...peter
Many thanks to you all above for some great ideas and some concerns to ponder on.
I think my next step is to bolt all the main ancillaries back on to the engine and then re-fit the main body tub, bonnet sides, etc and see how it all fits together.
I can then see which options work best.....
...peter
You're right there is lots of things to find a home for under the bonnet.
I've now temporarily bolted the major ancillaries back on to the engine and have bolted back on the innner wings and front nose cone.
It all seems to fit surprisingly well

(maybe John Barlow who designed the Sabre had a straight six engine in mind?)
No issues with the height of the engine....
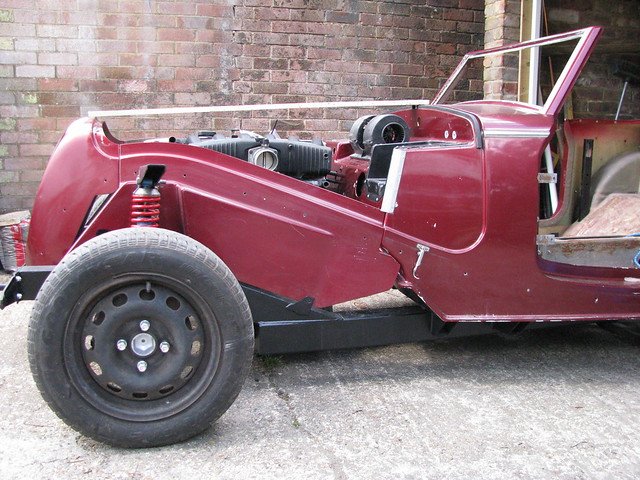 M52B28 in Royale Sabre
 by
marlinpeter, on Flickr
Or between the inner wings....
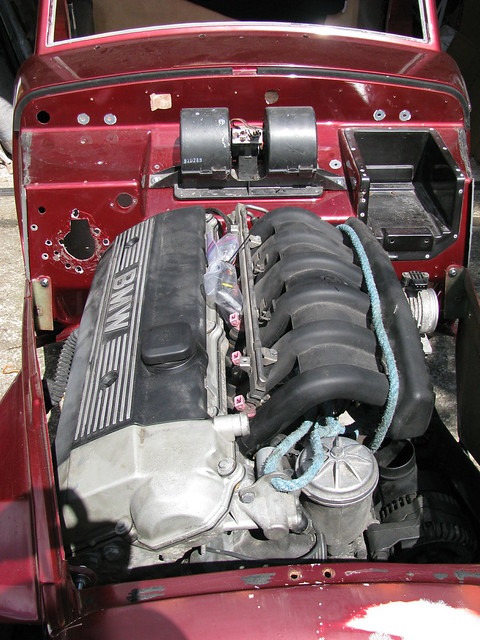 First position of M52B28 fitting
 by
marlinpeter, on Flickr
The front left corner of the rocker cover just clears the inner wing. Just a 3mm gap here so may need to move the engine across a little.
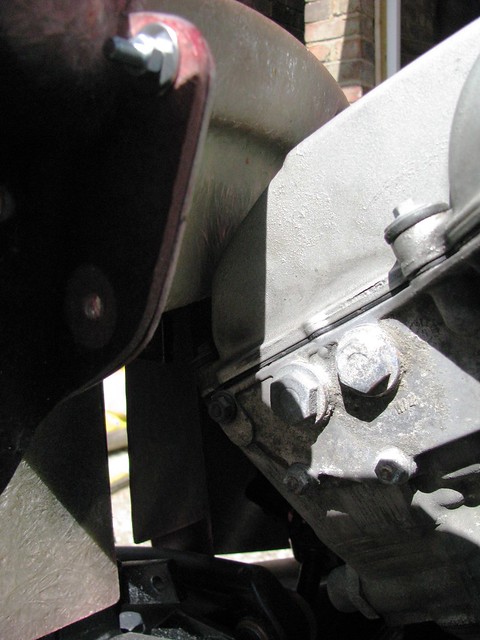 Rocker cover to inner wing clearance
 by
marlinpeter, on Flickr
Bulkhead clearance is now good and heater pipes are clear of the back of the engine......
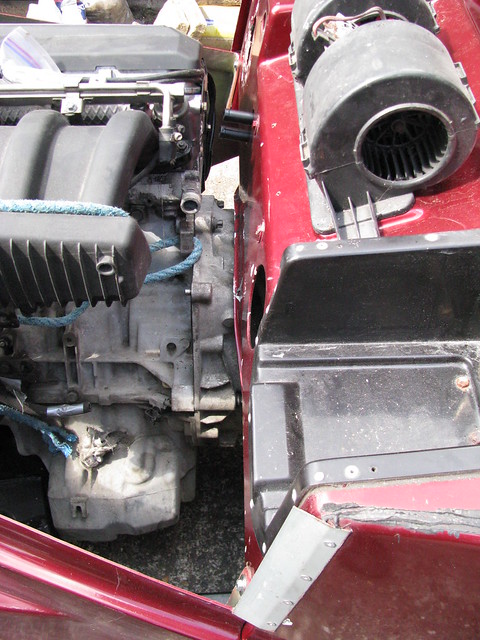 Bulkhead clearance
 by
marlinpeter, on Flickr
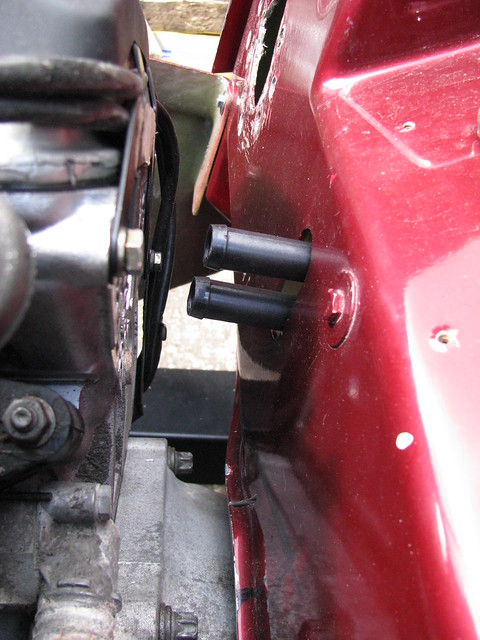 Heater pipe clearance
 by
marlinpeter, on Flickr
Alternator and Steering pump both clear suspension without any issue....
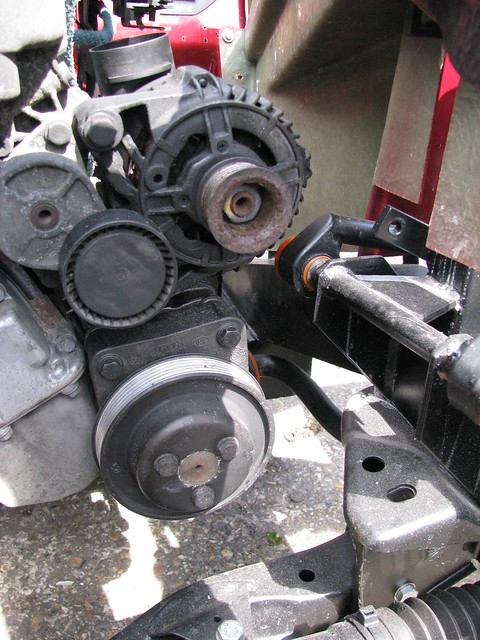 Alternator/steering pump clearance
 by
marlinpeter, on Flickr
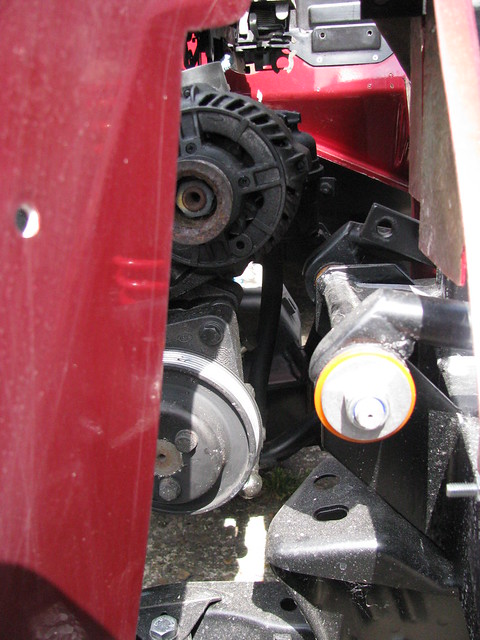 Alternator/steering pump clearance
 by
marlinpeter, on Flickr
Throttle body clearance looks good but I need to fit the rest of the MAf and inlet elbow gubbins.
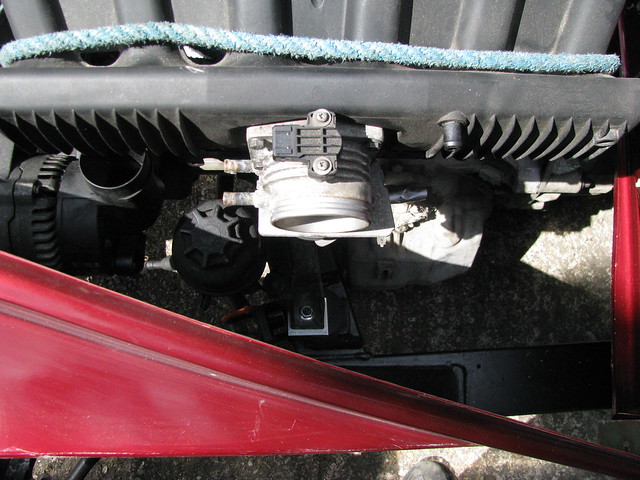 Throttle body
 by
marlinpeter, on Flickr
Exhaust manifold fits without any obvious issues....
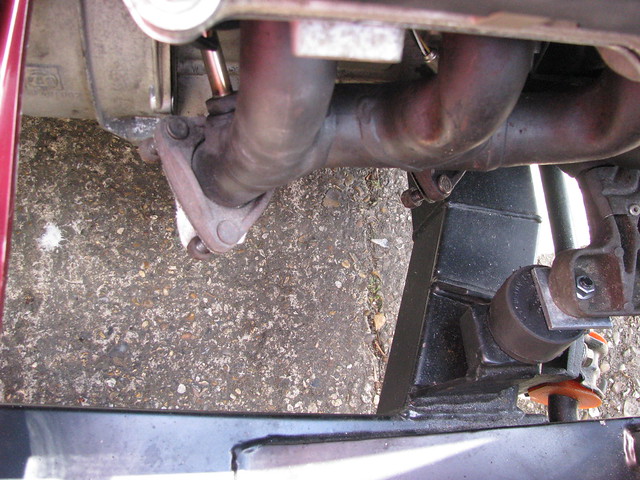 Exhaust Manifold
 by
marlinpeter, on Flickr
Well that's it so far.....just got work out where the put the radiator, header tank, Inlet filter, brake servo, HP fuel pump and filter, Fuel swirl pot, windscreen washer bottle and probably a host of other things I've forgotten for now
...peter
Not tried it yet but looks like it'll be OK.
The shaft runs behind the engine mounting like this....(this shot was taken when I had the steering column in to move the car from my lockup garage)
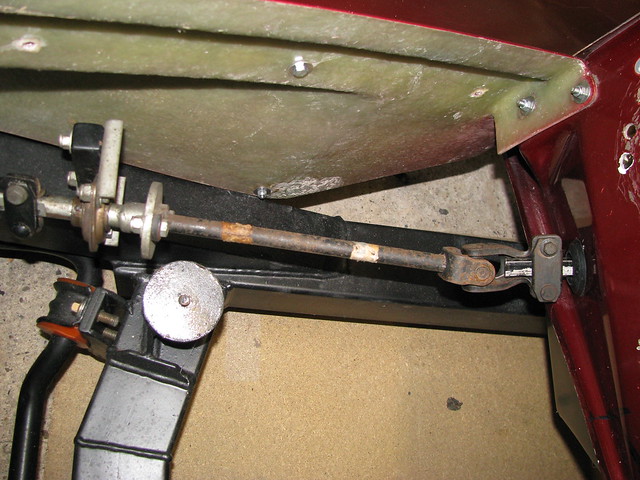 Steering Column to bearing link
 by
marlinpeter, on Flickr
.....but it will need to be checked
Yeah, been spending a bit more time in the garage but all the ancillaries are only temporarily fitted with a few nuts and bolts. Putting it all back properly and installing the wiring loom will take much longer.
At the moment I'm kind of doing space planning to work out where everything will fit.
I've had a look at the air intake elbow and MAF sensor. It clearly doesn't fit in its original position pointing towards the front of the car.
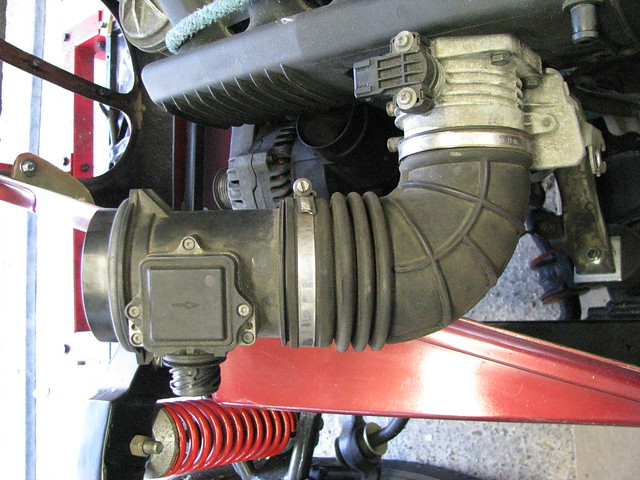 Air Inlet
 by
marlinpeter, on Flickr
But borrowing the standard Marlin solution, reversing the elbow seems to work.....
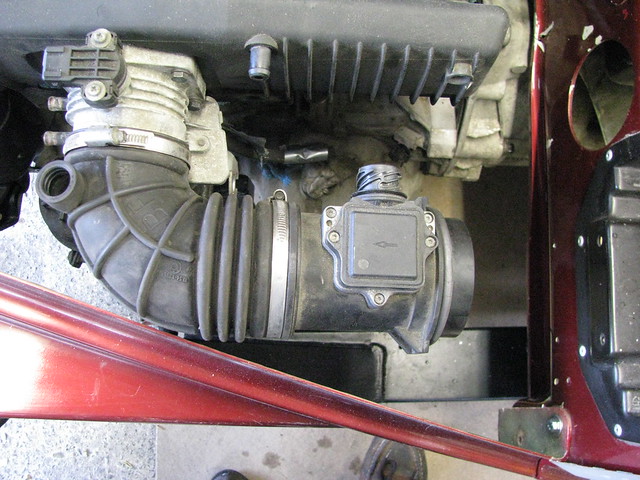 Possible Air Inlet solution
 by
marlinpeter, on Flickr
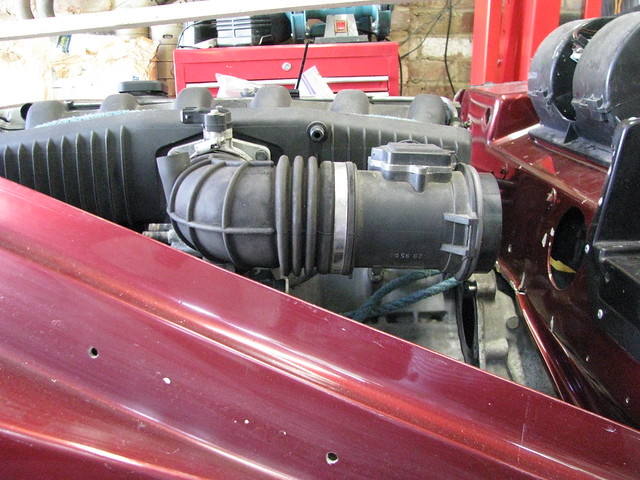 Air Inlet possible solution
 by
marlinpeter, on Flickr
It's a bit tight so I've got to be carefull how much I move the engine across to clear the rocker cover on the other side.
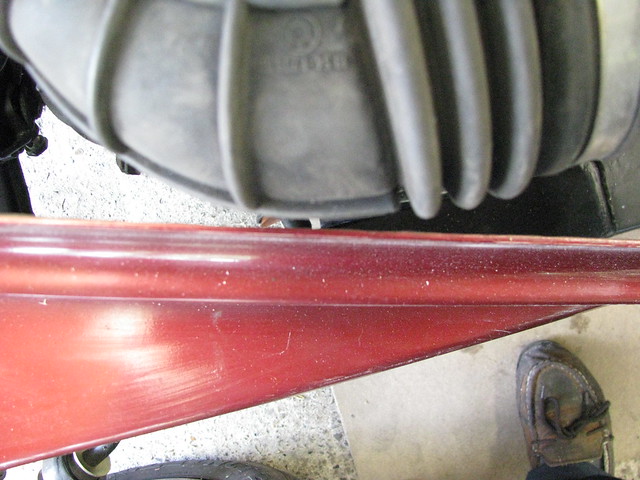 Air Inlet clearance
 by
marlinpeter, on Flickr
Just got to figure out where to put the air filter and 'cold air' input. I've also got to re-route the ICV pipe.
I also got out the windscreen washer bottle that I bought nearly two years ago. I think it'll slot in somewhere like this but shouldn't be too much of an issue to find a location.
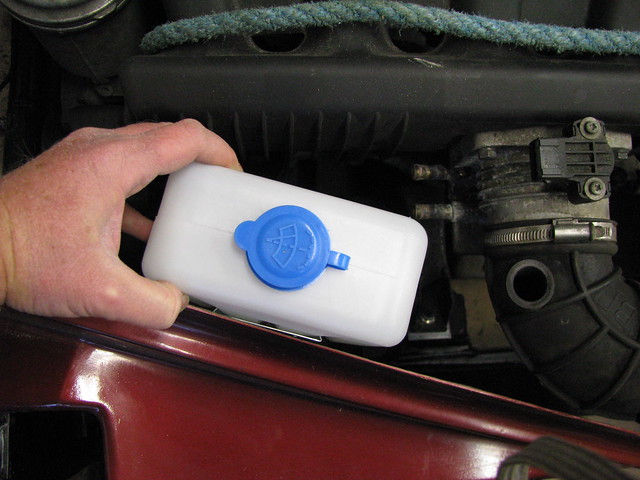 Washer bottle possible position
 by
marlinpeter, on Flickr
Next up will be locations for the brake servo, Fuel pump, filter and surge tank.....
...peter