At Last - Sunshine
I finally got the chance to lay out and photograph the other bits and pieces that came with the project as previously promised.
Just as I finished taking pictures the nice man from TNT delivered my double duck tonneau cover fabric.
I carefully removed the black plastic in which it was wrapped and was delighted to find that it was the end of a roll, and I'd been sent 170cm when I'd only paid for 1m. Result! It's 72" wide and a quick check with the tape measure confirmed that I (or rather my seamstress friend) can make two tonneau covers from it, one of which will be offered to another Monaco owner.
I also found time to photograph the spare chassis, rear suspension, diff. etc. and list them on Ebay. Time to reduce the clutter!
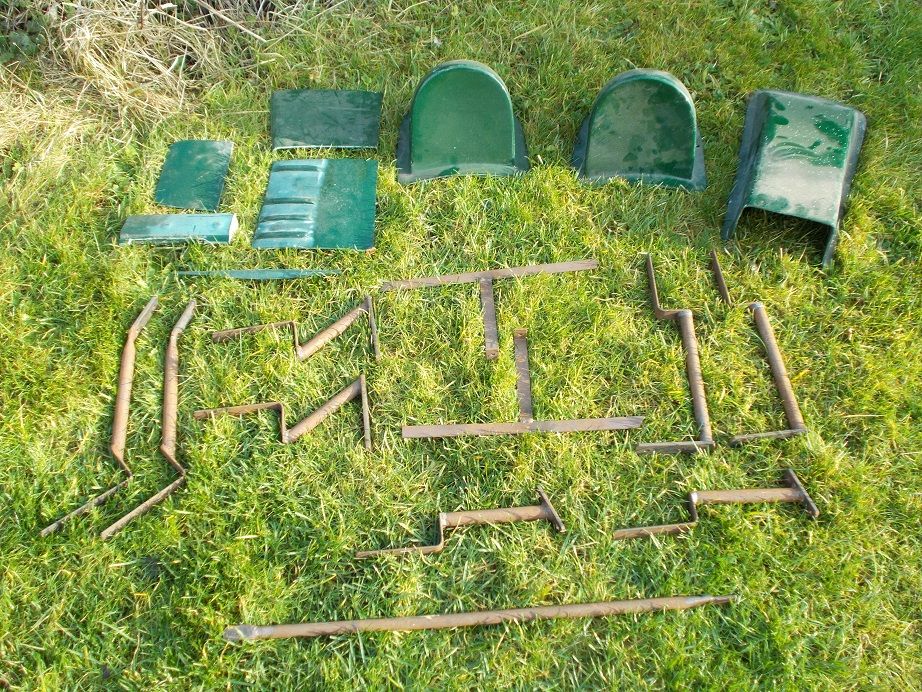
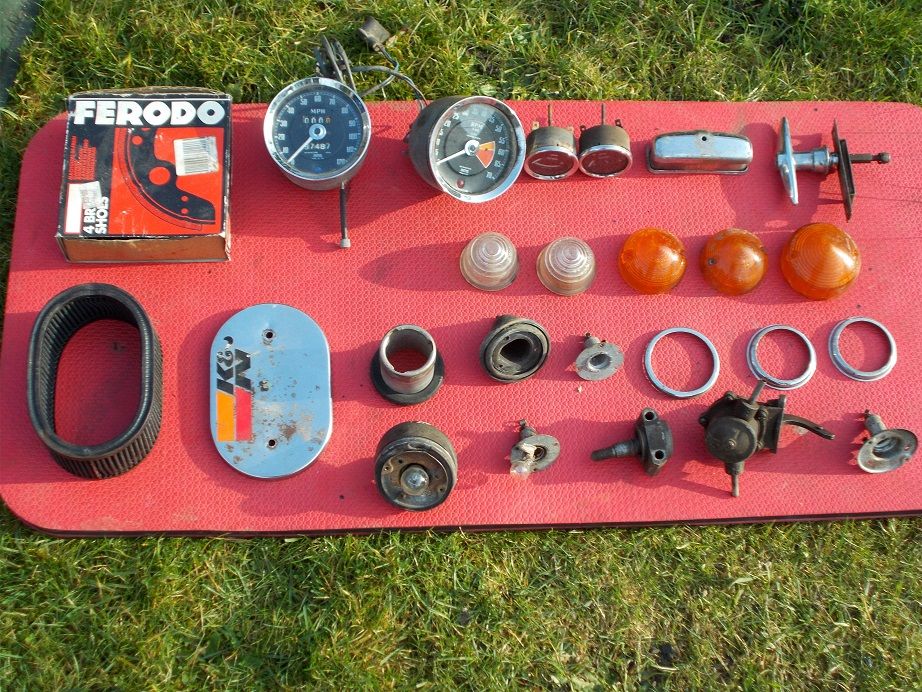
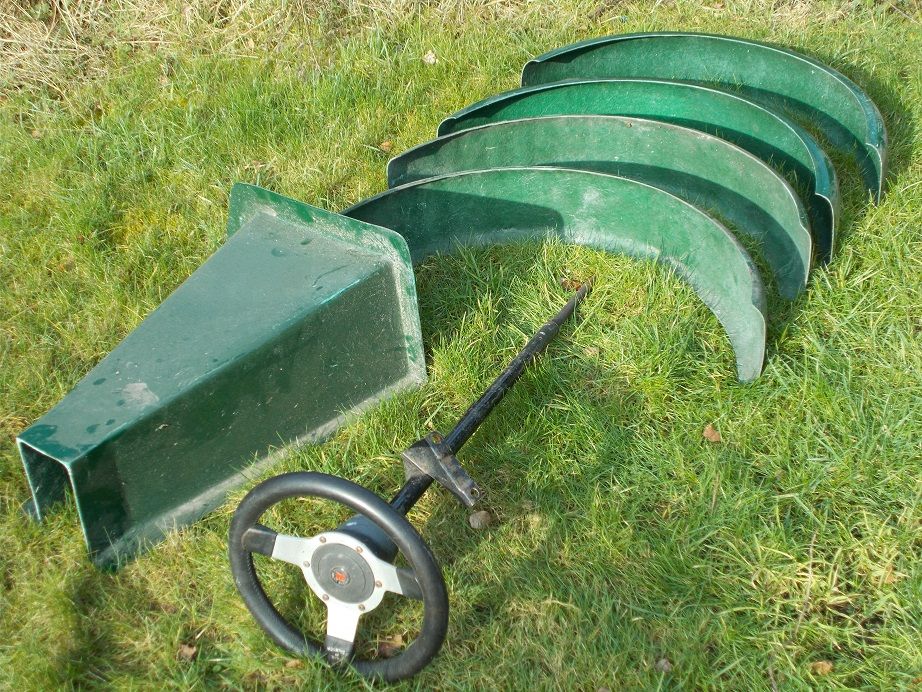
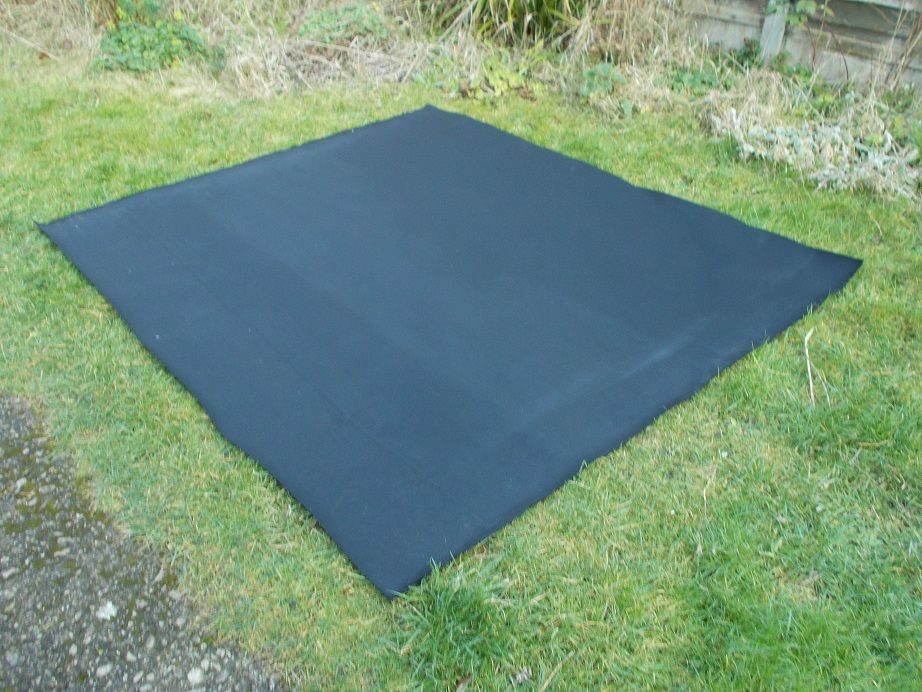
Regards, Mick
p.s. Deggsy, did you see my Super Two post on the previous page?
MGF Wheels & A352 Brakes
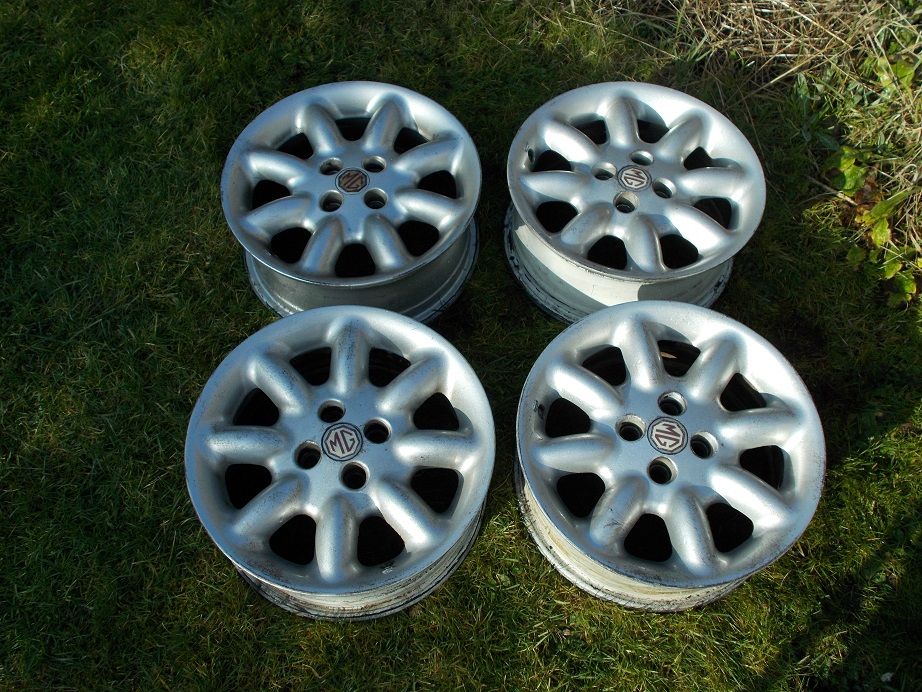
After re-stowing all the so far unused bits for the Monaco, I turned my attention to my MGF 15" wheels. The other day I'd browsed the interweb for professional wheel refurbishment and powder coating factors. Having seen the prices

I decided to spruce them up myself.
I found a handy guide on a forum that Goggle threw up. The stages were: 1) A good clean with hot water and washing up liquid; 2) A light rub down with emery paper to remove any nasty areas; 3) Spray with primer and 4) Top coat.
As the sun was shining I set to with the banister brush and removed the accumulated crud, rinsed with the watering can and left them to dry.
They're a bit grotty but I'm sure that with some elbow grease they'll come up fine. I've decided on black wheels and grille as that Alfa in the picture on page one looks so good

.
I'm still waiting for the two C clips that I ordered on line for the rear O/S wheel cylinder on the A352. Their absence was the reason for the brake imbalance which was one of the reasons she failed her test. The other, corrosion within 30cm of a seat belt mounting, has been addressed. I decided to take the clips off the Monaco chassis and use them so that I could get her MOT ready. This I did.
Today, weather permitting, I'll fit the new pads to the front of the A352 once I've popped the pistons a little and cleaned them with strips of emery paper. Key learning point: make sure the piston you're not working on is securely clamped as you gently prod the brake pedal with a long stick to expose the other one. Otherwise, disaster awaits.
Regards, Mick
Ebay Success
I put the spare chassis & V5C, front and rear suspension etc. on five day auction last Monday. They were all won by the same bidder who came and collected them with a car trailer yesterday. I threw in a spare Spitfire gearbox for good measure.
He's using them in a MkI Marlin Roadster, an example of which I sold only a few weeks ago. More synchronicity!
Regards, Mick
Diff is locked?
When this diff. and suspension were on the other chassis frame, it all rolled perfectly. Now, it's locked. Jacked up, one wheel turns in the opposite direction when the other is rotated. The input flange doesn't move. There's a tiny amount of movement when I twist the input flange, but the wheels don't even twitch.
Is it possible that inverting the diff as I was swapping it over has affected it internally? I certainly wouldn't have thought so, but I'm willing to be corrected.
Do any of you mechanical gurus out there have any ideas please?
Regards Mick
This was my second thought (see below!) that maybe something alien was floating around inside. I'll take a look.
This was my first thought, but I'd done that part of the job properly!
Regards, Mick
Freeeedom
I had a look at the diff. section in the Haynes Manual and thought "what a fag". I knelt at the back of the chassis and started working the nose flange back and forth. At first it only moved a couple of degrees but with perseverance, huffing, puffing and cursing, it gradually worked loose until, after only two or three minutes it was completely free. Result!
Retro200 was therefore correct in his assessment
. Whilst it was hanging inverted from the crane overnight, the crud from the bottom must have settled around the crown wheel, jamming it.
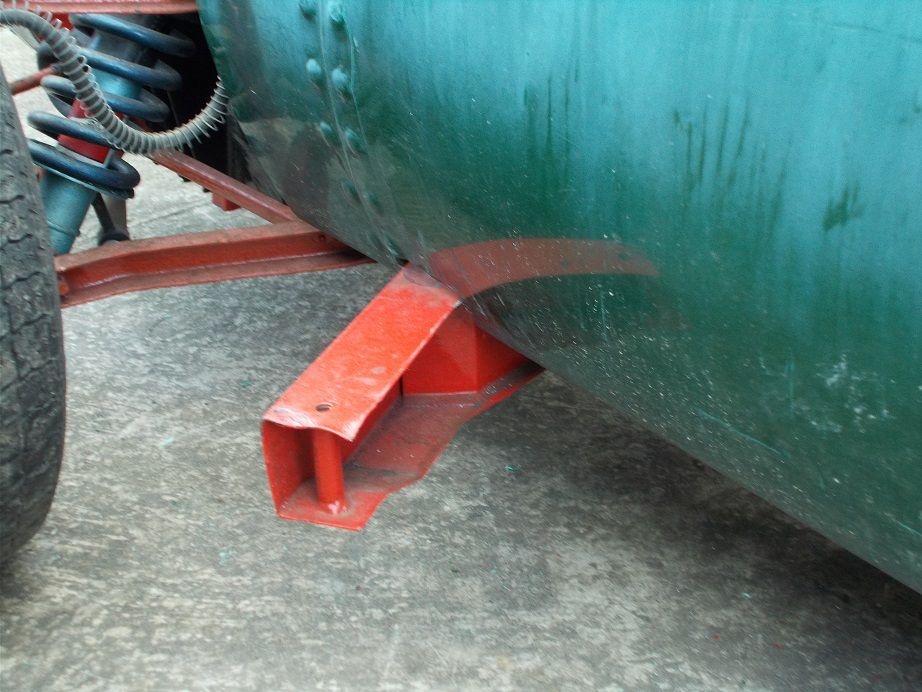
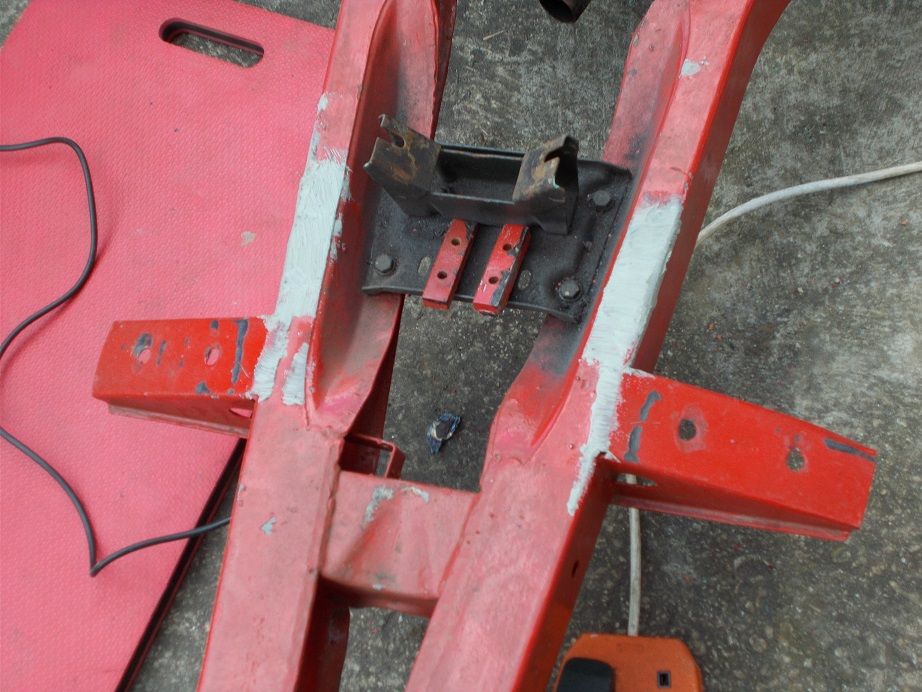
I decided to take the plunge with the angle grinder and chopped off the bonnet hinge extensions and the 'wings' which seem redundant anyway. I then smoothed the cut edges with a 40 grit flap wheel.
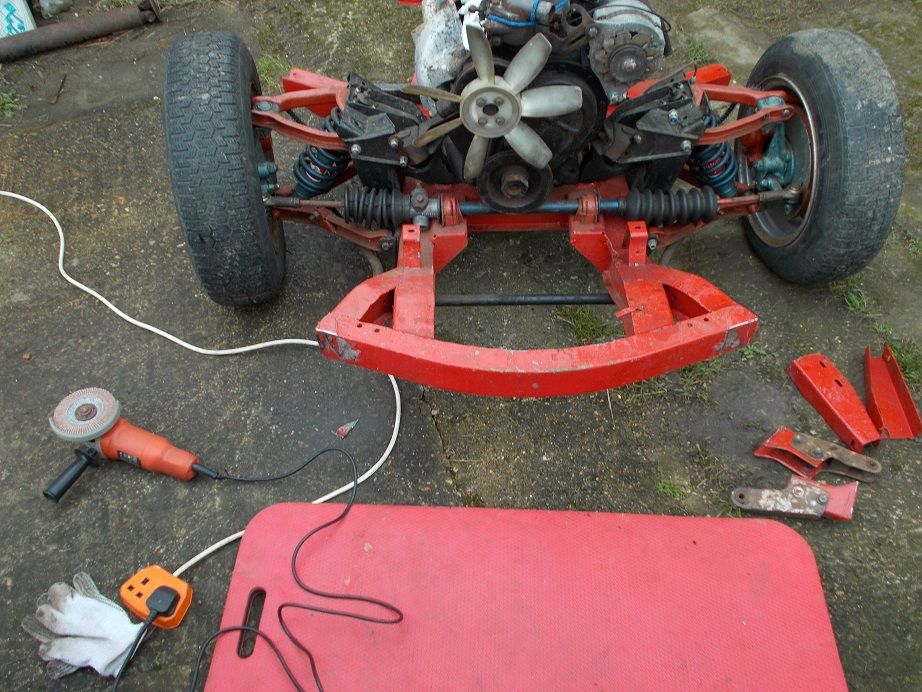
Having got rid of the original frame I was now able to manoeuvre the new slightly shorter chassis into a better position, having moved my stack of bagged logs yet again

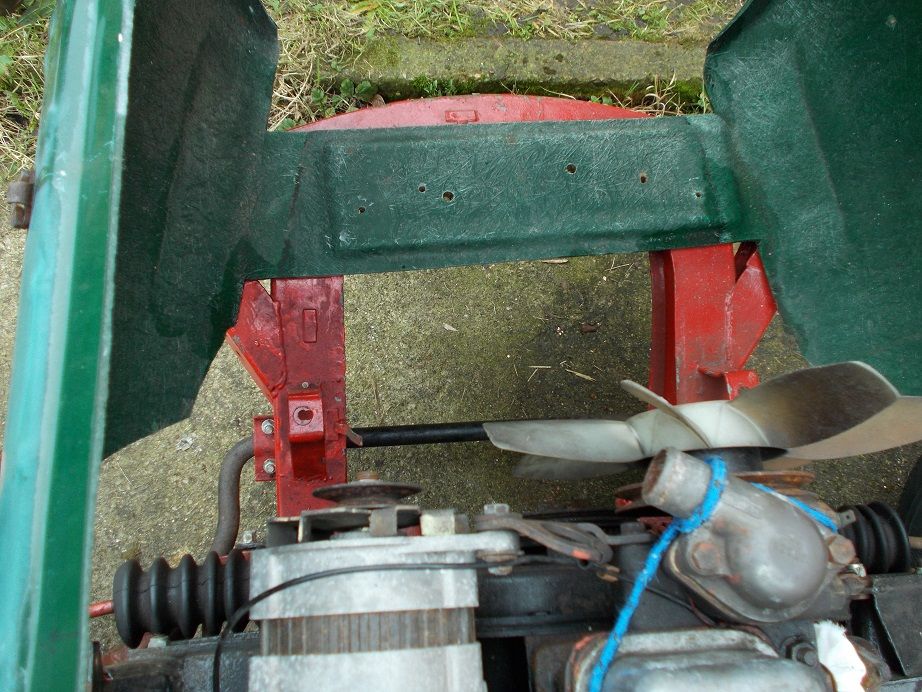
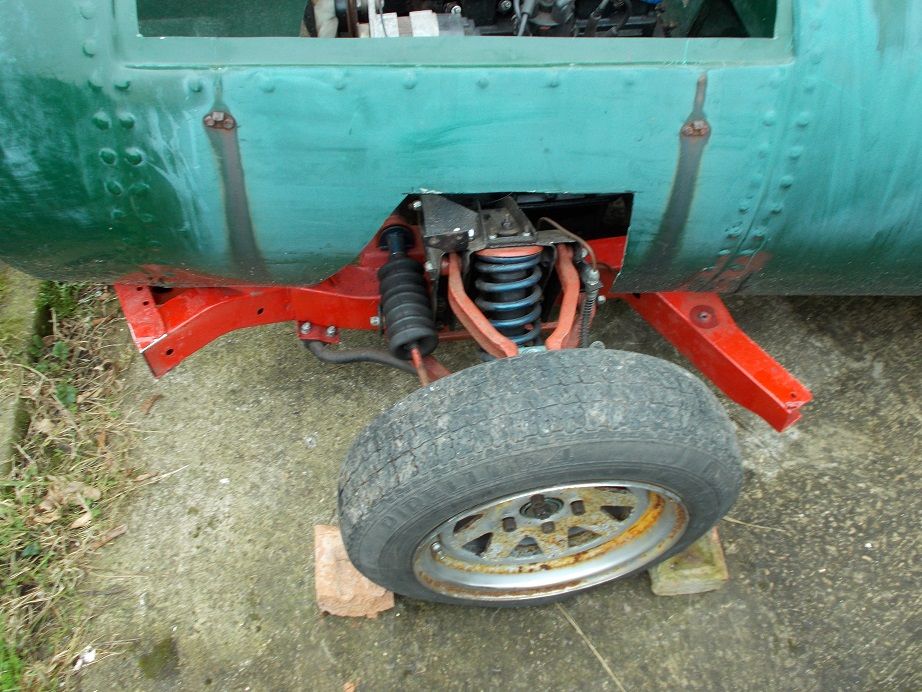
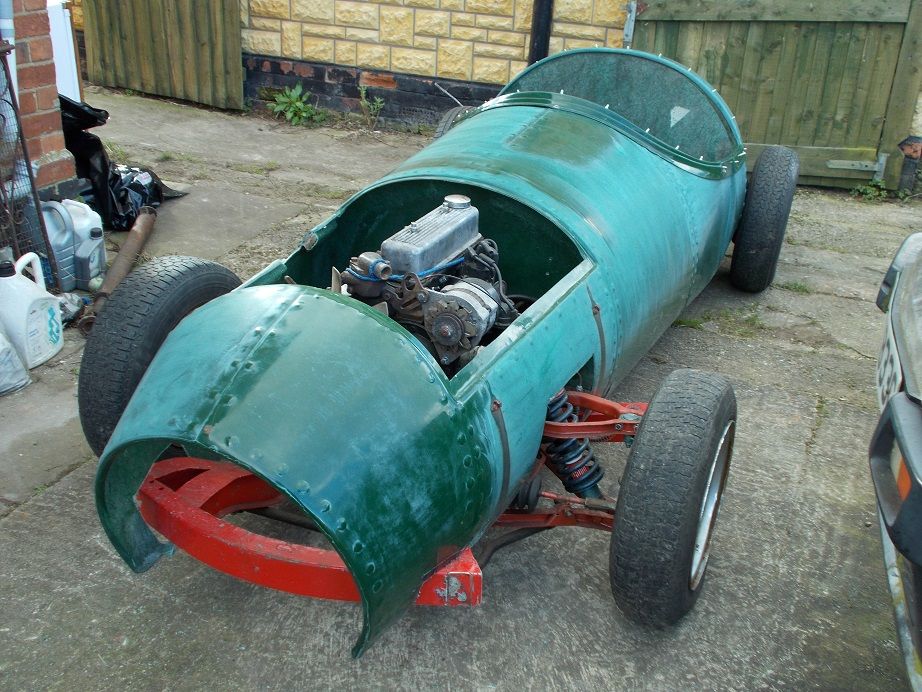
. I then recruited my son and plonked the body on top, using the existing suspension cut-outs for alignment.
I next chopped out the transverse brace come mounting in the nose cone with my jigsaw and carefully marked where the body will have to have slots cut to fit over the front frame and outriggers. This will be the next job, I imagine it'll involve a few body ons and offs with more measuring and ever smaller amounts removed until it sits nicely.
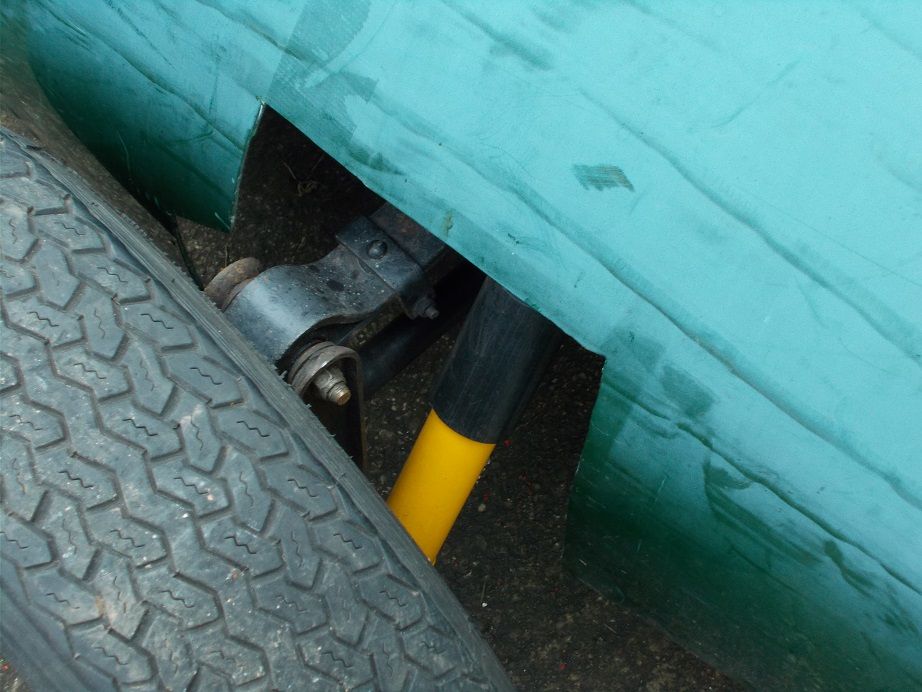
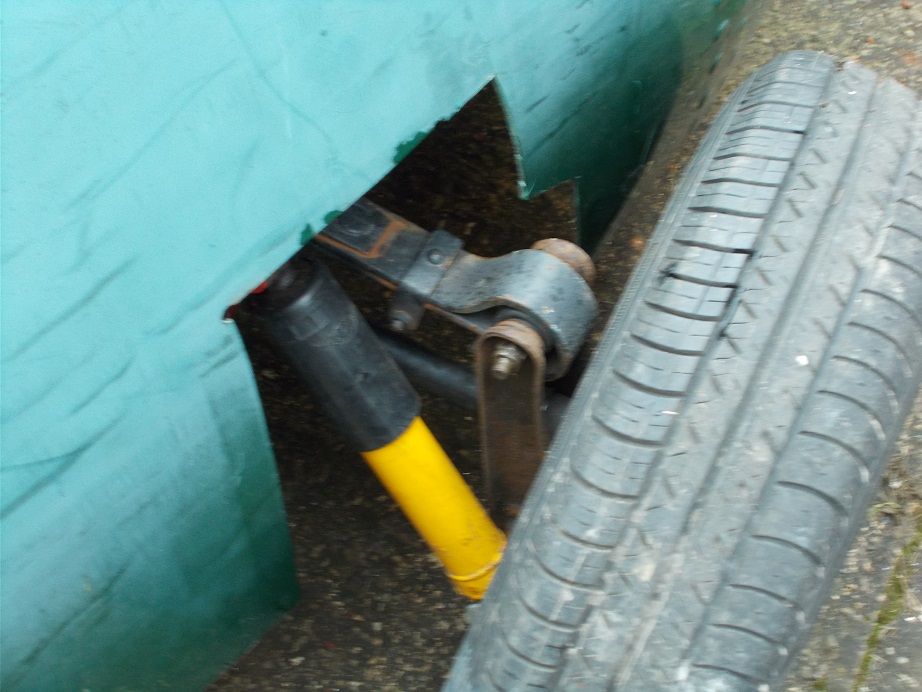
Regards, Mick
Taking the Plunge
Crawled around on the ground this morning with a roll of gaffer tape and a steel ruler and marked where the jigsaw cuts needed to be made for the body to drop onto the Spitfire chassis without fouling.
Having done this I propped the front with a handy length of timber. drilled 8mm holes in the corners of the marked areas and cut them out. It needed a couple of small extra cuts after the first attempt, when I remembered that I hadn't removed the two tapped blocks welded to the frame to which the bottom of the scuttle brace is bolted.
These needed an attack with a cutting disc and cold chisel, then a tidy up with a flap disc and a quick coat of frame sealant. The body then fitted snugly on the frame along its whole length.
Next job will be to source the strip of cushioning material to fit between the mating faces before joining them.
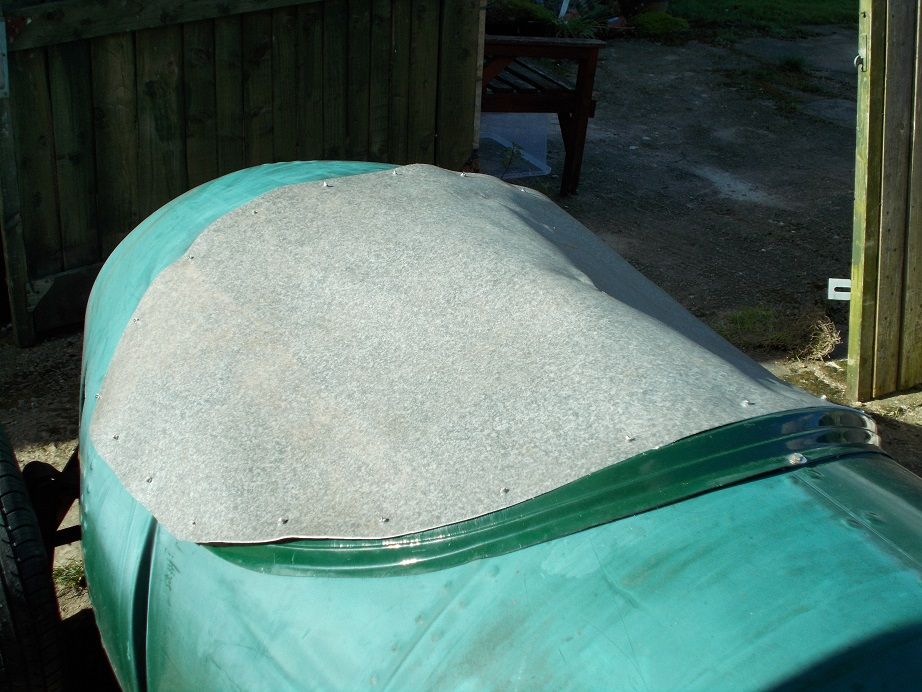
Yesterday morning I fashioned a rather natty temporary tonneau cover from vinyl floor covering, or Lino, as we coffin dodgers still call it. It withstood the worst that Draughty Doris threw at it
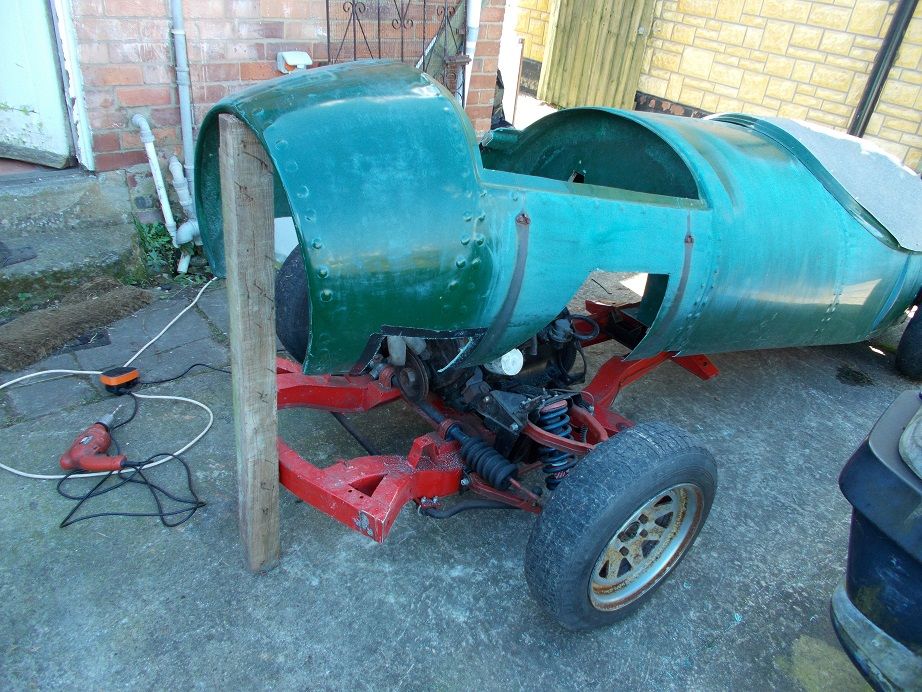
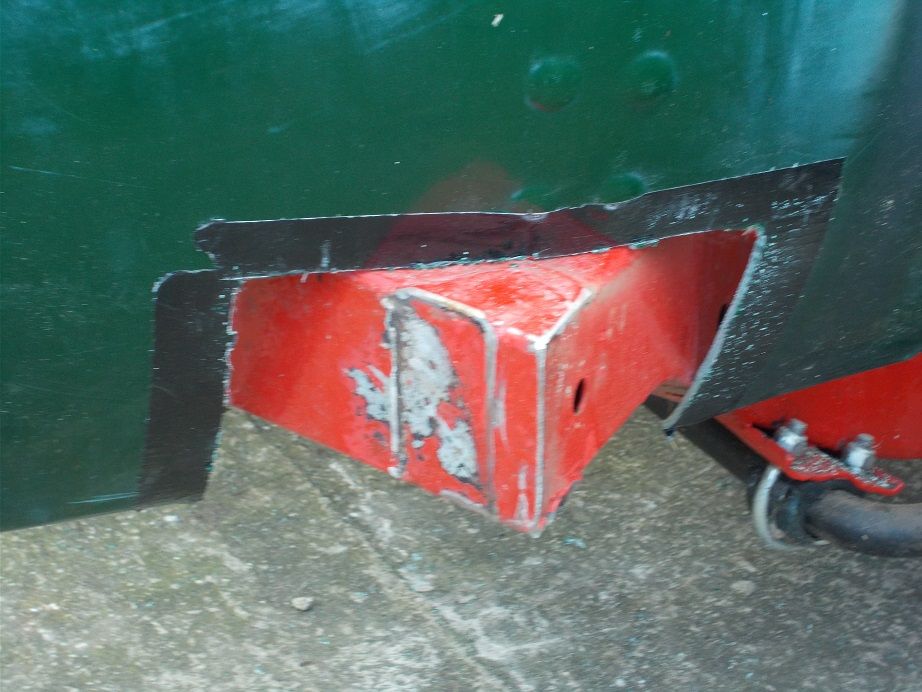
Regards, Mick
I've taken your advice regarding the ancient hypoy, and purchased this handy item.
Why did my thoughts immediately turn to Austin Powers
?
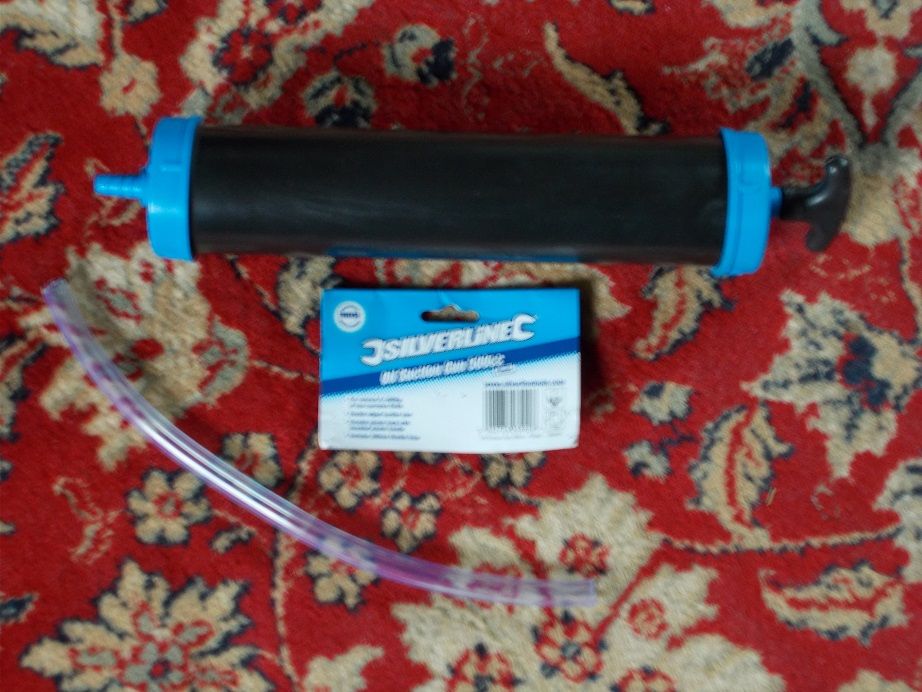
Regards, Mick
'Ford' Based Kit Cars
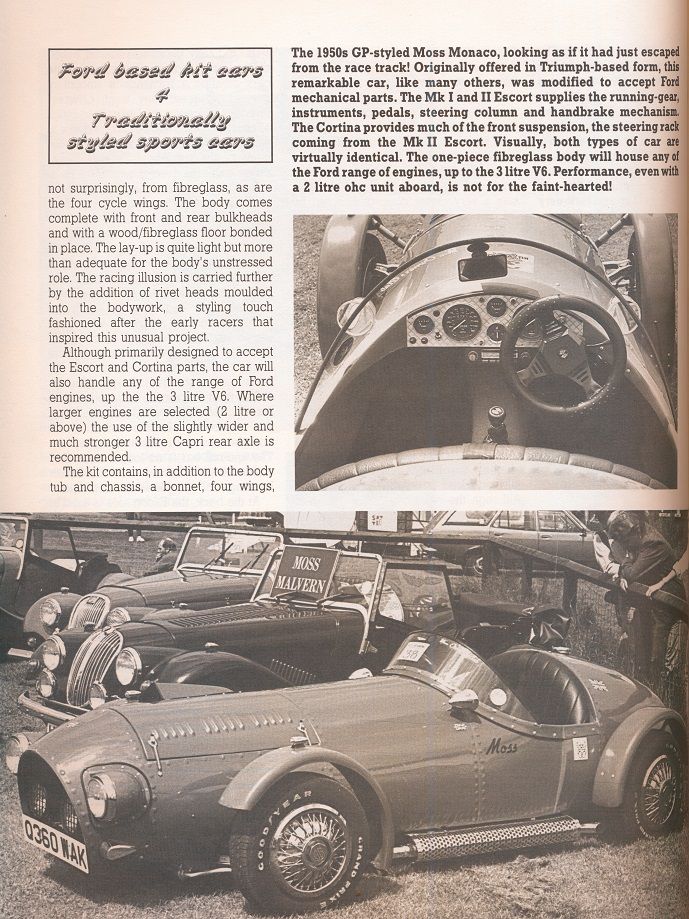
My 1988 copy of this hardback contains a write up of the Moss Monaco, complete with pictures taken at a show. These clearly depict a Triumph based example
Those faux wire wheels look awful IMO, the rest isn't bad at all, especially the dash.
Regards, Mick
Some Progress
Today, between showers, I loosely fitted the headlamp pods making sure that the front faces were vertical, using a small spirit level. I'd earlier bought the 7" plastic buckets which will eventually hold Lucas P700 copies
.
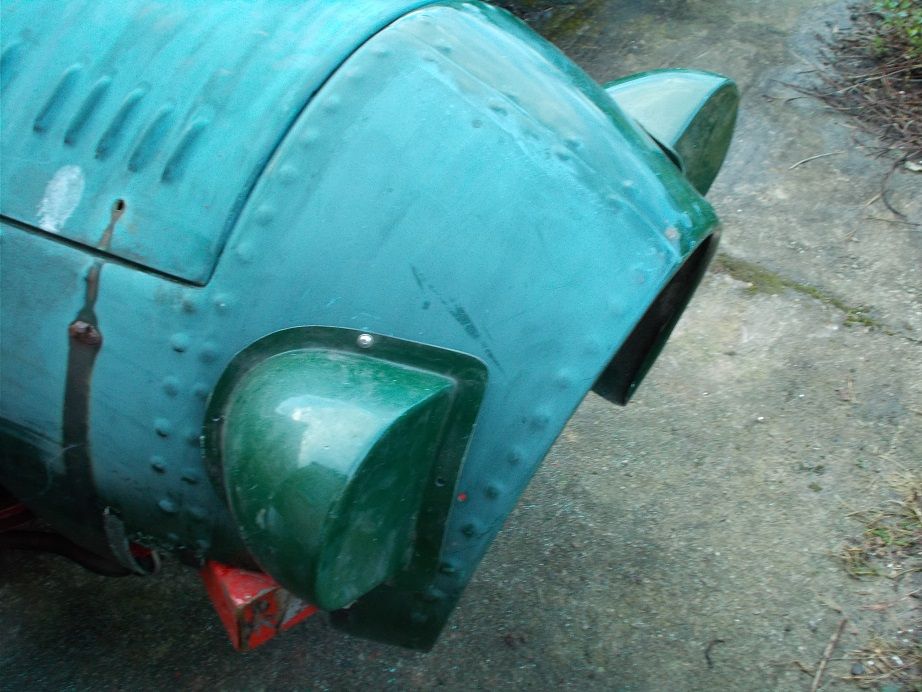
Postie delivered my 5m roll of 75mm x 3mm self adhesive rubber strip, so I finished off the cut outs for the chassis rails. This needed a couple of fine cuts and the body now sits perfectly, something I'm glad I checked, as it wasn't quite as good as I'd previously thought.
I next decided to make some angled sleeve washers/spacers for the centre outrigger body fixings. I made a template of the required angle and cut them from some mild steel tube about 15mm in diameter. The bolts through the centre outriggers and the floor will now sit perpendicular with decent mating areas. I'll try and get a picture of this when (if?) the sun comes out.
The rain started again so I came in and browsed Ebay for something to fill the grille hole and came up with
this. Once trimmed, painted and fitted with small angled locating flanges it'll set the front end off nicely.
Regards, Mick
Centre Body Mounting
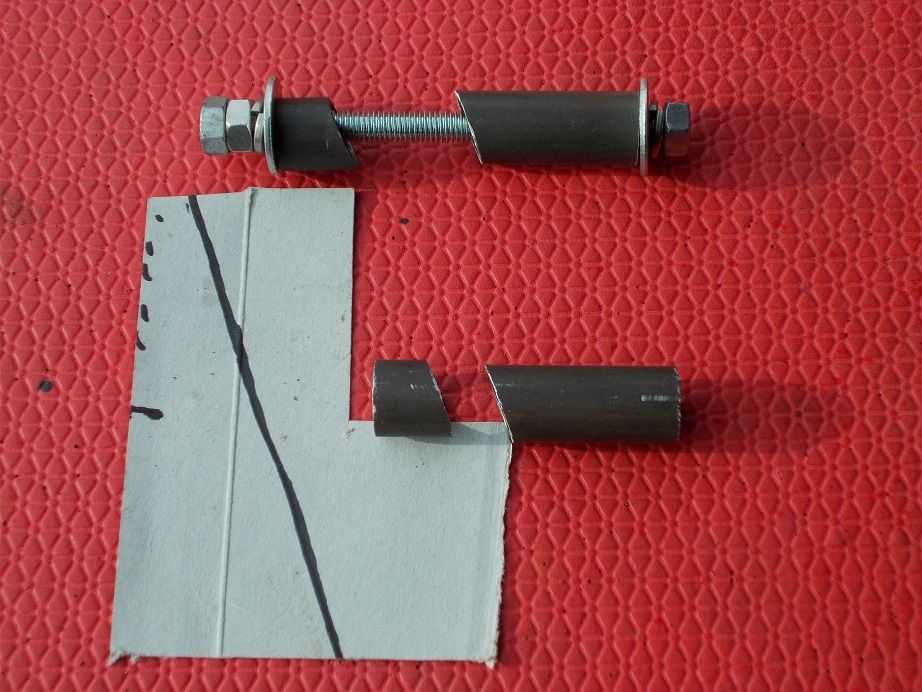
The longer half of each pair of sleeves will be between the underfloor of the body and the angled outrigger, the shorter half will be beneath the outrigger. I'll use proper bolts rather than studding.
Regards, Mick
Rain Stopped Play - Again
Today I decided to attack the boot and seating areas. I measured the amount of material I'd need and ordered a sheet of 8' x 4' 12mm exterior ply, which is enough for both areas. This is being delivered tomorrow.
The boot floor will be bonded to the body around its edges and bolted to the tappings on the tops of the suspension turrets. It'll be stepped down to the rear and will hopefully provide a useful amount of luggage space as well as taking the fuel tank and battery.
The seats will be similar to those I made for my Westie and Marlin - a one piece backrest shaped around the transmission tunnel and individual squabs, all made from the ply, 3" thick foam and faux leather vinyl. The back will tilt forwards as it did in my Marlin to provide access to the boot space.
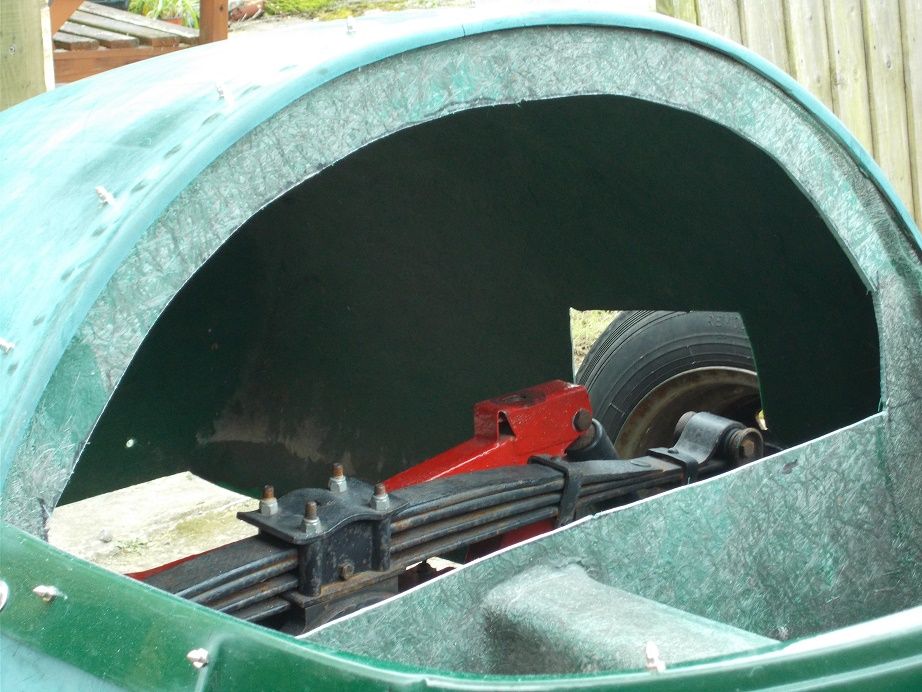
This meant the existing fibreglass seat back area would have to be opened up. I marked it out in felt tip, drilled 8mm holes at key points and jigsawed it out.
I'm waiting for delivery of a host of bits so, as postie still hadn't arrived, I decided to have a play with the rear number plate and light. Again, after careful measuring and trial positioning, the drill came out and both are now fitted, albeit with yellow bolts.
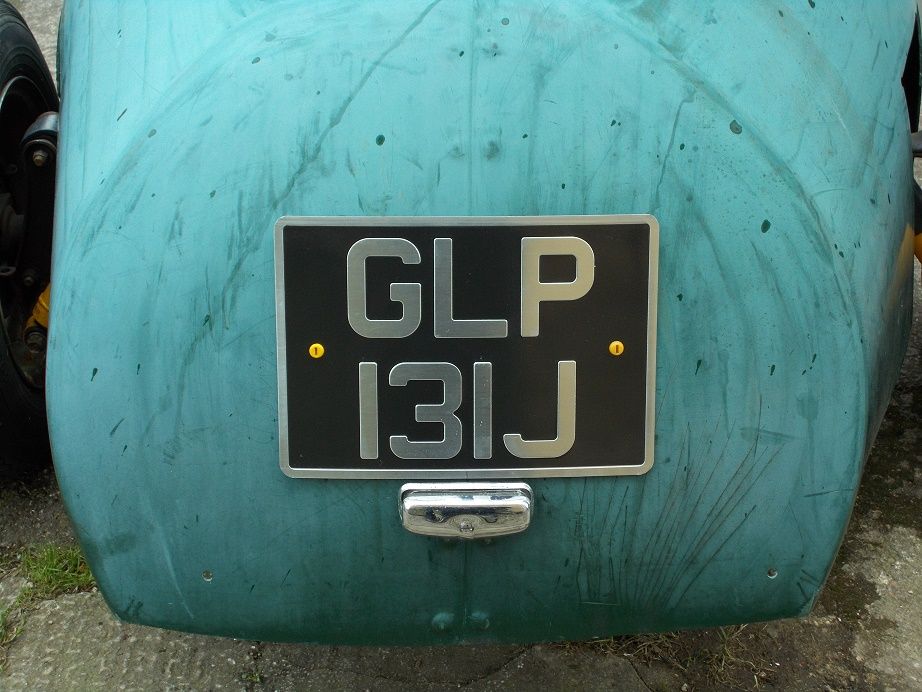
Big spots of rain then began to fall so I called it a day. Postie arrived just then but he only delivered my two lengths of 21sq mm battery cable, one red, one black. I have an isolator switch and crimp on terminals but no battery or starter solenoid, so this will have to wait.
Regards, Mick
Not a lot done
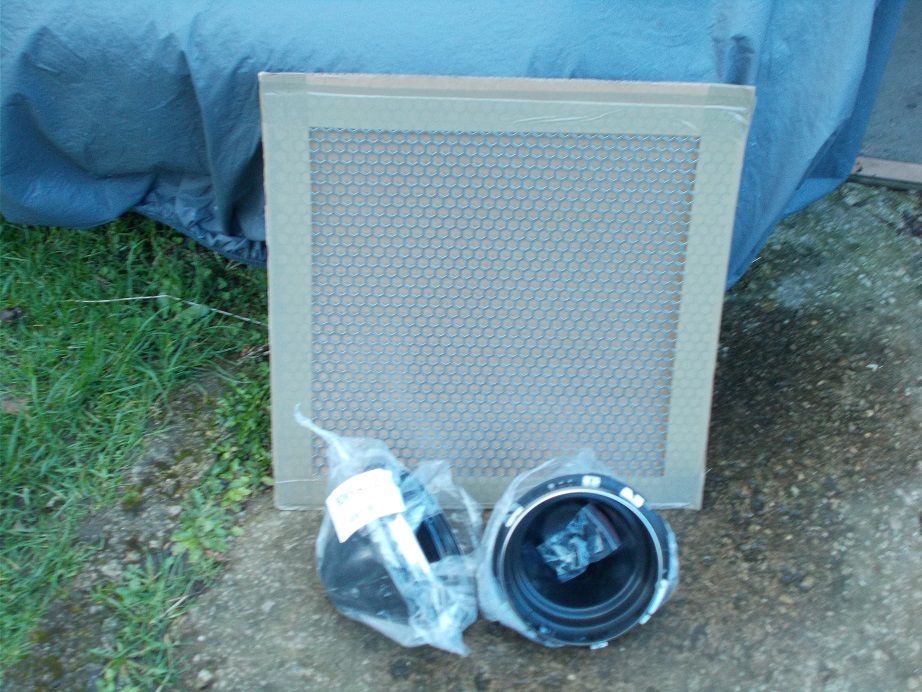
While I was out on Thursday afternoon my 8'x4' sheet of 12mm plywood arrived, which my son helpfully stowed in the man cave. Yesterday was a washout, the only progress I made was to walk to Argos and collect my grille mesh and headlamp pods.
This morning, being fine, I was down in the man cave early, where my ply sheet had blown over and partly lost its cover, fortunately doing no damage. I decided to cut it in two so that I could access my bench, against which it had been leaning.
I re-checked the measurements I'd made of the seats and boot floor and cut out 1/10 scale templates which I shuffled around on a similarly scaled paper ply sheet until I had the optimum layout. I then marked the bisecting line and hand sawed it into two. The frame of my granddaughters swing came in handy here as a support, and the two pieces now fit in the shed.
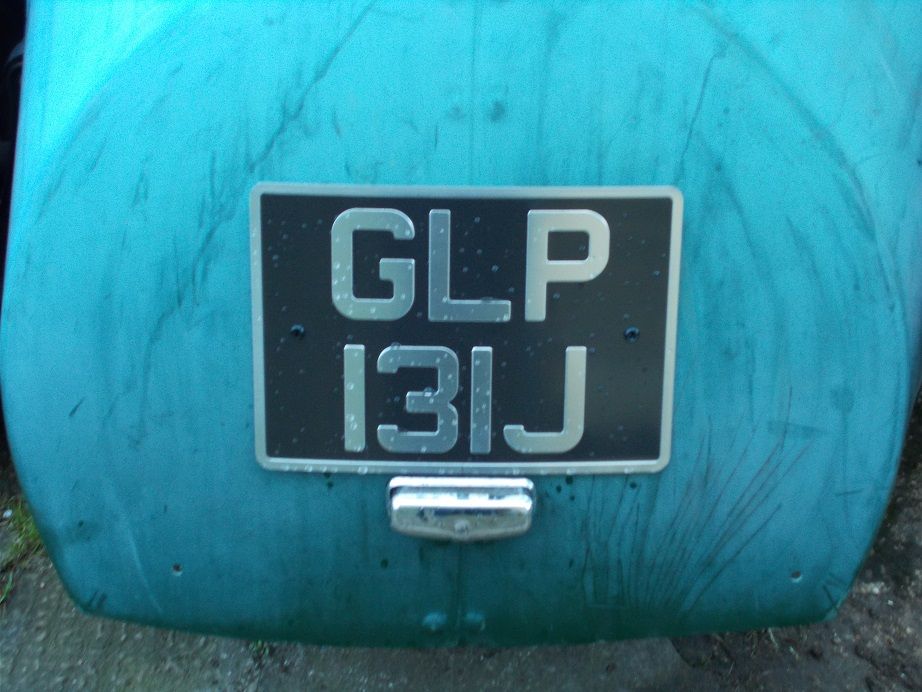
I'd hoped to make a start on the boot floor but in the absence of my son to assist in body removal (Burke and Hare?) and heavy showers I had to content myself with replacing the lairy number plate bolts and walking to Machine Mart for some wood blades for my jigsaw.
Regards, Mick
Hi Paul
I bought the bowls from Ebay, item no. 222054837202. The plywood came from a
family business just around the corner from me in Gloucester. Not the cheapest, but I like to support them
Regards, Mick
A fine day, at last!
Yesterday dawned bright so I decided to tackle some of the woodwork.
First job was to make a paper template of the seat back and transfer the outline to my ply. I knew it would be unlikely to come out perfect first cut so I sketched the outline about 30mm oversize. I lay the ply sheet on some stout lengths of 4 x 4 timber and set to with the jigsaw. The new blade made short work of this.
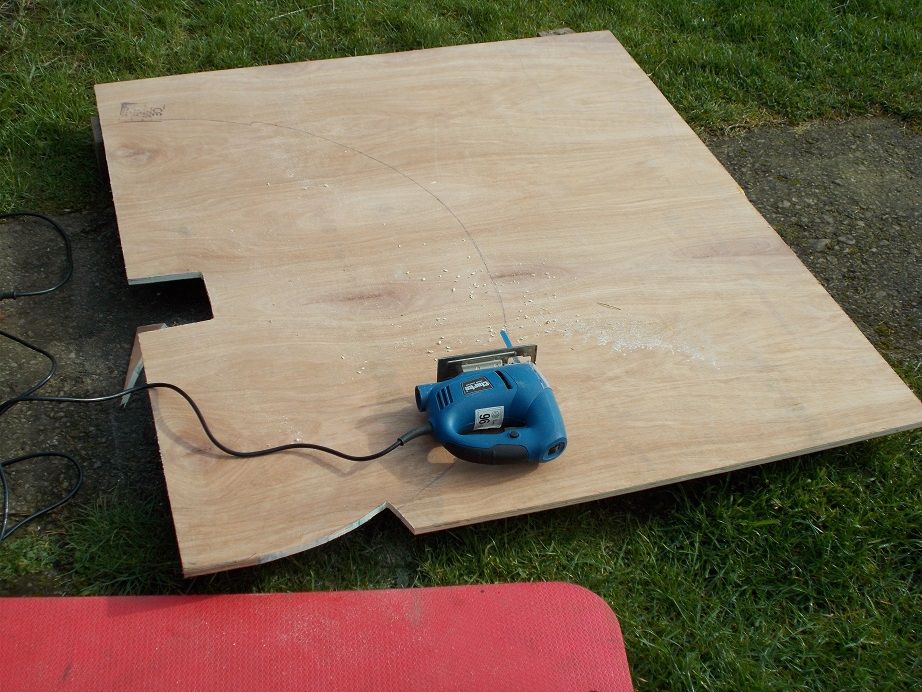
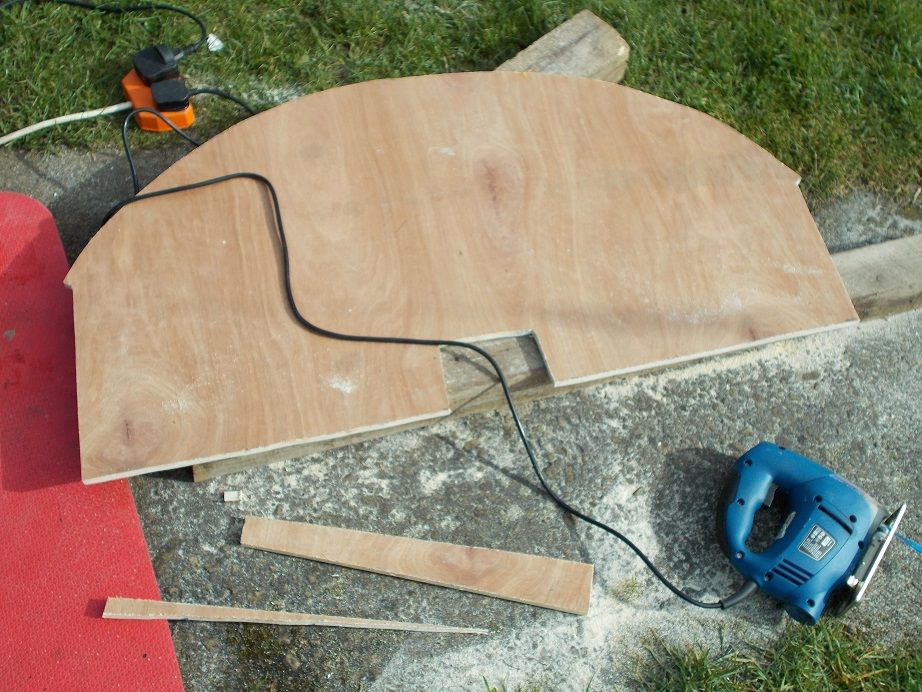
I offered up the newly cut seat back to the body and sketched in the areas that needed cutting back and chopped them off. During one fitting I tried turning it round to see if it was any better and discovered that the body is far from symmetrical! I was back and forth four or five times before I was satisfied with it. I'll sand the edges when it's time to fix the foam and vinyl on.
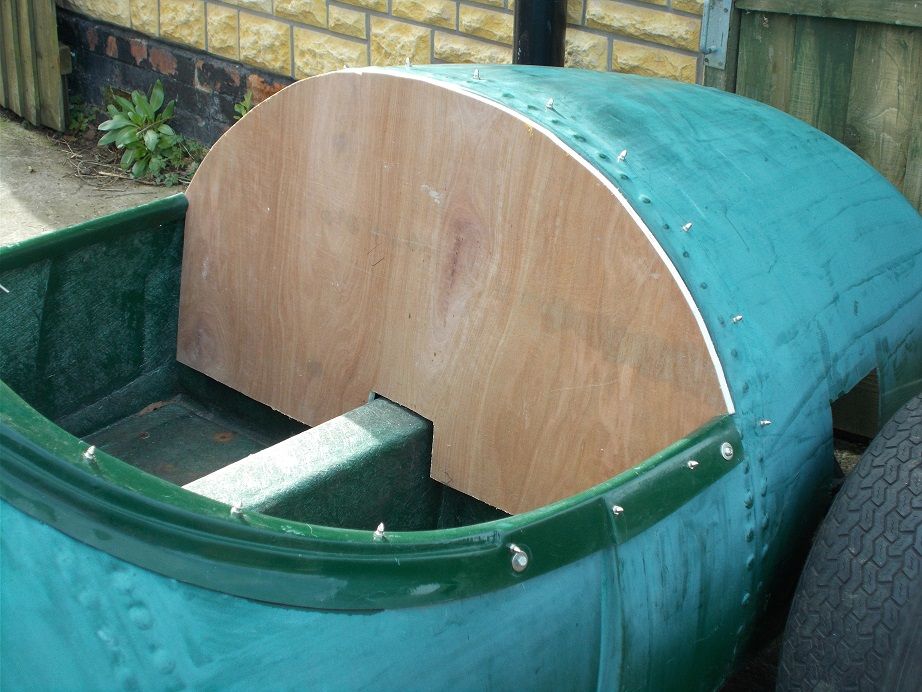
Next job, after stowing the seat back in the shed, was to recruit my son and remove the body, lying it upside down for better access to the boot space. I couldn't find a big enough piece of cardboard to make a template of the first portion of the boot floor so some head scratching was required.
I lay a stout batten on the inverted floor and cut a short length of ply to size down to the cut edge of the boot aperture. With a bit of gymnastics I was able to mark where the floor would sit on the inside of the body. I could them measure and mark out my next cuts.
These turned out more or less perfect, except for the straight edge to the body aperture which I discovered was bowed. One more cut and it sat nicely. It'll be glassed in around the edge, bolted to the suspension turrets and I may support the 'straight' edge with a couple of short lengths of angle or batten. It'll also need a rectangular hole and cover for access to the leaf spring retaining bolts
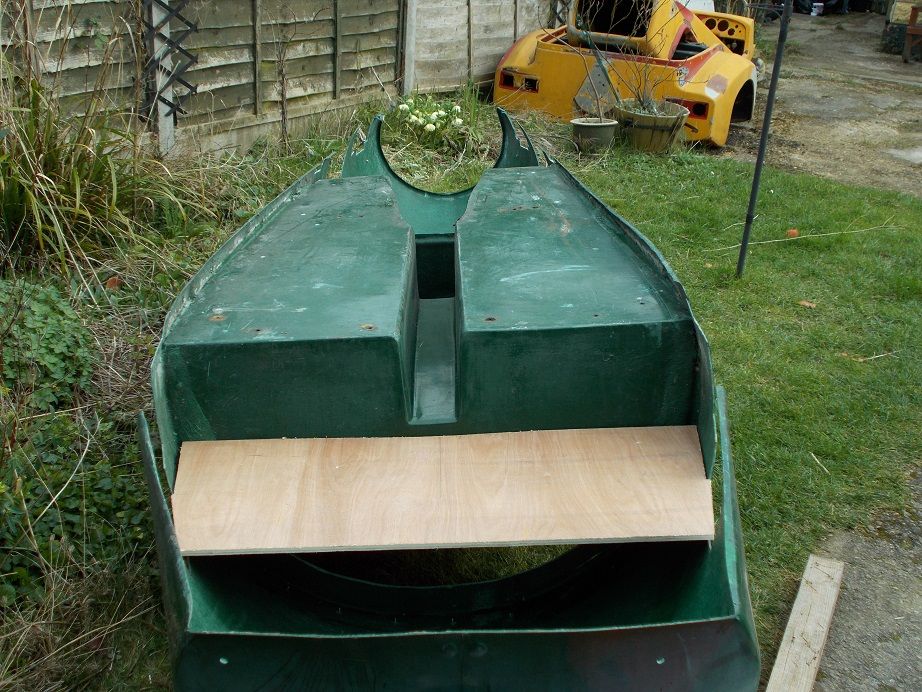
My son, who takes the lighter front end of the body for removal etc. had pointed out how floppy it was where the bonnet opening, which is reinforced at the sides with glassed in wood, had been cut away for the DCOE. I found a handy length of aluminium angle and drilled and screwed it bridging the gap to put the strength back temporarily.
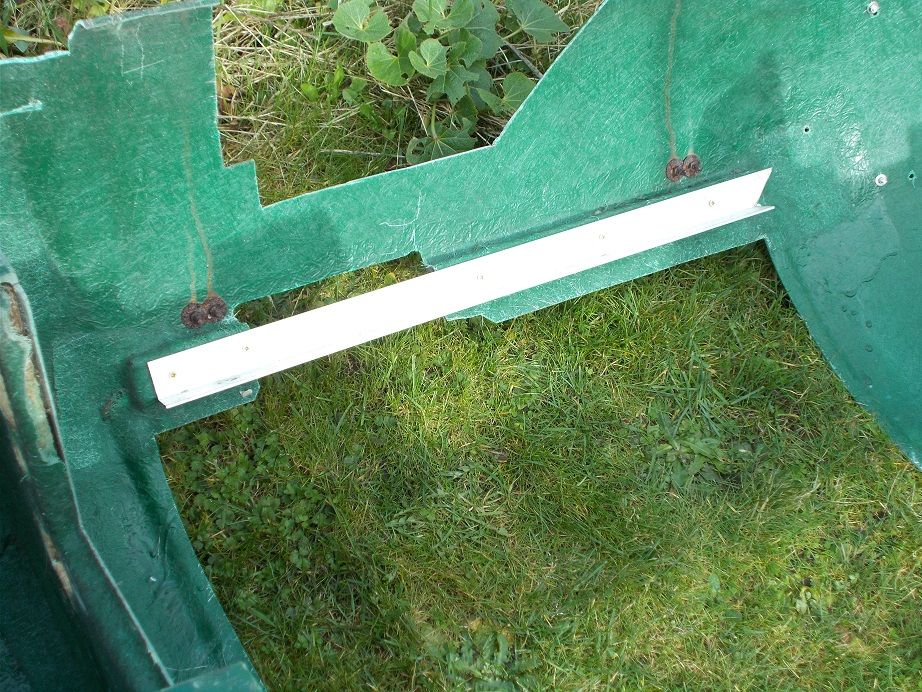
We popped the body back on and I tidied everything away as I was very pleased with the day's progress and didn't want to push my luck.
Regards, Mick
Jumbo Rivets
I think they're more like rivets on a Dreadnought! Too much work for not much return. It's never going to be a posh build, I think a big part of its charm is its crudity. This suits me fine having spent countless hours on detailing my A352
Regards, Mick
Another Fine Day
Another early start yesterday. My son wasn't around to help remove the body, so I decided to cut the spring bolt access hole in the panel I made yesterday. More careful measuring and re-measuring (it's not unknown for me to make real howlers!) before carefully drilling 8mm corner holes down a 4mm pilot hole from both sides to prevent splintering. Joined them up with the jigsaw and was quite pleased with the result.
In order to cut the vertical step panel for the boot floor I needed to temporarily locate yesterday's effort. Luckily, the steel strip I'd bought for strapping the rear body to the chassis had arrived with a nice length of door stop supporting it. I cut two short lengths for the sides and wood screwed the three through the body.
My son still hadn't surfaced so I turned my attention to the steering. The UJ between the rack and column had seen better days and, when searching on line for an overhaul kit (which is still available) I came across an upgrade in the form of a proper Hooke Joint, which I bought. A previous owner had drilled a very accurate hole in the bulkhead and I was able to connect together the standard column, extension, joint and rack, supporting the top end on blocks and scraps of wood until I was satisfied with the alignment. I marked the dash so I can work out the top bracket with the column out to enable body removal.
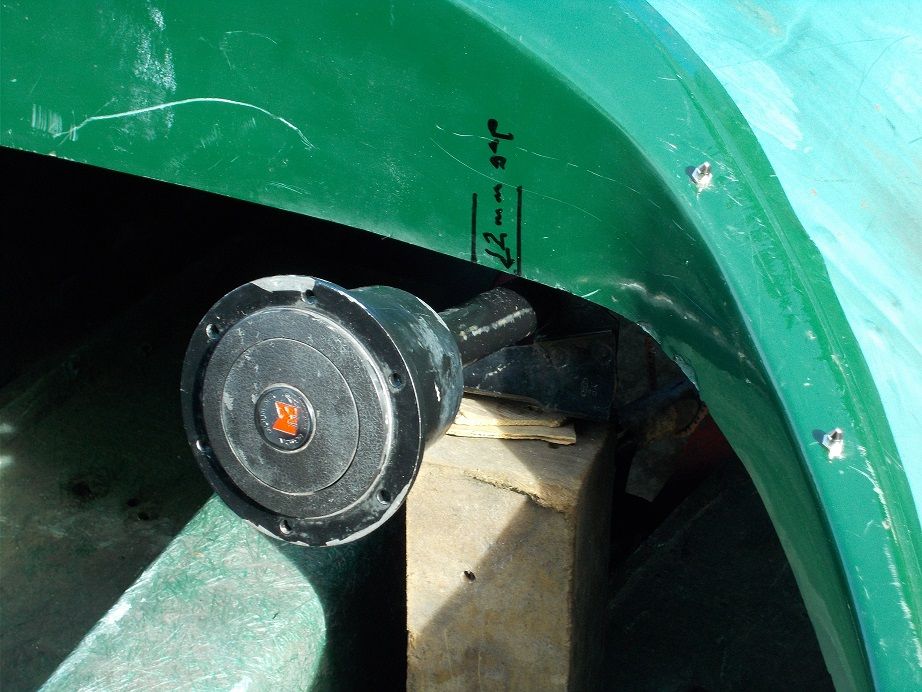
My thoughts then turned to the diff so I inserted my vacuum pump into the filler hole and sucked. Nothing, apart from a rusty looking smear of some indeterminate liquid on the pipe's end. I decided a drain hole was needed to further investigate. Jack up, axle stand, 4mm pilot hole, 5mm hole, (Cobalt bits - brilliant!) then 6mm tap. Some more of the above juice seeped out so I screwed in a suitable M6 bolt and pondered the best flushing medium to rinse the inside - any ideas?
Body removal assistant had emerged so I could turn my attention to more woodwork. It was a simple matter to wedge the floor up against the strips, balance the ply in position, mark and cut it out. Just then the nice man from Interlink Express arrived with my P700 replicas - how cool will they look? I love them on my A352

Again pleased with progress I packed up and called it a (successful) day.
Regards, Mick
Slow Day
Yesterday my son had been staying away overnight so body removal wasn't possible. After a bit of head scratching I decided that the A352 should now live on the front rather than in the man cave. As soon as a few days fine weather is forecast I'll take it for its test, so that, when it eventually passes
, I can at last use it.
This simple sounding task was a bit of a logistical problem. The Monaco had to be pushed right back, the wheelie bins and my daughter's redundant fridge and freezer moved temporarily into my front garden and the bird feeder moved from its socket in the lawn. It's a tight squeeze through the gaps for the A352, especially its wide back end. It's a lot easier with a helper, which I didn't have, so I had to hop out of the cockpit two or three times to check clearances. The beast eventually resided in its new home on the gravel next to the hedge (which is in sore need of attention). The aforementioned then had to be put back. My Machine Mart sack truck has been a godsend!
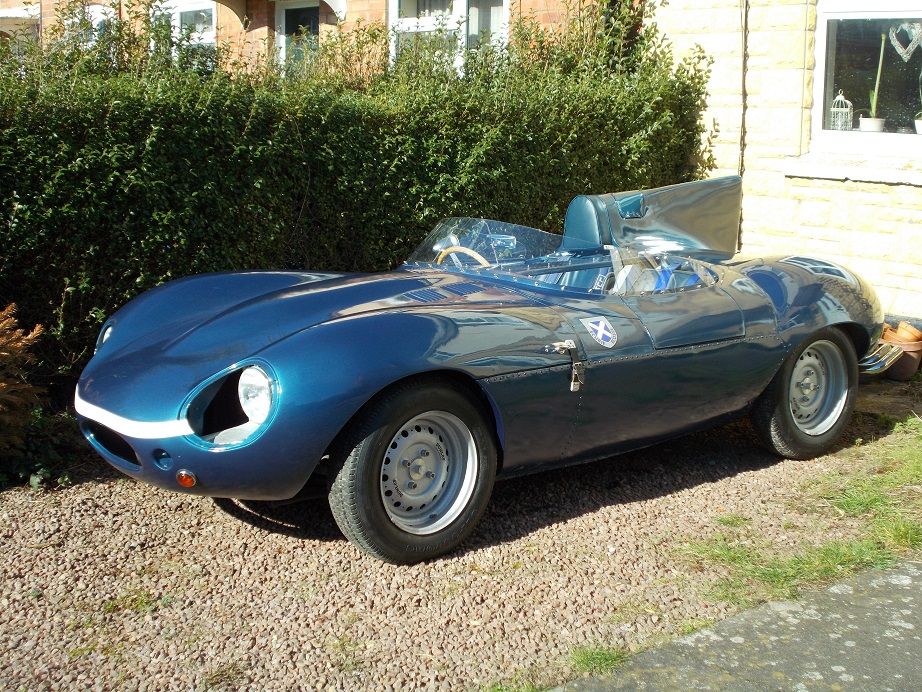
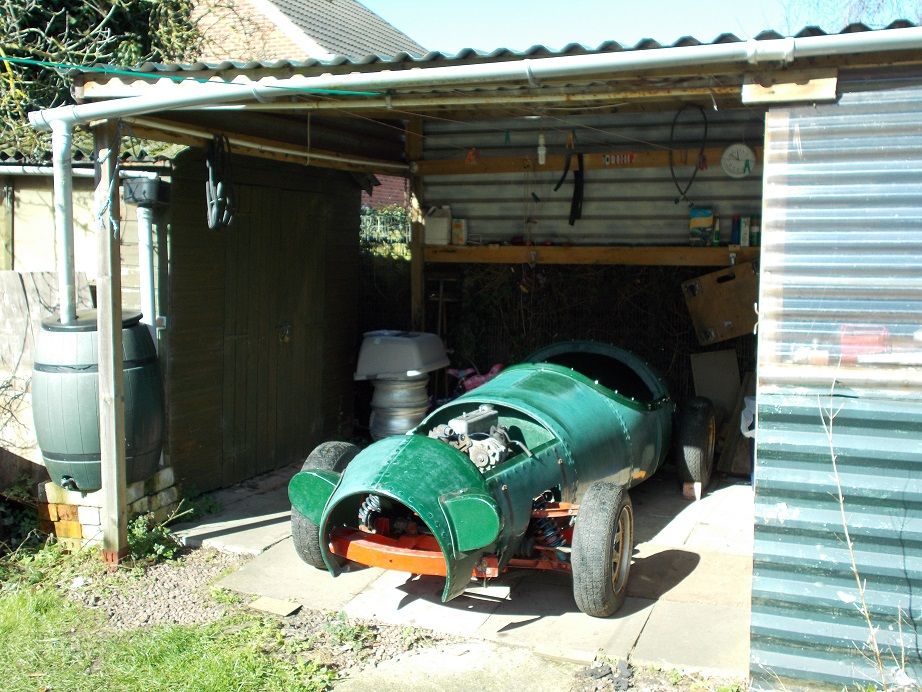
Next job was to move the Monaco. Space is tight so the manoeuvre involved a seven point turn, not easy without a steering column, but after much huffing and puffing it was sitting happily in the sunny cave.

In the continued absence of help, I turned my attention to fettling the L692 stop/tail lights which had come in the post the day before. The lenses are a fabulous deep cherry red which, when removed, revealed pristine interiors. I'm well pleased with them although separate reflectors will be needed. The nuts on the mounting studs were rusted solid so I set to work with wire brush, WD40 and judicious use of the blow lamp, protecting the backing rubbers with a wet cardboard shield. They eventually yielded without damage. My M10 120mm A2 bolts for the centre outrigger mountings had also arrived so I assembled them with my angled sleeves ready for the distant day when the body gets attached.

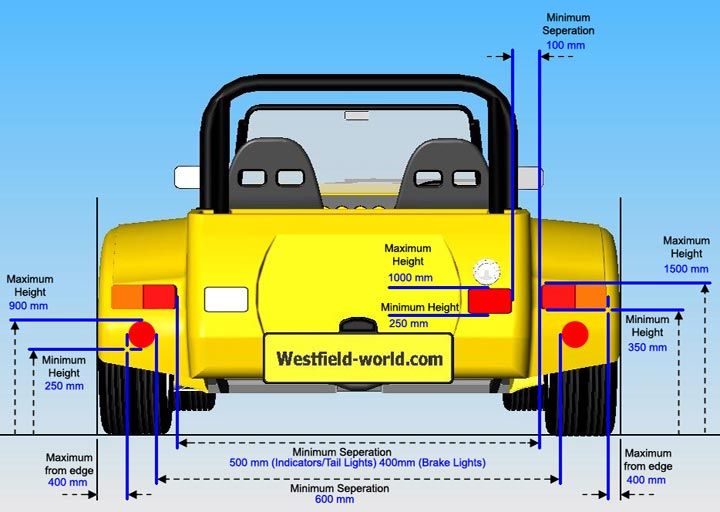
I pushed her forward a bit so I could sit behind in the sun and, with the aid of a plan I'd ripped from a Westfield site, tried to work out legal positions for them. I quickly realised that it wasn't possible to mount them on the body within the law. The maximum permitted distance between the edge of the vehicle and the light is 400mm but this wasn't possible on the off side, although it was on the near: the body really is asymmetrical! They'll have to go on the mudguards, eventually.
The grass was begging to be cut so I called it a day on the project as, on his return, my son was full of cold and disappeared to convalesce so body shifting wasn't an option

.
Regards, Mick
Found My Colour
I went out to work on the Monaco, and it's raining! What a difference a day makes
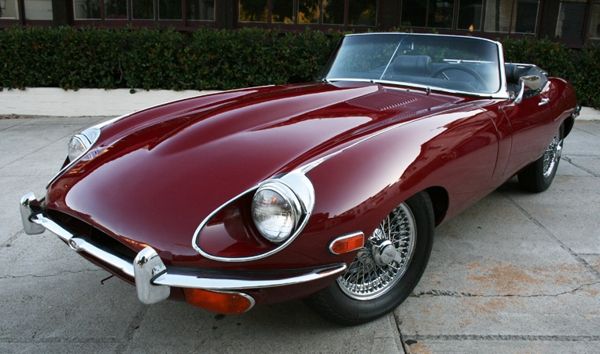
. I decided to search the web for a colour and paint code as I'll be going to the Spring Autojumble at Beaulieu where my suppliers exhibit and sell. They need plenty of notice to mix it so now's a good time.
After going down many blind alleys I finally found what I had in my mind's eye: Jaguar Regency Red
.
Regards, Mick
One Man Band
Yesterday I decided to address the problem of having to wait for help each time I needed to remove the body. Now that the Monaco was in the cave I resorted to the method I used when the same difficulty arose building the A352.
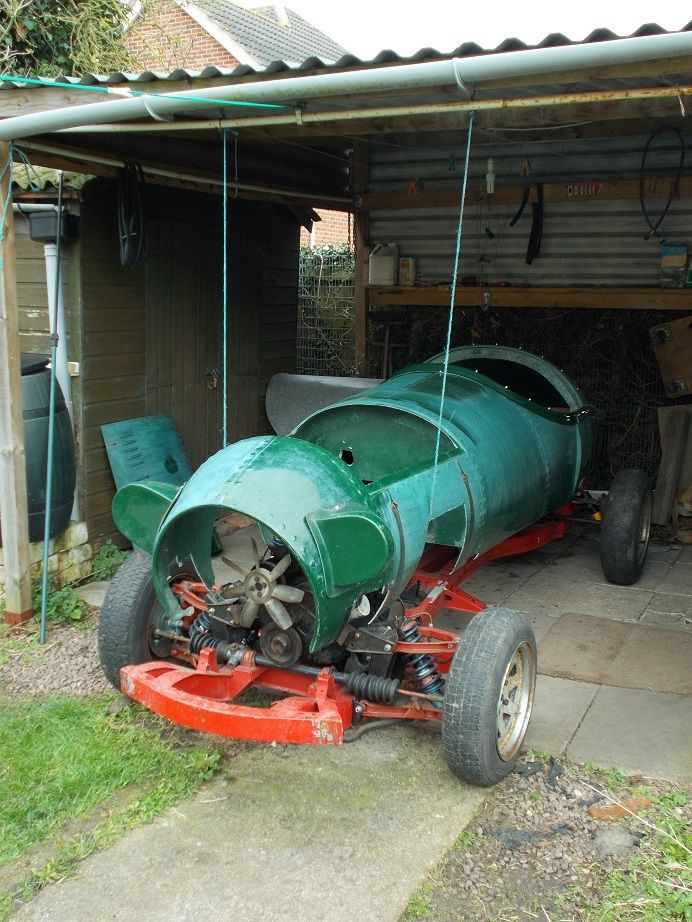
I'd screwed stout hooks from Wilko's gardening aisle into the cave's 4" x 2" roof timbers. I'd cut suitable lengths of nylon rope with looped ends to support it and hung it high enough to roll out the underpinnings. This was easy with the A352 as the front end was separate and I could stand inside the tub, not an option with the Monaco.
Anyway, I propped up the front end, made the bespoke rope support, looped it over the hooks, propped the rear and rolled out the chassis. It only just scraped by so a little shortening will be needed, but at least it worked
.

I decided to drill the holes for the centre outrigger attachment bolts while I had access. I'd already carefully marked their positions on pieces of white self-adhesive label stuck under the floor so, after putting a safety plank supported by two garden chairs underneath I drilled 5mm pilot holes then opened them out to 11mm from both sides to prevent splintering. On replacing the body I trial fitted the M10 bolts which aligned perfectly. Result! Previous owners have drilled a variety of other holes in the floor to the extent that I may name her 'Emmental'. The wood sandwiched in the floor is quite wet so a summer in the south facing cave won't do any harm!
I socialise on Friday afternoons so that was it for the day.
I've been going every year since '94 with an old kit car friend who built one of the first Westfield IIs in the early 80s. We camp in the New Forest, making a weekend of it, so practicalities demand we use his Mercedes, especially since the likelihood of our buying bulky automotive items is high!
Regards, Mick


