Thanks Robin, I had not heard that before. Maybe it's more significant on a very light vehicle like the Pembleton.
Hi Geoff,
I've not heard of any Sabres with a chevy block but I think I have seen one advertised with a Rover V8 engine. I don't think the weight would be an issue as the Sabre chassis is extremely strong and the whole car is quite substantial.
You could try contacting someone at the Royale Owners Club, they are a very helpful bunch
 http://www.royaleownersclub.org.uk/committee.asp
Ken Baker is their memsec and very knowledgeable.
Keep us posted if you decide to buy one.
...peter
Well week 11 update seems to be all about new parts.
It's a bit of a long story but when I bought the Sabre the guy selling it said he had a box of new parts that would be included. The problem was that when it came to delivering the car he couldn't remember where the box of stuff was. It's taken a long time but finally I picked up the box of bits yesterday.
I took the big box home and it was like a Christmas tombola as I gradually pulled out each small package to discover what I had. When the box was empty I had nearly covered our kitchen table with lights, trim and all kinds of fittings and spare parts. It will probably save me a few hundred pounds in the rebuild.
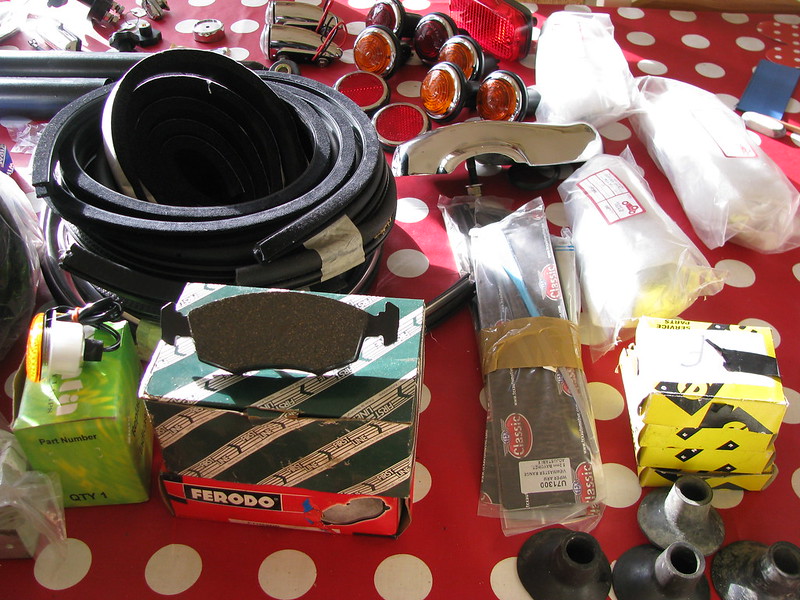 Santas grotto?
 by
marlinpeter, on Flickr
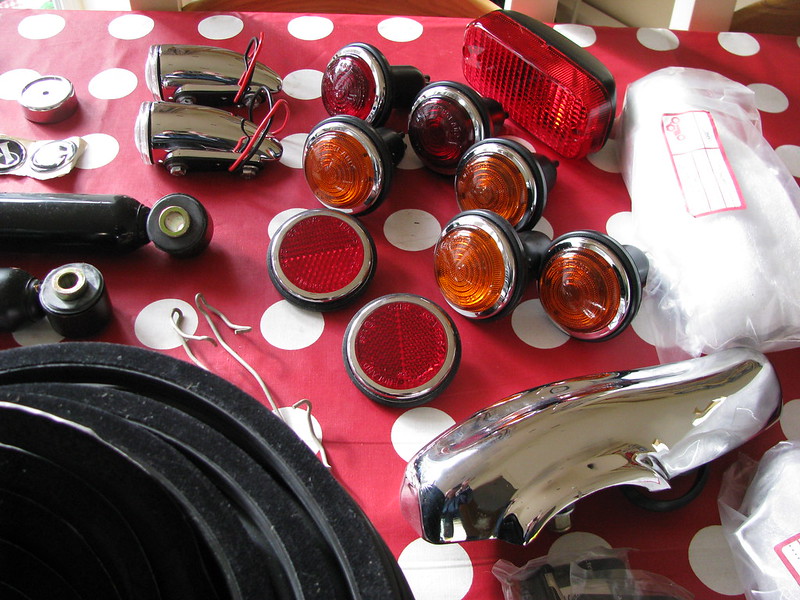 Santas grotto
 by
marlinpeter, on Flickr
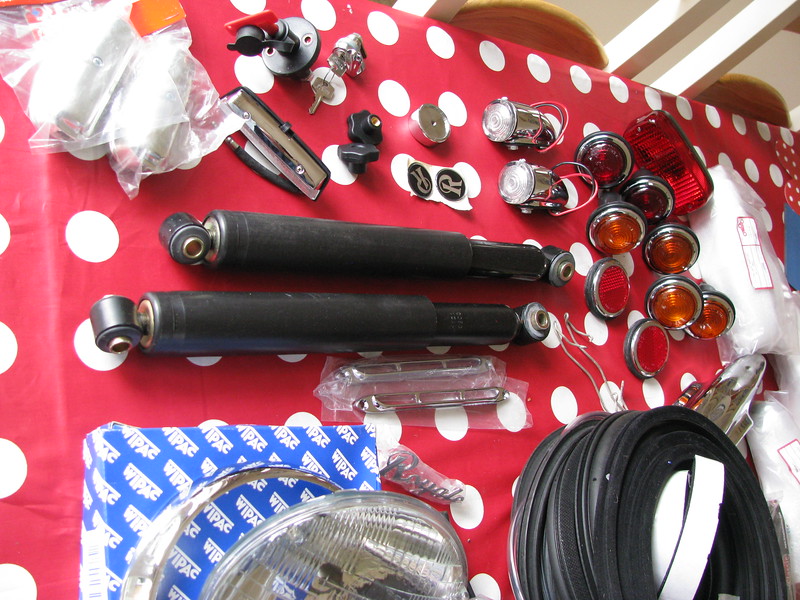 Santas grotto?
 by
marlinpeter, on Flickr
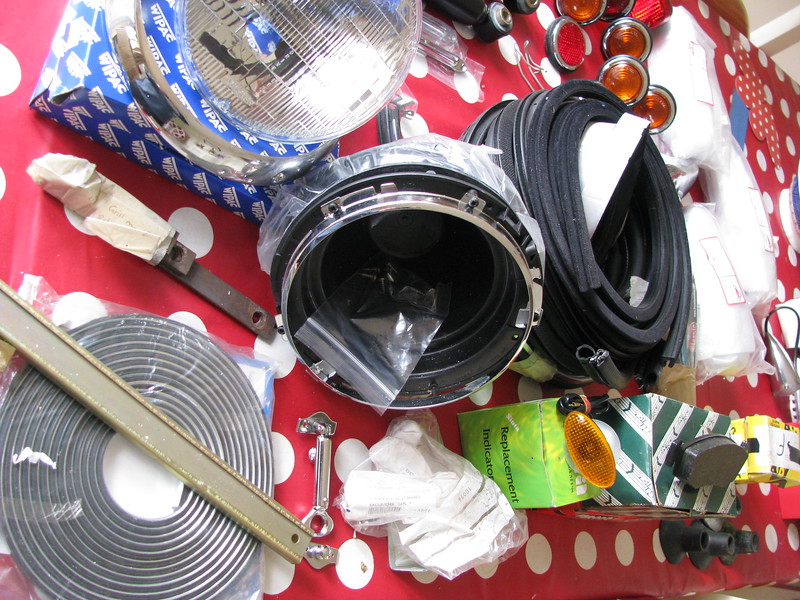 Santas grotto?
 by
marlinpeter, on Flickr
He also had a new'ish petrol tank which will replace the bent one on the car.
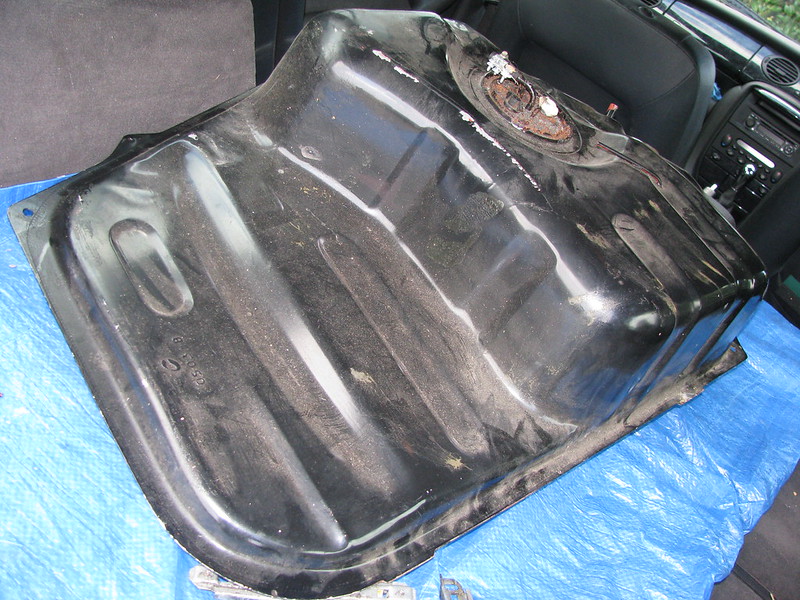 Replacement fuel tank
 by
marlinpeter, on Flickr
I also picked up on ebay a reconditioned power steering rack for only £24!!
I've now got to find some pipes and hoses which will probably cost more than the rack!
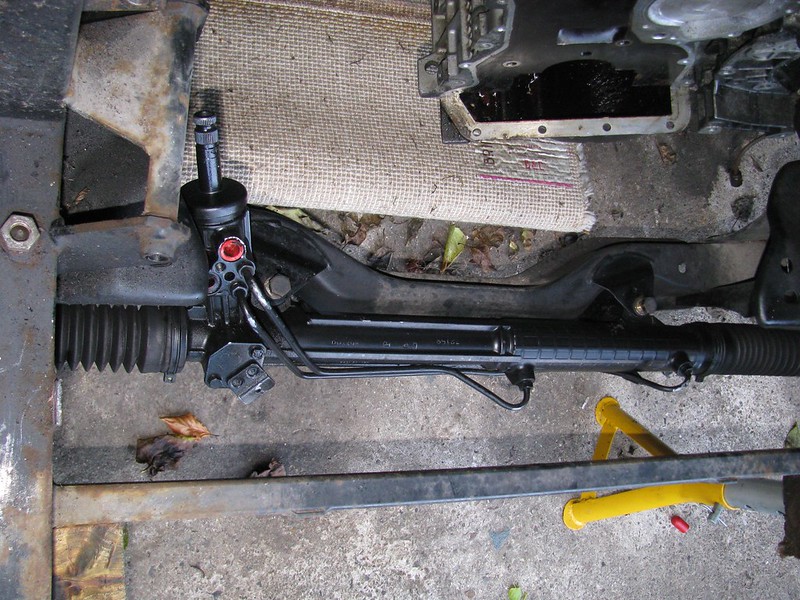 Power Steering rack
 by
marlinpeter, on Flickr
...and finally I've got some extra space with another rented lock-up....
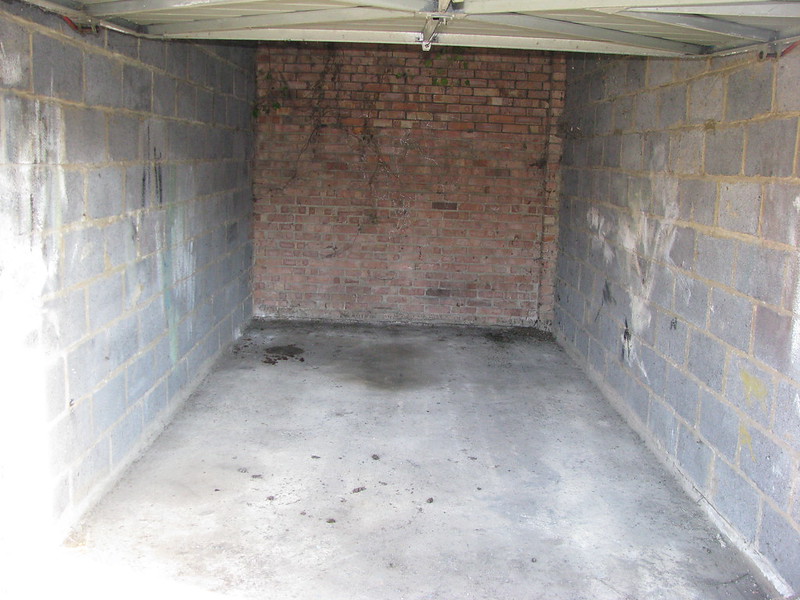 Space - the final frontier?
 by
marlinpeter, on Flickr
So now I should be able move around the chassis in the other lock-up!
...peter
P.S. If you click on the pictures, I have annotated the 'table' pictures with notes in Flickr
Week 12 - mini update.....
- Front suspension coil-overs have been dismantled for inspection.
- Front hub bearings fitted and hubs re-assembled (Metro ball joint socket and a 32mm deep socket are ideal sizes for re-inserting the Sierra bearings)
- Front cross member cleaned and ready for painting
- Chassis stripped of gearbox, propshaft and old pipes ready for preparation
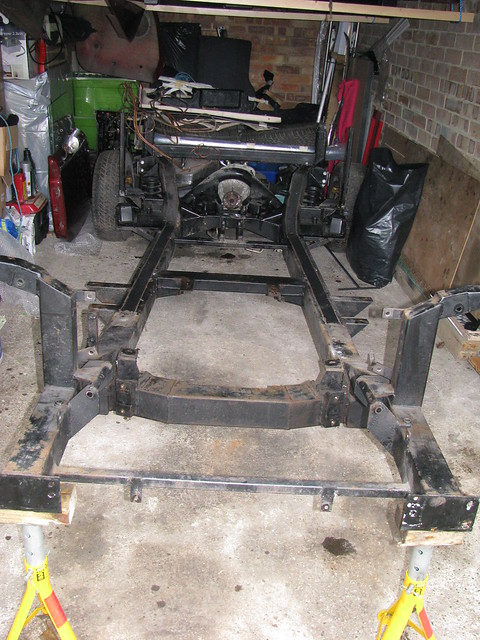 Chassis - front
 by
marlinpeter, on Flickr
I'm thinking of getting some new dampers.
Anyone got any feedback on the following company?
http://www.protechshocks.co.uk/
...peter
It weighs a 'ton'.
I thought the Marlin chassis was substantial until I got this one!!
Thanks Robin. An online search hasn't thrown up any negative feedback so far. A little bit more expensive than standard GAZ dampers but cheaper than AVO and they look nicer :-)
Week 13!
Not a lot to see this week as I've been cleaning, sanding, de-rusting and painting the front end of the chassis. (The plan is to do the front end, rebuild the front suspension and then turn the car round and do the back end). It's not been the best of weather for painting and it gets quite dark in my garage. I'm using hammerite satin as it's very tolerant to multiple coats and I can put some more on next summer when it's warmer and drier. The rust is only superficial and the chassis is like a battleship.
I raised the front of the chassis up on a workmate to make it easier to work on.
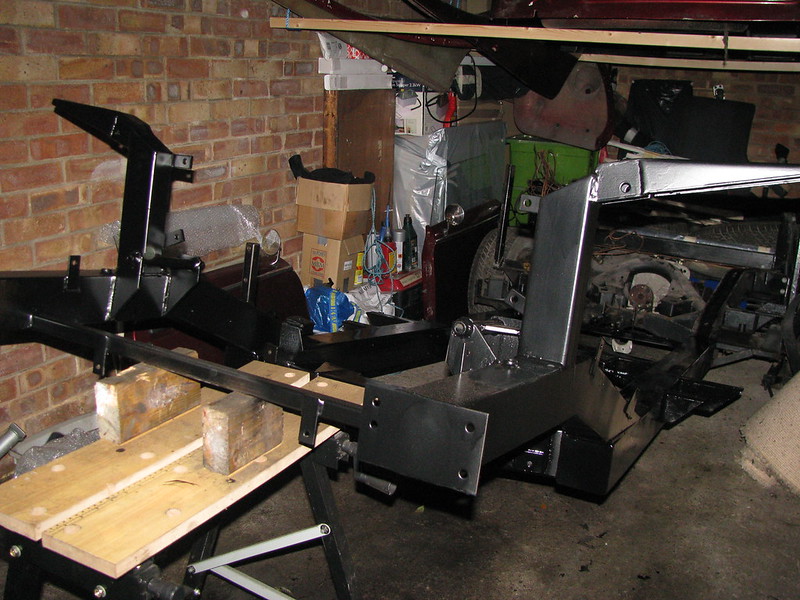 Chassis prep - front
 by
marlinpeter, on Flickr
In other news, I bought a complete set of Royale Owners club magazines from 1995 to 2009 so I'm spending hours reading all the building tips from the past!
Hopefully, I'l have some more interesting pictures next week....
...peter
Week 14 has been exciting as I have been able to finally start bolting things back together and truly start the rebuild.
Despite the appalling weather I managed to get a few coats of paint on the chassis. It's come up looking like a new chassis so the rebuild of the front suspension can begin.
 Chassis front end painted
 by
marlinpeter, on Flickr
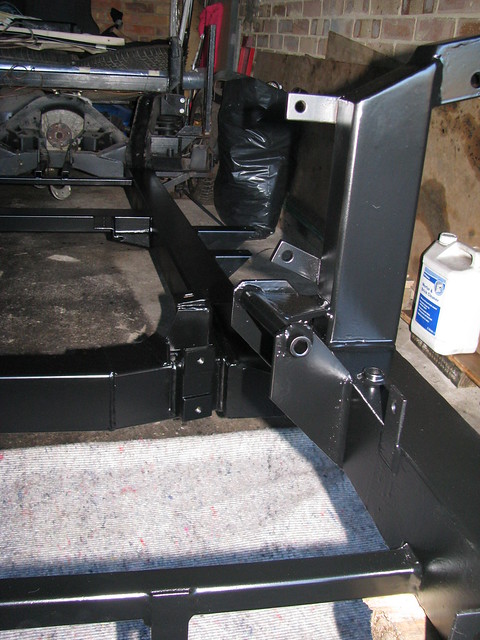 Painted chassis
 by
marlinpeter, on Flickr
The front suspension utilises the Sierra front cross member. Here it is after cleaning and repainting.
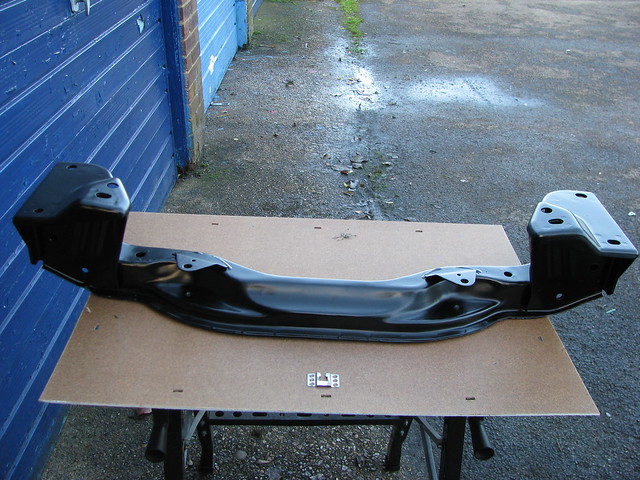 Sierra front cross member
 by
marlinpeter, on Flickr
So it didn't take me long to offer it up and bolt it in position.
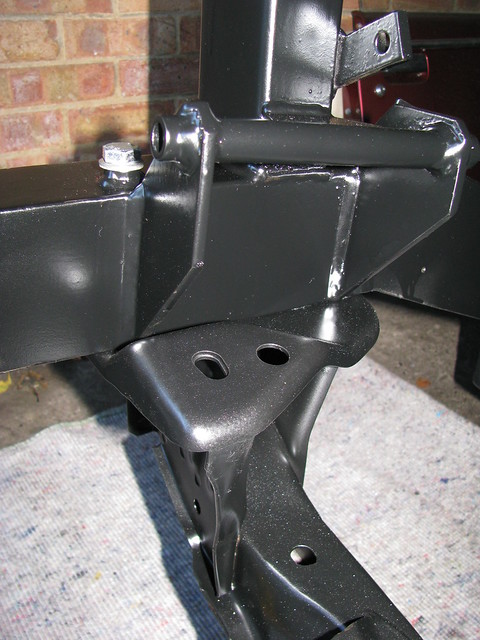 Bolted cross member
 by
marlinpeter, on Flickr
The upper wishbone bushes are Ford Cortina Mark 3. (this is a real vintage car!!). They have an outer metal casing that has to be pressed into the wishbone. I didn't fancy swapping these casin but found out that Flo-flex do a poly bush that sits inside the old metal casing. I was worried that the old rubber bushes might be 'vulcanised' to the casing but they weren't and slid straight out, leaving a nice clean hole for the poly bush.
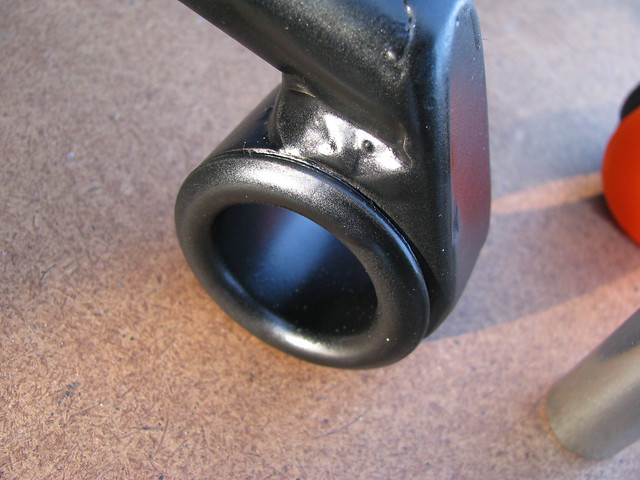 Front upper wishbone bushes
 by
marlinpeter, on Flickr
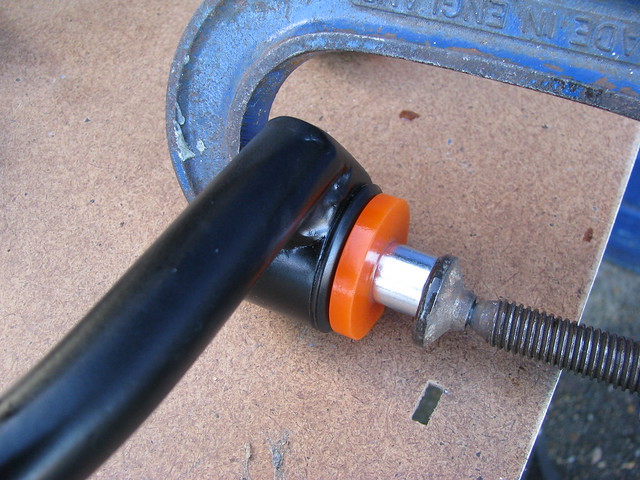 Front upper wishbone bushes
 by
marlinpeter, on Flickr
The wishbones are about 6mm wider than the chassis mounting points. The original builder had done the wishbones up tight to close this gap putting them under strain. I will put washers in here to give me some caster adjustment, just like the Sportster.
 Front upper wishbone bushes
 by
marlinpeter, on Flickr
 Front suspension - trial fitting
 by
marlinpeter, on Flickr
As previously mentioned, I want to fit a power steering rack. I've now got a column extension piece off a Mark 2 Granada which is the right length but just fouls on the chassis.
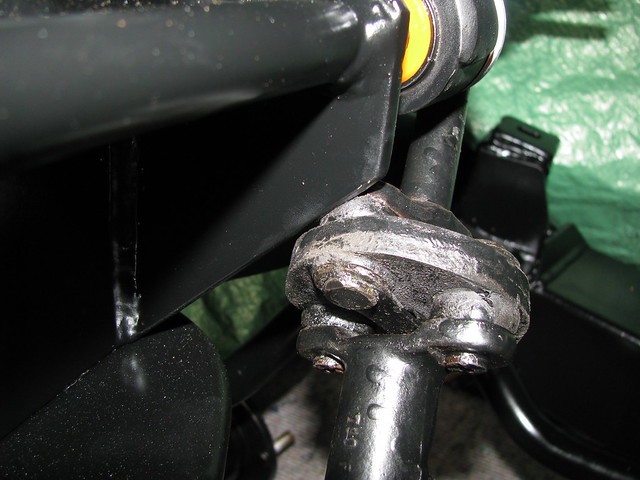 Power steering issues
 by
marlinpeter, on Flickr
It also just touches the upper wishbone bush which is more of a consequence of using the poly bushes.
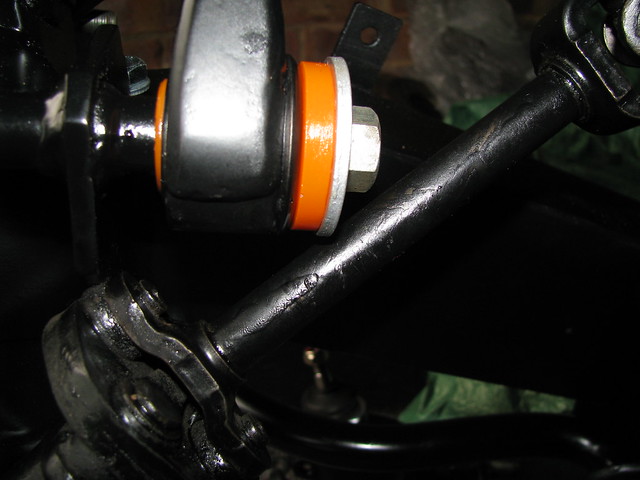 Power steering issues
 by
marlinpeter, on Flickr
A small modification to improve the clearance from the suspension support to the power steering rack extension.
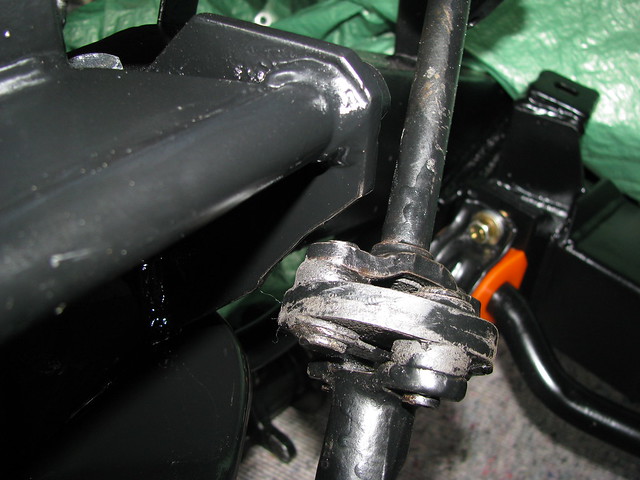 Steeering extension clearance
 by
marlinpeter, on Flickr
Next weeks plan is to complete re-asembling the front suspension and turn the car round so I can start work on the rear suspension.
......peter
Hi Roger,
glad you are enjoying my updates!
It will need IVA because although the car was started in 1994 it was never finished by the original builder so has never been registered on the road.
But I knew this when I bought it so was expecting to have to go for IVA. It should be interesting, (and the extra cost is a PITA) but there shouldn't be anything insurmountable with a little thought and planning.
....peter
Week 15 - great progress this week (mainly because the weather's been too crap to do anything else!!)
I've re-assembled the front suspension sufficiently to be able to wheel the chassis out of the garage and turn it around to work on the rear end. I've still got a few things to do like fit new shocks, lock nuts and swap that track rod end which is on the wrong side in this photo. The power steering rack is also a tad too long so I need to shorten it or fit the track rods from the manual rack which are 2cm shorter than these. I've ordered a Granada Track Control Arm which are rumoured to be a bit longer than the Sierra TCA's to see what that does to the suspension geometry.
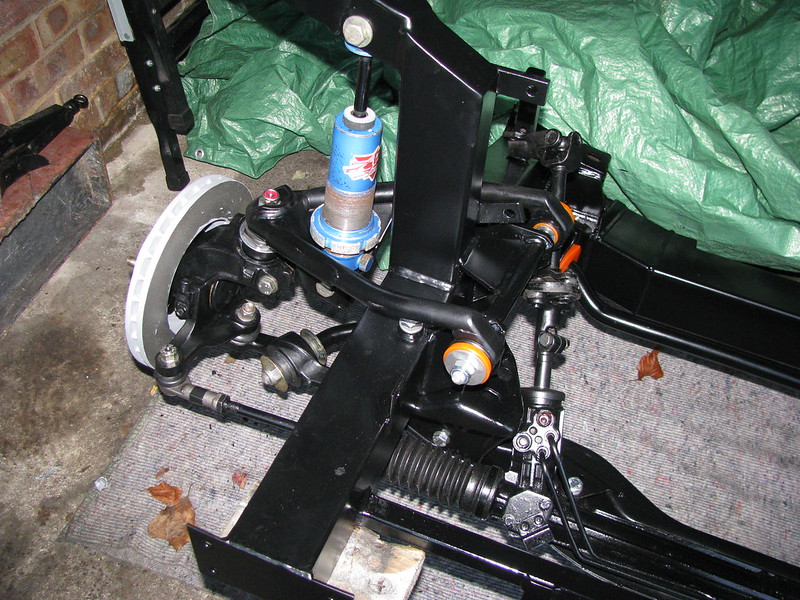 Front suspension - rebuilt
 by
marlinpeter, on Flickr
So I've now turned the chassis round so that I can refurb the back end suspension
 Back end before dissmantling
 by
marlinpeter, on Flickr
I then started dismantling the rear suspension and transmission....
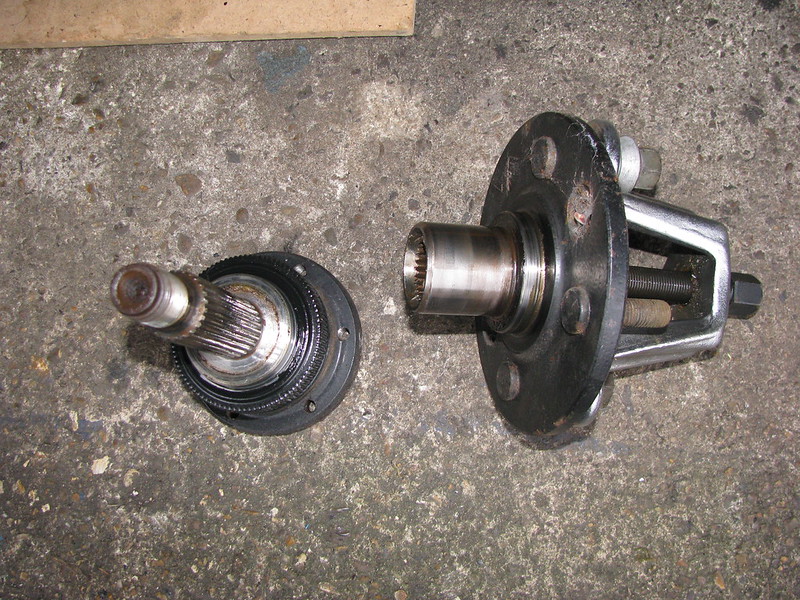 Rear hubs dissmantled
 by
marlinpeter, on Flickr
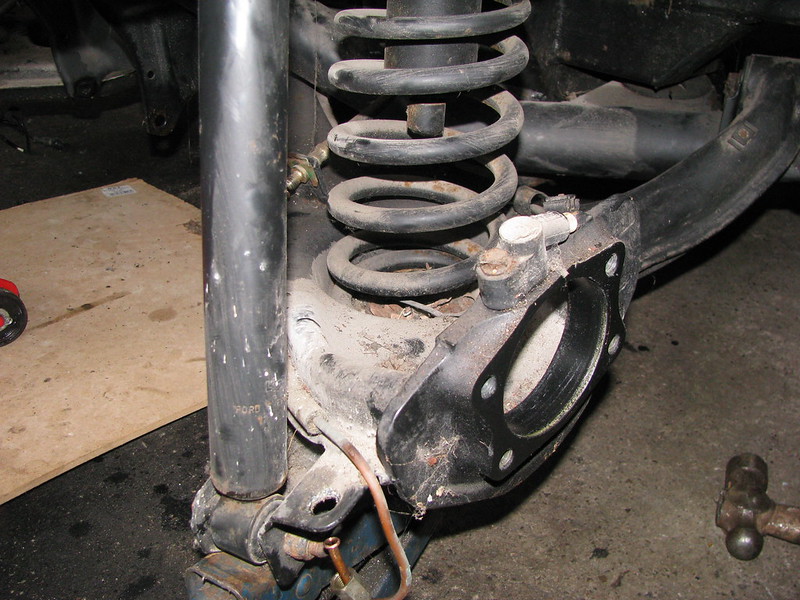 Hub removed
 by
marlinpeter, on Flickr
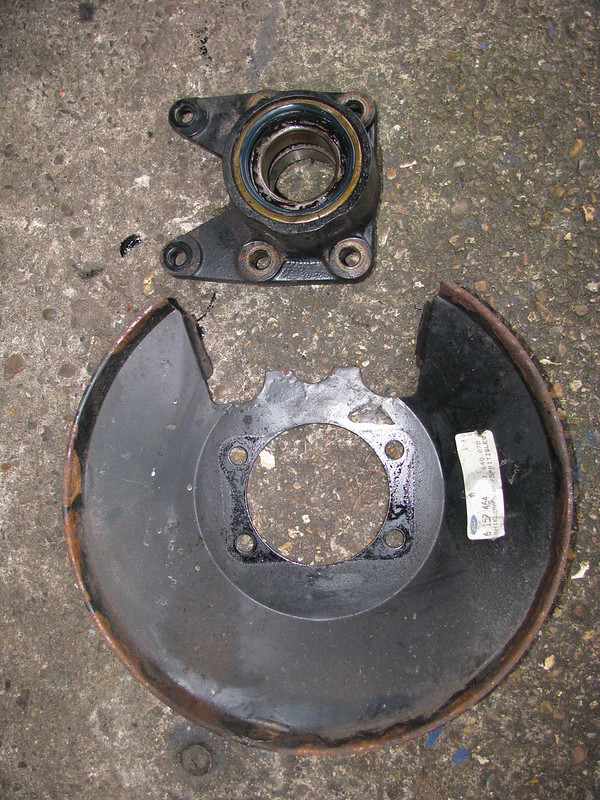 Rear hub and back plate
 by
marlinpeter, on Flickr
 Progress so far
 by
marlinpeter, on Flickr
I've also been having fun taking apart the drive shaft CV joints...
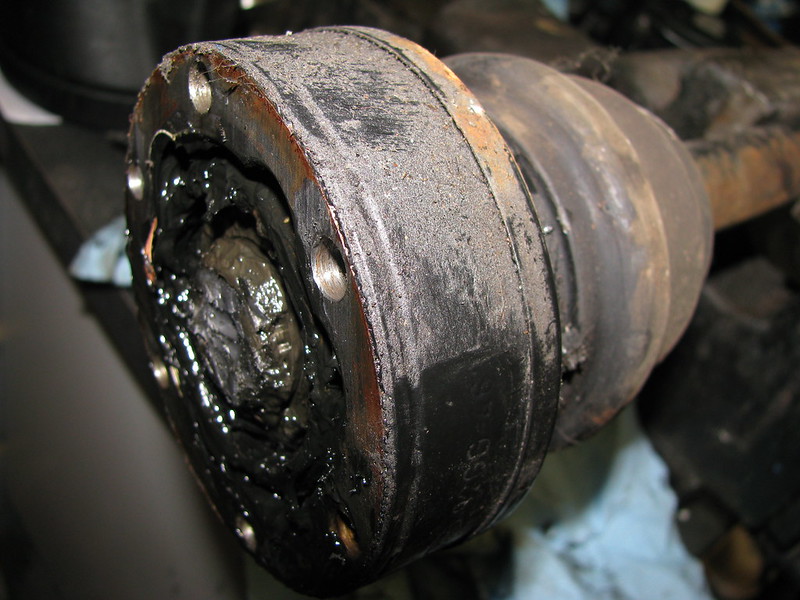 Drive shaft - CV joint
 by
marlinpeter, on Flickr
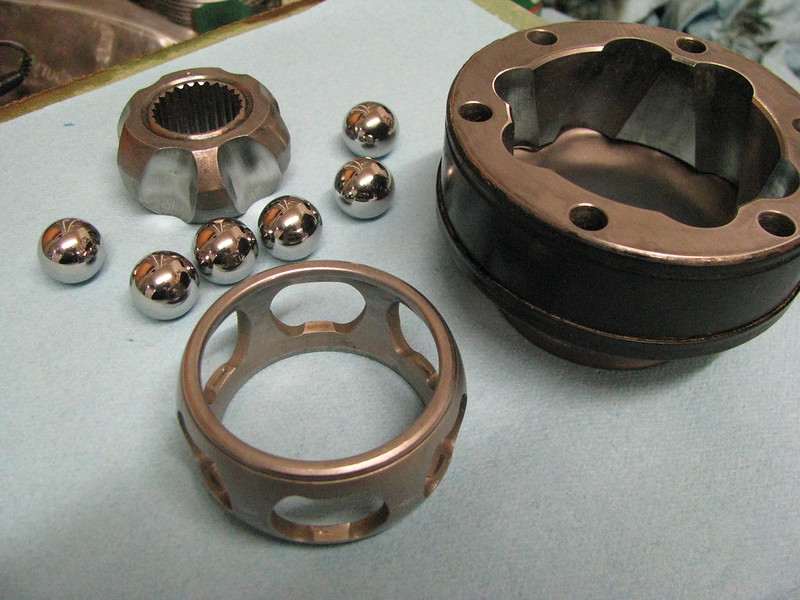 Ford CV joint
 by
marlinpeter, on Flickr
There is very liitle sign of wear in the joints so plan to re-use them with a repaint and some new boots and fresh grease
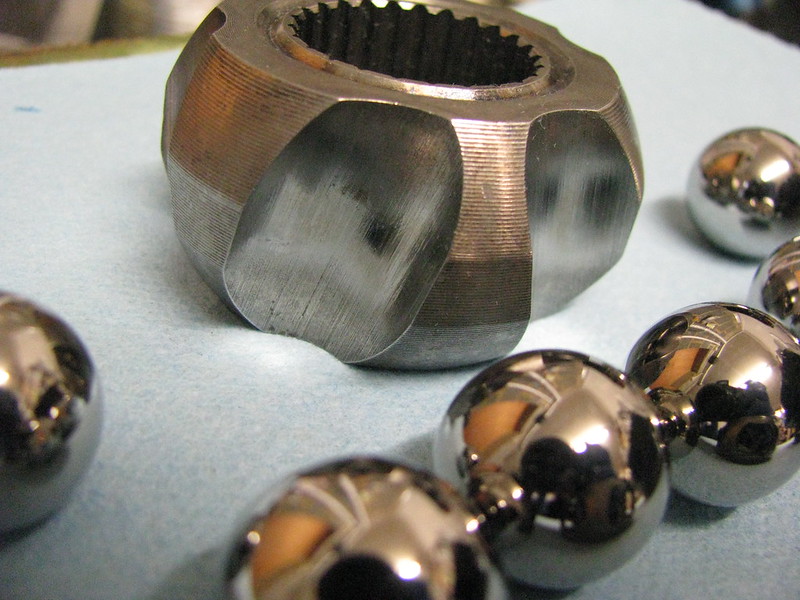 Ford CV joint
 by
marlinpeter, on Flickr
(I love that last photo of the ball bearings :smile
The joints are now being painted and I have four nice new rubber boots and CV grease.
I've now got lots of bits to refurbish and repaint and then I can get back down the lock-up to finish removing the rear suspension and painting the chassis.
Lots to do......
....peter
It's Hammerite Satin spray cans, 3 or 4 coats. You'll see the concrete floor now has a covering of black over-spray. I've got through about 11 cans so far

If I wrap up well and wear gloves (mechanics) I can do about 2 hours down at the lock up before nipping home for coffee, lunch, warm up, etc

Cor, working all day in unheated workshop, that must be tough!
I don't have any mains electricity down at the lock-up.
I do have a small generator but a died a few years back and I've not spent any time fixing it as the noise used to drive me mad.
You're probably right but the spray cans are just so convenient.
...peter
Another fine example!!
The interior on this one does look very nice and the high level brake light looks like it's made for the car.
I've added the pictures to my scrap book of ideas
Hi John and Nick,
yes, I've seen this car advertised on ebay and the ROC website.
In fact, it is one of three cars I considered when buying my car. I'm not sure I like the 'jaguar' like modifications, but others no doubt will like the style. It wasn't painted when I was looking into it and it will still need IVA and registration as far as I know. As far as I can remember, the current owner is not the original builder and I don't know how long it has been 'in-build'. I think the risk of buying a 'nearly finished' kitcar is you don't always know the full history and what has been done or not done during refurbishment. Also, rubber seals in brake cylinders and shocks, etc can deteriorate without any use and dry up or go hard, which is why I'm treating mine as a complete build albeit with the 'donor' parts already in place.
...peter
OK, enough about other cars, here's my week 16 build update.....
I nipped down to the lock-up this morning and removed the final few pieces of the rear suspension. An hour later and I was left with this pile of bits...
 Rear suspension
 by
marlinpeter, on Flickr
They're loaded up in the back of my car at the moment waiting to be cleaned down and repainted.
This is a big milestone as, apart from a few measly brake lines, that completes the dismantling of the car; so everything now on is building!!
Which leaves the rest of the chassis free to be de-rusted and repainted.
 Rear chassis
 by
marlinpeter, on Flickr
I've cleaned up the tag on the diff final drive unit.....
 Diff. tag
 by
marlinpeter, on Flickr
This tells me that I have a non-LSD 7.5" diff built on 28th April 1992 with a 3.91 ratio. This is a little on the high side but might be OK with 15" wheels and some high profile tyres that suit this style of car.
.......peter
Hi Alan,
welcome to the world of kitcars!!
How to 'clean up' donor parts, well that's a long subject worthy of it's own thread but I'll briefly describe what I do....
If it's really oily and greasy the most effective and fast cleaner is just neat petrol. Not very environmentally friendly or safe but it is the most effective. (I think garages use a paraffin based parts cleaner.)
If the item is just dirty and not too oily I use Bilt Hamber 'Surfex HD' which works very well.
For de-rusting I use Hammerite 'Rust remover gel' (thanks Robin!) but if it's small enough to immerse the part I use Bilt Hamber 'Deox-C'. I just mix up a bucket full and pop them in overnight and they come out the next day with no rust. You must clean them with Surfex HD first or it doesn't work so well. I call it my magic potion!!
On my chassis it was just a case of lots of elbow grease. Basically a variety of wire brushes in an electric drill and lots of emery paper on a rubber sanding block.
For degreasing before painting and for cleaning small parts like bearings, engine parts, CV joints, etc, I use Brake Cleaner.
There are lots of exotic anti-corrosion paint coverings available but most are very expensive. For this build I'm just sticking to black Hammerite Satin. It will probably last longer than me!!
Finally, if you are a complete novice then I can recommend you start buying a couple of the kitcar mags as they have lots of articles and reviews of the various preparation methods, etc.
Good luck.....
....peter
Week 17 update......
As the festive preparations start, car building has slowed down but here's a small update and hopefully useful for any other Sierra based kitcar builders.
The Sierra suspension rear cross-member, or beam, is mounted to the chassis with too very large rubber bushes that are nearly 4" in diameter.
You can see them here at the top of the picture...
Rear suspension by
marlinpeter, on Flickr
The Haynes manual doesn't cover how to replace these bushes and a trawl of internet forums suggested that these are notoriously difficult to remove with suggestions ranging from drilling them out to burning them out with oxy acetylene torches!!
Now normally I remove rubber bushes with a large socket, a length of threaded studding and some nuts and washers. Obviously I don't have a 4" socket but I did have a length of 4" ventilation pipe left over which is just the right size.
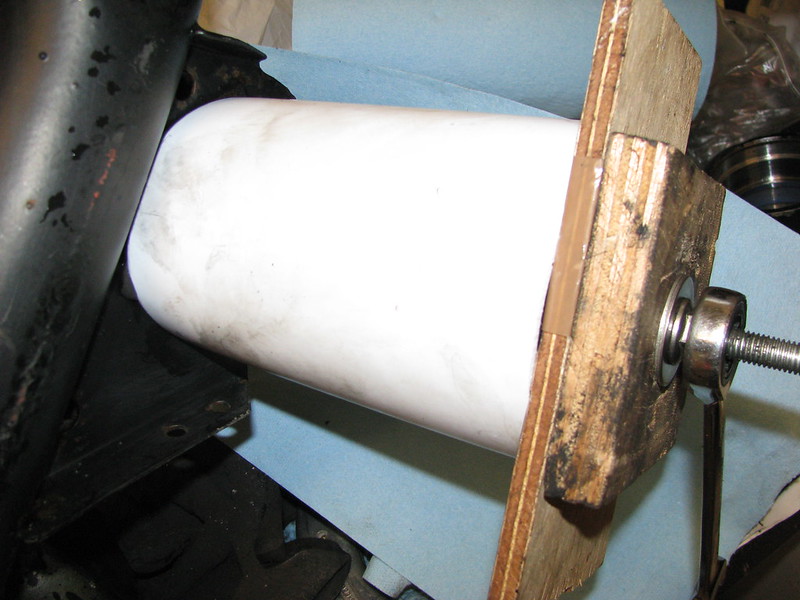 Cross-member bush removal
 by
marlinpeter, on Flickr
An old crush tube and a nut on the other side.....
 Cross-member bush removal
 by
marlinpeter, on Flickr
Just wind up the nuts and the bush just popped out without any effort.
Note: new Internet folklore = these bushes are really easy to remove!!
Here's a picture of one of the old bushes and a new poly bush version.
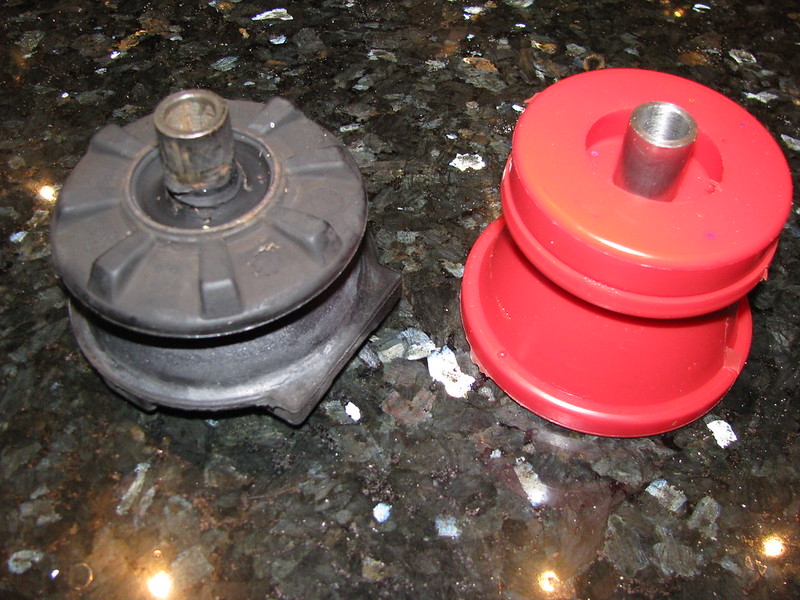 Rear Crossmember bushes
 by
marlinpeter, on Flickr
So as this is my last update before the festivities begin, I'd like to wish everyone a Happy Christmas and and a productive kitcar building and driving in 2013!
 Christmas 2012
 by
marlinpeter, on Flickr
The Christmas card is courtesy of the Royale Owners Club - nice one!
.....peter
Thanks guys, have a nice Christmas!
Week 18 update.........
I managed a couple of hours down at the lock up today between showers and while Pauline was off to the 'sales'

Before Christmas I managed to clean up and repaint the rear beam.
Replacing the rear beam bushes with the new poly bushes was a bit more of a challenge than getting the old rubber ones out, but this arrangement finally forced the bush into place. (The nuts you can see are just acting as spacers to allow the top edge of the bush to pop into place.)
 Rear beam - bush replacement
 by
marlinpeter, on Flickr
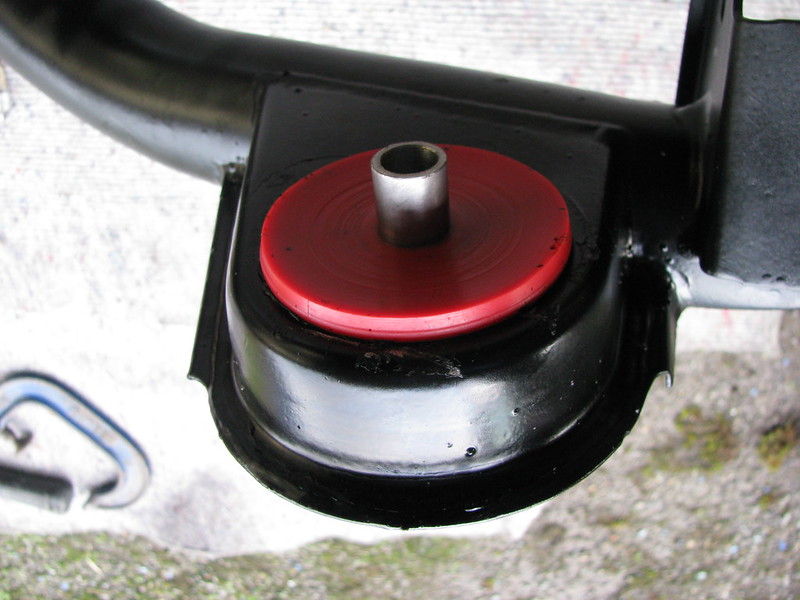 Rear beam - bush replacement
 by
marlinpeter, on Flickr
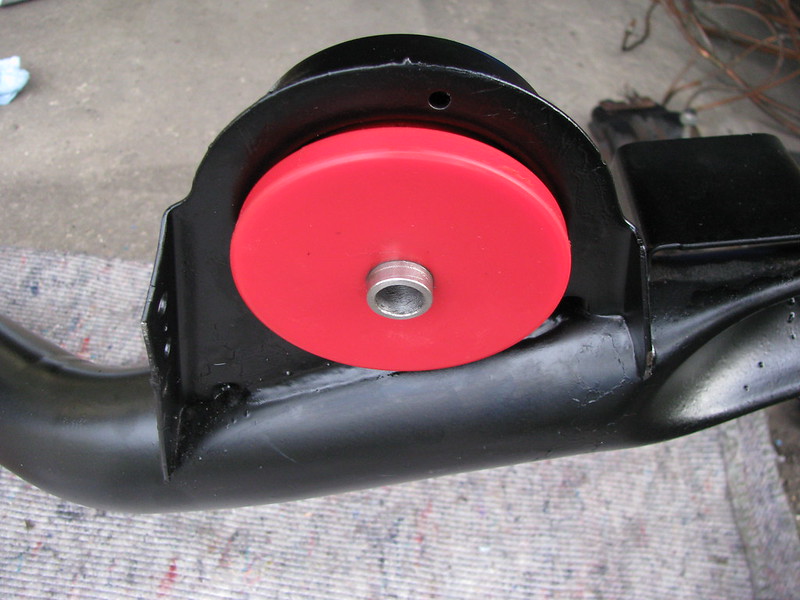 Rear beam - bush replacement
 by
marlinpeter, on Flickr
I've started to paint the rear end of the chassis. This is the second coat and is still wet.
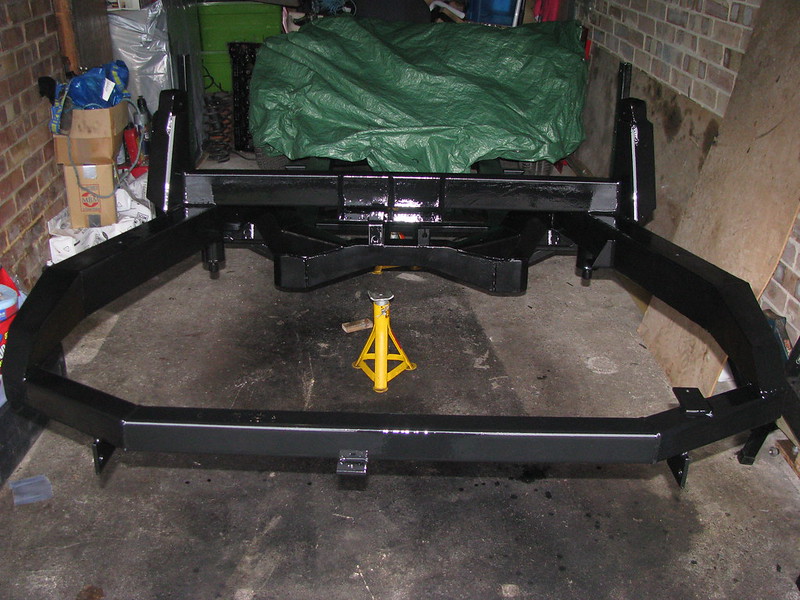 Chassis - rear end repainting
 by
marlinpeter, on Flickr
So that's the last update this year.....

.....peter