Slow Progress
I don't seem to have got a lot done this last week, although I've spent quite a bit of time in the cave. The depressing weather doesn't help, neither does my being full of cold. The dash is now in place and the front loom installed. Everything bar the lights and indicators is connected.
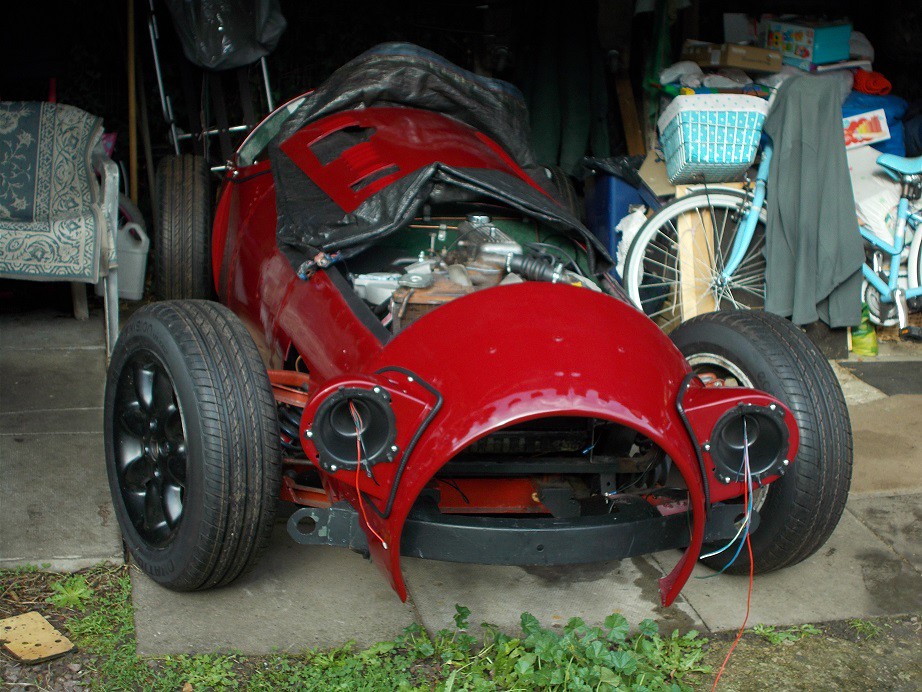
Today's forecast is once again for rain so I'll concentrate on refitting the scuttle brace and steering column. I offered up the former yesterday to find that the car seems to have changed shape as the brace doesn't fit as it did on fabrication. Weird!
I also had a close look at the so say 'refurbished' callipers yesterday. The nipples are seized and the pad pins have their ends painted over. The pads are new. I don't hold out much hope for them so would one of you knowledgeable chaps tell me what their type number is please as new ones will likely be required?

Regards, Mick
There's more than one type of calliper for small chassis Triumphs, and I'm unsure of either the differences or how to identify them.
Regards, Mick
Thanks Paul. Not got down the cave much lately due to being full of cold and the depressingly interminable rain. Yesterday was the first in a good while when I felt half way decent and there was good weather. Typically, it was the day I'd arranged to go to the NEC for the bike show

. My dream of having her on the road for an Xmas day blat is starting to evaporate

.
Regards, Mick
A New Hope (with apologies to Star Wars afficionados).
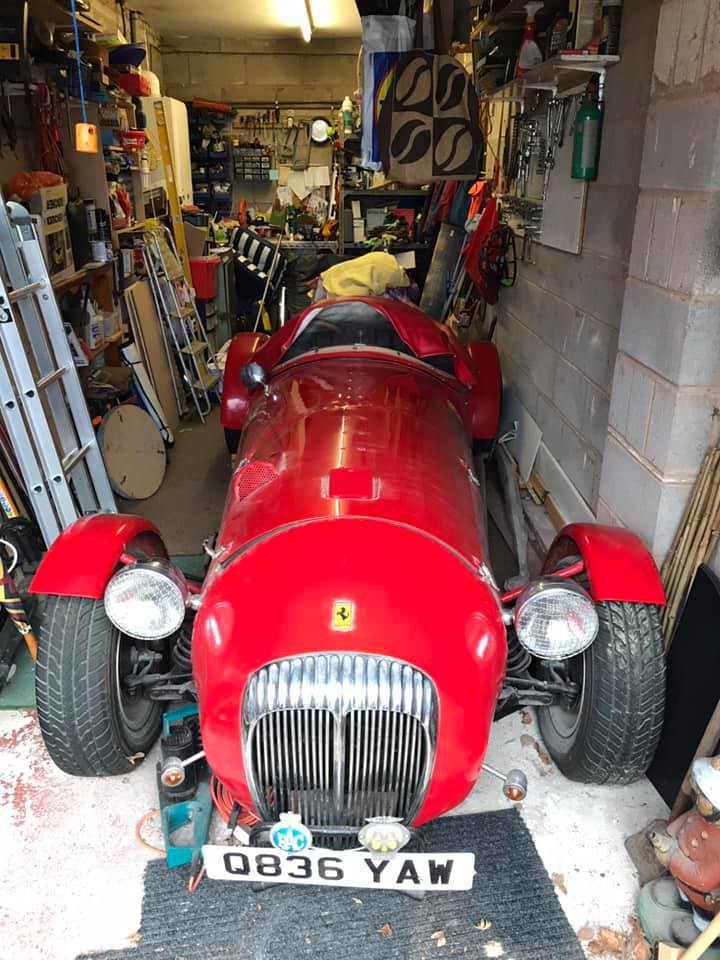
This has been the state of play more or less for the last four weeks. I discovered in that time that I have the wrong upper steering shaft, I think I may have given the correct one to the guy who bought my S4 Seven project - D'Oh! Anyway, I rang 'Spitfire Steve' on Thursday to order another and he told me that on Wednesday he had delivered an engine to a guy with a red Triumph based Monaco just up the road (well, 50 odd miles scenic route) in Leominster. Result! I spoke on the 'phone to this gentleman and we agreed that I'd show him mine, if he showed me his. Next weekend's looking likely so I may post with pictures Xmas week. I'm hoping that my visit will result in a fresh burst of enthusiasm, something lacking for a good long while.
Regards, Mick
French Monacos
I've mentioned before that the French are mad for these cars. It seems there's a Prime Suspect, of whom I'm not a little jealous: There was an enquiry on my Moss Owners FB page regarding the worth of a Monaco which the poster was considering buying. Here's my new hero's reply - bear in mind that English is not his first language...
i owned 11 Monacos....no one was the same price...depends a lot of the finish, and wish engine is inside...
also, the prices aee different in UK or France, Germany...ect...because they re difficult to register...when it s not impossible...
but i can say without reach a fortune, price are going higher...but it s the same for many kit cars...
few years ago...you baught a monaco to the builder...who was an enthusiast, just selling the price of the parts, to build a new car...
now you buy a kit car to the guy who baught the kit car to the enthusiast...
My 11 Duttons, out of many thousands, seems a puny total compared with 11 Monacos out of 88. His FB name is 'Lucky ******'.
Regards, Mick
Hi Robin
Many thanks for that, I was on the verge of posing my question in the 'Small Chassis Triumphs' feed on FB.
Best Regards, Mick
...and still they come.
This appeared on Ebay yesterday. I'm sorely tempted by that unmolested body; the wheels could be passed on; but the rest?

Regards, Mick
Back in the cave. At last
Yesterday, after what I see has been a three month break, I managed a little work on the Monaco. I'd been busy in the garden for the first dry days having previously been busy making and mounting two more double swift nesting boxes.

I had to remove the earthenware house martin nest (which was a gift, but in my near quarter century here I've never seen one in this part of town) to make space. I remounted it as it contained bat droppings, so obviously a handy summer roost

.
I'd sat in the car to try out the seats and seating position late last year, and was dismayed to find that the gear stick, bent back to clear the dash, hit the steering wheel in the 3rd and 4th plane. Aaaaaaaaaargh! I first considered cutting an access hole in the side of the tunnel, a lá A352, but then hit on the idea of extending the top tunnel hole backwards.

Suitably masked and suited, I drilled two 8mm corner holes and padsawed out a square. Utilising my advanced gynaecology skills I was able to remove the lever, clamp it in the vice, and bend the top third or so to the left using a 4' length of 1" box with an old wheel nut protecting the thread. Reassembly was straightforward, and a suitable gaiter will cover the hole.
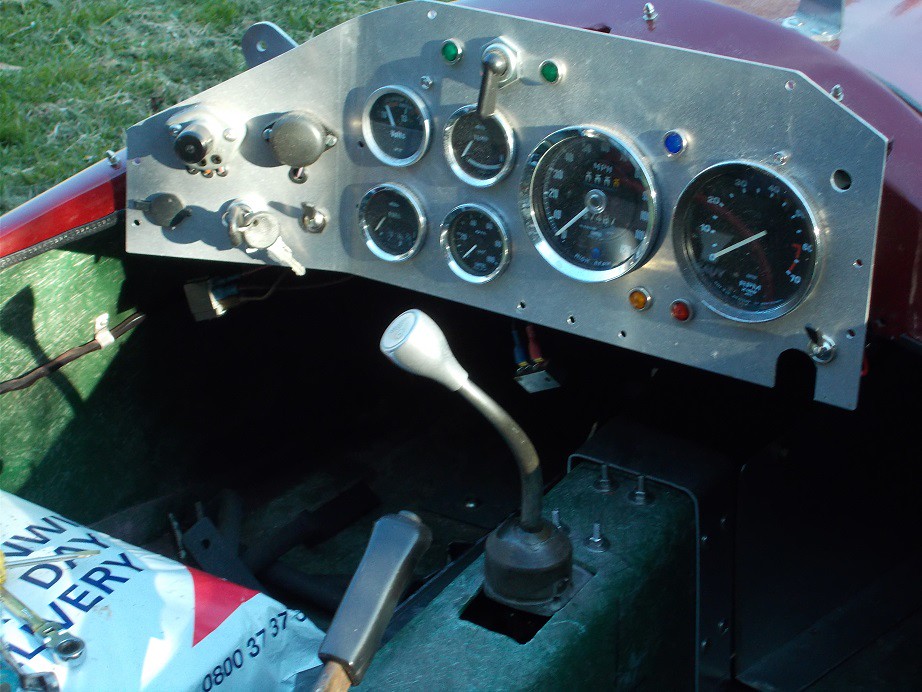
With a few more dry days forecast, and my enthusiasm rekindled, I'll crack on, with the re-scheduled kit car show my completion target date.
Regards, Mick
Good point!
On Friday I decided to finish off the wiring to the front lights. I decided that the 1mm ally indicator brackets were too flimsy so re-made them in 3mm using the old ones as templates to ensure the rivet holes in the frame could be re-used. I 4mm pop-riveted the indicator bodies to the brackets, tested the bulbs, and mounted them. I thought about bending the brackets forwards like the old ones but realised that, as they were, they'd double as side repeaters.

I then crimped the side and head light bulb holders to the loom and mounted the lights in their pods. Job done apart from the indicator wiring which I'll complete when I rivet on the escutchions I made - see below.
Yesterday I turned my attention to the wiring for the rear lights. I dug out the rear wings, their brackets, and the lights/indicators/reflectors. I realised that the rear escutchions would be much more difficult to fit with the wings in situ so decided to fit them first. These are cosmetic to hide the holes chopped by both myself and previous owners to clear differing rear suspensions. Tin snipping; bending; offering up; drilling and riveting ensued. These five minute jobs always take ages and I called it a day having finished one side.

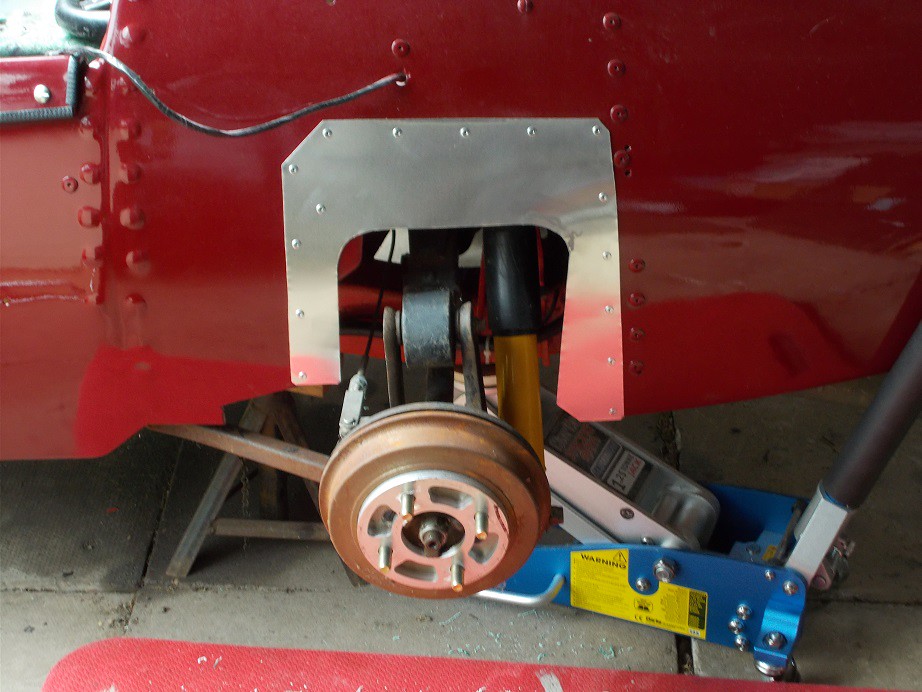
The sun's out now so down to the cave again
.
Regards, Mick
Cracking On
Having finished the escutcheon, I decided to fit the wing and lamps. The Lucas L691 stop/tail lamps are meant to be attached using the two stubby studs on the back. These are too short for the GRP. They came (second hand) without any of the fixings for the lenses either. A bit of head scratching and I hit on the idea of long M4 bolts going through the lens holes, the lamp body, the rubbers and the wing. These I've ordered on line. I cut off the stubs and carefully opened up the holes in the lenses, only the merest amount of plastic being removed. The Lucas L488 indicators I bought new, these I'll fix to the wings with hose clips, a technique I used successfully on my Lotus S2/3 styled Westie. I bolted the wing to its bracket, and fitted both front and rear braces: it's now very rigid. I popped the lights in and was very pleased with the appearance. Finishing off the wiring will wait until both sides are ready.

It was so cold in the windy cave that I went in for a warm up and a sarnie. Suitably refreshed I returned and started on the driver's side, but after fitting the escutchion I called it a day.

Regards, Mick
Yesterday's Efforts.
Taking advantage of the dry weather, I fitted the driver's side rear wing and connected the front indicator wiring, after riveting on the escutchions. These needed quite a bit of fettling to get them to sit nicely, and I treated the wires to some grommets. Excuse rubbish end-of-day photo'.

I then dug out my grille, wire brushed off the rust, and gave it a coat of Hammerite primer. If the sun comes out today I'll spray it with black stonechip and fit it. In the meantime I'll fit the front wings.
Regards, Mick
It's starting to look like a car.
After three more days beavering away in the cave, I have something approaching a car. Having fitted the newly painted grille and number plate, and finished attaching and wiring the rear lights and indicators, I decided to charge and fit the battery and test my reconstituted loom. I dug out the pedal operated stop lamp switch, the only electrical item not fitted, and wired it in. Having successfully reconstituted looms for my Marlin; A352; and Lomax I was confident that all would be well from the off. Engaging the isolator switch, the dash warning lights all came on. WTF? I turned it off and had a think, suddenly realising that the dash itself, which had everything it held earthed to it, was not itself earthed. D'Oh! I jury rigged a lead straight to the -ve battery terminal and tried again. The voltmeter swung; the sidelights worked; but the indicators; horn; and headlights didn't? More head scratching and I realised that in line fuse holders and relays work so much better with fuses in them. Bingo. It all now worked as it should.
Yesterday I set to with fitting the front wings. Once the brackets were bolted through the body I balanced the wings in place, adjusting them until they appeared symmetrical. I marked one bracket bolt hole each side from beneath with Snopake. Removing them to the bench, I drilled 3mm pilot holes from the undersides, and opened them to 6mm from the other. Bolting them on and again adjusting for symmetry, I could accurately mark the other three holes each side. Once they were fitted, I felt I was now getting on the last lap, so I mounted the aero screens, rested the DCD on its manifold, and popped in the seat back for a photo' call.

Feeling mighty pleased I called it a day. However, once night fell, I went back to the cave to play with the lights in the dark - very satisfying.
Brake and clutch hydraulics are next on the to-do list.
Regards, Mick
Cracking On
The last few days I've been addressing the 1001 small five minute (Ha Ha) jobs that are outstanding. Clutch and brake bleeding help has been unavailable as the lure of Overwatch et al seems irresistible during quarantining. I fitted the brake light switch to its bracket on the pedal box, having had to order the retaining nut. It operated correctly with no adjustment needed first time. Miracle!
I then had a play with the upright section of the seat. It was a massive fiddle to manoeuvre into position, negating my wanting to use the space behind as a handy luggage/shopping etc. area. After the usual head scratching, I decided to remake it in halves. Off with the vinyl (so many staples!) and out with the saw, job done. I then decided that the driver's side should be fixed in position and the other, access side, just sitting. I then offered up the vinyl but it's not big enough to cover the new reveals down the join. Scanning what's available on Ebay, I bought more, this time heavy duty in dark brown which I thought would complement the look better than black.
I then turned my attention to the rear view mirror mounting problem. The rear deck is much higher than the scuttle so, without a windscreen on which to mount it, some sort of pedestal would be required. After gauging the height needed using a long batten and spirit level I decided on a 3mm thick ally bracket braced with the remains of the stainless rod I'd used for mounting the one on the A352. Lots of back and forth, bending; drilling; thread cutting; trial fitting and, finally, polishing and the job was done. Having a sit in to view the back wall of the cave in my handiwork I decided to fit the 'wing' mirror. Locating it as near as possible to maximise the field of view, and fine tuning the angle with it held on by the front stud only, the job was soon done. Both these mirrors are Beaulieu Autojumble purchases, the second still marked in black felt tip with the original and knocked down prices. Also visible below are the Mille Miglia and Quadrifoglio stickers that have been patiently waiting their day in my Monaco folder.

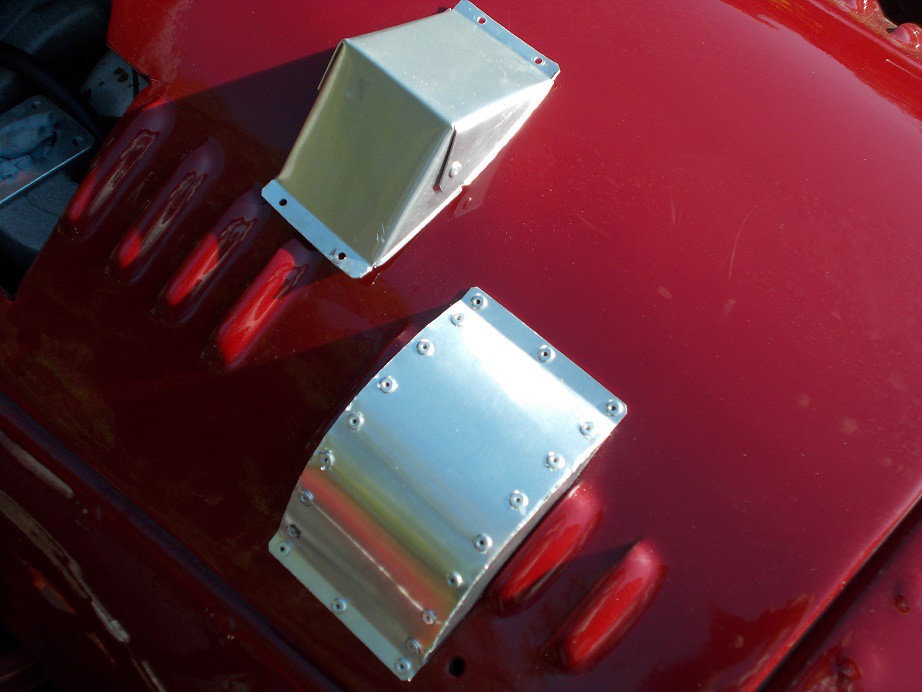
Yesterday's final effort was to remake the ally bulge over the radiator cap, which protrudes through the bonnet. I decided against the angular folded style of my first effort - the result to be revealed
.
This picture appeared this morning on my Moss Owners' FB feed. It's Fiat Twin Cam powered on '66 MkII Spitfire underpinnings. Nice!

Off to do battle down the sunny cave now
.
Regards, Mick
Yesterday's Efforts
First job in the cave yesterday was to rivet on the MkII radiator filler cap bulge. I'd passed on doing it the previous afternoon as I know how good I am at cocking things up when I'm tired. I'm reasonably satisfied by the result, especially when comparing it to its predecessor.
I then decided to fill and bleed the clutch hydraulics as my live-in son was available. With the off side jacked up and an axle stand in place, I could just about worm my way underneath. I softened the end of the bleeding tube
in very hot water and worked it over the nipple, which I'd fitted in the upper of the two tappings on the cylinder so that gravity would assist in purging air. Not that easy with the copper pipe in the way. I'd given both end nuts a final tighten as I'd not made up hydraulic pipe before, and was unsure if my flares would be OK. Five minutes with my son sat in the car and we had a pedal, and no leaks
. The down side? After three years the driven plate isn't releasing, but, if experience is anything to go by, it'll free itself after the engine heat's done its bit a few times.
I then dug out the last of the 1"x1"x1/8" aluminium angle I'd scavenged when the pet supplies shop around the corner closed - it was the surround of its sign. I cut and cleaned two suitable lengths and Sikaflexed them to the floor to prevent the seat squabs from moving forwards. I'd done this on my Marlin to good effect. The heat in the cave was now tropical so I called it a day.
I'm a member of the 'Homebuilt Cars From Scratch Or Kits' group on FB and my hero, one Howard Baker, yesterday posted his latest sublime efforts towards his scratch built Auto Union C Type evocation. Another of his followers posted
this video which had me itching to get down the cave and crack on. Skip to 1.56 to get to the highly inspirational meat - max volume and cans required
.
Regards, Mick
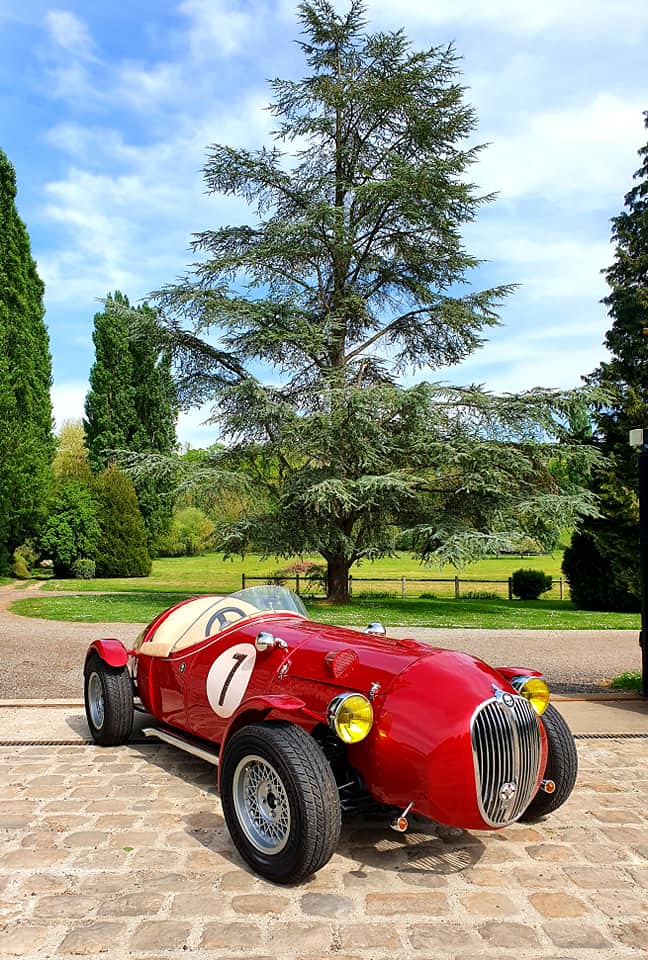
The French are mad for Monacos!
Remember this?
It turned up the other day in my Moss Owners FB feed. They don't hang about!

Regards, Mick
Plus ça change, plus c'est la même chose...
Lulworth Equipe Austin 7 Special.


Regards, Mick
The pictures and name are all that I have. It popped up on my 50s & 60s Special Builders feed on FB. Sorry.
Regards, Mick
Nibbling Away...
Not a huge deal of progress since my last build focused post. I'd noticed when studying an exploded diagram of the 28/36 DCD that some tiny parts (whose function is a mystery) were missing. I ordered these from my old friends Pierce Manifolds in California. When they arrived there was a 93p customs charge and an £8 handling fee - almost as much as the parts cost. I fitted them, mounted the carb., connected the throttle cable and realised that I'd not made provision for the cockpit end of the choke cable. Pondering its location made me realise just how ugly my high-level dash was. After more head scratching I decided to re-mount it at its original level - as if I didn't have enough to do!
I'd originally raised it as I'd neglected to factor in the steering column's position, which clashed with the 100mm Spitfire tacho. After some careful measuring I hit on replacing it with an 80mm one. As ever, cardboard assisted design resulted in this masterpiece
.

It's now been transferred to ally sheet and is awaiting the Smiths tacho. I won on Ebay. This cost me about half the price of a new one, which would have cost about £160.
In the meantime I've made up the Bundy pipes which fit on the Spitfire 1500 backplates. I only realised these were needed when I offered up the flexi hoses I'd bought, which were too short, bought the correct ones in stainless, and found their outboard ends weren't of the screw into the cylinder style. Study of exploded diagrams put me right - every day is a day at school!
The only other result I've achieved was getting a very local bloke to weld the extension into my inner steering column, which is now fitted.
Regards, Mick
Blast From The Past
This appeared on ebay a few days ago. I'm tempted to take up the 'Make Offer' option, bidding what I paid for it back in '89 - £80
.

I brush painted it from its original yellow with Ripcerol left over from my first Phaeton above. I swapped it for yet another Phaeton which I fitted with a Rover V8. Happy Days.
Regards, Mick
I neglected to mention that when I bought it in Worcester, the vendor had T-Boned someone and written off one side of the front. He was still limping. I cut off the front of the frame, got my welder to replicate it straight, and got a friend in the trade to weld it on. This all cost £120, so £200 was the real figure.
I know the vendor quite well. He lives in Australia (but is Covid quarantined over here) and we corresponded at some length prior to his visiting me a few years ago when he was over here. I gave him the original grille and 8" steering wheel which had lurked in my shed for decades, and quite a bit of guff I'd amassed, including a letter from Tim Dutton offering to buy it from me for scrap. I also passed on the transparencies I'd obtained from the original owner, whom I'd tracked down and corresponded with. The advert picture with the camper van is from one of them. The vendor also owns the green one.

I know chapter and verse on these cars from my Dutton years, during some of which I edited the club magazine. I could tell you a lot more about KPX594J but it's stuff I won't commit to print.
Regards, Mick