MadaboutKitcars

Build Stories are assembled automatically from a build thread's own author, in their own words and order — see all featured builds.

Royale Sabre - Take two!

By peterux · 372 updates · Sep 2012 to May 2025

Read the full original thread (with everyone's replies) in the archive →

March 2018

22 Mar 2018, 10:07pm Mechanical Overhaul Chassis and Body
Painting update...

Thanks for all the feedback, it's a little nerve wracking entrusting this kind of work to someone you don't really know but Dave has exceeded my expectations and is doing a superb job. IIRC the original John Barlow demonstrator was all blue but that is based on adverts I've seen in old mags.

-------------------------------------------------------------------------

Earlier this week I popped over to the bodyshop to drop of more panels. I delivered the rear wings, bonnets and wheels. The steel wheels are going off to 'Dave's mate' to be shot blasted before being painted.

Things are coming along nicely......

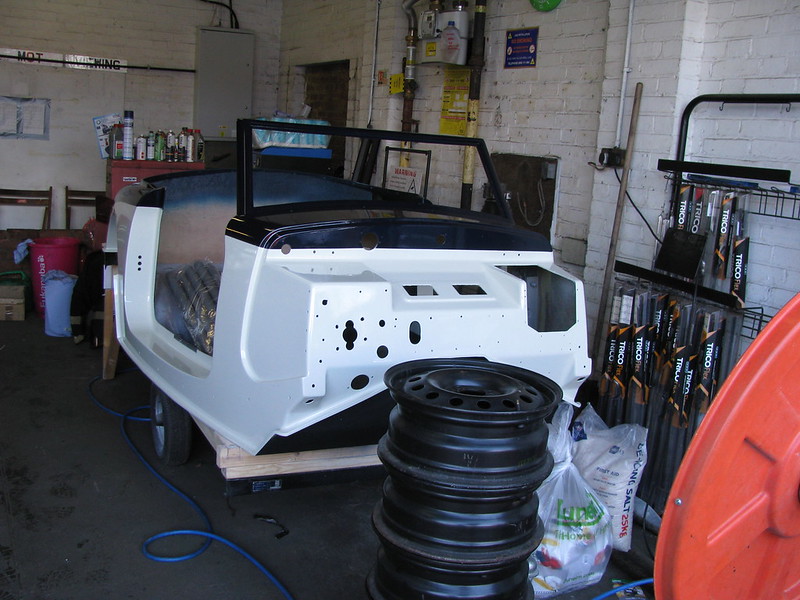
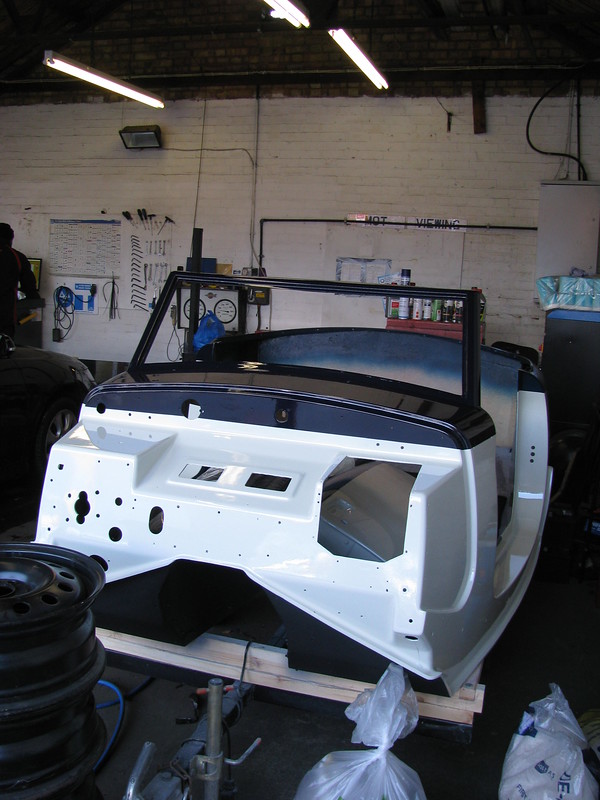
Following flatting back Dave decided to apply another clear coat.

Painting by Sabrebuilder, on Flickr

Body tub after second coat of lacquer. Wheels delivered awaiting shot blasting and paint.

Painting by Sabrebuilder, on Flickr

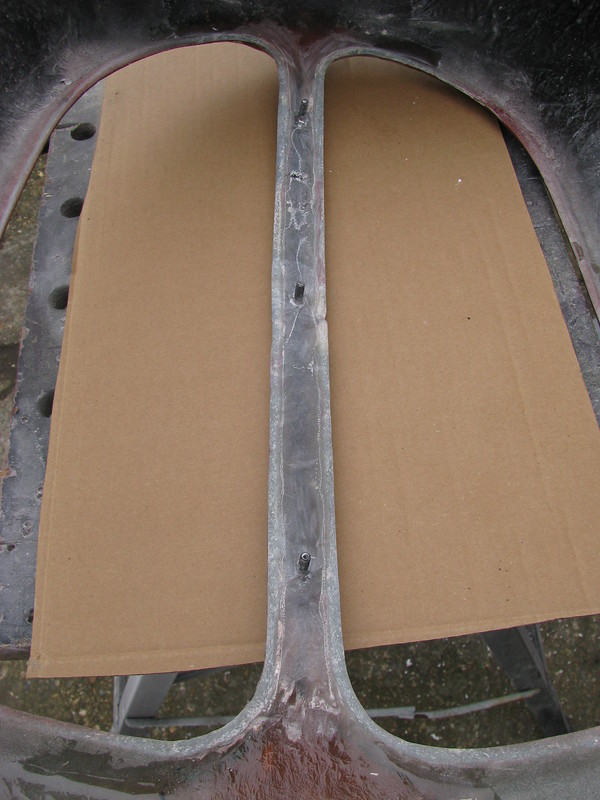
Gearbox tunnel has now been Schutz underseal coated.

Painting by Sabrebuilder, on Flickr

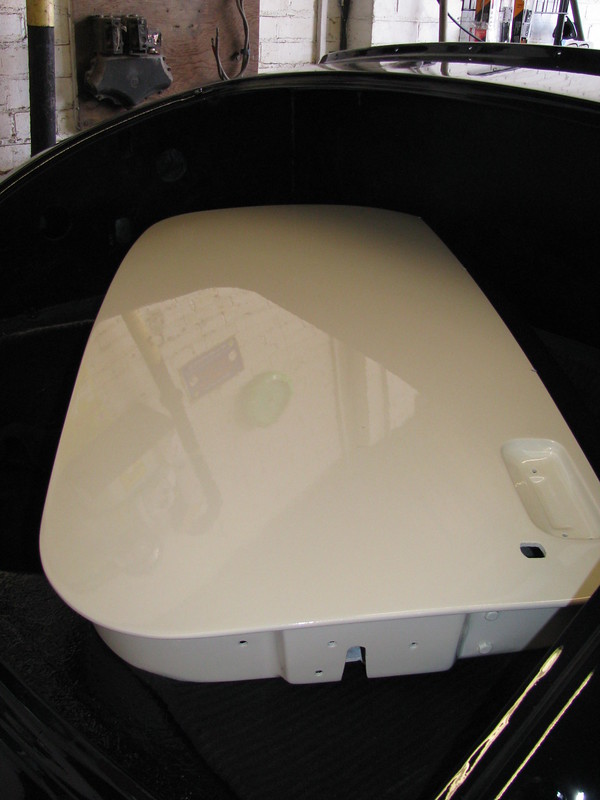
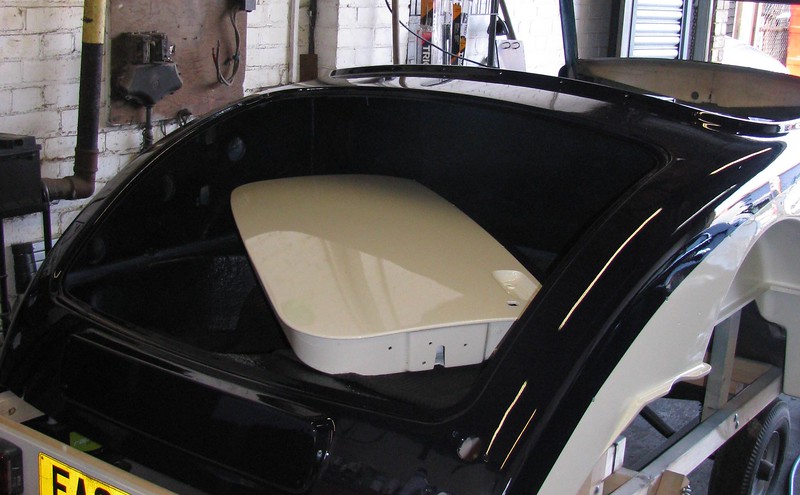
Passenger door before machine polishing. The boot inside has been colour coded.

Painting by Sabrebuilder, on Flickr

The body tub should be ready for collection early next week so fingers crossed for dry weather for the journey back :eusa_dance:


.....peter

P.S. the 'Midnight blue' looks black in these shots but it is painted blue:laugh:
26 Mar 2018, 8:31pm Engine Chassis and Body
My baby is back at home.....

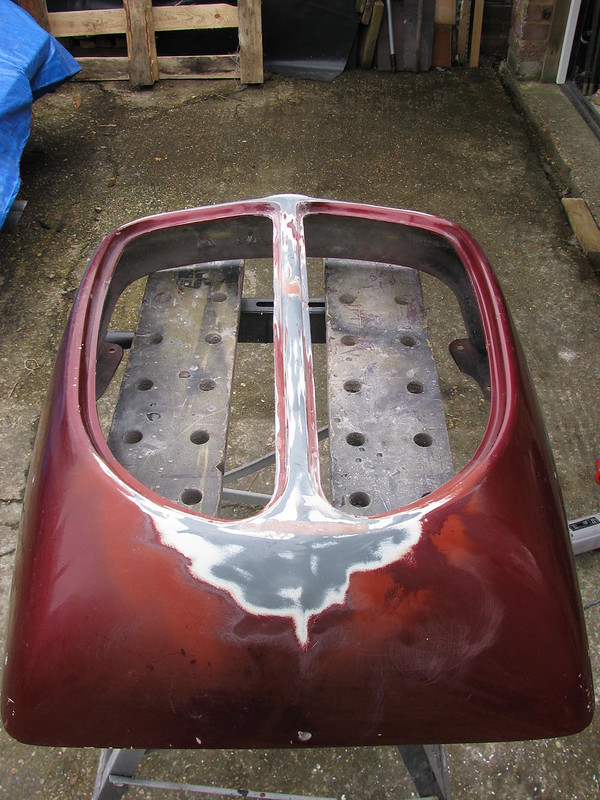
Over the weekend I found time to complete the repairs to the radiator cowl.

I finished re-enforcing the back of the cowl with glass mating and resin and then ground it flat with a flap disk in my angle grinder.

Painting by Sabrebuilder, on Flickr

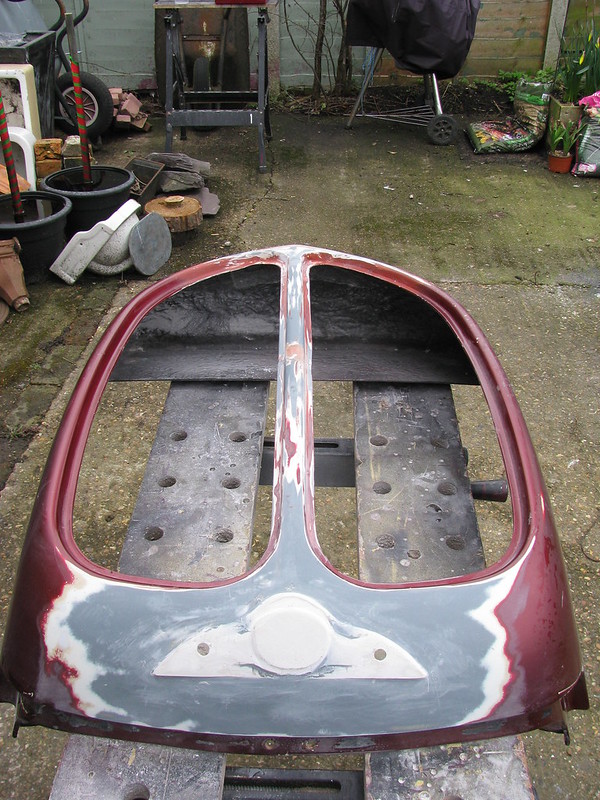
After I sanded down the front I found the damage was much worse than I first thought. It had already been repaired before being broken again. I dug out all the cracked gelcoat and filled it with GRP filler.

Painting by Sabrebuilder, on Flickr

I also created a raised 'plinth' for the badge....

Painting by Sabrebuilder, on Flickr

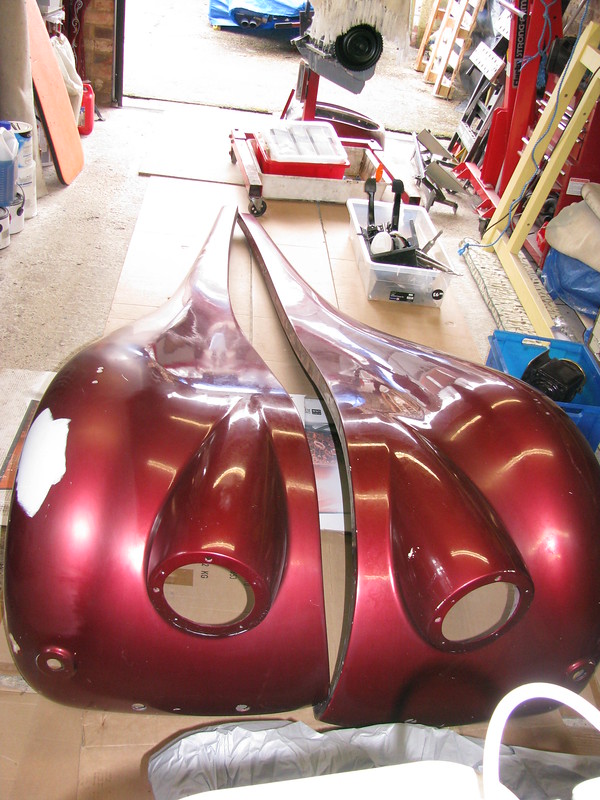
I then retrieved the front wings that have been hanging from the garage rafters for the last few years. They were covered in dust and spiders poo so I gave them a quick wash.

Painting by Sabrebuilder, on Flickr

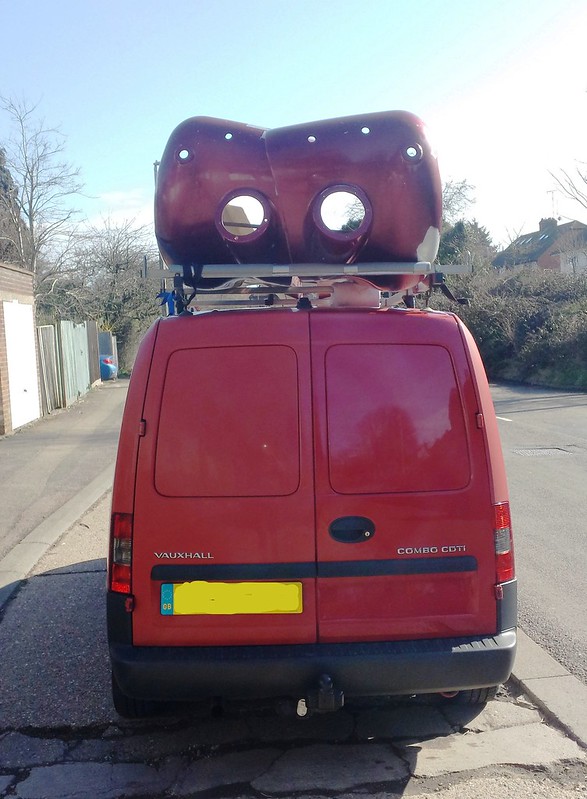
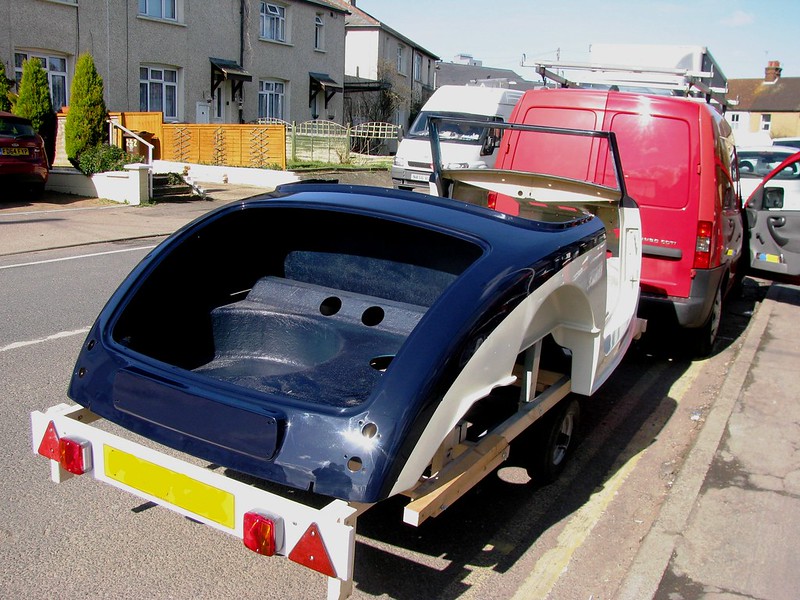
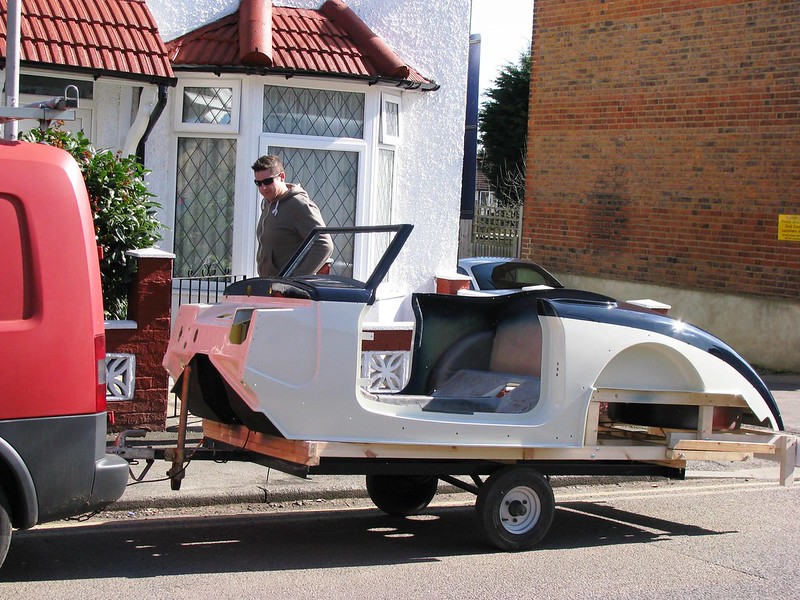
Today, we collected the body tub and doors from the painters, but first we loaded up the front wings.

Painting by Sabrebuilder, on Flickr

And then the trailer was hitched up for the journey back home.

Painting by Sabrebuilder, on Flickr

Painting by Sabrebuilder, on Flickr

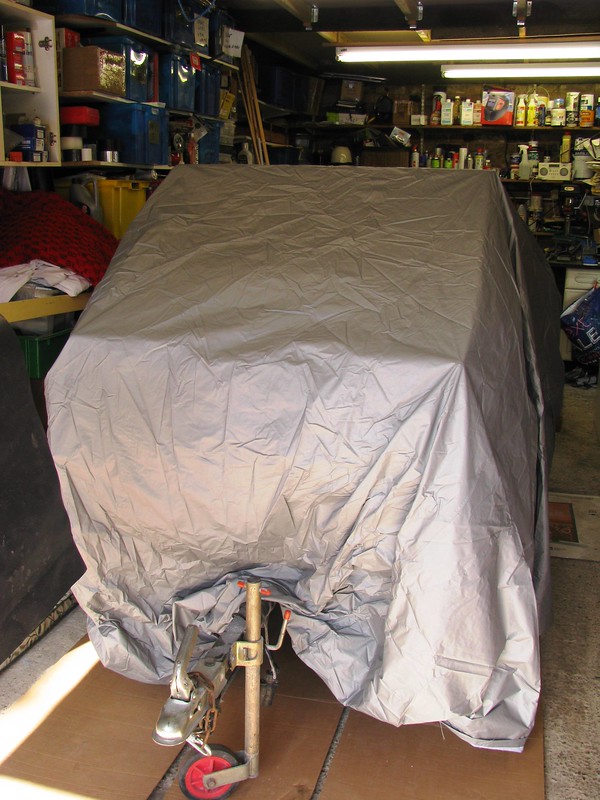
And it's now tucked up safely back in my garage at home.

Painting by Sabrebuilder, on Flickr

Happy days :icon_mrgreen:


....peter

April 2018

4 Apr 2018, 7:33pm Interior & Trim
Fuel level sender mods

A few weeks back I mentioned that I will give an update on the Fuel level sender modifications I've been working on.

This is the Ford combined 'lifter pump' and fuel level sender that fits the Granada fuel tank installed in the Sabre. But the Ford sender's resistance is not compatible with the ETB Fuel gauge that I have bought.

Fuel Level Sender by Sabrebuilder, on Flickr
(sorry about the poor quality photo's)

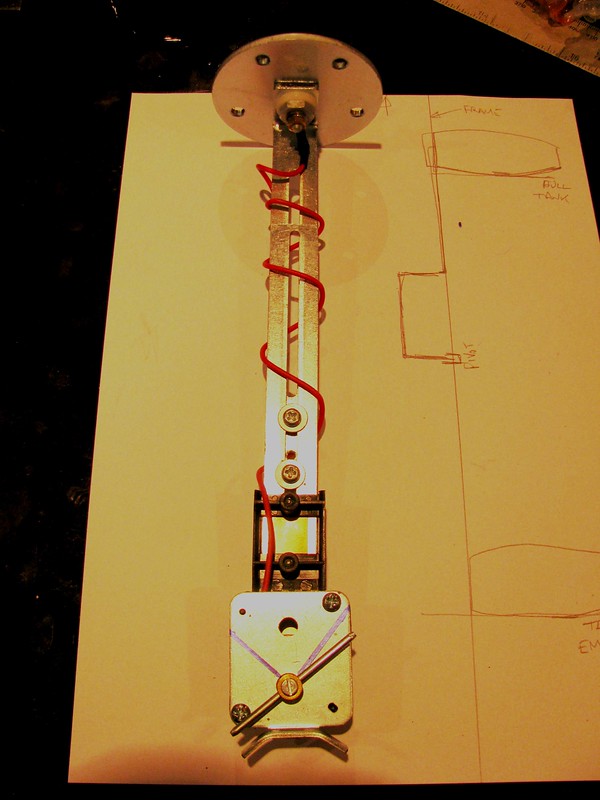
This is the ETB fuel level sender. Luckily, the full range from Empty to Full is covered by a 90 degree sweep which is the same as the Ford sender. Also, the RTB sender's variable resistance part is easily unbolted.

Fuel Level Sender by Sabrebuilder, on Flickr

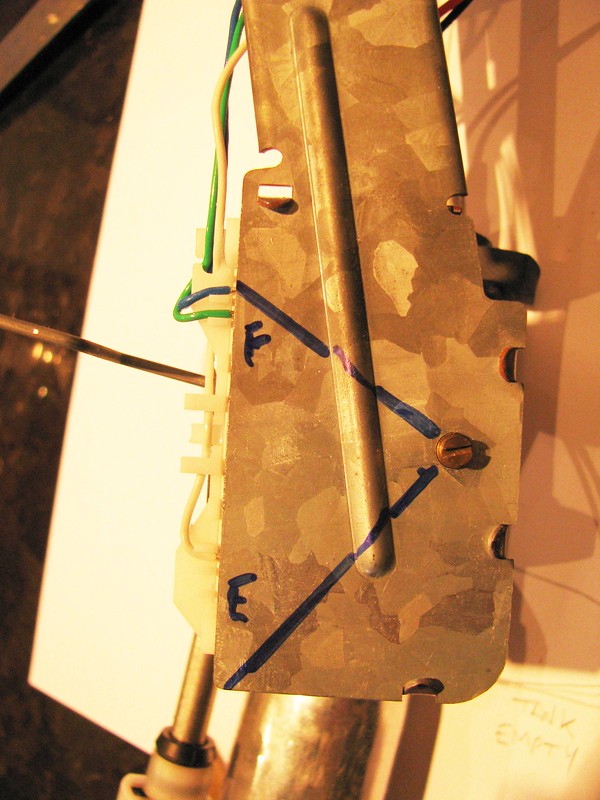
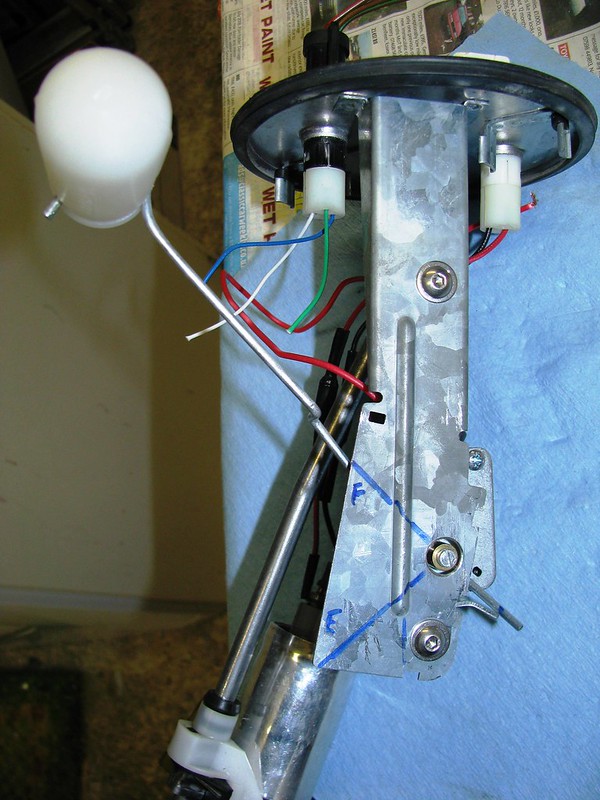
Before dismantling the Ford sender I marked the Full and Empty positions. It was easy to remove the Ford variable resistor by just bending back a couple of tabs.

Fuel Level Sender by Sabrebuilder, on Flickr

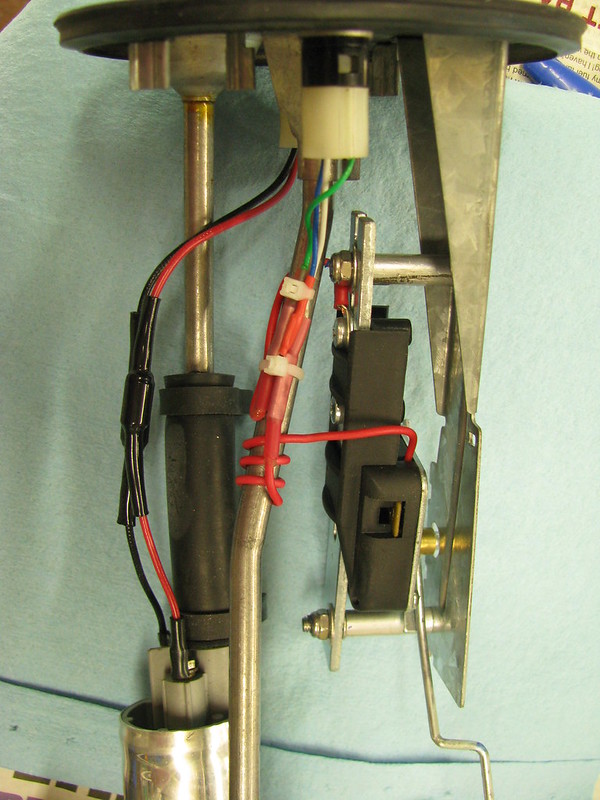
I then mounted the ETB rheostat to the Ford support leg using M6 screws and some aluminium tube spacers. A very fiddly job!!

Fuel Level Sender by Sabrebuilder, on Flickr

And here is a side view of ETB sender mounted on Ford fuel tank unit. In the Full position.

Fuel Level Sender by Sabrebuilder, on Flickr

It seems to work OK so just need to wire it up and make sure the gauge reads correctly; and then make sure it fits OK in the tank.

Another little job ticked off the plan :icon_mrgreen:

.....peter

May 2018

5 May 2018, 7:12pm Chassis and Body
Nearly done....

Well the final three body panels are being prepped for paint. The front wings and boot lid have been stripped of the old paint and primed ready for flatting.

Front wings and bootlid by Sabrebuilder, on Flickr

Should be finished next week.

I then just need to find the time to start the re-assembly :lol:

...peter

July 2018

10 Jul 2018, 7:35pm Engine Chassis and Body
So, very little progress on the Sabre over the last few months due to other priorities and projects taking up all my time. The painting of all the body parts was completed and all parts are now safely stored back in my garage loft awaiting re-assembly.

Here's a quick summary of a few jobs completed over the last few weeks.
Picking up on my last update back in May, I finished modifying the fuel tank level sender and tested it.

Fuel Level sender by Sabrebuilder, on Flickr

I then fitted it to the tank to seal up the tank and stop anymore dust getting in. I did give the tank a good hoover out before fitting the sender/pump unit.
I really struggled to fit the locking ring until I made up this improvised tool. With my hands on the wooden baton I was able to push down and turn the ring.

Fuel level sender locking ring tool by Sabrebuilder, on Flickr

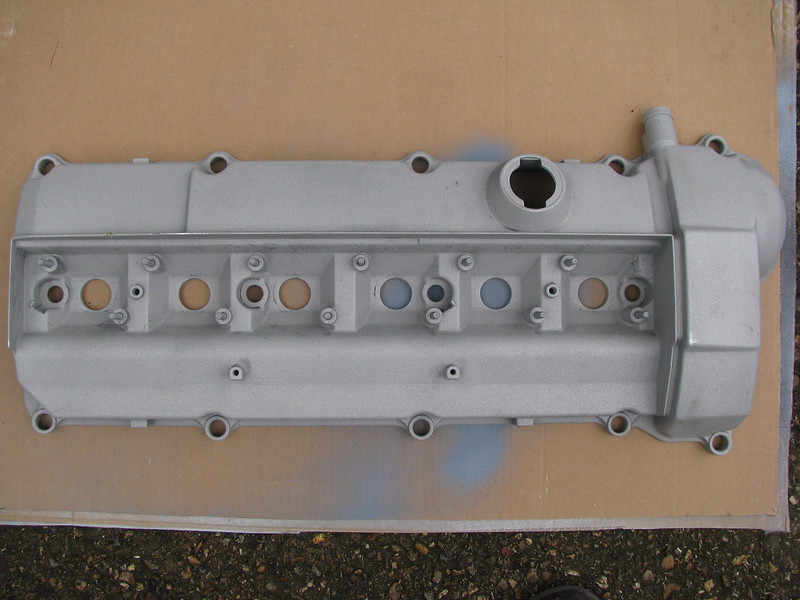
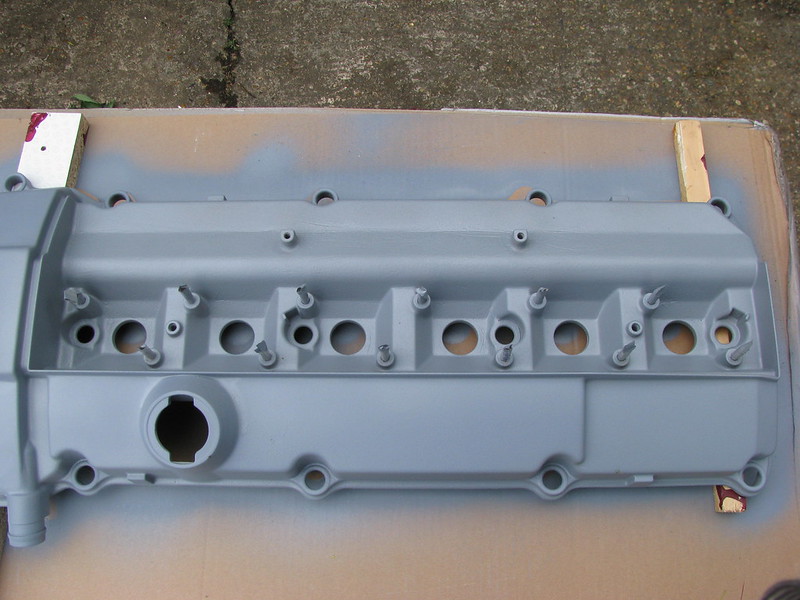
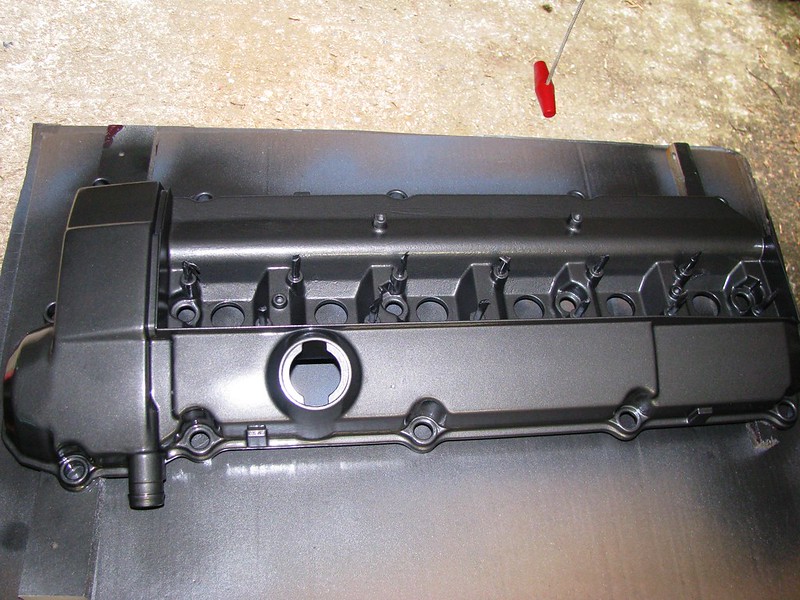
Some weeks back I chemically stripped the paint from the camshaft cover but everytime I finished cleaning it, it then oxidised and left white powdery residue. So I decided to have it shot blasted. It was amazing to find a grit blaster in a farm building only half a mile from my home. Nice matt finish ready for primer.

Engine Camshaft Cover by Sabrebuilder, on Flickr

Then a quick coat of VHT primer and topcoat.

Engine Camshaft Cover by Sabrebuilder, on Flickr

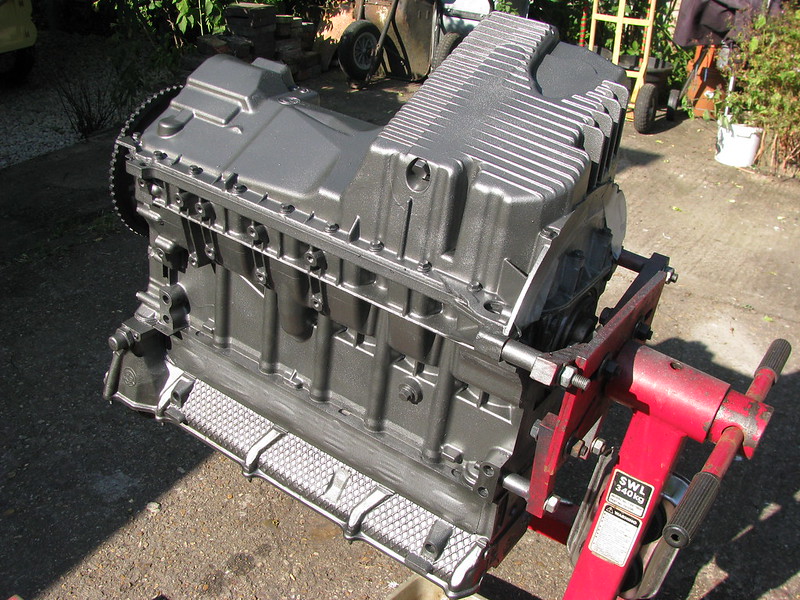
I've also painted the engine sump.....

Sump painted by Sabrebuilder, on Flickr

I know I've said it before but I hope to have some more regular updates to follow :flypig:


....peter
23 Jul 2018, 7:53pm Engine Mechanical Overhaul Chassis and Body
Brackets, brackets, brackets.....

Amir - thanks again for the encoraging comments :-)

------------------------------------------------------------------------

Small pause for my sons wedding last weekend but I have spent a few days on the Sabre.
I've got a long'ish list of small tasks to complete before the final fitting of the painted body tub to the chassis.
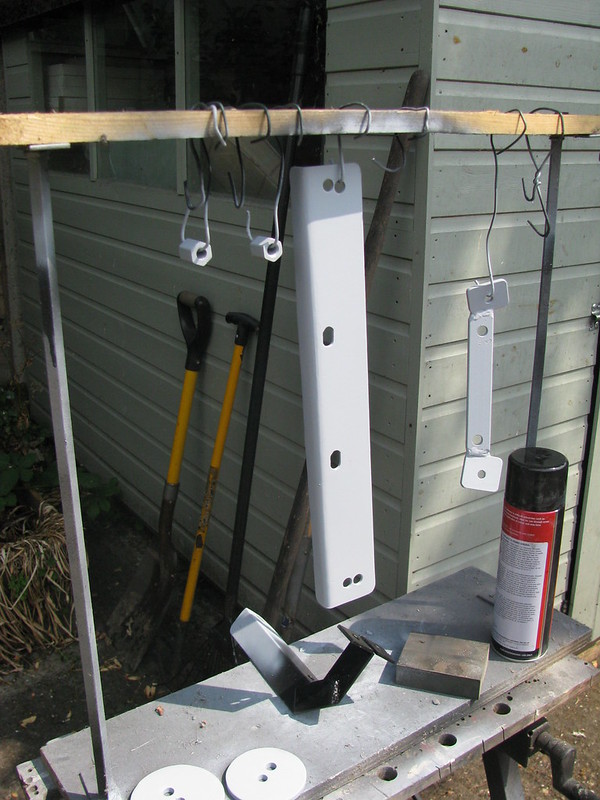
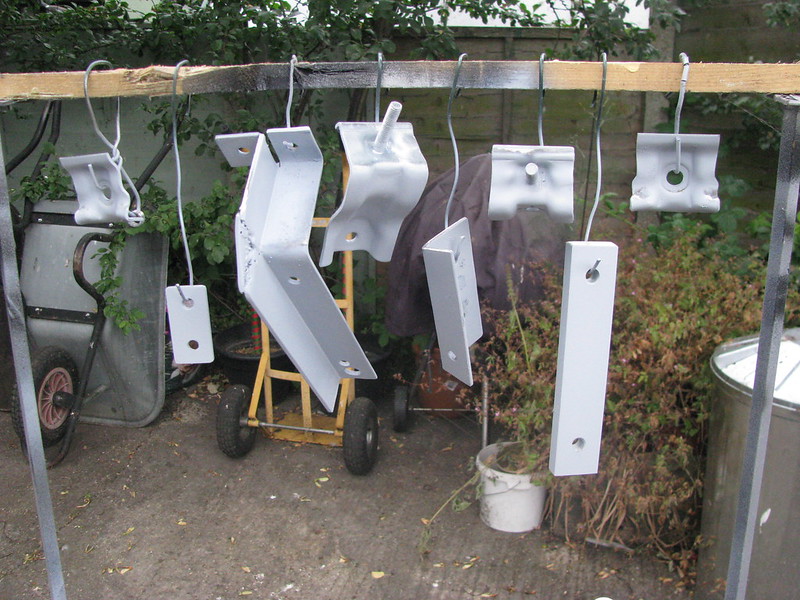
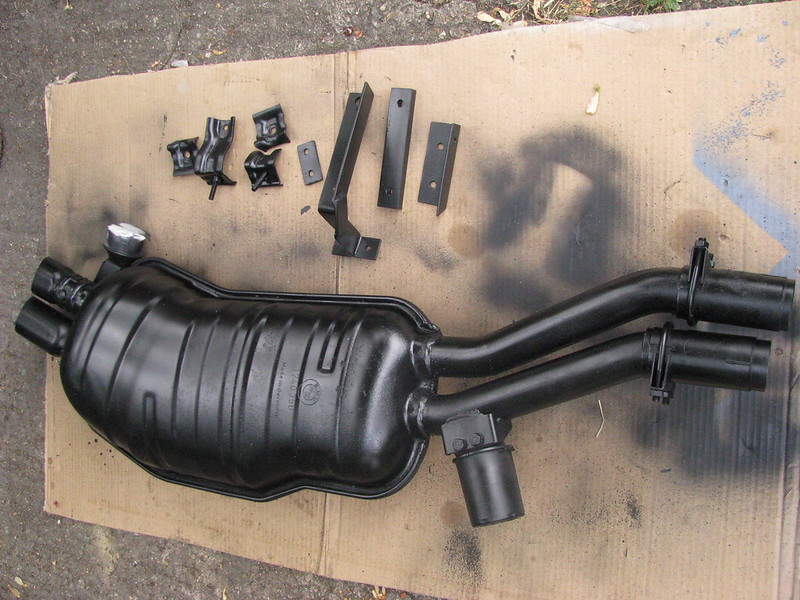
I've spent quite a lot of time finishing and painting all the exhaust brackets.

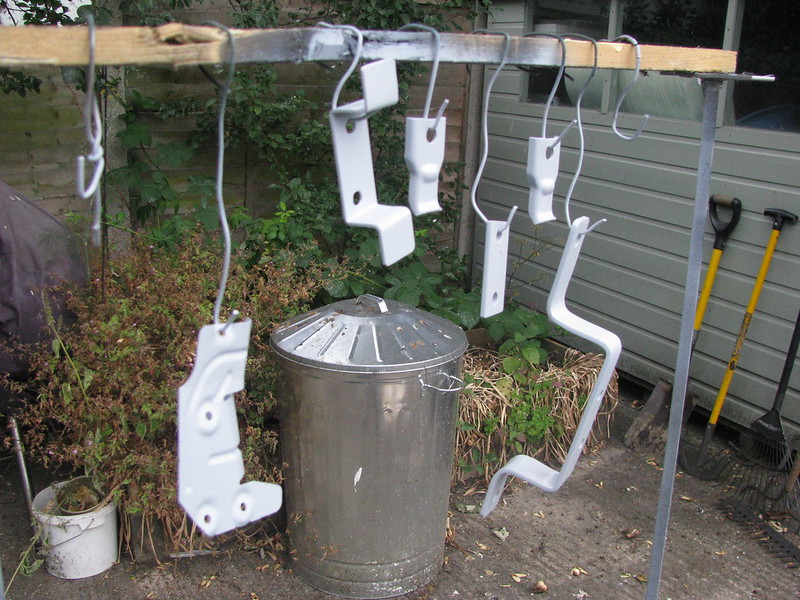
Brackets by Sabrebuilder, on Flickr

Brackets by Sabrebuilder, on Flickr

Exhaust back box by Sabrebuilder, on Flickr

Brackets by Sabrebuilder, on Flickr

I've painted the back box as it can show under the back of the car.

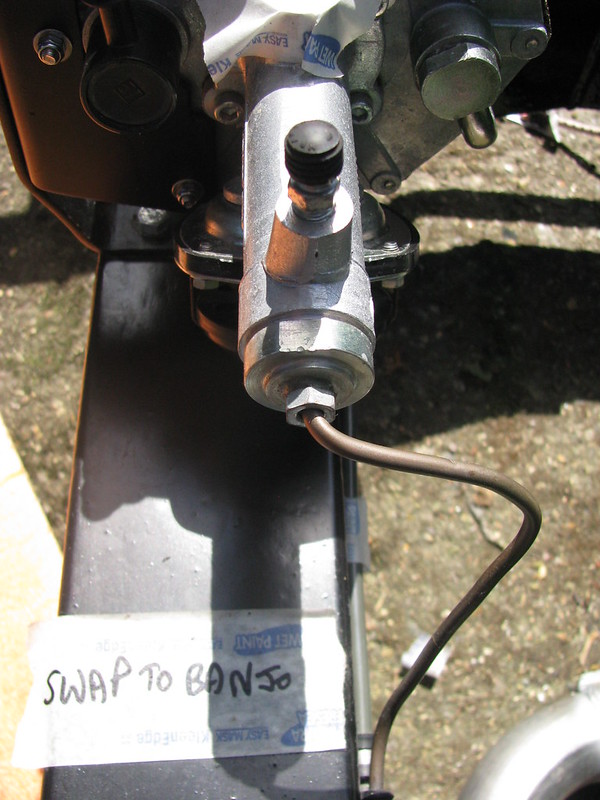
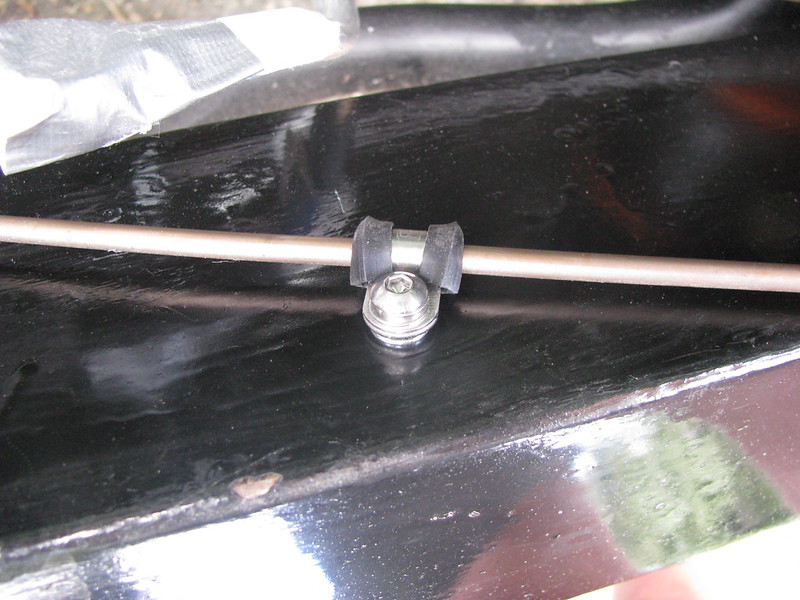
I've also been tidying up a couple of brake line fixing...

Brake lines by Sabrebuilder, on Flickr

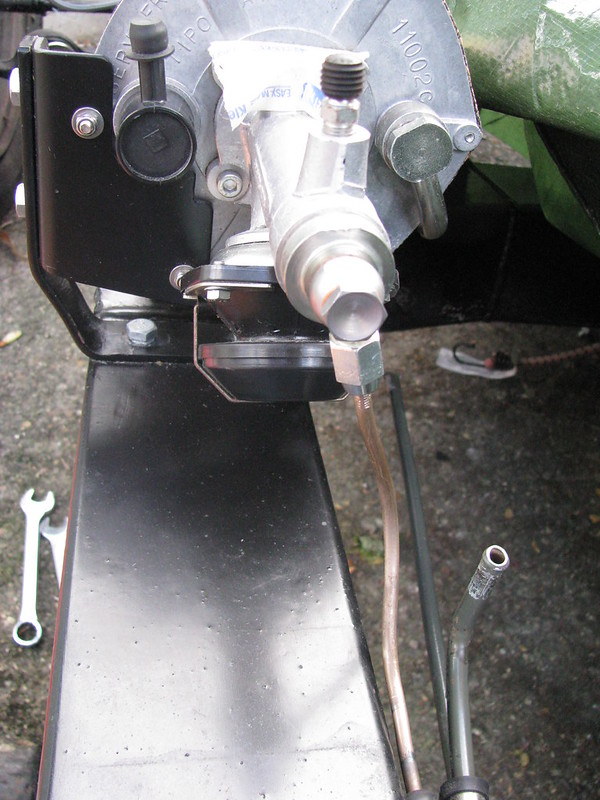
I wasn't happy with this line so I've changed it to a banjo fitting which looks much better....

Brake lines by Sabrebuilder, on Flickr

And added a p-clip in the engine bay as I couldn't drill the fixing hole with the engine in place last year.

Brake lines by Sabrebuilder, on Flickr

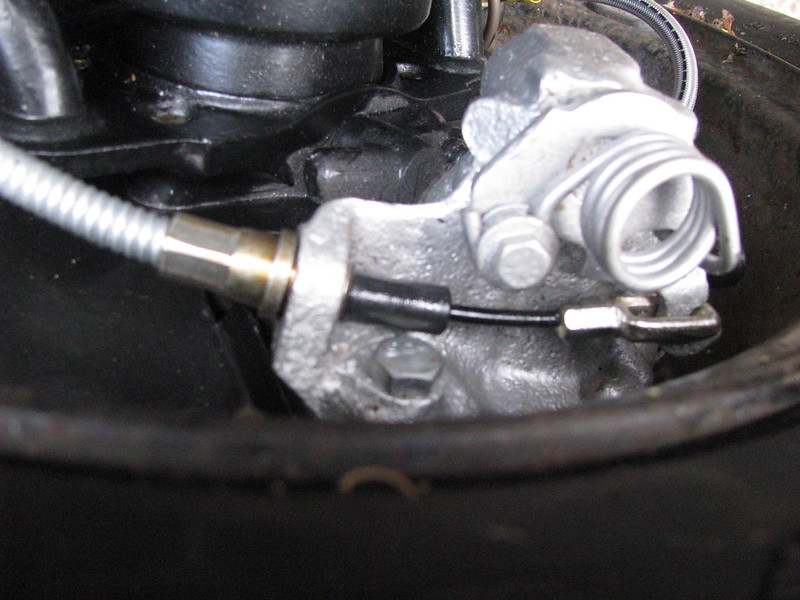
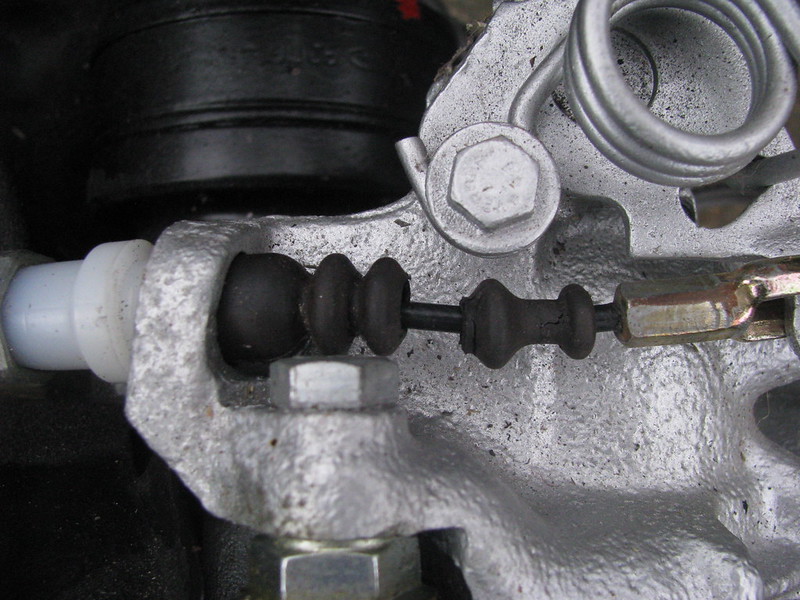
One of the draw backs of a, ahem, extended build schedule is that things can deteriorate before you've finished. One of the handbrake dust boots has perished and split. Not quite sure what I will do yet....

IMG_6818 by Sabrebuilder, on Flickr

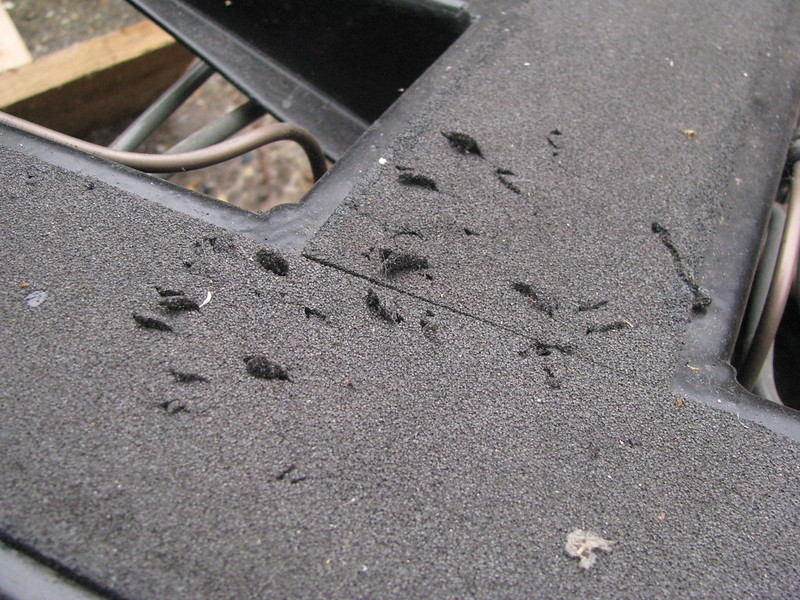
Another problem is that the chassis has been stored outside under a tarpaulin for the last 7 months. Some little blighters have been scratching away my chassis foam. No great loss as I had already decided to replace it as it compressed so much the body was touching the chassis is some places.
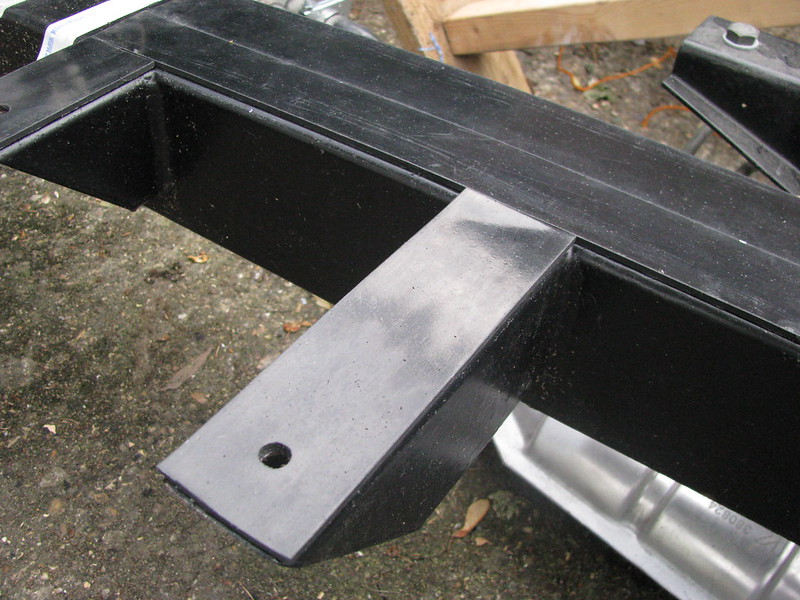
The traditional method is to use felt but the drawback is that you have to seal all around all the edges to stop rain soaking into the felt. After discussing it with Robin, I've opted to go for solid neoprene rubber.
Before...
Chassis insulation by Sabrebuilder, on Flickr

After.....
Chassis insulation by Sabrebuilder, on Flickr


So, a few more jobs ticked off the list and I'll finish with this shot....

Summer heat! by Sabrebuilder, on Flickr

How quickly we forget how cold it was last winter :lol:


....peter
30 Jul 2018, 6:38pm Engine Chassis and Body
More brackets.....

Yet more brackets being finished and painted.....

More brackets by Sabrebuilder, on Flickr

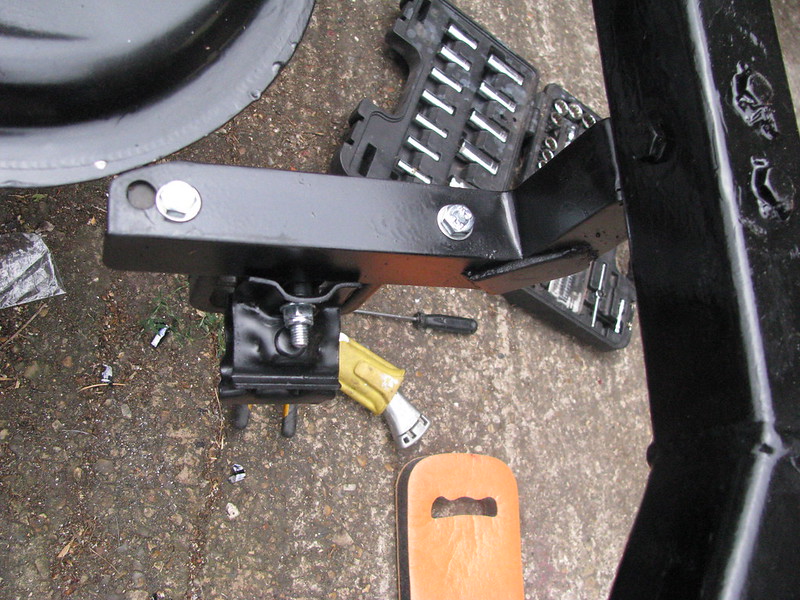
But some are now fitted back on the chassis

Exhaust hanger by Sabrebuilder, on Flickr

Exhaust hanger by Sabrebuilder, on Flickr

Exhaust hanger by Sabrebuilder, on Flickr

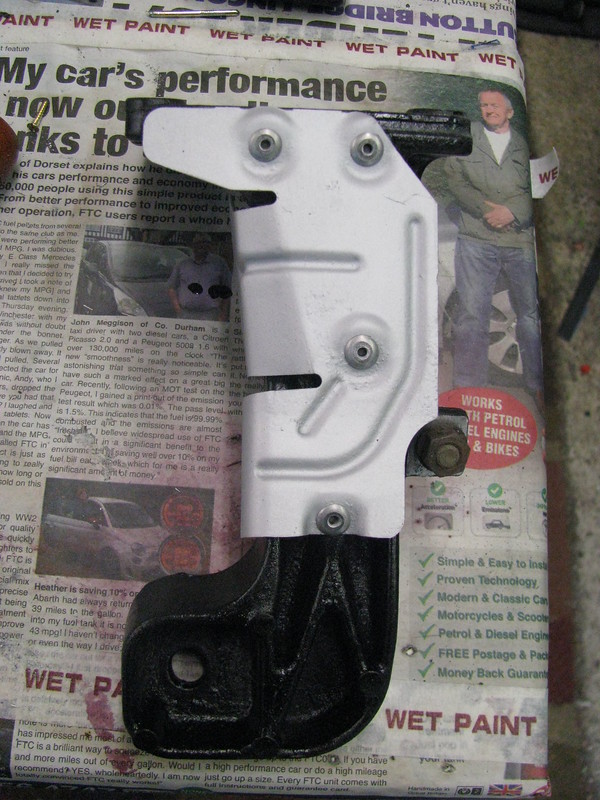
The BMW offside engine mount has a heatshield to protect it from the exhaust manifold heat. I removed the plate, painted both parts and then re-riveted the shield back on.

Offside Engine mount by Sabrebuilder, on Flickr

More exciting updates next week :eusa_whistle:

...peter

August 2018

7 Aug 2018, 8:07pm Engine Mechanical Overhaul Chassis and Body
Bonus day!

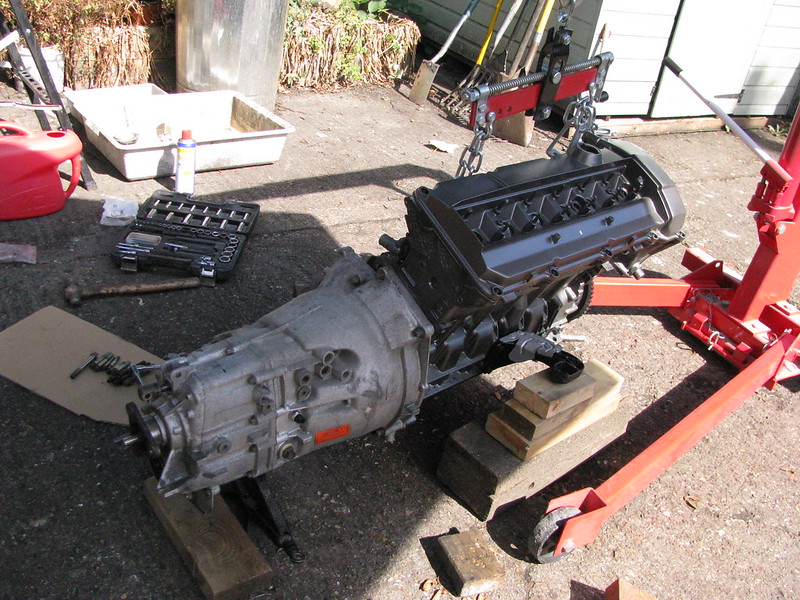
Unexpectedly due a last minute change of family plans I suddenly had all day on Sunday working on the car. So I thought I'd have a go at fitting the clutch and gearbox back on the engine.

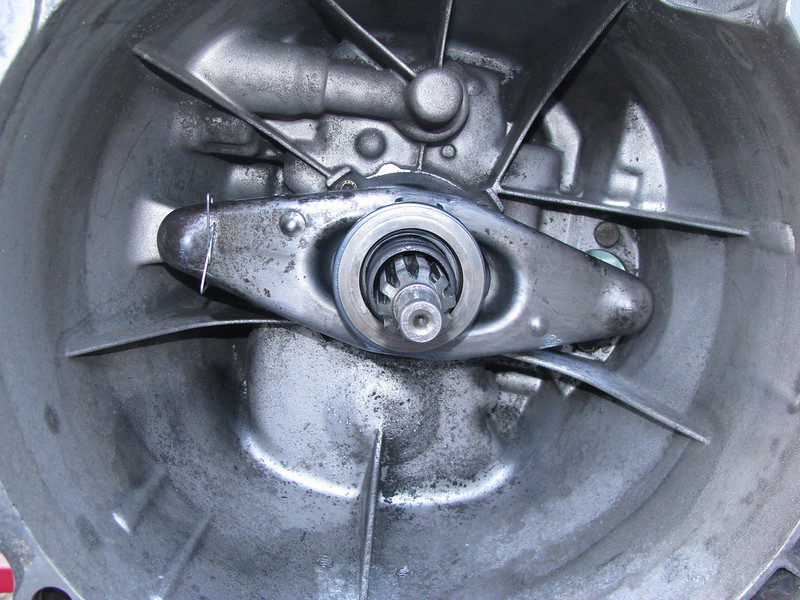
I started by preparing the gearbox, clutch release lever and bearing. I replaced the little spring clip as the old one was broken.

Clutch by Sabrebuilder, on Flickr

I then checked the new clutch plate fitted the splines and spread the HMP grease supplied on the spindle.

Clutch by Sabrebuilder, on Flickr

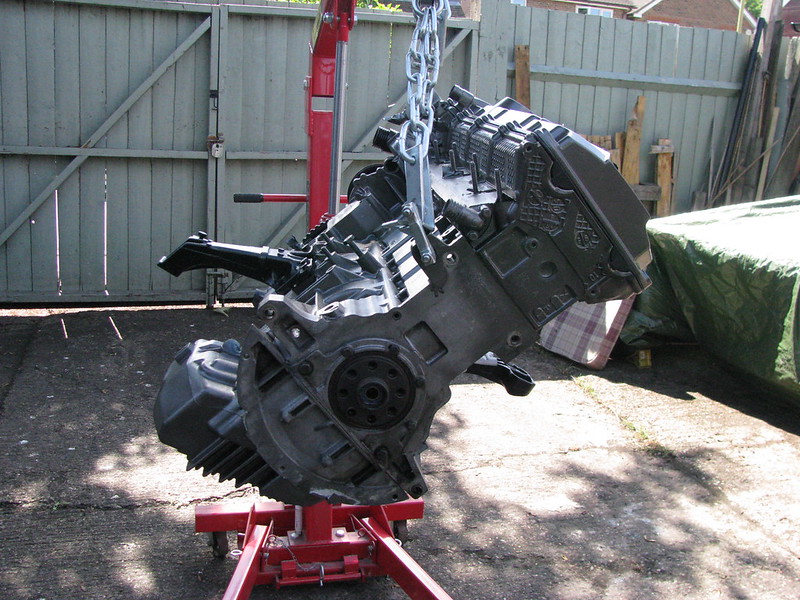
I then removed the engine from the engine stand where it had been for the last few months.

Engine by Sabrebuilder, on Flickr

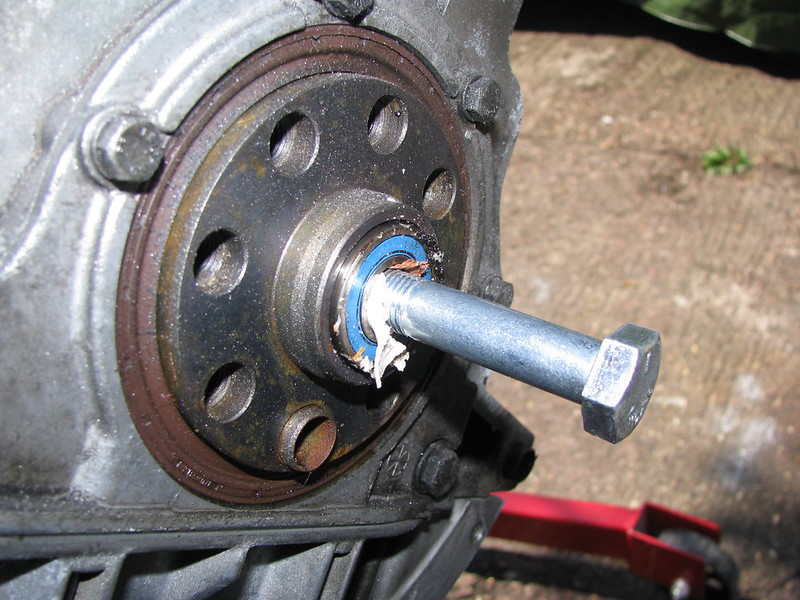
I then removed the old pilot bearing using the bread method. (check it out on Youtube if you've not heard of this method). Basically, you pack the back of the bearing with soft white bread and hammer a bolt in the hole. The force on the bread pushes the bearing out.Here you can see the bearing starting to emerge.

Pilot bearing removal by Sabrebuilder, on Flickr

And finally the old bearing is out. A quick clean up and the new bearing was tapped in with a socket.

Pilot bearing replacement by Sabrebuilder, on Flickr

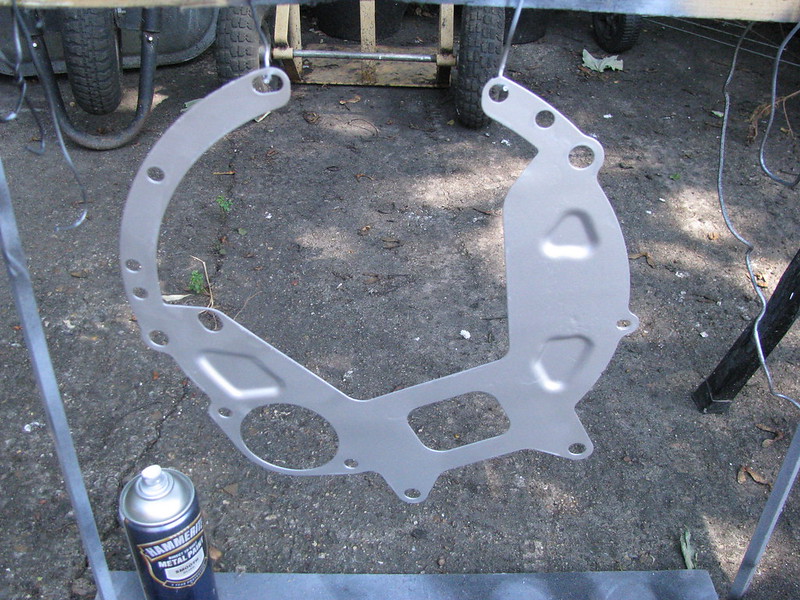
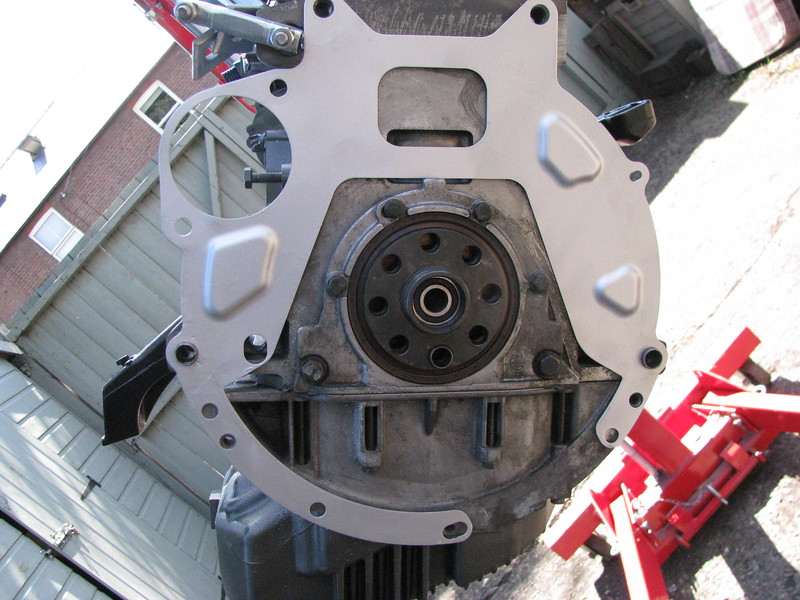
The plate that goes between the engine and gearbox had already been de-rusted, cleaned up and painted.

Gearbox closing plate by Sabrebuilder, on Flickr

Plate in position before fitting the flywheel.

Closing plate by Sabrebuilder, on Flickr

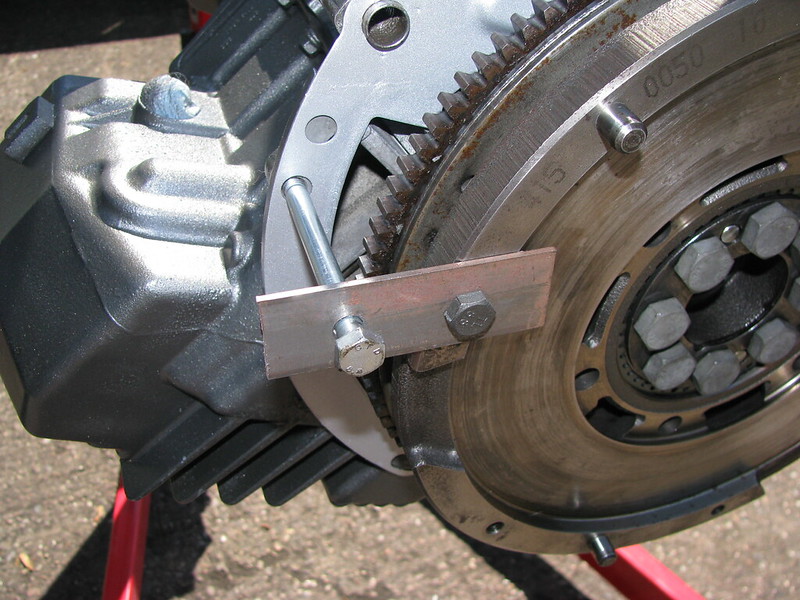
The flywheel was refitted with new BMW bolts. The old bolts cannot be re-used as they are stretch bolts. They have to be tightened to 105Nm so I made up this locking tool. (The long bolt actually bent a little but it served it's purpose)

Flywheel by Sabrebuilder, on Flickr

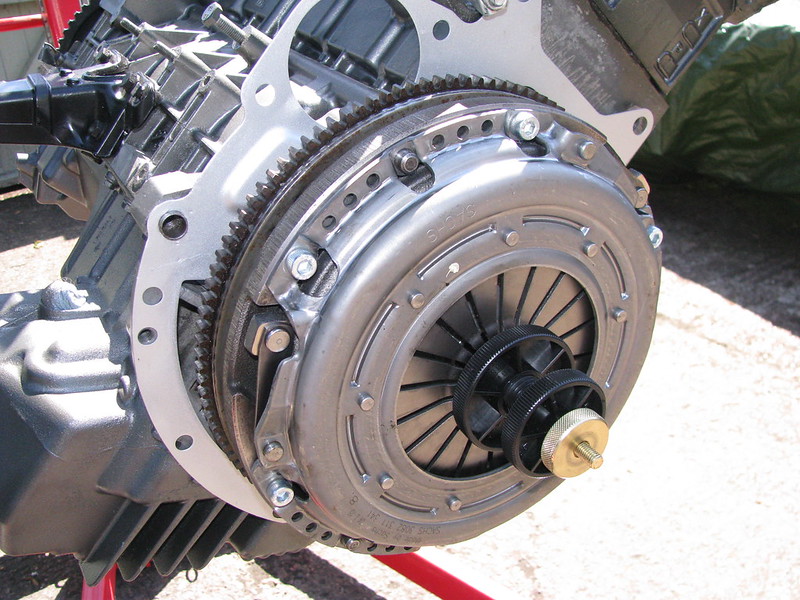
Clutch centering tool used to align the clutch plate with the cover assembly. Clutch cover then bolted to the flywheel with new 10.9 HT screws.

Clutch by Sabrebuilder, on Flickr

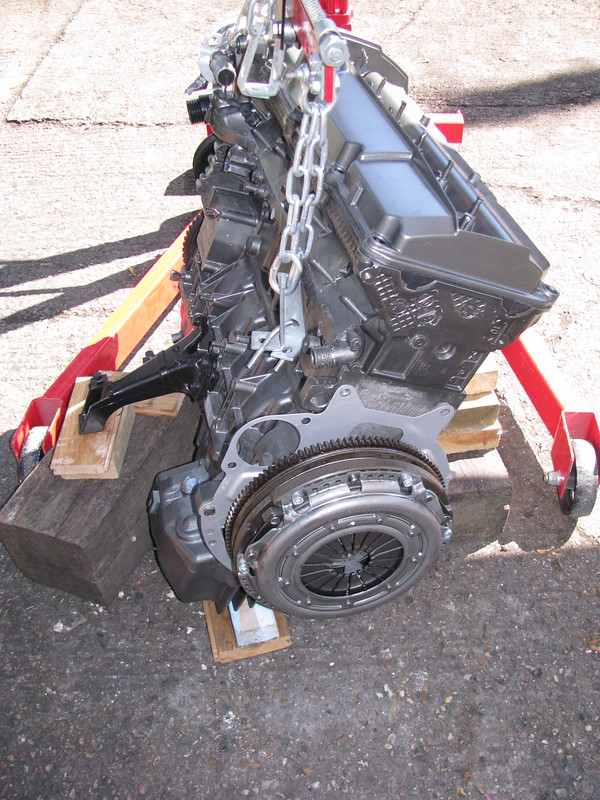
The engine was then lowered to the ground and supported on blocks of wood.

Gearbox fitting by Sabrebuilder, on Flickr

The gearbox was then supported on blocks and a scissor jack to allign it with the engine and then with a bit of jiggling it slotted home. Gearbox bolts then fitted and tightened to the correct torque.

Gearbox fitting by Sabrebuilder, on Flickr

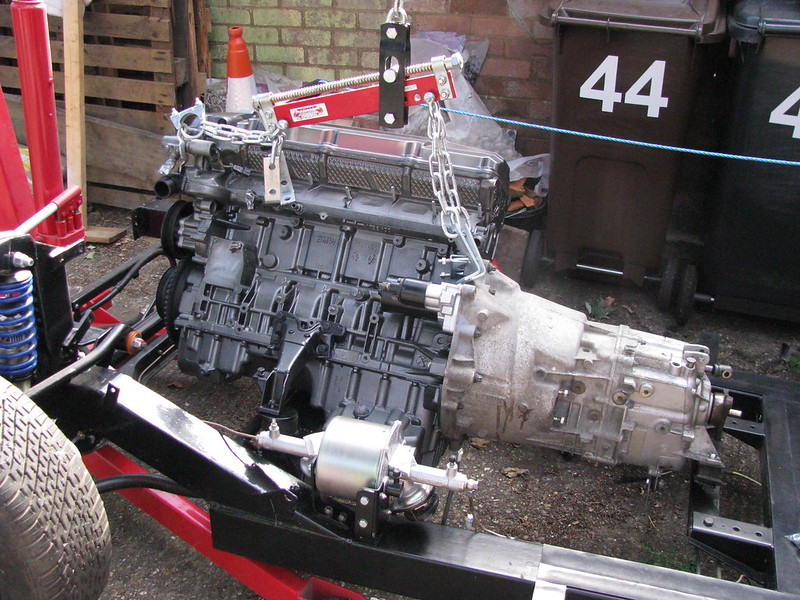
The engine and gearbox was then refitted to the chassis.

Engine fitting by Sabrebuilder, on Flickr

Despite the the 30 degree heat it was a very enjoyable day followed by a nice cold beer:biggrin::biggrin::biggrin:


...peter
14 Aug 2018, 7:40pm Engine Mechanical Overhaul Chassis and Body
A little exhausted......

Thanks Molleur, Barber and Amir for your feedback and I'm glad you all enjoying my updates.

However, it appears that my meticulous rebuild overlooked one vital item. It's been highlighted by Mike, (builder of the superb Marlin Cabrio documented in the Marlin section of this forum and BMW e36 aficionado), that I should have replaced the clutch lever pivot pin. These are apparently a common failure point on the e36 and can result in a very difficult clutch engagement position.
It means that I'll have to separate the gearbox from the engine again, but i'd rather do this now while the body tub is not in position.
But more on that next time........

I've only been able to spend about half a day on the car this week and I tackled the clean up and refit of the exhaust manifold. With hindsight it would have been easier to this while the engine was on the engine stand.

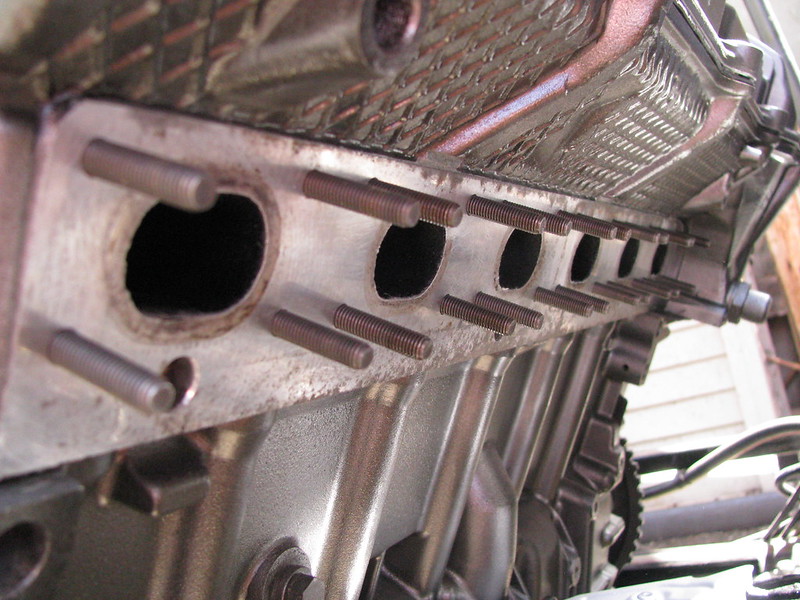
First, I had to replace the 24 exhaust manifold studs. They are an unusual size of M7 so you have to get genuine BMW studs.

Exhaust manifold by Sabrebuilder, on Flickr

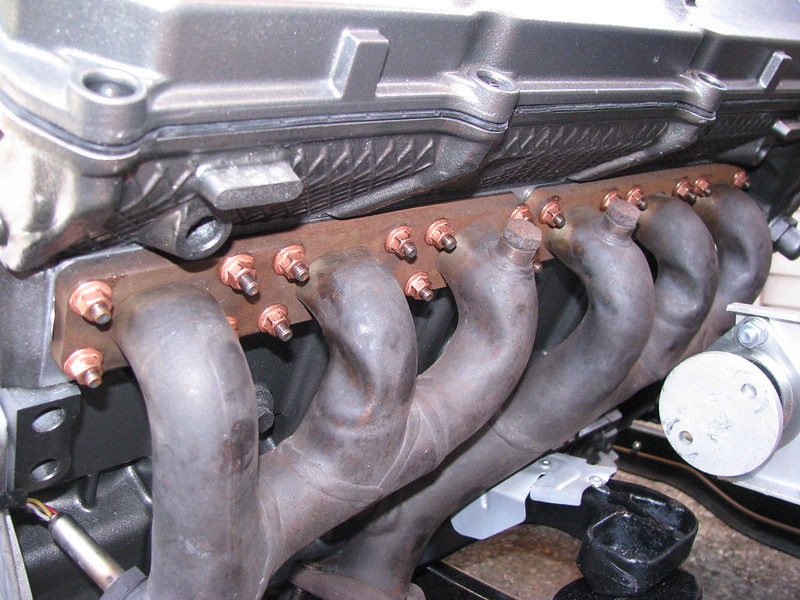
I then cleaned up the manifolds with a wire brush and scrapped off the old gaskets. They were then refitted with with new copper coated lock nuts and new gaskets. I used a smear of Copper ease on the studs and the nuts were tightened up to the specified torque of 20Nm.

Exhaust manifold by Sabrebuilder, on Flickr

Until next time, enjoy your builds...........

...peter

P.S. I found this interesting report of a Royale Sabre in Russia!!

https://www.retrorf.ru/royalsabre

(You'll have to use your web browser to translate unless your fluent in Russian :yo:)
23 Aug 2018, 6:16pm General Update


Thanks, Patrick.

------------------------------------------------------

No update this week due to holidays.:pout:

September 2018

19 Sep 2018, 8:09pm Engine Mechanical Overhaul Chassis and Body Electrics
Following a short holiday away I returned to the realisation that the neglected window frames on my cottage had been ignored for long enough and really did need my urgent attention.

Today was my first chance to get back to the Sabre so picking up where I stopped in August.......


.............so out came the gearbox again. Quite easy really with no bodywork in places and with only half a dozen or so bolts to remove it didn't take long.

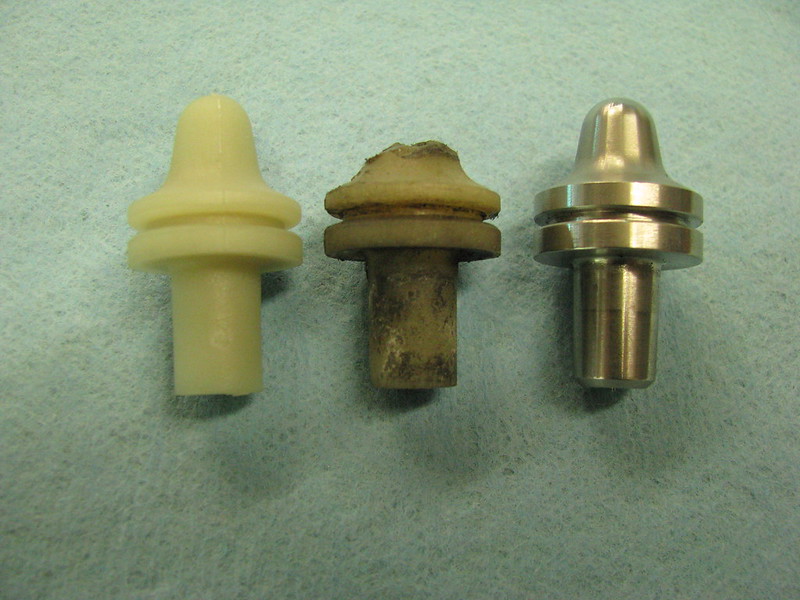
I then removed the clutch release bearing and lever. Removing the old pivot is easy as you can drift it out from the outside of the gearbox. I hadn't inspected it properly before and was shocked to see how worn it was. I was going to replace it with the standard BMW part (shown on the left) until I bought one. For some reason only known to BMW it has a hole up the centre which leaves only 5mm of solid material at the tip.
Having looked at the new part I decided to get a stainless steel replacement (Hack Engineering). It is a nicely machined part but I polished the tip to prevent any wear on the clutch leaver.
I'm indebted to Mike for highlighting this issue which I had overlooked.
Thanks, Mike :thumb:

Clutch lever pivot by Sabrebuilder, on Flickr


Refitting the gearbox was quickly done and then I treated it to some nice new oil.

Gearbox Oil replaced by Sabrebuilder, on Flickr

Nice quality oil from Gulf but a stupid shape bottle that slips out your hand and has no filling tube like the old Castrol bottles had.You need about 1.2 litres so you have to buy two bottles!

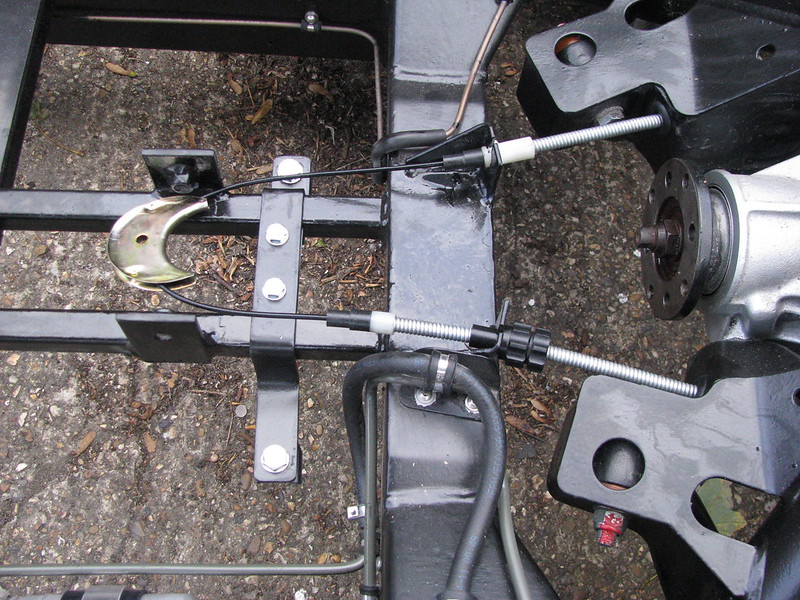
Following the discovery of perished dust covers on my first handbrake cable I had another one shortened. This one has solid rubber dust covers which will hopefully last longer.

Another handbrake cable by Sabrebuilder, on Flickr

Another handbrake cable by Sabrebuilder, on Flickr

So a few more jobs ticked of my task list......

.....peter

October 2018

12 Oct 2018, 1:12pm Engine Mechanical Overhaul Chassis and Body
Not a lot.....

Despite my best intentions holidays, days out and other commitments have prevented much progress being made on the Sabre in the last few weeks.
I have been refitting the exhaust system for the final time with all the brackets painted and with exhaust paste in the joints.(no pictures as it looks pretty much the same as before!)

Still working my way through 'my list of things to do' before fitting the painted body tub but as fast as I complete tasks i keep thinking of more things to do!
I have a thinner front ARB to fit and some new rear springs, but more on that in my next update.

...peter
13 Oct 2018, 11:38am General Update


So true, so true! !
19 Oct 2018, 3:32pm Engine Mechanical Overhaul Chassis and Body Interior & Trim
Heating up a bit.....


:icon_lol: You can call it anything you like but it doesn't change my everlasting list of things to do! :ranger:


-----------------------------------------------------------------------
This week I managed a couple of days on the car.

The first day was raining so I had to find something to do inside the garage so I thought I'd have a go at refitting the heater to the body tub. It turned out that this was a good move as it was a lot easier working standing in front of the tub (rather than leaning over from the side). The body tub is still on the trailer so at a good working height as well.
Of course, this should have been a case of re-bolting things back in the original mounting holes but, as always I had to complicate things a bit more. Because of the length of the BMW straight six space between the back of the engine and the bulkhead is at a premium so I had to mount the heater box as far back as possible. I had filled the original mounting holes before the tub was painted so had to drill new mounting holes. It was very nerve wracking working on the newly painted tub but thankfully no major disasters.
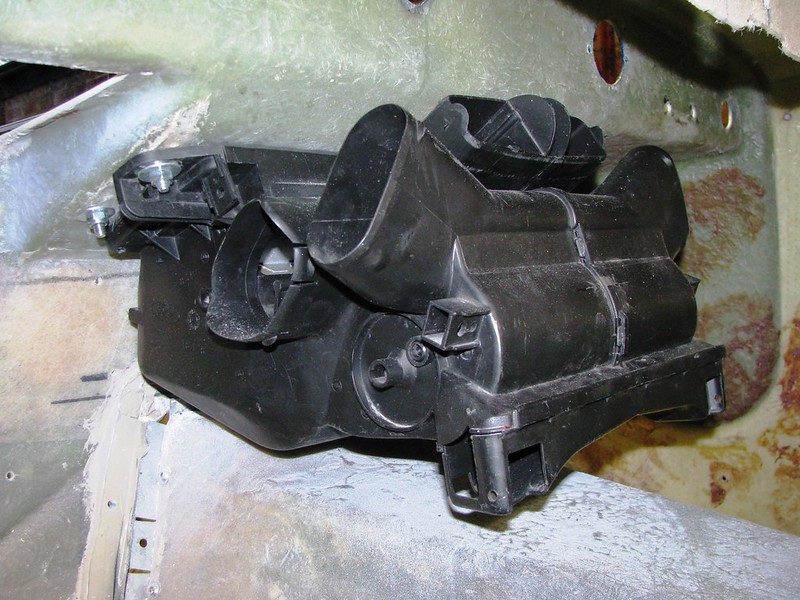
Heater by Sabrebuilder, on Flickr

Not yet finally fitted with nylocks as I had run out of sealing foam strip and I also need to figure which of the multiple outlets I am going to use. You need to be a bit of an octopus to reach both sides of the bolts so I put nutserts in the front fixing points which are almost impossible to reach.

The terminals on the original heater fan module had corroded and rusted badly.
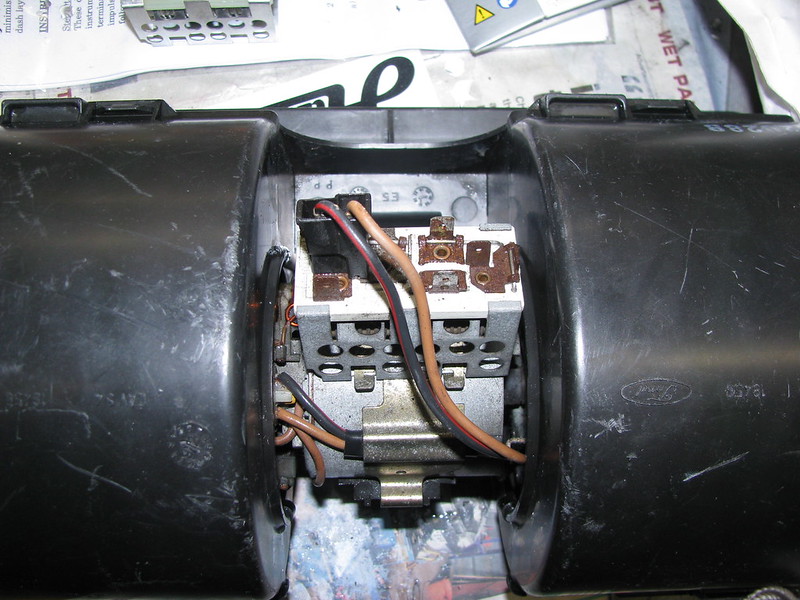
Heater Fan by Sabrebuilder, on Flickr

Luckily I had already found a new resistor pack on ebay so it was a simple job the fit the new one.
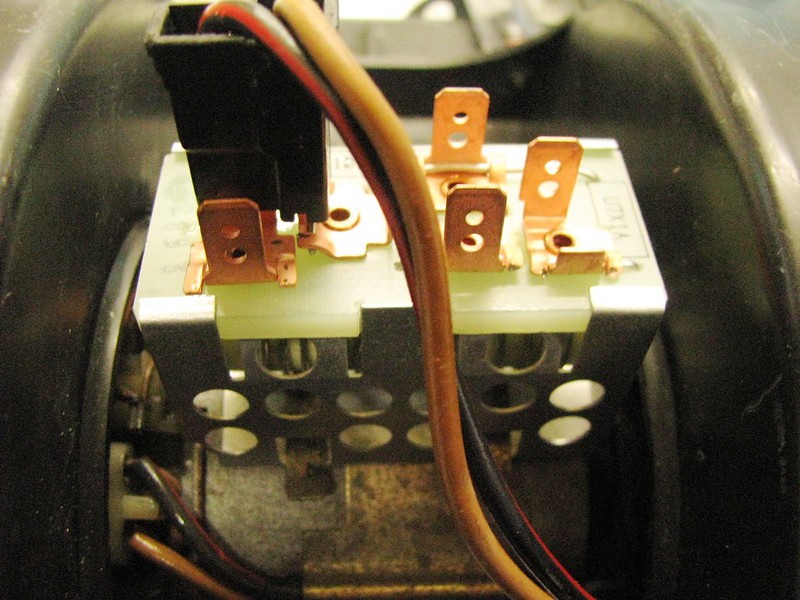
Heater Fan by Sabrebuilder, on Flickr

And here it is fitted to the car....
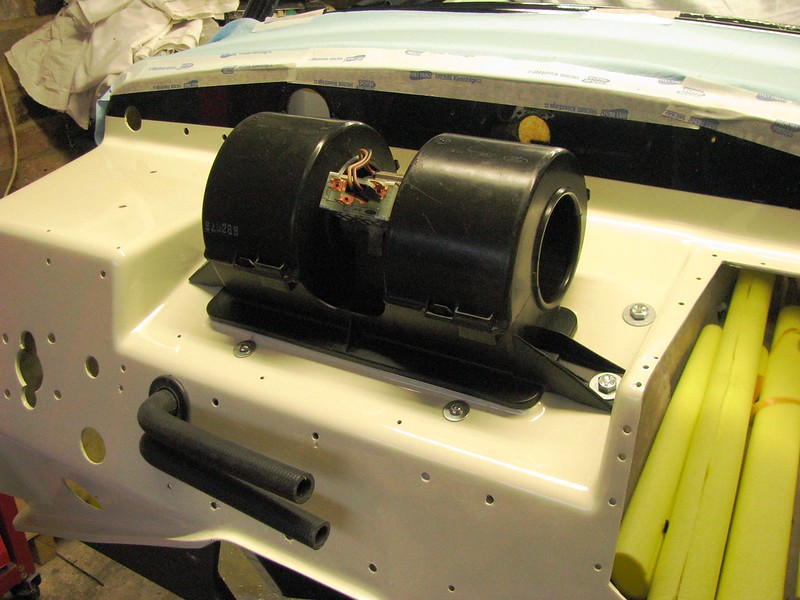
Heater fan by Sabrebuilder, on Flickr

It took me sometime to open up the hole for the heater hose grommet.

The second day's weather was much better so I worked outside on the rolling chassis. I decide to tackle something that has been bugging me for sometime....

Thanks to a Royale owners magazine from June 2000, I have discovered that my original car's builder used the wrong rear springs. Here on the left are standard Sierra rear springs and on the right is the spring originally fitted.
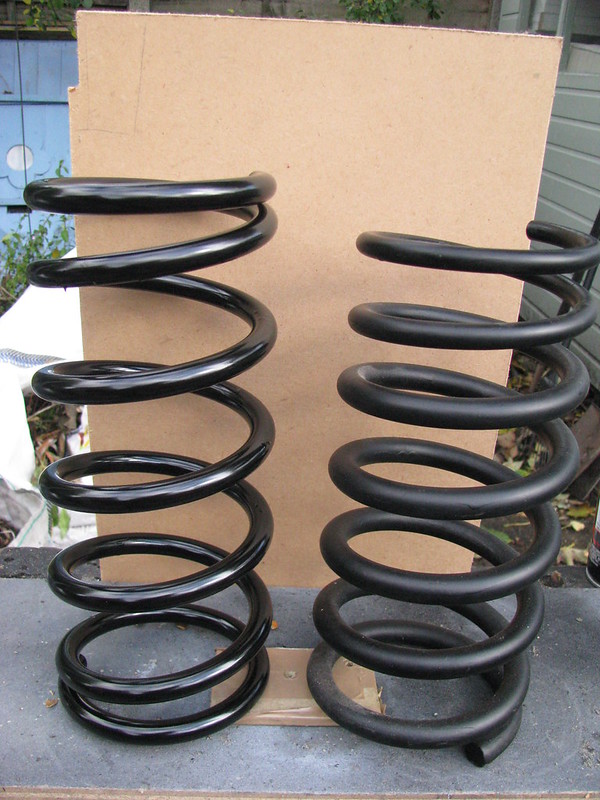
Rear Springs by Sabrebuilder, on Flickr

The old springs may have come from the original donor Sierra but who knows now where they came from?

The standard Sierra rear spring is 306mm overall length and 14mm wire whereas the springs fitted were 283mm and 15mm wire tapering to 10mm.
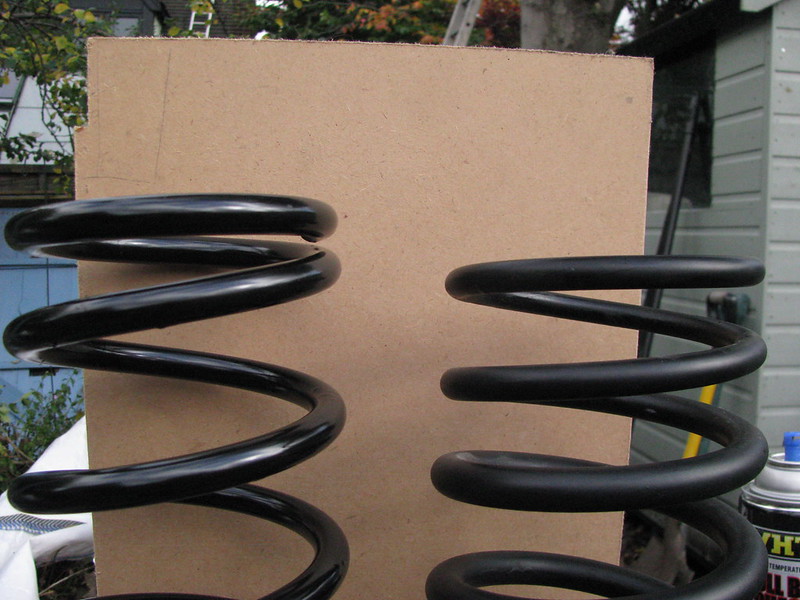
Rear Springs by Sabrebuilder, on Flickr

I followed the Haynes Sierra manual's procedure to change the springs. A bit of a PITA job but much easier to do without the bodytub fitted.
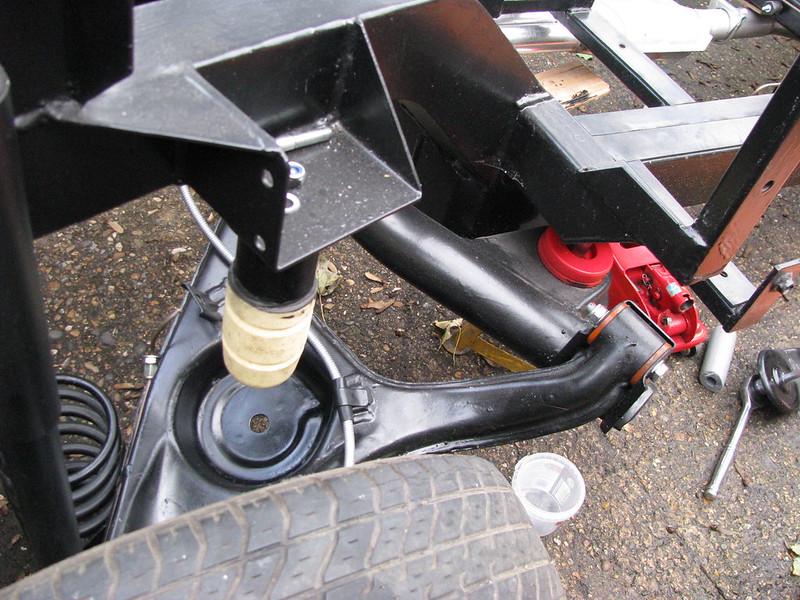
Rear spring re-fitting by Sabrebuilder, on Flickr

Not exactly real progress but I am really glad I have done this now as it was a lot easier than crawling around underneath a finished car.


...peter
24 Oct 2018, 7:35pm Mechanical Overhaul Chassis and Body
ARB swapping....

Today was a car building day and the weather was nice so I was off down to my yard to tackle the next job on my 'to do' list.

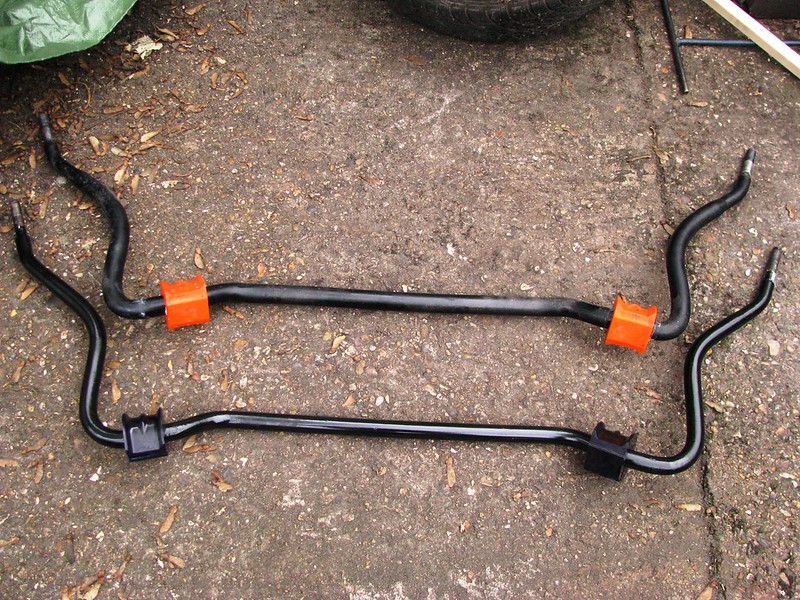
Initially, when the Sabre was first launched, John Barlow who designed the Sabre, advised builders to thin down the ARB to make it less stiff by grinding a flat section, But these cars failed their MOT as it was deemed to be modified suspension which is not allowed. The next best thing is to fit a 24mm bar. Longer term I may fit compression struts but not before the IVA test.

The original 28mm bar above and the new 24mm bar below.

ARB's by Sabrebuilder, on Flickr
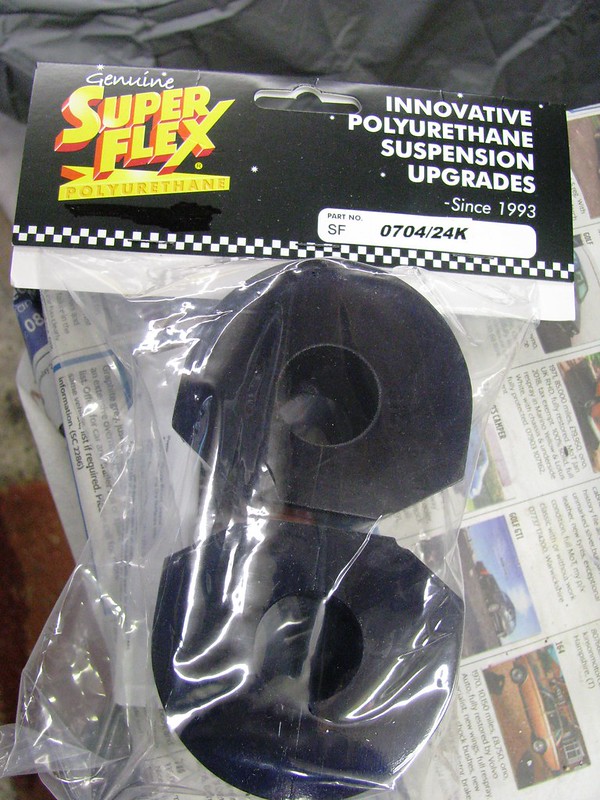
This required new bushes which I got from Superflex.

ARB Bushes by Sabrebuilder, on Flickr

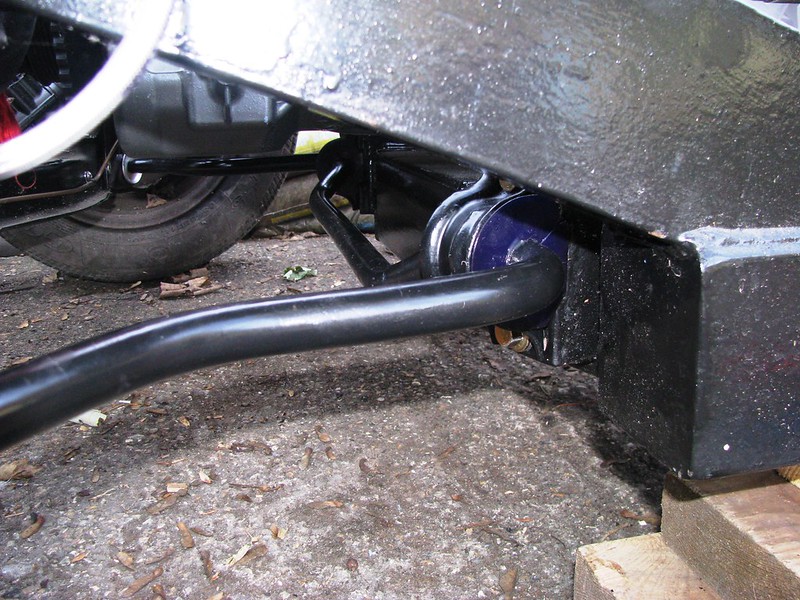
Following the Haynes Sierra manual, I swapped out the ARB.

24mm ARB fitted by Sabrebuilder, on Flickr
So another job ticked off :icon_biggrin:

.......Peter

November 2018

1 Nov 2018, 7:24pm Engine Mechanical Overhaul Chassis and Body Interior & Trim
Edging closer.....

I'm now edging closer to the moment I can refit the main body tub to the chassis for what should be the final time.
This week I've completed a few more tasks on my 'to do' list.

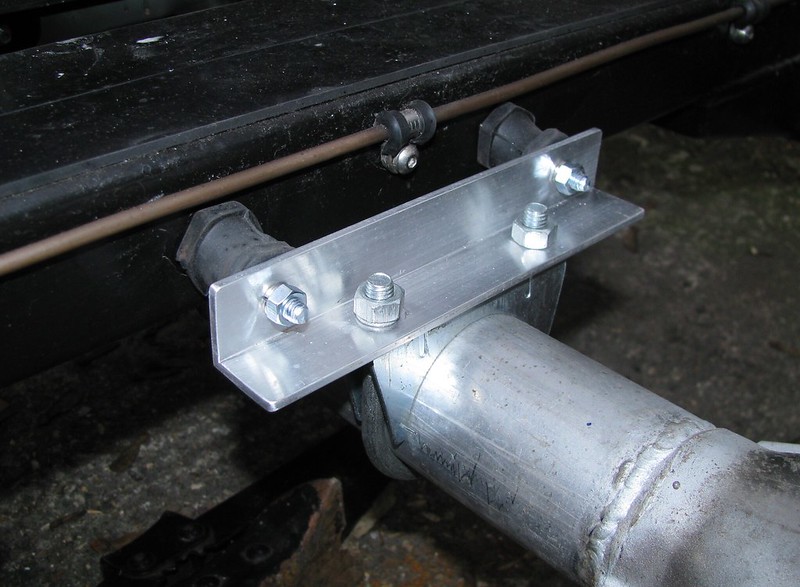
First up, I've added one additional exhaust bracket where the centre pipe passes under the chassis cross-member just the stop the pipe dropping or rattling against the chassis.(since i took this photo I've painted the bracket)

Exhaust bracket by Sabrebuilder, on Flickr

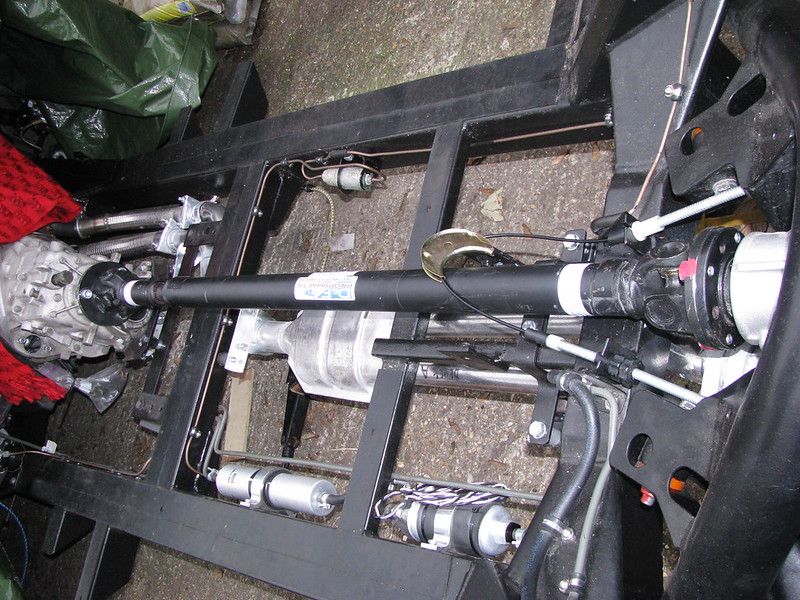
Next up, I've re-fitted the propshaft, hopefully for the final time. It is possible to fit and remove the propshaft with the body tub in place but it was certainly easier like this. I also fitted the cables to the HP fuel pump for the same reason.

Propshaft by Sabrebuilder, on Flickr

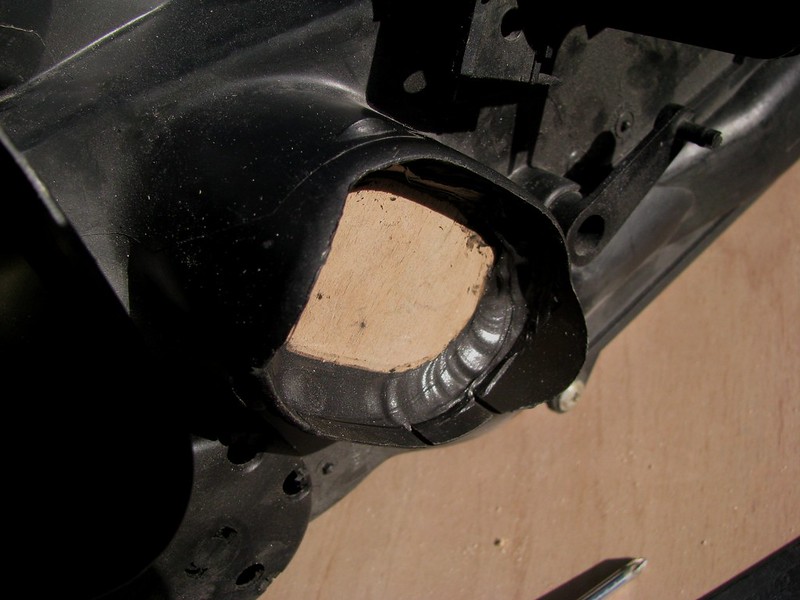
And before bolting in the heater box, I've blocked off the fresh air vents that are not used on the Sabre. I made 'plugs' out of 9mm plywood and then fixed them in place with RTV silicone sealer.

Heater by Sabrebuilder, on Flickr
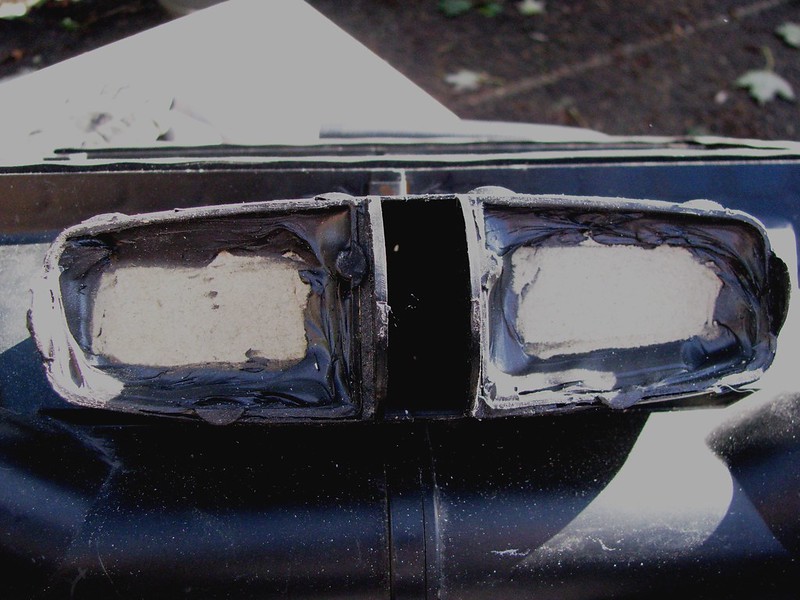
And, I made these 'plugs' from 6mm moisture resistant MDF.

Heater by Sabrebuilder, on Flickr

Now there is just a few small jobs to do before the body re-fit......

....peter
5 Nov 2018, 8:39am Engine Chassis and Body
Significant milestone!!


Hi Patrick,
no there isn't but I think the risk of failure is pretty low so I'm not concerned.


-----------------------------------------------------------------------------------------

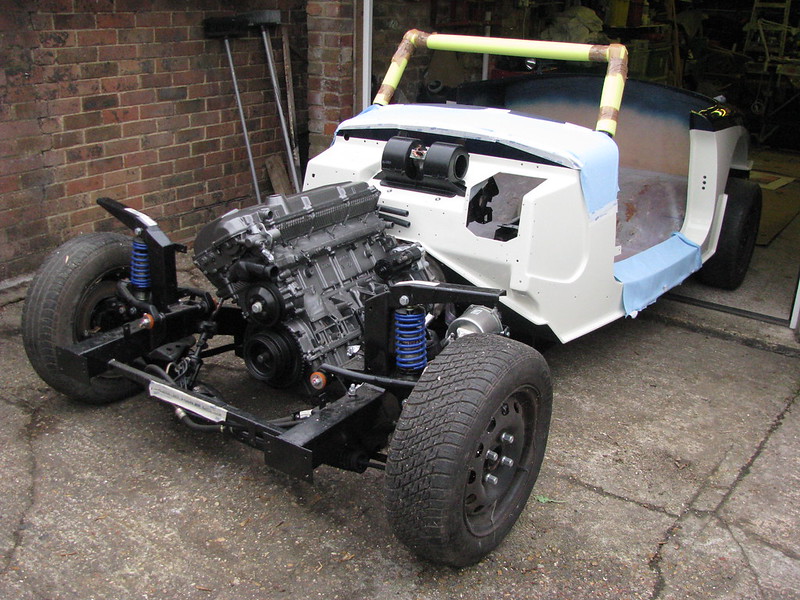
This weekend I reached a significant milestone in my re-build when we re-united the main body tub with the rolling chassis. It doesn't look much but due to the quality and thickness of the GRP this is a four man lift.

Body tub fitted by Sabrebuilder, on Flickr
I can now crack on with the build inside my garage :whoo:
The next milestone is to get the engine running again but there is lots to do before I get there....:icon_rolleyes:

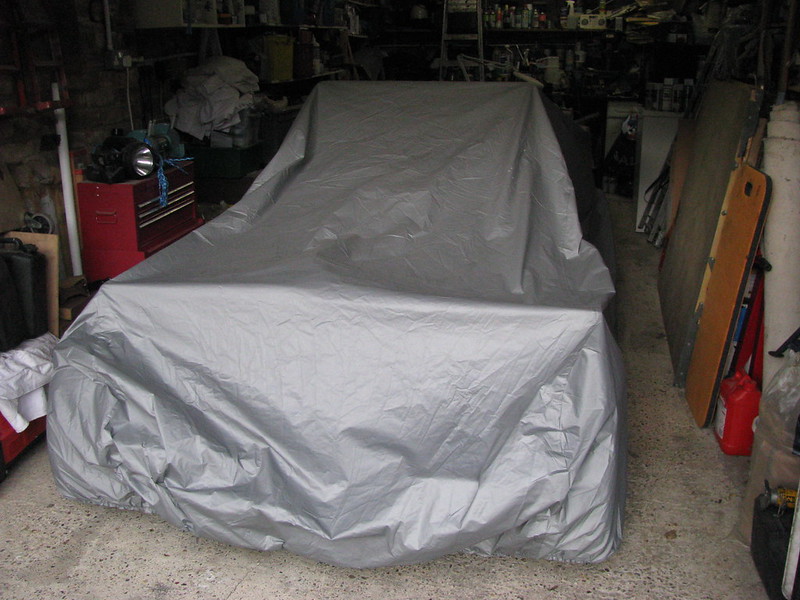
Until then the car is tucked up in the dry....

Bedtime by Sabrebuilder, on Flickr

....peter
12 Nov 2018, 7:56pm Engine Mechanical Overhaul Chassis and Body Electrics
Progress steps.....

Now that the body tub is in place I can now focus on refitting all the engine ancillaries. Many of the parts have been in storage for about 4 years since I dismantled the engine donor car (Is it really four years ago, gulp!!).
Some had been cleaned and repainted already but others needed a coat of paint before installation which takes up a lot of time especially as the weather has not been ideal.

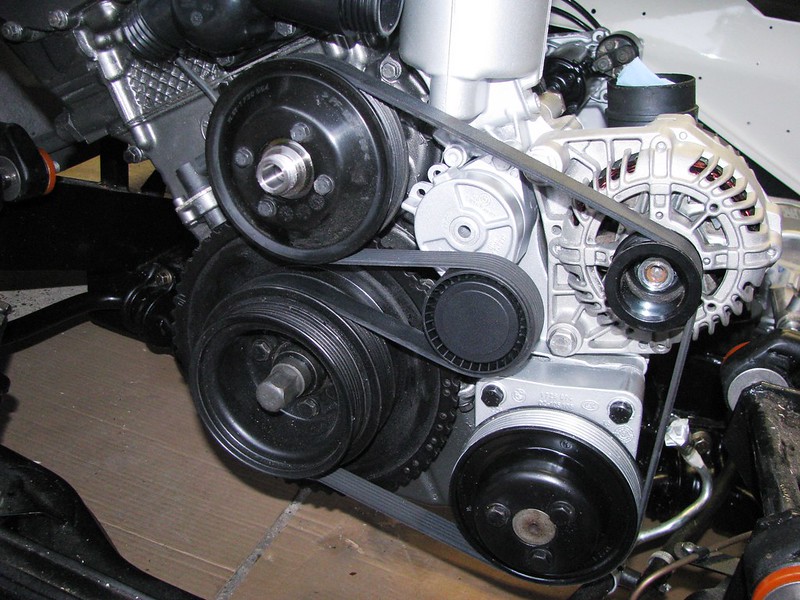
To start, I installed the oil filter housing followed by the alternator, power steering pump and the belt tensioner. A new wheel was fitted to the tensioner as these are quite cheap and good practice. And of course a new belt. The alternator was replaced by a nearly new refurbished one as the original was water damaged. I also re-installed the cam and crankshaft sensors and a new vanos oil pipe. New gaskets and seals were used throughout.

Engine ancillaries by Sabrebuilder, on Flickr
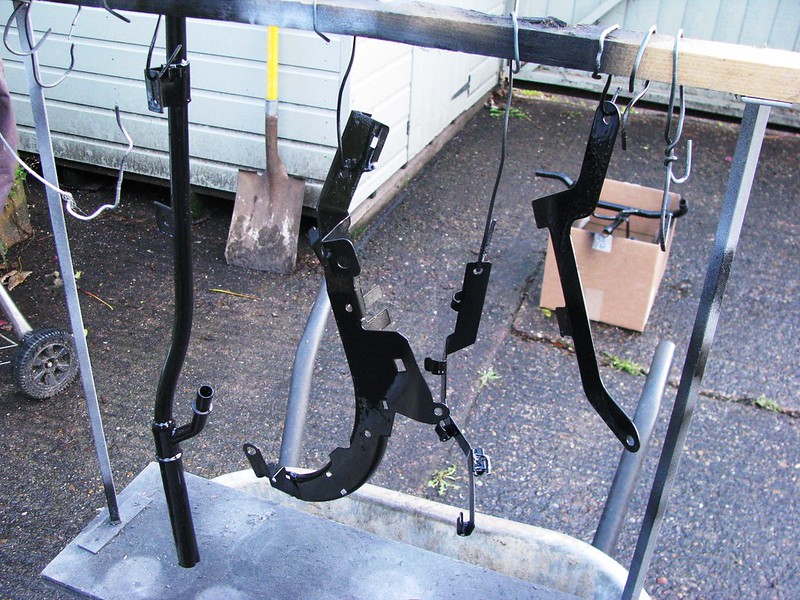
Whilst digging out the parts I also found a miscellany of cable trays and brackets that needed de-rusting and painting.

Misc. Engine parts by Sabrebuilder, on Flickr
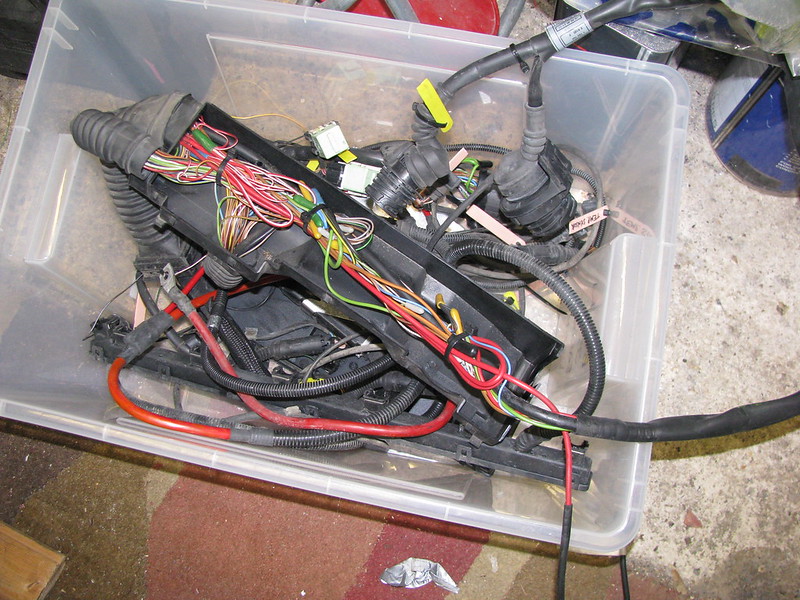
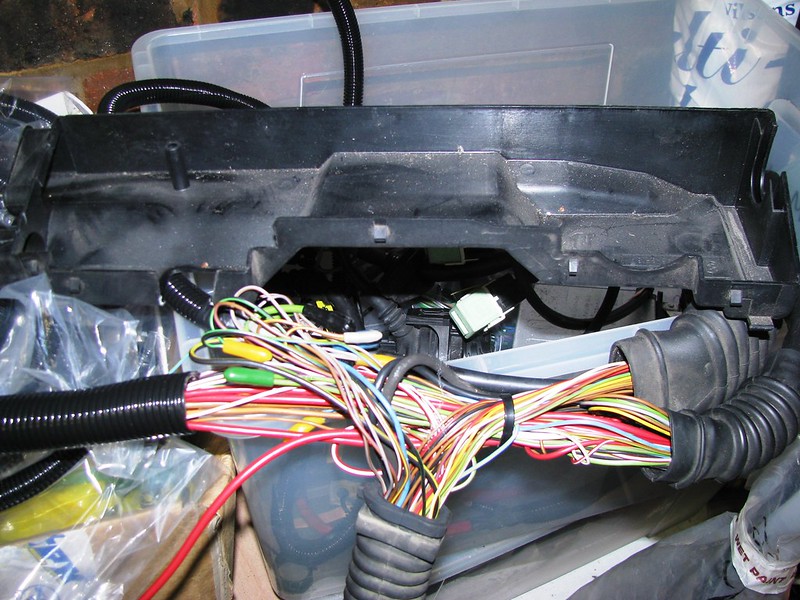
My next job will be to try and work out how to install the engine loom whilst try to keep the engine bay looking neat and tidy....

BMW engine loom by Sabrebuilder, on Flickr

It's a great feeling to start emptying the boxes of parts although finding all the bits can be challenging at times!


....peter
29 Nov 2018, 9:15pm Engine Mechanical Overhaul Chassis and Body Electrics
Chipping away....

I've not had a huge amount of free time to work on the Sabre over the last couple of weeks but I have been preparing and painting some parts and starting to re-assemble them into the car.

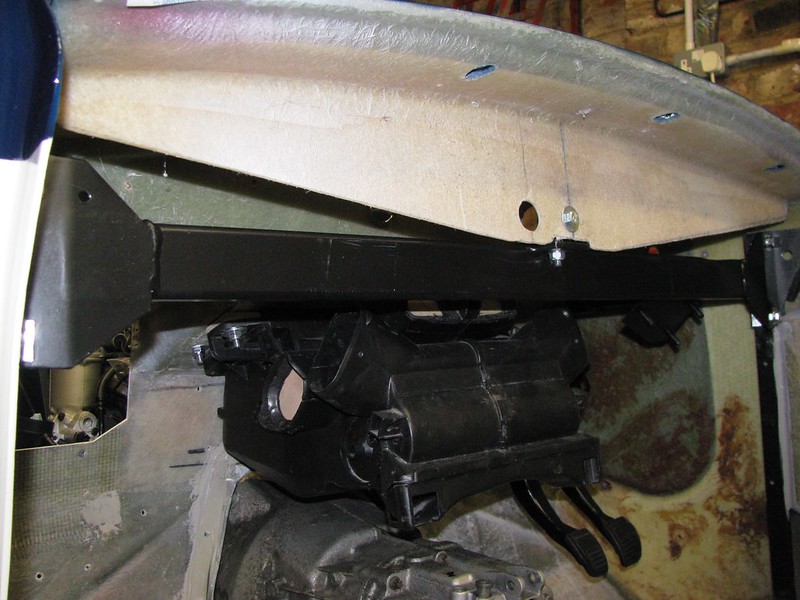
There is a very substantial steel crossmember that bolts either side to the 'A' posts that are bonded/bolted to the body tub.It also supports the scuttle with a single bolt in the centre. The crossmember also supports the top of the Sierra pedal box.
I've repainted it and refitted to the car. I masked or cleaned off the paint where the parts are bolted together as I want a good earth connection between the parts.

'A' post crossmember by Sabrebuilder, on Flickr
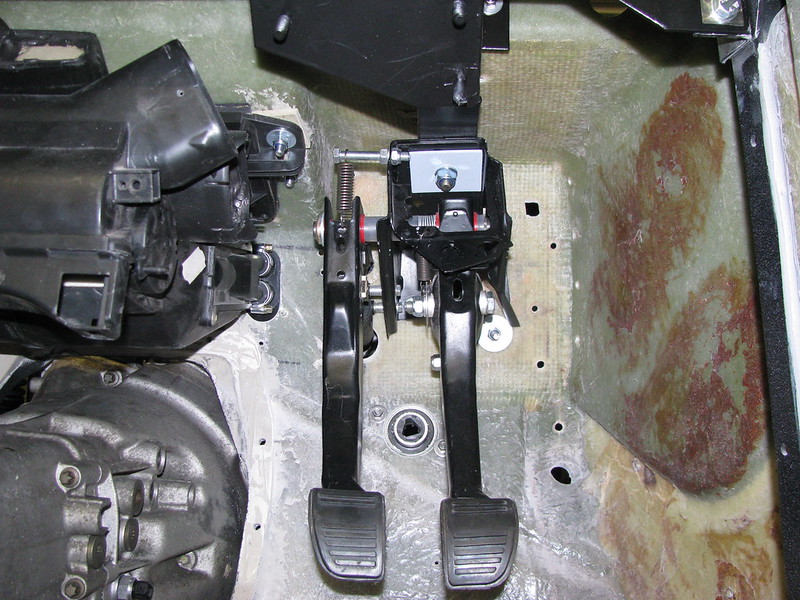
I was then able to refit the pedal box that I made 2 years ago!

Pedal box by Sabrebuilder, on Flickr
This is a back aching job that I don't want to do too often:doubt::icon_sad:

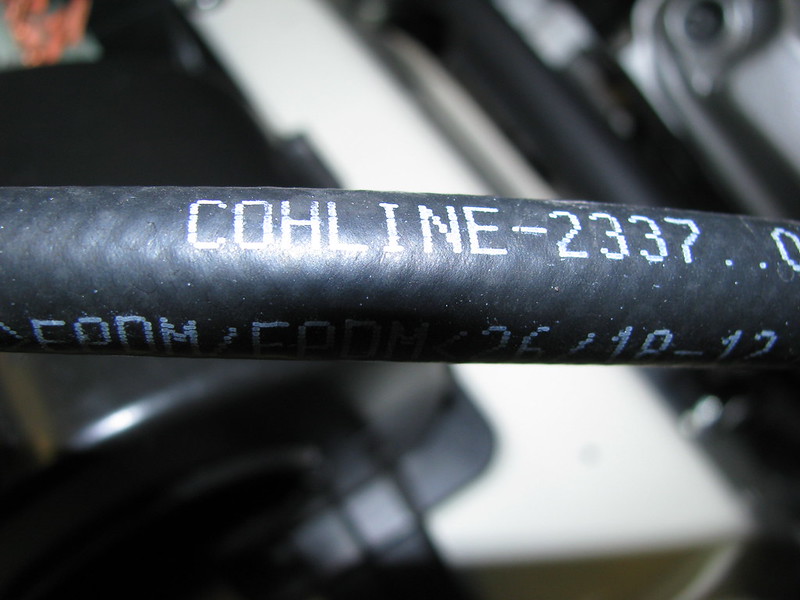
Before installing the pedal box, I pushed a length of Cohline 2337 hose over the inlet spigot of the clutch master cylinder as it is almost impossible to reach after the pedal box is in place. I chose Cohline 2337 as this hose is specifically made for DOT 3 or 4 hydraulic fluid.

Clutch Reservoir hose by Sabrebuilder, on Flickr
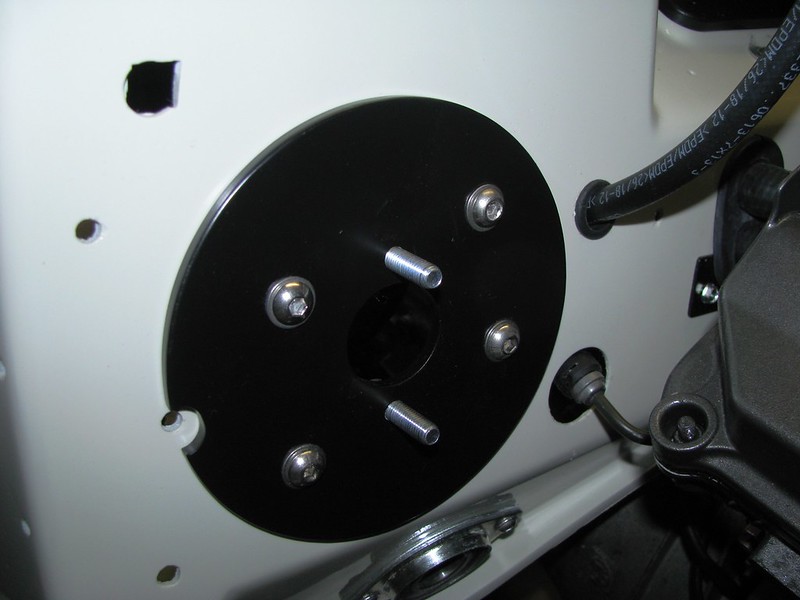
The pedal box is fixed to the brake master cylinder mounting flange.
The clutch reservoir hose can be seen exiting to the right.

Brake master cylinder mounting flange by Sabrebuilder, on Flickr

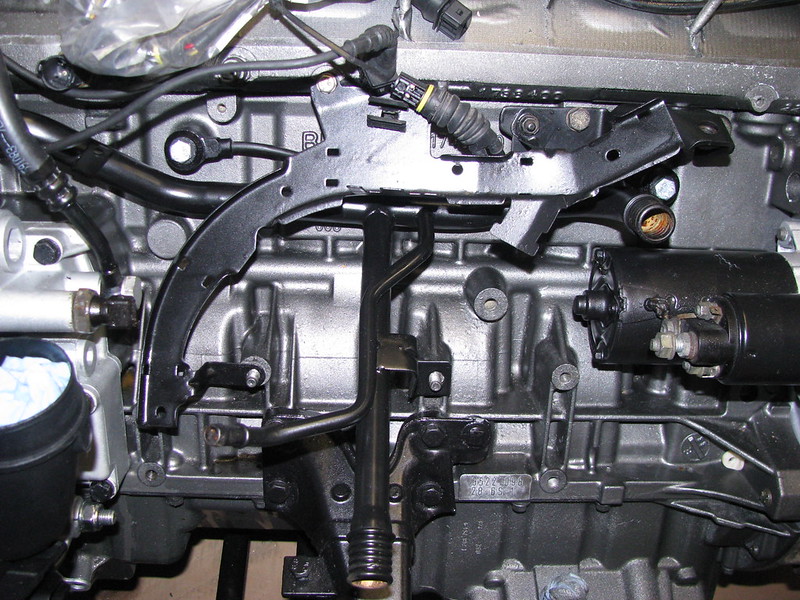
I've also been starting to refit the ancillaries to the engine.
The knock sensors, water rail and cable tray have been re-fitted.The water rail was cleaned and descaled before being painted and new 'O'rings fitted.

Engine ancillaries by Sabrebuilder, on Flickr
Now the cable tray is installed I can start working out how to install the engine loom.

I've made a start on working out the routing of the engine loom. I've split out the diagnostic socket lead and the coil pack driver cables that were sheathed together in the BMW engine bay. I've also removed this large bulky cable cover box that covered the 'T' junction of the loom.

Engine wiring loom by Sabrebuilder, on Flickr
I'm sorry that this picture is not very enlightening but was too dark and wet to take it outside for a proper photo. :icon_confused:

More next week, (or maybe later :eusa_liar:)

....peter

December 2018

11 Dec 2018, 8:47pm Engine Mechanical Overhaul Electrics Interior & Trim
A small diversion.....

Thanks JMC for your compliment.

And a belated thanks to Paul L and Patrick who I forgot to thank on my last update.

___________________________________________________________

I had expected to be writing an update on the installation of the engine loom but after a quick trial fit it soon became clear that I needed to fit the gearbox cover first.
So, I need finish off all the bits under the tunnel.
The e36 clutch is notoriously difficult to bleed so I've bench primed the slave cylinder with DOT 4 fluid before fitting in a hope that will make it easier.
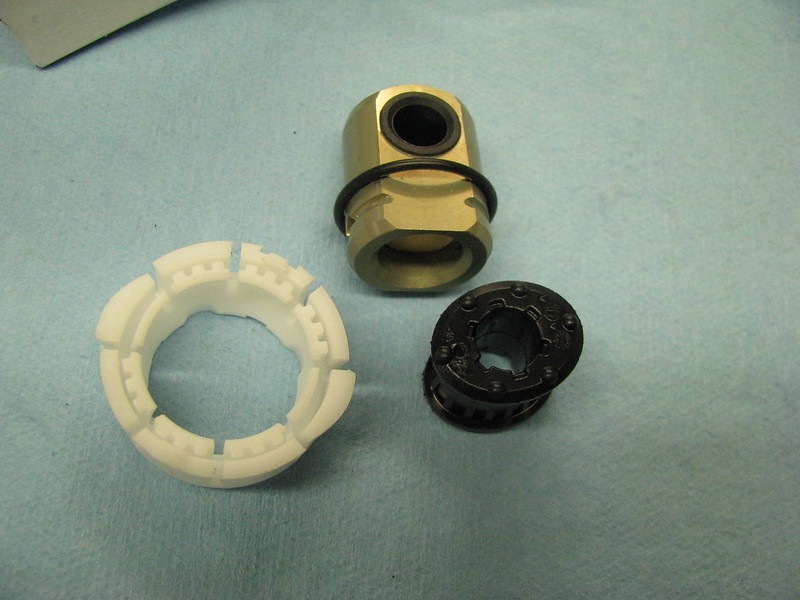
I then moved on to refurbishing the gear shifter. Whilst I had trial fitted it before, I had not refurbished any of the worn bushes. The parts are very reasonable prices so I ordered these up....

Gear selector refurb parts by Sabrebuilder, on Flickr
When I ordered the parts I forgot that I chose a gear selector from a 318 car as this was the right length for the Sabre. The black bush is for a 328 which is oval whereas the bush on the 318 selector rod the bush is round. The correct part has now been ordered.

The gear stick sits in a plastic saddle. According to the workshop manual, to remove it you need a special tool to rotate it by a quarter turn anti-clockwise but I found a few taps on a small drift on one of the indents had it rotated and removed in a jiffy.

Gear stick saddle by Sabrebuilder, on Flickr
Cleaned up and the new saddle fitted. To refit you just push it in until two tabs click into place. No special tools needed nor the need to rotate it.

Gear stick saddle by Sabrebuilder, on Flickr
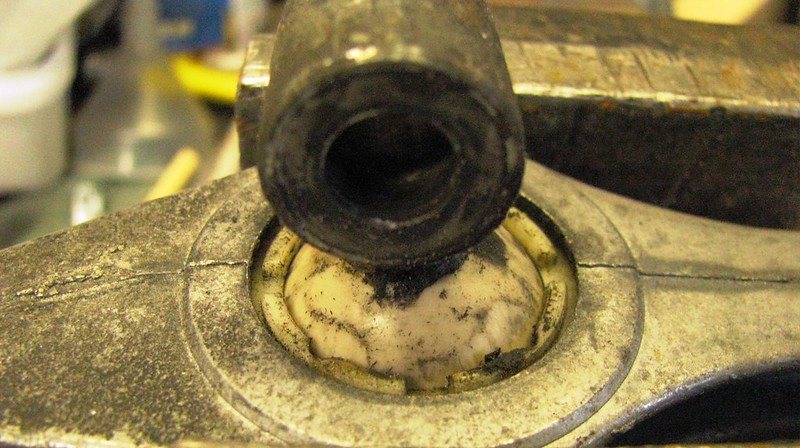
The rod joint (as BMW call it) is held on by a dowel pin through the gearbox shaft and the pin is held in place with a spring lock ring. Inside the joint there is a plastic foam pad that acts like a buffer. I'm glad I changed this part as my foam pad had almost disintegrated into a mush of oil and plastic particles. Interestingly, the old joint was made of heavy steel and the new one is a light anodised alloy.

Gearshift rod joint by Sabrebuilder, on Flickr
The final bush at the end of the shifter will be fitted once it arrives.
I'm now working on designing and making a bracket to hold the speedo sensor which will pick up the output shaft of the gearbox, so more on that in the next update.....

....peter