This is a read-only archive of the old Madabout Kitcars forum. New posts and replies are no longer possible, but every thread is still here to browse and read.
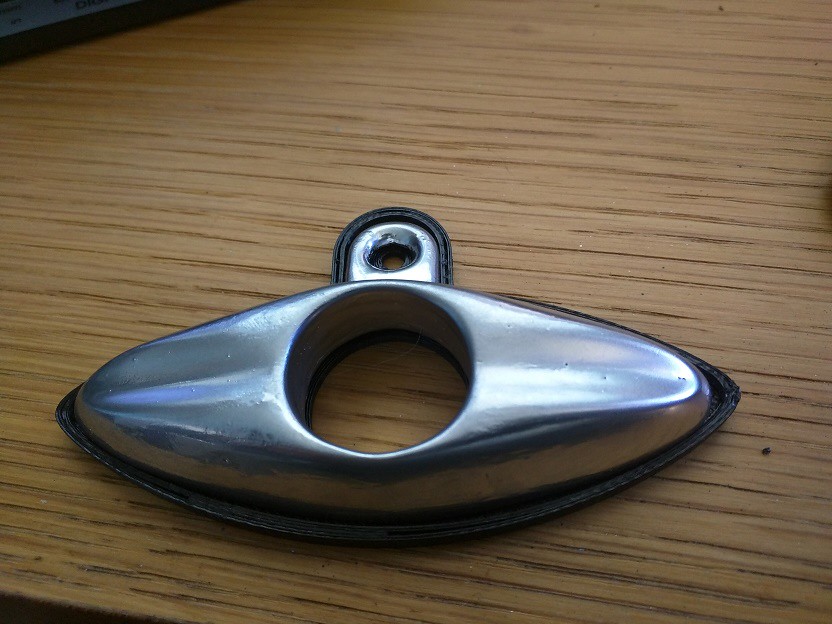
You can see a few strings which are easy to remove, and I should he done that before painting, but the lettering is more of an issue. I think this is because I shrank the design from 5 inches to 4 inches.
When you look at the main body of the badges there are bands around the edges and then a sort of rough infill. I have checked back on the design I downloaded and it is part of the design.
I think I will reprint this in 5 inch sizing and then spend a little time cleaning it up properly. I might even try a little body filler and then paint to make things smoother and brighter.
I will print a couple and send one to Ian for him to play with too See if he can make it look good.
Clever, fancy having a bash at Zagota "Z" for front wings? If so, pm me a price. I will spray it myself. Are they durable? A gear knob roundle would be nice too, maybe could be set in acrylic.
They are printed in PETG which is a fairly weather proof and food safe if that's relevant.
You could use my print outs to form moulds in sand if you want to cast stuff.
I don't have a computer capable of producing the STL files needed but anyone with access to a basic CAD package should be able to do them relatively easily.
I just down load other peoples designs from Thingiverse.com so I don't think there is a Zagota Z there. I was looking for Superleggera but couldn't find that either.
If you do want stuff printing then send me the STL files and we can work something out I am sure.
Worth mentioning that a small ish batch will make it more viable rather than one offs.
I think I did 10 sets for JagTVR which was just under £100 inc P&P so £10/ set.
Clever, fancy having a bash at Zagota "Z" for front wings? If so, pm me a price. I will spray it myself. Are they durable? A gear knob roundle would be nice too, maybe could be set in acrylic.
The Zagato "Z" is easily made from a small flat of aluminum using a saw and file.
Good ideas, thanks gents. I could even use the Z of the Z3 as a start point for a template, so I will have a good think about that. I don't want, or need to have the Zagato Milano text imprinted.
Worth mentioning that a small ish batch will make it more viable rather than one offs.
I think I did 10 sets for JagTVR which was just under £100 inc P&P so £10/ set.
And excellent they were as well, you just need to polish them so a buff is very handy.
There are a couple of the smaller ones but the glass plate I printed them on shifted so they are not great. I was thinking you might want to try to form a mould from them.
Please post photos of what ever you do in the end.
BTW It is great for printing kids bangles. Lots of happiness with very little filiment used 20171019_195124 by WCA!, on Flickr
Awesome work! When oh when will an affordable chrome plating solution be available for 3D printing I wonder? By the way there are quite a few solutions available free for designing the files needed for 3D printing. Some are pretty easy - my 10 year old is learning them at school.
Clever, fancy having a bash at Zagota "Z" for front wings? If so, pm me a price. I will spray it myself. Are they durable? A gear knob roundle would be nice too, maybe could be set in acrylic.
How about using the "Z" from the boot script of the Z3?
Cheap, plenty about and will give the car a subtle nod to the base car.
How about using the "Z" from the boot script of the Z3?
Cheap, plenty about and will give the car a subtle nod to the base car.
Haha, great minds and all that. I have discovered, now that I have finally stopped working, that I am even more lazy than I suspected, so this idea had surfaced already.
Awesome work! When oh when will an affordable chrome plating solution be available for 3D printing I wonder? By the way there are quite a few solutions available free for designing the files needed for 3D printing. Some are pretty easy - my 10 year old is learning them at school.
It should hydrochrome. That stuff goes on like glass cleaner. Not that expensive, but really convincing. Needs lacquering though as unless you buy the automotive grade stuff (many ££s), it's not UV resistant.
Small parts are best vacuum chrome plated. HOWEVER, the final finish depends on how good the finish is on the piece that is being plated. Almost all the printed parts that I have seen are rough to say the least and every mark will show.
Small flat parts can be cut from stainless steel and polished. The badges that I had cut were far better than any 3d printed badges you could get.
The trick is to print in ABS (or uv-stable ASA) and use acetone vapor to smooth the skin. Find a jar with a lid and hang your part form the lid such that it does not touch anything... pour in some acetone and put in 60-65c water bath for 3-8 minutes. The acetone will evaporate and condensate on the abs (and the glass) disolving the abs and creating a smooth skin. Let harden for a few hours before touching! Still some finishing to do after that....
 20171021_165617 by WCA!, on Flickr