MadaboutKitcars

This is a read-only archive of the old Madabout Kitcars forum. New posts and replies are no longer possible, but every thread is still here to browse and read.

Swifty's Navigator

5 Apr 2014, 7:35pm
The first post for my Navigator build and the start of a great journey.

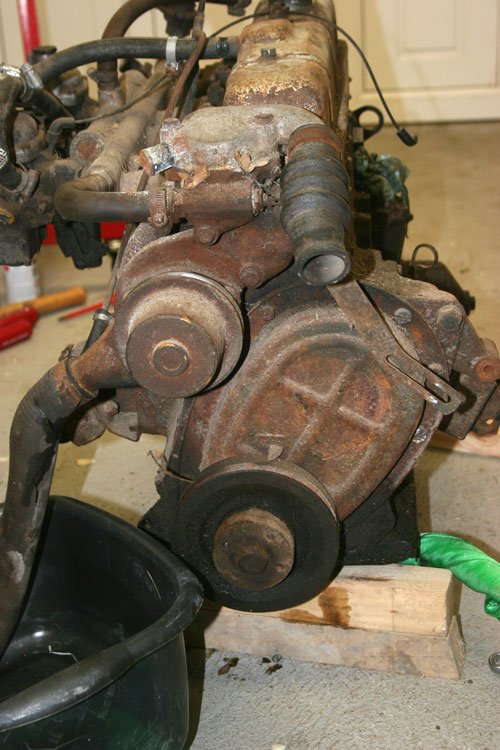
Bought a rather tired looking GT6 engine off flea bay for a reasonable price local to where i live which is handy.

Attachment “IMG_3992.jpg” from the original forum could not be reliably recovered.

Engine out of the van and ready for a full strip down.

IMG_4001.jpg
IMG_4005.jpg


She does look like she needs some TLC so here goes

Attachment “IMG_4021.jpg” from the original forum could not be reliably recovered.
5 Apr 2014, 7:44pm
Attachment could not be found in the archived database.
IMG_4024.jpg


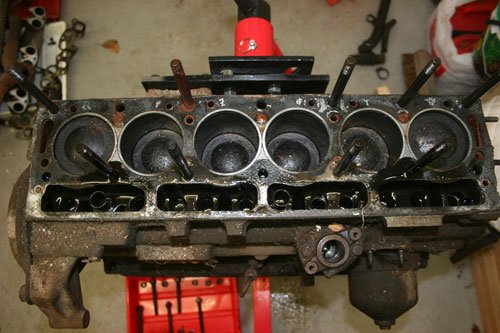
Rocker cover off then head removed to find six domed topped pistons as this is from a 1973 GT6 the later version, stronger crank etc.

IMG_4027.jpg
IMG_4032.jpg

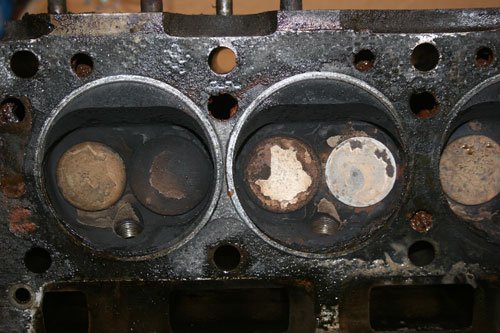
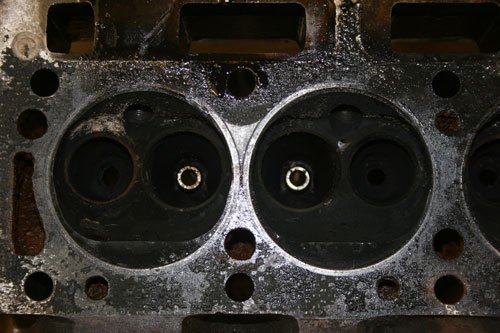
Now it's the turn of the head which has the larger inlet valves, a little bit of carbon build up and few burnt valve seats which will be fixed later.
5 Apr 2014, 7:52pm
Engine turned through 180 degrees to strip the bottom end.

Attachment “IMG_4040.jpg” from the original forum could not be reliably recovered.
IMG_4046.jpg


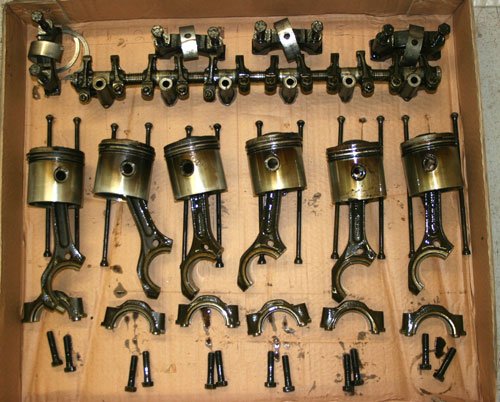
View into the crank case where the sump goes, all pistons con rods, main bearing housings and rocker shaft laid out in order. You can see a slight build up of carbon deposit around the piston skirts where the hot gases have been passing the piston rings, also there is a little rub wear adjacent the gudgeon pin axis which is normal for an engine of this age.

The engine was then sent off to an engine machine shop to be De-greased, the crank shaft journals polished, cylinder bores honed, the cylinder head was also converted to run on unleaded with hardened exhaust valve seats along with new valve guides and a 6th head skim.

Attachment “IMG_4051.jpg” from the original forum could not be reliably recovered.


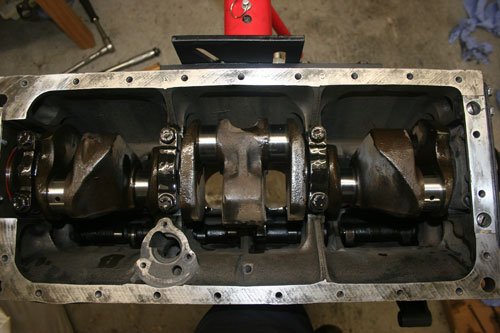
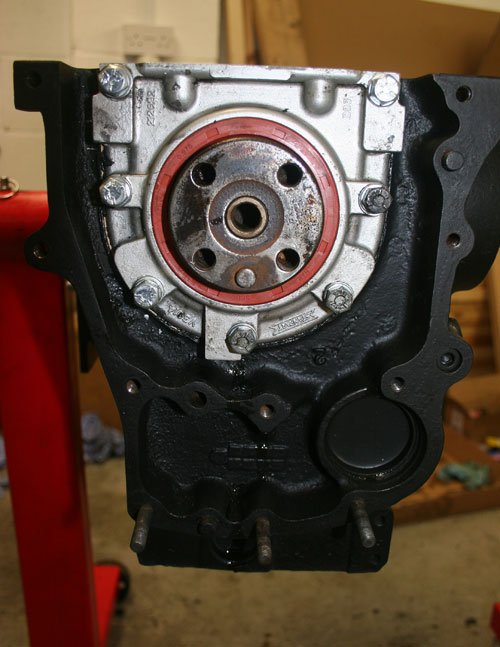
A very clean degrease crank case is ready for re assembly, all the oil and water channels have been cleaned and blasted with compressed air before the re assembly begins to make sure the engine has many more years ahead. New core plugs fitted.

IMG_4053.jpg
IMG_4055.jpg


Crank shaft fitted and torqued down with new main bearings. New crank shaft oil lip seal in place.

Well that's it for now, its time for a cuppa, i will load more photos soon.
5 Apr 2014, 8:03pm
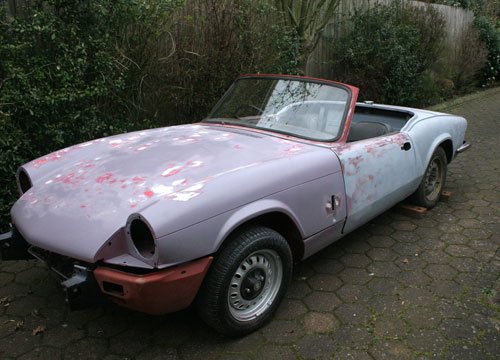
Exciting time the donor spitfire has arrived looking worse for wear but ready for a complete make over to a 50's sports car, roll on.

IMG_4058.jpg


Cant wait to start the strip to get a better look at the chassis.

Attachment “IMG_4073.jpg” from the original forum could not be reliably recovered.


Body midway from being removed.

IMG_4091.jpg


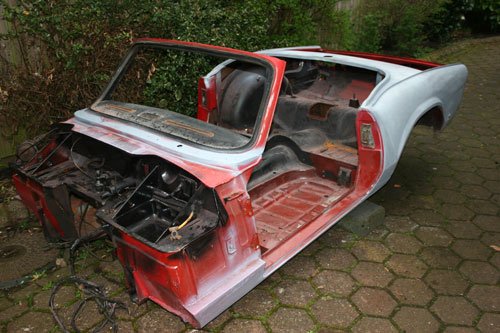
First major hurdle the body tub is off and time to inspect the chassis for problems.


IMG_4076.jpg


The chassis is not too bad just a couple of front outriggers to replace but will get a better idea once the engine is removed.

Well i now have loads of bits to sell hopefully i will get back most of the purchase price for the spitfire.
5 Apr 2014, 8:05pm
Welcome, Swifty. I look forward to following your build. And to think, somebody said that you would never build a car. You've made the right choice.
5 Apr 2014, 8:44pm
Thanks Oxford, i have followed your build and you have an eye for quality and detail which is the type of build i am hoping to achieve.

I do have more photos as i know the guys on here love to see what your up to and I've been busy manufacturing parts on the CNC gear we have so exciting times ahead.
5 Apr 2014, 8:45pm
oxford1360 wrote:
Welcome, Swifty. I look forward to following your build. And to think, somebody said that you would never build a car. You've made the right choice.


Never build a car? Who said that then...

Welcome to the fold Swifty, looking forward to seeing your build come together. :thumb:
5 Apr 2014, 9:43pm
Hi Swifty,

This is looking very productive and thoroughly at the same time. Looking forward to see the progress on this project.

michiel
5 Apr 2014, 9:44pm
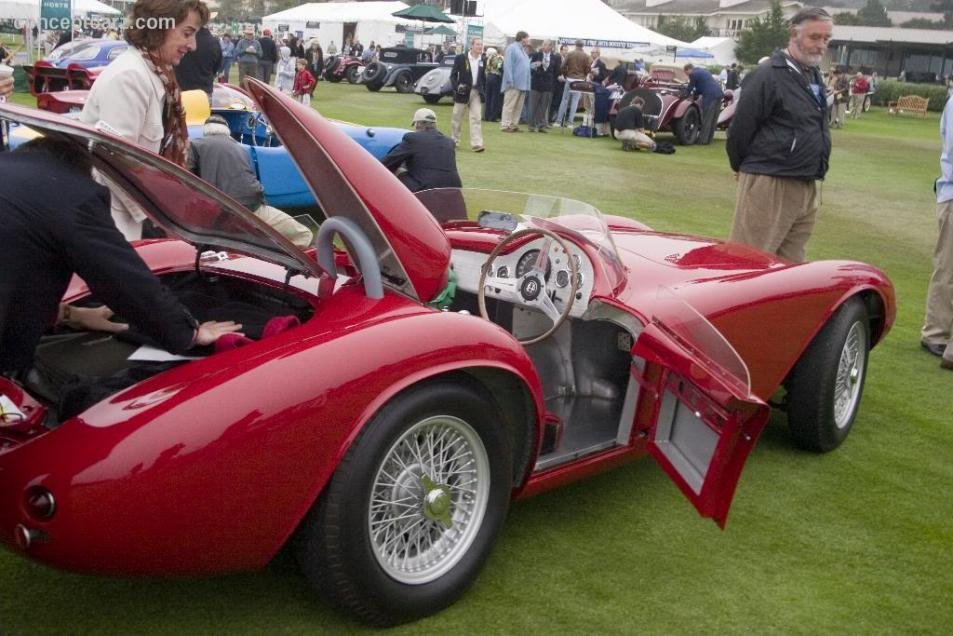
Has anybody attempted to hinge the hump like in this photo, it looks like a cool solution for a rear boot lid.

53_Alfa_Bucci_Special_TV_05_PBL_03.jpg
5 Apr 2014, 9:48pm
christinedmc wrote:
Hi Swifty,

This is looking very productive and thoroughly at the same time. Looking forward to see the progress on this project.

michiel


Thanks Michiel i have also followed your build which is to an exceptional high standard, are you an engineer by trade as the metal work on your build is spot on.:thumb:
6 Apr 2014, 7:06am
swifty wrote:
Has anybody attempted to hinge the hump like in this photo, it looks like a cool solution for a rear boot lid.

53_Alfa_Bucci_Special_TV_05_PBL_03.jpg


That hinged head fairing wouldn't be particularly difficult to pull off and it sure looks cool. There is no right or wrong with these cars, it's your project and you build it how you want it, so if you'd like a hinged hump just go ahead and make one!

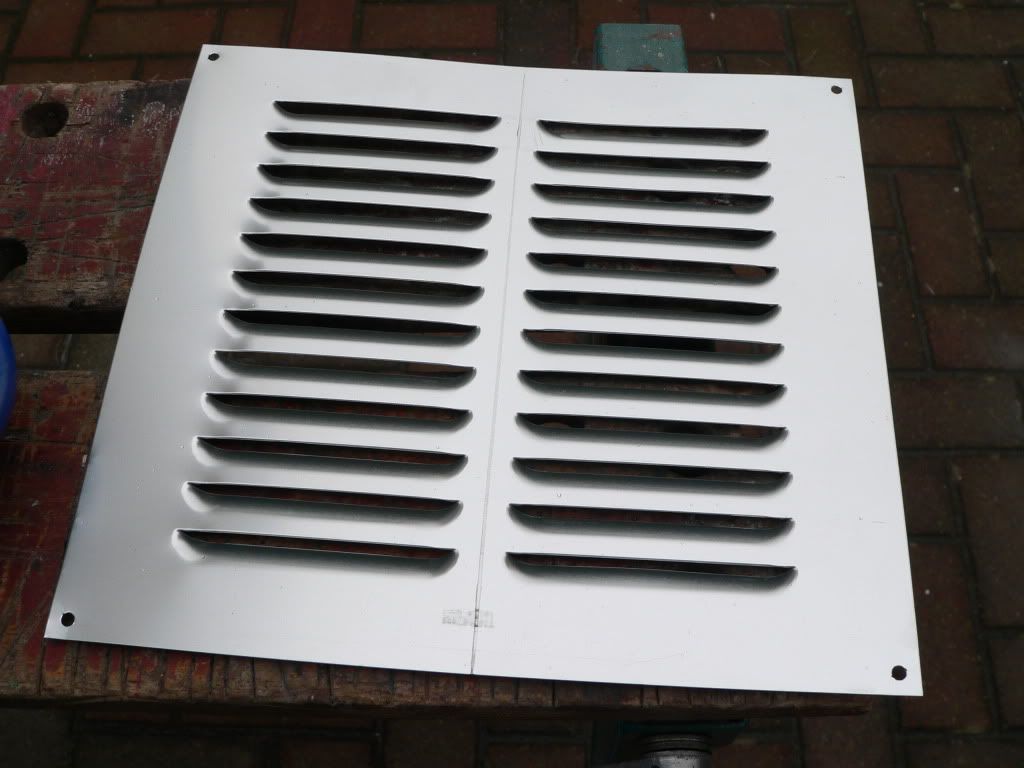
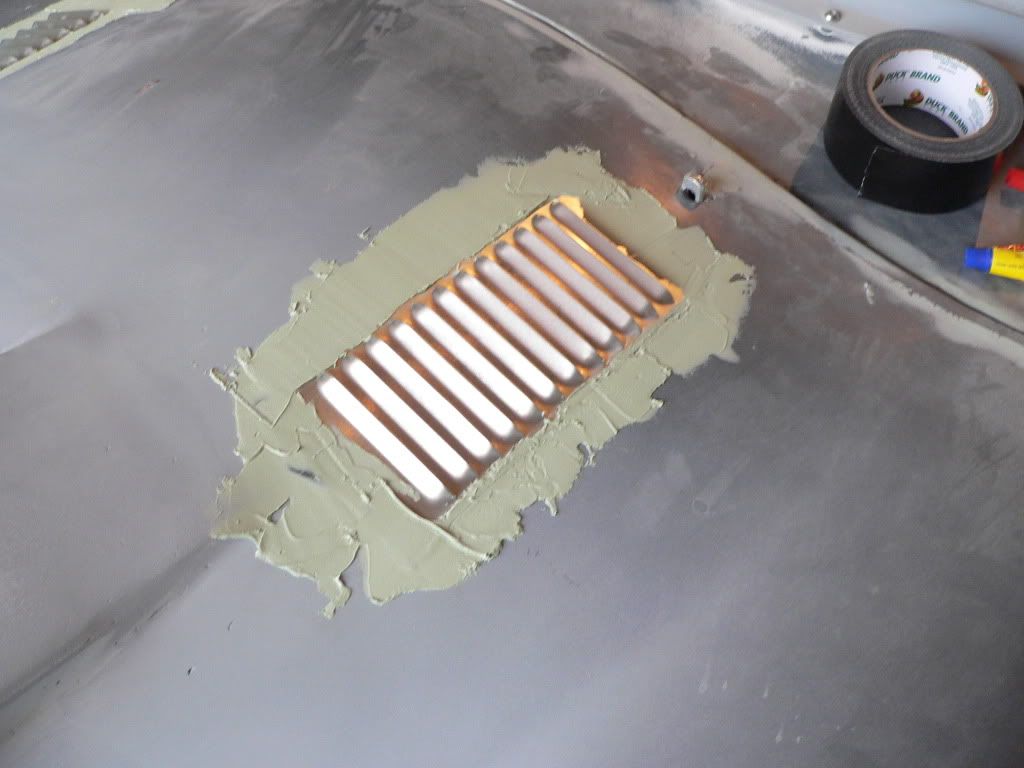
Without trying to blow my own trumpet too much, some of the modifications I made along the way show what's possible if you put your mind to it. Near the end of my build I saw a 50's Jag with loads of louvres in its bonnet and I thought 'I'd like some louvres in my bonnet...' So, a £3.49 aluminium airing cupboard vent from ebay and a little ingenuity later -



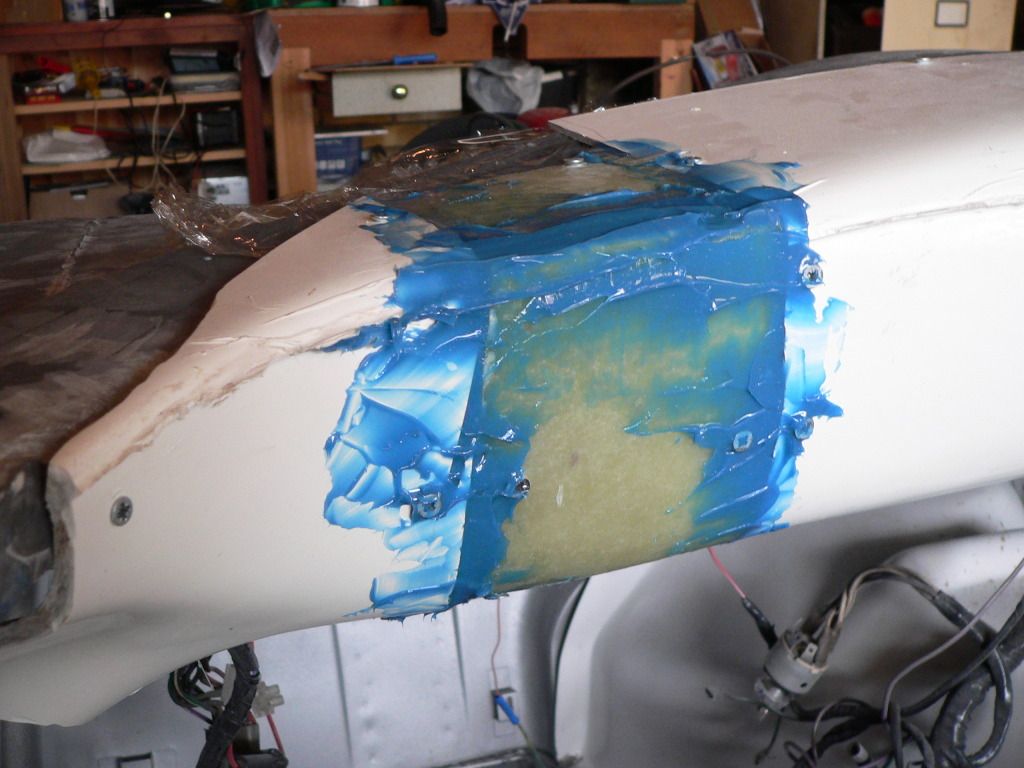
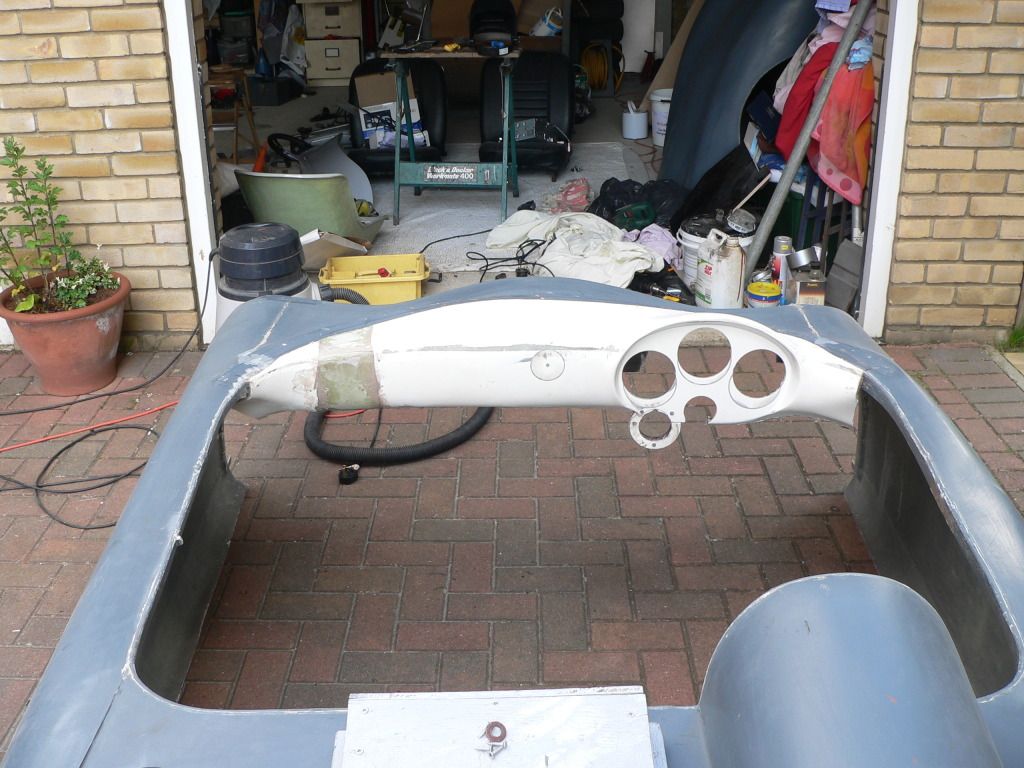
I also wanted a different dash design to the 'standard' flat panel, so I sourced a moulding taken from a Porsche 550 Spyder and made it fit -

This is the traditional dash layout as expertly put together as it's possible for it to be (Barry's car) -
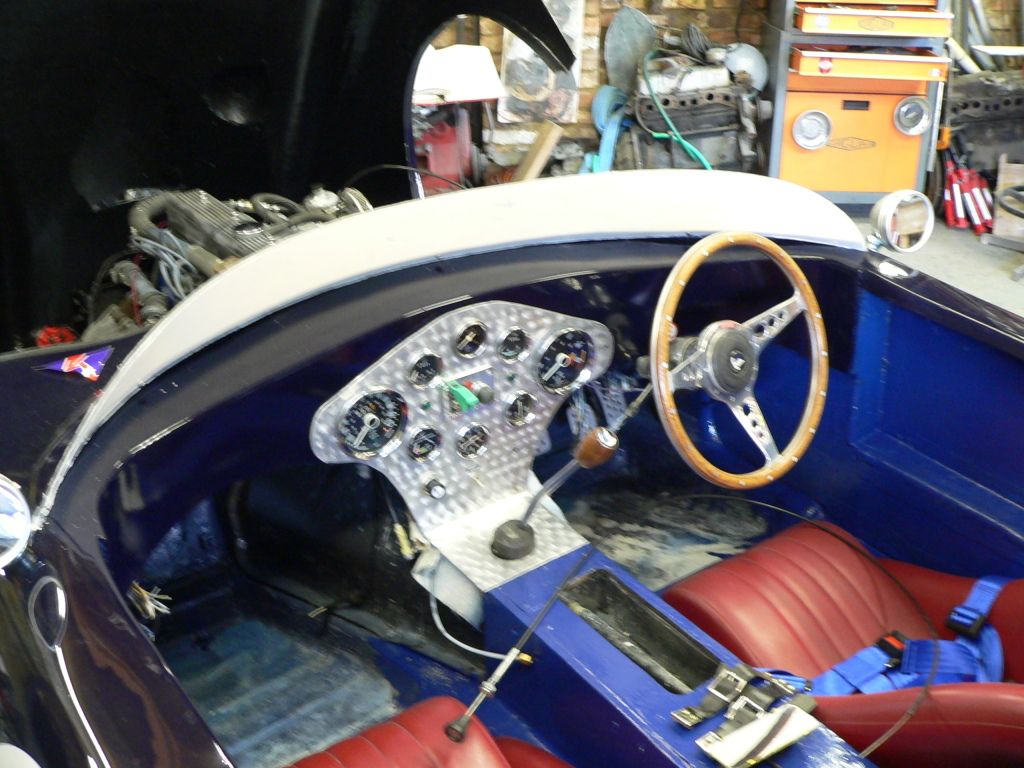


Very nice indeed, but I wanted the instruments ahead of the driver rather than in the centre of the car, so this was my solution -

Dash moulding from a 550 Spyder.
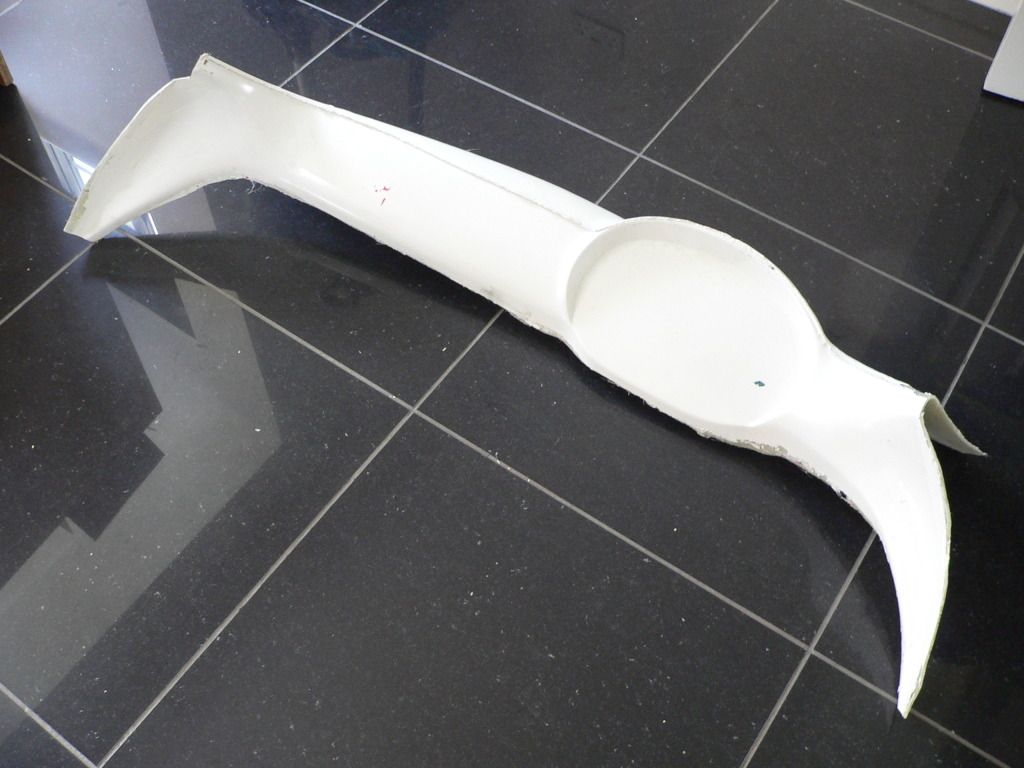

Not a great fit out of the box.
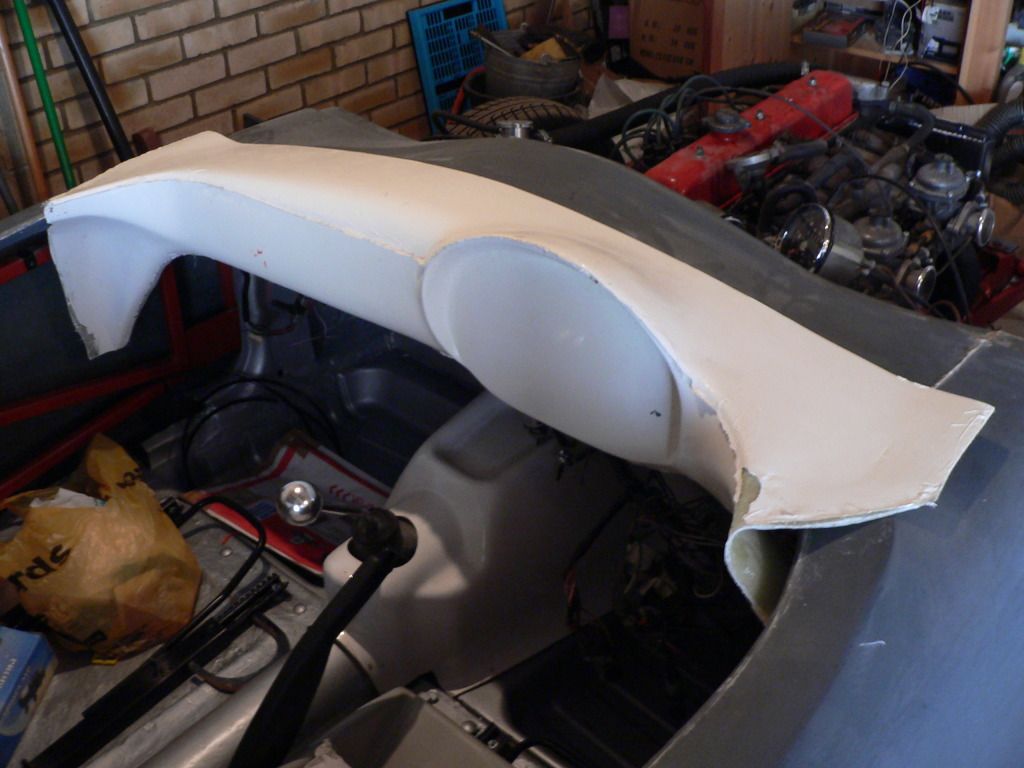

Bit of 'cut and paste'
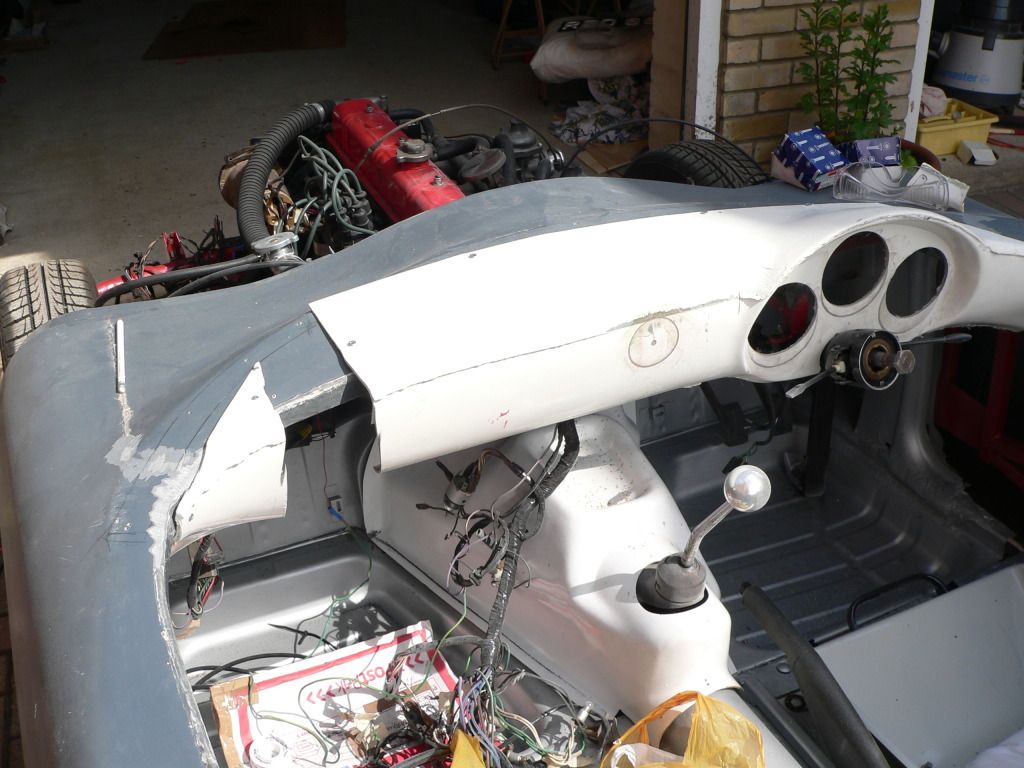


To end up with something a bit different -
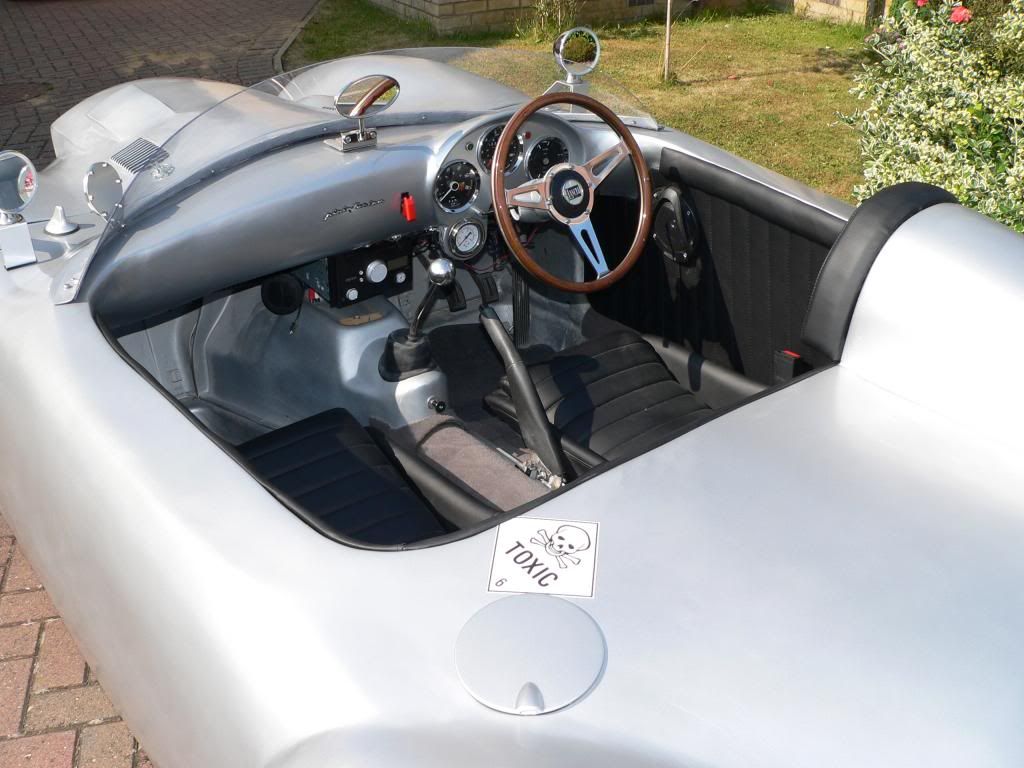

Just remember what Yoda has to say about Sammio/Ribble building - impossible, is nothing.
6 Apr 2014, 7:07am
Hi Swifty,
Thanks. No I'm not a engineer by trade. Just an enthoustiast like most of us.

Mars'69 which is building a sammio CV, made a large boot lit which include the two humps he has. So the whole lit is hinged at the back of the seats. But you have to acount for the back of the seats. When the lit opens, the humps could bump into the seat backs, if you haven't sorted this. Also the lit has to strengthened with a frame to make it strong enough.

This Bucci Alfa looks superb BTW. What a beautiful car.

Michiel
6 Apr 2014, 9:05am
christinedmc wrote:
Hi Swifty,
Thanks. No I'm not a engineer by trade. Just an enthoustiast like most of us.

Mars'69 which is building a sammio CV, made a large boot lit which include the two humps he has. So the whole lit is hinged at the back of the seats. But you have to acount for the back of the seats. When the lit opens, the humps could bump into the seat backs, if you haven't sorted this. Also the lit has to strengthened with a frame to make it strong enough.

This Bucci Alfa looks superb BTW. What a beautiful car.

Michiel


Thanks for the heads up on Mars69.

Mister Towed..... the dash blends in beautifully and looks the part along with the rest of the car, its a credit to you, the use of an air vent is a simple and effective solution.

Well its time to go back out and remove the engine from the chassis, oh happy days.
6 Apr 2014, 10:23am
Welcome top the fold Swifty. You've started your project in the right place, getting the Engine (Heart) of the car sorted. I hope the chassis is in as good condition when you're done. Ring or pop in for a chat when you can as we're doing a few interesting things to the Navigator kit that may help you along.
6 Apr 2014, 6:27pm
Thanks Andy, will contact you soon more than likely by phone.

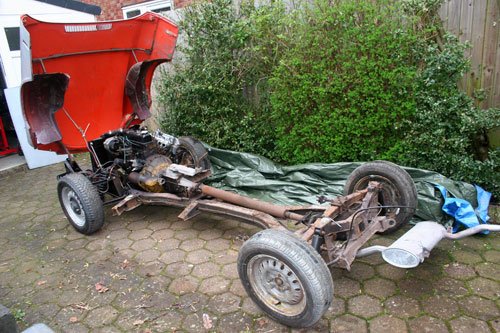
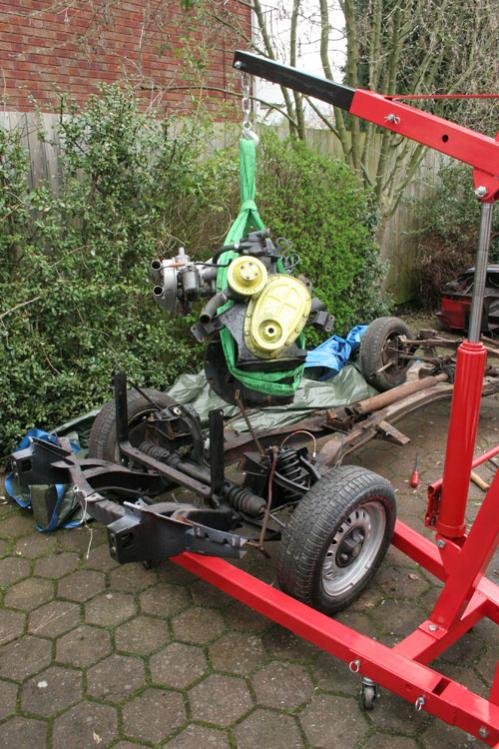
Been busy today removing the redundant engine and gearbox, its sooo easy with the open front end which will come in handy for future work once the car is complete.

IMG_4096.jpg


Engine out, its an easy task to complete with an engine crane, a couple of bolts to remove and hay presto job done.


IMG_4116.jpg


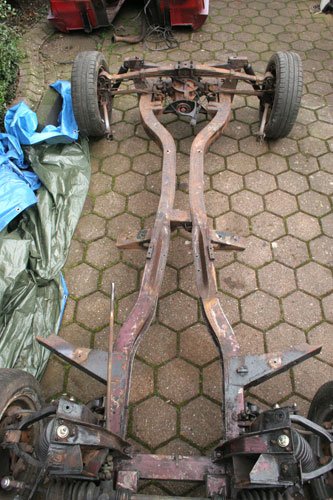
The chassis not too bad especially when you consider it's 41 years old, some area's even have the original paint which when removed has clean steel. The area around the oil leaker parts is as good as the day it was manufactured, its a shame the oil had not traveled all over the chassis.


IMG_4103.jpg
IMG_4104.jpg


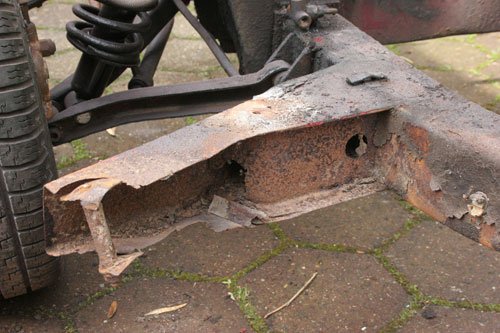
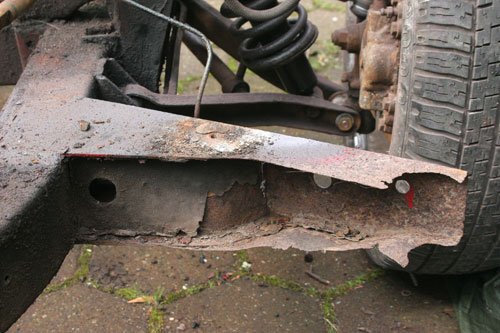
The two front outriggers will require attention, i think i will fabricate complete new parts as the replacement's cost £109 and a piece of 2mm plate will be no where near that, one more part on the ever growing list of replacements.


IMG_4097.jpg


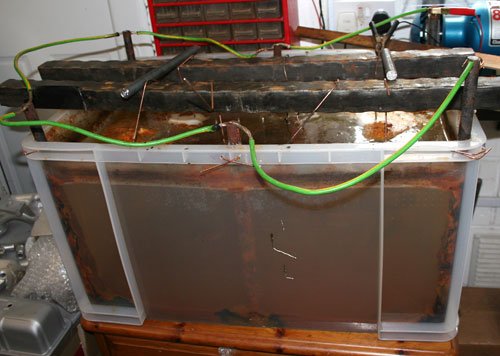
Thought i would include a picture of my electrolysis tank which is excellent at cleaning all the crud and rust off the metal parts before painting. It's very easy to put together and if you fancy one too then Google electrolysis metal cleaning for lots of info, some good guides on YouTube. Just be careful with ventilation as the gases given off i believe to be hydrogen and chlorine.
6 Apr 2014, 6:35pm
Sure I've seen one of those vats somewhere before...

Oh yes, that's right, Crystal Meth making chemistry teacher Walter White had something similar for dealing with business rivals.


Best of luck with the chassis restoration, it was my most onerous task. :(
6 Apr 2014, 6:47pm
Nice one Mister Towed :lol::lol:, i can do with one of those masks when spray painting:hippie:.
8 Apr 2014, 7:00am
Swifty - Good to see another Spitfire based build on the go. :cool:

Given the improvements to the Navigator body shell and internal framework, you should have an easy build.

OK, there is no such think as an "easy" build, but at least it will not be my Cordite based nightmare. :rolleyes:

Although the sight of dismantled Spitfire, open driveway & tarpaulin are sending shivers down my spine. :icon_wink:

I really hope that is a garage I can see in one of the photos and that is where the building will take place.

Good luck, Paul. :)
8 Apr 2014, 2:49pm
Welcome aboard the good ship Ribble Swifty :eusa_dance:

I look forward to seeing how your build progresses :dance::dance::dance:

Good to see another Navigator build :biggrin:

Cheers

"Lil" Andy
8 Apr 2014, 6:02pm
Paul L wrote:
Swifty - Good to see another Spitfire based build on the go. :cool:

Given the improvements to the Navigator body shell and internal framework, you should have an easy build.

OK, there is no such think as an "easy" build, but at least it will not be my Cordite based nightmare. :rolleyes:

Although the sight of dismantled Spitfire, open driveway & tarpaulin are sending shivers down my spine. :icon_wink:

I really hope that is a garage I can see in one of the photos and that is where the building will take place.

Good luck, Paul. :)


Hi Paul yes the build will be indoors, i'm trying to keep the majority of the muck outside, once the chassis is clean i will move indoors, thinking of having the chassis galvanized but will do the repairs and mods first.

Type 9 gearbox should be here in the next couple of days then i can sort out the adapter plate, make a cad drawing etc.

I have heard some stories about a few problems the cordite kit had one in particular with the body not being symmetrical but all has been rectified by the Ribble team, great job lads, i have seen first hand the navigator which looks great.

Looking forward to start the clean build instead of stripping old parts down but all in all it's being pleasurable so far.

Thanks AndyP85, will speak soon.
8 Apr 2014, 6:13pm
Made a few parts today and saved a few quid in the process....good result.

Attachment “IMG_4165.jpg” from the original forum could not be reliably recovered.
Attachment “IMG_4166.jpg” from the original forum could not be reliably recovered.


Fabricated the two replacement front outriggers for the chassis out of 2mm mild steel plate, will remove the old ones to weld these in to place for the Ribble sub frame to mount into. Also made two front brake pipe stainless steel brackets that hold the copper brake pipe on to the flexi pipe. Original bracket on the left to compare, you may notice the original is slotted, i didn't slot the hole as Triumph did this i think as a tolerance measure for assembly, i measured the hole centers on the front uprights to make sure i only needed to drill a hole, better to be right first time.


Attachment “IMG_4163.jpg” from the original forum could not be reliably recovered.


Parcel arrived from Rimmer Bros for the rocker shaft re-build kit which hopefully i will get to rebuild at the weekend as work commitments prevail, can't speak highly enough for the superb service Rimmer Bros have provided, order placed online one day and delivered the next and i got to save 15% with a discount code, happy days.

Well that's it for now and i hope to have the type 9 gearbox soon so i can tick another job off the ever growing list, when will the list end ummm.
9 Apr 2014, 7:03pm
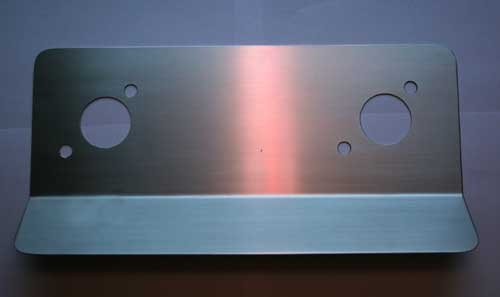
Not a great deal done today, made a carburetor heat shield from 1mm stainless plate, also done a little research into fitting the GT6 engine into the chassis which had a 1300 engine, it looks like i have to move the engine mounts in by 15mm per side other wise the engine sits too low in the chassis so another fabrication job on the list.

IMG_4169.jpg


Will make adjustments for the throttle cable linkage once fitted to the engine, most likely involve cutting away a section in the middle for clearance.

Good night for now and see you all soon.
9 Apr 2014, 7:35pm
Swifty - You are right, the new Navigator body shell is in a different league to the old Cordite one.

Based on how quickly you are fabricating things (and to a high standard) I can see you being on the road before I am!!

Good luck, Paul. :)
9 Apr 2014, 8:09pm
Paul L wrote:
Swifty - You are right, the new Navigator body shell is in a different league to the old Cordite one.

Based on how quickly you are fabricating things (and to a high standard) I can see you being on the road before I am!!

Good luck, Paul. :)


I don't know about being on the road before you Paul as my list just keeps on growing, buy hey it's enjoyable and that's all that counts.
11 Apr 2014, 5:42pm
Had a few spare minutes today so decided to make a new handle for the hand brake as well as some ally pads for the pedals.

IMG_4171.jpg
IMG_4172.jpg


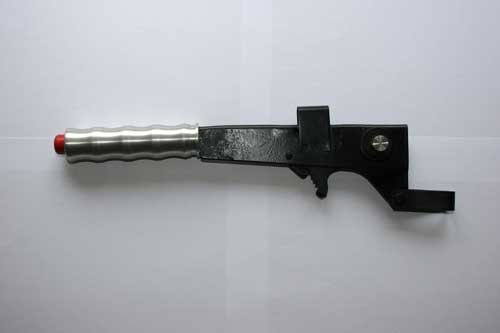
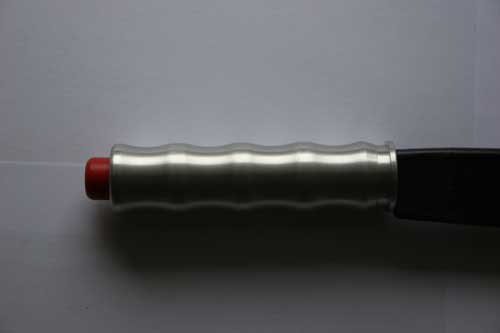
Handle machined from stock 30mm aluminum bar, not sure if i will leave the handle frame on show or cover with a leather shroud so machined a 5mm groove into the handle base. New stainless steel pivot pin made and fitted also fitted the red release button also have a black button in case i prefer.


IMG_4174.jpg


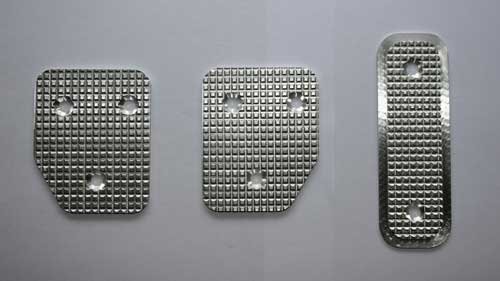
Pedal pads machined out of 3mm ally plate, used a chamfer tool to create the v grooves. Will have to come up with an idea to profile the plate to match the pedal curve as the plate is flat.

Tomorrow i hope to have the rocker shaft re assembled with the head fitted and may be the rotten out riggers removed. That's it for now as its time to go out for a few beers with the lads.