MadaboutKitcars

This is a read-only archive of the old Madabout Kitcars forum. New posts and replies are no longer possible, but every thread is still here to browse and read.

Tribute Mx250 - Build Manual

4 Nov 2012, 9:51pm
Over the next week or so I will be putting together the MX250 BUILD MANUAL that has been on my to do list for far too long. Please post any build questions on a new tread, so that this one is left as a quick/clear guide for those considering or undertaking an MX250 build. Thank you.


The MX250 kit can be finished using parts that suit your own taste and style when it comes to items such as lights etc. As a guide to help start your search for these items here are some possible parts/suppliers:

Petrol cap: http://www.vintagecarparts.co.uk/products/115-container-filler-cap-10

or: http://www.ebay.co.uk/itm/Chrome-Aston-Petrol-Cap-Cover-Classic-Mini-New-Fixings-/360555363601?_trksid=p2047675.m1850&_trkparms=aid%3D222002%26algo%3DSIC.FIT%26ao%3D1%26asc%3D11%26meid%3D4877317936609798315%26pid%3D100011%26prg%3D1005%26rk%3D1%26sd%3D251169277849%26

Number plate lights : http://www.ebay.co.uk/itm/LED-Chrome-Number-Plate-Bolt-Lights-Streetfighter-Sport-Custom-Classic-Tail-Tidy-/140753573812?pt=UK_Motorcycle_Parts&hash=item20c59117b4

Mondeo grille from 1997-2000: [url]www.ebay.co.uk/itm/Ford-Mondeo-MK2-1997-2000-Front-Bumper-Radiator-Grille-Grill-Panel-New-/150954959996?pt=UK_CarsParts_Vehicles_CarParts_SM&fits=Model%3AMondeo&hash=item23259de47c[/url]

Headlights: http://www.ebay.co.uk/itm/220860025264?ssPageName=STRK:MEWAX:IT&_trksid=p3984.m1423.l2649

Headlight buckets: http://www.ebay.co.uk/itm/280779118126?ssPageName=STRK:MEWAX:IT&_trksid=p3984.m1423.l2649

Rear lights: http://www.ebay.co.uk/itm/230814434945?ssPageName=STRK:MEWNX:IT&_trksid=p3984.m1439.l2649

Bonnet pins: http://www.ebay.co.uk/itm/390402137207?ssPageName=STRK:MEWNX:IT&_trksid=p3984.m1439.l2649

Grill mesh: http://www.ebay.co.uk/itm/Black-Aluminium-Bumper-Racing-Mesh-Grille-Buy-2-get-1-free-/221057818104?pt=UK_CarsParts_Vehicles_CarParts_SM&hash=item3378129df8

Bucket seats: http://www.ebay.co.uk/itm/Classic-Clubman-Bucket-Seat-x1-Ideal-MG-Ford-Mini-Triumph-Morris-etc-/150960366036?_trksid=p2047675.m1850&_trkparms=aid%3D222002%26algo%3DSIC.FIT%26ao%3D1%26asc%3D11%26meid%3D4877418413947216483%26pid%3D100011%26prg%3D1005%26rk%3D3%26sd%3D200841590569%26

Numberplates: http://www.ebay.co.uk/itm/110959632234?ssPageName=STRK:MEWNX:IT&_trksid=p3984.m1439.l2649

Wheel spacers: http://www.ebay.co.uk/itm/250888885628?ssPageName=STRK:MEWNX:IT&_trksid=p3984.m1439.l2649

Mirrors: http://www.ebay.co.uk/itm/Historic-Classic-Vintage-Bullet-Style-3-1-2-Flat-Chrome-Race-Mirror-Non-Handed-/200819636544?pt=UK_CarsParts_Vehicles_CarParts_SM&hash=item2ec1c87940

Wiper adapters: http://www.ebay.co.uk/itm/LAND-ROVER-DEFENDER-SPLINE-WIPER-ARM-ADAPTER-SET-TO-07-/260962166327?pt=UK_CarsParts_Vehicles_CarParts_SM&hash=item3cc28ea637
4 Nov 2012, 10:10pm
Stage 1

Strip the front of base car, remove:

- bonnet
- bonnet hinges (retain)
- bonnet catch and it’s mounting panel
- rubber stops from slam panel
- indicators/sidelights
- outer bumper cover
- headlights and lifting units
- wipers and arms
- lower windscreen trim (retain)
- side repeaters

Unbolt the fusebox and radiator expansion bottle on the drivers side and pull them towards the engine, for relocation after new inner wings are fitted.


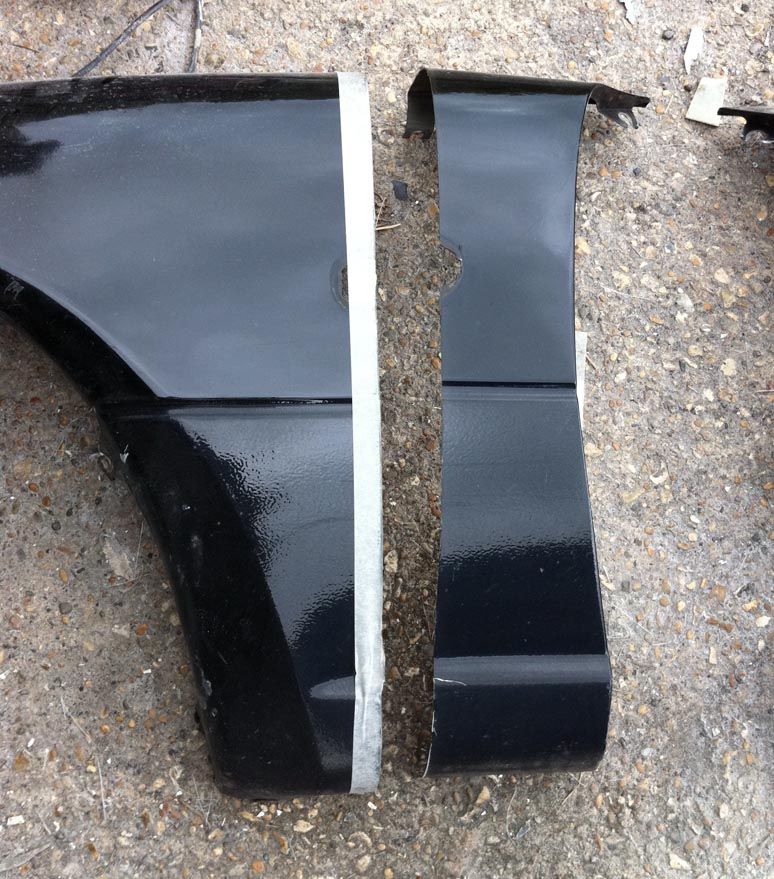
FOR MK2 MX5 ONLY: Cut wings vertically to leave approximately 150mm in front of the door, as shown.
MK1 MK5 kit has complete bolt on GRP front end section that does not require any bonding.


Remove paint in readiness for bonding on new GRP panels.


Bolt on new GRP inner wing extenders to existing Mazda captive nuts. Pop rivet at bulkhead. Some trimming of one panel may be required to clear wiper motor.


Trim upper corners from plaster bumper bar, as shown, to clear headlight buckets.

4 Nov 2012, 10:19pm
Stage 2

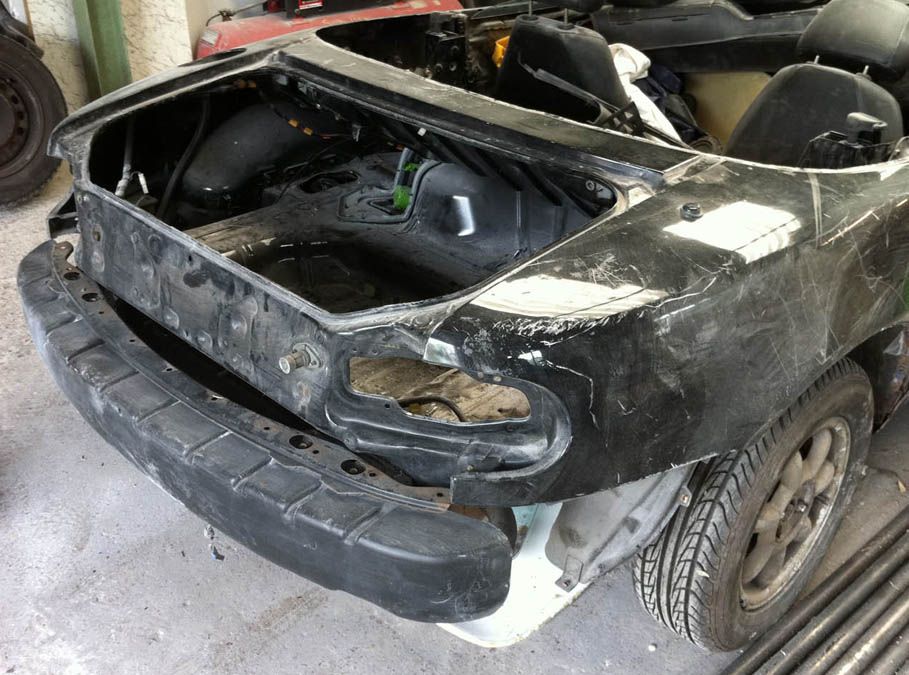
Strip the rear of base car, remove:

- soft top, latches and frame
- boot + hinges (one bolt per hinge is located inside the soft top area)
- outer bumper cover
- rear number plate panel
- rear lights
- fuel filler flap
- ariel

Remove retaining screws from filler neck and push back through rear wing into boot space. Unbolt boot catch mechanism and pull it and cable through rear light opening into new extended boot area.


Bond and screw new GRP inner boot extender, ensuring that it is centred from side to side.

4 Nov 2012, 10:27pm
Stage 3

Remove the chrome hardtop crosshead screws from the panel in front of boot opening, but leave the chrome trim pieces in place as packers for roll cage feet. Trail fit new GRP parcel shelf and loosely place roll cage over it. Mark around rear foot plates so that holes can be cut out of panel to allow fitment of roll cage.


Bond and screw on the top mounting panel/parcel shelf.


Bolt roll cage/shellbrace to 12 existing captive nuts on shell, at hardtop 4x mounting points and 2x soft top

10 Dec 2012, 9:27pm
Stage 4

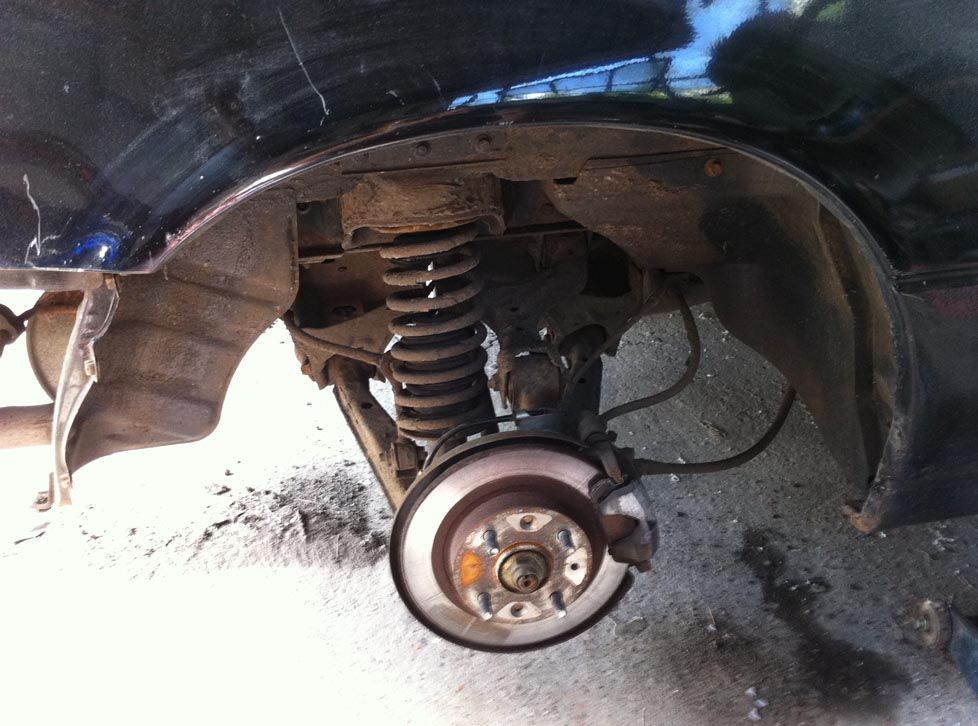
As the new GRP rear section, and hence the replacement wheels, will be wider than the original MX5 it is necessary to "roll out" the lip of the rear wheel arches to provided tyre clearance.

Jack up the rear of the car, support on axles stands, and remove the rear wheels.


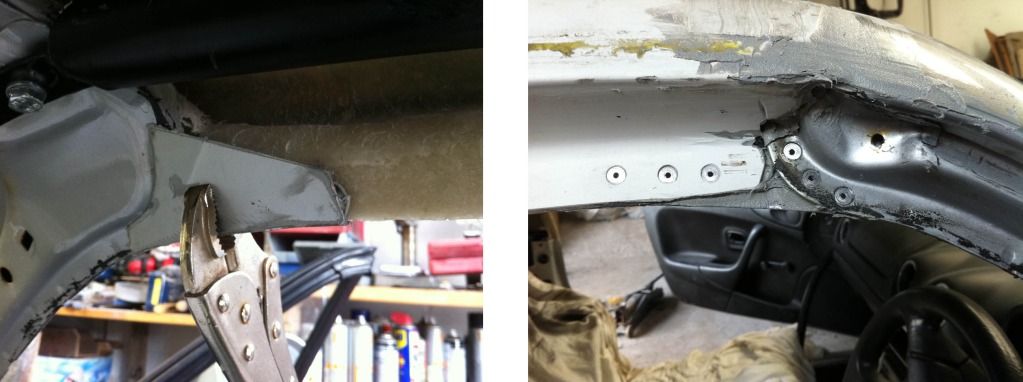
Using a pair of Mole grips bend the inner lip down as shown.


Work your my around the arch from where the rear bumper would be, until you are about 150mm above the sill.


Next push the Mole grips as far over the edge of the arch as possible, as shown, and bend upwards until the lip is at 90 degrees. Work around the whole arch as before.


You will need to use a pair of hammers to push the arch into it's finished shape (unfinished arch shown below).

29 Dec 2012, 1:02pm
Stage 5

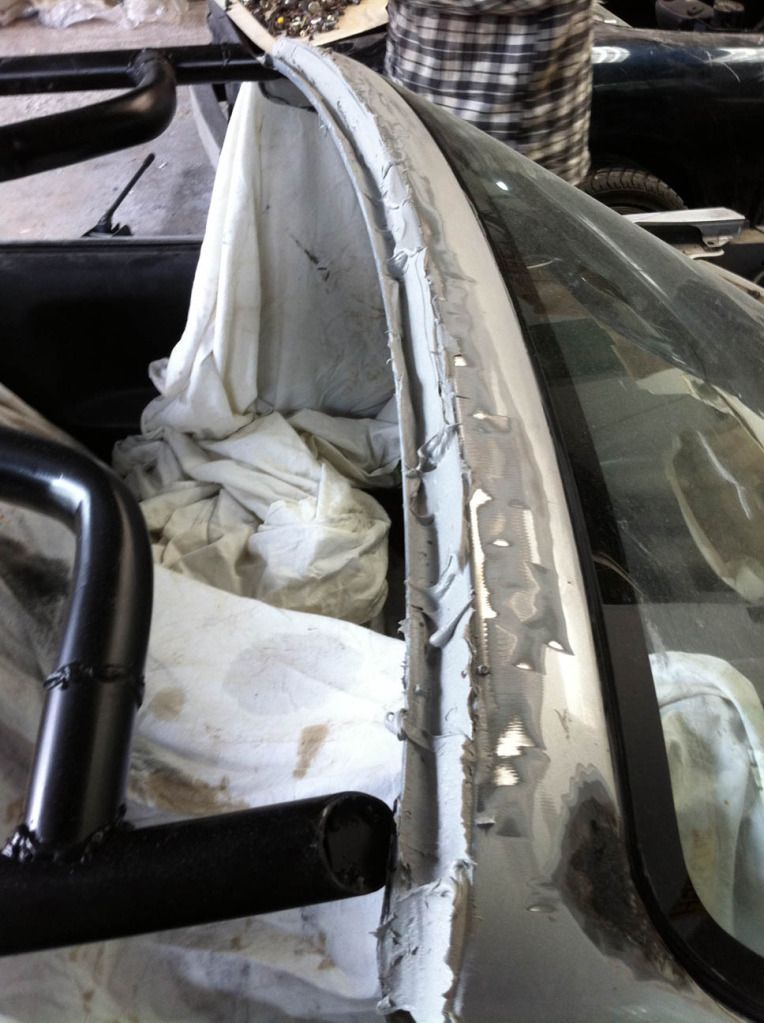
Trail fit the new MX250 body section. Check that the panels fit closely to the existing MX5 body, especially where the front of the new roof fits into the gutter above the windscreen.


PLEASE NOTE: It is far easier to trim out vent and headlight holes etc before bonding the kit to the MX5.

Once you are happy that the panels are sitting correctly temporarily fix with self tapping screw, then mark the location of the new join behind the doors. Remove the rear section of body and remove the paint and the key metal where you have marked plus along the gutter above the windscreen. Degrease new panels where bonding is to take place and key gel coat surface with 80 (min) grit sand paper.

Mix a sufficient amount of the 2-part epoxy adhesive provided with the kit to cover the gutter at the head of the windscreen.


Refit the new rear body section, push the roof section into the adhesive and place some heavy weights on the roof to prevent movement. Cut some metal plates as shown (you can use a section from the old from wings) bond and riveted into the doorshut/windscreen head area. When rivetting the GRP panels always countersink to give as flush a finish to the surface as possible. Use any excess epoxy to fill any gaps between the new GRP and the steel bodywork.

17 Mar 2013, 9:20pm
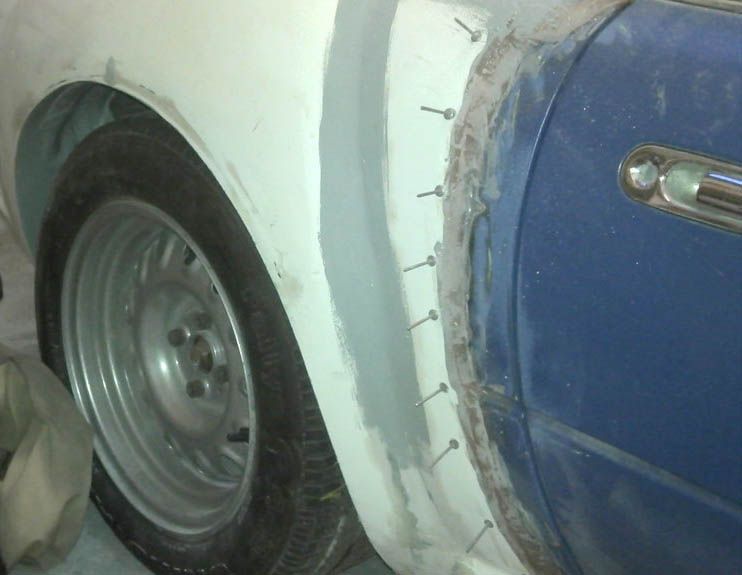
Once the roof section is attached/bonded, use the same process where the rear section joins to the rear wings behind the doors. Pull out the new rear wing slightly to allow the application of epoxy to the rear of the panel.


Push the new rear wing into place and secure with temporary screws, before drilling every 2-3" ready for rivets.


Countersink rivet holes and insert rivets.


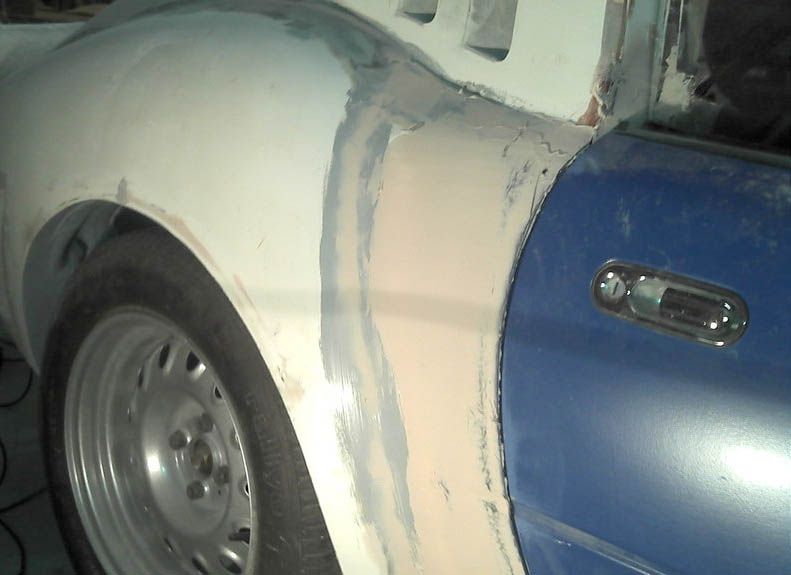
After epoxy has dried (approx 24 hours) sand off any high spots before applying UPOL P40 chop strand paste for the first fill over the joins from GRP kit panel to metal.


Then use UPOL EASY 1 filler to get the shape right. Then Top Stop to fill any small pinholes etc.

30 Jun 2014, 7:23am
Chris - If it helps, there is a link to this thread in the useful info sticky.

Cheers, Paul. :)
10 Nov 2017, 8:42pm
Modified MX250C kit on Mk2 MX5

The standard MX250 kits require modifations to fit the Mk2 shell as shown:


The kit is trimmed back to follow the wider profile wings of the Mk2:


The front end fits against the MX5 scuttle panel in the same way for mk1 or 2:


Small sections of the Mk2 rear wings require cutting out or knocking in with a hammer to clear the rear air scoops on the MX250 wings:

10 Nov 2017, 8:47pm
1st step fitting rear panels is the bolt the new boot lid to the existing MX5 hinges:


Then bolt on the existing MX5 boot latch plate:


Because the rear of the Mk2 boot opening is larger the boot latch requires packing out as shown to meet up with the boot latch plate on the new boot lid:


The original Mx5 boot rubber seal and cable release cable are reused.
10 Nov 2017, 9:02pm
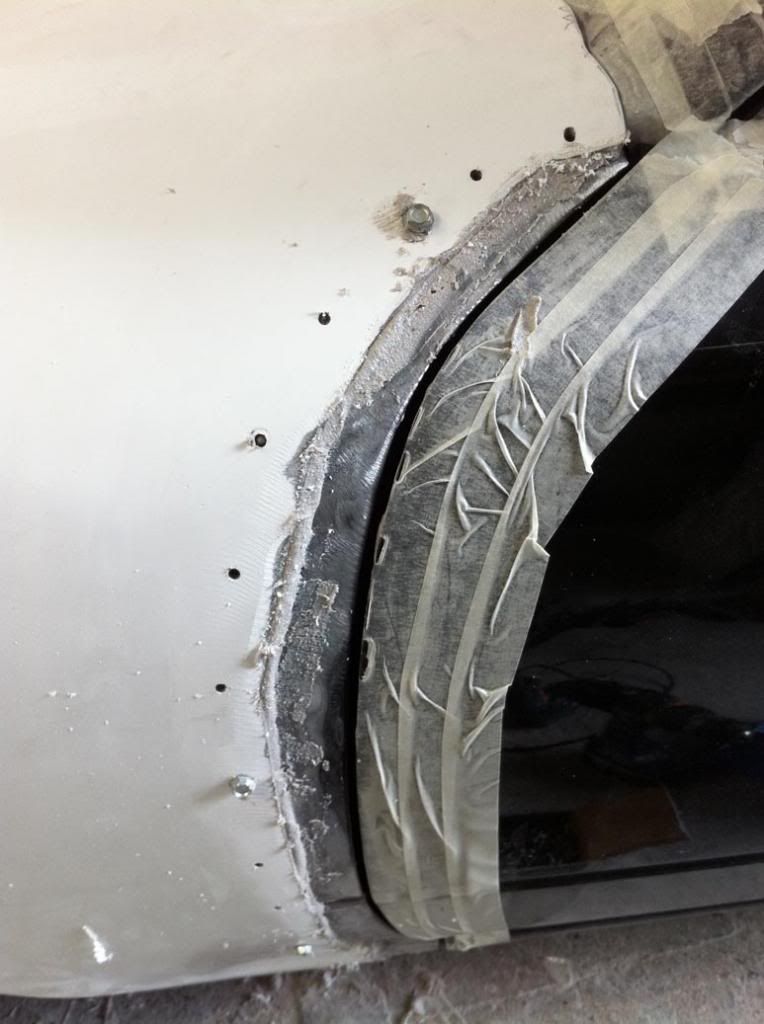
Once the boot lid is fitted, latched and closed, the rear end section can be trail fitted, screws and washers can be used to temporarily fix the kit as shown:


The rear body section can be lifted by the spoiler to align the edges of the boot lid with the surrounding shuts:


Once you are happy with the fit of the panels the temporary screws can be removed, tiger seal used to bond on panels and screws replaced until tiger seal has cured then removed and replaced with countersunk pop rivets.