MadaboutKitcars

This is a read-only archive of the old Madabout Kitcars forum. New posts and replies are no longer possible, but every thread is still here to browse and read.

Another Cordite Is Born ...

9 Jun 2016, 7:37pm
Big Thursday - Part 4:

Eventually, that was set enough to be sanded back down again.


Not a great photo, but the body shell "corner" curve is coming along too.


Actually, it is much easier to see in this photo.


Now given all the time & effort it has taken to reach this stage, I am very happy with the result. :cool:

Believe it, or not, but I still have some domestic chores to do, so I'd better go.

Take care, Paul. :)
10 Jun 2016, 5:56am
Evolution, not Revolution:
When talking to Jones the other day, I mentioned that my build had followed a 'making it up as I go along' development path. :rolleyes:

And that I usually have so many jobs left to do, that I don't often stop to really appreciate the amount of work I've already done.

Well, by the time I posted the last photo in yesterday's update, I was running on empty and still had stuff to do. :icon_sad:

However, the more I look at that last photo, the more my spirits are lifted, as the end result will definitely be worth all the effort. :cool:

But in terms of "making it up as I go along", here is how my plans for the front arch "developed":

Plan A
- My Spitfire bulkhead is much higher than the set up used by Mac & Swifty.
- So if I ran a straight line from the horizontal "shelf" on my bulkhead, it would miss the wheel arch completely.


Plan B
- Still using the Spitfire bulkhead's horizontal line, but the "cut away" line was now matching the angle of the scuttle.
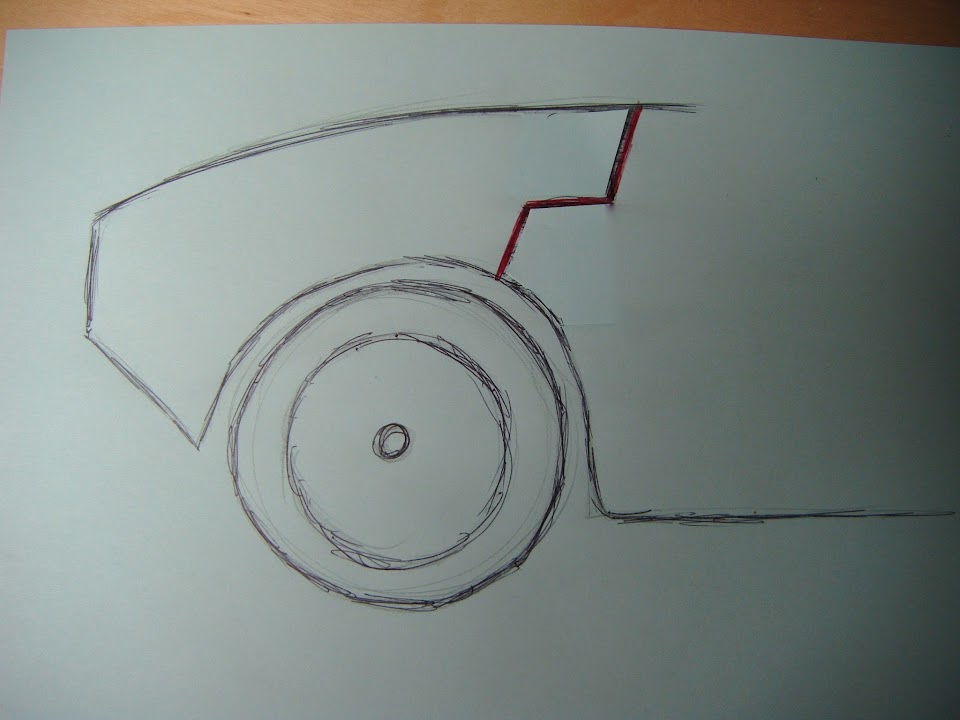


Plan C
- Started to form when this photo of Micky1Mo's "new" Sammio Spyder appeared.


- Which I tried to replicate by drawing on a printed photo of my car (Blue Peter remains a big influence on my build :icon_wink:).
- Although Fwingo subsequently posted a great photoshopped version of how it might look that was miles better.


The key to making this design work was building a "two tier" bulkhead.
( I really like the way this has turned out in practise. )


Yesterday's "reality"


What is really striking (to me at least), is how much 'deeper' the body shell extension is compared to how thin the original bonnet end was.
( This is partly due to the differences between the passenger and driver's sides, as the bottom of the bonnet is actually deeper on the driver's side. )


- - - - - - - - - - - - - - - - - - - - - - - - - - - - - - -

Finally, you may have seen that Adam is selling his unfinished Cordite/Navigator.

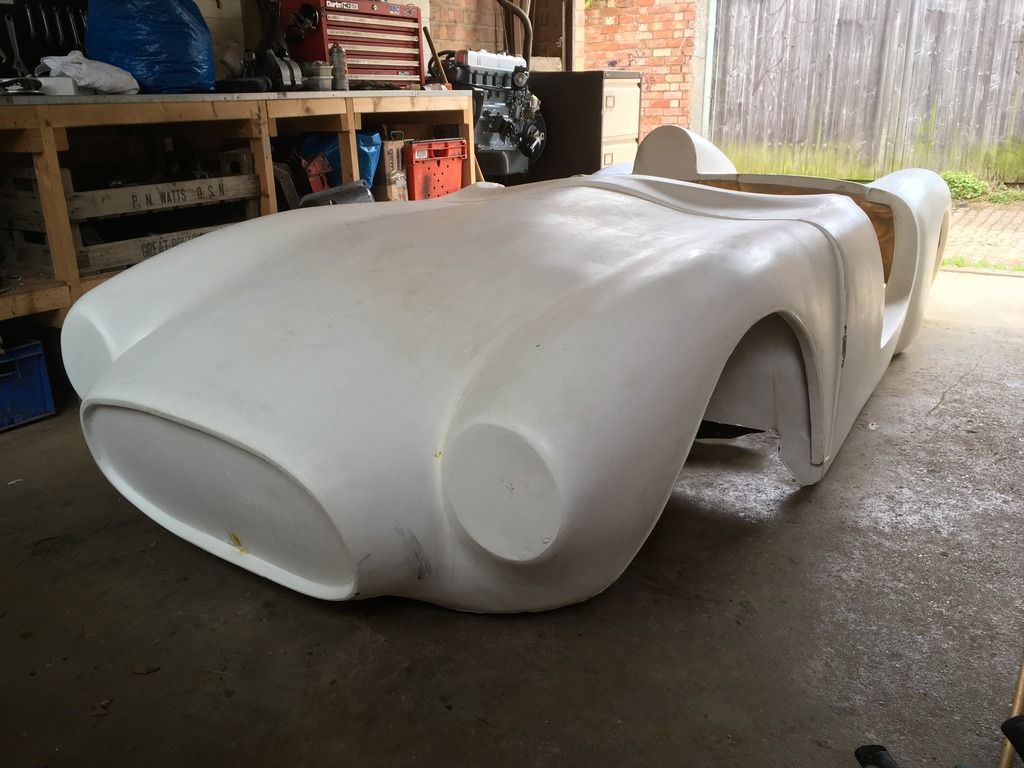
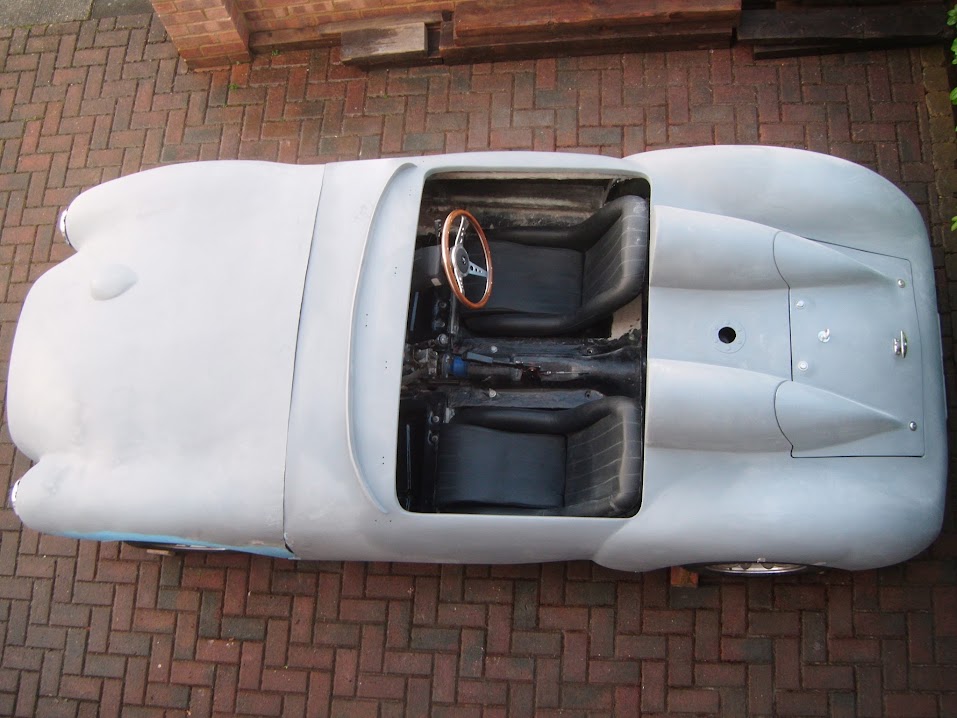
These are the photos of his original (read not butchered) body shell and bonnet.
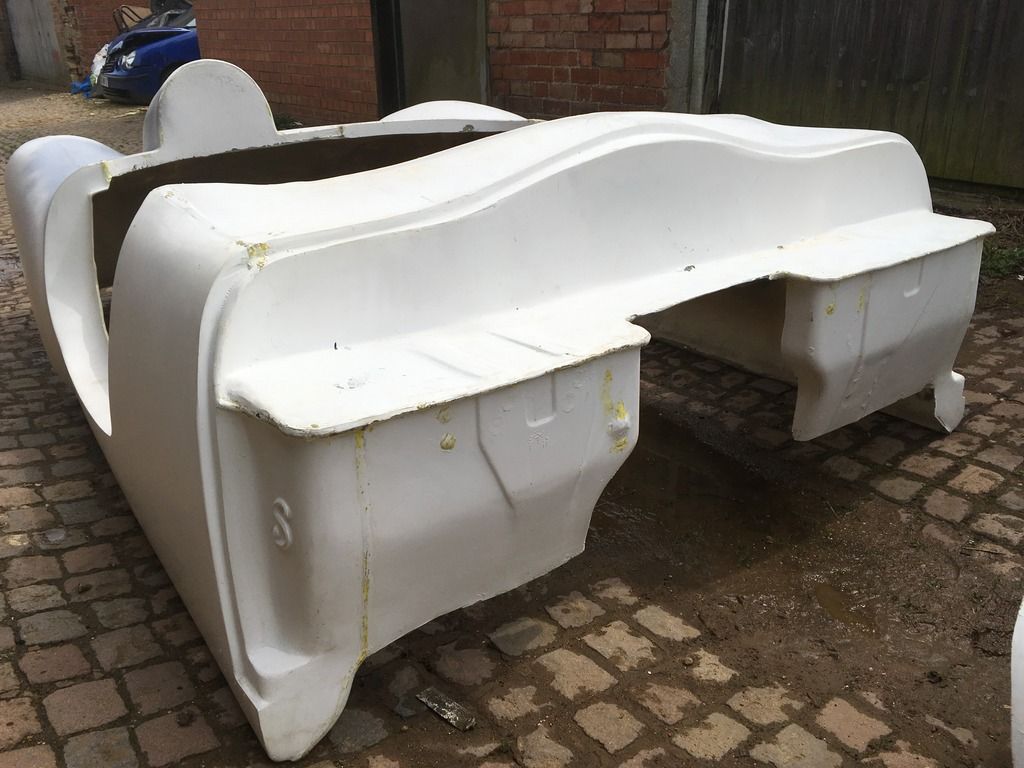


They really bring home the sheer volume of changes I've made to the kit I bought. :eek:

- - - - - - - - - - - - - - - - - - - - - - - - - - - - - - -

Right, I have a busy day ahead, which will involve more juggling of domestic and car chores. :juggle:

So hopefully there will be another update car later on today.

Until then, take care, Paul. :)
10 Jun 2016, 12:14pm
So as Paul alluded to I was very lucky to be able to pop in for a cuppa and a freshly opened pack of Hob Nobs - chocolate no less!

The one thing I will say is that the pictures do not give justice to actually how good this build really is.
  • The reuse of the spitfire bulkhead is once it's all painted going to give a look of a production racer
  • that rear end is slick - looks low and wide with the cuts into the hump for the boot working visually really well
  • Progress on the wheel arches an absolute (ahem) Triumph!
  • the engine sounds great, and the smile he wore was like that kid at Christmas who got the Meccano set
  • SOLID! that car has no flex - the panels are solid, I did say to Paul that he should get it weighed at the local scrap merchant when complete as I feel it would be a close thing between donor and the finished Swordfish 1500


All in all it was a good visit - Paul is exactly as he comes across on this forum, a genuine nice guy whom I admire for the tenacity of completing the build on that 1:3 gradient driveway open to the elements. The final build I have no doubt will be a great end result.

Thanks again Paul for taking the time to show the car and have a general chat.
10 Jun 2016, 6:13pm
Jones - Will you behave? You are making me blush. :icon_redface:

Jokes aside, it was great to meet you and I'm glad you liked my car. :cool:

I will definitely drive it over to your neck of the woods when I am on the road.

- - - - - - - - - - - - - - - - - - - - - - - - - - - - - - -

Frantic Friday - Part 1:
Today has been very hectic to say the least, but I did managed to get some more car work done.
( I'll spare you the details of all the domestic chores that were done in between. )

Round #1
Started by added some fibreglass matting over the rope I bonded to the bonnet yesterday.


I also built up the inside of this corner, as I need to grind down the other side to line things up.


I also healed the wounds on the sunny side of the bonnet.


- - - - - - - - - - - - - - - - - - - - - - - - - - - - - - -

Round #2
Added the next layer over the bonnet rope.


Added the first layers over the rope running along the bottom of the body shell extension.


Now this is very hard to reach (even with the car jacked up) and working upside down is a pain.

However, you definitely need some eye protection to avoid resin drops! :eek:


End of Part 1…
10 Jun 2016, 6:14pm
Frantic Friday - Part 2:

Round #3
After some sanding down and tidying up of any stray bits of fibreglass matting I was left with this.


Fixed up some fibreglass filler to start the smoothing out process.


Also added some "normal" filler to the side extension.


Then I put the wheel back on.


I know I still have work to do in this area, but I need to make sure there was nothing car related in the house.

Which is why I then lowered the car back to the ground.


As this allowed me to move the jack & other tools back to the Summer House.


- - - - - - - - - - - - - - - - - - - - - - - - - - - - - - -

Round #4
After roughly sanding all the filler down, I wanted to reverse the car out of the way so I could clean the drive.

It started up no problem, but then spluttered and died and would not re-start. :icon_sad:

Thankfully, checking the glass fuel filter confirmed there was no petrol in it and then it dawned on me…

The garage has drained the tank after finding old petrol in the carbs & hadn't put much fresh petrol back in.

So after topping up the tank with some petrol it started again and confirmed the fuel gauge is actually working.
( It was just showing "empty" before. :rolleyes: )


Note:
The gauge reads low due to the angle of my driveway.

So with the car out of the way, I could clean up the mess.


And while the car was away from the wall, I took a couple of photos of my progress.

Now remember, the car is still tilted and the rubber seal for the bonnet isn't fitted, but it is shaping up.


Overall, I'm a very happy bunny. :cool:


So that is it for car work until at least Monday.


I've just got one last chore to do, but there is a cold beer waiting for me in the fridge.

So until next time, take care, Paul. :)
10 Jun 2016, 7:54pm
Looking Good Paul
Now you have one side in the bag the other side has less head scratching
11 Jun 2016, 6:06am
Roadster - Cheers. :cool:

I am confident (for a change) that the driver's side will be easier to do for a number of reasons:
- Obviously, I've just done the passenger's side.
- The gaps are not as big on the driver's side.
- I plan to steal, sorry, borrow, an idea I saw on Jaguartvr's build "next door"...

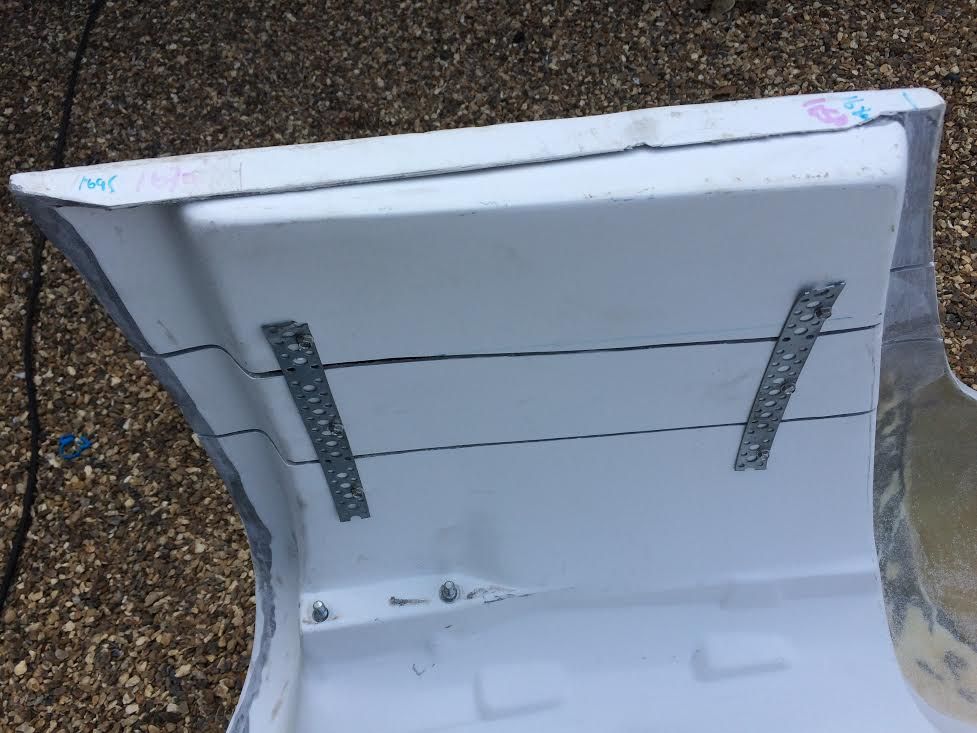
To date, I've used recycled bits of fibreglass and metal to hold all the pieces together like this.


Whereas, Jag's use of "builders band" would give me much more flexibility.
( In terms of lining up the screw holes and getting the right curve in the bracket. )


So I plan to buy some strips of this stuff and use them to bolt the whole driver's arch jigsaw puzzle together in one go. :eek:

Hopefully, this should reduce the time I spend building up the passenger side, one small section at a time.

Well, that is today's theory anyway.

Right, I've got to get ready for a trip to the airport, so I'd better go.

Take care, Paul. :)
11 Jun 2016, 6:51am
Paul as ever a great thread with so much detail. I feel almost like we live next door to you with the level of detail.

Also you should be very proud of not only the vision of what you wanted to achieve but also in getting there. Your patience is admirable.

Keep up the good work

Dave
11 Jun 2016, 11:09am
DaveP wrote:
Paul as ever a great thread with so much detail. I feel almost like we live next door to you with the level of detail.

Also you should be very proud of not only the vision of what you wanted to achieve but also in getting there. Your patience is admirable.

Keep up the good work

Dave


Wait till he gets it in paint - he will be like a dog with two tails.

The end is in sight now, with the hours that have gone into this build I hope Paul drives it at every opportunity.
After I finished the roadster, I didn't drive it as much as I should. Sure I took it to a show or 2 but I should have gone for a blast round the lanes at any excuse.

Sunday afternoon trips ending in a pub garden were always good.
12 Jun 2016, 5:39am
Shhh…


Everyone else in the house is still asleep, so I am typing this post very quietly.

- - - - - - - - - - - - - - - - - - - - - - - - - - - - - - -

DaveP - Thanks, after such a long & frustrating build, it is great to finally be heading towards the finish line. :cool:

Although, I can't quite believe what a transformation the body shell extension work makes to the overall look.
( As modifying the front arches has been on my "To Do" list for years. )

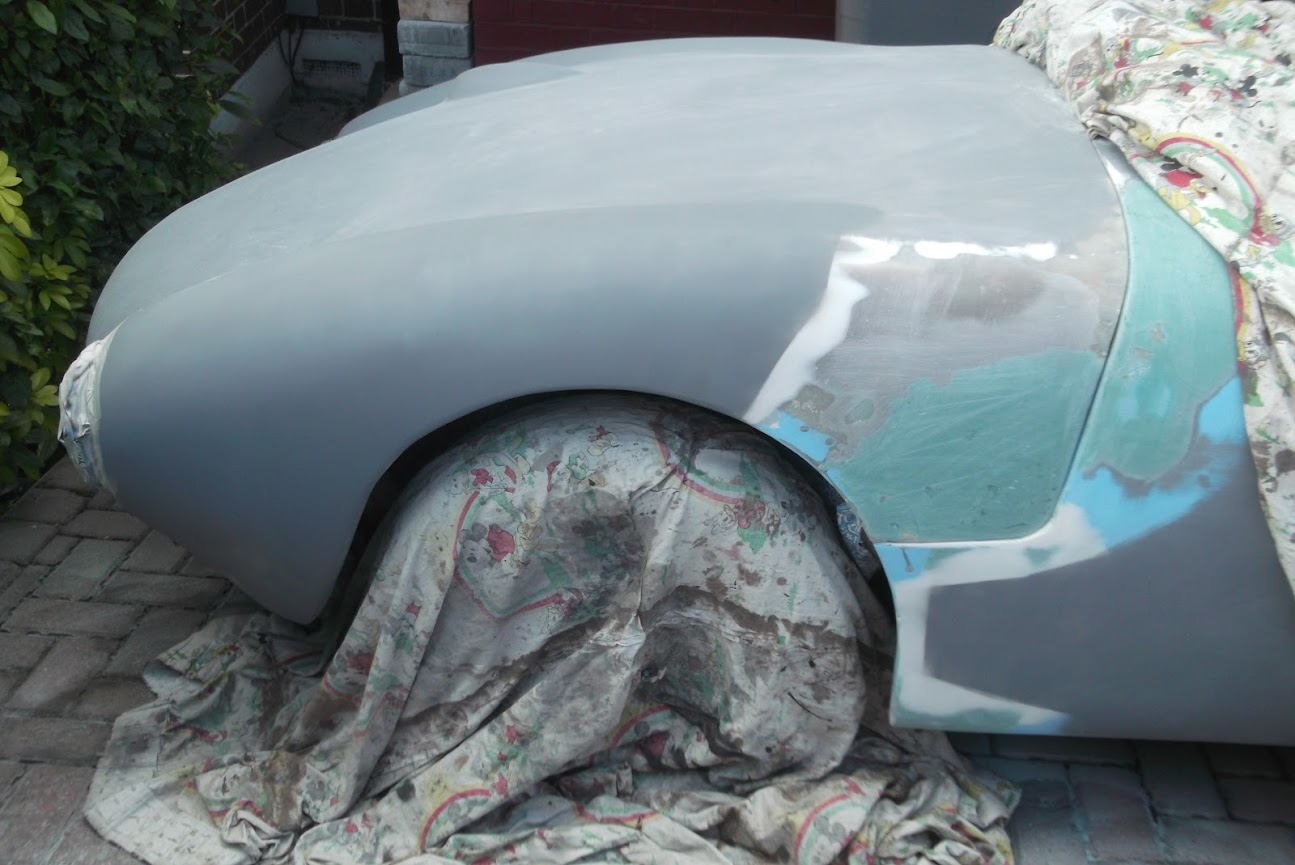
Driver's Side - To Be Done:


Passenger Side - Almost Done:


I'm really looking forward to reaching the point where I can get some etch primer on this side.

I think Christinedmc was the first person I remember doing this mod on Spyder #47.
( Although the G-46 incorporated this approach in it's original design. )

- - - - - - - - - - - - - - - - - - - - - - - - - - - - - - -

Roadster: - Well, I certainly plan to rack up some miles to "pressure test" the body work.

As I'd much rather discover any issues with cracking, etc. before I even think about paint.

However, I expect the day when the paint is done and the final sticker is applied to be worthy of a major celebration. :pray:

- - - - - - - - - - - - - - - - - - - - - - - - - - - - - - -

Take care, Paul. :)
14 Jun 2016, 11:10am
Looking great, Paul.

It is now 48 hours since your last post. I am on the verge of submitting a Missing Persons report.
14 Jun 2016, 11:55am
Oxford: - Thanks, I'm lovin' the way the final shape is turning out. :cool:

And there is no need to report me missing just yet. :icon_wink:
( I was just about to paste the post below, when I noticed your reply. )

- - - - - - - - - - - - - - - - - - - - - - - - - - - - - - -

Frustrating Times:
My wife's brother and sister-in-law enjoyed their visit over the weekend, so all the preparation effort was worth while. :cool:

But by the time I got back back from the airport on Monday I was so tired I ended up sleeping for 3 hours in the afternoon! :rolleyes:

My work project has been temporarily put on hold, so I am likely to be off work for all of this week.

Which would have been a great chance to make some significant progress on the car, if the weather wasn't so :tape: !

I did make an attempt at car work this morning...

I gave the body shell extension a final sanding along the "middle".
( Note: I still need to do some more filler work at the top & bottom. )


I cleaned the area and was actually shaking a can of etch primer when the rain started. :icon_sad:


Thankfully, I had only peeled the covers off from the front of the car, so it was all quickly covered back up.

- - - - - - - - - - - - - - - - - - - - - - - - - - - - - - -

I finally got some etch primer on during the next decent break in the rain.


Although it would probably have been a better idea to wait until all the filler work was done. :rolleyes:

Then I wrapped up the headlight & indicator to protect them from all the filler dust.


But as soon as I had cleaned the panels and got my tubs of filler out, the rain returned. :rant:


So I quicky put everything away and got the covers back on.

- - - - - - - - - - - - - - - - - - - - - - - - - - - - - - -

"You gotta know when to fold 'em."
It is hopeless trying to get anything constructive done at times like this.

So I guess I will just have to wait and get on with other stuff instead.

Until next time, take care, Paul. :)
14 Jun 2016, 12:29pm
Its looking good Paul, when i reached stages like you have i felt as if i was getting some were, you can see rssults for all the hard work done, keep on plugging away matey.
14 Jun 2016, 2:55pm
That's a heck of a lot of bodywork going into the car it will be a stunner when finished.
14 Jun 2016, 8:37pm
Swifty: - Cheers. :cool:

The front arch work has been very tricky to do, but it is finally coming together nicely.

I remember calling your car "menacing" when it reached this stage.


So I am pleased that I've managed to maintain a vague family resemblance.

- - - - - - - - - - - - - - - - - - - - - - - - - - - - - - -

Deggsy - Welcome to my build thread. :cool:

This old photo is a perfect example of my point on your build thread about the rain channels…

Even if my boot area is watertight, there is still a gaping hole in the middle of the car. :icon_wink:


- - - - - - - - - - - - - - - - - - - - - - - - - - - - - - -

Better Late Than Never:
I was just chilling out after dinner, when I noticed that it was actually quite nice outside.

I'm always allowed to excuse myself from family time if they decide to watch Coronation Street, so I nipped outside.

Mixed up some fibreglass filler for the bottom corner of the bonnet.


Plus the corner of the scuttle.


The bonnet will sit a little higher when the rubber seal is fitted, so this is getting there.


I also applied some 'normal' filler to the leading edge of the arch.


By now it was 9pm and the nicest it had been all day.


Unfortunately, the filler is taking a bit longer than normal to set, so it currently looks like this.


But it should be hard enough now for me to head back outside to put the covers on.

I'll start the sanding process tomorrow (weather permitting).

Until then, take care, Paul. :)
14 Jun 2016, 8:54pm
The bonnet to body style and fit looks superb and a big improvement on the original flimsy design. You must be so proud to take the covers off now! After all the work you have put into this body why not take a mould and go into production.Lol.
14 Jun 2016, 9:04pm
It's coming on well Paul, it really looks good that bonnet to body join.
15 Jun 2016, 1:24pm
Froggyman & Jones - Thanks chaps. :cool:

Even though it has been a lot of hard work, I do like the way this arch re-shaping work has turned out.

I also love the fact this is a genuine "one off" design, so there will be no moulds/Swordfish production line.

Obviously, this unique car has "borrowed" lots of ideas from other builds. :rolleyes:

- - - - - - - - - - - - - - - - - - - - - - - - - - - - - - -

Weather Permitting - Part 1:
Based on the morning's forecast, the sunshine would last until 10am before the rain came.

So I was outside sanding yesterday's filler just before 8am.


As the leading edge was now done, I just had to get some etch primer on.


There was a feeling of deep joy as all the construction "wounds" just melted away. :cool:

Well, some of them disappeared, but others remained.


In fact, I can't actually sort out the mess on the return lip until I jack the car back up & remove the wheel.


So I slapped on some normal filler instead.


Once that was set, it was sanded down.


At this point it was reaching 11am and it looked like the rain that was promised was finally about to arrive.


So I packed up for the day and then headed to the Sainsburys, just as the rain was starting.

End of Part 1…
15 Jun 2016, 1:26pm
Weather Permitting - Part 2:
However, to my surprise, as I left Sainsburys, there was blazing sunshine outside.

So when I got back I took a chance and got some more etch primer on.


Note:
I need to finish sanding the horizontal panel, before I can paint that whole section.

Then I cut off some small sections of the bonnet seal, just to temporarily hold things in place.


Next I got the car out of the way so I could clean the drive (again).


But before I put the car back into position there was just enough time for a photo shoot.

It actually seems like a very long time again when this "Before" photo was taken.


I've still not reached the 100% "After" stage yet, but this view is still a great boost to morale. :cool:


Note:
I've only taken the body work to a "good enough for an MOT" standard for now.
( All the final gaps & alignment issues will be dealt before paint. )

Unfortunately, by now the sky looked like this and I really thought I'd pushed my luck with the weather too far this time. :icon_sad:


But, thankfully, I had all the covers back on before the next round of rain arrived.


Overall, I wasn't expecting to get much done today, so this has been a great result.

Until next time, take care, Paul. :)
15 Jun 2016, 1:36pm
I probably missed this somewhere down the line, but what are you using to shape the filler? You appear to use quite a lot, and when I use it I have the devil's own job getting it smooth again, having tried surforms, sandpaper, files etc. So would be interested in your methods.

Thanks

Marc
15 Jun 2016, 1:57pm
Marc F - It was Mac/Viatron who recommended this set of sanding blocks (+ a long board) to me.


Only the small block seen below has a straight edge, all the others have different curves on them.


Having searched this thread to find the photo, it seems I've been using them for almost 2 years now! :eek:

The other tip Mac gave me was to start the sanding as soon as the filler has set hard enough (if possible).

For this front arch work, I generally start with 80 grit on the long board to get the big undulations under control.

As I tend to mix too much filler & use too much hardener, so rarely get the chance to smooth it all out after applying. :rolleyes:

Hope that helps, Paul. :)
15 Jun 2016, 2:02pm
Yep, starting whilst still "just set" is always a good idea - before it goes like concrete, but after it has stopped being sticky. I found the surform good at taking off the silly sized lumps, but had to be careful not to go too far otherwise it would carve grooves below the desired surface.

I like the look of that kit, and am impressed you are entirely hand powered with these blocks.

I will have to take a look for these blocks on line. I assume they are plastic by the colour/shape. Is the paper (with Velcro fixing I assume) readily available?
15 Jun 2016, 4:56pm
Paul the front arch is a massive improvement, like it.
15 Jun 2016, 5:04pm
Great work Paul its looking very straight now.
watch this when the weather isn't being co operative.

https://youtu.be/bKmkQbDGd6Y

1/ it will inspire you for the final few jobs
2/ It has some lovely details, I think you will like the screen arrangement on the C type
15 Jun 2016, 5:12pm
Marc - Sorry for the delay in replying, I saw your message just as I was heading outside (see below).

Yes, the blocks are plastic and I pulled out one of the boxes of circular sandpaper so you can see what it looks like.


- - - - - - - - - - - - - - - - - - - - - - - - - - - - - - -

Swifty & Roadster - Thanks gentlemen. :cool:

- - - - - - - - - - - - - - - - - - - - - - - - - - - - - - -

Bonus Session - Part 1:
It was raining when I posted my previous update, but once again the rain cleared and the sun came out.

So I jacked the car up & removed the wheel.


Marked up a few areas for trimming:

The return lip of the bonnet on the trailing edge.


The return lip of the body shell side extension to tie in with the "in fill" panel I will be adding.


The bottom edge of the bottom corner of the side extension.


And finally, the return lip of the bonnet on the leading edge.


Next I cut out the small panel.


And trimmed all the other areas.


End of Part 1…