MadaboutKitcars

This is a read-only archive of the old Madabout Kitcars forum. New posts and replies are no longer possible, but every thread is still here to browse and read.

Another Cordite Is Born ...

11 Mar 2016, 11:27pm
Well its March now and I thought as the weather is still so cold you might want some more reading and as I am getting to the latter stages I found this link on the forum on Car Photographer'so thread about painting. Interesting take on not using etch primer. Looks like I'll be sanding that off mine then although not used a huge amount. Here it is... http://www.hotrod.com/how-to/additional-how-to/car-paint-fiberglass-preparation/
12 Mar 2016, 6:18am
Just a flying visit…
I'll be heading back to the dentist later today more root canal work. :icon_sad:

I've also been very busy at work, as I'm reaching the closing stages of my current project.

But this does mean I will soon have a better idea of the time available for car work before the next project starts. :cool:

- - - - - - - - - - - - - - - - - - - - - - - - - - - - - - -

Car Noob - I must try harder to see this engine in action next time it is heading to London.

- - - - - - - - - - - - - - - - - - - - - - - - - - - - - - -

Jones - Thanks for the link.

Believe it, or not, but I actually read it last night and have just posted a reply on Car Photographer's thread.

In between the recent 'flaming' in the Tribute section there was also these useful painting tips.

Jeff H wrote:
… Dampness is also an enemy of paint work, micro blister in paint is 99 times out of 100 due to moisture either in the air during priming, Primer being left too long before paint being applied,( primer is porous) or moisture in the air line...


Jeff H wrote:
… Personally I would never advise driving a car in primer of any sort for any length of time. more so at this time of year, I have seen so many paint jobs ruined because of this…


So apart from using primer outside in less than ideal weather, leaving parts of my car in primer for years and planning to get it MOT'd like that, I should be fine. :rolleyes:

Jokes aside, these days I'm very tempted to aim for a rough paint finish right from the start.

This month's 'Classic & Sports Car' features a 1937 Wolseley that is on the road in 'barn find' condition.
( Although I can't find a better photo of it on line. )


I also remember Mister Towed posting this photo from Goodwood.

[

And I've always said I'd like my car to be good enough for Goodwood. :icon_wink:

Cheers, Paul. :)
12 Mar 2016, 7:42pm


This is a plastic coated bowling pin done in rusty paint, (the flash has washed it out a bit) the stuff is quite expensive but does age well over time, it gets rustier.

Paul, i have read all your thread over the last week or so, I admire your patience and commitment, more so for working outside in all weathers.

On another note ! I see you hail from Wembley ? I grew up there, moved from Wealdstone when I was 11 years old and lived in Preston Road until I was 17, then we moved down to the south coast.

I am sure you know what i mean when i say it holds some "dark memories" for me :icon_lol:

Don't get back much, have settled here now, best of luck with the build.

Jeff.
13 Mar 2016, 8:10am
Roadster - I like the idea of a 'Racetrack Refugee', but not necessarily the rusty look for this car.
( Although I am a big fan of 'Sin City Motors' and rat rods. )

So I should really give a better explanation of the photos I used in my last post.

I don't want to create fake patina to make the car look older than it is, as that is way beyond my skill levels.

It is more me accepting there is a limit to the standard of paint finish I can achieve working outside with a brush.

I will still try to achieve the best finish that I can, but, deep down, I know it will not end up looking as good as this.


The key, for me at least, is seeing other cars that are "lived in" being enjoyed for what they are, regardless of paint finish.

Here is another car at Goodwood, that certainly appears to have had a hard life.
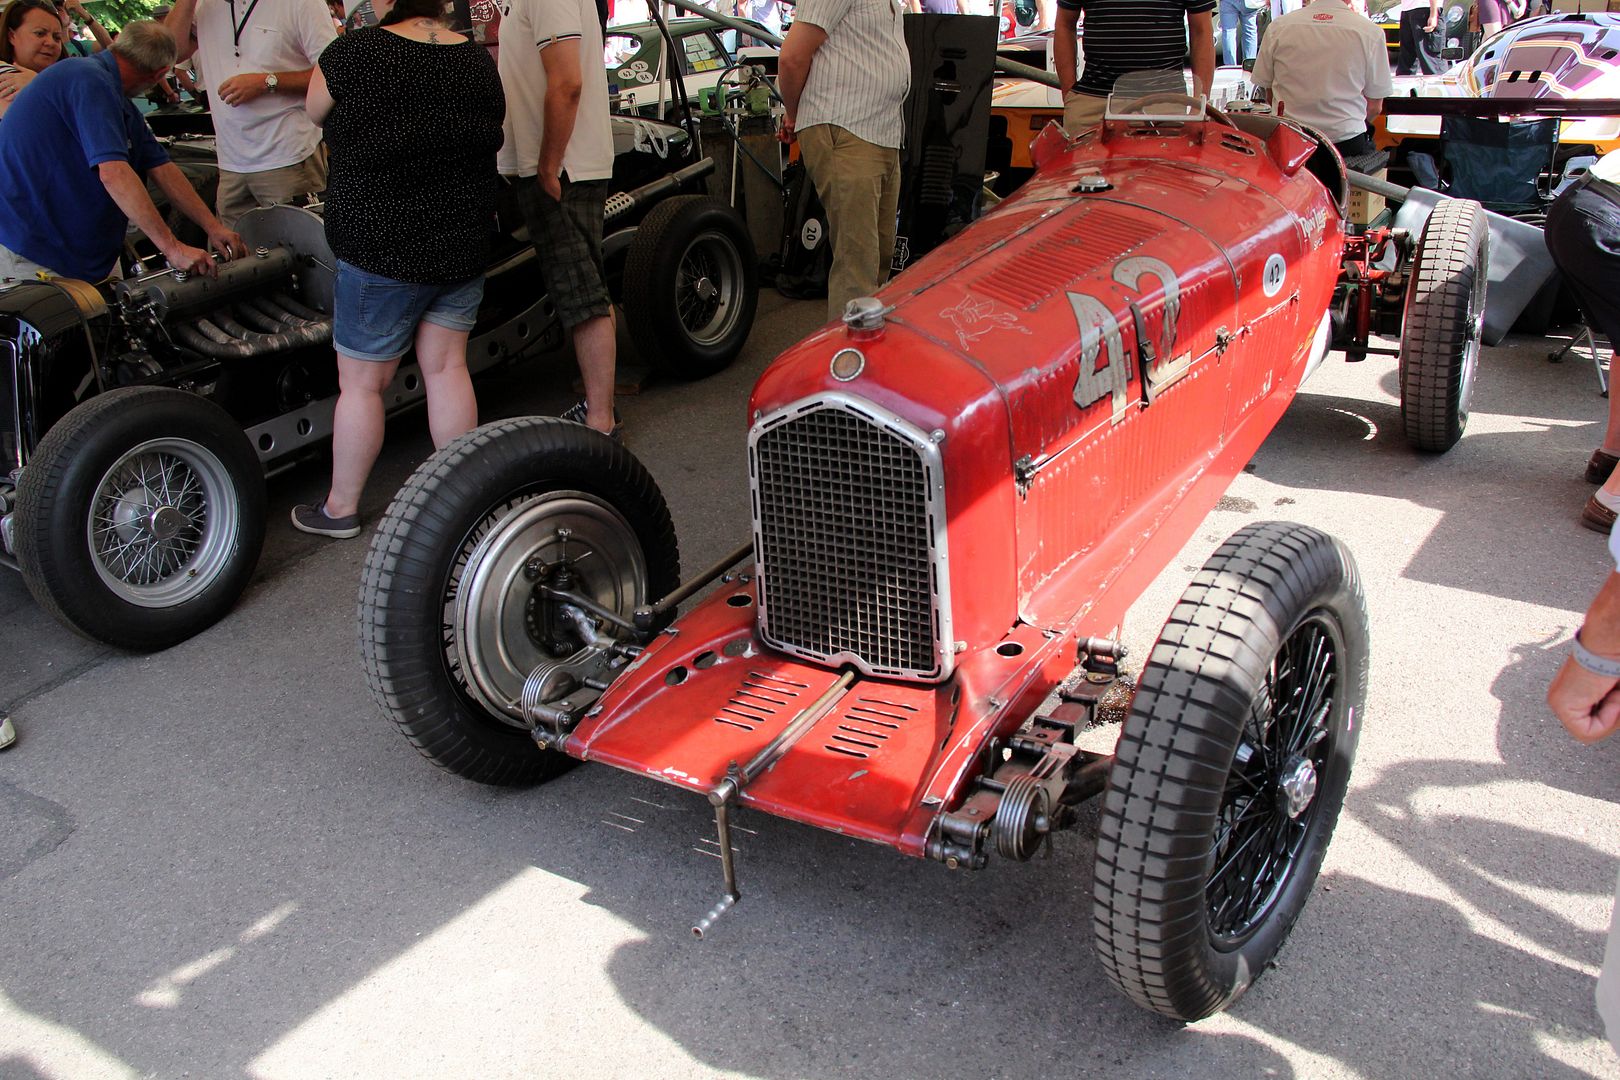


I certainly hope no one criticised the fact it didn't have perfect, shiny paint!

So my plan remains to get the car MOT'd in primer (just incase I need to make any further mods to get a pass).

- - - - - - - - - - - - - - - - - - - - - - - - - - - - - - -

Jeff - Welcome to my build thread. :cool:

Fair play for working your way though this thread, it is certainly a lot longer than I hoped it would be when I started. :rolleyes:

Spooky that you should mention Preston Road, as that is where I was suffering in the dentist's chair yesterday.
( My jaw still aches this morning. )

I think that rusty paint is an amazing thing, but as I said above, not what I am aiming for on this build.

Also, I don't want you to think I am ignoring your good advice on how to get a great paint finish either.
( As it is nice to have the experience of a professional on the forum. :cool: )

Again, it is more like there is a definite limit to what I can achieve, so I just need to accept that and be happy.

- - - - - - - - - - - - - - - - - - - - - - - - - - - - - - -

Steam Punk
While looking through Google Images yesterday, this popped up.


Again, just because it isn't a shiny one, doesn't mean it wont turn heads. :cool:

Take care, Paul. :)
13 Mar 2016, 8:59am
I understand Paul
Old race cars were not lovingly painted. The Jaguars were painted in that dark green because there was a surplus of army drab which they mixed a little black into it.
Germany adopted silver as their race colour so they didn't have to paint them at all
13 Mar 2016, 9:38am
Paul, you've got me thinking about the acid etch, when I bought my paint pack I explained what it was for and bought on the suppliers recommendations, including etch primer, a trawl of the net finds a mixed bag of those in favour and against. I think now. A test spray on a hidden piece to see how it reacts may be worthwhile, would like my paint to key but not at the cost of strength to the grp.
I don't think I would remove what you've applied, any damage would have been done by now wouldn't it?
13 Mar 2016, 11:28am
Both the online paint supplier and a local guy i used for paint sundries advised against etch primer on fiberglass with celly paint, what they did advise was to use a primer used on plastic bumpers to give a good key and help to seal the fiberglass surface which was put on first before any paint work commenced.

This is what i used.

Attachment could not be found in the archived database.


The spray finished surface has a metallic satin look.

Attachment could not be found in the archived database.


I do know there are guys on here who have used etch primer and are not reporting any issues as of yet so mixed messages possibly but my gut feeling was to follow the advice from people who work with paint.
13 Mar 2016, 12:15pm
Novice sprayer, never even held a rattle can before -


Using professional grade tools to mix the paint, well, if I were a chef -


Took advice from the paint manufacturer, Jawel, to use etch primer beneath high build primer -


Then direct gloss cellulose -


Resulted in an authentic fifties patina paint finish, shiny but not over glossy like two pack, that's still looking exactly the same three years later -

13 Mar 2016, 12:55pm
And no sagging on the body ( well of the car anyway).
13 Mar 2016, 5:58pm
Roadster, Pops, Swifty & Mister Towed – Thanks for all the feedback & replies chaps. :cool:

I am pretty sure I picked Jawel paints as a supplier because Mr T used them.

Similarly, I picked a “Truck” paint as it was something Mac recommended, as it could be brushed on.

The advice I was given by Jawel was start with etch primer, as my bodywork is a mix of gel coat, fibreglass & filler. :rolleyes:

Then a “normal” (not sure of technical term) primer/undercoat, before the paint.

As far as I can tell the truck paint is “synthetic”, but I couldn’t tell you if that is different to “cellulose”.

Either way, I am certainly going to give it a go and we’ll see what happens.

Cheers, Paul. :)
19 Mar 2016, 9:25am
I'm sure that you'll do a grand job! I'd never painted a car before i did the Sammio and I loved every minute of learning, even if it was hard work! and the Miglia turned out like this!


I also went to Jewel and they were very good for choice and advise.
The biggest lessons i learnt is that for a novice even the most basic suction spray gun is good enough, don't worry about immediate finish as you can always flat it back and the biggest thing that made a difference for me was make sure you have an in-line water trap/ pressure regulator! (you can see mine attached to the wall in teh above pic)

BTW i used Etch primer on the Sammio and normal primer on the Miglia and I would say that Etch is better, especially if(when) you get stone chips!


Oh... and we fully expect a Breaking-bad style photo like Towed's and mine as you go. it's seems to be traditional along with the "sat in the body"photo :)

19 Mar 2016, 5:21pm
Hey Paul, just to throw in my two hapeth on the paint subject.
I also used acid etch primer, followed by high build primer, then
the modern equivalent of celly paint, and it didn't turn out too bad at all, so it would appear that good results can be had by either method, so just go with whatever you feel suits you!
19 Mar 2016, 11:15pm
How could I have missed the chance to show off my best ever paint job?

WCA would never have made a mistake like that I know!!

So here it is:

[IMG]http://[/IMG]
20 Mar 2016, 12:16am
Scottie22 wrote:
How could I have missed the chance to show off my best ever paint job?

WCA would never have made a mistake like that I know!!

So here it is:

[IMG]http://[/IMG]


That is flipping gorgeous (can you say a car is gorgeous?) - :)

Dave
20 Mar 2016, 7:45am
It's tempting to get seduced by a £2k 2k professional paint job - blemish free, mirror shiny and obviously gunned on by a pro using bodyshop equipment and a spray booth/oven, and quite a number of the Tribute Ferrari style car customers have gone down that route.

That will certainly get you the Pebble Beach concours d'elegance, never, ever driven trailer queen look, but with these earlier fifties race style cars they wouldn't have been painted that well when they were new. That gives the enthusiastic amateur builder the ideal opportunity to do it yourself on the cheap and, rather satisfyingly as it happens, have it turn out looking more authentic than if you'd spent ten times as much cash letting someone else have all the fun.

Painting your own car is all part of the Sammio challenge. Enjoy!
20 Mar 2016, 7:48am
DaveCymru & Scottie - Thanks for the painting tips and photos. :cool:

Given the fact I will be using a brush, I have to put my faith in the flatting back process.

Once the weather warms up I will do a painting test on the inside of the boot lid.
( As I have already spent a bit of time getting a smooth(ish) finish on that. )


I'll also post the traditional 'Breaking Bad' photo, although I've seen this decend into a "gimpfest". :icon_wink:

- - - - - - - - - - - - - - - - - - - - - - - - - - - - - - -

DaveP - Welcome to my build thread. :cool:

I'd say "flipping gorgeous" seems like a fair way to describe Scottie's car to me.

In case you missed it, his build thread is here:
http://www.madabout-kitcars.com/forum/showthread.php?t=4553

- - - - - - - - - - - - - - - - - - - - - - - - - - - - - - -

Still Busy:
Yesterday was my fourth visit to the dentist and the root canal work is finally finished.
( I still need a bit of minor work in a few weeks, but nothing compared to this. )

Other good news is that my work project has been extended for a few more weeks.

The bad news is that this means it will be Easter Weekend before I get a chance to work on the car.

Given that it is the Spring Equinox today and the clocks go forward next week, at least daylight is returning. :cool:

So until next time, take care, Paul. :)
20 Mar 2016, 7:54am
Mister Towed - Sorry our posts crossed and you have summed it up nicely. :cool:

I absolutely want to paint the car myself and am happy to give it a go with a brush.

The fact is that my car is far from prefect as it is, so I can live with imperfect paint too.

The key will be that it will still stand out from the crowd when I bring it to the local supermarket car park.
( For that other traditional photo shoot. )

Cheers, Paul. :)
20 Mar 2016, 11:27am
Glad you're going to paint it yourself, Paul, you won't regret it.

Funnily enough, I'm just reading about the unrestored C Type Jag in Octane that's got at least four different paint colours showing through the stone chips in the paint, all of which add to its authenticity and value.

Keep up the good work and you'll be on the road before you know it. :)
20 Mar 2016, 12:03pm
Glad that your continuing the build soon , I miss your updates.

I painted the roadster by hand and I was happy with my finish but if I was to do it again I think a roller would have been better.
I helped painting a commercial vehicle with the Jawel synthetic paint and the rollered finish was superior to that of my brushed enamel.
20 Mar 2016, 6:40pm
Mister Towed wrote:
It's tempting to get seduced by a £2k 2k professional paint job - blemish free, mirror shiny and obviously gunned on by a pro using bodyshop equipment and a spray booth/oven, and quite a number of the Tribute Ferrari style car customers have gone down that route.

That will certainly get you the Pebble Beach concours d'elegance, never, ever driven trailer queen look, but with these earlier fifties race style cars they wouldn't have been painted that well when they were new. That gives the enthusiastic amateur builder the ideal opportunity to do it yourself on the cheap and, rather satisfyingly as it happens, have it turn out looking more authentic than if you'd spent ten times as much cash letting someone else have all the fun.

Painting your own car is all part of the Sammio challenge. Enjoy!


I think most people are aware that this side of Pebble Beach is more my bag:

http://oily-rag.net/oil-on-the-pebbles/

Best of luck with your painting Paul. I used to change the colour of my old Wolseley 1500 Kustom every 6 months using a brush and silk emulsion, which was actually fairly water proof once it dried. Daily driven between bouts of modifications. Those were the days:

21 Mar 2016, 12:55pm
I rather liked the old Wolseley, and the times when we could build that sort of stuff. I didn't realise it was yours Chris.
A photo from the original forum’s picture album could not be recovered.

A photo from the original forum’s picture album could not be recovered.
21 Mar 2016, 6:57pm
Mr T & Roadster - Thanks chaps, I hope to return to car build updates soon. :pray:

Hurnleft - Nice photos Bob and see the comment below too.

Tribute - Hi Chris and a very warm welcome to my build thread. :cool:

I must confess it is the hand painted cars on "Rods 'n' Sods" that are giving me hope.

I've posted this photo before, but at a total cost of £35 (including the brushes) it is worth repeating.


Although while I'm looking forward to the painting, I am not looking forward to all the prep. work.

Take care, Paul. :)
22 Mar 2016, 8:50pm
Kurust

Hi Paul,

I have been following your thread for a while now and enjoyed every page. I am looking forward reading it further and hope you will continue your build soon (good luck with the dentist...).
I have a question; I have noticed that you have used Hammerite Kurust to treat your metal parts. After the Kurust dried, did you clean the metal surface before painting it with primer, or did you just paint over the dried Kurust layer?

Cheers, Deni
25 Mar 2016, 6:07pm
Deni - Welcome to my build thread. :cool:

I think I did all of the above with the Kurust. :rolleyes:

So sometimes it was primed then painted, other times it was just given a coat of Hammerite.

- - - - - - - - - - - - - - - - - - - - - - - - - - - - - - -

The Short Good Friday - Part 1:
Given the weather forecast & other Easter stuff going on, today was going to be only realistic chance of doing some car work.

Unfortunately, my, self imposed, "be nice to the neighbours" policy, means no noisy "toys" before midday.

So I started with a bit of manoeuvring (by hand), so the car when from here, in the middle of the drive…


To a spot closer to the house, which gave me better access to the rear, driver's side, wheel arch.


Given that the covers haven't been off since before Christmas, it was nice to see the old girl again. :cool:

I then spent ages trying to work out the impact my sloping drive was having on the wheel to wheel arch gaps.

I finally settled on a difference of 1cm between sides due to the different suspension loadings.


So I need the template to sit a little higher than it did before and hope it all settles down properly on the flat.


I still take on board Mr T's very valid point about the fact the wheel may move within the arch after alignment. :icon_sad:

But I've spent a lot of time convincing myself that I could live with "non centralised" rear wheels (if required).

Which also ties back into the previous debate about paint, as this car is never going to be perfect.

Obviously, having gone through this process once before on the passenger side was a big help.

Started with the "Before" shot.


Then marked up the section of the existing lip that needed to be removed.


Thankfully I remembered to cover up the cockpit before generating clouds of dust.


Used my jigsaw to remove the lip.


But there isn't enough room for the lip to re-attached without further cutting.


End of Part 1...