MadaboutKitcars

This is a read-only archive of the old Madabout Kitcars forum. New posts and replies are no longer possible, but every thread is still here to browse and read.

Another Cordite Is Born ...

9 Dec 2015, 6:03pm
Tidying Up:
With my wife's guests arriving tomorrow, one of today's domestic chores was cleaning the driveway.

Thankfully I was able to build in a bit of "mission creep" while I was outside.

Jacked the car up, removed the blocks and put it back on it's wheels.


There is still work I need to do underneath, but, for now, it just needs to be "presentable".

This also allowed me to tidy up my collection of wood.


I sanded down the last batch of filler applied to the bridge across the cockpit floors.

I also used this flexible attachment for those hard to reach areas behind the angle iron in the framework.


Then I applied some Tetroseal along the edge joining the body shell and any bits I'd previously missed.


Note:
I've left enough room for the next round of bonding/fibreglassing to take place.

E.g. You can see which areas will be behind the cockpit side panels.


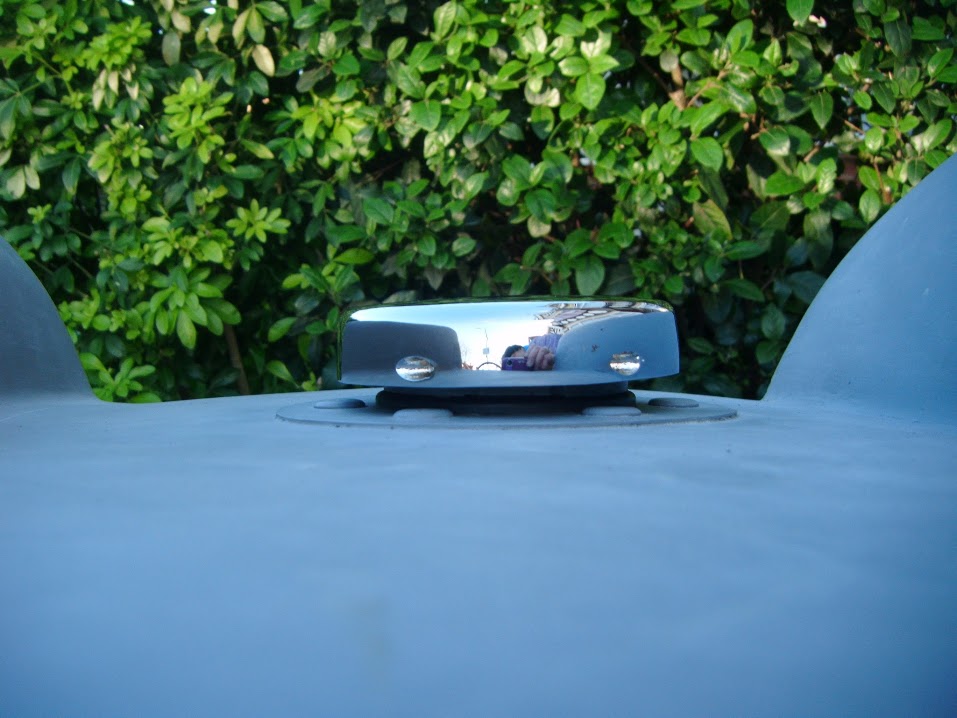
Then I trimmed the fuel filler hose to fit the gap between the body shell and the petrol tank.


Then removed the tape protecting the tank from dust.


Fitted the rubber seal into place around the inside edge of the metal "ring".


Then the hose just sits "free" underneath the seal, but firmly pushed down around the petrol tank opening.
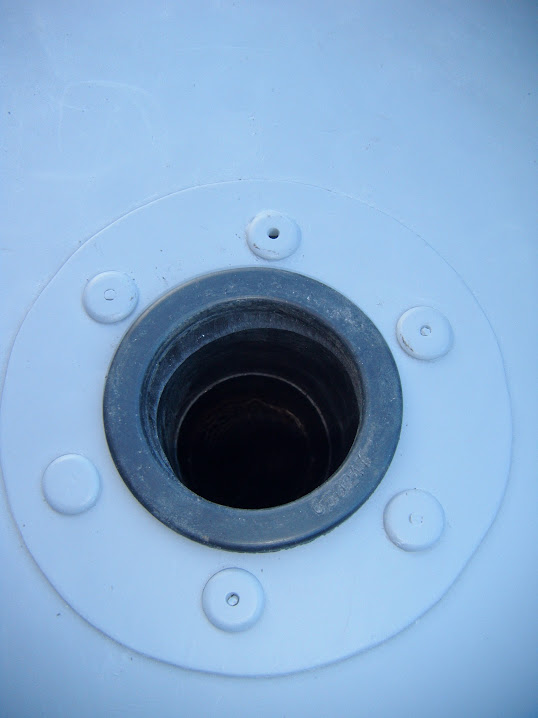


The neck of the petrol cap then goes through the seal and the top of the hose when it is fitted.


And two clamps hold the top and bottom of hose in place like so.


This will all have to come out again for final painting, but for now, this is good enough for an MOT. :cool:


That was as much car work as I dared to sneak in, as I still had to weed the drive. :icon_sad:


Still, that task is normally on my list of Christmas chores, so I am ahead of the game there.

I've leave you with a photo of my tidy drive.
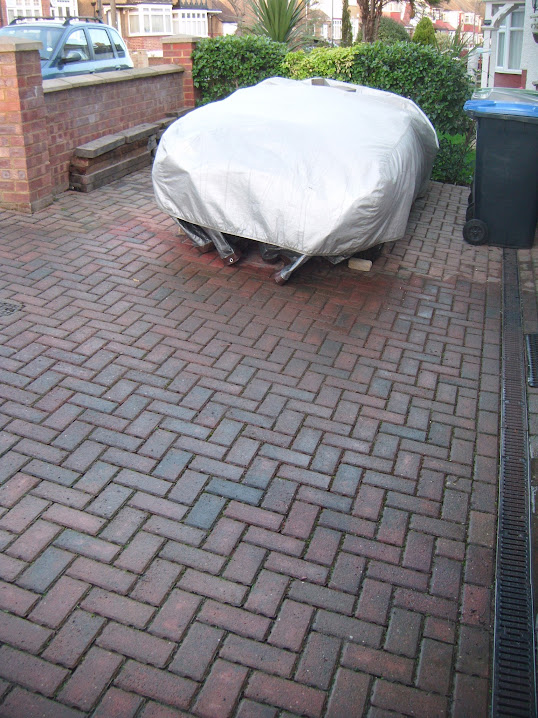


Until next time, take care, Paul.

PS
Winter Solstice Approaches
"Wembley Henge" is starting to line up with the lowest trajectory of the Winter sun. :cool:

9 Dec 2015, 6:38pm
All looking spick and span there Paul, i think i will have to get my finger out with my build as you are catching me up.

Keep up the great progress its coming together well and i think you will have one of the sturdiest builds.
9 Dec 2015, 6:59pm
swifty wrote:
All looking spick and span there Paul, i think i will have to get my finger out with my build as you are catching me up.

Keep up the great progress its coming together well and i think you will have one of the sturdiest builds.


Fuel cap looks good Paul,
Swifty is right there will be no rattles or squeaks and there cant be much chance of scuttle shake either.
11 Dec 2015, 3:59pm
Swifty & Roadster - Thanks gentlemen. :cool:

I think my lack of experience means I often take a "Belt 'n' Braces" approach in many areas. :icon_sad:

I just hope the MOT tester appreciates the effort going in underneath the car, as no one else is likely to see it! :rolleyes:

Although, some of this work makes me feel like I've done everything to the best of my ability, which has to be a good thing.

Still entertaining our guests at the moment, but hope to spend a bit of time on the car next week, Paul. :)
12 Dec 2015, 3:56pm
Playing Tourist:
One advantage of having guests is an excuse for us to make a rare visit to the West End last night.


As we were going to see this.


It was my wife's choice and there was some really great songs in it. :cool:

Although she clearly hadn't read any reviews, as there was an awful lot of "F'ing & Blinding" in it too. :eek:

I'd certainly be in the dog house for using that kind of language in front of our daughters. :rolleyes:

- - - - - - - - - - - - - - - - - - - - - - - - - - - - - - -

A Brief Encounter:
I had a load of domestic chores to do today while everyone else headed off to Kensington for the afternoon.

But I did manage to sneak out for a few minutes...

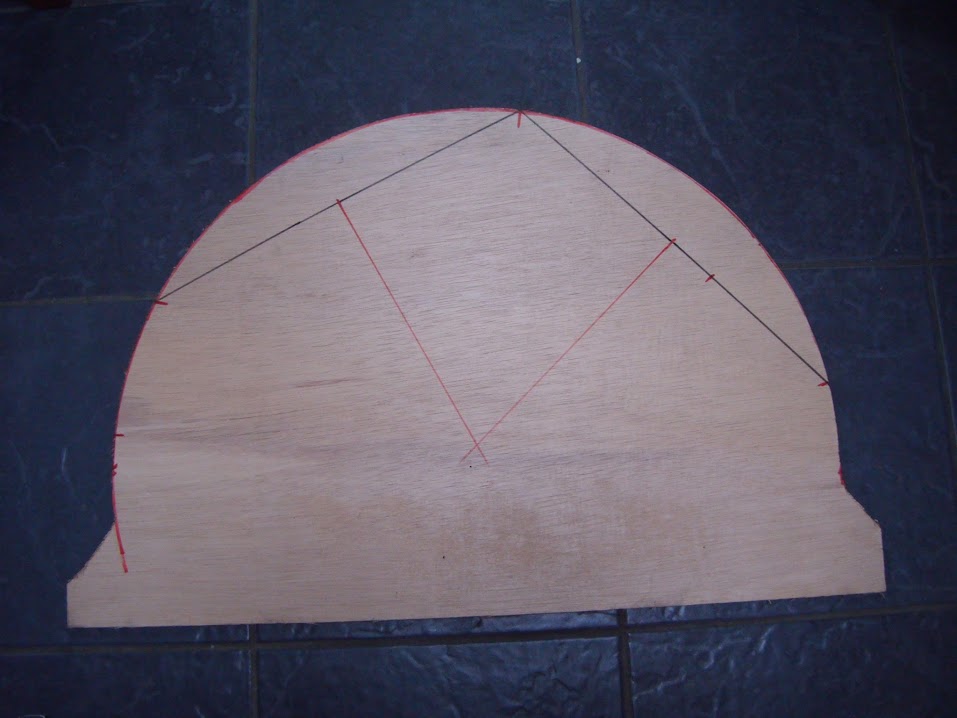
Previously, I had make a rough sketch on a printed out photo.


So to get an even gap all the way around, I need to reduce the gap on the left & increase the gap on the right.

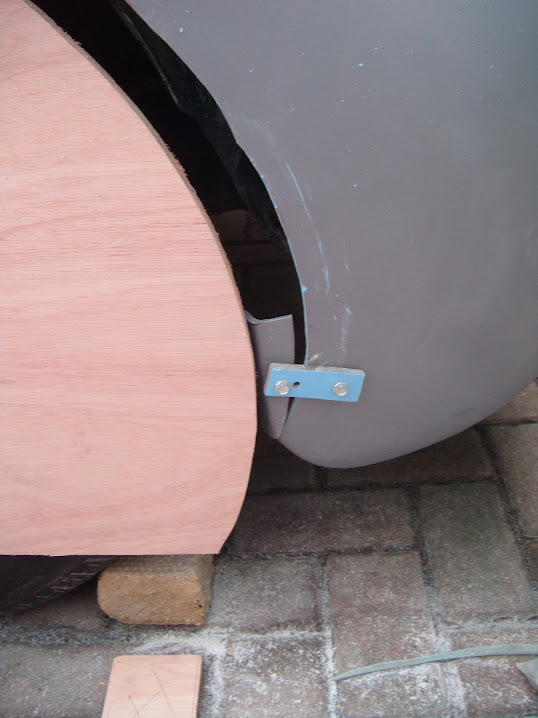
Today I just wanted to quickly compare the arch on the passenger side to my plywood template.


So even though this is just resting in place, and must lower than it needs to be, you can still get the general idea.

This is how Swifty tackled re-profiling his rear arch.


And this is PsychoPops doing his.


Currently, I plan to use a combination of these two approaches to "cut & shut" the arch.

However, first I need to drill a hole in the template that will line up with the centre of the wheel.

Then I will add a few extra holes, so I can zip tie the template to the wheel spokes to firmly hold it in place.

But that will be a task for another day, as I now need to start making a Shepherds Pie for dinner. :rolleyes:

Take care, Paul. :)
16 Dec 2015, 4:21pm
Making A Start:
After a lot of other distractions recently, I finally got a chance to do some car work today.

Although technically I actually started with the traditional tidying up of the Summer House.


Next I used the Mark Evan's trick to find the centre of my wheel arch template.


Before drilling a "peep" hole.


Next I roughly marked up a "cut" line around the existing passenger side arch opening.


Before cutting the whole thing out.


The section I removed keeps the "return" lip.


Although I did trim this lip a bit where parts of the original moulding lip were still there.


Note:
The remaining arch section is supported at one side by this small "bridge".


And the boot floor panelling on the other side.
( Which still needs to be finished off, tidied up and painted. )


Next I marked up a few fixing holes on the template.


So that when the centre was lined up...
( The flash makes it look off centre. )


The template could be zip tied to the wheel spokes.
( I just temporarily used two ties for this next stage. )


As I needed to mark up another section of the remaining arch opening to be cut off.


The next step will be to alter the original arch lip to make it as round as possible.


Only after that has been done will it be fixed back into position, something like this.


I will use brackets to hold the two sections together, remove the wheel and fibreglass it from behind, before healing the wound on the sunny side.

Obviously this is easier said than done, so I will take my time to line it all up as well as I can.

Even if I am a few mm out from a perfectly round arch, it will still be miles better than what I started with.

But that was all I had time for today, so until next time, take care, Paul. :)
17 Dec 2015, 5:39pm
Frankenstein Rides Again:

Warmed up the jigsaw by extending the circle around the sides of the wheel arch template.


Mixed up a small batch of bonding paste and "topped up" some of the inside edges of the boot floor to body shell panels.


Not easy to see, but I also put some extra paste on the panel between the Spitfire wheel arch and the body shell.


Zip tied the template to the wheel, but the ties were not strong enough to hold it in position. :icon_sad:

So I trimmed up a couple of plywood off cuts to prop it up in the correct place like so.


Then it was time to channel Young Frankenstein...


As I chopped up the wheel arch lip and then stitched it back together, one section at a time, starting with the right hand side.


Before switching to the left hand side.


And then finally meeting in the middle.


To give this overall look.


Then I could remove the template and see what it all looked like...

But first, here is what I started with "Before":


And this is what I have "After":


Is it perfect? - No.

Is it miles better than it was originally? - Yes. :cool:

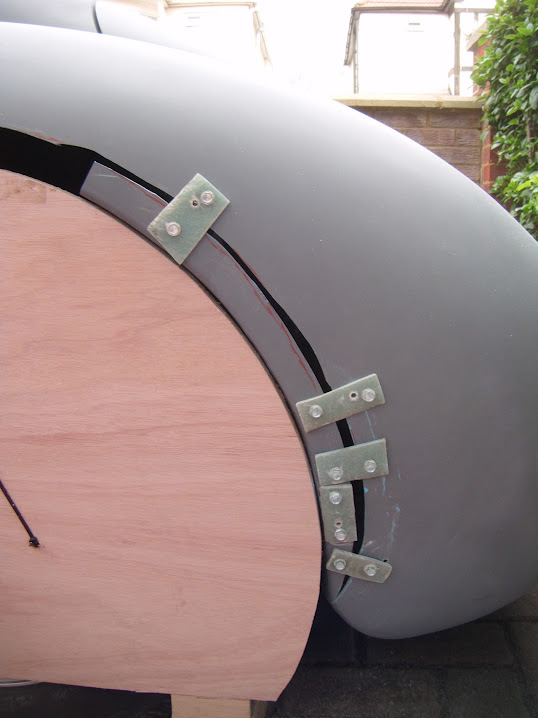
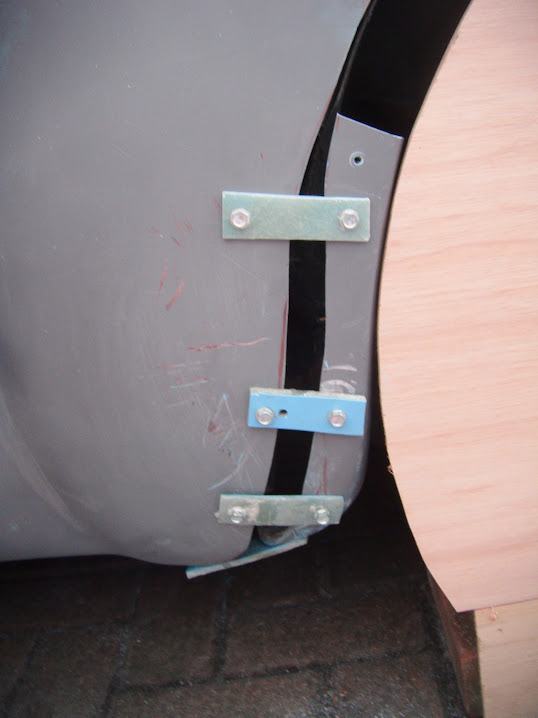
Then I worked my way around the arch, loosening the screws & clamping parcel tape covered card over the gaps.


Next I jacked the car up and removed the wheel.


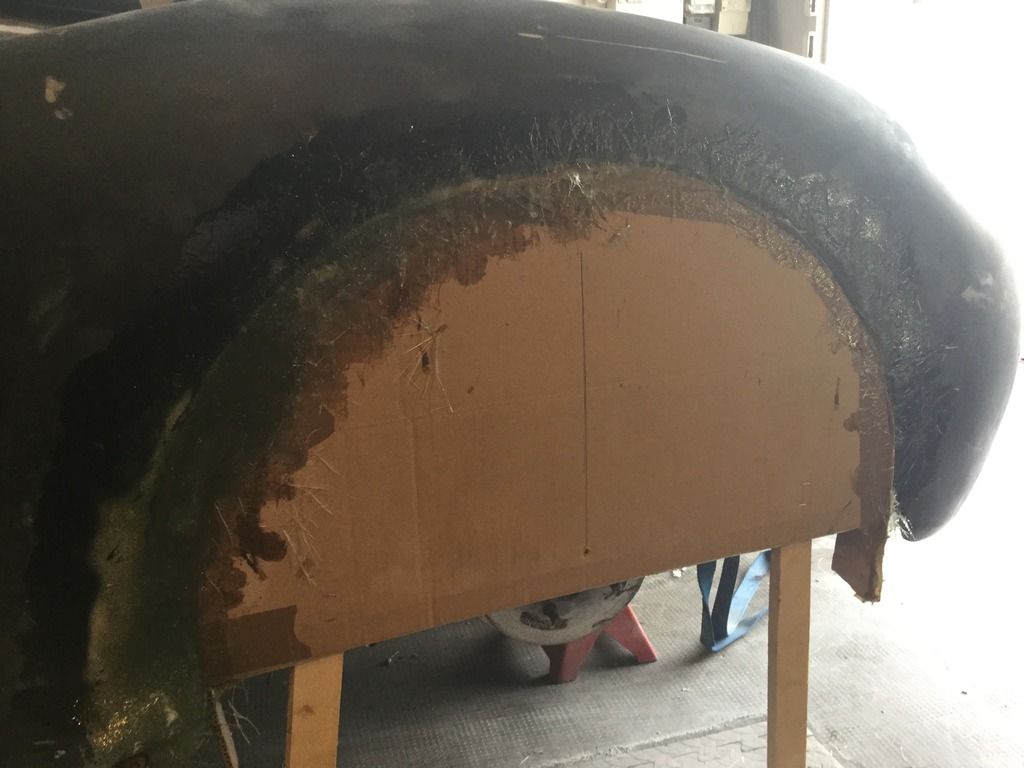
Unfortunately, after the first round of adding fibreglass matting across the inside it still looked the same.
( As I just couldn't get any decent photos inside the wheel arch. :rolleyes: )


Still, at least I have started the healing process.

Next time I will remove the screws and add more matting to the inside edge.

Cheers, Paul. :)
17 Dec 2015, 6:06pm
Your right, miles better than the original, well done :eusa_clap:
17 Dec 2015, 7:21pm
Faster , neater and cleaner than my chosen method, unfortunately lack of work forces further halt to progress this end, typical I have all the time in the world but no funds, keep at it officially overtaken me now
Pops
18 Dec 2015, 4:15pm
Micky1Mo - Thanks. :cool:

Pops - Cheers, although I'm not convinced this approach was "Faster, neater or cleaner." :icon_wink:

Good luck on the work front.

- - - - - - - - - - - - - - - - - - - - - - - - - - - - - - -

Christmas Countdown:
Hard to believe that this day next week will actually be Christmas Day. :eek:

So, unsurprisingly, available car time is reducing, as my Christmas chores are increasing.

Thankfully the weather is on my side at the moment, so progress continues...

- - - - - - - - - - - - - - - - - - - - - - - - - - - - - - -

Session 1:
First job of the day was to "calibrate" my disposable measuring containers.


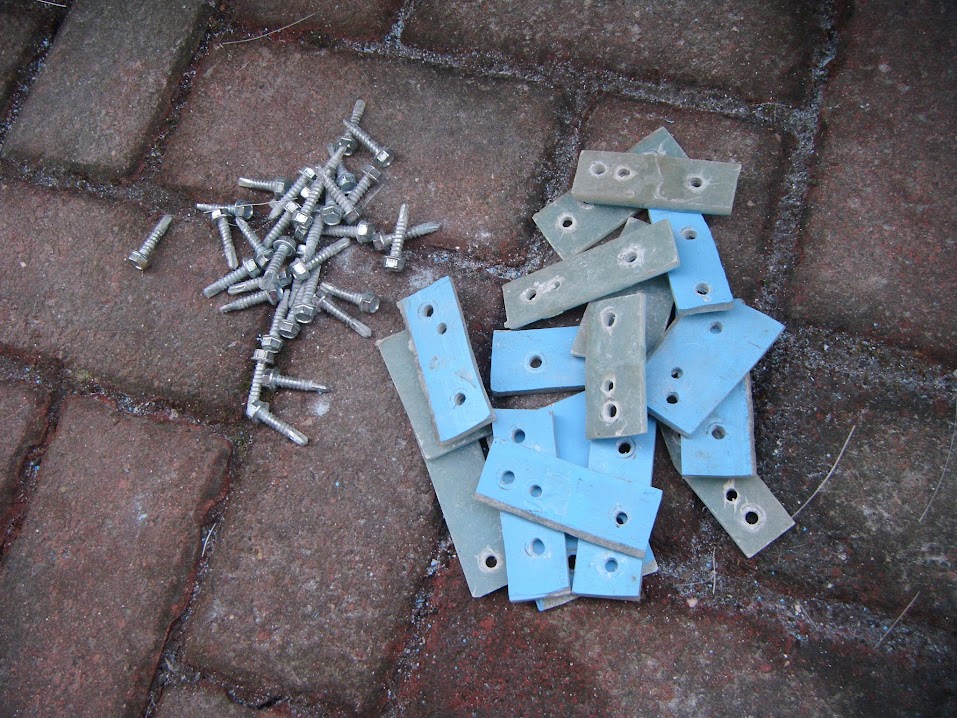
Then it was time to remove the brackets from the wheel arch brackets.


I left the brackets in place at the bottom of the leading edge of the arch.


As I wanted to leave filling this big gap until after the other parts were in place.

So some more parcel tape covered cardboard was fitted to provide a former.


Then more parcel tape was added to the outside of the arch.


I then tidied up yesterday's fibreglass work on the inside, which was a very messy job. :icon_sad:

I used a "work light" today, which makes it slightly easier to see what I'm doing and take some photos.

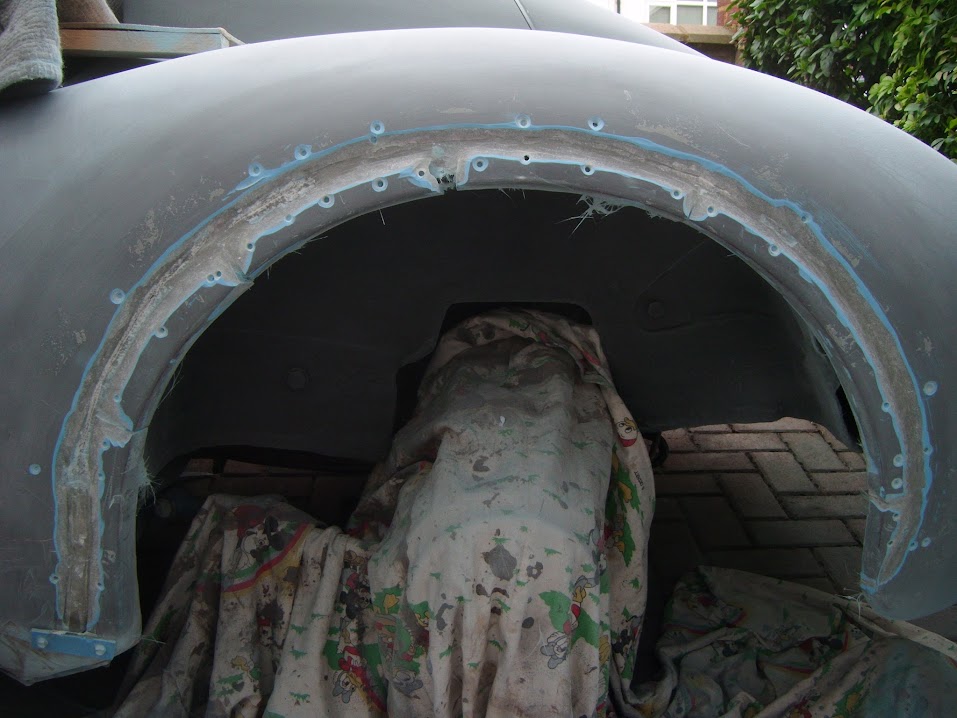
This shows what little room I have to work in, between the Spitfire wheel arch and the body shell.


- - - - - - - - - - - - - - - - - - - - - - - - - - - - - - -

Session 2:
Added the second round of fibreglass matting on the inside covering all the screw holes, like so.


- - - - - - - - - - - - - - - - - - - - - - - - - - - - - - -

Session 3:
Thankfully, by the time I could do some more work, the earlier fibreglass session along the inside had set sufficiently.

So I removes all the tape from the outside, cleaned up the joins with my grinder & counter sunk the screw holes.
( Which was a biblically messy job. )


Then I built up several layers of fibreglass matting in small sections along all the joins.


I still need to add a bit more matting (both inside & out), but at least some strength has now been restored to the arch. :cool:

- - - - - - - - - - - - - - - - - - - - - - - - - - - - - - -

That was all for today, hopefully I can continue to tidy this mess up over the weekend.
( And finish off the bottom corner of the leading edge of the arch opening. )

So until next time, take care, Paul. :)

PS
I'm just heading back outside now to hose down my neighbours garden as it is covered dust from my grinder. :rolleyes:
18 Dec 2015, 7:49pm
Paul, this is looking great and already light years away from the what you started with - a great improvement!
18 Dec 2015, 8:59pm
jones wrote:
Paul, this is looking great and already light years away from the what you started with - a great improvement!


+1 from me

Once upon a time this would have scared you Paul but now you cut it out and rebuilt it in a day. Im guessing both arches completed before 2016.
Great job
19 Dec 2015, 6:26am
Jones & Roadster - Thanks chaps. :cool:

There was indeed a time when just the thought of cutting up my kit would have filled me with fear.

This is just one of the reasons why I enjoy this forum so much, as seeing other builds really inspires confidence.
( Especially the butchery stage that Tribute go through during their kit development. )

Also, these days, I am happy accept there is a limit to what I can achieve given my experience and "facilities".

That is not to say I don't try to do the best job I can, but rather that I can live with the fact the car will not be perfect.

Since the body shell has been bonded on, the number of positive comments I get from people 'passing by' has shot up.

All they can see is a car that looks like it really belongs on a 1950s race track, so that is a major achievement in itself.

So I have tried to approach re-shaping the wheel arches in a pragmatic way, knowing any job I do will be an improvement.

Without getting ideas above my station, I've also been looking at some photos of the Jaguar C Type.


In the photo above, there is quite a bit of clearance around the tyre in the rear arches and they still look good/period. :cool:

However, dare I say it, that the front arches on a £2.9m car are not centralised around the front wheel. :eek:

But the radius of the front arch is still consistent, which was not the case in my "Before" photo.

The other C Type photo that inspires me is this one, with the rear arch under load.


As my biggest worries about doing this work is the car is still not at its final "racing weight" & my sloping driveway.

So at this stage, I really don't know what the final gap between the tyres & the rear arches will be. :rolleyes:

But I do know that the re-shaped arches will be round (ish) and centralised and that will certainly be good enough for me. :cool:

As for targets, I hope to have reached the filler stage on the passenger side before Christmas (weather & chores permitting).

Then I should be at least able to make a start on the driver's side before New Year's Eve. :pray:

Anyway, I have a busy weekend ahead, so let's see what car work I can squeeze in.

Cheers, Paul. :)
20 Dec 2015, 5:13pm
Saturday:
This turned into one of those days where my available car time simply evaporated right in front of my eyes. :icon_sad:

It had started well enough, as I was able to remove the last brackets from the leading edge of the wheel arch first thing.


Note:
I knew the alignment of this section would look pretty ugly at this stage, but it should be fine by the time I'm finished.

As it was too early to "fire up the grinder" to really clean up the mess, I just gave the "wound" on the sunny side a basic sanding down.


This was enough to allow me to add a final layer of fibreglass matting along the gap.


So far, so good. :cool:

As planned, I then got on with other stuff, when at my next opportunity to do some work, the fibreglass was still "tacky".

So rather than start adding filler, I had to leave everything as it was and head off on my next chore…

- - - - - - - - - - - - - - - - - - - - - - - - - - - - - - -

#Dinosaur:
I had booked an appointment in the Apple store to get my old Mac's operating system and browser updated.
( Mainly because I was having problems uploading/storing photos for this build thread. )

What was supposed to be a "simple" wipe & reboot turned into an almost 3 hour technical problem filled nightmare. :rant:

More on this later…

- - - - - - - - - - - - - - - - - - - - - - - - - - - - - - -

Noisy Toys:
By the time I got home, it was already getting dark, so there was a limit to what I could start/do.

So I decided to fully prepare the arch for the next stage, as it was still early enough to make some noise.

Using a combination of my angle grinder, dremmel lookalike & drill I tidied things up as best I could.
( Sorry the photo isn't great. )


Although I didn't take a photo, I used the plywood template to check how round the arch was as I was going along.
( This really helped me work out which "high spots" to grind down. )

The good news is that the variation from "round" is now just a few mm here and there, compared to the previous "spread" measured in inches. :cool:

Adding a layer of filler should reduced these difference still further and that will certainly be close enough for me.

- - - - - - - - - - - - - - - - - - - - - - - - - - - - - - -

#Dinosaur - Part 2:
My build thread is pulled together using some relatively simple technology:
- Plug my camera into to the Mac so I can upload the photos I've taken.
- Edit/crop/delete/etc. these original photos until I am left with the ones I want to use.
- Upload these photos "on line" so that I can include them in my update.
- Paste the [img] links to these photos into my "words".
- Copy and paste the words into the Forum.

After a frustrating day NOT working on the car, I spend even longer trying to get my "upgraded" technology to work properly. :rant:

- - - - - - - - - - - - - - - - - - - - - - - - - - - - - - -

End of Part 1...
20 Dec 2015, 5:16pm
Sunday:
Thankfully, I finally managed to get all my technology working properly first this morning, so the build thread continues.

One reason I was so frustrated with Saturday was we were heading off to see my mum & sister today.

Still, I managed to get outside nice and early and gave myself just enough room to work in.


I actually had a layer of fibreglass filler covering the joins in the arch by 9am.


Luckily I had enough filler, as I'd forgotten to order another tin after the last time I used it.
( New tub now ordered. )


I didn't have enough time to start sanding the filler before we left, so I just covered the ares with my dust sheet.


This avoids any chance of the covers sticking when I packed up and headed out.

- - - - - - - - - - - - - - - - - - - - - - - - - - - - - - -

No sooner had I walked back into the house from a lovely lunch out when the heavens opened.

By the time it was dry enough for me to get outside to start sanding the sun had already set.

And by the time I'd started clearing up for the night, this was what my workshop looked like.


So apologies for yet another round of poor photos...

This is the overall arch, which still needs a skim of normal body filler.


This is the trailing edge, which I think has worked out quite well.


I've still got to start repairing the "wounds" on the leading edge and that will then need a bit of shaping.


I will have to come back and hose down my garage wall tomorrow.


Until next time, take care, Paul. :)

PS
For the first time I have actually exceeded the 10,000 character post limit.
(Which I didn't even know there was.)

The reason for this?

The "upgraded" [img] code for each photo is now 100s of characters long FFS!
20 Dec 2015, 5:37pm
Persistance !

H Paul ,I have been following your build and your progress and for a novice ! you are doing a pretty good job ! keep up the good work ,Pete.
20 Dec 2015, 6:21pm
Looking good Paul your glassing skills are going from strength to strength. It was a wise decision to alter the arches and in the long run will make the car look more balanced.
20 Dec 2015, 6:32pm
Paul, Saturday looked good - unfortunately not sure why but can't see your Sunday pics.
20 Dec 2015, 6:51pm
jones wrote:
Paul, Saturday looked good - unfortunately not sure why but can't see your Sunday pics.


That's odd, I can see them on my Mac, but not my daughter's laptop?

So I will have a play and see if I can get them back.

Did I mention I've been having a few IT problems? :rolleyes:
20 Dec 2015, 7:12pm
Jones - I've just recopied all the photo links and can now see them on both my Mac and a Windows laptop.

So I hope you (and everyone else) can see them too, but let me know if there is still a problem.

- - - - - - - - - - - - - - - - - - - - - - - - - - - - - - -

Slickshod - Welcome to my build thread Pete & thanks for the kind words.

I know it has taken me a long time to reach this stage, but the last of the major alterations are now within sight. :cool:

- - - - - - - - - - - - - - - - - - - - - - - - - - - - - - -

Swifty - Cheers and I guess I've now have a lot of practise working with fibreglass. :icon_wink:

Although, deep down, I am still amazed how well everything joins back together to form a new single piece.
21 Dec 2015, 1:00pm
Just Another Manic Monday…
Once again I was outside first thing in the morning in order to squeeze some car work in around other chores.

I started by adding fibreglass matting to both the inside & outside of the bottom corner of the arch.


Then I added a layer of normal body filler over the work I did yesterday.


While that was setting, I could make a start on emptying the porch of car stuff.
( As some of my wife's family are coming round for dinner tonight. )

Before:


After:


As I still needed to use my sanding blocks when the filler had set hard enough.


As usual, the finish is just to an MOT'able standard for now and the real body work preparation can wait.
( Although I honestly can't imagine how I will ever get a continuously smooth, rather than undulating finish. :rolleyes: )

Even though I still have more work to do on the leading edge corner, I just couldn't resist getting some etch primer on. :cool:


There was just time to clean up my driveway and a large area of next door too).


As soon as I had finished outside, it actually started to rain, so today's timings worked out well.

I just needed to clean up the porch and that was it for today, as I have more stuff to do now before our guests arrive later.

So until next time, take care, Paul. :)
22 Dec 2015, 4:39pm
Blustery Tuesday - Part 1:
It is never a good sign when the howling wind and lashing rain outside wakes you up in the morning. :rolleyes:

So I had to wait for a break in the weather before I could trim the bottom corner of the arch.

Before:


After:


At which point it started raining again, so I had to down tools for a bit.

- - - - - - - - - - - - - - - - - - - - - - - - - - - - - - -

Next I added some fibreglass filler to both cover the join and improve the overall shape.


There was then another break while I was waiting for that to set sufficiently.

- - - - - - - - - - - - - - - - - - - - - - - - - - - - - - -

When I roughy sanded it all down.


I will leave this fully set overnight before I put the next layer of normal body filler on.

Then I put the wheel back, but do not be alarmed, the car is still on blocks at this stage.


Note:
I will need to remove the wheel again when I come to "seal off" the remaining gaps between the body & Moon Rover.

This allowed me to jack up the car, remove the blocks, lower the car back to the ground and push it across the drive.


The good news is the car feels really solid when I push against the body work. :cool:

- - - - - - - - - - - - - - - - - - - - - - - - - - - - - - -

[color="red"]WARNING - Don't try this at home![/color]

Whilst the photo above looks great, I almost suffered a complete disaster just minutes earlier.

Regular readers will know this is not a lightweight build by any means and my driveway has a slope on it.

Well I seemed to complete forget this, as I turned the steering wheel way over to the left and pushed hard.

I was quickly reminded of these facts as the laws of physics and gravity created a "runaway" car heading straight for my porch wall!! :eek:

I managed to grab the car and used all the strength I could muster (& then some) to bring the car to a halt with an inch, or so, to spare.

Then, after a lot of huffing and puffing, I managed to drag the car away from the wall & get it back in a straight line.

- - - - - - - - - - - - - - - - - - - - - - - - - - - - - - -

End of Part 1…
22 Dec 2015, 4:41pm
Blustery Tuesday - Part 2:
With that little drama over, I could sit inside the porch in order to take a better photo of the wheel arch.
( The front wall of the house prevented me getting any further back before. )

Note:
Obviously, there is still a little bit of work to do before the arch is completely finished.

However, I am still very happy with the way this has actually turned out. :cool:

Before:


During:


After:


At this point, I roped my wife in to take the following photo of my very basic suspension travel test.


Not very scientific I know, but hopefully the tyre should not foul the bodywork when it is on the road.

Next I had another look at the work required for the rear arch on the driver's side.


And while I was at it, I quickly checked the front arch on this side too.


Then it was time for yet another clean up of my drive.


At which point the sky was getting darker again.


So I just pushed the car back into position.


Thankfully I had all the covers back on before the next round of rain arrived.

So until next time, take care, Paul. :)
22 Dec 2015, 4:48pm
Paul, I take it you set your rear wheel 'toe in' to where you want it before altering your wheel arches? Only that can make quite a difference to where the wheel sits within the arch...
22 Dec 2015, 5:19pm
Mister Towed wrote:
Paul, I take it you set your rear wheel 'toe in' to where you want it before altering your wheel arches? Only that can make quite a difference to where the wheel sits within the arch...

Unfortunately, the short answer is "No I didn't". :icon_sad:

I'd better not type the long answer, as it is basically the same three words above, but surrounded with every swear word I know. :frusty:

Oh :tape:.

Paul.