MadaboutKitcars

This is a read-only archive of the old Madabout Kitcars forum. New posts and replies are no longer possible, but every thread is still here to browse and read.

Another Cordite Is Born ...

13 Jun 2015, 4:41am
Micky1Mo - That is one serious "cut & shut" job! :eek:

Where did the Navigator body come from, as I thought the moulds were not useable?

Actually, following on from my previous post, you don't know how many Navigator kits were made do you?

Either way, looking forward to seeing the finished Scimitar version. :cool:

- - - - - - - - - - - - - - - - - - - - - - - - - - - - - - -

That Was The Week That Was...
A bit of a belated catch up from me and without any of my planned car work to show. :icon_sad:

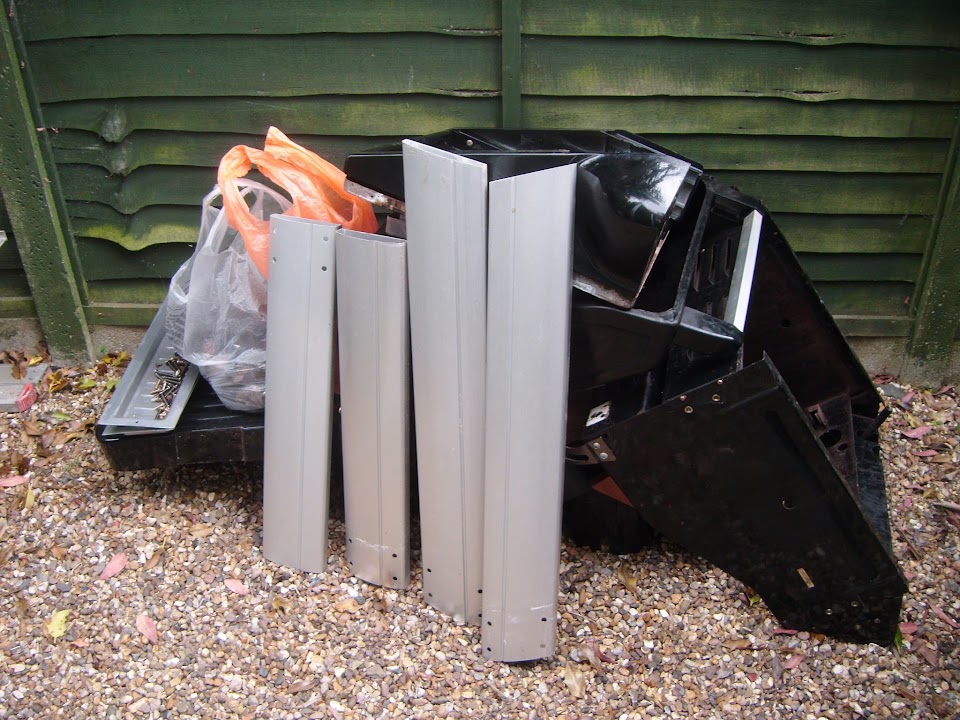
Although last Saturday I did have a small construction project turning this box of bits...


Into one of these.


As my family wanted to have a BBQ for the 4 of us on Sunday and our old BBQ had finally bitten the dust.

In fact, the last time I used it, I had to bodge a bit of metal from my Spitfire "left over" pile to bridge a corroded section.

Note:
I do not actually recommend temporary repairs on something where gas and flames are combined. :rolleyes:

The good news is that whilst the new BBQ has a similar "foot print" to the old one, it has a much bigger cooking area. :cool:


So Sunday the BBQ was christened and we had a nice relaxing family day.

- - - - - - - - - - - - - - - - - - - - - - - - - - - - - - -

On Monday I got the news that all my work checks had been completed and I started in Canary Wharf on Tuesday! :eek:

So this has turned into a long week, as my return to the rat race has played havoc with my sleep.
( Long hours in front of twin computer screens has left me waking up at all hours. :icon_evil: )

This morning was no exception, so I've been typing up loads of forum replies and will post them now before going back to bed!

- - - - - - - - - - - - - - - - - - - - - - - - - - - - - - -

Quite by chance there is an open air car show in Canary Wharf at the moment and I loved the Jaguar stand.

This twin tail pipe set up makes my pipes look like pea shooters.


But best of all I got to see their "Project 7" car. :cool:
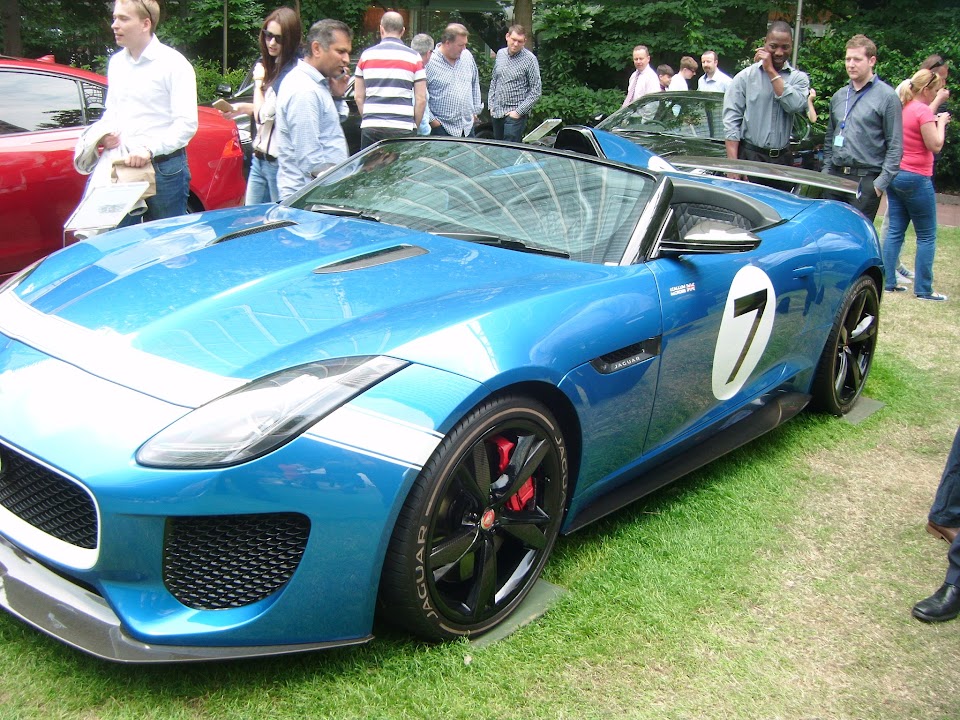


And this is what a proper "boot lid through the aero hump" design is supposed to look like.


Having said that, I don't thing this Jaguar was put together on their driveway. :icon_wink:

- - - - - - - - - - - - - - - - - - - - - - - - - - - - - - -

It would be nice if I could get at least a token gesture of car work done this weekend. :pray:

But we will have to see, cheers, Paul. :)
13 Jun 2015, 10:36am
Paul L wrote:
Micky1Mo - That is one serious "cut & shut" job! :eek:

Where did the Navigator body come from, as I thought the moulds were not useable?

Actually, following on from my previous post, you don't know how many Navigator kits were made do you?

Either way, looking forward to seeing the finished Scimitar version. :cool:

:)


Hi Paul, when I spoke to RIBBLE's laminator he told me he built 22 body's, 2 Austin Powers things, 8 Navigators and 12 Pilot's, if I remember right :tongue1:
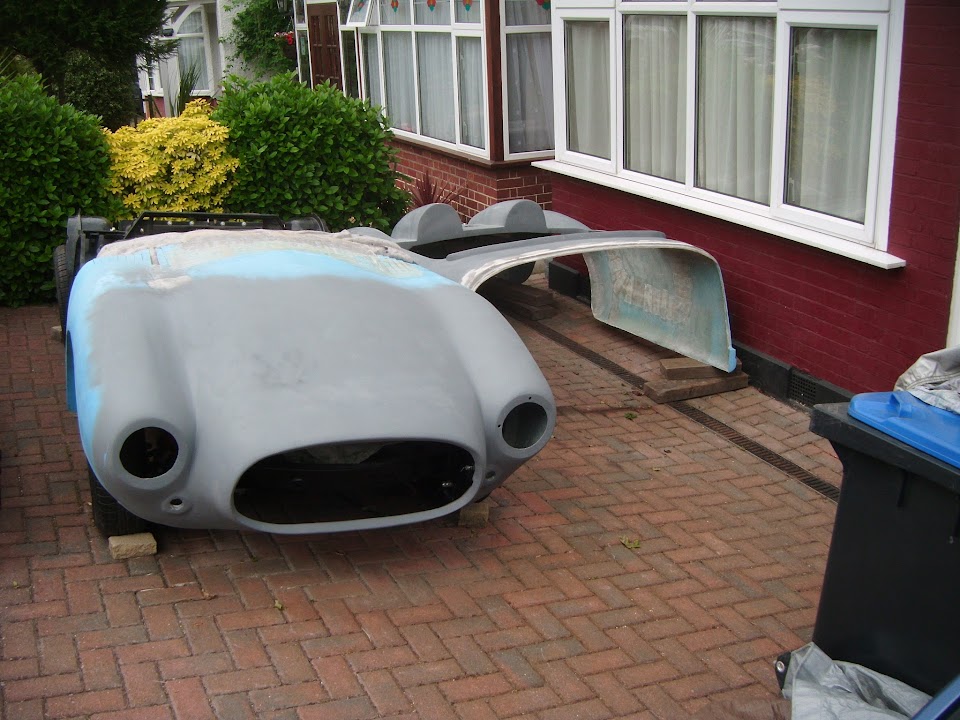
This shell was one of the original SAMMIO Cordite body's before they where "re-worked".
Here a few photos of "work-in-progress"


The whole thing looks simple but it's been a nightmare :icon_cry:

I still have a problem with the driving position, some how I have to extend the dash to meet the steering wheel.


I also think I will have to lower the floor-pans to avoid the "noody" effect.

I would have like to do a blog on this but the chap who's buying it said no, so sorry :eusa_whistle:
13 Jun 2015, 2:16pm
humbug...
14 Jun 2015, 4:52pm
Mr T: - This was my bodged repair, using a folded section of Spitfire body work to bridge the corrosion.


But the thought of a gas explosion is why the old BBQ is now a pile of parts ready for the recycling centre.


Although I will hang on to the legs in case I can think of a use for them in the car build. :rolleyes:

- - - - - - - - - - - - - - - - - - - - - - - - - - - - - - -

Micky1Mo & Gary - It is a shame that there isn't another build thread to follow.

- - - - - - - - - - - - - - - - - - - - - - - - - - - - - - -

A Token Gesture:
Whilst it is good to be back talking about my build again, unfortunately there isn't much to report.

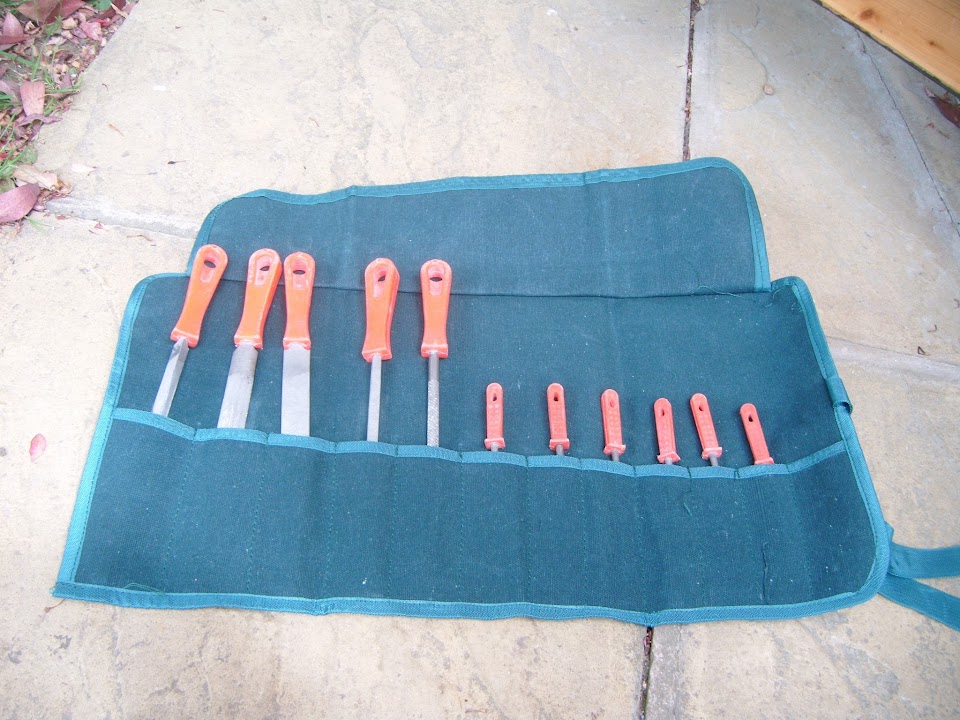
I was getting fed up with the fact the cheap plastic wallet my hand files came in was always falling apart.


So I've replaced it with a cheap material tool roll instead.


This was part of my traditional tidying up of the Summer House and at least I can see the floor again.


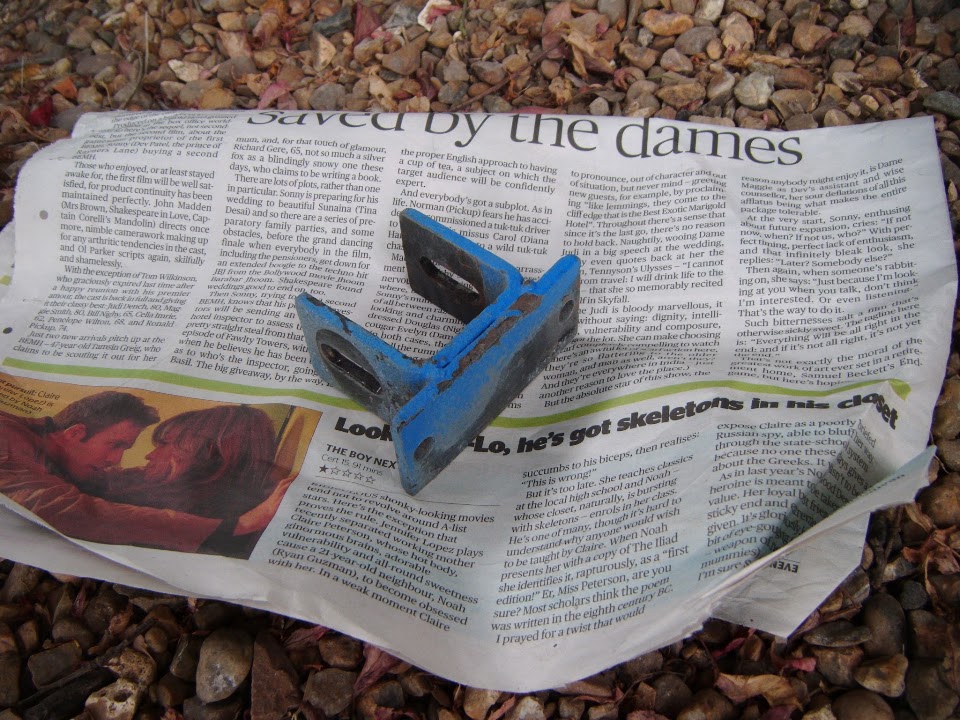
I've found the original fixings for the Spitfire steering column.

But there was one bracket that I just needed to paint over the blue.


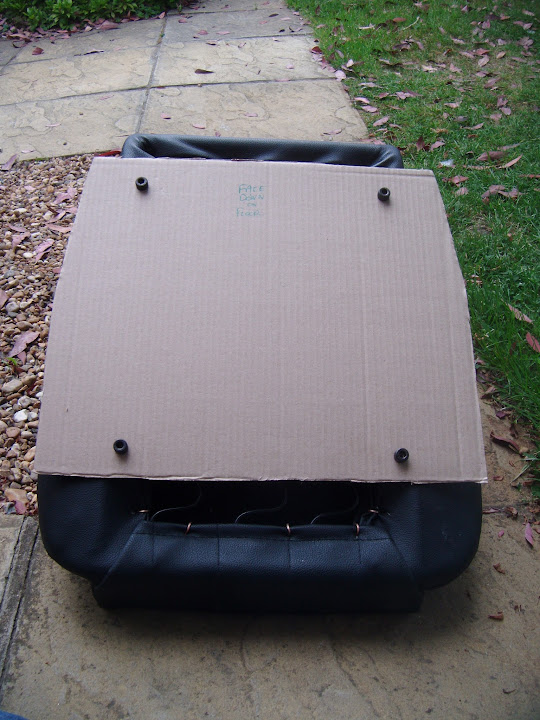
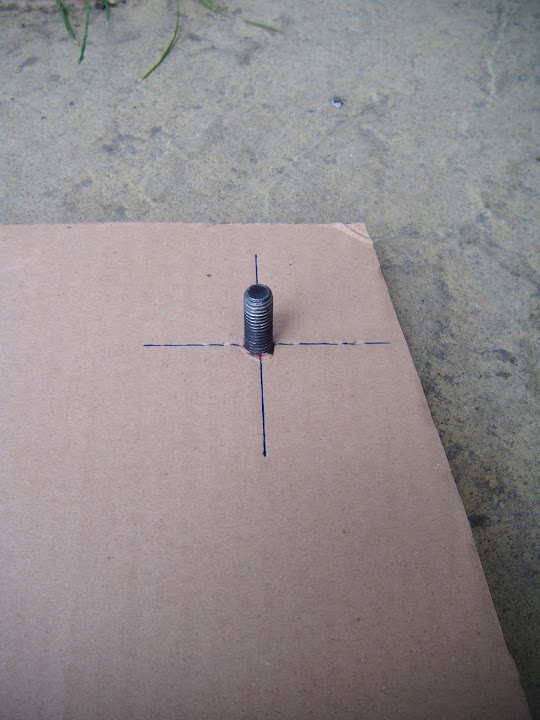
Then I made two cardboard templates for the mounting bolts on each seat.


These will be used when I come to mark up / drill the holes required to bolt the seats to the floor.
( There is no room for seat runners to work. )

- - - - - - - - - - - - - - - - - - - - - - - - - - - - - - -

Confession Time:
Tidying up the hand files reminded me that I need to mention a slight mishap I had with the internal frame work. :icon_sad:

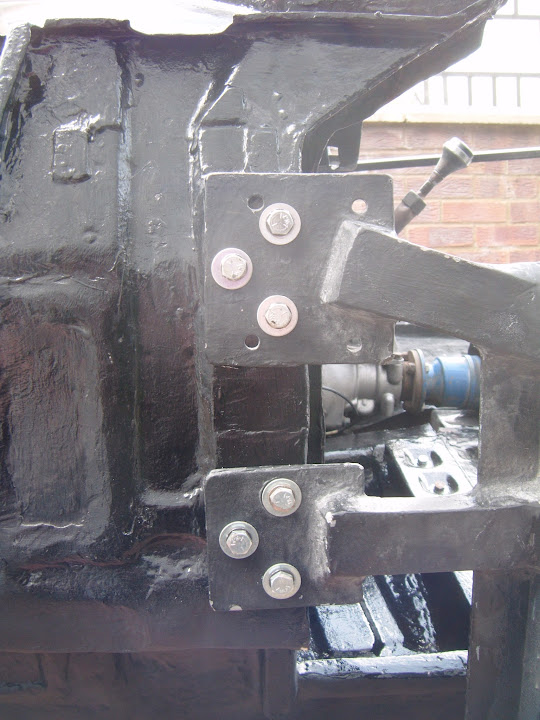
Because I'd lowered the bulkhead slightly by removing an extra spacer, one of these brackets didn't want to line up.


So I'd been using a big screwdriver to give me the little bit of leverage I needed to get the bolts into place & that worked well.

Although there was one hole that needed to be open up a little bit in order to line up, so I used one of the small hand files.

Then my brain shut down for a moment and I carrying on with my levering action, except I hadn't picked up the screwdriver.

Yes, I really was dumb enough to break about 5 cm off the top of the file and drop it into my completely sealed A pillar. :rant:


To say I turned the air blue was an understatement, but as I couldn't think of any way of fixing the problem I just bolted it all up.

Now I need to pick one of the following options:
- Leave it where it is and carry on regardless.
- Cut an access hole into the A pillar, find it & fish it out (no idea where it is, so it may not even work).
- Squirt a load of expanding foam in though one of the bolt holes and hope to entomb it.

Although I am open to better suggestions if you have any.

- - - - - - - - - - - - - - - - - - - - - - - - - - - - - - -

Anyway it is nice to be back working on the car again, even if it was only for a short time & I didn't get much done. :rolleyes:

Until next time, take care, Paul. :)
14 Jun 2015, 5:16pm
do you think it will rattle or jump around... Can you drill a whole in the top and drop something magnetic down the end? Or grind the top off, take it out and re-weld.
15 Jun 2015, 6:51am
Paul, I think one of the top priority's you have to do at this stage of your build is to "sit" in the car and play "driving".

I know this sound stupid but is an important moment.

Firstly, you can tell if the car "fits", leg room, peddles, steering wheel, seat position ect.
Secondly, It makes you feel so good at what you've done so far and bleeds inspiration to finish the car :icon_smile:
15 Jun 2015, 8:38am
micky1mo wrote:
Paul, I think one of the top priority's you have to do at this stage of your build is to "sit" in the car and play "driving".

I know this sound stupid but is an important moment.

Firstly, you can tell if the car "fits", leg room, peddles, steering wheel, seat position ect.
Secondly, It makes you feel so good at what you've done so far and bleeds inspiration to finish the car :icon_smile:


I have to agree with that one, having now driven my Marlin about 100 miles, to and from it's MOT, I have realised I need to make adjustments to the seating, steering wheel and clutch pedal positions. My left, clutch leg is now suffering cramps as a result if the lack of a 'rest' position and I need to improve the throttle position too, I am having difficulty keeping a steady throttle position when cruising.

Part of my problem is the pedal box, I had to add a hydraulic clutch for the RV8 (Ford was cable, which takes up much less room), which has put the clutch pedal too close to the gearbox, so I have nowhere for my left foot to rest. If I were doing it again I would make my own pedal box, probably floor mounted, which would solve a bunch of other issues, including access around the steering column.

Better to get this right at an early stage while you can more easily make the adjustments. I did try but not hard enough! You need to be really comfortable seated in a driving position. Think, you have to be comfortable for at least an hour or two at a stretch, else it will be purgatory to drive it and that's not what it's about, you want to enjoy the experience.
15 Jun 2015, 11:25am
I should have said some think earlier but just forgot!!
Only just remembered as I have just had to "cut and shut" a local guys body by 4". :shock:
Made a real mess of his nice red paint job and messed up his interior trim. :shock:
Sorry but he was to embarrassed for photos. :scared:

One of the major problem with the Navigator body was the lack of cockpit space.
Mac, got around his leg-room with the floor mounted pedal box.

I
20 Jun 2015, 3:46pm
Gary - Well part of me thinks that there will be so much noise in a completely open car, that one more rattle wont be noticed. :rolleyes:
Plus I spent so long repairing the rusty bulkhead that I am very reluctant to cut an access panel into the pillar in order to get the bit of file out.
So I'll leave it for now and have another think before the body shell is bonded onto the framework, which would limit my access options still further.

- - - - - - - - - - - - - - - - - - - - - - - - - - - - - - -

Micky1Mo & 8 Valve Ed - Luckily I am only 5' 8", so there is just enough room for me to fit based on previous test fittings. :cool:
By using the Spitfire bulkhead there is plenty of room for my feet, so I have no issues with access to the pedals.
The only slight problem is the angle of the lowered floor pans combined with the angle at the back of my seats means they only just fit.
I was actually hoping to sort out the holes for fitting the seats today, but it was not to be...

- - - - - - - - - - - - - - - - - - - - - - - - - - - - - - -

Another Token Gesture:
Almost 6 weeks after I put the covers, they were finally taken off today.


Then I removed the boot lid.


As this makes it easier for my wife and I to lift the body shell back into position.


Although one corner just wouldn't sit right and then I realised I had been a bit thick (again! :rolleyes:).

When I was painting the rear arches I noticed a bend in one small section, which I straighten out before painting.

As it turns out, I had previously bent this out the the way on purpose so one corner of the boot rain channel didn't foul.

So a bit of leverage was applied for the second time.


And now this corner sits nicely.


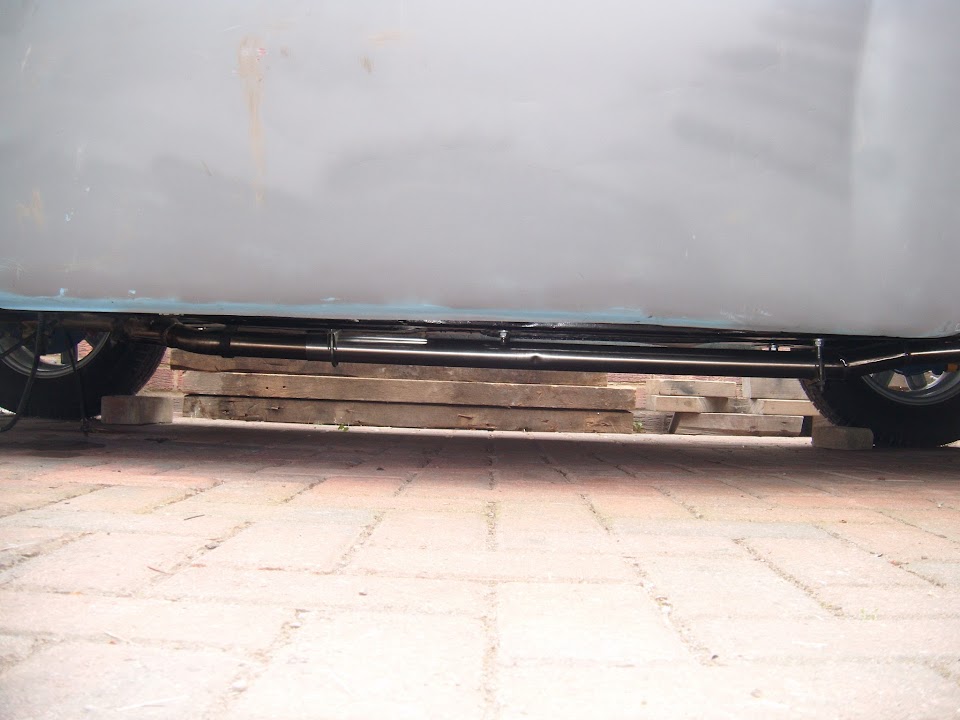
So with the boot lid back in place and the bonnet lowered, it was looking like this.


Scottie posted a photo of the gap under his "slammed" Spitfire the other day.

By comparison, I appear to have build an off road Le Mans car. :icon_wink:


Note:
The small dent in the exhaust pipe was put there by the previous owner. :icon_sad:

At some point I need to be brave and start work on chopping the bonnet sides & extending the body shell.

A bit like Micky1Mo's build photos above.


I've also got to sort out the rear edge of the bonnet, to match the profile of the scuttle.

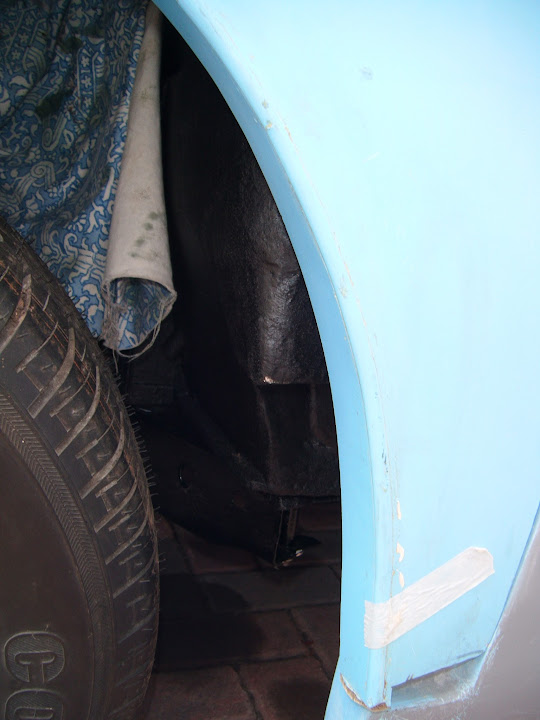
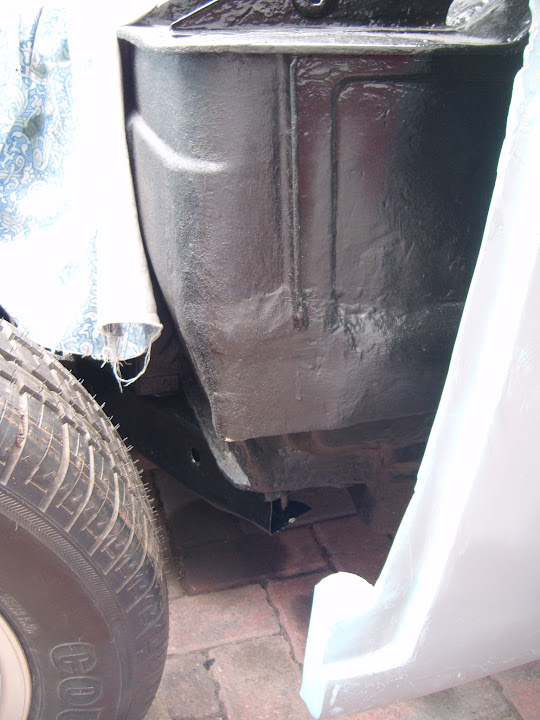
But this is what the passenger side front wheel arch looks like now.


Not easy to see in the photo, but currently you can see the front edge of the bulkhead through the arch.


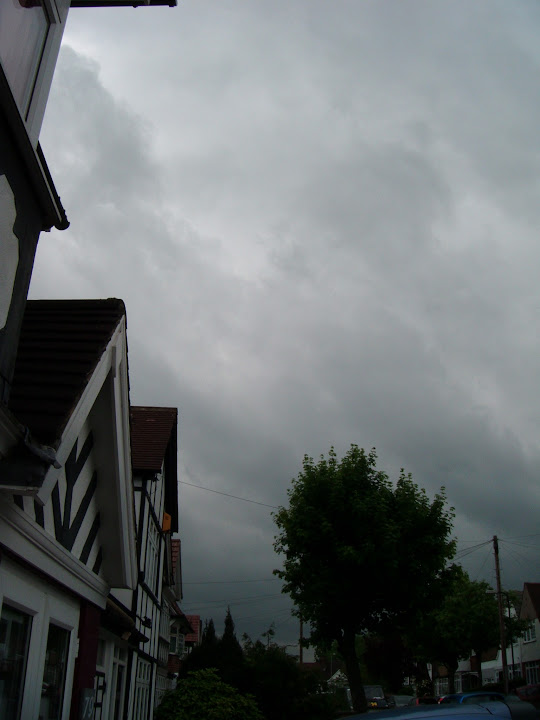
Unfortunately, by now the sky looked like this and I didn't want to push my luck with the weather.


So the covers went back on and I will have to sort out fitting the seats another day.


At least it now looks like I have a car under there.

Take care, Paul. :)
28 Jun 2015, 12:47pm
Weekend - Part 1:
There were two small(ish), and inter-connected jobs, that I wanted to tackle, which were the seats and steering column.

But I'm really struggling to find "any car" time at the moment, despite the run of nice weather we have been having.

Luckily I managed to make use of a "gap" between a "Dad's Taxi" drop off and pick up on Saturday that at least allowed me to do some prep work.

When I was digging out the steering column brackets the other day, I knew one part was missing / stored in a different place.

So the first job was to find the box with these bits in it.


I've ended up with two sets of brackets to seal the steering column to the bulkhead, as I've had two body shells. :rolleyes:

So I just need the one I've painted black, plus the new rubber seal I'd bought from Rimmer Bros.

Then I spend a bit of time finding a matching sets of small washers for the two fixing bolts, rather than use the odd collection originally fittied.

Next up were some minor modifications to the cardboard seat bolt templates I'd made last week.

I marked up some "cross hairs" on the "sunny side" of both templates.


Which allowed me to increase the size of the holes from bolt to bolt head size.


Which in turn will allow me to remove the seat, but leave the template on the floor, rather than have it still bolted to the seat.

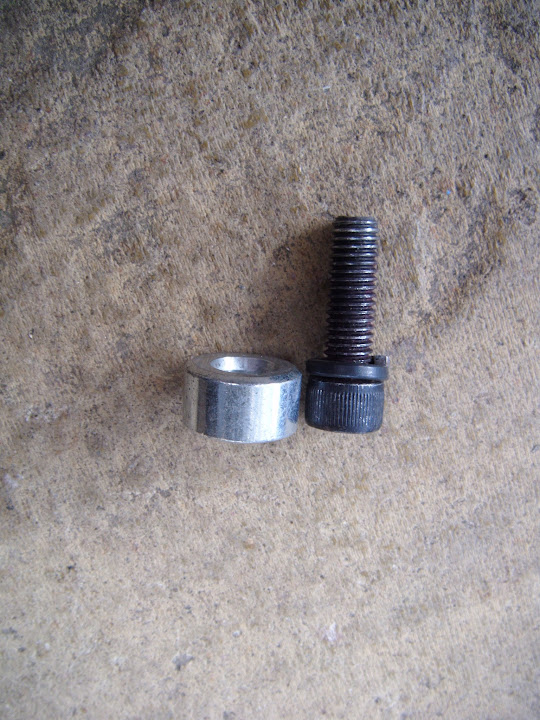
The bolt heads will act as a rough match for the height of the seat spacers.


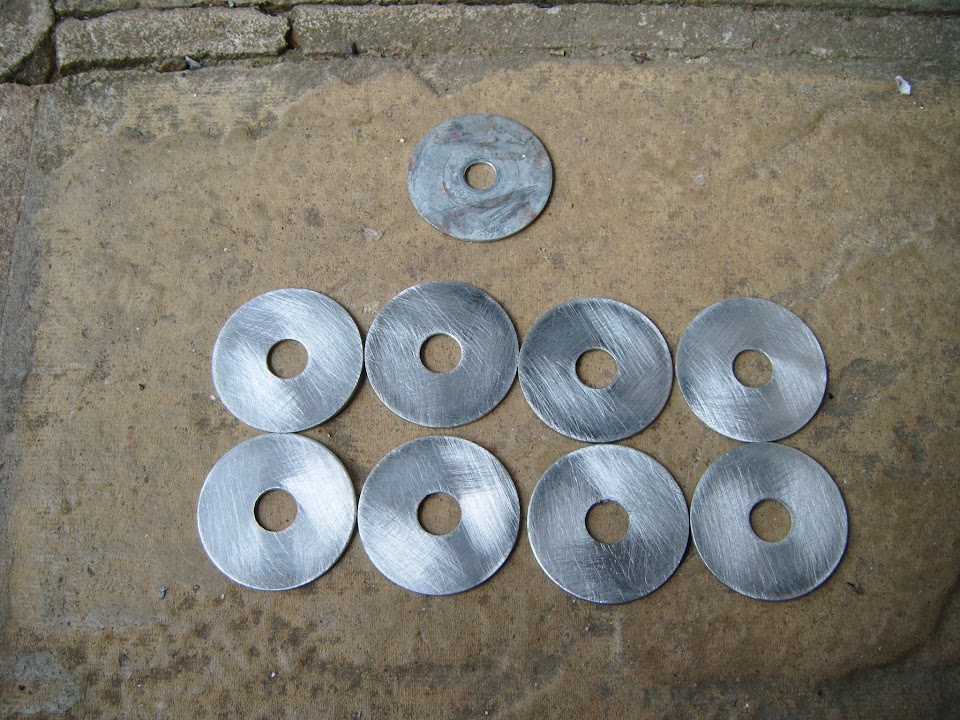
I then cleaned up a bunch of penny washers that were originally used during my various boot locking experiments.
( And were covered in bits of filler and/or etch primer. )


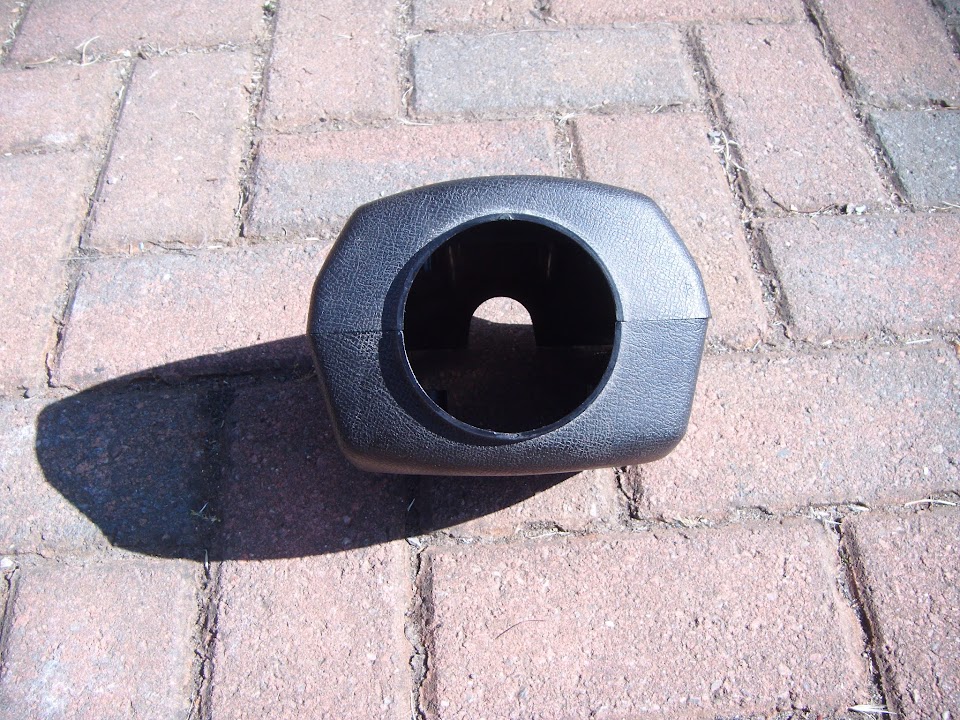
Next I removed the steering column cover and indicator/horn/high beam switch.


Note:
At some point I would like to make a new cover to replace the plastic one, but this will do for now to at least get me on the road.

I just need to have a quick read of the Haynes manual before I re-fit the column to ensure I line everything up correctly.


It was early evening before I could finally take the covers off and do a bit more.

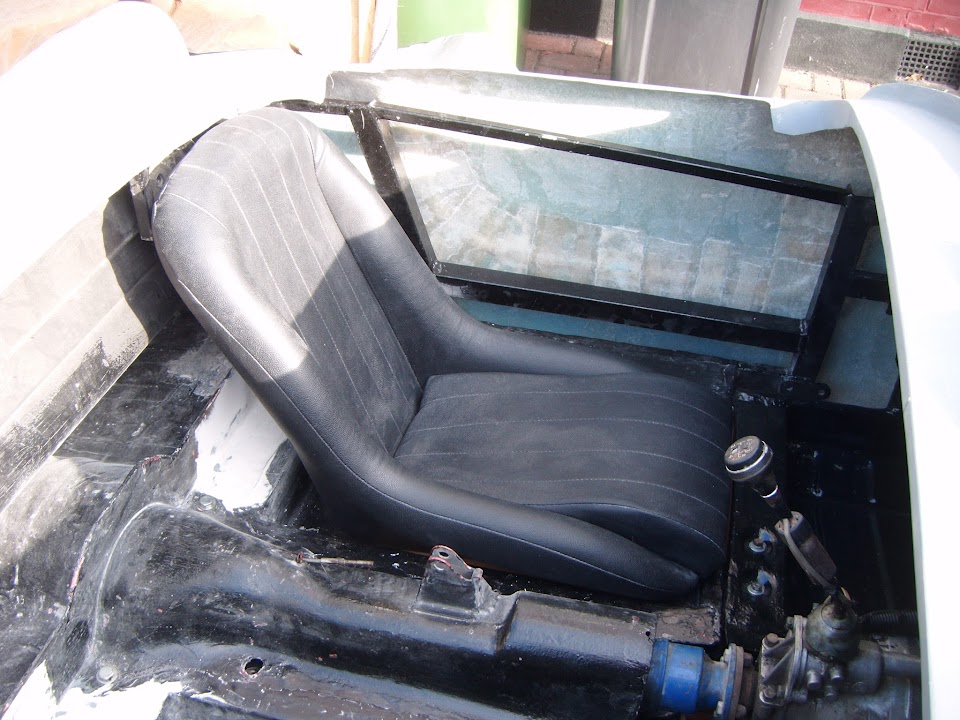
So I put the passenger seat into position.


Given the angles of the lowered floor pans and the back of the seat, there is no space at the back.


So when the rear cockpit wall is in place, the back of the seat make be squashed a bit.


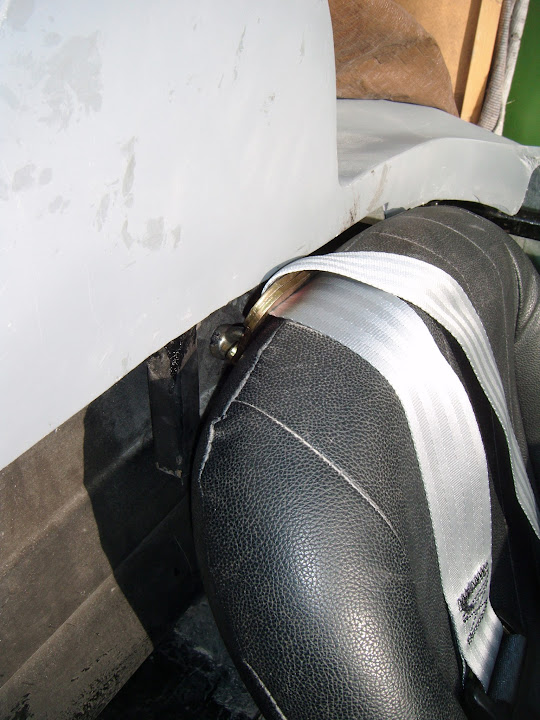
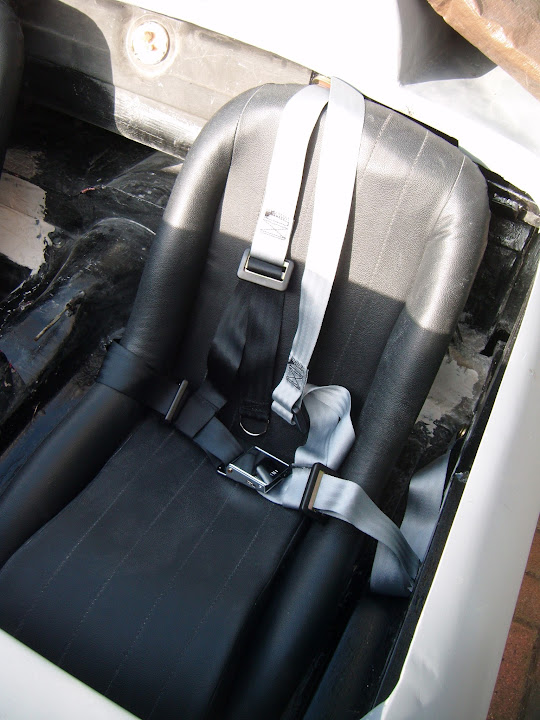
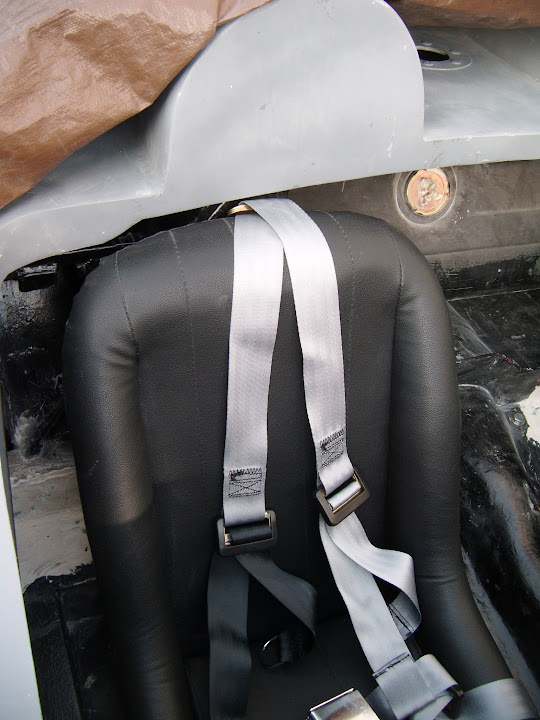
Before I went any further, I thought I'd better double check the seat belts too.


From my previous tests, I knew the rear mounting point would not line up with the centre of the seat back.

But this does not seem to cause a problem when the belts are over your shoulder (excuse dodgy selfie).


So now that I was happy with the position of the seat, I could take the template to the floor.


Then mark the hole centres onto some masking tape I'd put underneath.


By now, even though it was still daylight, it was a bit too late in the evening to start drilling.

So I had a quick look at the possibility of adding some washers to the bolts at the rear of the seat.


This does actually gives a very marginal improvement to the gap behind the seat, so I've ordered some longer seat bolts.


End of Part 1...
28 Jun 2015, 12:48pm
Weekend - Part 2:
I just had enough time left on Saturday to put the driver's seat & belt roughly into position.


But I want to fit the steering column before I commit to a final seat position.

Actually, I might fit the accelerator pedal too, as I just have the clutch & brake pedals in position at the moment.

Note: I still can't budge the clutch pedal no matter how hard I push against the pedal. :rant:

Another job I need to tackle at some point is sealing up the small gap between the bulkhead & rear framework / floors.


- - - - - - - - - - - - - - - - - - - - - - - - - - - - - - -

OK, when I started typing this post up, I was expecting "Part 2" to include some of today's work as well. :rolleyes:

Unfortunately, it has been chucking it down with rain during my intended car work "slot". :icon_sad:

So I'll post this now and if I do get another chance to work outside, I'll do another update later on.

Cheers, Paul. :)
28 Jun 2015, 5:32pm
Taking shape now Paul!
Ref the busted file, I would have tried a stick-magnet, and after failure, foamed it it there!
Good luck with it.
28 Jun 2015, 5:33pm
Quick Question:
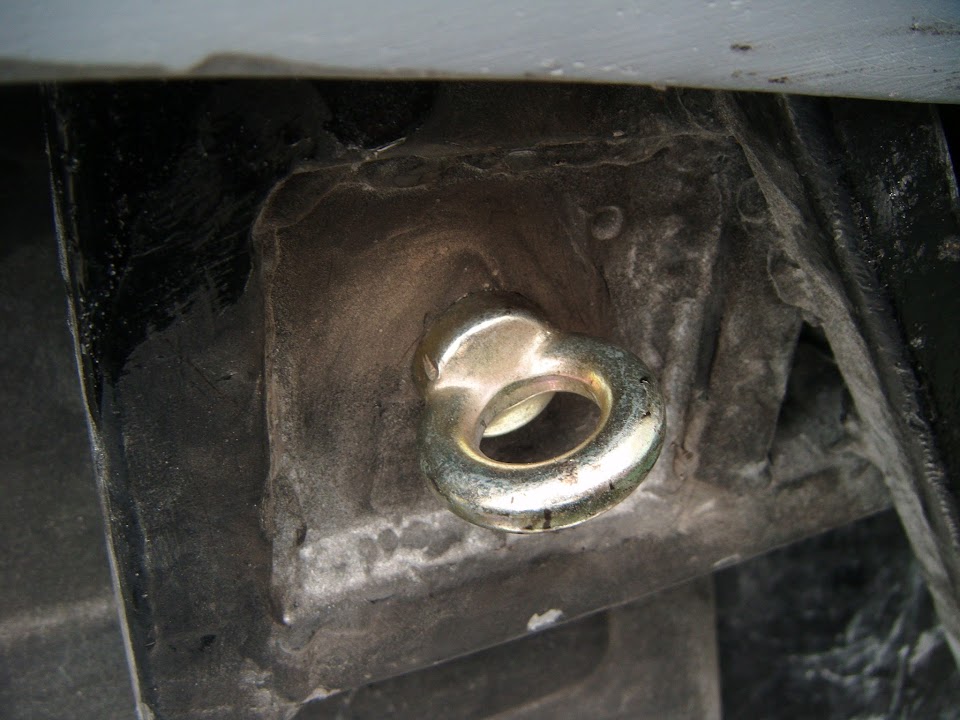
Messing about with the seat belts yesterday reminded me of a question I've been meaning to ask...

Do the eye bolts simply get tightened straight onto the mounting plate?


Or are there any washers, nuts, etc. I should be using as well?

- - - - - - - - - - - - - - - - - - - - - - - - - - - - - - -

A Poor Show:
Drilling the 4 holes in the passenger side floor was straight forward enough.


My plan for using just a spacer for the 2 front holes & some extra washers for the rear 2 holes was also simple enough.


But getting the seat into the correct position to test bolting it into position is not a one man job.

I tried taping the bolts in place from underneath...


Guides on the holes...


Guides on the seat...


But nothing worked, so that will have to wait for another day when I can call on an extra pair of hands.
( I'll also jack the car up to give me more room to work underneath the floor. )

So for now, this is just a mock up to give you an idea of what the underside will look like.


Next I re-fitted the bottom half of the steering column.


This was a painfully slow process given the lack of room to tighten the nut up more than a fraction of a turn at a time.

Then I started to fit the bulkhead bracket / seal.


But quickly discovered this is another job that requires two people to complete. :icon_sad:
( As there is no way to reach both sides of the bolt & nut at the same time. )

Just to add insult to injury, at this point I felt a drop of rain and had to call it a day.

So not the most productive car session I've ever had by any means. :rolleyes:

Until next time, take care, Paul. :)

PS
Guy Martin
This was a Father's Day present last Sunday and I've already finished it, a most enjoyable read. :cool:


One bit of trivia for you:
- Guy's first crash in a motorcycle race was at Park curve on the Cadwell Park circuit.
- This is the very same corner that I had my last crash in a motorcycle race.
( Hit by another rider, spectacular tumble, knocked out cold, race red flagged, trip in the back of an ambulance. :rolleyes: )

I've got Cordite kit #7 and always planned to use a variation on Barry Sheene's number for my racing roundels.


So I might find room to include a small Guy Martin logo with my "sponsors" stickers.


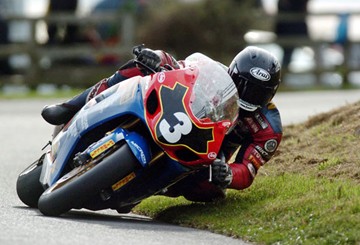
The book also includes some cracking photos, including this one.

28 Jun 2015, 5:39pm
Scottie - Sorry I only saw your reply appeared after I posted my message.

It was quite nice getting the body shell back on last week, as it at least looks more like a car.

It it the same with seeing the seats in there, it gives me hope.

Although I need to find more hours to work on the car, or it will take me another 3 years at this rate!!

Cheers, Paul. :)
28 Jun 2015, 9:48pm
Looks like a pic from Oliver's mount

I've wondered about your pic of the yellow bike...so ex racer

Just mangled my yellow rsv Mille on the mountain road on the Isle of man...trouble is I mangled my leg as well .."oops
29 Jun 2015, 9:33am
Cordite

Yes the abnormalities are never ending on the build! I had to jump levels of the build to stop me giving up! It was often a psychological exercise but slowly the achievements look presentable! My mate has said that he would have given up ages ago! Ive decided to reach a level where the Cordite is usable and race like and road worthy and to return at a later date to improve certain areas where needed. Otherwise the build will take years of my time and that is not what I have! But really depends on your nature and skills and money resources. I believe the most important factor is to enjoy the build and be happy with your results ! Your build is far beyond mine and like you I work with limited knowledge and tools and such but what you have succeeded in tremendous indeed!
9 Jul 2015, 6:30pm
RedRatBike - Nice bike. :cool:

Or at least I guess it was before you crashed it. :icon_wink:

Jokes aside, get well soon.

Yes, the Guy Martin photo was from the 2004 Scarbourough Gold Cup.

In my avatar photo, I'm actually cresting the Mountain at Cadwell Park on a track day.
( My first experience of the full course, as I only raced MZs on the club circuit. )

- - - - - - - - - - - - - - - - - - - - - - - - - - - - - - -

Neil - Thanks for your encouragement. :cool:

I hope that by the time I finally get this car on the road it will have been worth the effort.

- - - - - - - - - - - - - - - - - - - - - - - - - - - - - - -

Sweet days of Summer, the Jasmine's in bloom.


Yes, I actually planted Jasmine in my garden based on the lyrics of "Summer Breeze". :rolleyes:

I started writing this post on Saturday, but there was no point in posting it before now.

- - - - - - - - - - - - - - - - - - - - - - - - - - - - - - -

Saturday
I had a simple plan for the weekend, domestic chores & gardening on Saturday, followed by car work on Sunday.

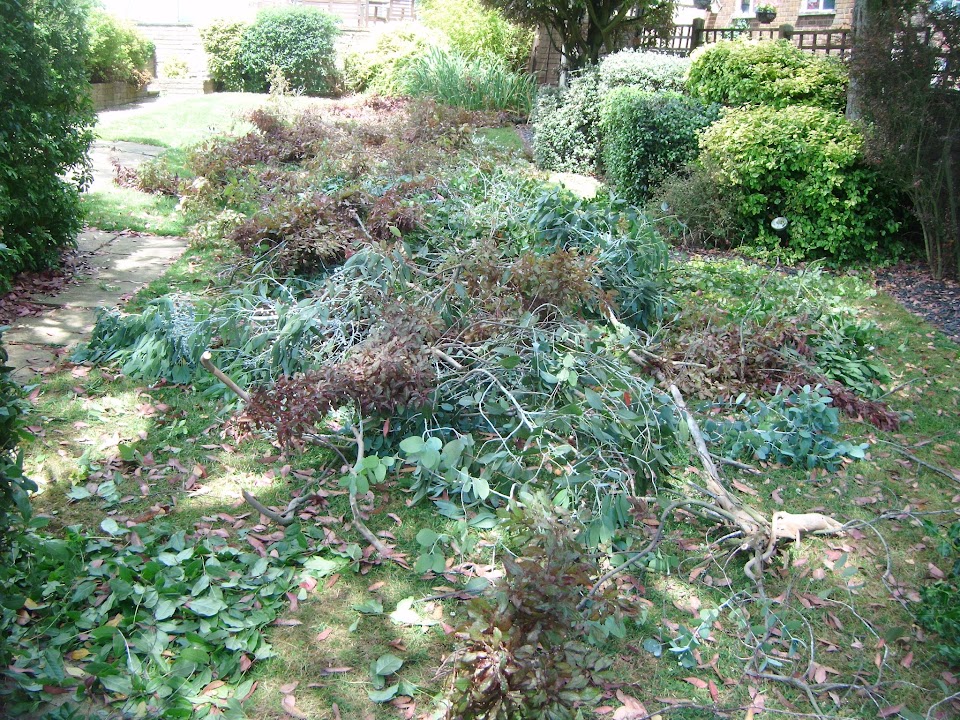
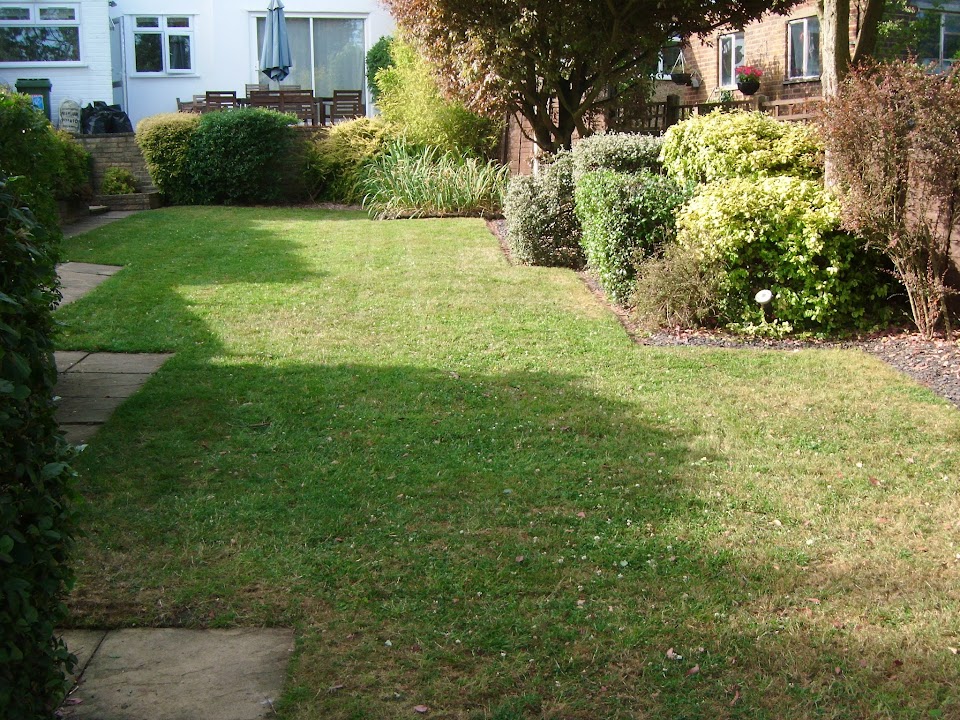
First, the pruning took a lot longer than I was expecting.


But the next round of trimming so all the waste could all be bagged up was worse.


Note:
I actually ran out of bags, so there are still a couple of small "piles" than need to be done.

By the time you could finally see the grass again, it had been a long, hard day.


- - - - - - - - - - - - - - - - - - - - - - - - - - - - - - -

Sunday
I was completely stuffed and just didn't have the energy for even a small token gesture of work on the car. :icon_sad:

( I guess Saturday's efforts in the heat, combined with the long days I've been working finally caught up with me. ).

- - - - - - - - - - - - - - - - - - - - - - - - - - - - - - -

Thursday - Part 1:
It was not practical for me to get to Canary Wharf during today's tube strike, so no work (or pay) for me today.

However, the weather forecast was good and I tried to make the most of it, although I still had some domestic chores as well.

In order to fix the position of the steering column I need to have one section of the dash board in place.


Note:
The hole on the right hand side will be used for the choke lever.

I got slightly concerned when the dash section wouldn't slot home into the bulkhead.

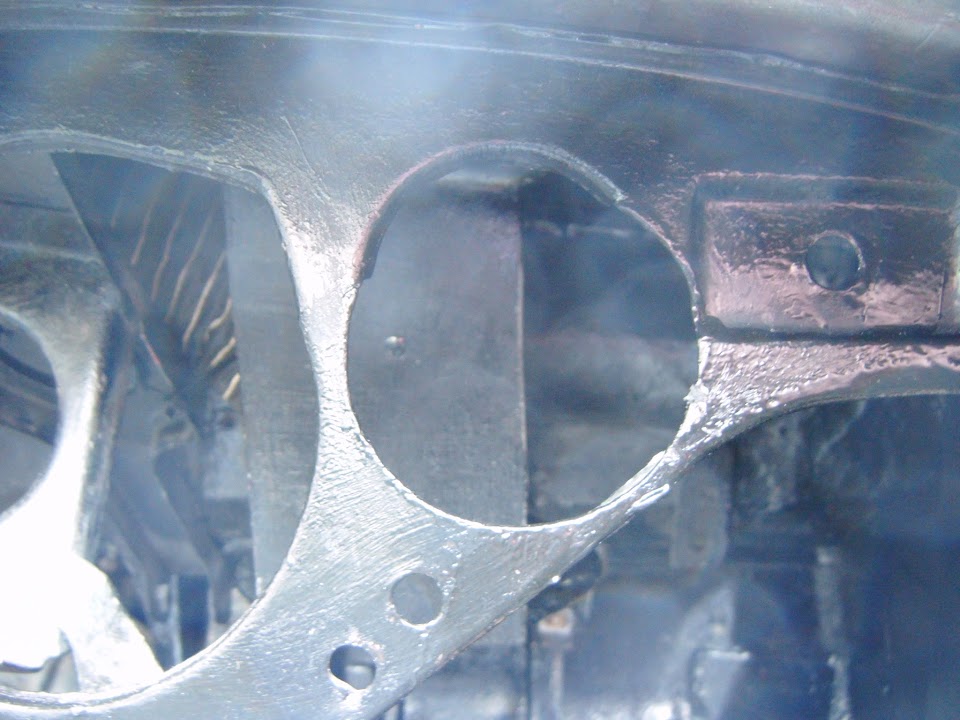
Then I realised that my home made bracket to hold the oil pressure gauge...


Was too wide to fit into the corresponding hole in the bulkhead.


At least that was an easy fix, just remove the bracket & re-fit it when the dash section was in place.
( This is just to help set up the steering, nothing is actually connected. )


I also wanted to fit the accelerator pedal to help me check the position of driver's seat.


But first I had to make a paper template for the "grip" tape Mac had sent me.


This was then cut out and stuck on the pedal to make it less slippery.


Next I had to go back to check some old photos to confirm where this metal plate went.


Turns out it was a home made bracket (by the previous owner) to move the pedal forward.

So after a bit of effort I finally managed to get the bulkhead bolts in.
( This was another job that would have been a lot easier with an extra pair of hands. )


So now I have all three pedals in place. :cool:


End of Part 1...
9 Jul 2015, 6:31pm
Thursday - Part 2:
Then I could finally turn my attention to the steering column itself, which I'd cleaned and greased.


You will notice I had printed out some old photos to help me putting it all back together.

Unfortunately, I should have looked at these before I mixed up some bolts. :rolleyes:

It was only when I was almost finished fixing the first clamp in place that I noticed my error.

The horizontal bolts should have been used vertically and were too long.


So I had to undo everything and then I promptly dropped a split washer onto the ground.

Now bear in mind I am jammed inside the bulkhead at this point, barely able to move. :icon_evil:

After wasting far too much time looking in vain for the washer, I had to go to the Summer House and get a new one.

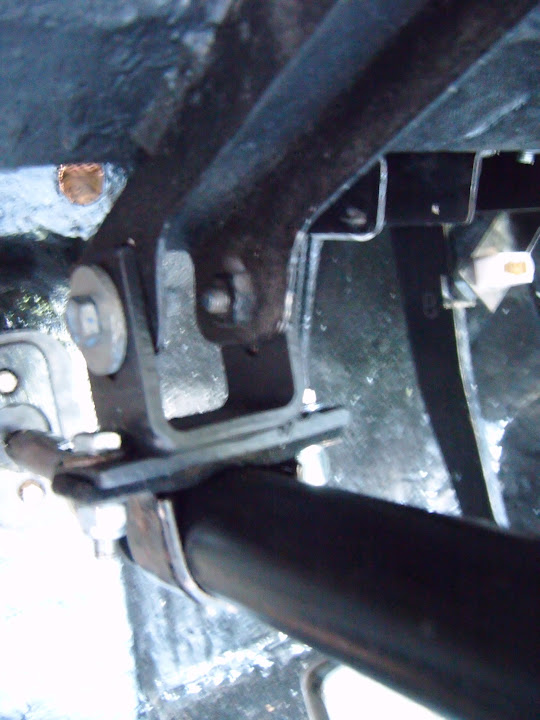
I haven't tighten everything up at this point, but you can see the bolts work better this way round.


The first two steering column clamps were loosely fitted with no other problems.


But the third clamp has become a real pain in the :tape:

Initially, I was very happy that I'd worked out how the two parts of the steering column overlap and get locked together.

A hole in the outer column lines up with a flat side on the inner column here.


Then this lower clamp has a bolt that screws into the flat surface.


Or rather it would do, if it wasn't seized solid. :rant:

So I had to soak both sides in WD40 and wait for it to do it's work.


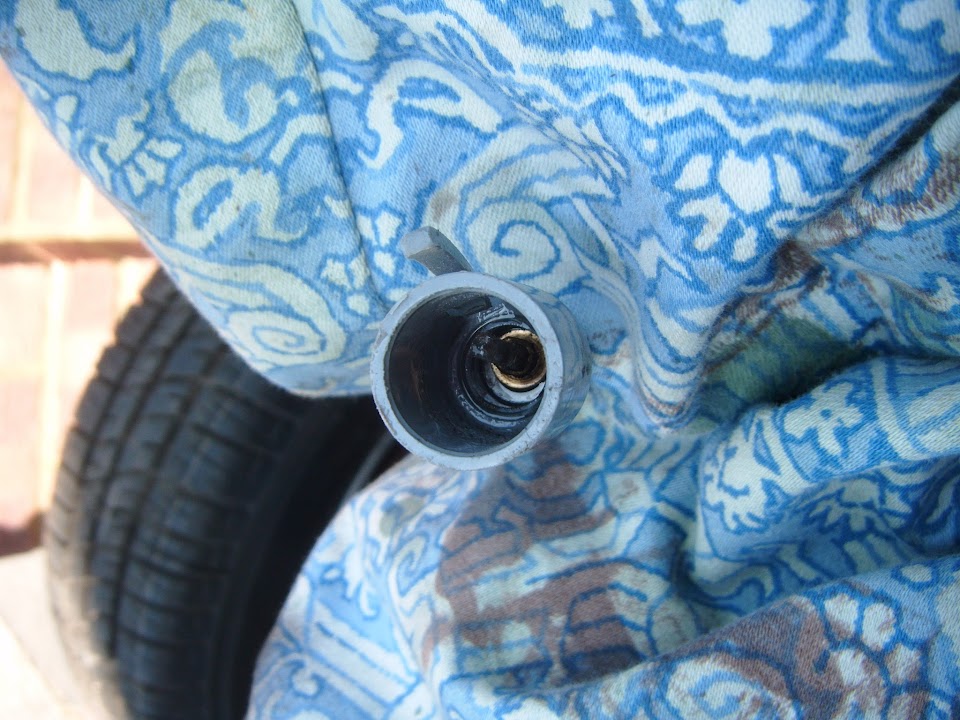
While I was waiting for that, I put some 3 in 1 oil into the end of the speedo cable and left that for a while too.


Finally I refitted the plastic column cover to ensure the steering wheel would be the right distance from the dash.


Eventually the parts of the bottom clamp could be separated.


I also pushed the speedo cable in through the bulkhead.


Next it was back to crawling around in the bulkhead to get the bottom clamp into position.


Now the steering wheel could go on.


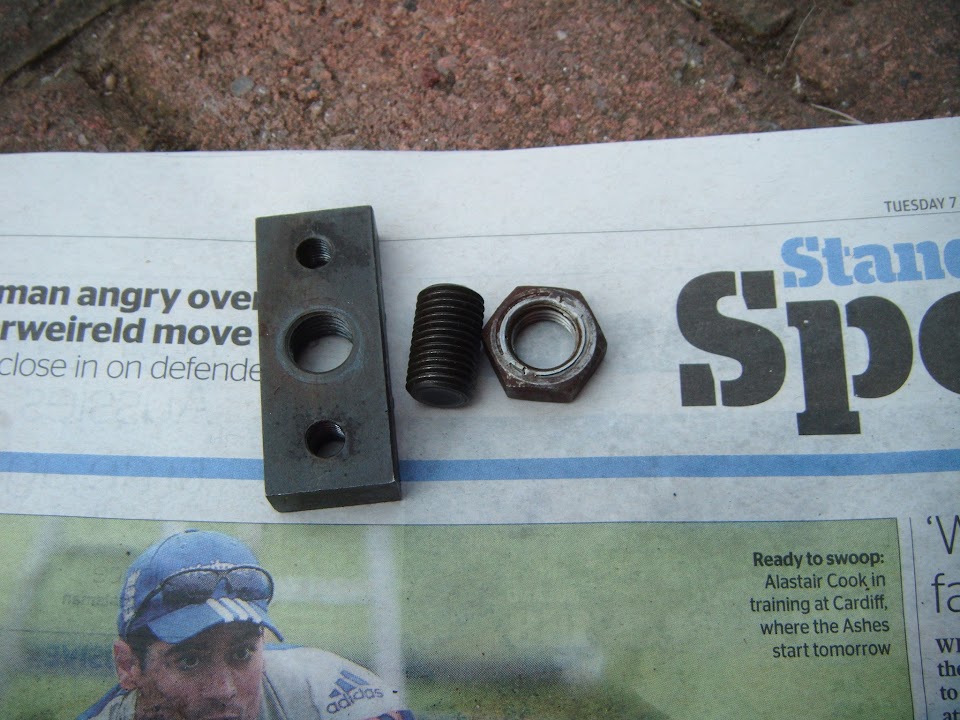
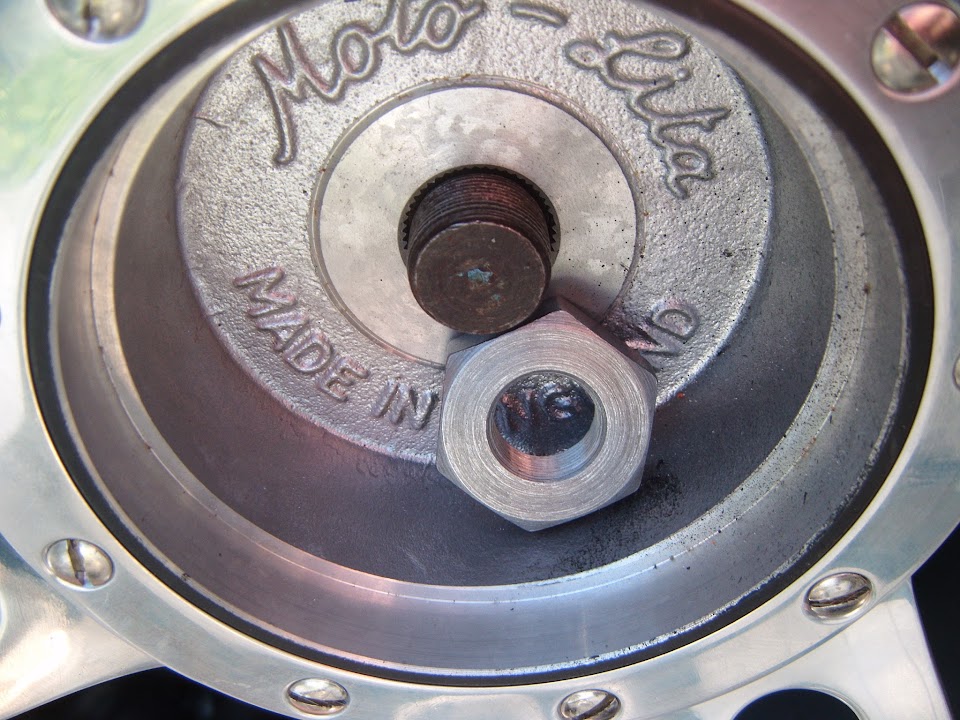
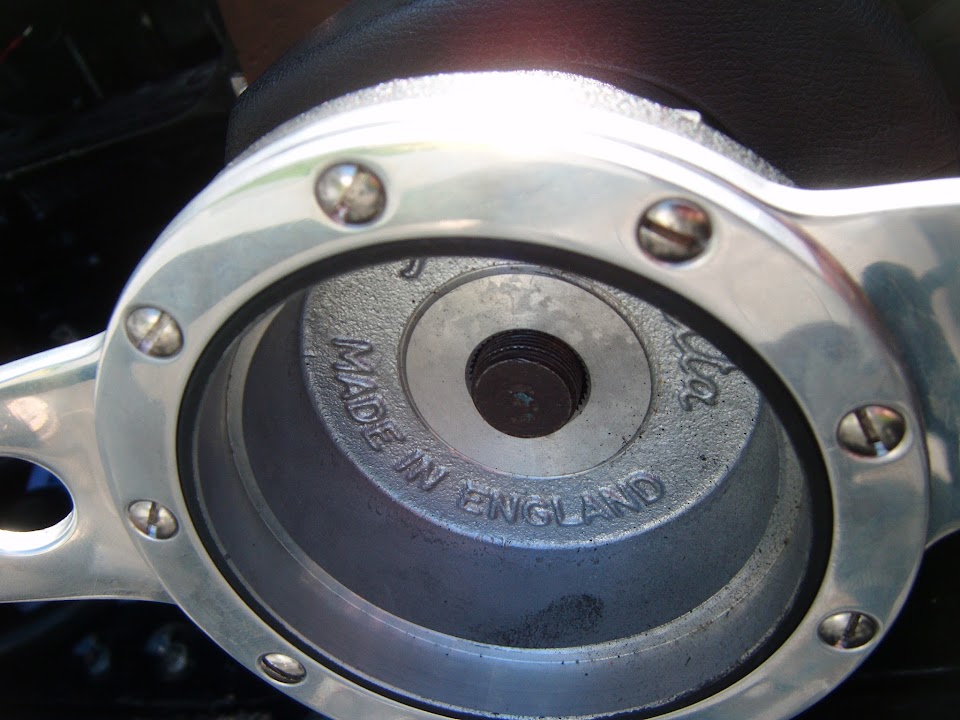
And that is when the next series of problems arrived, starting with no thread available to hold the wheel in place.


End of Part 2...
9 Jul 2015, 6:32pm
Thursday - Part 3:
I spent absolutely ages going through photos, checking things on line and I even found the original steering wheel.


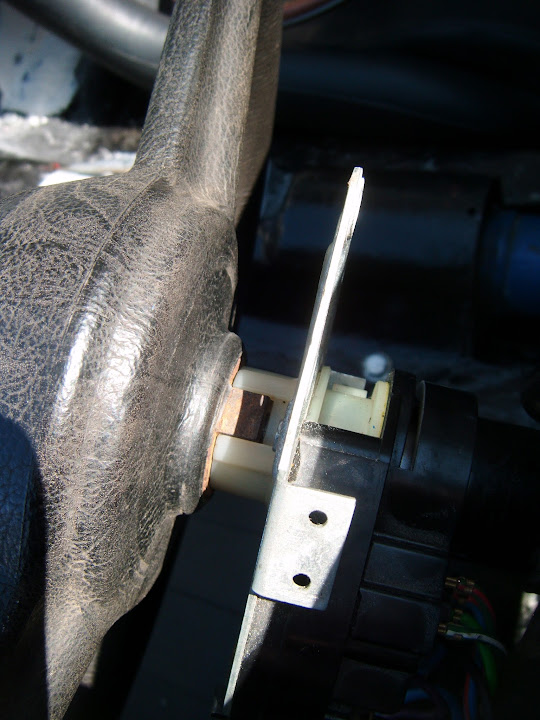
By this stage I had remembered to refit the indicator stalk & this reminded me about the self cancelling switch.


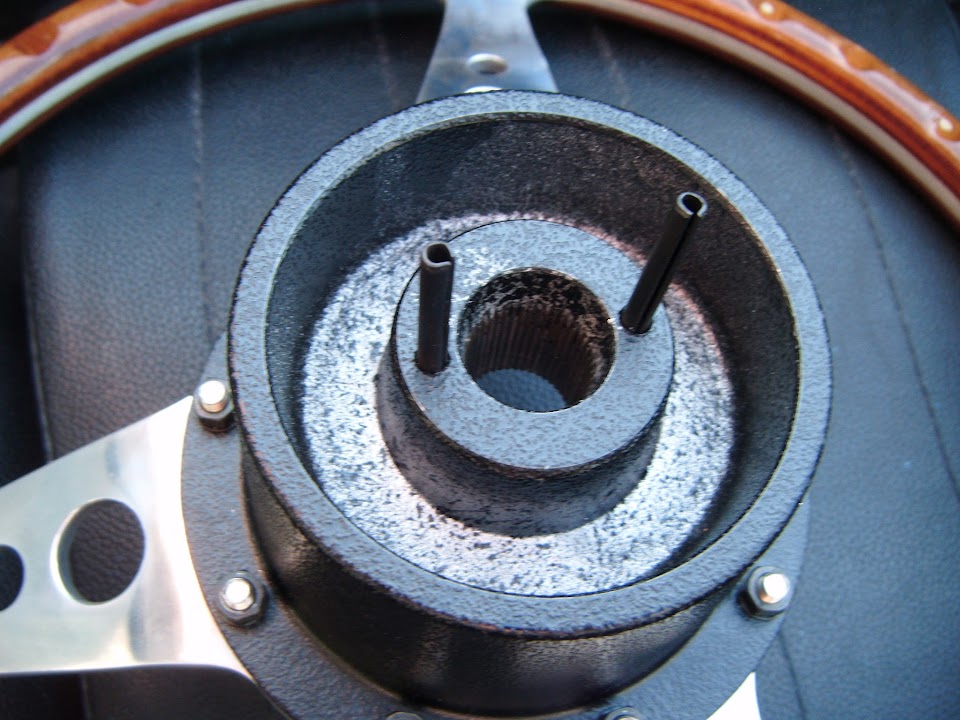
This operated by two big lugs on the original wheel, but two pins on the new wooden one.


But I am not going to hammer the pins into position just yet, until I sort everything else out.

One post on line showed that other Spitfire owners had discovered this boss was too big for late model 1500s. :icon_sad:

They also showed a simple solution and I'll come to that shortly.

I decided that I needed to work "backwards" to discover how much space I needed.

By now, I'd also worked out the steering wheel was tightened up against the taper in the column.


But the air turned blue when I discovered the brand new steering nut I bought was the wrong part! :rant:


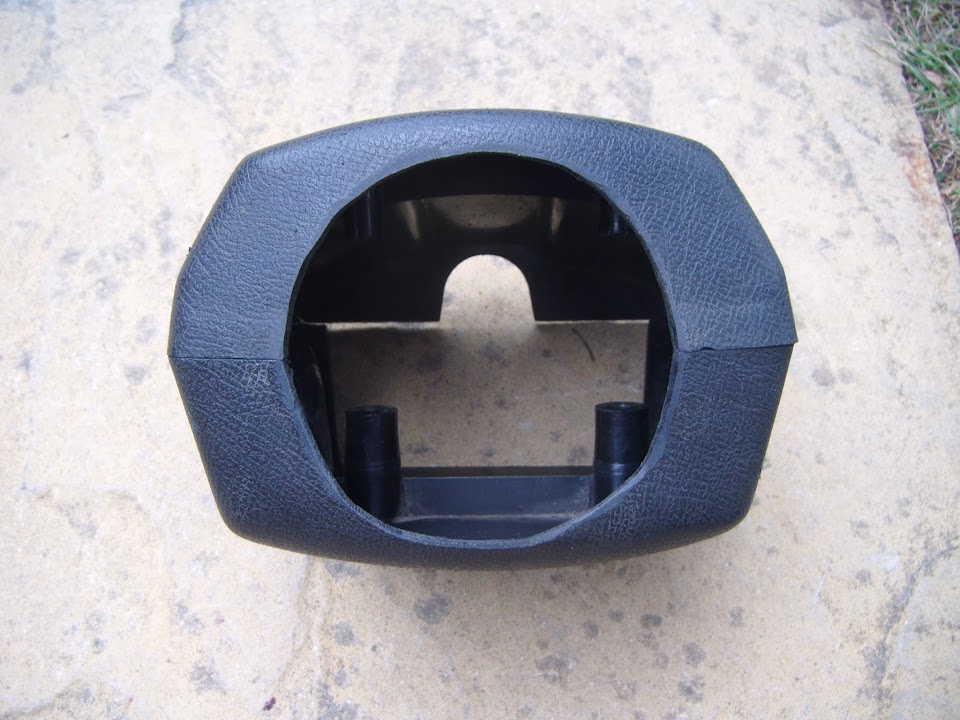
Going back to the boss problem, the on line solution was to simply widen the opening in the plastic cover.

Before:


After:


Back in position.


Close, but no cigar.


So I will need to open up the hole just a little bit more and that should do the trick. :pray:

But by now I had been cooking in the sunshine and wanted a clear head for this final set up.

Plus my family were back home and my wife wanted some takeaway fish and chips.

So I decided to call it a day and I hope I will get the chance to finish this job at the weekend.

I'll leave you will a photo of the wheel with its centre section in place. :cool:


Whilst it was a shame I didn't get more done today, I'd rather take my time and not make a mistake setting up the steering.

So until next time, take care, Paul. :)

PS

A1 Alpha:
I've enjoyed following Micky1Mo & the Tribute boys designing the new Sammio here.

This is a photo of the new scuttle design being constructed to sit on top of a cut down Spitfire body tub.


I've always said my build will look like a distance relative of Sammios with the original "curvy" scuttle shape.

But now looks like I will have a little bit more in common with the new car. :cool:


The only depressing thing is that this new build approach will be miles faster than what I am stuck doing now.

In fact, every job I've had to do today wouldn't be required, as you wouldn't need to take any of these things off in the first place!!
9 Jul 2015, 8:52pm
Looking good Paul, reading your bits about the steering column being too short bought back memories!
I had the same problem, and had to slacken all the column nuts and lengthen it a bit in the end.
(But that is easy to do)
10 Jul 2015, 4:03pm
I know what you're going through with the column matey, as I had to do an extreme-makeover on mine, but I followed largely the process you are.

i.e. lye upside down in the footwell and swear a lot every time I wrigged in and out :)
10 Jul 2015, 6:27pm
Scottie & Dave - Cheers chaps. :cool:

Hopefully all the crawling around inside the bulkhead will be worth it in the end.

- - - - - - - - - - - - - - - - - - - - - - - - - - - - - - -

Friday Fix:
I figured it was more neighbour friendly to use my angle grinder after work, rather than first thing on Saturday morning. :rolleyes:

So yesterday's "After" photo, becomes today's "Before" one.


And this is what today's "After" looks like.


I still need to tidying up the edges a bit, but I will be doing that with a hand file.

The thing to remember is that replacing this whole section in on my "To Do" list after the car is on the road.

So for now, I just want to be able to work out where the steering column needs to be.

Whilst I only need to be able to move the boss in a little bit, I figured it was easier to give myself a bit of extra clearance.

This was as far as the boss would go yesterday.


And now it can be pushed in a decent way without fouling. :cool:


So with a bit of luck I will be able to bolt the steering column into position tomorrow.

Cheers, Paul. :)
11 Jul 2015, 7:08pm
One of those days - Part 1:
Today started well enough as I tided up the enlarged hole in the steering column cover with a hand file.

I'd taped some cardboard over the wheel boss to ensure I had a sufficient gap all the way around.


I also need to seal off the hole in the steering column cover for the windscreen washer lever.

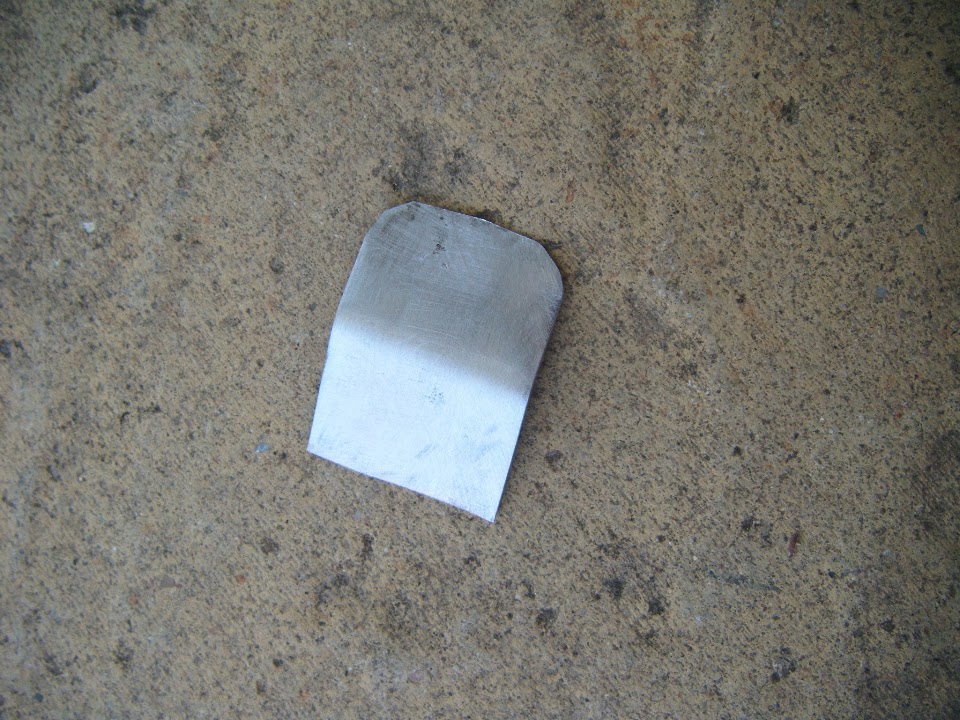
So I cut out a small section of metal & bent it a little to see if that would do the job.


I'll come back to finish this off another day, but it should work.

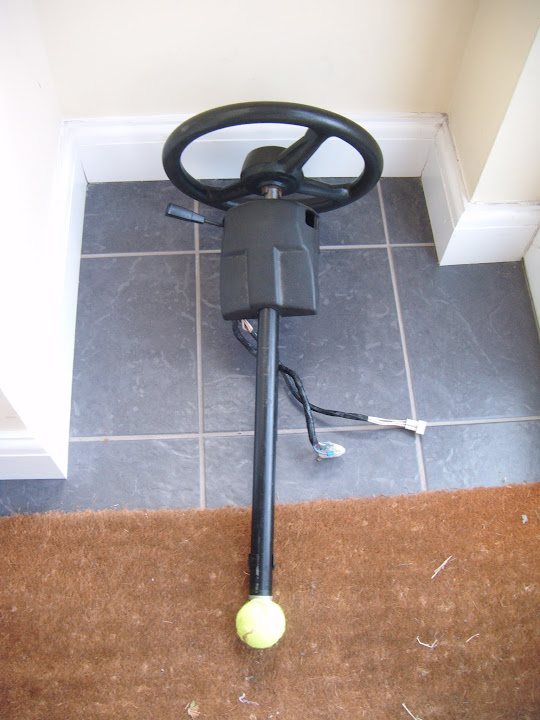
I also put a hole in an old tennis ball to cover the end of the column once it was fitted.


Then it was back to crawling around inside the bulkhead trying to set up the steering column.

For some reason it was easier to see what I was doing today and this helped me work out what the problem was.

Whilst the boss of the new steering wheel doesn't help, it is actually the column itself that is not right.

Unfortunately it did take me a very long time to to work this out.

And it was with a heavy heart that I undid all the clamps and removed the column completely. :icon_sad:

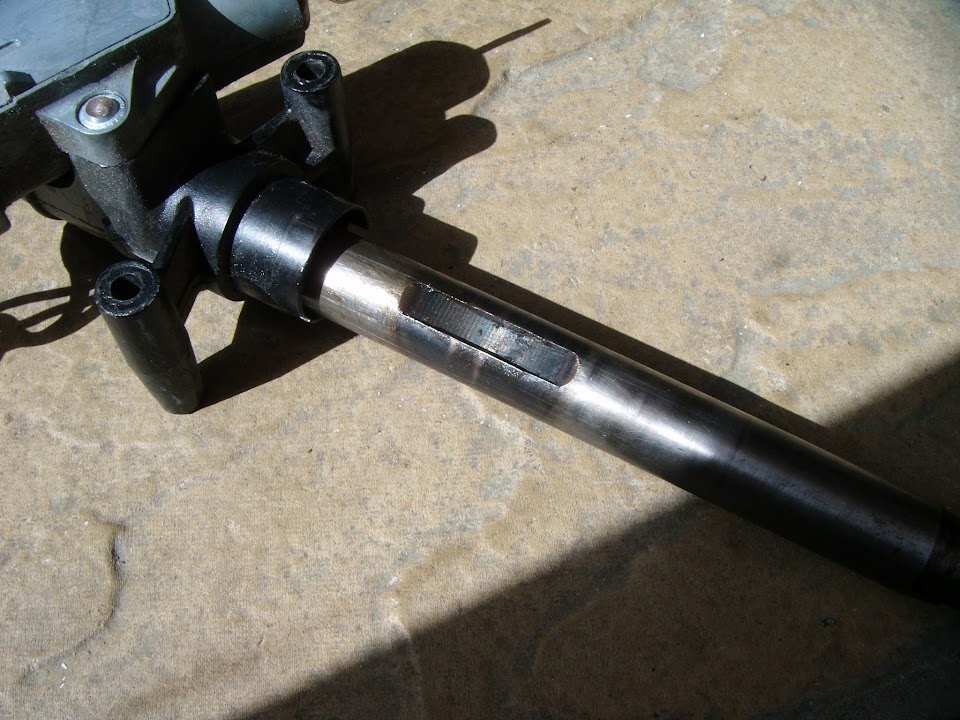
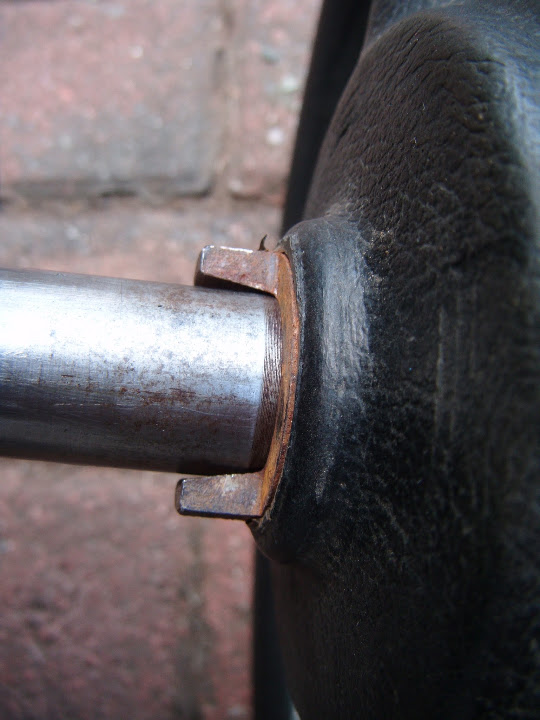
This cut out section sits over the lower steering shaft connected to the steering rack itself.


Then this clamp holds the two sections together.


Which means the outer column can only be pushed down as far as this clamp.


However, this still doesn't leave enough room for the steering wheel at the other end.


I tried the original wheel again and there was barely any thread available.


Plus the wheel was not butting against the taper in the steering column.

Instead, it would be hitting the plastic indicator cancelling "thingy".

So if the steering wheel is pushed as far as it needs to go on the column.


Then this is the problem at the other end.


Clearly there isn't enough room for the clamp to be fitted and the steering to work. :icon_sad:

When I first bought my donor car the "old" steering wheel came off in my hand, as it wasn't bolted into place. :eek:

At the time I thought this was because the "new" steering wheel was meant to be fitted instead.

Now I think the previous owner came across this problem and never got around to fixing it.

Based on Scottie's comment from the other day I went back and had another look at what he did.

He actually cut 2 inches off the top of the outer column like so.


So I think I have two options and I would value any feedback.

Option 1 - Cut a few mm off the bottom of the outer steering column.
( I can't remove anything from the top end as I am using the ignition switch, indicator stalk, etc.

Option 2 - Extend the "cut out" in the inner steering column by the same few mm instead.
( This would allow the clamp to fit with the outer column untouched. )

Personally, I think the second option would be slightly easier for me to do.

But I don't want to try this option if there is a risk of weakening the inner column itself.

Please let me know what you think, as for now, I've put the steering column to one side.


I'm not sure if I spend too long with my head upside down in the bulkhead.

But at one point I really felt terrible and actually had to lie down for a bit to recover. :rolleyes:

End of Part 1...
11 Jul 2015, 7:10pm
One of those days - Part 2:
So after resting for a bit I thought I'd look for an easy job to do and picked fitting the wider radiator.

I noticed one of the cooling hoses has split.


So I'll check them all carefully before ordering some replacements.

There were just four bolts to remove, as I don't need the sections on either side of the radiator.
( I do have a bracket for the overflow bottle. )


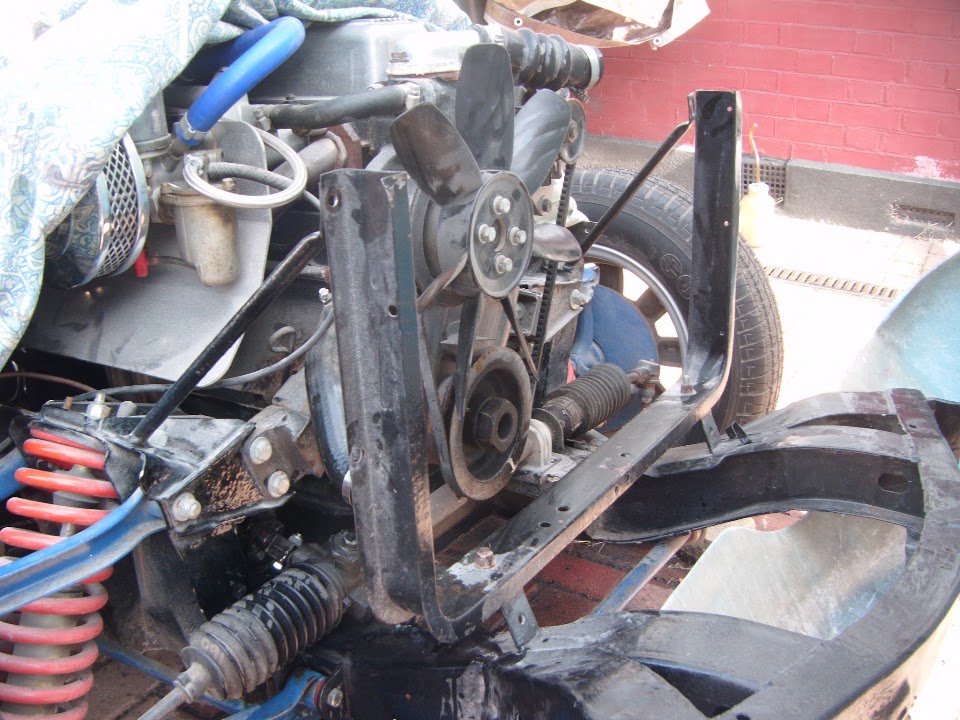
I know Scottie lowered his radiator mount on his build.


But I want to see if I can keep the standard set up and still clear the bonnet.

When it came to putting the wider radiator in I seemed to be struggling for some strange reason?

I mean, how hard can putting 4 bolts back into position be?

Thankfully I didn't try to force anything into place when it appeared to be twisting.

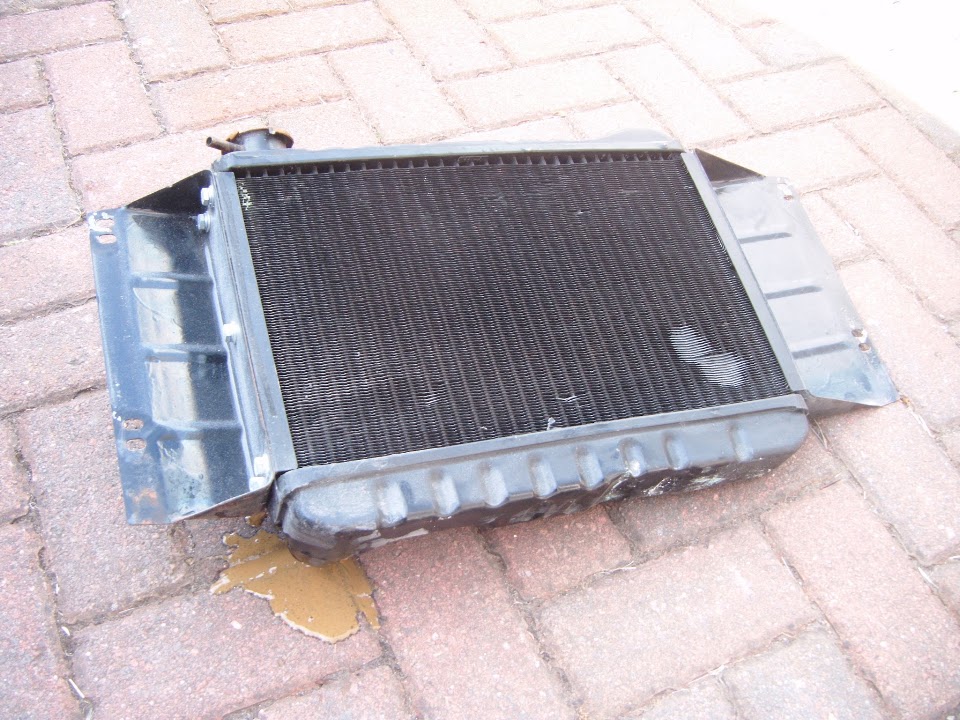
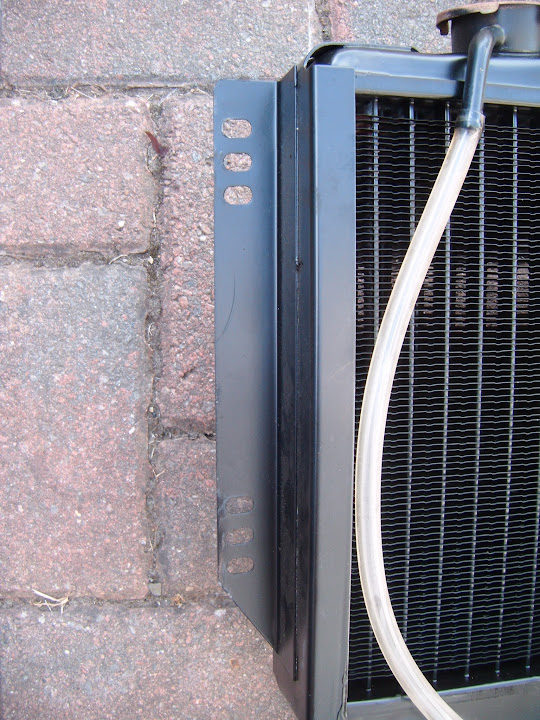
Instead I took the radiator out and had a closer look and discovered it is a faulty item! :rant:

This is not a great photo to highlight the problem.


But basically the mounting bracket on one side is fitted incorrectly.

It should look something like this on both sides.


But the passenger side is like this.


Which can only mean that two driver's side mounts were fitted in error.

So whilst the driver's side lines up with the original mounting points...


The passenger side is miles out, as the holes at the end of my fingers are supposed to line up.


By now I was having a major sense of humour failure and accepted defeat as best I could.

I will have to contact Rimmer Bros and see what I need to do, as I bought this years ago.

- - - - - - - - - - - - - - - - - - - - - - - - - - - - - - -

In a vain effort to end the day with at one one job completed I retreated to the garden.

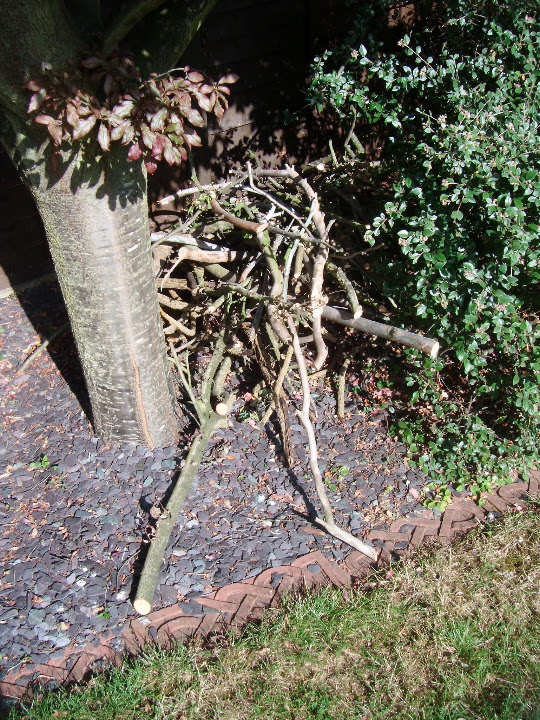
Where there was a pile of "big sticks" left over from last week's pruning.


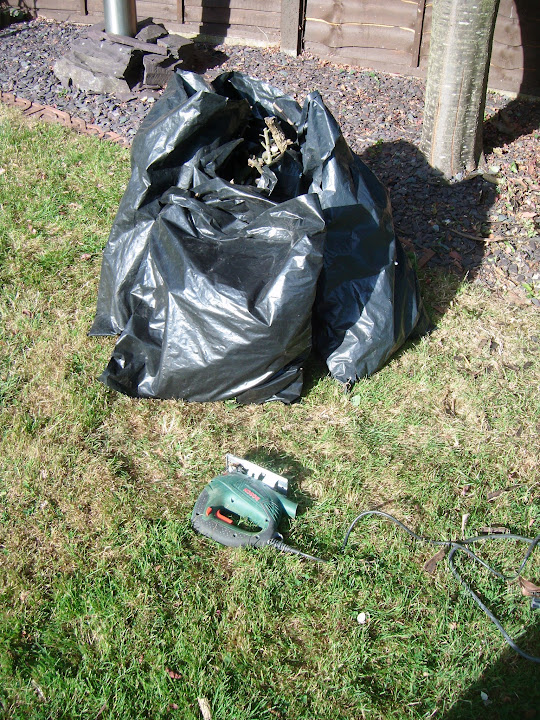
Rather than use my hand saw, I rigged up my jigsaw and turned the pile into "bag size" sections.


So at least I managed to do one thing right today. :rolleyes:

Until next time, take care, Paul. :)