MadaboutKitcars

This is a read-only archive of the old Madabout Kitcars forum. New posts and replies are no longer possible, but every thread is still here to browse and read.

Another Cordite Is Born ...

21 Apr 2015, 8:20pm
Ticking Along - Part 2:

Frame/Arches/Floors:
Thankfully the sun was shining on the primer through the gap between our house & next door.


So that was soon dry enough to add a skim of normal body filler to a few places.


Unfortunately, the heat meant that the last bits was filler were setting before I could smooth them out. :rolleyes:


At least it didn't look too messy after it was sanded down.


And another coat of primer applied.


I know this is still rough & ready in places, but it is all sealed up and that is all that matters to me.

This also means this section is now finally ready for painting. :cool:

- - - - - - - - - - - - - - - - - - - - - - - - - - - - - - -

Three Years & One Day:
Yesterday was the 3rd anniversary of the day I bought my donor car, having reserved Cordite #7 the week before.
I was secretly hoping to have reached the stage of bolting the framework back onto the chassis to mark this event.
Still, at least I am slowly, but surely, inching my way along the path to this major milestone in the build. :cool:

- - - - - - - - - - - - - - - - - - - - - - - - - - - - - - -

Until next time, take care, Paul. :)
21 Apr 2015, 9:20pm
Paul L wrote:
Ticking Along - Part 2:

I was secretly hoping to have reached the stage of bolting the framework back onto the chassis to mark this event.
Still, at least I am slowly, but surely, inching my way along the path to this major milestone in the build. :cool:


It will come Paul, as you remarked recently there are other things that have to come first, especially when you have family.
22 Apr 2015, 2:42pm
8 Valve Ed - Cheers Robert. :cool:

I know this build has dragged on for both good reasons (family priorities) and bad (problems with the kit, the weather, etc. ).

I guess I just find it slightly depressing that despite the countless hours I have spent so far, I am still a long way from finishing.

- - - - - - - - - - - - - - - - - - - - - - - - - - - - - - -

Fingers Crossed:
Spend quite a bit of time this morning washing my neighbours' wheelie bins & hosing down their drive.


After they complained yesterday about the dust I was making while sanding down the filler.
( It was unfortunate that every gust of wind seemed to blow stuff in their direction. )

However, I spoke to one of them after I'd finished cleaning and pointed out the roof of my Mondeo.
( This is sand from the Sahara that landed the other day and the whole street is covered in it. )


As they also complained about their car getting dirty and I now realised this had nothing to do with me.
( In fact most of the cleaning I did today was of their mess and not mine. :rolleyes: )

- - - - - - - - - - - - - - - - - - - - - - - - - - - - - - -

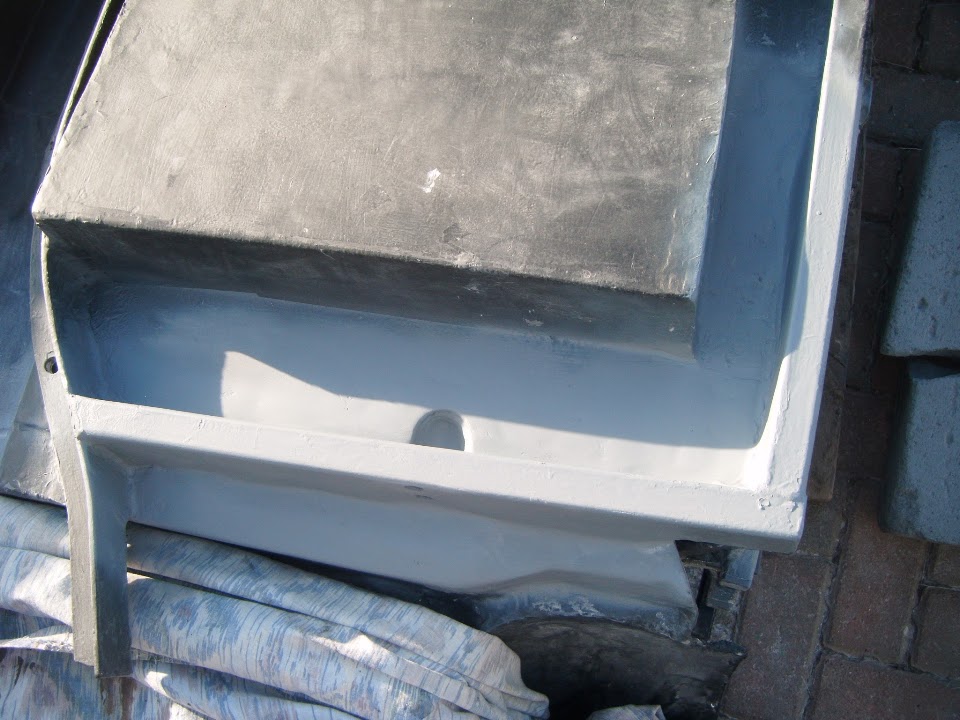
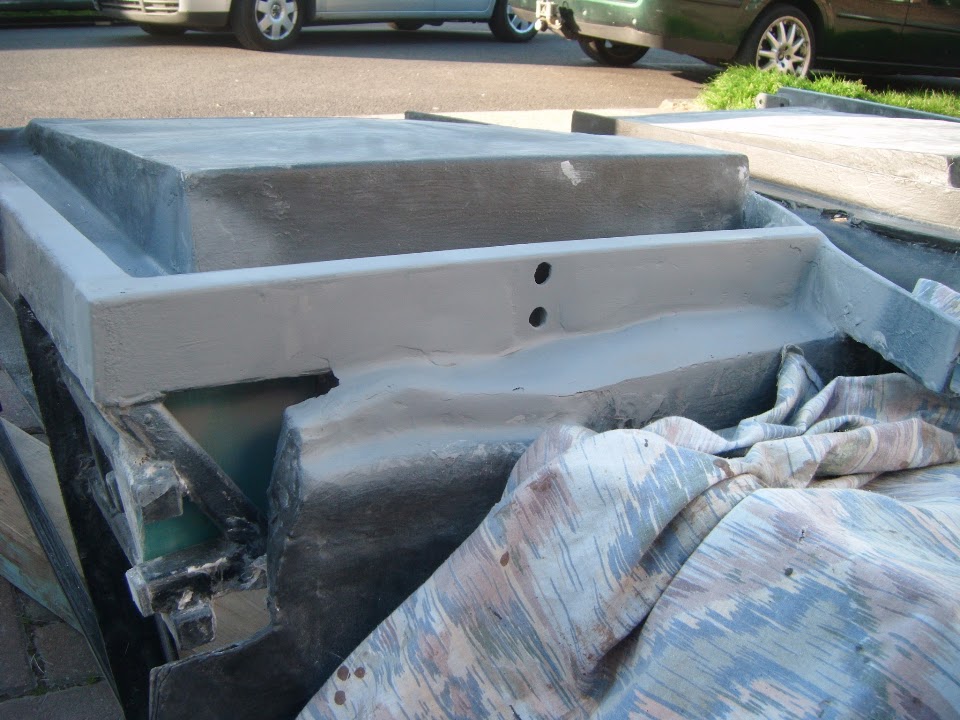
Boot Lid:
I really like the way the "sunny side" of the boot lid now looks, even the eye bolt.

But I have to admit that the boot opening underneath is rapidly turning into a bit of a dog's dinner. :icon_sad:

However, this stage I need to just keep going and try to make the best of a bad job...

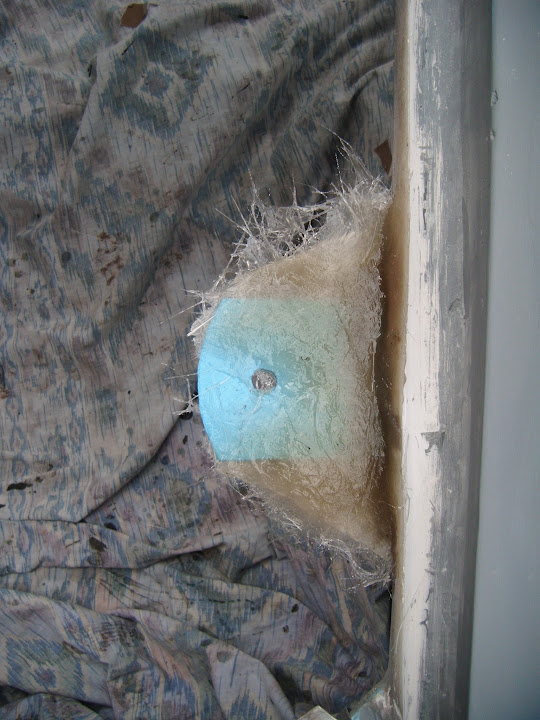
I started to tidy up the fibreglass work that I did yesterday.


But then decided the way some of the matting had overlapped at the top of the mounting plates was a good idea.

So two fibre glassing sessions later and I had this.


Hopefully this will look marginally better when I've tidied it up a bit. :pray:

- - - - - - - - - - - - - - - - - - - - - - - - - - - - - - -

Frame/Arches/Floors:
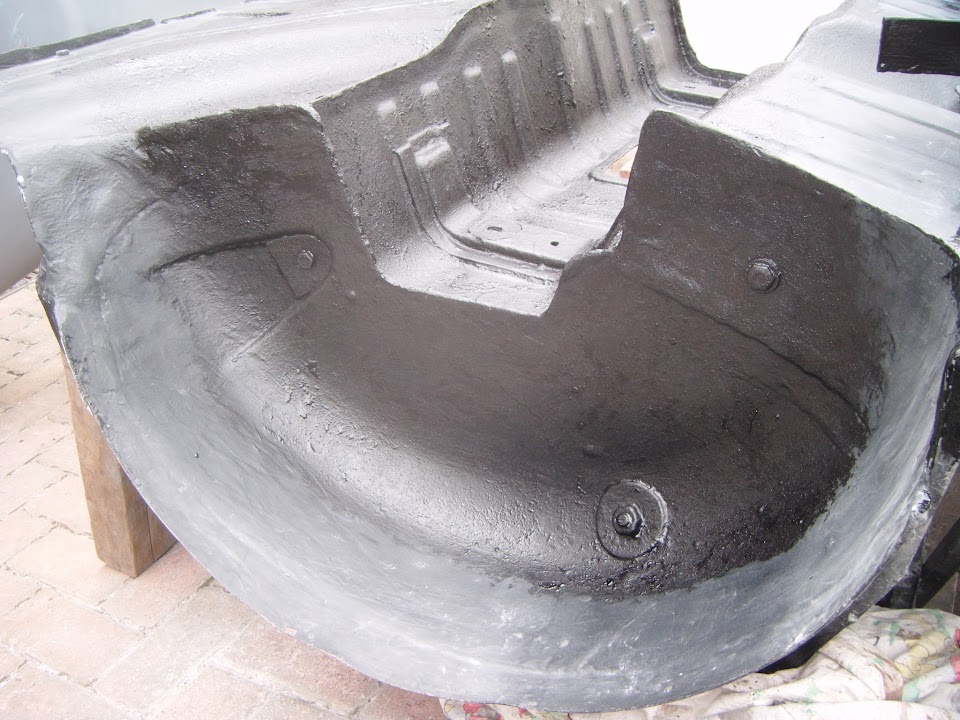
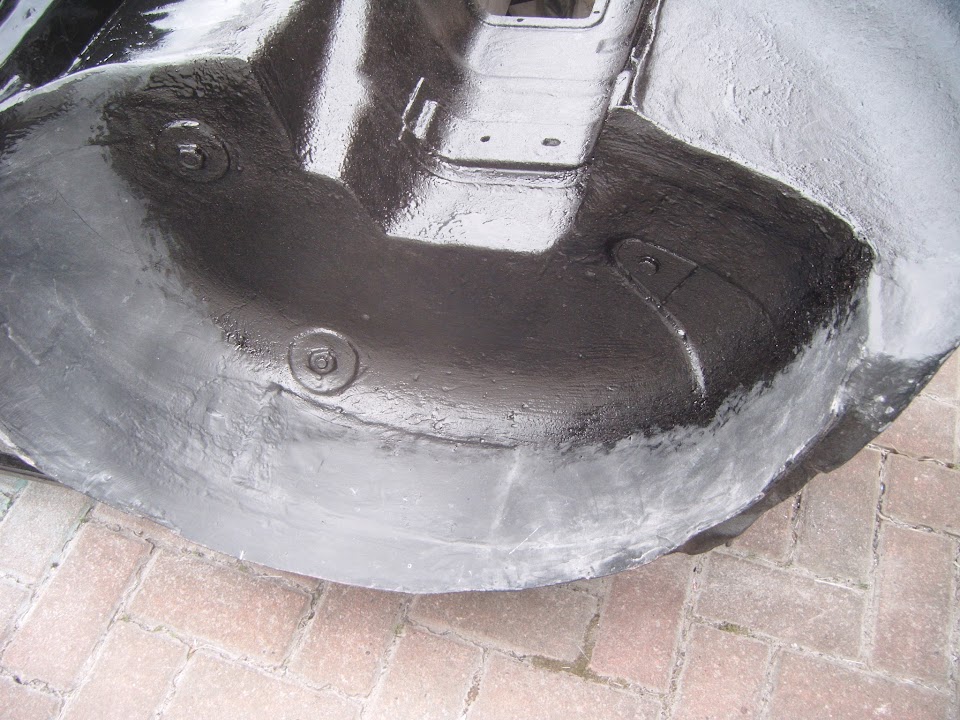
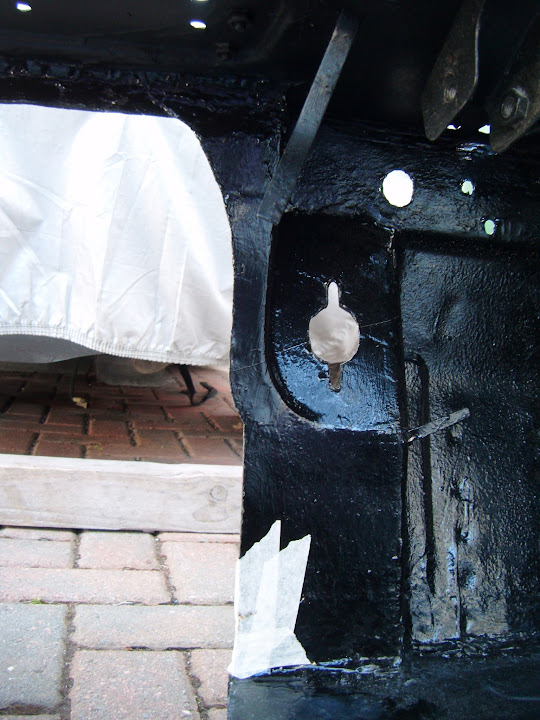
The areas that were primed yesterday got their first coat of Hammerite.


Then I started adding Tetroseal to some of the areas that had already been sprayed with stone guard.

This included the front of the lowered floor pans & underneath the hand brake panel.


Plus sections of the rear arches and boot floor.


Obviously I will eventually end up with the whole area looking the same.

- - - - - - - - - - - - - - - - - - - - - - - - - - - - - - -

Bulkhead:

While I had the Tetroseal out, the bottom area of the bulkhead got it final coat too.


- - - - - - - - - - - - - - - - - - - - - - - - - - - - - - -

Today's title of "Fingers Crossed" refers to the fact that by the time I'd finished all this work the sky was black. :icon_sad:

The thought of rain at this point, with so much fresh paint/sealer/fibreglass exposed, filled me with dread.

But <Touch Wood> the clouds are moving quickly overhead and it has stayed dry.

I'll leave everything for as long as I dare before getting the covers back on for the night.

So until next time, take care, Paul. :)
22 Apr 2015, 10:28pm
Hi Paul, are your locating pins going to come through to the top side of the boot lid, or are you going to attach a top hat type thing underneath with a hole to locate? Ed.
23 Apr 2015, 5:59am
Ed - Previously I added these solid "blocks" of fibreglass under the lid.


Therefore the plan is to drill holes into these blocks for the locating pins, rather than through the lid itself.

Unfortunately, this is another one of those areas where I have struggled to work out a simple solution to a problem. :rolleyes:

- - - - - - - - - - - - - - - - - - - - - - - - - - - - - - -

Last Night:
I am pleased to report despite the clouds, no rain fell yesterday.

Although I had moved the bulkhead into position just in case I needed to get the tarpaulin on quickly.


- - - - - - - - - - - - - - - - - - - - - - - - - - - - - - -

Thursday:
I will only have a limited opportunity to work on the car today.

But hopefully I can continue to paint/seal/fibreglass the same big pieces I worked on yesterday.

That way I can be getting on with other stuff while I am waiting for things to dry/set.

Cheers, Paul. :)

PS
I dream of having just a fraction of the skills required to turn a humble Morris Minor into this. :cool:

23 Apr 2015, 6:05am
Love the 40's American look on that minor. coincidentally happened to have found this one while looking for classic Lancias on ebay yesterday -

http://www.ebay.co.uk/itm/251930012211?_trksid=p2060778.m1438.l2649&ssPageName=STRK%3AMEBIDX%3AIT

That used to be a common conversion back in the day, there were at least two minors with Fiat group twin-cams fitted in the RAF St Athan Motor Club back in the seventies.

Not seen one on an early convertible though. Hmm, where's my cheque book...
23 Apr 2015, 7:37am
Stay focused Mr. Toad! You will be fancying at one of these next :plane:
23 Apr 2015, 1:30pm
Mr T - That convertible Moggie was a nice find. :cool:

I know there was some debate "next door" about old style cars with new engines / running gear.

But I've always been a fan of combining classic looks with modern performance.

Which is a good excuse to post a photo of my favourite "best of both worlds" car...

Beacham Jaguar MkII


- - - - - - - - - - - - - - - - - - - - - - - - - - - - - - -

Today:

Tail Pipe Shields:
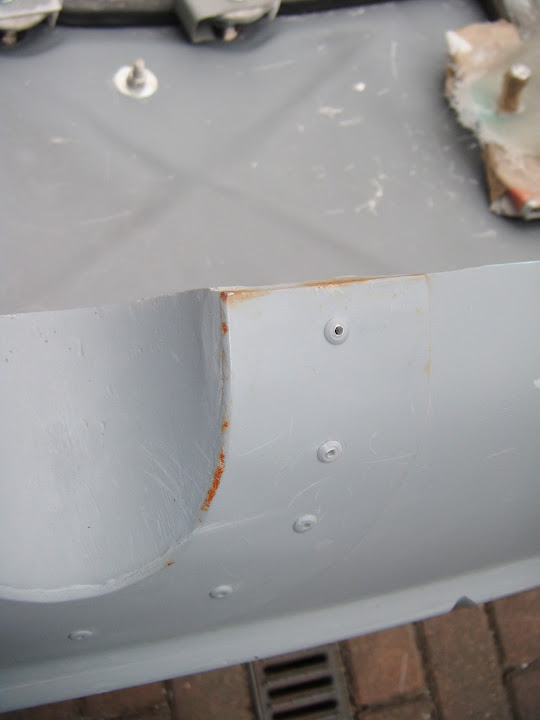
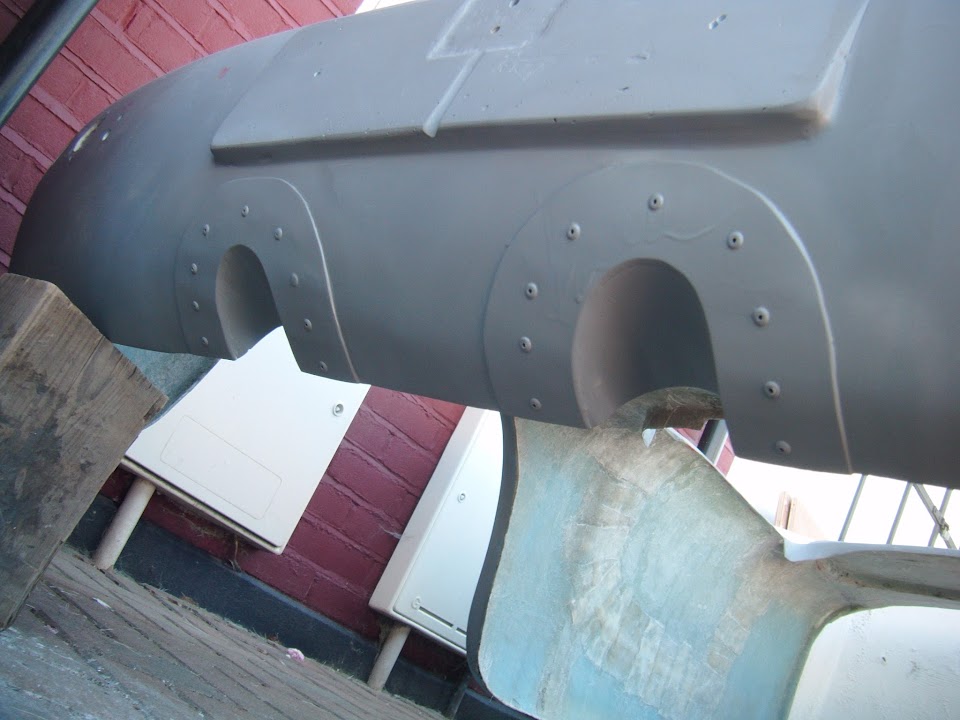
Unfortunately, a few spots of surface rust had appeared here.


This was due to the fact I stupidly did a bit of extra sanding after the last coat of primer. :rolleyes:

So I cleaned this up and treated the whole area with Kurust in the morning.


Before putting some more etch primer on in the afternoon.


Although this was now quite awkward to get to and whilst lying on my back I managed created a few runs. :icon_evil:

- - - - - - - - - - - - - - - - - - - - - - - - - - - - - - -

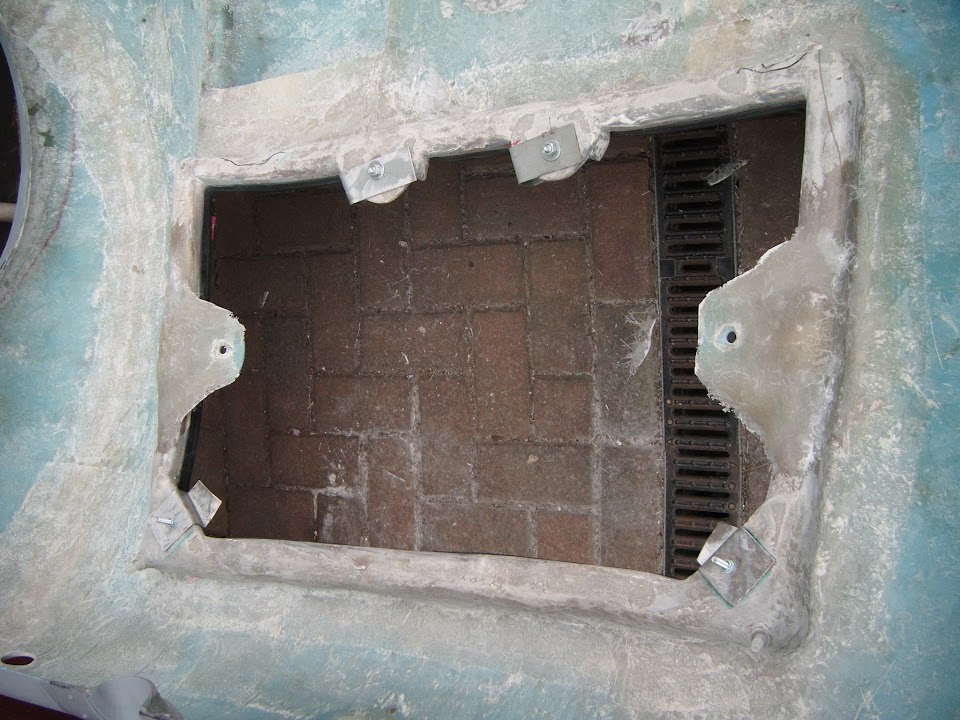
Boot Lid:
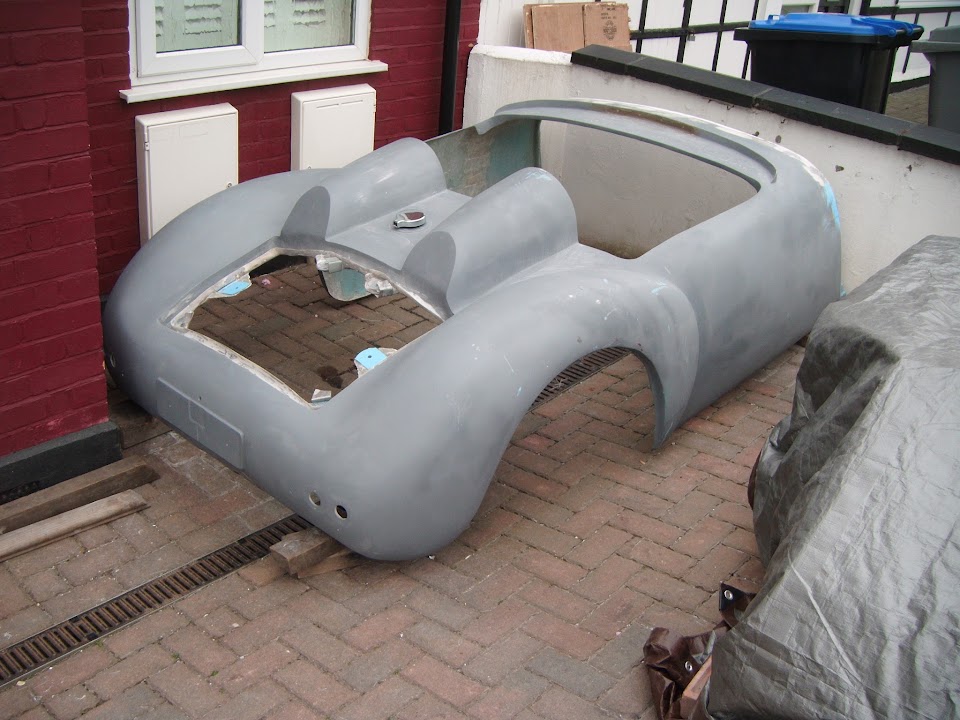
With the body shell still upside down, I unlocked & removed the boot lid.
( Making sure it didn't drop on my head when the last lock was undone! )


Which made it slightly easier to turn the body shell back the right way up.


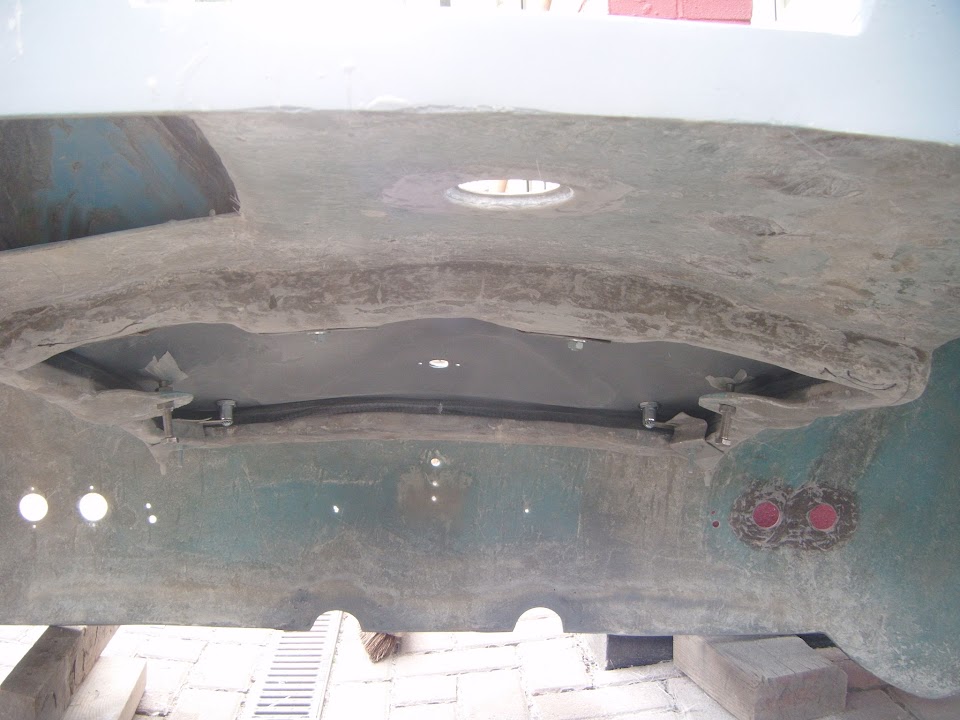
After two small sessions of fibre glassing, the mounting plates looked like this.
( I removed both the bolts and the rubber boot lid seal to avoid making a mess of them. )


Eventually I will trim these back into a more natural looking curve.

Although no amount of shaping will disguise the fact this is still an ugly solution. :rolleyes:

- - - - - - - - - - - - - - - - - - - - - - - - - - - - - - -

Frame/Arches/Floors:
Second coat of Hammerite on the closed gaps areas.


Plus second coat of Tetroseal on the areas I started covering yesterday.


- - - - - - - - - - - - - - - - - - - - - - - - - - - - - - -

Bulkhead:

Final coat of Tetroseal on the lower front area of the bulkhead.


- - - - - - - - - - - - - - - - - - - - - - - - - - - - - - -

As expected, I now need to get on with other stuff while everything outside dries/sets.

However, with a bit of luck I will get a coat of stone guard on the "filled in" areas tomorrow.

So until then, take care, Paul. :)
23 Apr 2015, 6:17pm
Ah yes now i remember, i was concerned it could get too fussy and ruin your water tightness if they came through.
Your solution may not be as elegant as some bent tang locating pins or similar but as we discussed before when you started the boot endeavour they would be near impossible with your raked cut through the humps, and that does look elegant, personal I think with a little shape and some rubber trim it will be fine, maybe you just been looking at it too long? I have been pondering over a job on my folding camper for a few days when my dad came round and said why don't you do this it was simple and obvious likewise I have just been to his and he has been beard scratching all day over a wind break side panel for his fiamma awning on his motor home the solution not only sprung straight to me but I had everything in my van to complete it, we are both ticking off many jobs pre stoneleigh.
it must be very difficult for you when you have little or no external input I know you have said before that's why you post a lot of pics on here so you can recap. I will pm you my mobile if you want to meet up or come have a nosey at my camper its a 1981 StarCraft, I'll be there with my daughter she will be revising, my brother he like you ran mz's many years ago his 6 year old son my two spaniels,and my parents in the motor home so there will be many options for hot or cold drinks and a sit and relax. Ed.
24 Apr 2015, 4:14pm
Ed - I have certainly spent far too long thinking about, & working on, this boot lid, but at least it is nearly done.
Thankfully, most people will only every see the outside of the boot lid and not the rather messy boot area underneath.

I really hope to make Stoneleigh this year, especially given the number of forum members (& their cars) going.
However, at this point, I still can't 100% guarantee I will be able to go, so I will keep you posted.
As it would certainly be good to meet up and have a chat. :cool:

- - - - - - - - - - - - - - - - - - - - - - - - - - - - - - -

One of Those Days:
Rather than follow a strict time line, I'll start with the simple job...

Frame/Arches/Floors:
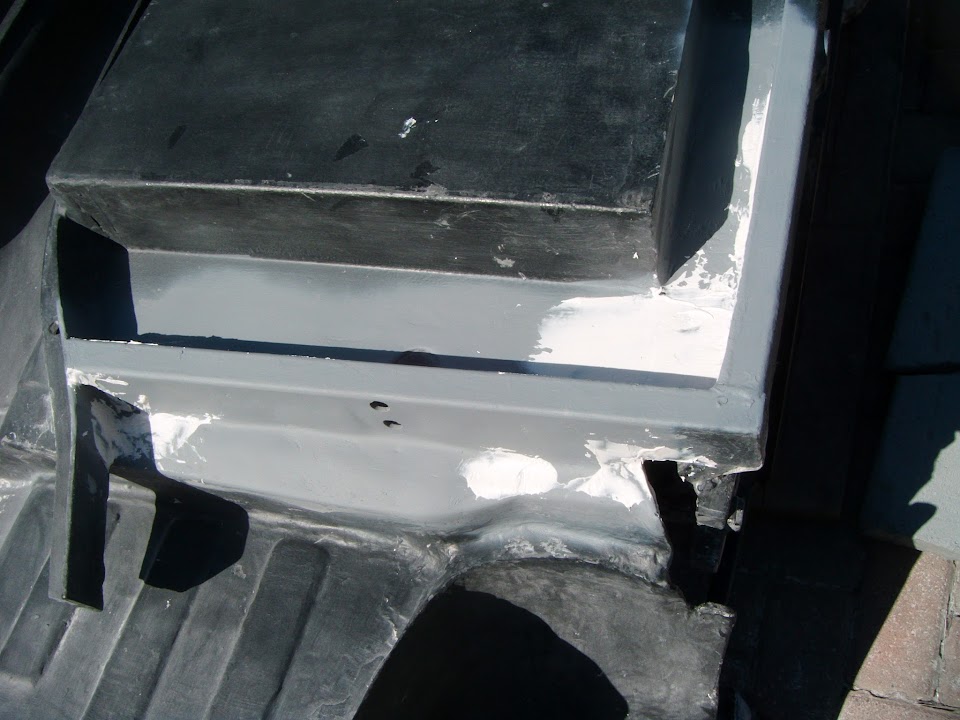
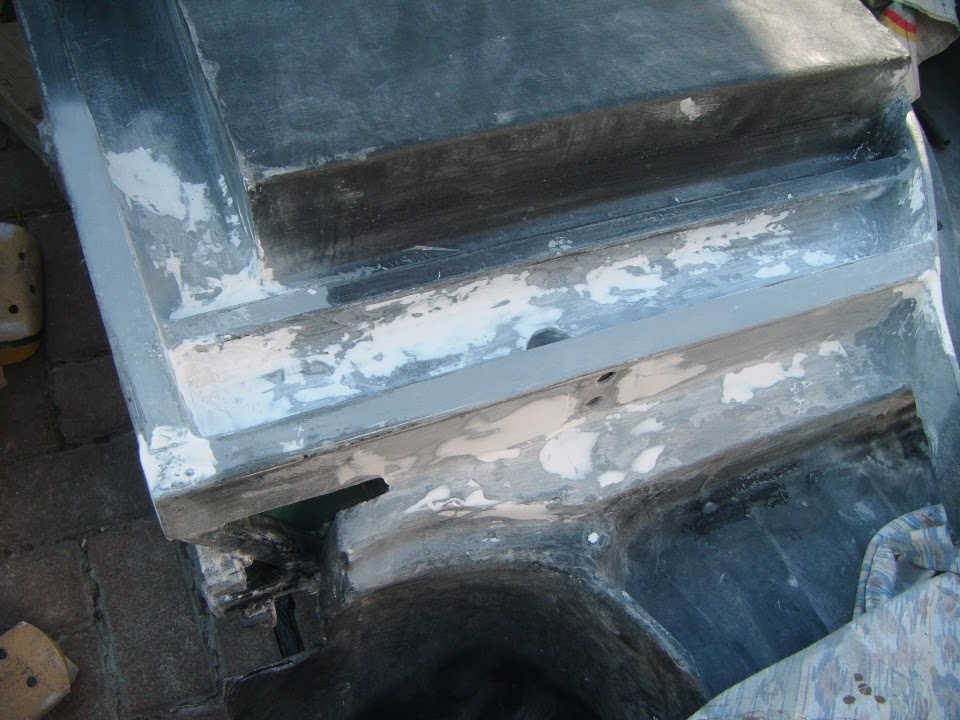
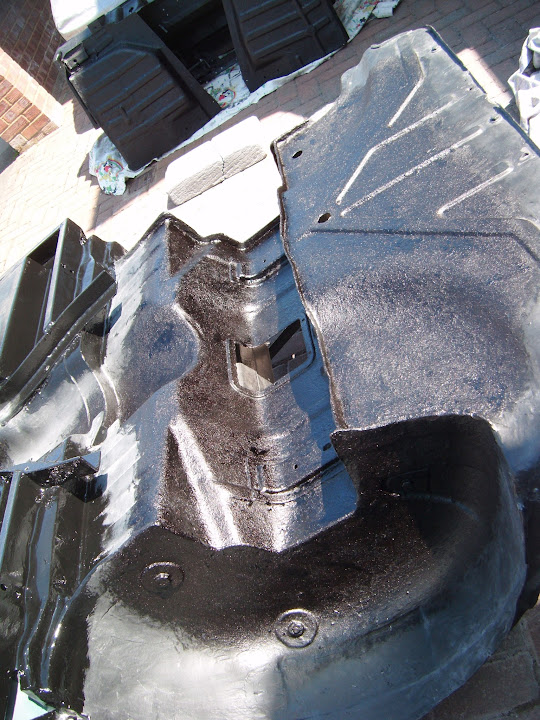
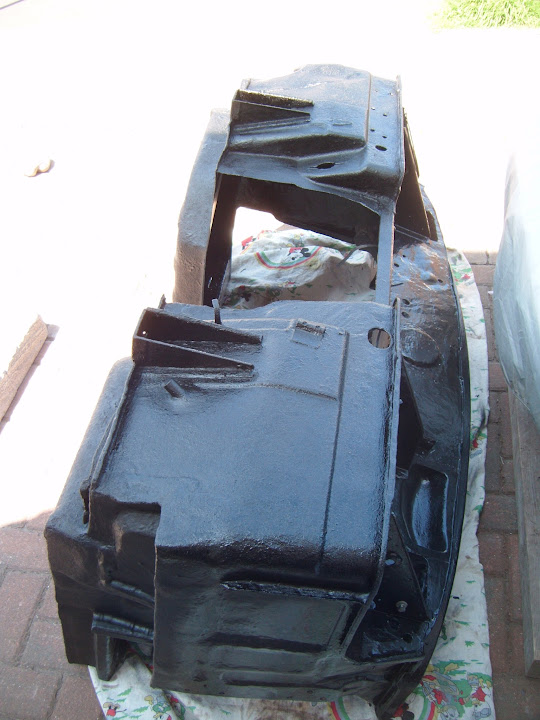
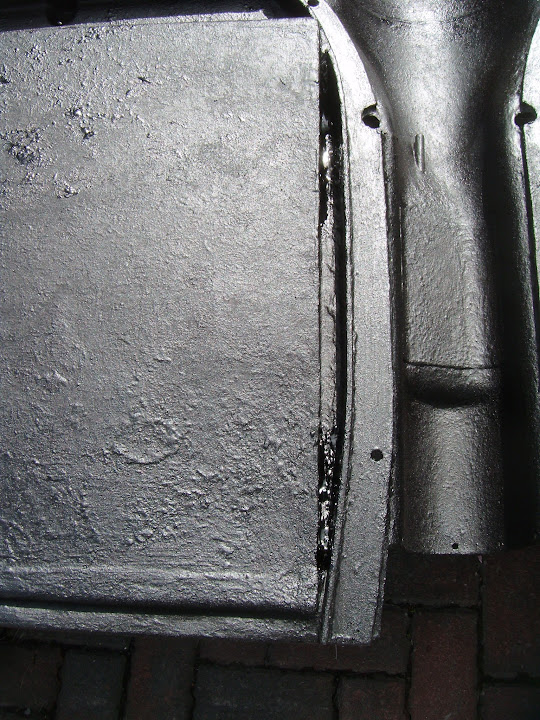
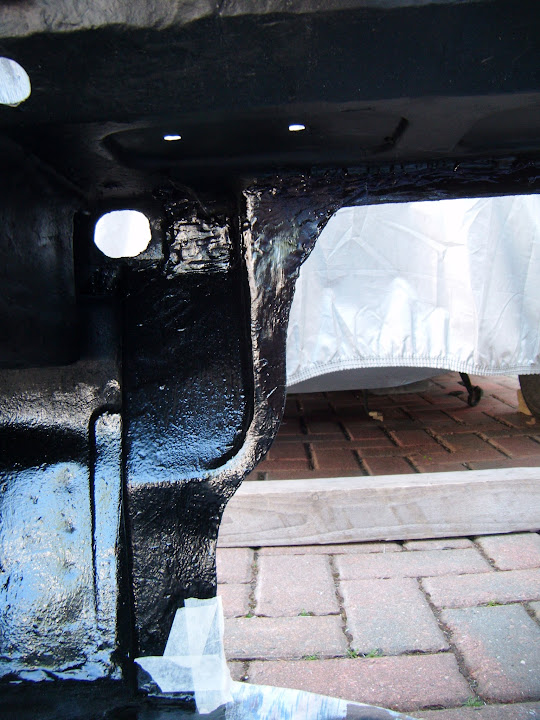
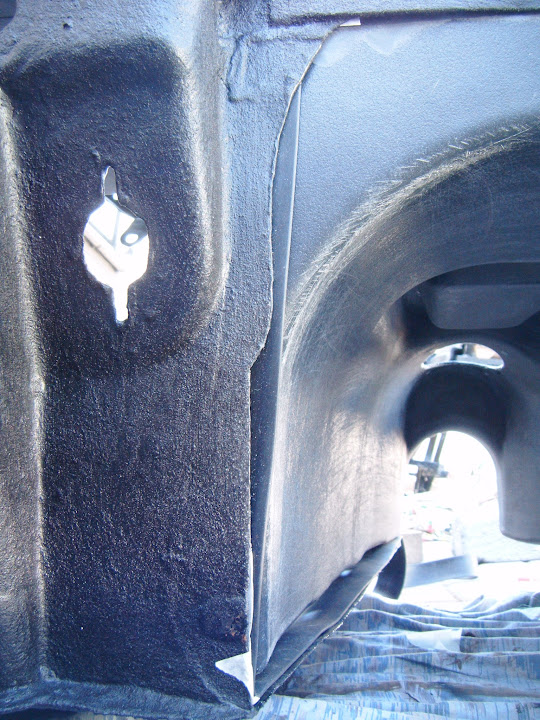
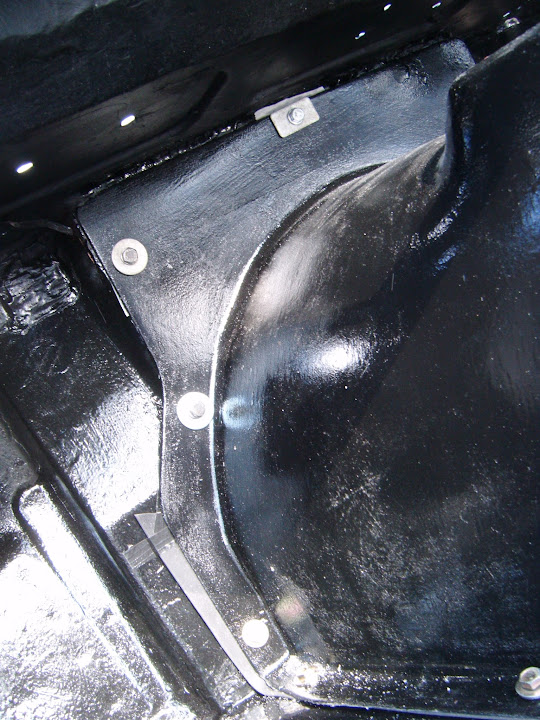
Thankfully it was warm enough to spray two coats of Stone Guard over the "filled in" gaps.
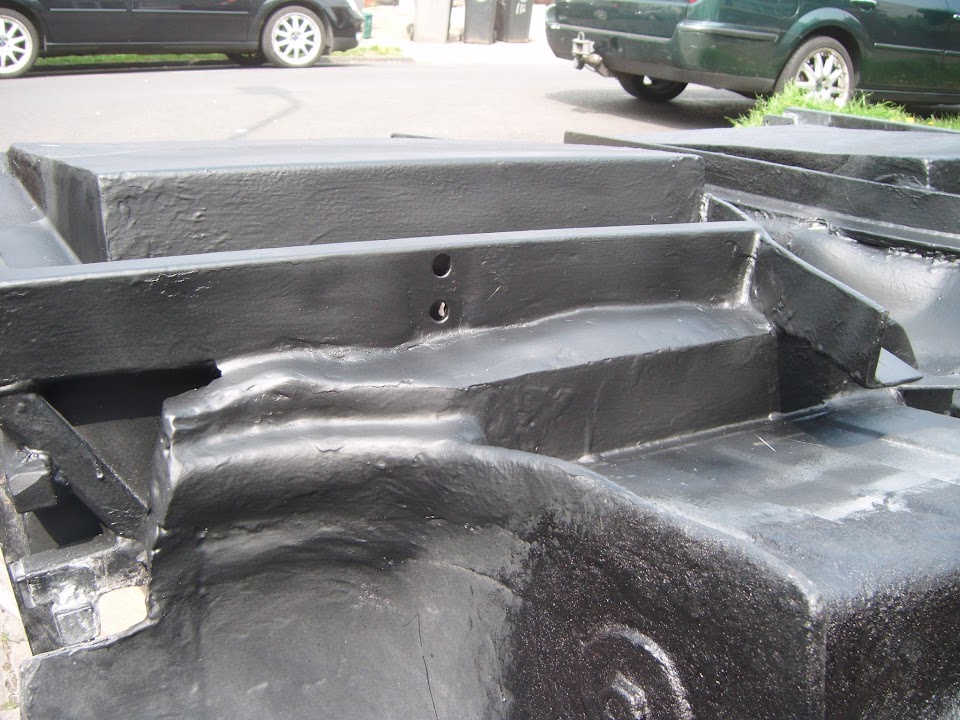


The photos were taken after the paint had started to dry to its matt finish.

But I will wait until next week before covering this in a layer of Tetroseal.
( As the forecast for the weekend a bit too wet for painting. )

- - - - - - - - - - - - - - - - - - - - - - - - - - - - - - -

The next job involved literally hours of crawling around under the body shell and almost drove me mad...

Boot Lid:
Trimmed & tidied up the mounting plates.
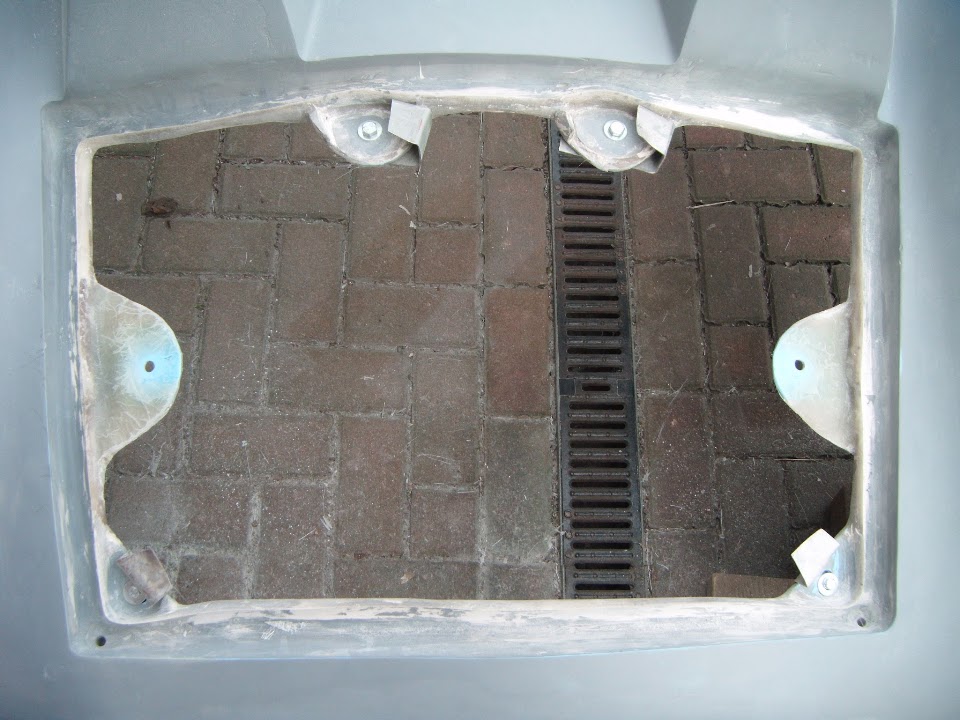


Then locked the lid back into place.
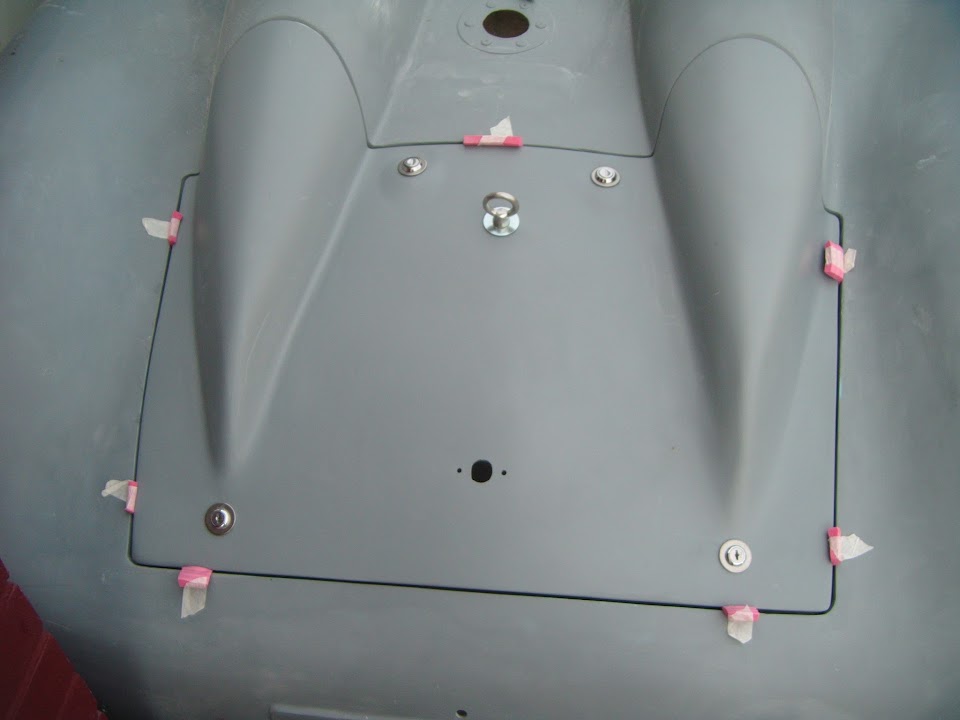


Started to mark up where I needed to drill the holes for the locating pins.
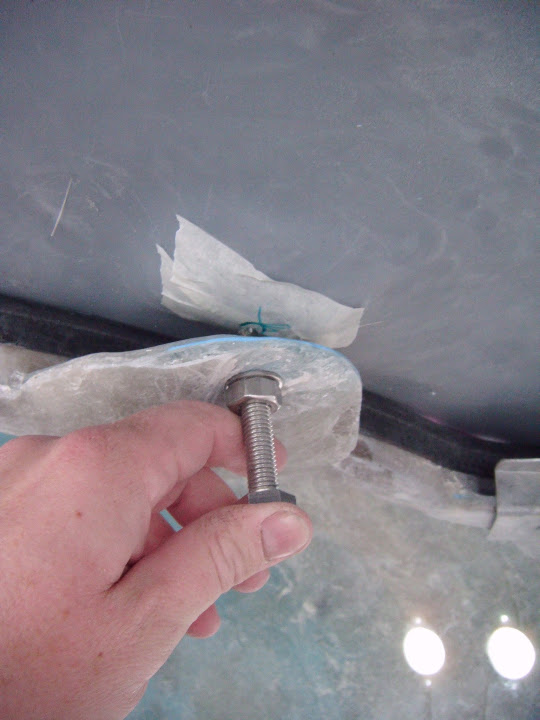


Then realised, to my absolute horror, that I had made the same school boy error as before. :frusty:


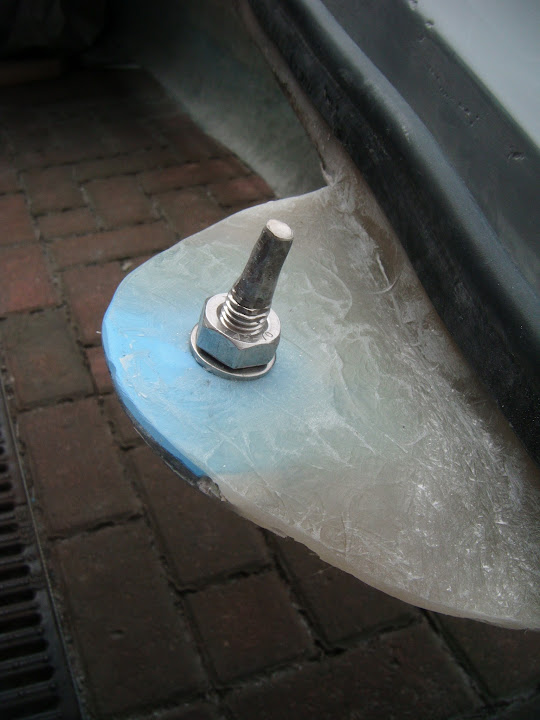
Yes, the mounting plates have been fixed into position "square" to the fibreglass mounds.

Whereas, they should have been mounted horizontally, so they would be square to the lid being lifted up & down. :icon_sad:

This discovery resulted in a significant bout of swearing, followed by some serious beard scratching.

I even had to resort to making cardboard "models" of the lid & the bolt angles to see how I could make this work in practise.

Previously I planned to have cone shape leading to the pin hole to provide a bit of "wiggle room" when fitting the lid.

Well, in a classic case of "luck rather than judgement" this wiggle room was all that was needed to fix the problem.

I started by drilling the holes in the fibreglass mounds and fitted the locating pins.

Sure enough, when I unlocked the boot lid, it could not be removed due to the outward facing angle of the pins.

So I removed the pins from underneath, added the wiggle room to the holes.
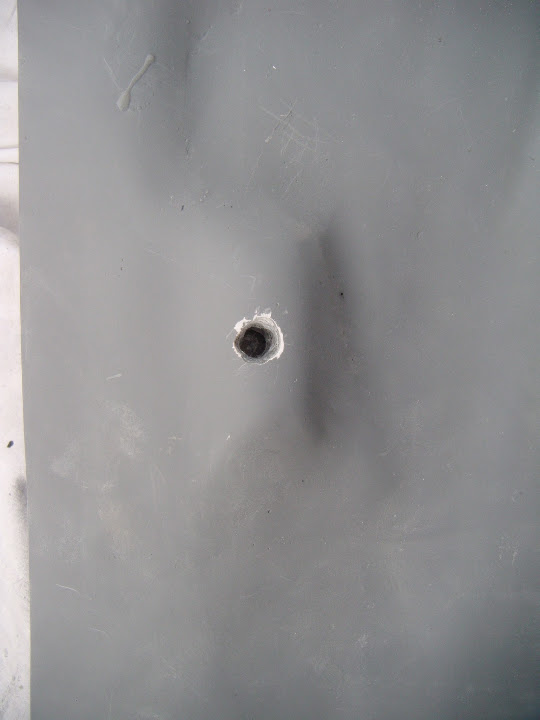


Re-fitted both of the locating pins (OK, they are just bolts with the thread ground down :rolleyes:).


Now the lid could be lowered into place and the pins slid home preventing the lid from moving up & down, or side to side. :cool:


To say I was relieved would be a massive understatement, as I just couldn't face scrapping the work I'd already done & starting again.

With the position of the lid now fixed, I did a bit of work on the panel gaps.


The next step will be to add some filler to build a smooth transition across the gaps in the humps.

But at this point I just couldn't face doing any more car work and packed up early for the day.
( I had planned to do some more work on the gearbox cover & start preparing the rolling chassis. )

Until next time, take care, Paul. :)

PS
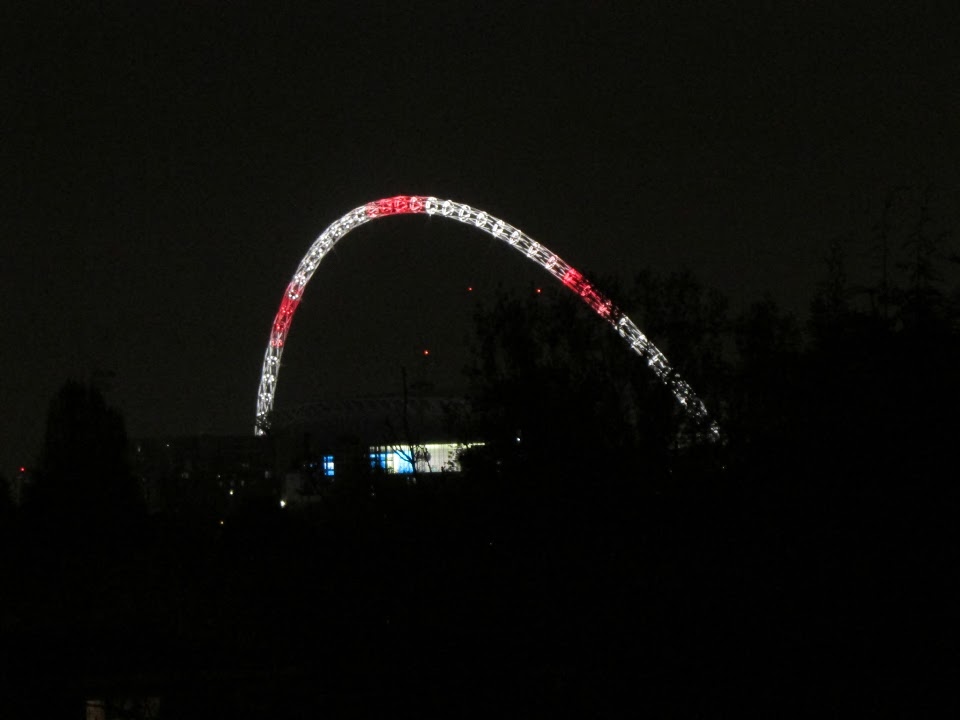
This was the view out of my bedroom window last night as the Wembley Arch marked the St.George's day.
24 Apr 2015, 6:41pm
Yay, tick it off have a smug beer while enjoying the satisfaction, pick the bits of glass fibre from your arms and plan the next job. The boot will look splendid once painted you can always trim it all out and attach first aid kit, extinguisher etc to the sides under the locating pins like tgey where meant to be there, don't forget its a 50's racer on the road, you could even let the exhaust heat trims rust just to fool the keen eyed onlookers Ed.
25 Apr 2015, 6:43am
Ed - There is a bit of work left on the boot lid, but getting past yesterday's problems was a big step in the right direction. :cool:

Although at some point I need to make some final decisions about how this build will progress:
- Working moon rover before bonding body shell vs. bond body shell on & then make it all work.
- Present it for an MOT (i.e. get it on the road) in primer vs. finish the body work & paint it first.

This last option may actually be my best hope of actually driving this car before the year is out.
It may also be a practical option, as I fear the MOT will throw up some more construction work. :icon_sad:

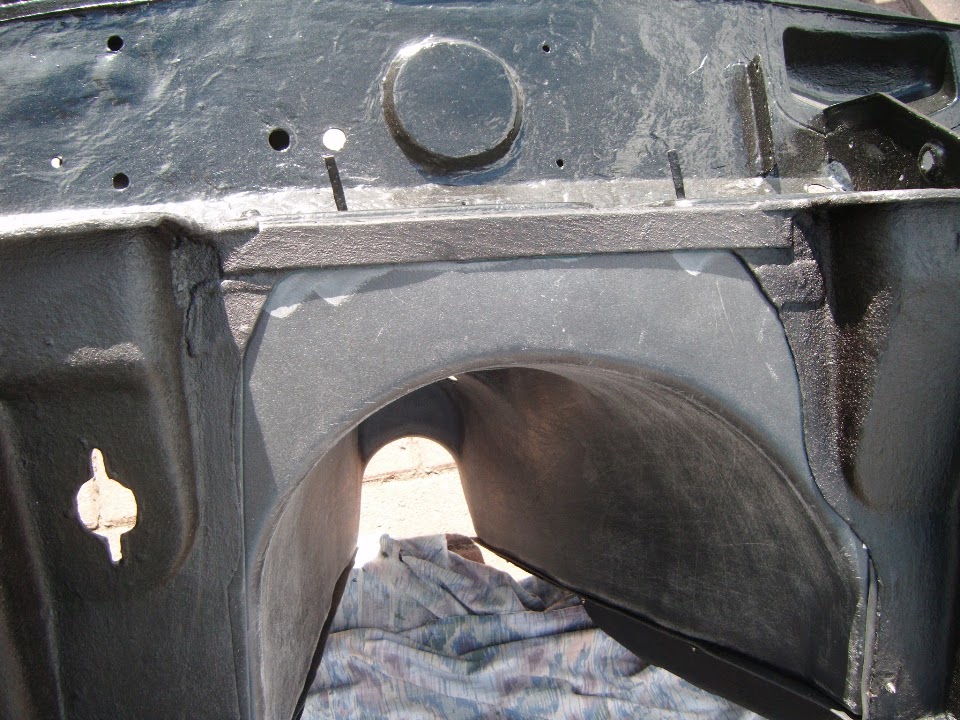
In particular, I am convinced the headlights will need to minor "cut & shut" work to point in the right direction.
( But this is something I can't really test properly myself. )

Similarly, as far as the MOT is concerned the boot lid is done, as it is now firmly secured in place.
Whereas there is a lot of filler work required to blend in all the edges so they line up across the gaps.
( As there was slight distortion to the hump profiles on both the body shell & the lid during construction. )

Anyway, as usual, there is lots to think about and plenty of other things to do first.

Although as it is raining outside & the forecast is a bit hit & miss, I might stick with non car stuff this weekend.

Cheers, Paul. :)
25 Apr 2015, 8:03am
Paul L wrote:

In particular, I am convinced the headlights will need to minor "cut & shut" work to point in the right direction.
( But this is something I can't really test properly myself. )


It's very easy to check the headlamp alignment Paul.

All you need is a white board about two feet by three, a black marker and some chalk or string. It's probably even more accurate than the MOT beam aligner although slower of course!

If you shine the DIP beam against the white board it should project an arrow pattern, if it lacks a distinct arrow pattern the reflector or lens is stuffed, should fail.

With the car sat on flat ground, with a chalk line in front of and centred on the car, place the white board on the ground and in front of the headlamp and mark the horizontal and angle lines of the beam pattern on the board with your marker pen. Then move the white board further away from the headlamp at the same distance from the cars centreline and check that the beam arrow pattern is still in exactly the same place. Repeat for the other side, job done. The beam pattern can be a little lower than horizontal but not higher, nor may it be pointing to the right. You need to move the board at least cars length away to get a reasonable check but with care you will get a good idea of how well the lamps are aligned at very little cost.

I normally drive up to a white wall, note the location of the beam then reverse away a cars length, adjusting as required so the beam stays in the same place, I have never had an issue with beam alignment at MOT time.

I realise you have limited space and a crooked paved drive to contend with but I would have thought it could be done, at least to check if it's reasonably within limits.

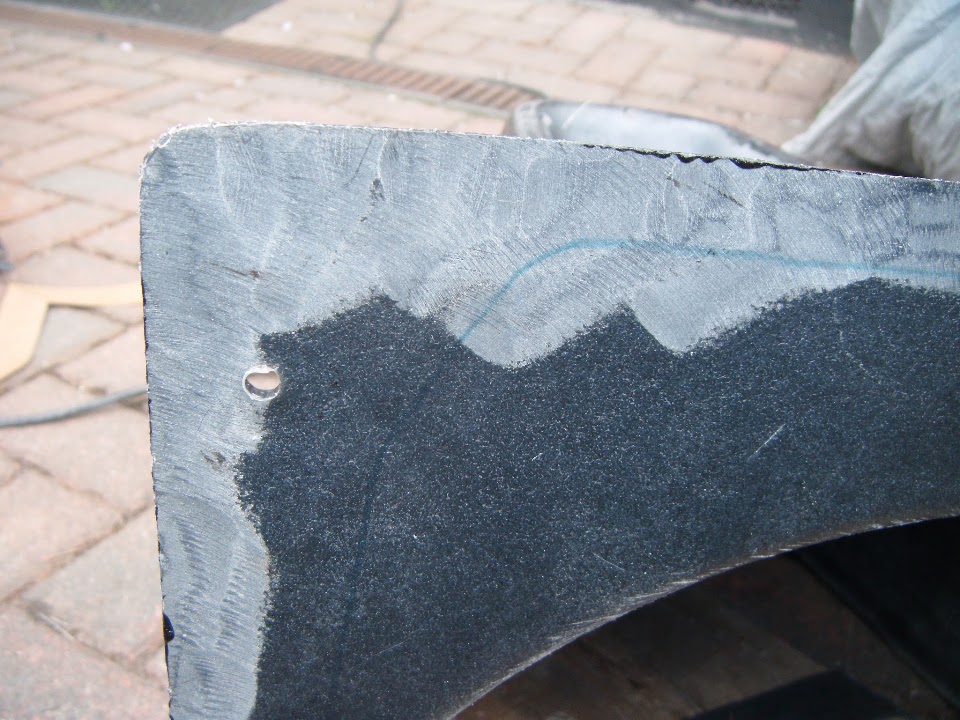
A couple of washers and a little filler could be all that's needed to get them pointed in the right direction. :eusa_angel:
27 Apr 2015, 4:50pm
8 Value Ed - Thanks for the headlight testing tips, hopefully only minor adjustments will be required. :pray:

- - - - - - - - - - - - - - - - - - - - - - - - - - - - - - -

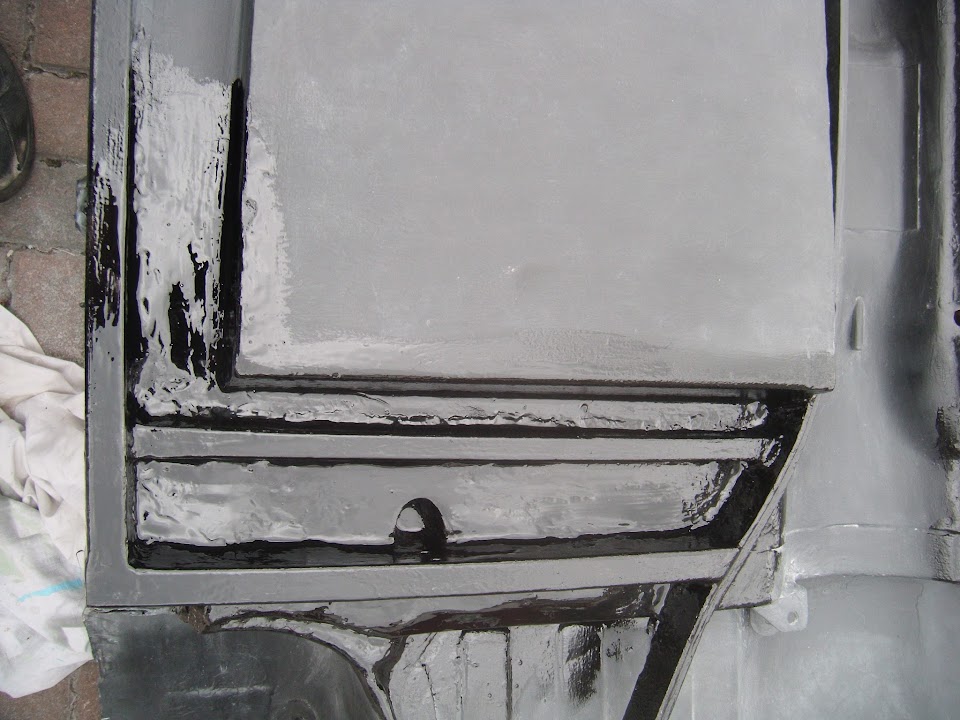
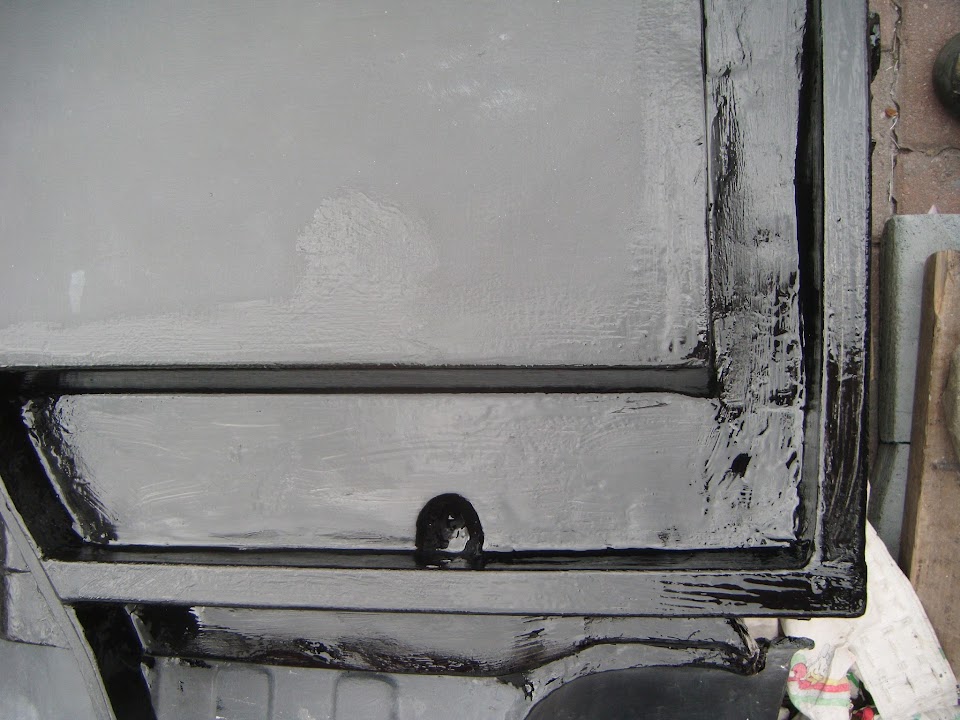
A Small Restart:
I didn't do any car work at the weekend and didn't have much time available today either.

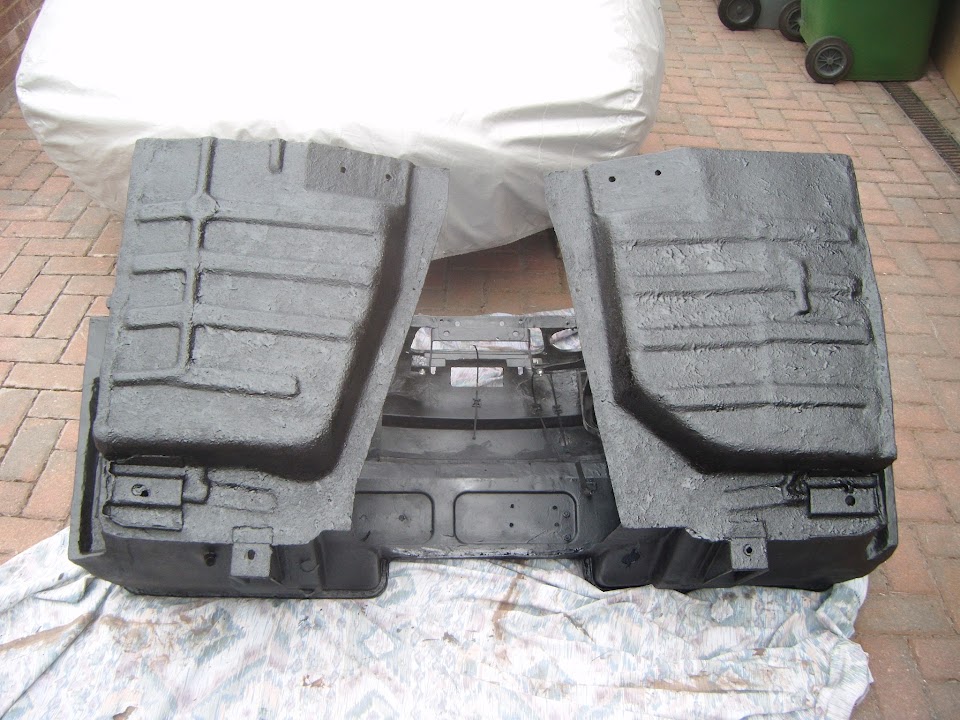
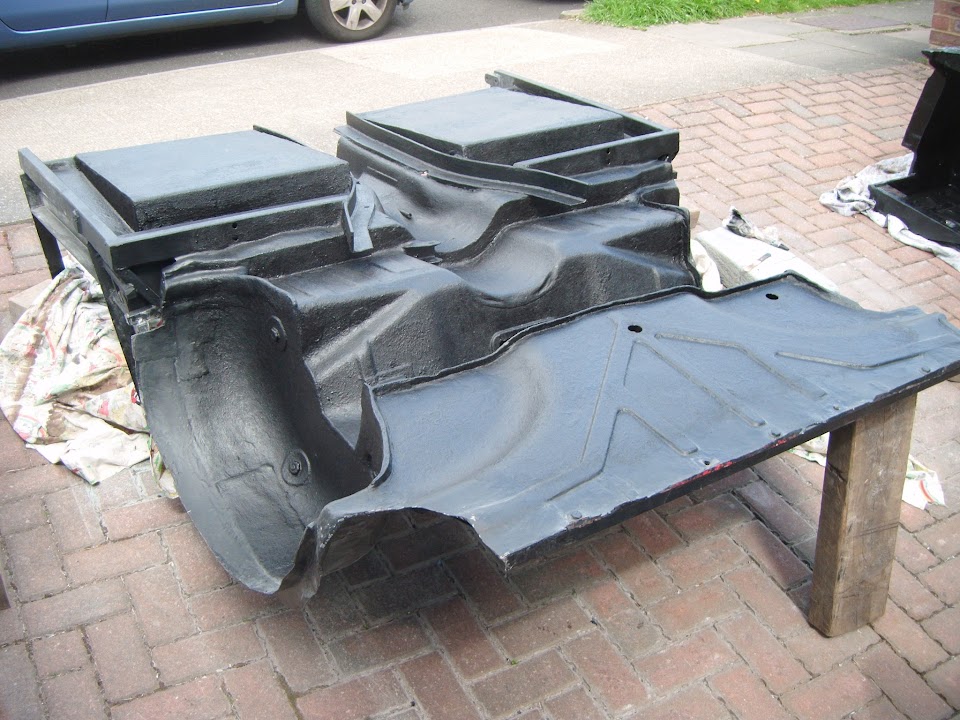
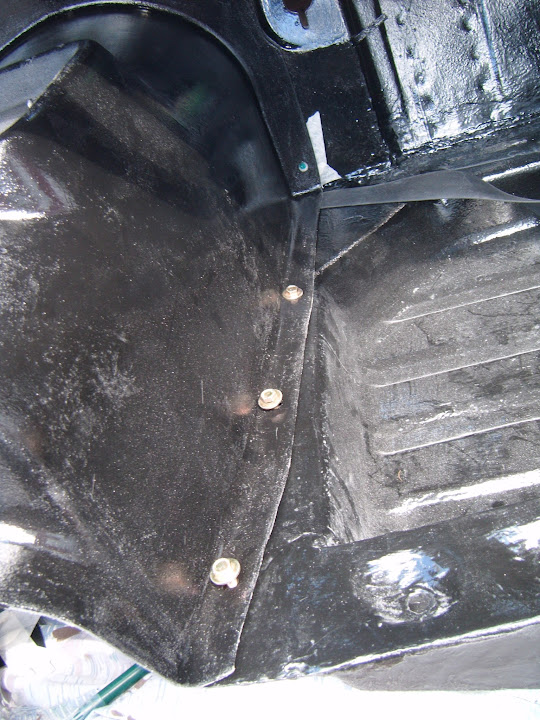
But at least I managed to get some Tetroseal on the frame/floors/arches combo.


I had to use a wooden spatula to spread this stuff into the small gaps here, that the brush wouldn't reach.


These photos were taken after the first coat and thankfully I also managed to get a second coat on today.

But I will leave these "fresh" sections to dry overnight before putting a final coat over the whole area.

I know these "after" photos don't look very different to this "Before" one.


But it has been quite a time consuming job to seal up all the gaps and I'm glad the underside is finally done.

Until next time, take care, Paul. :)
28 Apr 2015, 6:37pm
Tiresome Tuesday - Part 1:
It was bloody cold working on the front driveway this morning, as it takes a few hours for the sunshine to reach it.


- - - - - - - - - - - - - - - - - - - - - - - - - - - - - - -

Gear Box Cover:
The mess you can see is my attempts to work out how the rubber seal was going to cover these angles.


Eventually I had made cardboard templates for both sides.


Although in a rare moment of clarity, I realised the width of the seal would cover the small kink in the driver's side. :cool:


So I cut the rubber seal to the right length for the starting point on both sides.


At this point other stuff got in the way, but at least there was some sunshine when I returned...

- - - - - - - - - - - - - - - - - - - - - - - - - - - - - - -

Frame/Arches/Floors:
Put the final coat of Tetroseal onto the underside of this area.


Which means this is finally ready to be bolted back on to the chassis. :cool:

As the rest of the work to be done on this area can still be reached when it is back in position.

- - - - - - - - - - - - - - - - - - - - - - - - - - - - - - -

Gear Box Cover:
I wanted to mark up the first vertical holes in the bulkhead, but realised the rubber seal would be in the way. :rolleyes:

So I fixed the cover into position with just a section of the seal under the cover near the front of the bulkhead.


This allowed me to roughly mark up the position of the hole, before I could fit the "catch" and fine tune the position.


Then I worked my way along the rubber seals, opening up all the holes required in the right place.


Eventually the rubber seals on both sides were done.


So the cover when back on again and the first screws on the vertical face now fitted.


End of Part 1...
28 Apr 2015, 6:38pm
Tiresome Tuesday - Part 2:

Gear Box Cover:
However, I wanted to add an extra screw on the horizontal face, so the cover came off again.

And a "catch" was added to both sides.


Before the cover went on again.


And the bulkhead was propped up.


So I could drill a pilot hole through the catch and the cover.


Then it the cover had to come off again, so I could remove the catch and drill out the holes to the right size.

Then I could refit the cover yet again to test fit the extra screws.


While the bulkhead had been propped up, I also marked the position of the top edges of the bulkhead onto the cover.


The cover comes with 3 pilot holes drilled in this top area and the two outside ones were going to be no problem.


But the centre one was too low compare to the metal available to screw into.


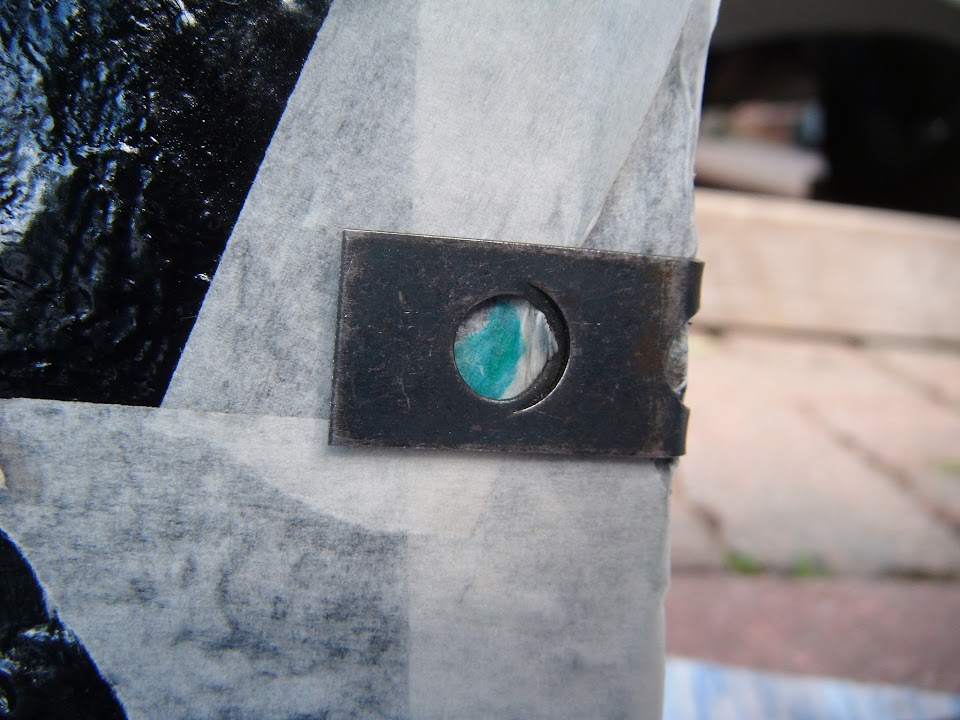
My donor car came with this small plate for this hole, so I used that to mark up the cover.


Then the three holes were drilled out to the right size in both the cover and the bulkhead.


Then I decided to add an extra bolt in the middle of this vertical face around here as well.
( As this ties in with the number of fixings my donor car had on the cover. )


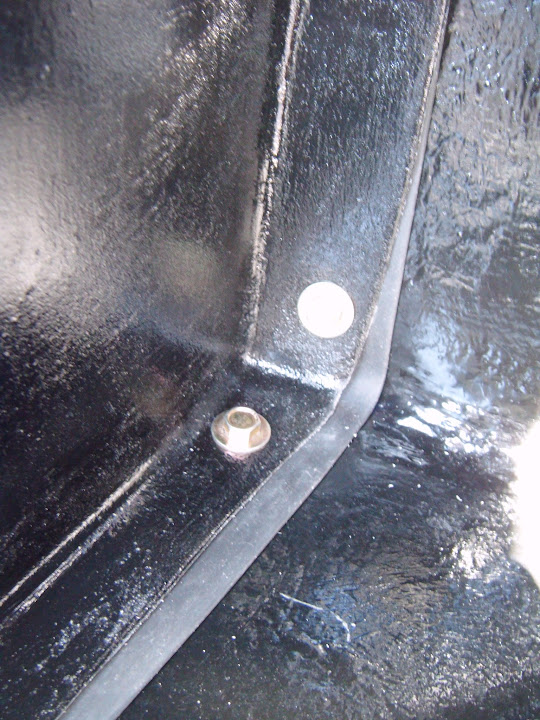
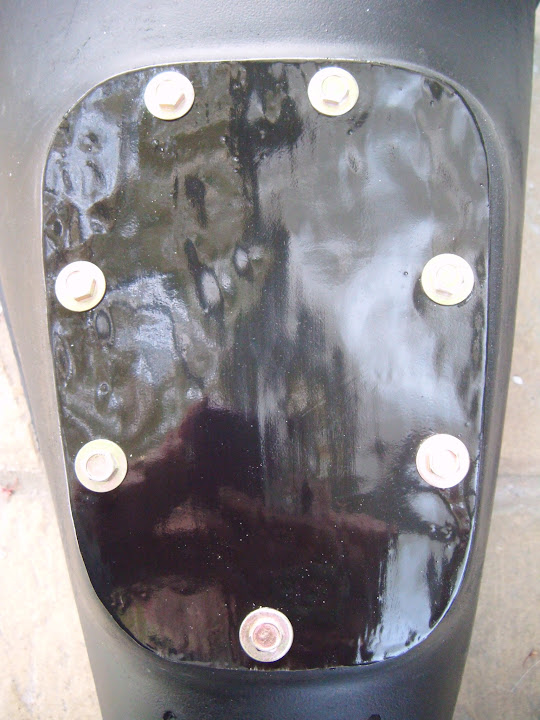
With the holes drilled out, the bolts will look like this when fitted.


So after messing about for a very long time, all the holes required to fit the cover are finally done. :cool:

Now I just need to tidy up all these new holes and touch up the surrounding paint work, plus clean up some of the old catches.

Note:
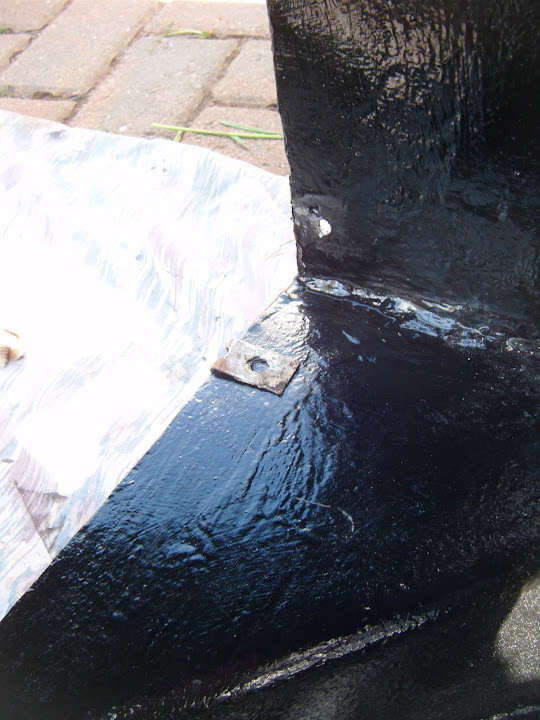
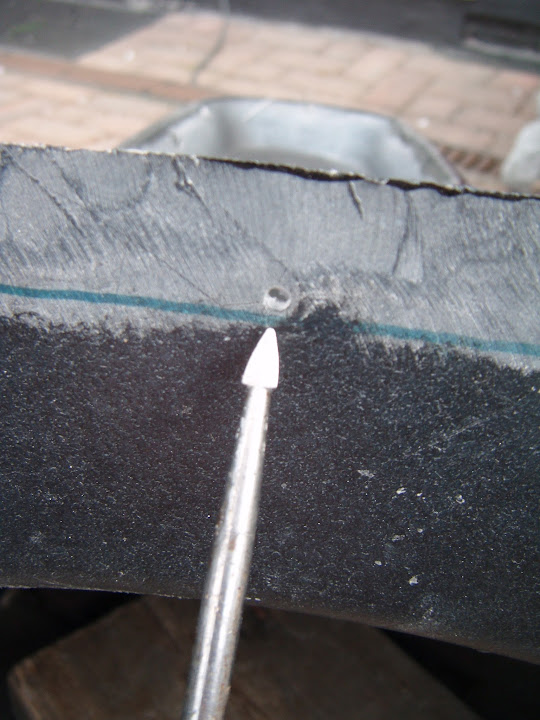
I've trawled through this build thread to find these photos of the original bulkhead holes for the cover.
( Sorry the first photo is rubbish. )


Most of this mess was simply cut out and new metal was welded in.

Which is why I had to drill every hole required for the cover at this stage.

At least this job was a lot easier to do with the bulkhead off the chassis.

- - - - - - - - - - - - - - - - - - - - - - - - - - - - - - -

Overall this was definitely another slow progress day, but at least it was still some progress.

Until next time, take care, Paul. :)
28 Apr 2015, 7:29pm
gearbox cover looks very neat keep up the good work
28 Apr 2015, 8:59pm
Very tidy.
28 Apr 2015, 9:35pm
Paul
Any chance of a stand alone shot of your gearbox cover just so I can compare it to mine please?
Nice job BTW mine is going to be a bit easier though as I have decided to bond and rivet it in place. You have the "advantage" of having all the original mounting threads but with the frame etc I'm using none of them exist. I will probably put an access cover on for the gearbox filler but anything more serious will require removing the gearbox. That said you would have to remove the seats to get my tunnel off anyway so I don't think dropping the gearbox would really be that much more work.
Mac
28 Apr 2015, 9:50pm
Mac - I'm Just logging off, so I'd better be quick...

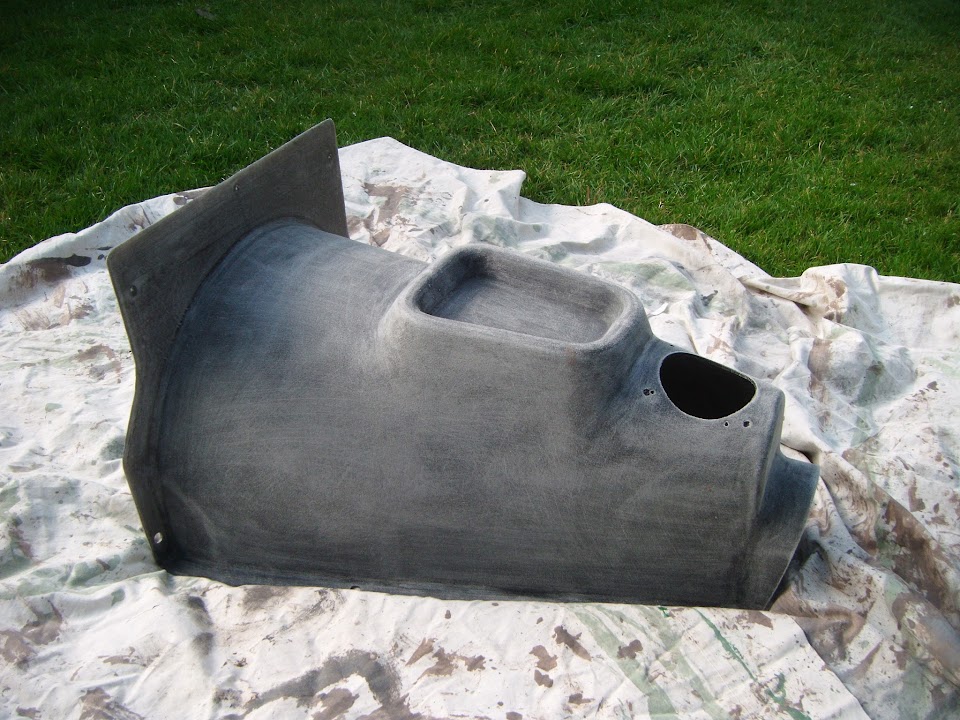
Here is my cover...


But this is Michiel's one from Spyder #47, which is Herald based and looks a bit like your one.


Hope that helps, Paul. :)
29 Apr 2015, 7:21am
Thurcroft Flyer & Gary - Thanks gents. :cool:

The cover still needs a few finishing touches and another lick of paint, but that can be done away from the bulkhead.

I actually really like the look of the unpainted 10mm bolt heads on the self tapping screws (a bag of them came with my donor).

I've used them along the bottom edges of the cover and for this false access panel.


So it makes sense to replace these four screws with them as well, so it all matches.


I may also change the original Spitfire mounting plate for a circular one, similar to Michiel (see photo in previous post).

Which reminds me that at some point I need to make and fit a gaiter for the gear lever.

- - - - - - - - - - - - - - - - - - - - - - - - - - - - - - -

Mac - Cheers, hopefully adding a bit of sealant when I finally bolt the cover into place will keep it all water tight. :pray:

And whilst restoring the bulkhead was a LOT of work, when I look back at the original Cordite layout it was the right decision for me.


Note:
The passenger front foot well didn't sit flush as the frame rails were not the same height on all four sides. :rolleyes:

- - - - - - - - - - - - - - - - - - - - - - - - - - - - - - -

Cheers, Paul. :)
29 Apr 2015, 8:29am
Nice work on the box cover Paul.
30 Apr 2015, 6:55am
Scottie - Cheers. As you well know, all these little jobs take ages, but they all need to be done at some point.

- - - - - - - - - - - - - - - - - - - - - - - - - - - - - - -

Holding Pattern:
I couldn't co-ordintate my free time with any dry weather to do any work on the car yesterday.

But I did spend a bit of time tidying up the Summer House (again :rolleyes:) and looking at the gearbox cover.

After a bit of playing around, I don't think it will be practical to change the shape of the gear lever bracket to a "simple" ring.

As this would also involve cutting the original rubber seal down to match and I am not sure that would be a good idea.


Note:
I still plan to replace the screws holding the bracket to the cover, with ones to match the false access panel.

- - - - - - - - - - - - - - - - - - - - - - - - - - - - - - -

Not sure how today is going to pan out as my daughters will be at home due to the school closing for their teacher's funeral.

I've also had a few other reminders recently that there is more to life than my car building project.

I'm off to a funeral myself next Tuesday for the mum of one of the people I was in Center Parcs with a few weeks ago.

Plus I'm visiting an old mate in hospital on Friday, as I've just discovered he had a major stoke last week!

Which means a trip to Stoneleigh on Bank Holiday Monday may not be possible, but we will see.

Take care, Paul. :)
30 Apr 2015, 7:09am
Suggestion Paul, why don't you make a leather boot for the gear lever? very simple to do, I have some old leathers from my biking days which I have unstitched, I plan to sew a simple funnel shaped tube to slip over the gear lever then trap under a polished stainless ring (like a very large washer) secured by screws onto the gearbox cover.

Bit's of suitable leather are easy enough to obtain, if not from bike leathers, maybe from from old furniture, car boot sales?
30 Apr 2015, 10:37am
if you want some leather i have lots of bits in navy blue :-) your welcome to some