MadaboutKitcars

This is a read-only archive of the old Madabout Kitcars forum. New posts and replies are no longer possible, but every thread is still here to browse and read.

Another Cordite Is Born ...

27 Mar 2015, 6:43pm
Rene - Thanks for the tip and the link. :cool:

I will definitely replace the "inner tube" seals with "real" ones at some point.

- - - - - - - - - - - - - - - - - - - - - - - - - - - - - - -

The Only Way Is Up - Part 1:
Today I was planning to fit the new locks to lower boot lid edge, but they still haven't arrived.
( Chased the ebay seller who will "look into it" if they haven't arrived by next week. :rant: )

Instead I had face the reality of dismantling the "Moon Rover" to get access to the underside.

In terms of my build morale, I know this is going to be the absolute low point as thoughts of the finish line simply evaporate. :icon_sad:

However, as the saying goes, "You can't make an omelette without breaking eggs."

So here goes...

The seats had to come out.


The twin tail pipes had to come off.


The brake pedal had to be disconnected.


Plus all the original Spitfire chassis bolts & the four bolts holding the frame to the chassis.
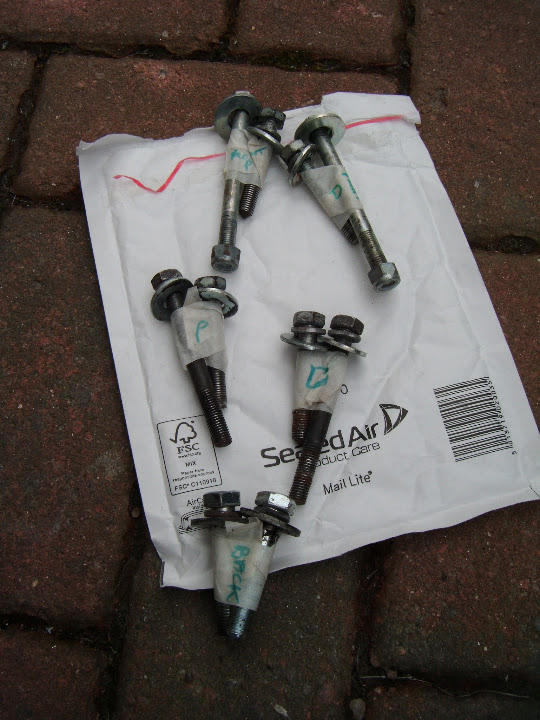
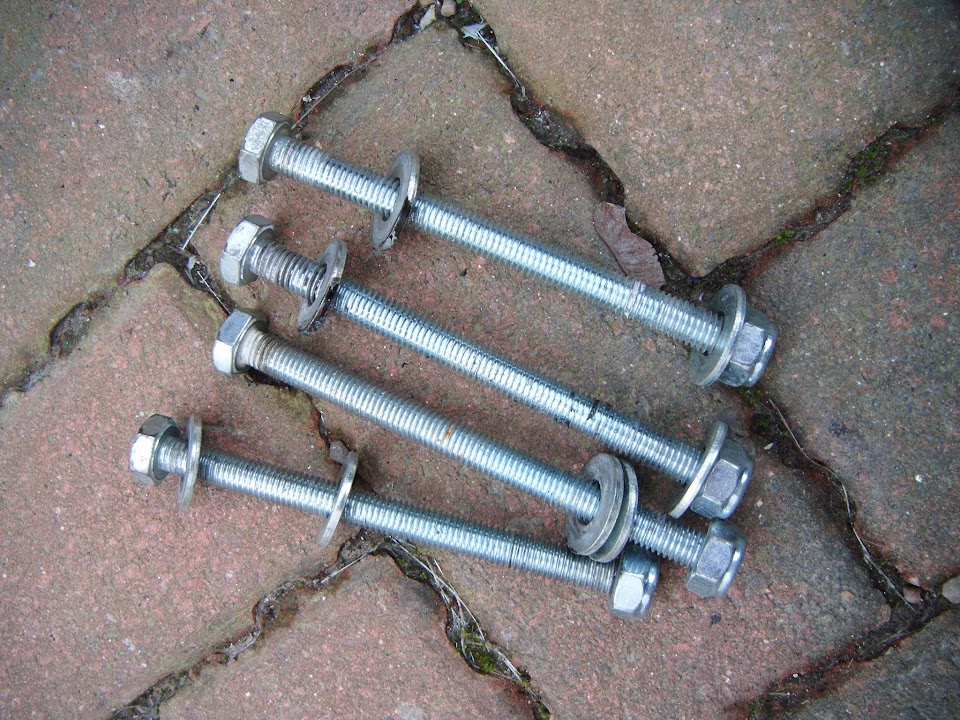


Note:
One good thing about having no body work is I can just about reach both ends of any bolt to remove it. :cool:

I also unbolted the rear framework from the Spitfire bulkhead.

Then I made a note of a few jobs that I will need to do.

A hole needs to be drilled here for the petrol hard line to enter the boot.


Swifty added a neat panel to this build to provide easy access to these nuts.


I just need to double check I can get sufficient access to mine, or I'll need to modify the floor a bit.

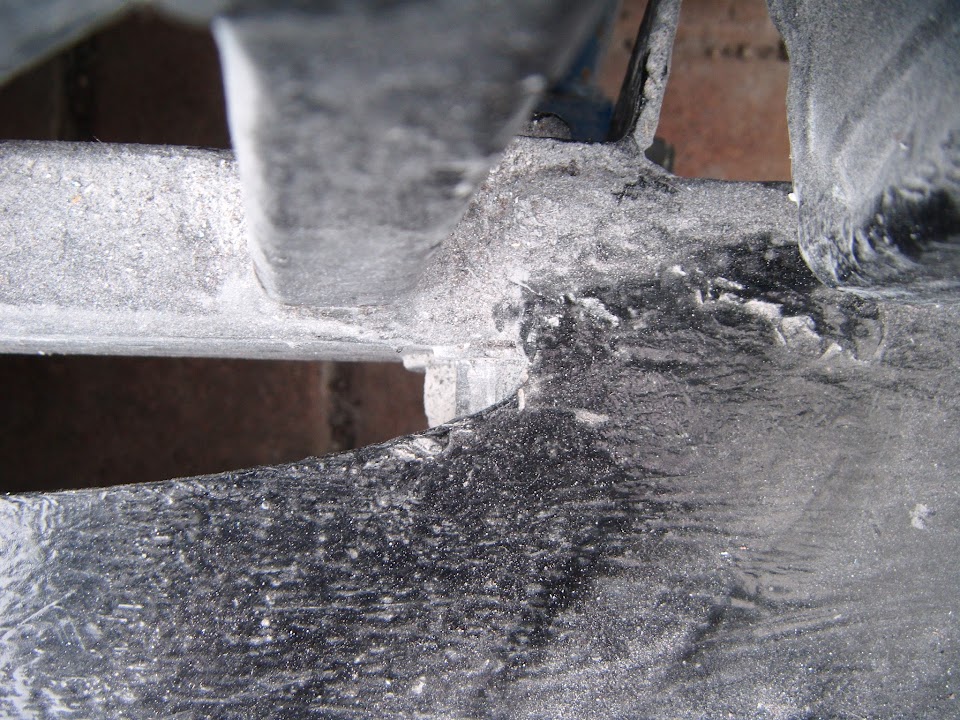


But no matter what I do, there is no way to get a good join here.


So that is something else I will need to come back to.

But one of the key questions is whether I can get away with removing these metal spacers at the front of the bulkhead.
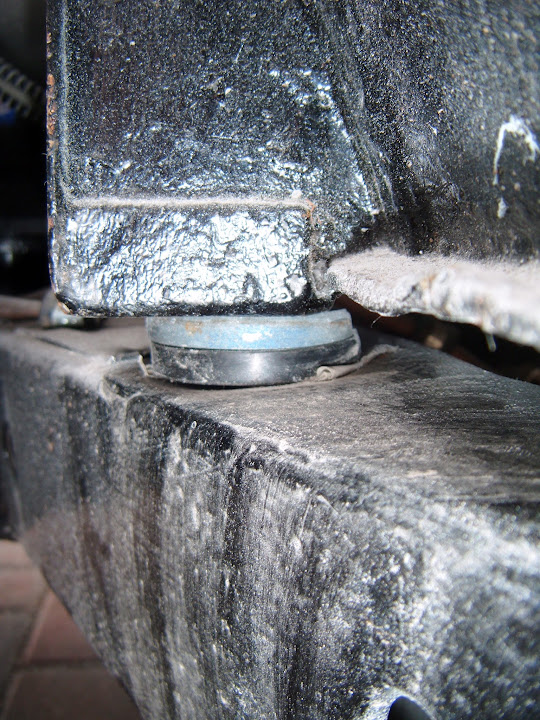


This would have the effect of lowering the front scuttle ever so slightly.

Which in turn is why I have to wait until this work is finished before I re-profile the rear edge of the bonnet.

As I look at the great period features that other builders are adding, my gear knob stands out for all the wrong reasons.


Unfortunately, this is yet another area where I don't know what I am talking about. :rolleyes:

But I believe you could fit an overdrive switch on the dash that would look something like this.


Questions: Is this correct?
And if so, is it simply a case of running the wires from here to a separate dash board switch?


If I could move the switch, I could then swap the gear knob for something else.

Clearly I need to make a decision PDQ if I am going to do this mod before everything goes back on.

Although deep down, KISS tells me to leave everything as it is and worry about something else!

End of Part 1....
27 Mar 2015, 6:45pm
The Only Way Is Up - Part 2:
The good news is that the "Moon Rover" structure was now free to be removed from the chassis.


The bad news is that this is simply too heavy for me to lift off by myself. :icon_sad:

So I just started to rearrange the driveway so there would be somewhere to move the framework to.

The body shell is currently sitting here.


I started to peel off the covers and thought this was a bit harder to do than normal.

Then I spotted the amount of water caught in the middle. :eek:


After a bit of huffing & puffing, I had rearranged the body shell like so.


At which point I simply had to wait until my wife came back to give me a hand.

The bulkhead was quite straight forward to remove.

But the rear frame work, lowered floor pans & rear wheel arches "combo" was just too heavy for my wife to lift safely.

In the end we got it onto its side and I pushed it along a "rolling path" of lengths of wood in a Stonehenge style.

Thankfully my neighbour was passing and he gave us a hand to get it into it's final resting place for now. :cool:


It is these "gaps" where the hand brake panel was welded to the frame / floors from above that I want to seal.


Questions:
- Is this sort sort of gap that seam sealer is designed to be simply "stuffed" into?
- Should the whole underside of the car get a protective coat of general sealer?

Unfortunately, this was all that was left of my "car" by the time we'd finished. :icon_sad:


Which is the depressing part, given that it looked like this just a few weeks ago.


But while this last photo does give me hope that the car will look good when finished.

The reality of my driveway tonight tells me this is still a long way off yet.

However, I am trying to remain positive, as when these bits go back on it will be for good!

Next the bulkhead was moved over.


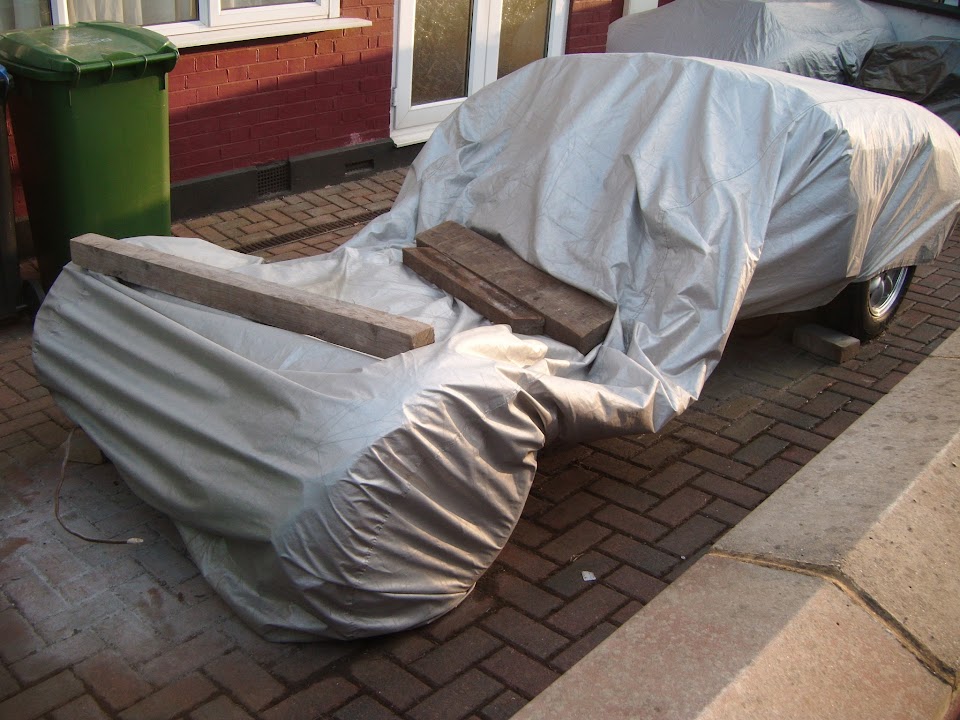
Before the new extra large tarpaulin was used to cover everything up.


The bonnet and rolling chassis leaves a very strange shape under the cover.


There will now be a load of small, time consuming jobs to do and the weather forecast doesn't look good.

So I will try to take comfort from the fact that whilst the finish line seems miles off...

The "Start Line" will now slowly come into sight. :cool:

I can genuinely say that I have started the process of finally assembling the car when I put these big parts back on.

So until next time, take care, Paul. :)
28 Mar 2015, 4:05am
Hi Paul, I couldn't help but notice the overdrive wiring on your gearbox, I think it would be wise to give it a check over. I have annotated your photo showing the items I would look at. You may take the view that sleeping dogs are best left but those connections don't look fresh to me and bullet connections are prone to unreliability. Easy to sort now, very difficult later.


If it's possible to start the engine I would also check the operation of the overdrive with the back of the car jacked up before putting the floor back on. There is also an inhibit switch on top of the gearbox which should be checked over too. The length of time the car has stood is sufficient for bad connections to creep in.

If the bullets won't pull easily cut the rubber off and prise the brass tubes apart. The sleeves are only cheap and are difficult to clean properly anyway.

I know you are short of tasks but a few minutes spent checking these could save hours of frustration later!!! LOL
28 Mar 2015, 10:58am
8 Valve Ed - Hi Robert, thanks for the very comprehensive reply. :cool:

I've just printed that out and will work my way through the "To Do" list.

This has also confirmed that I will NOT touch the original Spitfire gear knob.

After all, my trim details all have Triumph on them anyway. :rolleyes:

Plus the rest of the interior will be largely standard Spitfire, unlike Scottie's car's transformation.

- - - - - - - - - - - - - - - - - - - - - - - - - - - - - - -

It's been a hectic morning, but now it is car time, so I'd better go.

Cheers, Paul. :)

PS
Does anyone have any thoughts on simply using seam sealer in the gap under the hand brake panel?
28 Mar 2015, 11:24am
Glad you feel it's constructive, one point about the vinegar, it really needs neutralising after the cleaning process, perhaps washing with water and spraying with a water repellant like WD40 perhaps?

I have a cheap ultrasonic cleaner I use for small objects, brings many things up like new, especially plastics and brass carburettor parts, very handy.

As for the OD switch, I would leave 'as is' it keeps the gear changing all in one place, (KISS?) after all, you aren't trying to create a specific replica, just a 'period' car, like I am. We aren't bound by the need to be faithful to specifics, merely the style of the period.
28 Mar 2015, 12:54pm
Paul L wrote:
8 Value Ed

PS
Does anyone have any thoughts on simply using seam sealer in the gap under the hand brake panel?


Just blob it full with a good sealer will do the job just fine.
28 Mar 2015, 1:57pm
Paul L wrote:

Does anyone have any thoughts on simply using seam sealer in the gap under the hand brake panel?


Bit of a difficult one that Paul. Not keen on pumping all that grunge into a large void, on the other hand you will never be able to clean it out in the future... It will become a bit of a rust trap. I think I would have clamped and welded the two together at a much earlier stage but we are well past that now. Is it possible to pull them closer with maybe 4 bolts? Squirt some warm sealant in, then squash the panel onto the angle iron with the bolts? Or would that move or distort things above...

I am a great lover of builders foam, it's light, relatively cheap and inert, won't soak up moisture and fills gaps effortlessly. You could always run a little sealer over the foam once you have trimmed it.
28 Mar 2015, 5:45pm
Rene & 8 Valve Ed - Thanks for the suggestions gentlemen. :cool:

I'll have another good look at the gap before making a final decision.

- - - - - - - - - - - - - - - - - - - - - - - - - - - - - - -

A New Hope - Part 1:
I dropped my wife and daughters off to the airport at "Silly O'Clock" this morning.
( As they are visiting my wife's relatives for a few days.)

The boot lid locks also arrived today, although it turns out they are a complete waste of time. :icon_evil:

I bought a pair of "keys alike" locks so that, like the top edge ones, one key would open both locks.

So far, so good.

But these locks do not let you remove the key when they are in the open position?

Therefore these would only work if I used both the two matching keys & kept them on separate key rings too. :rant:

I couldn't believe it, especially after such a long wait for them.

So at this point I started searching the internet for any locks I could actually go out and buy today.

A local ScrewFix had some, but were out of stock of "key alike" pairs, so I just bought two single locks.

These allow key removal in the open & closed positions, so at all 3 keys needed to open the boot lid can be carried together. :rolleyes:

This meant that I could at least start the process of fitting the locks.

I needed to work out the best position in between the bottom of the aero humps & the rain channel.


Which translated into these positions on the sunny side of the boot lid.


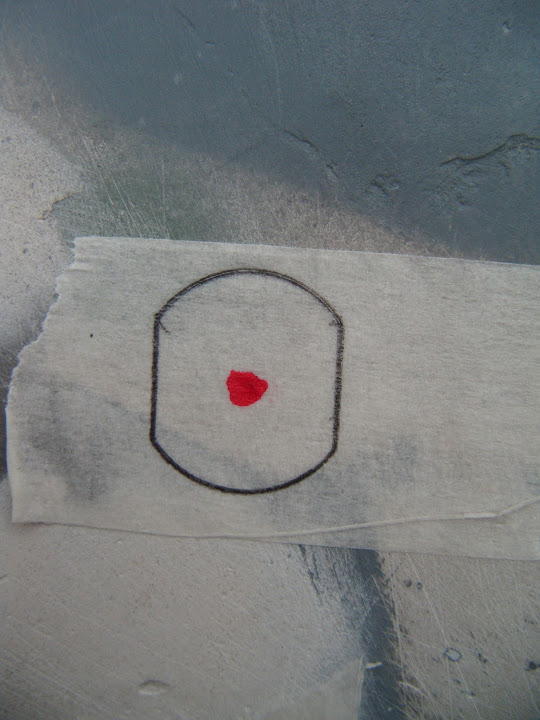
Then I marked up the odd shape holes required.


At which point it started to rain and I had to pack everything away on the drive.

I then relocated to the Summer House to cut the holes out using a combination of drilling and hand filing.


Note:
Thankfully, the locks sit "square" in the lid, without the need for any shaping.


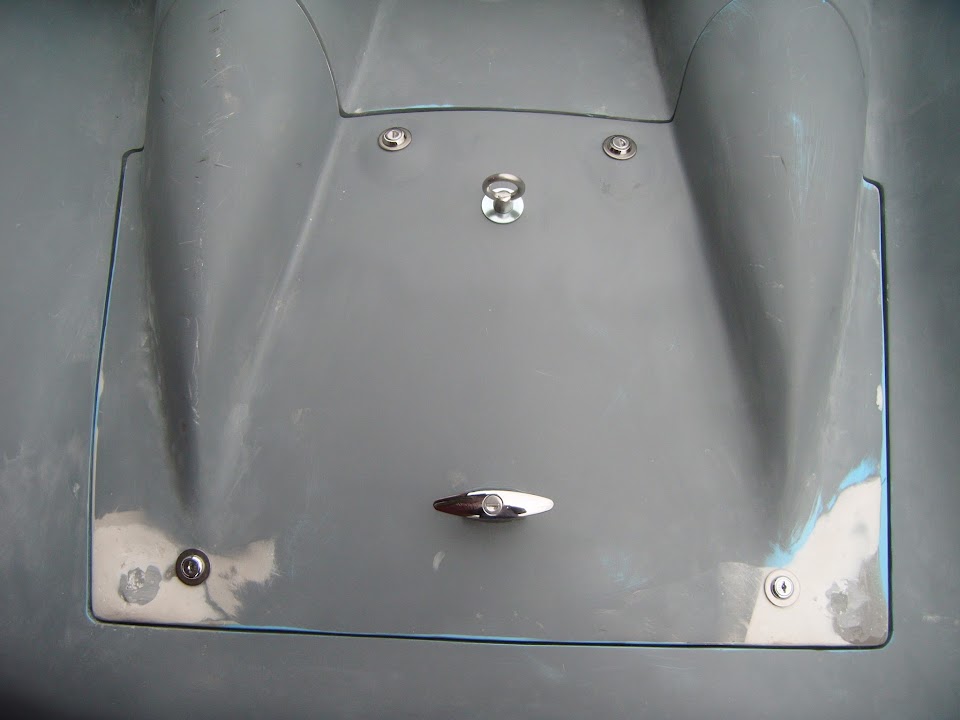
And with the locks fitted, the lid looked like this.


I think that the smaller washers I bought make this a much neater job. :cool:

Unlike the top locks, I need the bottom edge locks to point outwards in different directions.


Then it was back to the front drive and more crawling through the wheel arch to work on the underside of the lid. :rolleyes:


I made cardboard template for the catches.


Which were cut out of metal and bent into shape.


Then fitted to the existing mounting plates.


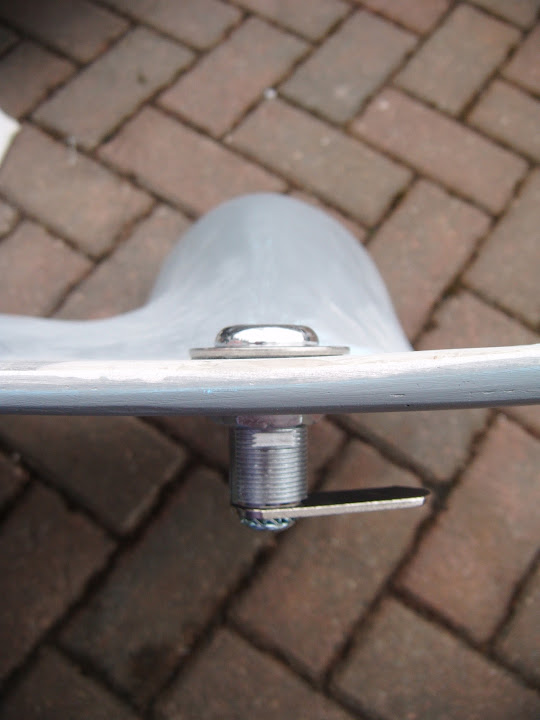
And the catch works like this underneath.


There then followed a prolonged period of "tweaking" all four catches until the boot lid sat nicely when locked...

End of Part 1...
28 Mar 2015, 5:46pm
A New Hope - Part 2:
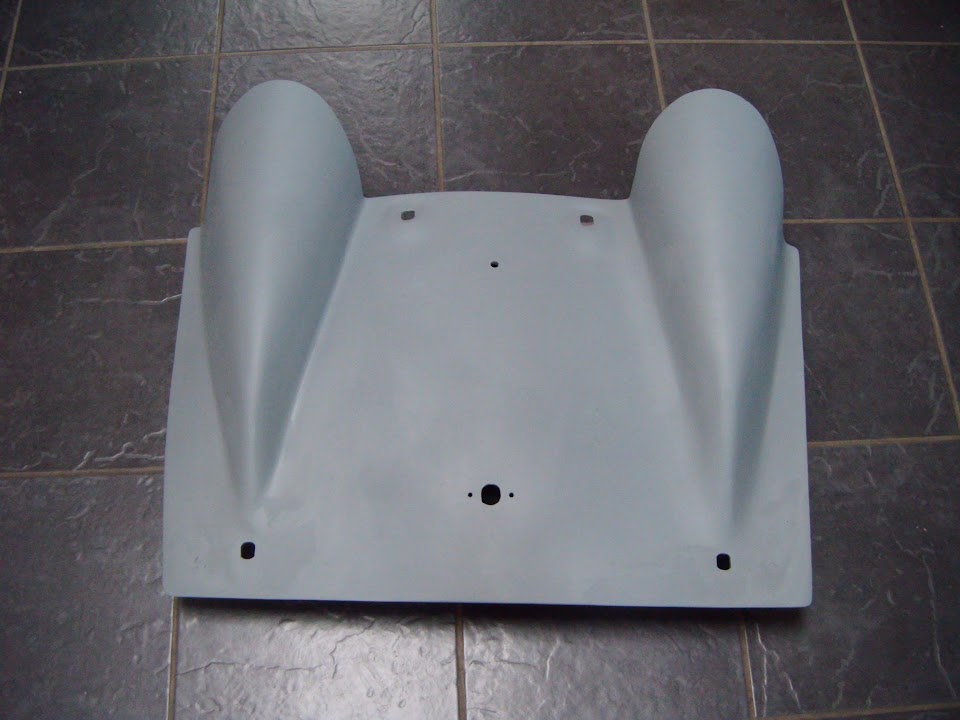
And there you have it, after what seems like an eternity, my "simple" access panel finally works. :cool:


But before I get too excited, there is still a bit of work I need to do:
- Weld some bracing to the catches.
- Smooth out both bottom edge corners that where previously built up for the locking pins.
- Set the final panel gaps around the boot lid.
- Sort out the lid locating pins.

So I removed the bottom locks & started sanding the bottom edge corners.

Unfortunately, I didn't get very far before rain returned again, so I had to wipe this area down to get the photo.


I am looking forward to getting a coat of etch primer on, as this will give a better idea of how the locks will actually look in practise.

However, I really hope that by the time everything is in BRG this over complicated arrangement will not look too fussy. :pray:

As it is still damp out I think that is it for today, so I will end this update with some other stuff...

- - - - - - - - - - - - - - - - - - - - - - - - - - - - - - -

Kit Car Building:
When I started my Cordite project I figured that if an accountant with no car building experience could build one, anyone could.

Unfortunately, the harsh reality of a "problematic" kit, combined with my limited skills and lack of facilities has been very tough.

However, I absolutely love the new Tribute 250 SWB kit. :cool:

It has classic car looks, great donor car performance & reliability, plus a "simple" method of construction.

Chris & Dan are seriously hard workers, but even so, this transformation took less than 3 weeks! :eek:

[color="blue"]Donor Car Arrived - 9th March 2015


Donor Car Stripped - 12th March 2015


Roadworthy SWB 250 - 26th March 2015[/color]

Archived forum photo


Archived forum photo


Clearly it is not 100% finished, but Bob (Hurnleft) was still able to drive it home. :cool:

In a few weeks I will have reached 3 years of building & the best I can now hope for is a sub 4 year build. :icon_sad:

The never ending list of things to do just seems to grind me down these days and it is hard to stay motivated.

But as I said yesterday, I know I have reached a real low point of the build, with everything in bits all over my drive.

So I am hoping that as things finally start getting put back together and the weather improves so will my spirits. :pray:

- - - - - - - - - - - - - - - - - - - - - - - - - - - - - - -

Spooky!
I mentioned the FFR '33 Hot Rod the other day and it is featured on the cover of this month's KitCar.


- - - - - - - - - - - - - - - - - - - - - - - - - - - - - - -

You May Want To Look Away Now...

One-off Mercedes-Benz 300 SLS 'Porter Special' crashes into rare Lister-Jaguar at Goodwood | Autoweek

- - - - - - - - - - - - - - - - - - - - - - - - - - - - - - -

Right, I'm off to tidy up all the stuff I've dumped in the porch to shelter from the rain. :rolleyes:

So until next time, take care, Paul. :)
28 Mar 2015, 7:17pm
Paul i think you are thinking too little about your own capabilaties building a kitcar.
If someone like yourself is taken the challence to build a car himself and as you mentioned a kit with a lot of problems to fix,already building for 3 years outdoors in his front driveway without any decent carbuilder tools or expirience i must say that you earn my deepest respect....
I have build a hotrod,trailer,restored other cars and buil many racing bikes and even a boat........always indoors with good tools and a heather...........I have more admiration for your determination to finish your car as i have for a pro-builder even as his car looks 100% better as yours.........remember you did all the work yourself.
When at last you are driving around in your car you can put a bumpersticker on with: This car is build by hand,not bought with a creditcard.
Keep the faith brother..........
29 Mar 2015, 9:58am
Rene - Thanks for your kind words, they do mean a lot. :cool:

I am actually really proud of what I have achieved so far.
( Especially as a few Cordite projects seem to have simply been abandoned. :icon_sad: )

It is just the slow pace of progress that frustrates me at times. :rolleyes:

However, I am still looking forward to that first day of driving a car I've build myself. :pray:

- - - - - - - - - - - - - - - - - - - - - - - - - - - - - - -

British Summer Time:
Although the clocks went forward, the weather seems to have gone backwards. :icon_sad:


So rather than get fed up trying to do battle with the weather I plan to spend today on other things.

I also spotted a potential car related purchase last night, but I need to check something else first.

I'll be happy if I could just finish off the sanding of the boot lid and get that in primer tomorrow.
( As seeing the final look would be a big step forward. :cool: )

I know I took a break from it in the middle, but I made the first cuts into the body shell back in October.
( Having started the process of cross bracing the under side of the shell the month before. )


So until next time, take care, Paul. :)
29 Mar 2015, 2:42pm
Hi Paul excellent work on the boot lid, if the locks are the same ones as the links I sent you when you first started the journey of lid fitting and I threw a few late night musings at you? Then I can confirm there rust proofness as I have had 2 fitted outside for nearly a year on my camper and they are untarnished. (I have not commented on your build for a while as my spaniel managed to launch both my phone and my tablet onto the aga hearth and both where very broken indeed, annoying when all info on one is backed up on the other, my point is can you not get 4 locks keyed alike with a spare in the car for that inevitable day you loose or break a key) my other thought from a week or 2 ago was re the lifting eye, I thought a fibre glass moulding possibly with a 3rd brake light on the rear face with a finger slot on the front face may look good, although the wire for light would be a pain, but now I am actually really liking the stainless eye, don't forget to get in touch before stoneleigh if you want anything for the interior sewing and I will take my machine. Looking good keep it up Ed.
29 Mar 2015, 3:37pm
So you should be proud Paul! You have achieved an enormous amount, and we have all watched your skills and confidence increase, over the last year or so, well done.
29 Mar 2015, 3:53pm
Paul did you seen these locks?
https://www.google.nl/search?q=universeel+slot+brievenbus&espv=2&biw=1242&bih=585&source=lnms&tbm=isch&sa=X&ei=cB8YVZK-FPGv7AbOrIHIDQ&ved=0CAYQ_AUoAQ#imgdii=_&imgrc=Zx0y_QYTNGhmmM%253A%3B_y4CqLt8J1NgqM%3Bhttp%253A%252F%252Fi00.i.aliimg.com%252Fwsphoto%252Fv0%252F1176304952_1%252FFree-shipping-10pcs-High-Quality-CM1923-font-b-Cam-b-font-font-b-Locks-b-font.jpg%3Bhttp%253A%252F%252Fnl.aliexpress.com%252Fw%252Fwholesale-cam-lock-box.html%3B700%3B438
29 Mar 2015, 5:54pm
Ed - I already had one pair of those locks, so just needed to get a second pair.
One day I might replace all four with new "key alike" versions, but not until I'm on the road.

Scottie - Cheers mate.

Rene - I did see that style of lock, but I already had two locks with traditional keys.
But see my reply to Ed above, as I might get 4 of those at some point in the future.

- - - - - - - - - - - - - - - - - - - - - - - - - - - - - - -

The Calm After The Storm:
After the wind & rain had lashed the house all day, suddenly the rain stopped & the sun came out. :cool:

Admittedly the wind was still blowing as I discovered when I peeled off one the car covers and nearly took off down the street!

I used this bonus car time to continue sanding down of the bottom edges of the boot lid.

You many recall that I added some fibreglass matting to the underside of this corner.


So now I could sand down the sunny side and still maintain the lid thickness.

It is clear that I will need to come back and add some filler in places, but for now I wanted to get some etch primer on to see how it all looked.

This is the traditional "Before" shot.


Before I took the "After" shot I went back out the front to touch up the edges of the boot opening.

While doing this I thought I noticed the wind was blowing water from the covers on to the body shell.

Then to my horror I realised it was actually starting to rain again. :icon_evil:

I quickly pulled the cover back over the body shell and thought that was a close call.

Until I realised the boot lid was still sitting outside on the patio at the back of the house. :rant:

One mad dash, and some perfuse swearing, later the lid was safely in the kitchen.


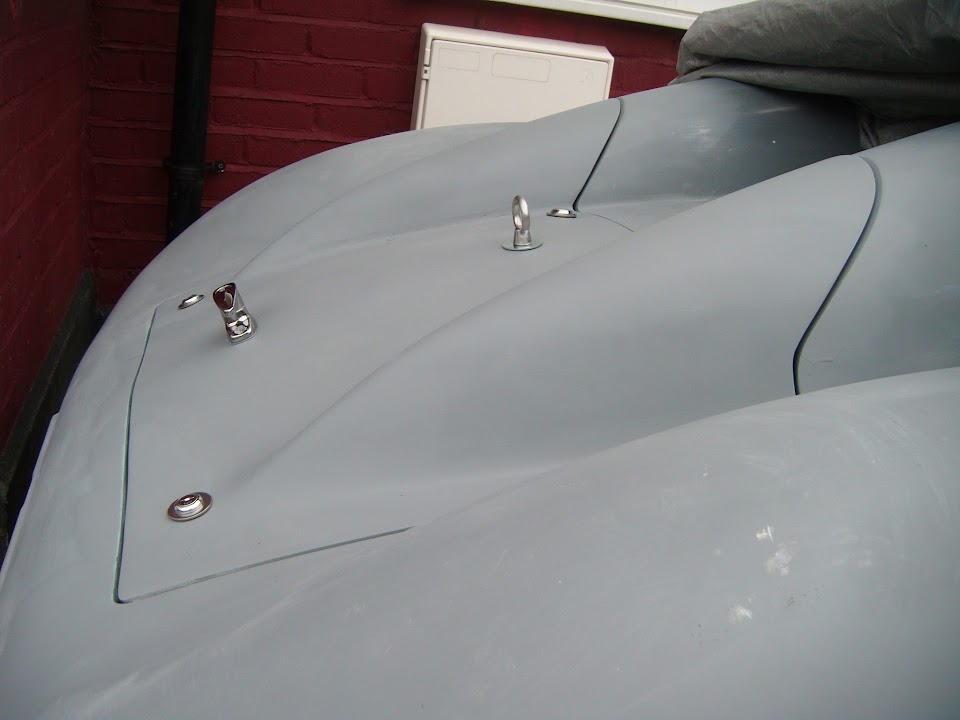
When that was dry enough, I loosely refitted all the shiny bits.
( They will all be removed again so I can start the next round of filler work. )


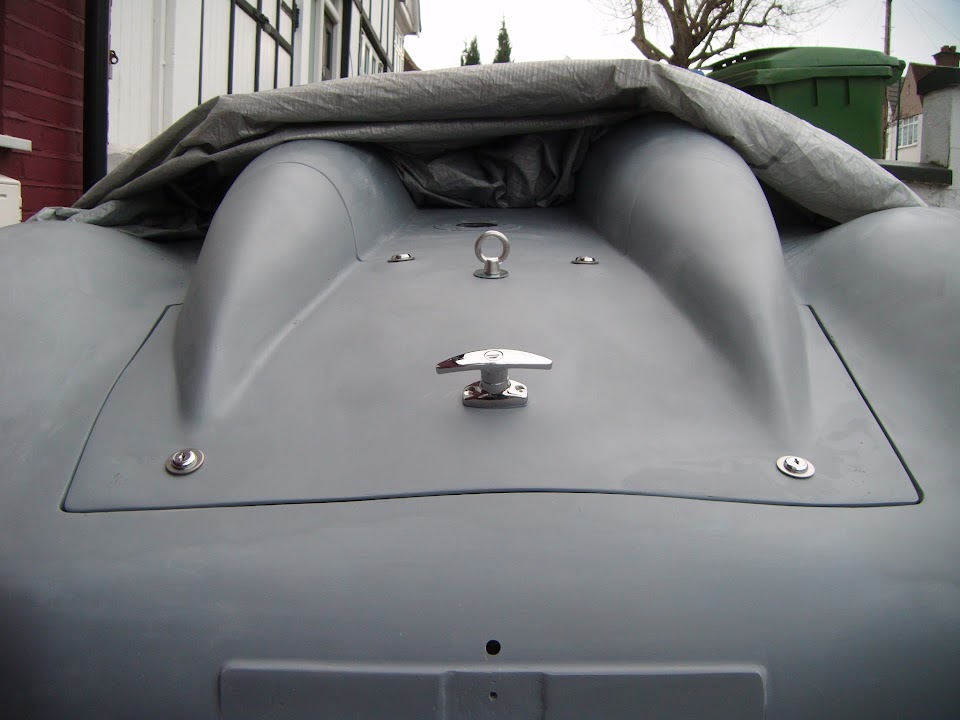
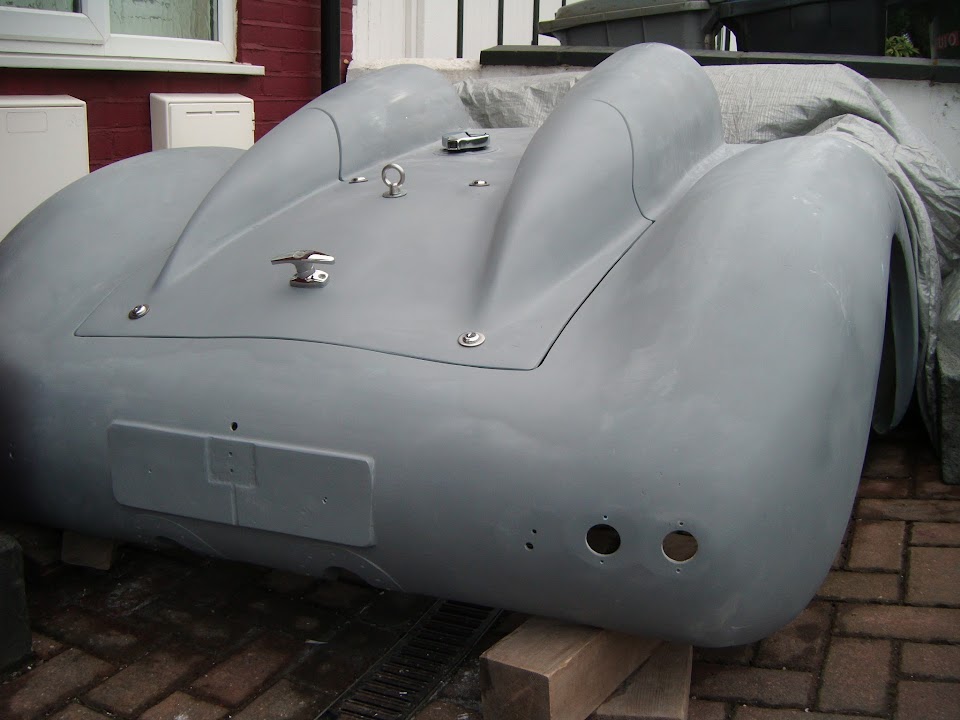
And here, at last, is the view I wanted to see.


I know this lid has been a complete nightmare to do, but I must confess I do love how it looks. :cool:

After taking this photo I realised that I needed to do one more thing to improve the view.


So it was another trip back down to the bottom of the garden to get the petrol cap.


I hope when this is all painted British Racing Green it will really look the part. :pray:

A bit like Scottie fitting his steering wheel, it was worth painting the lid just to lift my spirits. :cool:

So until next time, take care, Paul. :)
29 Mar 2015, 6:26pm
It looks the part now Paul, never mind the BRG!
29 Mar 2015, 6:27pm
P.S. You've got to fit a Monza style fuel cap!!
Straight swap.
29 Mar 2015, 7:09pm
Looks really good, worth the effort.
29 Mar 2015, 7:21pm
So I have been smug that my wedding anniversary weekend happened to tie in with the shocking weather so I wouldn't miss playing with the car. However yet again your perseverance has shone through and you have an awesome boot lid and really does look great - a headache it may have been but very well thought out it certainly is worth the work. I feel your car will be just reward when complete for all the determination you have shown. Mine is now behind schedule and likely to miss Stoneleigh.
29 Mar 2015, 8:56pm
I really like all the shiny bits and the number plate plinth, in my opinion it was all worth the effort as it makes it look like a real period car that's been raced and modified. I can't wait to see the proud smile on your face the day it is finished. Ed.
30 Mar 2015, 7:15am
Scottie, GaryH, Jones & Ed - Thanks for all the positive feeback. :cool:

It is easy to get overwhelmed by all the work that lies ahead when I see my "Moon Rover" littered all over my drive. :icon_sad:

However, those last two photos I posted are actually a text book example of what can be achieved by "chipping away".

When I bought my Cordite, I really thought the only work required at the back would fitting the rear lights, number plate & petrol cap. :rolleyes:

As you all know, the reality has been very different, so this seems like a good time to reflect on the work required to get this far.

Therefore last night I looked back through my photos and pulled a few together to highlight just what I have managed to achieve...

- - - - - - - - - - - - - - - - - - - - - - - - - - - - - - -

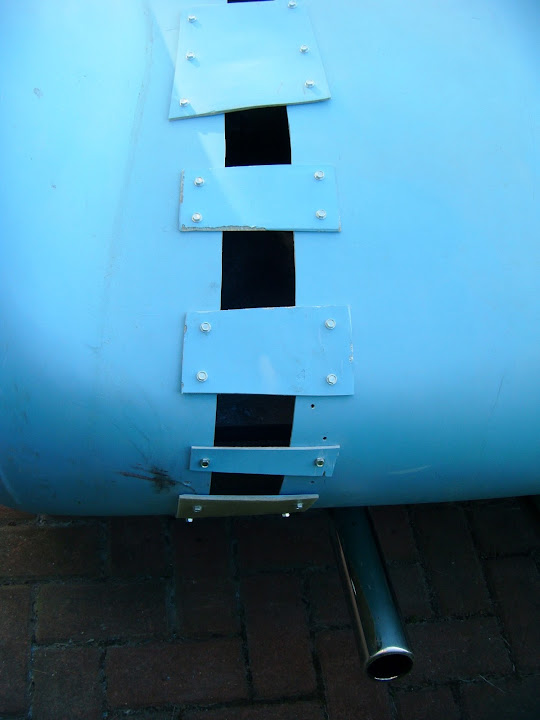
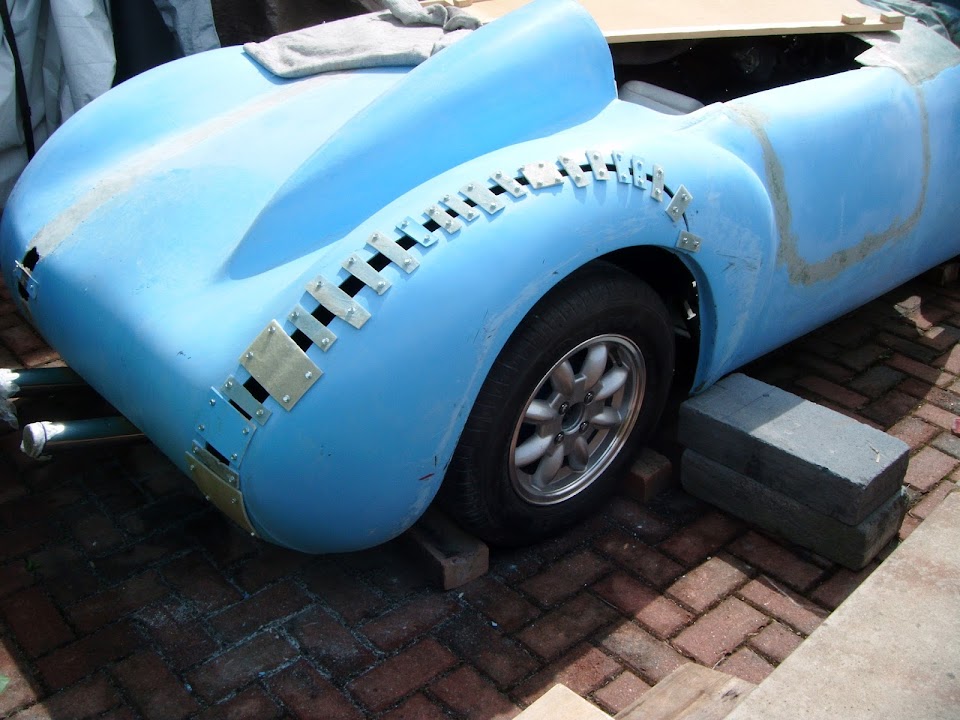
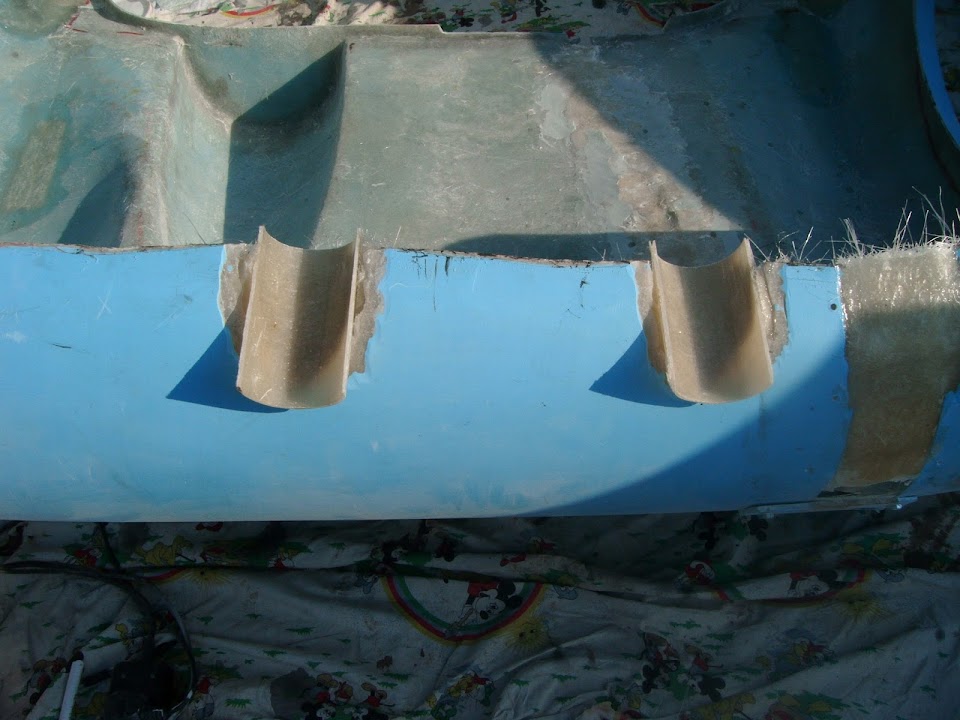
There was the wholesale butchery of both sides of the rear body shell.


Which in turn lead to extra work to get a straight(ish) line along the bottom edge of the body shell.


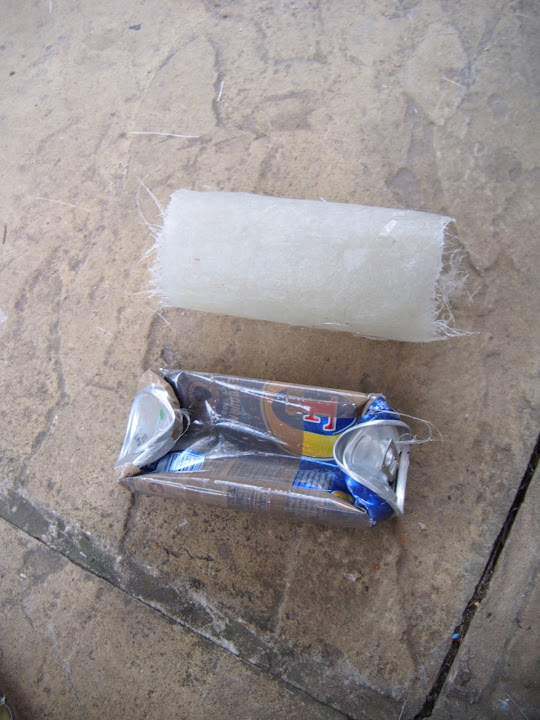
The photo above also shows the tail pipe exits that I made using old beer cans.


Fitting the extra hump AndyP57 sent me was not straight forward either, as it was for the driver's side.


I even had to lower a small section of the body shell next to the hump.


Plus I had to build a new rear cockpit edge & straighten out the faces of the two humps before I reached this stage.


Finally there was the ton of extra work I made myself when I decided to cut out a boot lid in the first place. :rolleyes:


Whilst the above is not even a full list of all the work required, it is a pretty good example of why I love those last two photos. :cool:


- - - - - - - - - - - - - - - - - - - - - - - - - - - - - - -

I know the current spell of wet & windy weather will eventually pass and some sunshine will help me get more done.

It is also clear that if I keep "chipping away" the rest of the build will fall into place eventually.

Cheers, Paul. :)
30 Mar 2015, 8:07am
I take my hat off to you Paul. I couldn't do the 'chipping away', I have to attack the build at 110% time and effort. I would have lost interest after the first month doing it your way! Most days I am spending at least 12 hours in the garage and three or four here in front of the computer researching or keeping abreast of things on here.

You have ended up with a LOT of work which is very time consuming and fiddly. I cringed when I saw your first welds but you have shaped up well if you don't mind me saying so. The only way to learn is to get stuck in and get your hands dirty! You are packing a lifetime of learning skills and techniques into a relatively short time.

I am sure, having got this far you will complete a creditworthy car which you can be proud of. The big thing is to keep up the momentum. If you find a sticking point, go do another aspect of the car then come back to the sticking point with a fresh mind and it will resolve.

Good luck and keep at it!
30 Mar 2015, 8:27am
"I hope when this is all painted British Racing Green it will really look the part. " .............................well all the bits looked good with just grey primer so with the BRG they will really set the rear off ...
keep at it you are really making progress .. ... think you need to get some seam sealer and have a play ... there is brush on and in a tube buy both and see what suits you'll use it up either way
30 Mar 2015, 3:58pm
Wow

I was going to say give yourself a break and look at what you've achieved but I think maybe you being so harsh on yourself is partly why your getting results like the boot opening. If you keep the quality going and don't worry about the time this is going to (does) look amazing. Really well done, first class effort. :first:
P.s I'm gutted I can't make it over to blighty for stoneleigh I really want to see these cars in the flesh, anybody want to buy a house in France http://www.frenchestateagents.com/french-property-for-sale/view/50021DC17/house-for-sale-in-villeneuve-la-comtesse-charente-maritime-poitou-charentes-france. I can't start a build until my house sells so some one help me out please:eusa_pray::ballchain:
30 Mar 2015, 4:40pm
8 Valve Ed - Cheers, I've certainly learned a lot of new skills working on this project.
So hopefully I should be able to complete the remaining jobs a bit quicker now compared to when I first started.

RedRatBike - I am still amazed at the difference seeing things in one colour (even if it is grey) makes.
I already have a tub of brush on seam sealer that I first used during the bulkhead repair work.

ufo17 - Thanks, seeing the overall shape finally coming together is a great boost. :cool:
I am pleased with what I have managed to achieve so far, especially given the circumstances.
My really frustration come from how much work I still have left to do, as it often seems relentless.

The house in France looks great and I would love a big garage / workshop like that to play in.
Good luck with the sale.

- - - - - - - - - - - - - - - - - - - - - - - - - - - - - - -

Little & Often - Part 1:
Although there are a few small jobs left to do on the boot lid, I've started on the 101 little jobs the framework needs.

In no particular order...

Gear Box Cover:
I drilled the 6 horizontal holes required in the bulkhead.


Doing this work reminded me that I hadn't order a new rubber seal for the, so that now on its way from Rimmer Bros.

While looking on line for this seal, I also noticed this parts guide from Canley Classics.


And it would seem that my donor car was missing Part #608563.

Which is why there is currently a gap here:


Unfortunately, this part is no longer available & it seems you now use a section of the other seal I've just ordered.

Anyway, back to the gearbox cover and I can't drill the 5 vertical holes needed until the seal arrives,

Even then I might have a bit of extra work to do, as whilst the cover fits needed along the top edge,


There is no way of getting the bottom corners any closer than this due to the shape of the cover.


But I will worry about that another day when I can see how thick the rubber seal is.

I also tidied up the underside of the holes I drilled in the bulkhead and got some Kurust on them.


I then covered some scrapes on the bottom of the bulkhead with Kurust while I was at it.

I also put some on the fixing brackets for those holes.


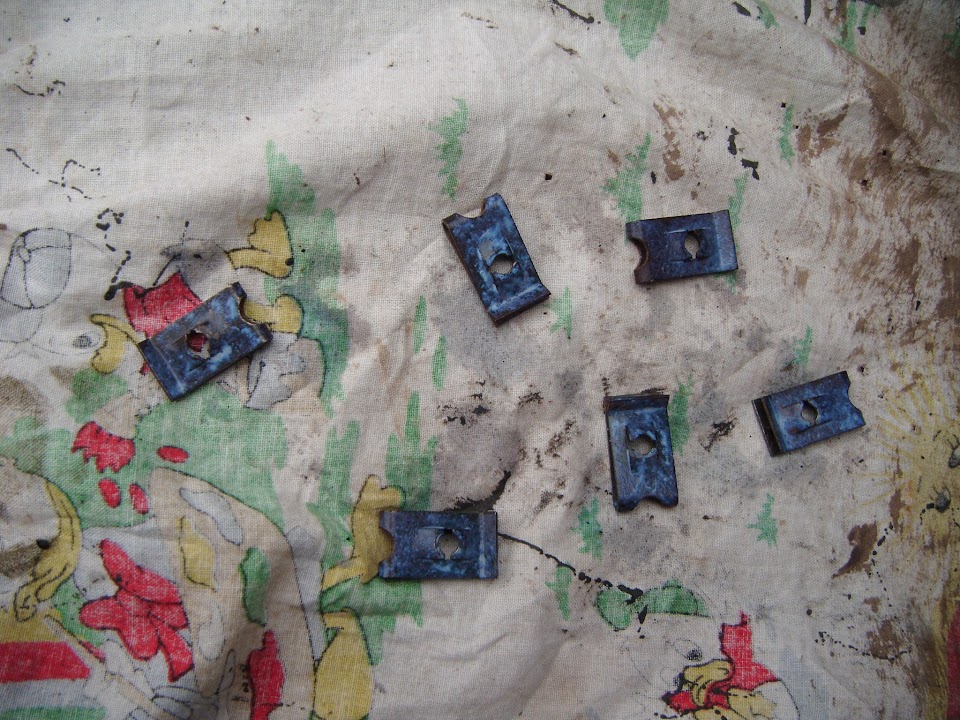
Top Tip:
Don't keep small parts like this on a small corner of a sheet you are mainly using for something else.

I had forgotten all about them until I heard "pinging" sounds when I shook the sheet to start folding it.

Thankfully I was able to find all 6 brackets scattered around the driveway.

- - - - - - - - - - - - - - - - - - - - - - - - - - - - - - -

Hand Brake Panel:
I spent a while staring at this gap trying to work out the best thing to do.


I appreciate 8 Value Ed's point about welding it up the first time, but these parts were never designed to be joined.

I was able to weld the Spitfire hand brake panel from above and keep the original shape.

But I knew this was not going to sit flush on the other side, hence removing this to seal it in the first place.

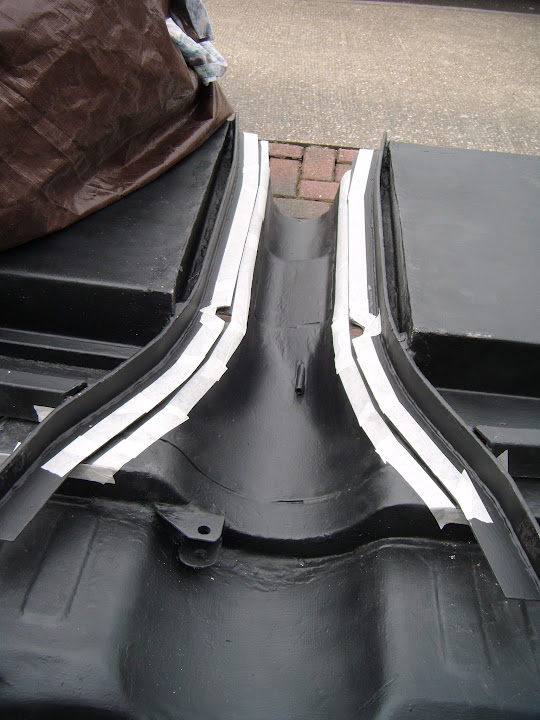
In the end, I decided to use the seam sealer than I already have, so I masked the area off first.


Then used a spatula to really push the sealer into the gap as best I could.


I'll now leave that to dry before trimming the edges and removing the masking tape.

- - - - - - - - - - - - - - - - - - - - - - - - - - - - - - -

Hard Fuel Line:
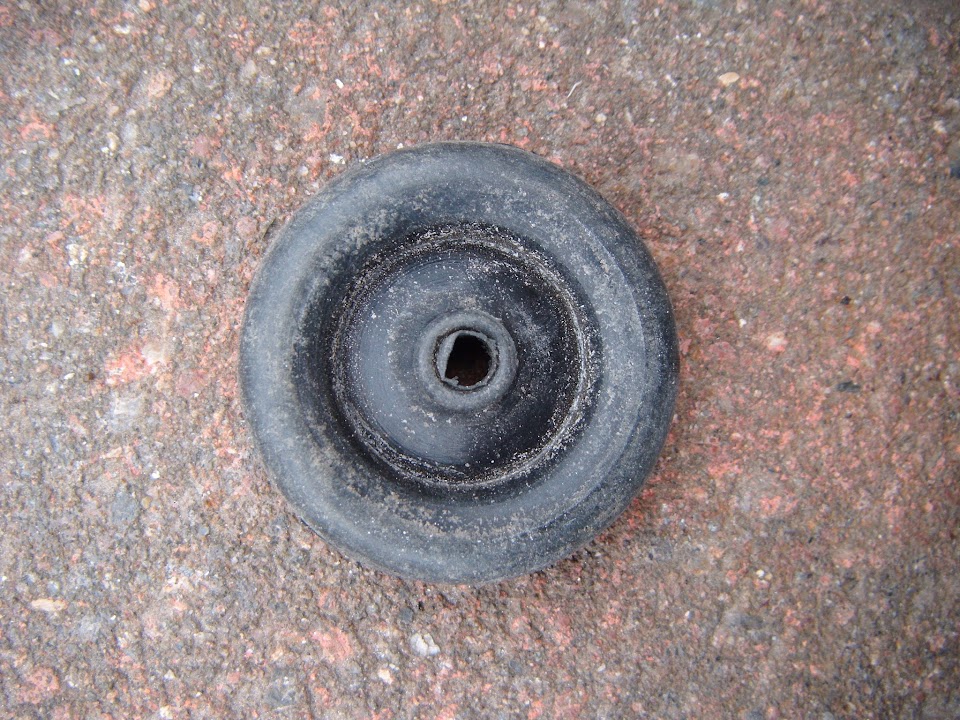
I found a new grommet that will fit snugly around the fuel line.


There is one drain hole left in the boot floor.


Which was just the right size for this grommet.


So now I know what size hole I need to drill here at some point.


- - - - - - - - - - - - - - - - - - - - - - - - - - - - - - -

End of Part 1...