MadaboutKitcars

This is a read-only archive of the old Madabout Kitcars forum. New posts and replies are no longer possible, but every thread is still here to browse and read.

My Photo's

18 Feb 2008, 9:52pm
Nice - the wiring all looks very neat and tidy.

I hope you staunched the bleeding! ;)
18 Feb 2008, 10:31pm
peterux wrote:
my back aches from crawling in the foot well!


ahh pleasant memories. :)

Looking great!
19 Feb 2008, 9:03am
Looking great - in fact better that that! You must be nearly ready for the SVA.

One question about the position of the mirrors. Did you take into account where the tonneau cover will fit? It's just that the mirrors seem very close to the forward edge of the dash top.

I haven't actually seen a Sportster with a tonneau but they are more useful than a full hood sometimes. Does anyone have any pictures?

Cheers

Robin
19 Feb 2008, 9:54am
Looking excellent!

Speaking of hoods, anyone heard if the new style Marlin one's are ready?
19 Feb 2008, 9:50pm
MartinClan wrote:
Looking great - in fact better that that! You must be nearly ready for the SVA.

One question about the position of the mirrors. Did you take into account where the tonneau cover will fit? It's just that the mirrors seem very close to the forward edge of the dash top.

I haven't actually seen a Sportster with a tonneau but they are more useful than a full hood sometimes. Does anyone have any pictures?

Cheers

Robin

ha ha.... I keeping thinking i'm nearly finished and then make another long list of things to do! I still have lot of interior making and fitting to do, not to mention the rad fan?

The mirror positions are a bit of a compromise. I checked with Marlin and inspected lots of photo's. Marlin's instructions were 150mm up from the lower edge of the scuttle which is absolutely spot on.
They recommended 80mm forward from the dashboard edge but iI felt that was a little too far forward. (too far forward and I couldn't see all the nearside mirror from the driving position). The mirror screw holes are 35mm apart so I just put the front screw hole at 80mm from the dashboard edge. The mirror base is large enough so that I can remount them about 20mm further forward, if i need too, when I get the hood.

There are pictures of a car with a tonneau on Patrick's website. (Section: Kit Car Shows page 20)

cheers

Peter
20 Feb 2008, 8:40am
peterux wrote:
The mirror base is large enough so that I can remount them about 20mm further forward, if i need too, when I get the hood.


Ah - a cunning plan. Looking at the pictures it appears the tonneau only covers the rearmost edge of the dash top so I think you will be OK.

Robin
16 Mar 2008, 4:27pm
Oh bugger!

I had one of those 'oh bugger' moments when I took one step forward and two backwards. I was just trail fitting the seatbelt mounting 'eyebolts. Three went in fine but one was very tight due to either weld splash or powder coating in the thread. I stripped the thread of the eye bolt! I tried another old seat belt bolt off the BMW with slots cut in it to clear the powder coating. Stripped all the threads of that one too. (Starting to panic now).

So, I took the whole of my exhasut system off to get to the back of the threaded hole (Luckily?? it is one of the ones welded to the gearbox tunnel).

I got another old BMW bolt and carefully screwed it in from the inside of the tunnel with plenty of oil. It was fine for the first 90% of the thread and then it hit something so hard it strips off the thread of the bolt! I have now had to order a 7/16" UNF tap to re-cut the thread and clear whatever it is stuck in there. I just hope I can get the tap in as there is not much room at the back of the tunnel.
Fed up with no progrees, I turned to an easy job of fitting the rear reflectors, which wasn't quite so easy drilling the holes in the Stainless steel bumpers!

Pictures here.........
http://www.flickr.com/photos/peters-bmwmarlin/

cheers all,

Peter
16 Mar 2008, 5:48pm
Hi Peter

Be very carefull with the tap - I guess you know but they are very brittle. Snap it off in the hole and you really will be b*ggered. Get as good a quality one as you can and use plenty of lubricant. My guess is you have a weld splash in there (good trick!).

Where did you get the reflectors from? They seem to be a very good fit for the bumper.

Robin
16 Mar 2008, 8:57pm
MartinClan wrote:
Hi Peter

Be very carefull with the tap - I guess you know but they are very brittle. Snap it off in the hole and you really will be b*ggered. Get as good a quality one as you can and use plenty of lubricant. My guess is you have a weld splash in there (good trick!).

Where did you get the reflectors from? They seem to be a very good fit for the bumper.

Robin


Thanks for the advice, Robin, I certainly don't want to make it worse!

I would advise anyone to check theirs at a much earlier stage, like when you first get the chassis :smile:

On the reflectors, after many searches, I came across these...
http://cgi.ebay.co.uk/CHROME-RED-2-REFLECTOR-CLASSIC-STYLE-TRIUMPH-AJS-BSA_W0QQitemZ120224848797QQihZ002QQcategoryZ108839QQtcZphotoQQcmdZViewItemQQ_trksidZp1713.m153.l1262
They are nice quality and good value.

Peter
17 Mar 2008, 11:02am
peterux wrote:
I had one of those 'oh bugger' moments when I took one step forward and two backwards.


Oh yes. I had one of those on Sunday. I was running the leads to my coil, and everything was going great until I decided to clip them up. I decided to use the same bolts that where holding the breal pipes in place - except that one of the decided to freeze in the rivnut, and no mater what I did I couldn't get the bolt to back out.

Then the rivnut started to spin, and then decided to pop through the metal. So I had a bolt trapped in a riv nut that was wholly inside one of the cross members. Fudge.

I ended cutting the bolt as close to the chassis as I could with a dremel holding the bloody thing with a pair of pliers, but I couldn't get the rivnut or the end of the bolt out - so it now resides inside the rail. I guess i'm going to get a rattle on the driver's side every time I accelerate or brake now.

peterux wrote:
Fed up with no progrees


I know that feeling. Still no parts from Marlin. :(

Still, those reflectors look good... :)
17 Mar 2008, 5:31pm
GreatOldOne wrote:

I ended cutting the bolt as close to the chassis as I could with a dremel holding the bloody thing with a pair of pliers, but I couldn't get the rivnut or the end of the bolt out - so it now resides inside the rail. I guess i'm going to get a rattle on the driver's side every time I accelerate or brake now.


You're not alone - i managed to snap a drill off and YES - it dropped into the chassis rail where it will remain until the end of time....

Robin
17 Mar 2008, 10:27pm
MartinClan wrote:
Thanks for the link Peter. They do look the business and fit just right on the bumpers. Are they E marked, or are you going to do a temporary alternative for the SVA?


Hi Robin,
No, they are not 'E' marked. After months of searching for E marked refectors I re-read the SVA manual and realised that the only requirement is that the rear refectors are Red and not traingular.
Just in case, I have some cheap oblong stick on ones that are e marked which I might have in my pocket during the SVA test :smile:
18 Mar 2008, 8:34am
peterux wrote:
After months of searching for E marked refectors I re-read the SVA manual and realised that the only requirement is that the rear refectors are Red and not traingular.


Well you learn something every day!. Like you I have been looking for E-marked ones. Good plan about having the cheap stick on ones in reserve in case the SVA man hasn't read the manual either LOL Now where was that link....

Robin
18 Mar 2008, 10:02pm
peterux wrote:
I have now had to order a 7/16" UNF tap to re-cut
the thread and clear whatever it is stuck in there. I just hope I can get the
tap in as there is not much room at the back of the tunnel.

Peter


OK, so my brand new shiny cobolt plated tap arrived in the post today. (It really is a thing of beauty!)
So I popped out to the garage after my tea, lots of oil and 10 mins later the job was done! I now have a nice smoooth thread hole which the eyebolt glides into. Pretty sure it was weld splatter as the debris that came out was hard and metallic.
If only I had the tap last Saturday morning I would have not wasted hours taking off the exhaust system let alone the time to now put it all back together again. But I am relived that I don't have to get a new bush welded in, etc.

I really do think Marlin should run a tap through the bushes after the powder coating and before delivery. Check yours now, but don't force the eyebolt in, as you will strip the thread.

If anybody wants to borrow a nearly new 7/16th UNF tap, just drop me a pm :smile:

Peter
18 Mar 2008, 10:11pm
Nice one Peter, the right tools for the job always make life easier. I don't want to know how much I spent on tools in the last 3 years! :)
22 Mar 2008, 9:23pm
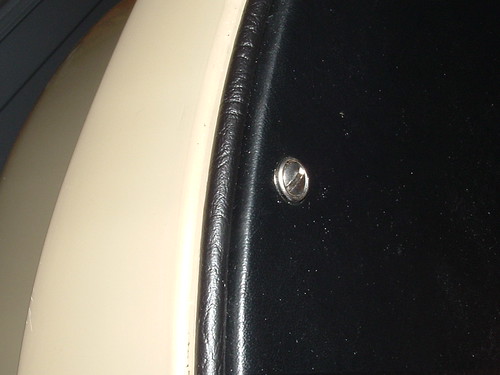
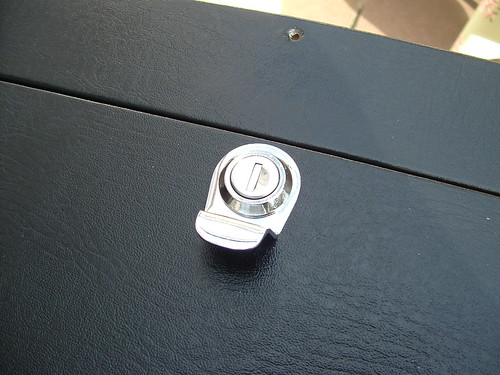
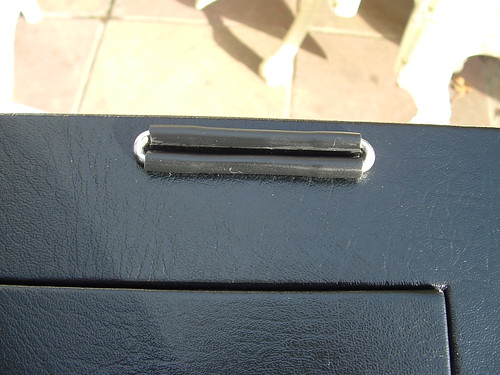
Not much progress today due to weather and other things to do, but I did make some progress on the rear trim yesterday.


and guess what this is made from?


answer and more pictures here.........
http://www.flickr.com/photos/peters-bmwmarlin/
cheers

Peter
23 Mar 2008, 7:56pm
Looking good Peter. I like the wing piping around edge of the trip panels - it finishes it off well.

So how did you persuade that plywood to fit around the radius of the tub?

Robin
24 Mar 2008, 8:46am
MartinClan wrote:
Looking good Peter. I like the wing piping around edge of the trip panels - it finishes it off well.

So how did you persuade that plywood to fit around the radius of the tub?

Robin


Hi Robin,
yes, wing piping makes a great finish. The vinyl covered stuff looks very professional.

I formed two sheets of 4mm ply, glued together round a former. Take a look at my page 5 on my flicker site...........
http://www.flickr.com/photos/peters-bmwmarlin/page5/

cheers

Peter
24 Mar 2008, 7:49pm
peterux wrote:
I formed two sheets of 4mm ply, glued together round a former. Take a look at my page 5 on my flicker site...........
http://www.flickr.com/photos/peters-bmwmarlin/page5/

cheers

Peter


Very good! I hope you kept the former - you could rent it out!

You can't have much left to do now - you must be itching to get it on the road.

Robin
24 Mar 2008, 10:17pm
The rear trim is looking great. All the Ark building you did earlier has paid of big time! :)

MartinClan wrote:
Very good! I hope you kept the former - you could rent it out!


Nice idea - what's the going rate? ;)

However, I'm guessing that with the "precision" parts provided, we'd be better making our own formers that followed the individual tubs....
24 Mar 2008, 10:56pm
:lol: GOO :D

I really like the rear hatch. I've got a big open hole there still. Its one of those things I planned to sort out after SVA. Got a little side tracked though :tape2:
25 Mar 2008, 10:14pm
MartinClan wrote:
Very good! I hope you kept the former - you could rent it out!

You can't have much left to do now - you must be itching to get it on the road.

Robin


The former has been sitting outside my back door, wating for the next trip to the dump. It wasn't made for a production run, but if your serious, i'll save it for you and Jason :smile:

I still have a long list of things on my to do list (do you ever finish??)
The main things are
* refit the exhaust and swap my wishbones
* fit interior carpet, gear and handbrake trims, door capping, etc
* buy and swap my HT leads as the current ones aren't marked (doh!)
* fit seatbelts
* finish switch wiring, speedo, heater control and tidyup wiring under the dash
* final seat fitting
* final dashboard fitting
* steering and suspension set up
* fit rubber, nut covers and plastic edging on everything
etc, etc, etc

all the little things are taking ages to finish

Peter
26 Mar 2008, 8:26pm
peterux wrote:
The former has been sitting outside my back door, wating for the next trip to the dump. It wasn't made for a production run, but if your serious, i'll save it for you and Jason :smile:


If it's serviceable then please save it. I guess the fiberglass tub moulding is the same for all of us and it looks like you made the mould well enough so that it will be good for another couple of runs :smile:

At least you only have the small jobs left. Would now be a good time to book the SVA? - nothing like a deadline as an incentive :eyebrows:

I still have some big jobs to do (boot floor, seats, seatbelt support bar, seatbelts, dashboard, wings, wishbones etc etc etc) and some small items to buy (looks like a visit to Stoneleigh will be essential) plus the instruments - whilst they are small they are big £££'s.

Regards, Robin
26 Mar 2008, 9:44pm
peterux wrote:
but if your serious, i'll save it for you and Jason :smile:


Yes please - Robin will need it before I do though. It'll be a while before I get to fit the rear tub & have to think about closure panels, based on current experience. :)

Ah well. At least my propshaft is now in properly - As you said, the flanges sit fine once you tighten the bolts up.