MadaboutKitcars

This is a read-only archive of the old Madabout Kitcars forum. New posts and replies are no longer possible, but every thread is still here to browse and read.

Mick O'Malley's Moss Monaco

24 Oct 2017, 6:34am
Steering Column Brace

Yesterday, after a few days off, I pitched in with locating the top end of the steering column. I'd purchased a 500mm length of 37x37x3mm angle in ally in anticipation of this job, and offered it up to the bracket on the column, clamping it in position with mole grips. Making sure that it was parallel with the bottom of the dash, I marked the end which would mate with the body with its profile in both planes. I used a pencil taped to a small block of wood to bridge the gap and hacksawed off the scrap.
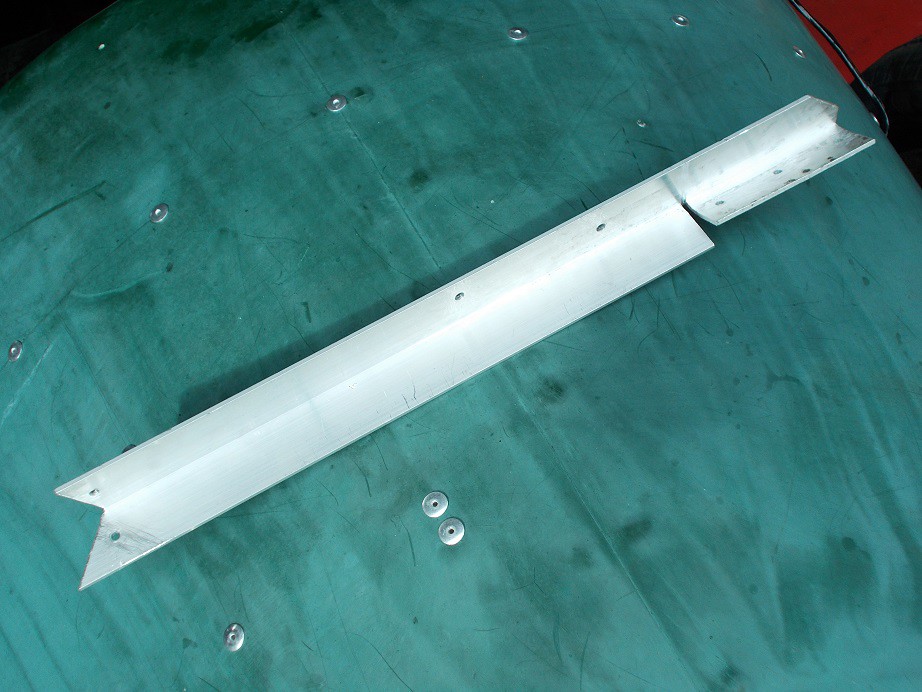


With the angle mole-gripped in position, its newly cut end snugly against the inside of the body, I marked through the two holes in the column bracket, removed the angle, drilled 6mm holes and bolted it back.

I then made two locating angle brackets, firstly with card, then some of the ally strip I'd used to locate the petrol tank, to fix the RH free end to the body. I clamped these one at a time to the angle, again with the mini mole grips, and marked where to drill it for M5 bolts. After rivetting and bolting it in position with the column still supported by the wood block, I turned my attention to the scuttle brace end.


First job here was to cut a suitable slot in the angle and bend back the side which would mate with the brace. It took a few goes before I was happy with it.

I then cut a small slot in the return on the brace to accommodate the front edge of the unbent end of the angle. With everything sitting nicely I could then mark and drill the 5mm holes to bolt the two together. I removed the wood block and made a realistic attempt at moving the new attachments - they were solid as rock. The only blot was that where the column comes through the slot in the dash, a gap of about 2mm had been overlooked somewhere in the proceedings :rolleyes:. I can easily rectify this with a similar thickness ally spacer between the brace and the column. The ugly protruding end of the angle will be much less obtrusive once it's been painted matt black, the eyes of interested parties hopefully being drawn to the dash.
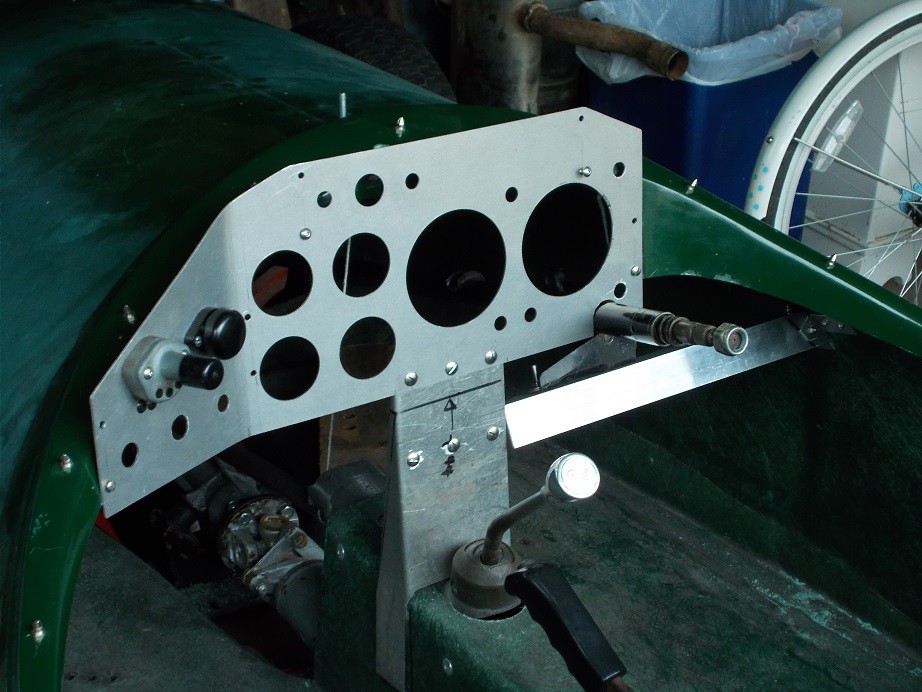


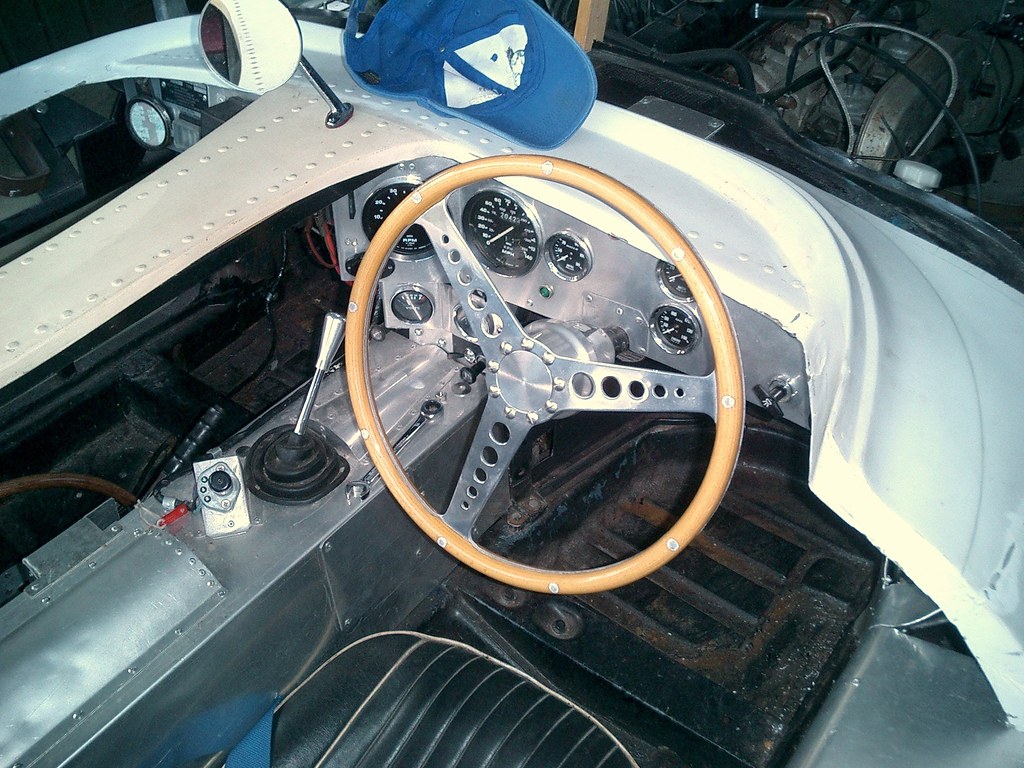
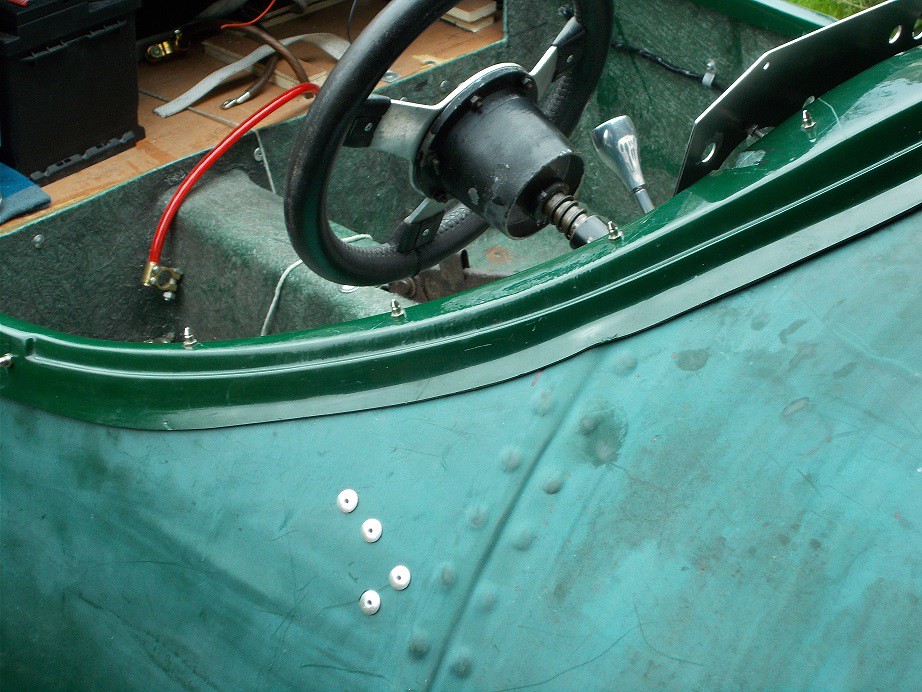
I dug out the steering wheel which came with the project, popped it on, and wormed into the cockpit. The wheel's boss is very deep, locating it far too close, so a replacement will have to be found. I made a few brmming noises, extricated myself and packed everything away, having once again decided to quit whilst ahead :). Apologies for the pictures having been taken out of sequence, and for the crap one of the body brackets. This last picture shows both the depth of the boss and the heads of the rivets attaching the aforementioned angle brackets.


Regards, Mick
24 Oct 2017, 8:59am
Looking good, my only concern would be the sharp edges of the metal dash, could do a lot of damage in an accident.
Could you tap them over to produce a small radius?
25 Oct 2017, 4:39am
A Short Day

Jaguartvr wrote:
Looking good, my only concern would be the sharp edges of the metal dash, could do a lot of damage in an accident.
Could you tap them over to produce a small radius?
I'm not sure quite how to finish the edges. They're not sharp as I'd gently profiled them with a fine file. I think maybe I'll use some small section transparent split edging strip which would be quite unobtrusive.

Yesterday I had hoped to make a start on fitting my stainless steel exhaust, kindly delivered last week by Spitfire Steve. I don't have any of the mounting gubbins so some Ebaying or breaker's yarding would have been involved. However, as it was drizzling and I wanted to plonk the body on the grass to access the chassis, this had to be postponed. Maybe today as the forecast is good?

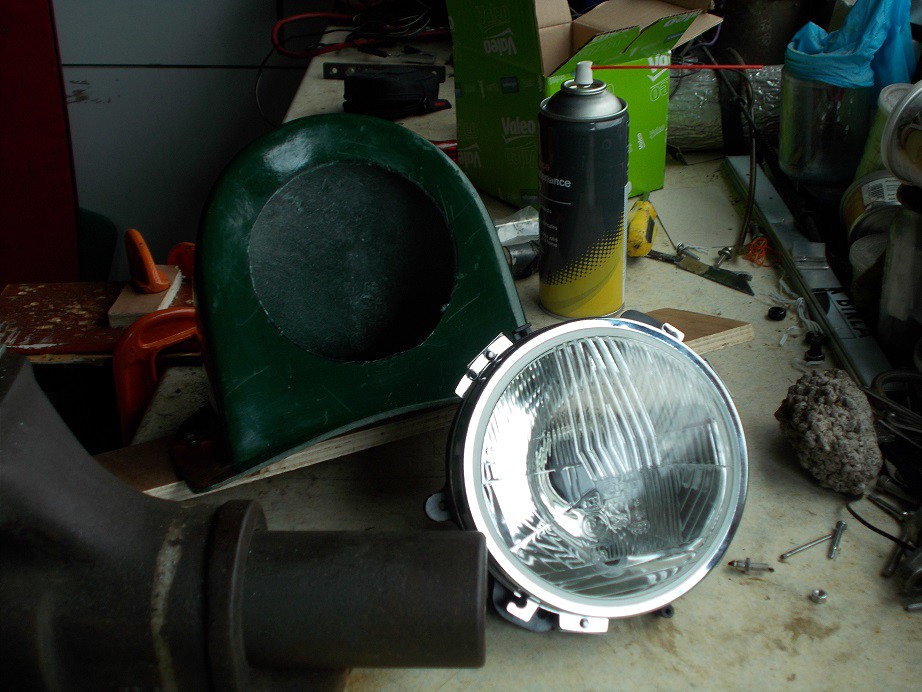
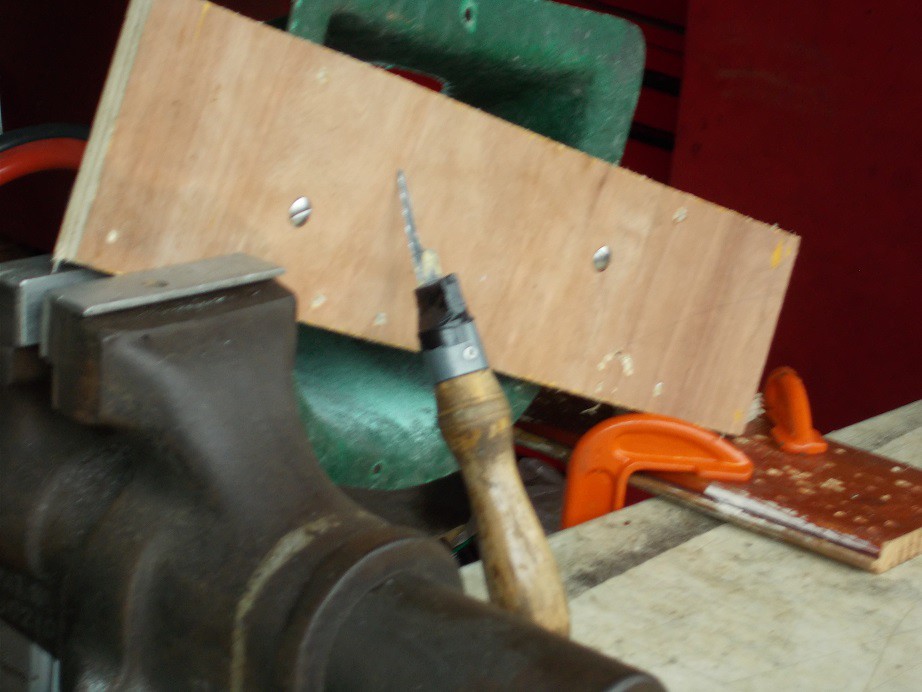
A job I've been putting off is cutting the headlamp holes in the GRP mounting pods, so I decided to tackle that. The first hurdle was how to fix the pod securely to the bench? I drilled matching holes in one of my many ply off-cuts and bolted the pod to it with big washers to spread the load on the GRP. I clamped it in the vice with its free end supported on a piece of scrap wood G-cramped to the bench - it was suitably rigid. Apologies again for crap photo'.


Next problem was what to cut it with? I considered the 'ring of holes' method but discarded that idea because of the amount of filing needed to clean the edges. My solution was to make a super fine padsaw blade by disc cutting a short length of hacksaw blade to size. I drilled three starter holes 120° apart in the marked face of the pod and set to with my new tool. It must have taken a good hour of patient work but I was delighted with the result. I assembled one of my 5¾" headlights and offered it up. It slotted into its new home perfectly, all that was now needed were the holes for the mounting and adjustment screws. My ex-neighbour turned up at this juncture for a coffee and a chin wag and, after he'd gone, being full of cold, I called it a day.


Regards, Mick
8 Nov 2017, 3:59pm
I really like your dashboard - and the rest of the car!
I may have missed it, but what thickness / gauge of aluminium are you using for the dash? And what grade?
It is a balance between too thick (difficult to work, too heavy, difficult to install) and too thin (flexes when switches are used, etc).
Thanks
9 Nov 2017, 6:52am
Dash Saga

softfeet wrote:
I really like your dashboard - and the rest of the car!
I may have missed it, but what thickness / gauge of aluminium are you using for the dash? And what grade?
It is a balance between too thick (difficult to work, too heavy, difficult to install) and too thin (flexes when switches are used, etc).
Thanks
The alli from which my dash is cut was supplied by a friend who has a workshop. I sent him my own blank with the centres of all the holes marked with a punch with a list of the required diameters. Top bloke that he is, he cut it from a new 3mm blank of unknown (to me) grade. £27 all in!

I had considered doing it all myself, but the problems I'd encountered with my A352 dash (also 3mm unknown grade), especially the mammoth fag of cutting the two 4" holes, made up my mind.


Picture courtesy of Scottie22 :)

At 3mm thick both dashboards are nice and rigid, especially once the clocks are fitted. As long as the fixings to the body are sound (and I'm a big fan of scuttle braces!) 3mm of any reasonably stiff grade will do the job.

Regards, Mick
9 Nov 2017, 11:02am
Thanks very much for the very helpful and comprehensive answer.
23 Nov 2017, 8:08am
Progress? Not a Lot

I haven't been down the cave much for the best part of a month now, a combination of weather, health and lack of motivation.

Yesterday morning my daily 'Kit Car' search on Ebay brought up this. Lightweight frame and body with one of those bewilderingly popular overweight and huge truck engines doesn't strike me as very good combination. Be interesting to see if anyone's daft enough to shell out two and a half grand for it, especially as it'll need IVA. No mate, just clap the Cortina plates on, you'll be OK :rolleyes:

Regards, Mick
23 Nov 2017, 8:16am
Mick O'Malley wrote:

Yesterday morning my daily 'Kit Car' search on Ebay brought up this. Lightweight frame and body with one of those bewilderingly popular overweight and huge truck engines doesn't strike me as very good combination. Be interesting to see if anyone's daft enough to shell out two and a half grand for it, especially as it'll need IVA. No mate, just clap the Cortina plates on, you'll be OK :rolleyes:

Regards, Mick


Yes I rang that joker a couple years ago inquiring about a NG kit car incorrectly registered as a MGB IIRC , said if he got it correctly registered ' as he said it would be easy ! ' I would come over and look at it.

He said he had never been more insulted in his life and put the phone down on me .....

Shame really as I could have done a much better job of insulting him if I realised that was needed when trying to buy a car from him !

regards Paul
23 Nov 2017, 7:34pm
Monaco race car ... lightweight race chassis ....cortina logbook ....it all sounds so perfect
25 Nov 2017, 6:25am
What a Joker!

I belong to the Moss Owners' Facebook Group: the following post appeared on my feed. Says it all, except 'Caveat Emptor' should maybe have been in red capitals!

[COLOR="GREEN"]'As the original owner of the Yellow Monaco I have to say I laughed when I saw this. I sold the car via eBay to this seller last Saturday for £500 which I was happy to get knowing how difficult it would now be to get it on the road. The advert is (to be diplomatic) riddled with inaccuracies. I ordered it from Moss Cars at Store Street in Sheffield in March 1985 although by the time I collected it in April they had moved to a factory unit on the outskirts of the city. Therefore I owned it 32 years 7 months from April 1985, not 34 years from 1984. Lightweight racing chassis? It has a ladder chassis designed to accept Ford mechanicals and a longer bodyshell than the Spitfire based version so is more likely to be heavier. Lighter and stronger yellow gel coat body? Being longer than the Spitfire version it'll be heavier, nothing special about it other than the colour which was a special order (I believe it to be the only one in that colour). Engine was bog standard out of a 1973 2 litre Cortina, which last ran about 20 years ago and hadn't even been cranked over by hand in the intervening years. No fancy pistons, crank or cam and only ever had a single carb which was still with the car on Saturday. Judging by the photos the engine in it is the one it was sold with a few days ago. For someone who claims to have had 3 Monacos he seemed a little unsure of where the headlamp pods were supposed to go. Make of all this what you will but as ever caveat emptor!'[/COLOR]

Regards, Mick
25 Nov 2017, 8:23am
Hmm! There does appear to be quite a bit of misleading information in that listing! I also never take any notice of anyone who over-uses exclamation marks!!!

CPS wouldn't consider it fraudulent though - Lighter and stronger yellow gelcoat body? Yes, Your Honour, these were usually moulded in dark green or dark blue and yellow is a much lighter and stronger colour than either of those...

As for the engine mods, does the 'Night Ridden' crank come with a row of red led's that sweep from side to side across the front grille?
25 Nov 2017, 9:39am
This bloke has also bought a few Scimitars and written misleading adverts with huge price hikes. Everyone’s entitled to make a living but his attitude stinks.
4 Dec 2017, 9:09am
Great paint job on it, looks just like aluminium. It's the sort of finish that I think Andy was after on his 250 (EricHolmes) build.
Think the headlights and mountings look far nicer than the standard Moss lights.
Only thing against it are the rivets, they look as if they have come off one of the Titanic's boilers, I think it would be better to sand them out and fit proper fake smaller
rivets in their place.
It really does look like Dick Dastardly's car with the rear hump, very cool.
4 Dec 2017, 9:31am
I like my standard 5.75" pods, I think they enhance the overall quirkiness. The builder has used the same stop/tail lamps, reflectors, style of number plate and light as me. A man of impeccable taste :icon_wink:.

All four indicators are too far from the sides to be strictly legal, and the view in that bullet mirror will be more or less useless. A few big [COLOR='RED']722[/COLOR]s wouldn't look too shabby............

I still love it, though!

Regards, Mick)
4 Dec 2017, 2:50pm
Progress (sort of) at last.

After six weeks or so of coughing, spluttering, looking at the rain/frost/wind and wondering why my get-up-and-go had got up and gone, I at last ventured down to the cave this morning and pitched in.

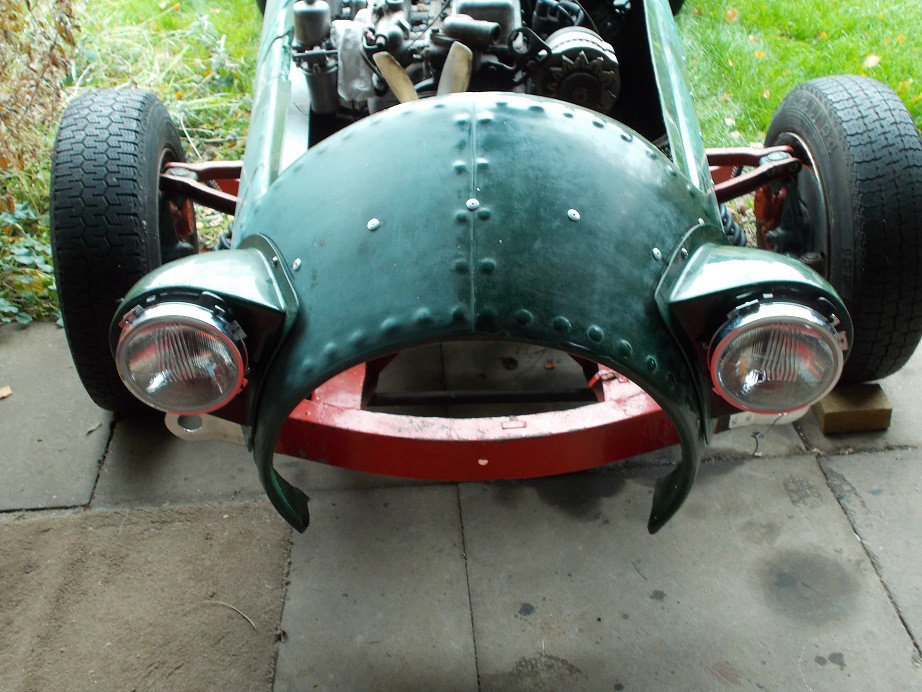
First job was to drill the long awaited headlamp bowl mounting holes in the GRP pods. This involved levelling the car with my spirit level on the front cross member with one side jacked up to get the bubble central, then using a plumb line to find and mark the vertical. I'd already marked the exact tops of the bowls so drilling was a matter of holding them with the marks aligned. I then temporarily mounted them for the picture. The parallax effect makes them look a little pissed but they're spot on.


My ex-neighbour turned up at this juncture for a coffee and a chin wag so it was a couple of hours before I ventured back down to the cave. I decided to fabricate a steady bracket for my reversing spot lamp, as I'm certain it would go seriously AWOL if I relied solely on the bottom mounting. I made it from cardboard and transferred the holes and bends to a spare length of the ally strip I'd used for the fuel tank mounting straps. I then pop-riveted it to the back of the lamp housing and after a couple of small adjustments to the bends, it sat perfectly. The mounting hole in the body will have to wait as access for the inside nuts needs a spare pair of hands, unavailable today.


I included the back of the lens in the shot to show my home-made LED bulb which will ensure minimal load on the lengthy supply cable.

That was it for the day.

Regards, Mick
4 Dec 2017, 5:11pm
Mick O'Malley wrote:
I like my standard 5.75" pods, I think they enhance the overall quirkiness. The builder has used the same stop/tail lamps, reflectors, style of number plate and light as me. A man of impeccable taste :icon_wink:.

All four indicators are too far from the sides to be strictly legal, and the view in that bullet mirror will be more or less useless. A few big [COLOR='RED']722[/COLOR]s wouldn't look too shabby............

I still love it, though!

Regards, Mick)


I've always liked the Monaco as it's totally bonkers and silver really suits it.

The indicators look fine to me, so long as they're at least 500mm apart, a minimum of 350mm from the ground and can be seen front and rear they're perfectly legal on a pre-'86 car.

http://www.legislation.gov.uk/uksi/1989/1796/schedule/7/made
14 Dec 2017, 8:23am
Complete Non-Sequitur

I didn't know where else to put this, which came up on my FB 'Historic Lotus Register Group' feed. It's a Type 14 Elite body on a Spitfire chassis. Full marks to the builder for fitting a Triumph badge!


Regards, Mick
15 Jan 2018, 7:08am
Hoping for a Monaco Summer

I really hope to get the Monaco on the road this summer.

Rumours that I have an ulterior motive should be ignored.

Regards, Mick

15 Jan 2018, 7:15am
Well, at least you know you'll be able to fit them all in if Bananarama ever ask for a lift home from the pub.
23 Jan 2018, 10:32pm
beautiful one(s) !!!
24 Jan 2018, 10:48pm
I see the 'Silver Arrow was withdrawn. Anything to do with the 9K price?
25 Jan 2018, 8:24am
Non!

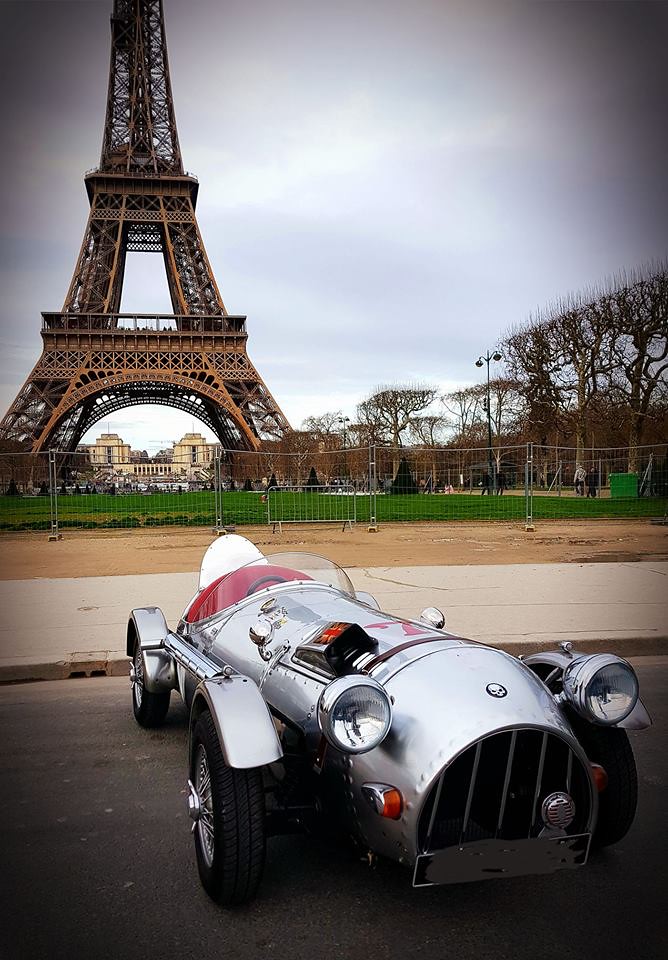
It's gone to France, I believe, where there's a strong Monaco following. My suspicions were aroused by this appearing on my FB Moss Owners' Club feed........

Lucky guy!

25 Jan 2018, 11:58am
Very nice. The Monaco has to be one of the icons of the kit car world at the sensible end of pricing. I love your build.