MadaboutKitcars

This is a read-only archive of the old Madabout Kitcars forum. New posts and replies are no longer possible, but every thread is still here to browse and read.

Another Cordite Is Born ...

22 Nov 2012, 9:23pm
Lowered Floor Pans - More Thoughts & Photos...
Finally got a chance to take a few more photos of the passenger floor in place.
Although you'll have to excuse the photos as taking them at night is hardly ideal. :rolleyes:

The space available inside the frame work means there is a limit to where the lowered section will fit.
I have started with the front edge of the lowered section at the front edge of the frame work.


So clearly the floor can not go much further forward than this, but it could be moved backwards.
However, unless I get different seats, moving the floor backwards wouldn't help me much.
I'd also want to leave enough space for access to the radius arm mounting bracket.


Based on my initial seat fitting test, I'd say the lowered section could do with moving inwards a bit.
As this would allow the top, outside edge of the seat to clear the cockpit bodywork.
Towards the front of the floor, there looks like there is room to move inwards.


But at the rear of the floor, the curve of the frame will stop the floor moving any further inwards. :icon_sad:


The other thing that occurs to me is that if the seat rails will not work, I'll have to remove them.
As I will not be able to bolt them in place if I can't get the seats out of the way of the mounting points.
This will actually lower the seat by the height of the rails, as it would be bolted directly to the floor.
This in turn would mean the seat would probably clear the bodywork even if it stayed where it was.

So I should be able to get both the passenger side floor & seat fitted in a way that works well. :cool:
But before I confirm that, I need to test fit my seat belts to ensure they work around the seat position.

My main concern is the floor for the driver's side, as I would like the seat to remain adjustable.
I think it is the small vertical "lip" where the floor starts to lower that is causing the problem.
My initial thoughts are to remove this lip & extend the slope to meet the horizontal floor level.
This should provide a straight run for the seat adjustment handle and the runners themselves to work.

I just need to check how much extra space extending the slope in this way would take up.
As the start of this extended slope would be the first part of the floor to hit the front frame rail.
So the rear of the existing slope would effectively be pushed back towards the rear cockpit.

See another of my "not so technical" drawings...


So clearly a bit of thinking still required, as I do want to get the driver's side right.

Welding Lessons:
Met my mate for a beer last night and had a brief chat about when he would be free to teach me to weld.
He has some time off work over Christmas / New Years, so it looks like we will try to get together then. :)

In the mean time I will need to order some of the same box section tubing used in the Cordite frame.
Some of this will be incorporated into the existing frame and some will be to practise my welding on.
My mate will order all the parts he needs to bring his welding gar back to working order & I'll refund him.
He also has small sections of "left over" metal which might be handy for the odd bracket, or bracing.

I'm really looking forward to this, as I think it will remove some of my fears about work I know needs doing.
It will also mark the step up from assembling my kit, to building my car, something Mr T has mentioned.
Whilst I never intended to touch my chassis, I am kind of jealous of those builders who have restored theirs. :cool:

Shopping Update:
I decided to replace the rubber seals from my donor I had for my headlight shells as they had seen better days.
Given the time I spend restoring all the damage done by water getting past them in the past, it made sense.
Got a new pair from Ebay with outstanding service, ordered them one afternoon & they arrived the next day.


http://www.ebay.co.uk/itm/271019295444?ssPageName=STRK:MEWNX:IT&_trksid=p3984.m1497.l2649

Until next time, take care, Paul. :)

Replies:
DaveCymru - Cheers, I'll re-read your build thread to see how you squared the corners.
It's funny how certain things make more sense when you reach the same part of your own build.

25 Nov 2012, 7:07pm
Some of the last two weekends has been taking up with shopping not involving car parts as...

Christmas is coming...
We traditionally host the family Christmas day meal at our house & this will be for at least 10 this year.
Obviously there is quite a bit of preparation involved with this and the dining room has to look the part.
So my recent bad habit of leaving car parts, tools, etc. in there will have to stop for the festive period. :rolleyes:


But before I could clear the dining room, I had to tackle the summer house which was even worse...


There was also car stuff in the utility room (see story before).

So a few hours of tidying up left the dining & utility rooms clear & the summer house looking like this...


Engine Re-Start:
I was hoping to re-connect a few parts so I could attempt to re-start the engine today.
However I lost some time to the tidy up & then I had to log in remotely & do some work! :icon_sad:
Unfortunately, the run up to Christmas is my busiest time in the office too.

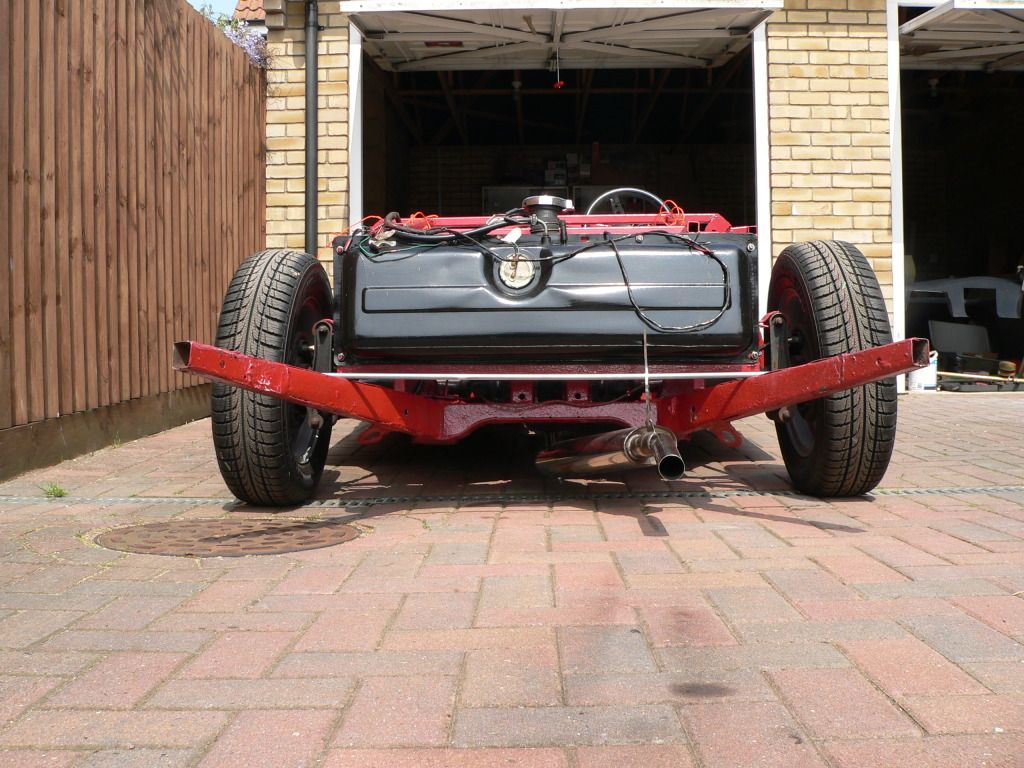
Thankfully I was able to "tidy up" my twin silencers by temporarily pushing them back into place.
Which was one of the jobs I needed to do before the engine re-start anyway.
( Working out how to mount these permanently is on my beard scratching list. )

I must say the length of pipe sticking out at the back is growing on me.
So I might just stick to KISS principles and not shorten the exhaust at all.


Domestic Appliances Threaten Build... :rolleyes:
As if I didn't have enough problems with the weather, our white goods are out to get me too!

Last weekend it was the washing machine which wasn't draining after a wash cycle.
After bailing out the water in the drum, I found the filter was seriously blocked.
It needed to be unclogged in two places, but the final bit sent water flooding everywhere. :icon_evil:

Unfortunately, all my exterior plywood was temporarily stacked in the utility room.
So in the best heroic builder tradition I put myself between the water and the wood.
By the time my wife arrived with some more newspaper & towels my clothes were soaked...
...but the wood was dry. :cool:

Then today, just after I'd moved all the plywood down to the summer house, the drier went.
Another blockage leading to more water everywhere and this time some skin off my finger too.
Still there are some brownie points in the bag for keep the washing machine & drier in use. :)

Until next time, take care, Paul. :)
26 Nov 2012, 8:53am
Work and domestic commitments are all part of the trials and tribulations of Sammio ownership, welcome to the club. :ballchain:

As for the exhaust mounting issue, I welded a length of 1" box section between the boot outriggers and bolted a short rubber strap hanger to it. I don't appear to have taken any photos of the finished version, but here's the early mock up using an old expanding curtain rail rod I had laying around in the garage -


Oh, and it didn't affect the rebody registration process as the reg's allow for brackets etc to be added (and the nice chap at Peterborough didn't actually look under the back end).

Good luck getting your pipes where you want them :)
26 Nov 2012, 8:56am
Trouble with the Cordite is that the Spitfire doesn't have rear outriggers so there's nothing to hang the bar on (I've done similar to my Spyder). I'm fairly close to this problem myself so when I figure a solution I'll be sure to post photos.
26 Nov 2012, 7:40pm
Mister Towed & Andy - Thanks for the replies.

As Andy said there is currently thin air where the Heralds have outriggers.

This is the best photo I have to hand...


You can just see the string holding the exhaust pipes in place (temporarily :rolleyes:).

I've pushed the silencers over those pipes and the mounting brackets are just inside the rear of the body shell.
( There were originally bolted into the Spitfire's boot floor. )

So I'd be interested to see how you have over come this Andy.

Cheers, Paul. :)
27 Nov 2012, 9:52am
Do the Herald boot outriggers fit the Spitfire chassis?

The back end looks pretty much the same to me apart from the outriggers - a bit like the difference between a tailed cat and a Manx.

They're under £25 each from Canley Classics -

http://www.canleyclassics.com/?xhtml=xhtml/diagram/vitessechassis.html&xhtmlcatalogue=xhtml/catalogue/vitesse.html&category=chassis&xsl=diagram.xsl

£50 for an exhaust hanger is a bit steep though, so I'd be inclined to weld some lengths of 1" box section steel in their place with a cross bar to hang the exhaust from. You might even get away with a single length of box section welded on pointing straight backwards above the exhaust.

Good luck finding a solution. :biggrin:
27 Nov 2012, 9:59am
Just noticed this diagram of the Spitfire 1500 chassis on one of Paul L's posts. Hope it copies across...


Are they stubby boot outriggers on the back? I don't seem to be able to find them on Canley's web site though.
27 Nov 2012, 1:42pm
Mister Towed wrote:
Are they stubby boot outriggers on the back? I don't seem to be able to find them on Canley's web site though.


Only fitted for later North American cars I think.
27 Nov 2012, 7:10pm
Oops, looks like I took a photo of the wrong page of the Spitfire manual. :rolleyes:

Mind you, I did the same thing when I initially photo copied the wrong wiring diagram. :mmph:

I was also considering welding on some box section support (following my lessons at Christmas).

Another solution was taken by DonnySoutherner who re-used a section of bodywork.
The silencers would then simply bolt back in their original position.
(With the added benefit of inner rear arches too.)


So, lots to think about, cheers, Paul. :)
1 Dec 2012, 1:04pm
Frosty The Sammio...


Well I guess it makes a change to remove the ice from the cover instead of the water. :rolleyes:


"[COLOR="Blue"]Cold in the garage my ar$e.[/COLOR]" :icon_wink:

Christmas Opening Hours:
I've spent the morning shopping for Christmas pressies & stocking up for our Christmas day meal.
So it is clear that I am going to have even less time available than usual over the next few weeks.

But Christmas is one of those times where the family comes first and car building comes second.
I have no problem with that at all and will lower my car building expectations accordingly.

There is only one job that I would really like to get done before Christmas and that is start the engine.
As it has now been 4 months since I had it running and I had hoped to do this last weekend.
We have a family trip to the cinema this afternoon ("Nativity 2") so this might have to wait until Sunday.

[COLOR="Red"]In the mean time, here is something I wrote earlier...[/COLOR]

Door Hinges:
Ages ago I posted a question on the "Ask Mike" thread (here) about fitting the door hinges.
But I keep forgetting to go through his very helpful answers here....

mikmiglia wrote:
... You need to look on the inside of the hinges as they are sided, and top and bottom. As you look the shape of the hinge, they camber from top to bottom. Basically to fit a lightly curved door, I found the flatter area the better. Get yourself a spirit level and mark a straight and level line across the door to a panel. Then work the next hinge position of that, so basically the hinges work together without fighting each other...


The hinges didn't come with any instructions, but after reading the above I had another look.
Sure enough, the insides of the hinges were marked left & right + top & bottom (RHT, RHB, etc.).
I'm pretty sure I would have missed this completely as they all looked the same to me. :rolleyes:


Mike also made another good point about access requirements...

mikmiglia wrote:
... maybe cut an access hatch, at the end of the day, the car is fibreglass and things can come loose and at least you can re-tighten the bolts if needed...


I was planning to follow the Spyder tradition of using simple plywood panels around the cockpit sides.
I understood that bonding / fibre glassing the panels in place was key to strengthening the whole car.
So clearly making the whole panels removable for access would kind of defeat the object a bit.

However, the hinge bolts will be in awkward to reach places anyway (behind frame & inside door inner skin).
So I may need to put quite sizeable 'removable' sections in the fixed panelling to ensure they can be reached.
You can just about make out the bolts in the doors in this photo.


And this was my earlier mock up of where the hinges would go through my own doors.


One option would be to cut through the inner door skin to leave just the outer skin where the bolts are.
Then build up and box in the rest of the door to make that a single solid item.
See another of my poor sketches below, which would leave the hinge bolts permanently on view.


I also know AndyP57 has been working on fitting the doors to his Cordite Demonstrator.
I look forward to seeing what he has done, but fear he'll have to cut holes in his lovely alloy panels. :icon_sad:


If the worst comes to the worst, I can always go for my drastic, last resort, 'non functioning' doors option.
Thankfully I don't have to make a final decision just yet, so there is more beard scratching time available.

Hopefully I'll be back again tomorrow, cheers, Paul. :)
2 Dec 2012, 6:35pm
Engine Re-Start - Attempt #1:

Re-connecting the fuel supply was a little bit harder with the body shell sitting in place.
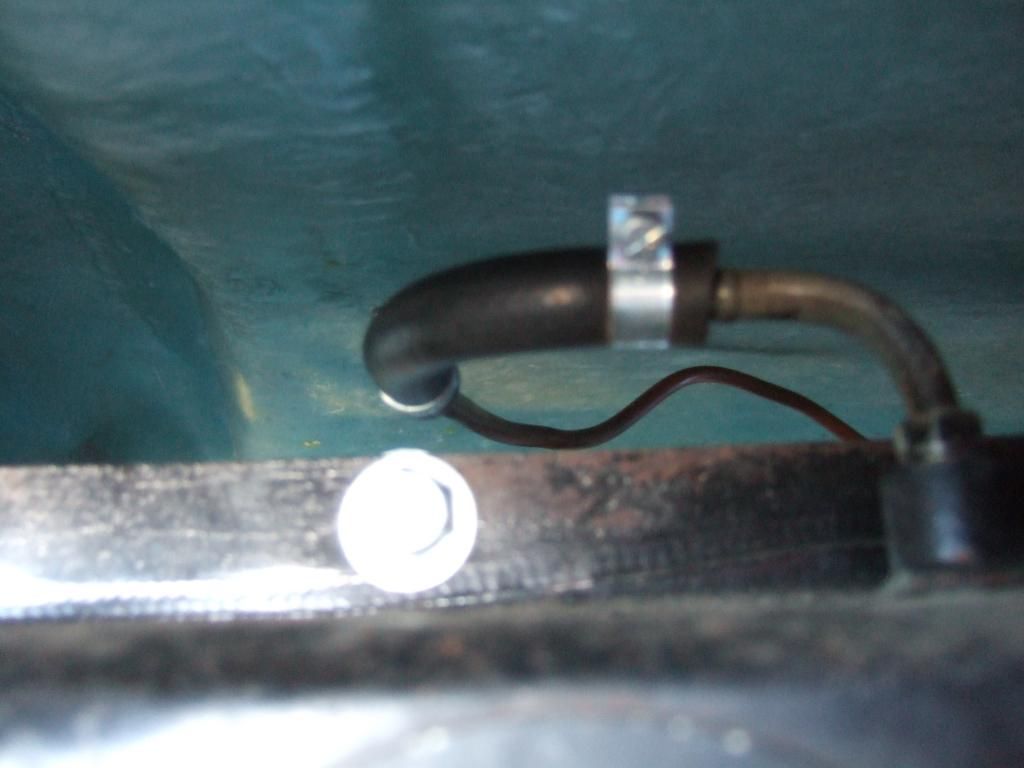
I didn't want to re-route the hard fuel line until I'd worked out what I was doing in the rear of the car.
So for now it was just a temporary hose pipe join between the tank & fuel line to get me going.
I also remembered to remove the protective cover I had stuck over the tank's fuel filler hole.


I've had this 2nd hand Spitfire expansion tank for a while now (it was missing from my donor).
Believe it, or not, this is what it looks like after I've spent some time cleaning it!


I'd also bought a grommet for the top of the cap, based on forum comments.


Even I could managed the simple job of cutting a hole in it for the pipe to go through. :rolleyes:


This gives a nice seal between the pipe and the hole in the cap. :cool:


Then I connected it to the radiator and topped up the water and anti-freeze.
( I will use the bottle mounting bracket before I try to drive the car anywhere. )


I've still need to connect the Megane expansion tank to the heater hoses, but that can wait for now.
I would like to upgrade the radiator when I know more about how much space I've have under the bonnet.

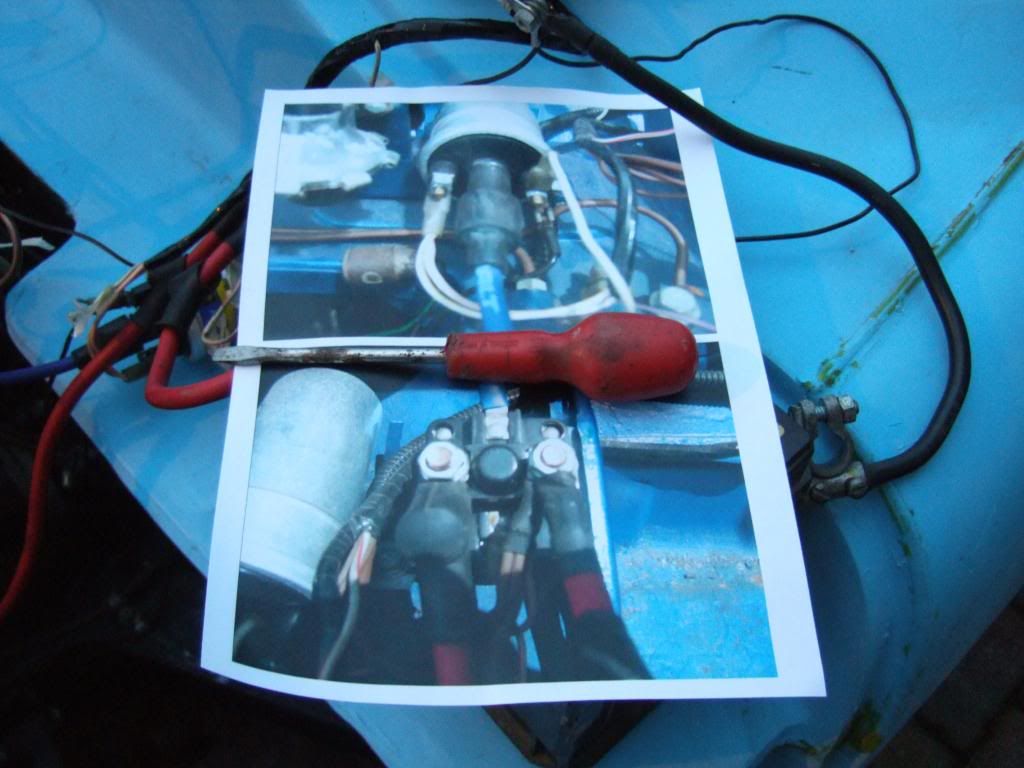
I'd printed another copy of my modified wiring diagram to highlight (in pink) the minimum wiring required.
I wasn't 100% sure I needed the wires highlighted in blue just to start the engine (gearbox connections, etc.).


I thought it would be a good idea to protect the rest of the loom before taking it outside.
This "protection" was nothing more than some cling film & tape, but it did tidy things up a bit.
I just used the section of the steering column with the ignition switch attached so I could use the key.


Then it was simply a case of connecting the wires I thought I needed before connecting the battery.
( Which I had already given a bit of a charge, just in case.)


The good news was that when I turned the key to the first position the ignition light came on.


The bad news was that when I turned the key to start the engine I got a bit, fat, nothing. :icon_sad:
There wasn't even the sound of the starter motor trying to burst into life.

Try as I might, I just couldn't trace the problem & eventually I needed a torch as the light faded.
So unfortunately I had to call it a night and decided to unplug the loom & bring it back inside the house.
As to be honest it was so cold staying out any longer was not really an option.

My drive faces North and the house keeps it in shade when the winter sun in low in the sky.
The ice from the top of the car cover was still solid at 2.50pm today when I started the wiring.


I'm sure the problem is "earth" related and I hope it is something simple.

Question: Does anything need new earth leads when fitted to a fibreglass bulk head?
As things like the coil & starter motor solenoid were previously mounted to a metal body.

Well I can just about feel my feet now, so until next time, take care, Paul. :)
2 Dec 2012, 7:16pm
Paul like you i will be fitting a header tank, one question will the feed from the radiator need blanking off and the expansion bottle run from the header tank?
Seeing as the radiator is now so low in the system i wonder if the water will flow out from this point or does the radiator cap prevent this from happening.
Cheers Stewart
2 Dec 2012, 7:16pm
From memory I think the starter solenoid has an earth cable attached to one of its mounting screws. You might want to run a cable from the chassis to one of the starter solenoid mounting screws to complete the circuit. Hopefully, it's that simple...

Good luck getting your engine started, it's one of the build milestones. :bounce:
5 Dec 2012, 9:25am
Got the day off work today as the Gas Board are digging up pipes outside our house & require access.
If the weather improves I might even get the chance to sneak out and do some work on the car. :cool:

But first, this...

Megane Expansion Tank:
Psycho Pops - Thanks for the reply Stewart, as this is an area I've read conflicting stories about.
Clearly my first solution of simply connecting the two heater points together wasn't a brilliant idea.
As the forced bend in the hose pipe might allow an air pocket to form, blocking the whole system. :rolleyes:


So I thought the Megan expansion tank was a simple way of forming an air free "in" & "out" connection.
In effect the bottle would simply be 'replacing' the heater & just allowing the coolant to circulate as normal.
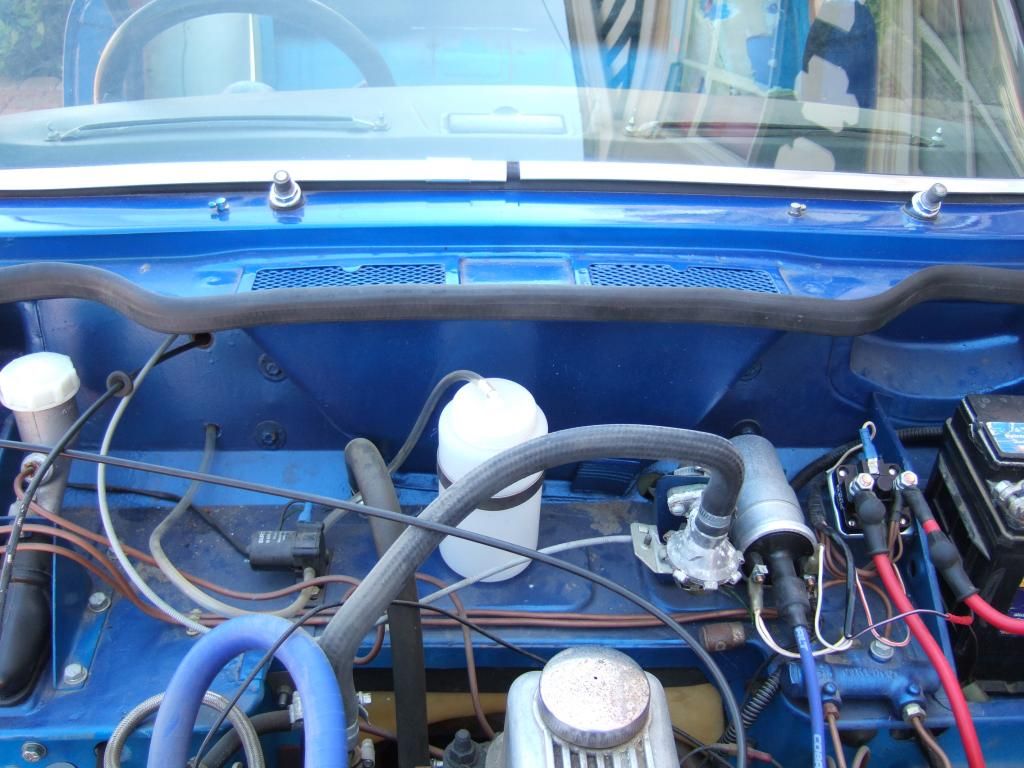
This isn't a great photo, but you can see the two heater hoses connecting to the bulkhead in the middle.


And this is the Megane bottle...


So lower heater hose (going to left side of bulkhead as you look at photo) to the bottom pipe in the bottle.
And higher heater hose (ending up on right side) would be connected to the top pipe in the bottle.
I hoped that under normal operations, the bottle would remain full of coolant with no air inside it.
I believe this would be possible if I get the bottle fitted at the right height compared to everything else.

Clearly the bottle's cap would be handy when filling up the system with coolant (if radiator is upgraded).
If the Megane cap doesn't let air in (TBC), any water heat expansion would end up at the radiator as normal.

I know you have just lowered your radiator and if I have to do the same I think all bets will be off. :icon_sad:
DonnySoutherner lowered his Cordite radiator & I'm waiting to see what AndyP57 has done on his.
Unfortunately, I can't test fit the bonnet until after the re-body inspection, so don't know what I need to do.
( Chassis brackets need to "fall off" after the inspection before there is room to fit the bonnet. )

So hopefully the current system will allow me to re-start the engine & I'll worry about the rest later.

Note: I'm happy to be corrected if I have got the wrong end of the stick about any of the above.

Cheers, Paul. :)

Mister Towed - Thanks for the suggestion as I hope to have another go at starting the engine soon.
At this stage I think it would be nice bit of build motivation to end the year knowing that it still fires up. :pray:
6 Dec 2012, 8:30am
Starter solenoid definitely needs an earth, I earthed the coil as well for completeness sake, not sure it was required but I figured it was earthed when it was attached to metal so why not! Mine goes!
6 Dec 2012, 7:10pm
Gas Pipe Repairs:
In the end, I didn't get a chance to work on my car while waiting for the gas men to do their thing.
There were two main reasons for this, the first was how close the gas works were to the car itself.
Trying to "spark" my starter motor into life with a battery & jump leads would be an explosion hazard! :shock:


You can just about see the man standing in the hole in this photo.


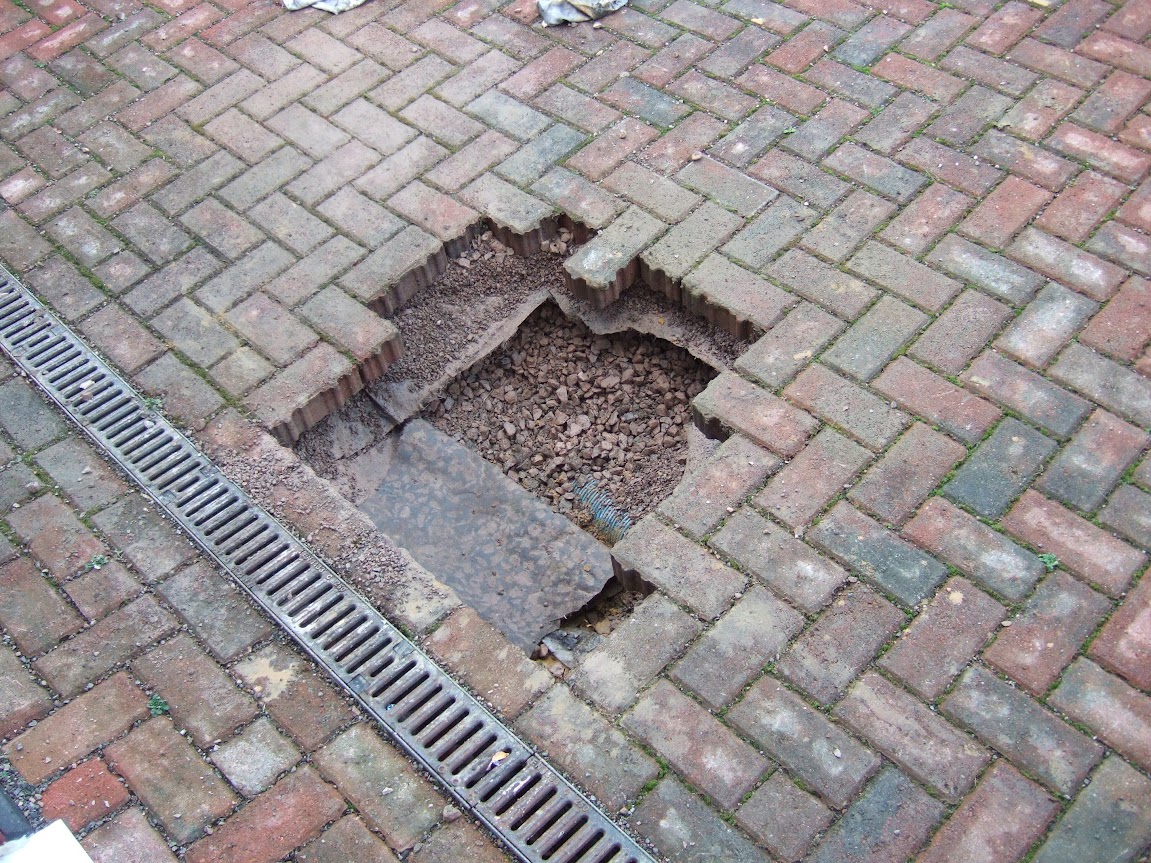
The second was the fact they needed to dig up our new permeable driveway to reach a gas pipe join. :icon_sad:


I had to make sure the different sizes of stone & gravel making up the different layers were kept separate.
We will now have to wait until the Gas board's driveway specialist is available to "make good" the mess.

After spending a few hours in the cold, I then had to return to a house with no gas & therefore no heating.
Which in turn made me spare a thought for the hole diggers themselves who had to work outside all day.

Hopefully I'll get to play with my engine at the weekend.
( After I've put the Christmas tree up with my daughters. :cool: )

Cheers, Paul. :)

DonnySoutherner - Thanks for the tip Simon, I'll try that first and see what happens. :pray:
7 Dec 2012, 10:59am
I don't know what you were worried about, the sign clearly says 'No Smoking'.

If you'd tried to start your engine and blown the street sky high you could've just sued the gas company for failing to put signs up saying 'No Trying to Start Classic Car Engines'. Where there's blame...
9 Dec 2012, 4:59pm
Yesterday was a major Spring (Winter?) clean before we put the Christmas tree up.
I was also forced to spend time up on on Santa's sleigh landing stop (see below).
Then most of today I have felt rubbish, but eventually I got outside just before sundown...

Engine Re-Start - Attempt #2:
Before I had another go, I re-read WCA's "First fire of the build" thread here.
I also did a quick Google search & found another great thread with a helpful photo here (last post).
And these highlighted the simple schoolboy error I made during my first starting attempt. :rolleyes:

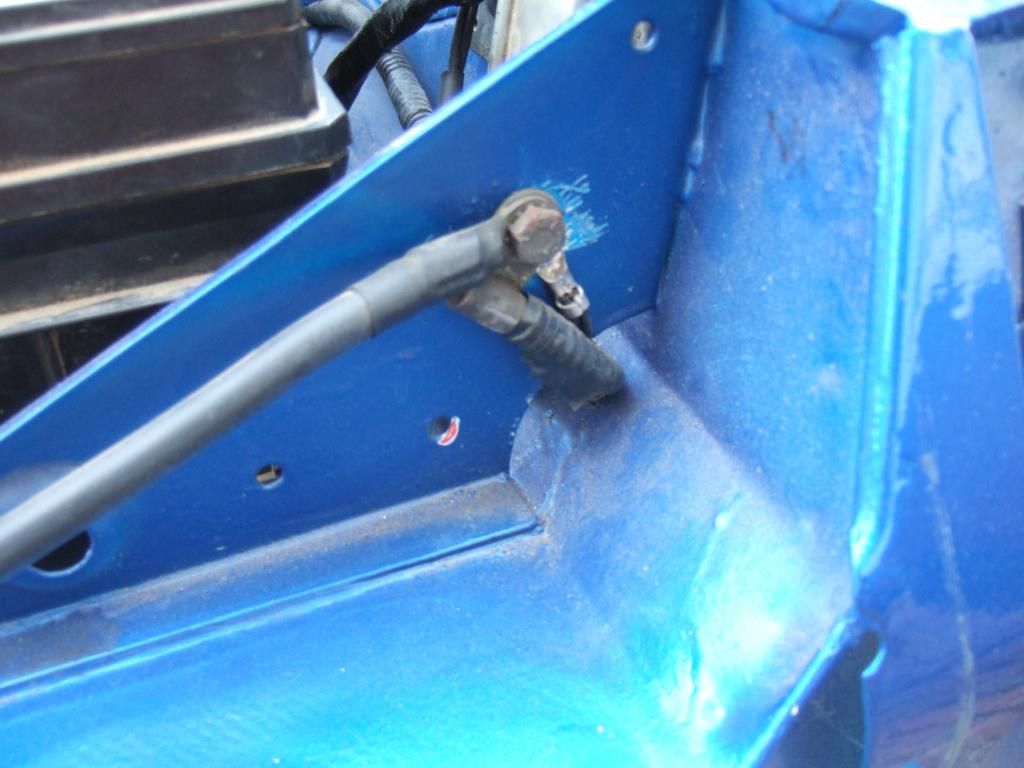
I thought the "earth" lead bolted to the engine was providing the earthing point for the loom.


Where as, it actually needs to be connected to earth itself & this was previously where it joined the body.


So making sure the loom was fully connected to the engine was a complete waste of time.
I knew I needed new earth points on the frame for my lights, etc. but missed this completely, oops.

But before testing my earthing theory, I dug out some of the surplus wires I had removed from my loom.
I then wired both the starter solenoid & coil mounting points back to the main battery earth wires.
( This was just a temporary measure for the engine start & I will wire it all up properly later on. )

My final bit of simple trouble shooting before connecting everything back up was with the starter motor.
Using jump leads, I connected the "-ve" battery terminal to the frame & touched "+ve" lead to starter.
This got the starter motor turning over, so that was one possible problem removed from the equation. :cool:

So I plugged my wiring loom back in again to just the main connections needed (gearbox wires not required).
Along with the wiring diagram I also printed off a copy of the original solenoid & coil wiring to double check.


I then created a new earth point with a jump lead from the wiring loom at one end to the chassis at the other.
( Excuse the poor photos as it was starting to get dark. )


Turned the key the first turn, nothing happened at all and my heart sank.
Then I quickly spotted that I had forgotten to connect the loom plug back to the ignition switch. :frusty:

So take #2 of the first turn of the key and this time the ignition light came on as before, so far, so good...

But unlike last time, there were definite signs of life coming from the engine at the next turn of the key.
I hadn't re-fitted the throttle or choke cables, so needed to operated their levers on the carb. by hand.
( Sorry couldn't operate choke & throttle and take the photo. :icon_wink: )


It took a few attempts to get the petrol in, but eventually...

[Dr Frankenstein] "IT IS ALIVE! . . . . ALIVE!" [/Dr Frankenstein]

You have no idea how happy I was to hear the engine running again. :biggrin:

Obviously it was working before I dis-connected everything, so I'm just glad I hadn't messed it up.
I left it running for a while before switching it off, but thankfully it kept starting each time I tried it again.

So whilst it may not look like much, this is a functioning wiring arrangement.


Santa's Sleigh Landing Area (or Domestic Appliances #3)
It rained so hard & was so windy on Friday night that water managed to get into our en-suite in the loft.
It had come through the extractor fan, after travelling through over 8 feet of hose! :shock:
So I spent Saturday afternoon climbing out the skylight, up the front roof & onto the rear dormer.
Here is one of the views...


Turns out the builders decided to located the external vent next to the roof edge and gutter. :icon_evil:
I had to remove the gutter, tape up the top half of the vent & refit everything.
Hopefully this will keep the rain out (fingers crossed).

The only good news is that was a few extra car building brownie points in the bag. :cool:

Until next time, take care, Paul. :)

Mister Towed - I'll need to sort out my insurance with 'A Plan' before I blow the car & street up!
:icon_wink:
9 Dec 2012, 7:57pm
Glad that my earthing/fire was of use. Now be careful on those ladders too!

Keep on posting.

Cheers

WCA
9 Dec 2012, 11:24pm
Congratulations on firing that engine up. It's quite a milestone, well done.
10 Dec 2012, 6:44pm
Mild Steel Box Section:
With a bit of luck, my mate will still be OK to give me some welding lessons during the Christmas holidays.
I'm not 100% sure of all the work I need to do (e.g. silencer mounts), but I need something to practise on.
So I've ordered 4 x 3 metre lengths of 20mm x 20mm x 2m mild steel box section ([url]www.metals4u.co.uk)[/url].
This should be more than enough for any work on the frame, plus welding practise, plus some left over.
I have another day off work on Wednesday and they have arranged delivery for then, which is a big help. :cool:

Note:
As part of my record keeping, I will list how much steel I actually used on the car when I do the work.

Ebay Update:
I still haven't got around to listing my last few remaining Spitfire donor parts for sale on Ebay. :rolleyes:
Rather than put myself under more pressure in the run up to Christmas, I'll simply leave this until 2013 now.

Cheers, Paul. :)

Replies:
WCA - I'm a firm believer in learning from other builds & hope putting lots of detail on here may help others.
Ladder? I used my "off road" trainers for grip, TV aerial mounting bracket & chimney to climb up the roof. :rolleyes:
But I must confess the thought of your foot (& death itself) did keep me focused on doing this carefully.
Mister Towed - Cheers, getting the engine to run at this stage will set me up for the winter ahead.
It also has really improved my understanding of how the wiring loom is supposed to work (especially earthing).
Which I hope will help me trouble shoot as more sections of the loom get re-connected in the future, :pray:
11 Dec 2012, 10:25am
well done with the engine mate! With my broken leg I expect you to overtake me so I can start learning from you!
11 Dec 2012, 11:45am
If you're doing some welding practice then there is a good supplier on e-bay (might even be metals 4 u?) who do variety bundles of box section and sheet.

I bought a few packs so that i could practice with the different settings on my welder and also so that i had odds-n-sods lying around in the garage in case little jobs cropped up!
11 Dec 2012, 12:24pm
davecymru wrote:
If you're doing some welding practice then there is a good supplier on e-bay (might even be metals 4 u?) who do variety bundles of box section and sheet.

I bought a few packs so that i could practice with the different settings on my welder and also so that i had odds-n-sods lying around in the garage in case little jobs cropped up!


I did the same and made some wonderfully bizarre sculptures........

However, a far cheaper way is to track down a local engineering firm that keeps box, tube and sheet. I am fortunate to have a very friendly one just a mile from The Glade and they will sell off-cuts or full lengths/sheets much much cheaper than eBay and without the postage. I have had to get out of the habit of questioning them when they say the price.

I had no contact with them before I started building e.g. I don't have a mate that works there. I just rang them.

Best of luck!

PS The oddments - big and small angle, tube, rod etc. - that I got from eBay are really useful. For example, my special-bush-removal-tool was made with them.
12 Dec 2012, 4:15pm
Box Section Delivery:
Very happy to say my box section arrived as promised, all wrapped up neatly.
( Note that isn't "real" snow on the cover, but the effects of the freezing fog we had last night! )


Day off passes me by...
Domestic chores, the gas board & my neighbour's flat battery conspired against me today.
So the small little jobs I have lined up between now & Christmas will have to wait until the weekend.

Cheers, Paul. :)

Replies:
DonnySoutherner - I've still got quite a bit to do to catch you up, but I'll try my best.
DaveCyrmu - Thanks, my mate has promised me his metal "left overs" when I see him.
Oxford - Cheers, I'm hoping this & my mate's odds and ends will be more than enough.