MadaboutKitcars

This is a read-only archive of the old Madabout Kitcars forum. New posts and replies are no longer possible, but every thread is still here to browse and read.

Another Cordite Is Born ...

28 Jan 2015, 4:20pm
Gary & Ian - Good luck with your fibreglass work.

Based on my experience as a complete novice, my top tips for starting out would be:

Only mix up a very small batch of resin (100ml) to begin with.
I was all "fingers & thumbs" at first & the resin was setting in the pot before I finished applying it. :rolleyes:

Apply the resin to the matting before putting it where you need it.
I lay out the matting on some newspaper and brush in the resin there.

Again if you are just starting out, apply the resin to both sides of the matting before putting it on.
After it is in place, use your brush / roller to ensure the matting is full of resin & firmly stuck.

Even now, if I have lots of fiddly matting shapes to play with I do it in small stages.
In fact, I never mix more than 300ml at a time, even if I have big sections of matting to apply.
I find this avoids a stressful "race against time" to get everything done.

And remember, if it all goes horribly wrong, you can simply grind it off & start again.

- - - - - - - - - - - - - - - - - - - - - - - - - - - - - - - -

Thurcroft Flyer - There is no shame in having better priorities than car building.
I lost time on my build when reading 'Harry Potter' to my children, but would never trade that time.

As for where to start, pick a small / simple job, even if it isn't a major issue.
If you haven't done it already, even just cutting out the holes for the headlight & grille would work.
This really makes a difference to the way the car looks, which in turn helps motivation.

- - - - - - - - - - - - - - - - - - - - - - - - - - - - - - - -

Wind Chill:
I was happy to be doing other stuff this morning as the rain was lashing down outside.

I did get another limited effort on the car in the afternoon, but the wind was biting!

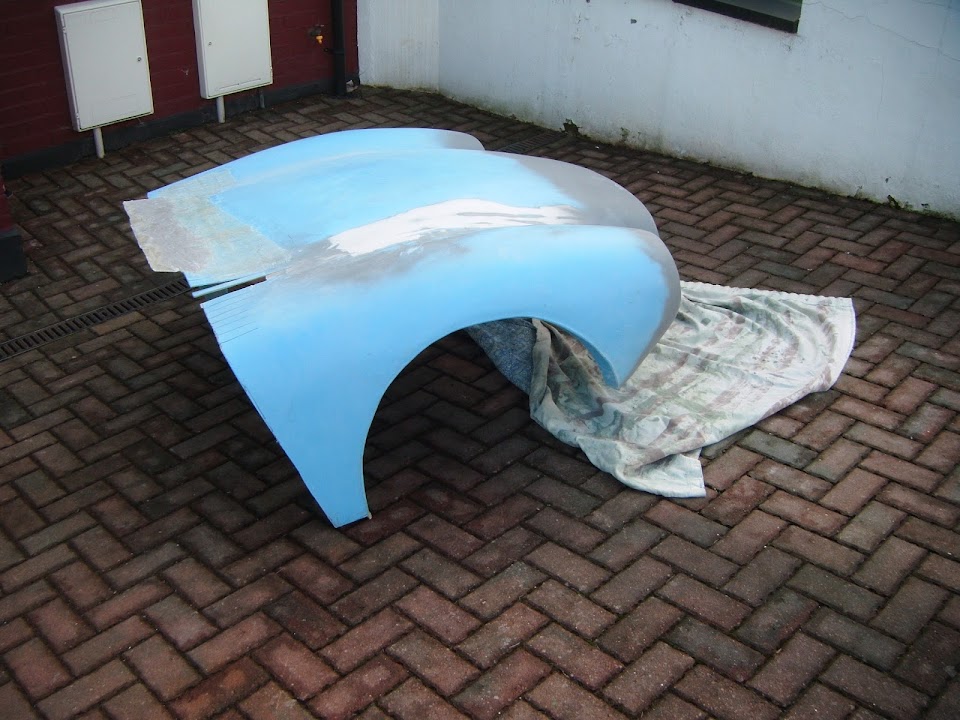
I trimmed back any fibreglass matting that extended beyond the bottom edge.


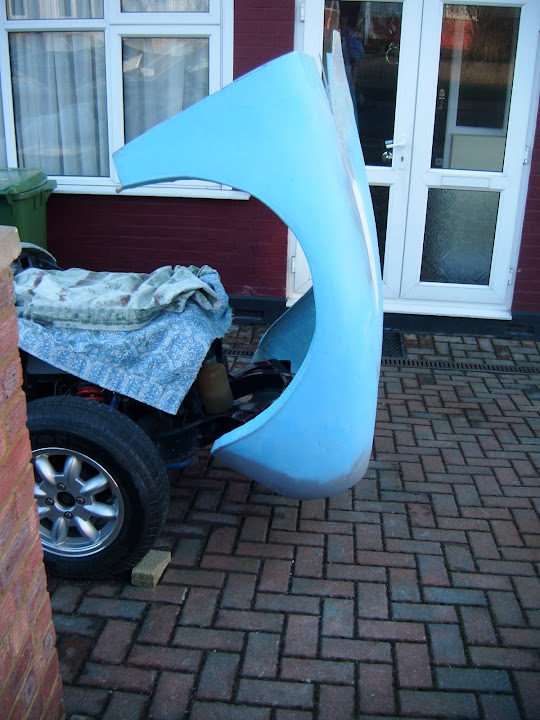
Then I carried the bonnet to the front drive as the wind tried to blow me (& it) into next door's garden. :eek:


Notice my rather fetching hinge protectors that stop the waterproof cover getting ripped.
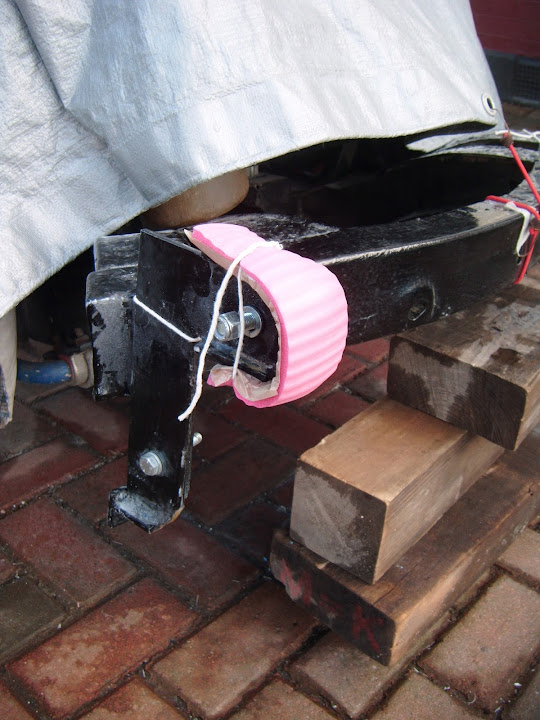


I then drilled out the hinge pivot holes from M10 to M12 so I could fit my new beefy bolts.


I think it might be worth adding a splt pin / lock wire to make sure the nyloc nut does not work loose.

Then I attached the bonnet back to the hinges and checked the chassis clearance with the bonnet up.
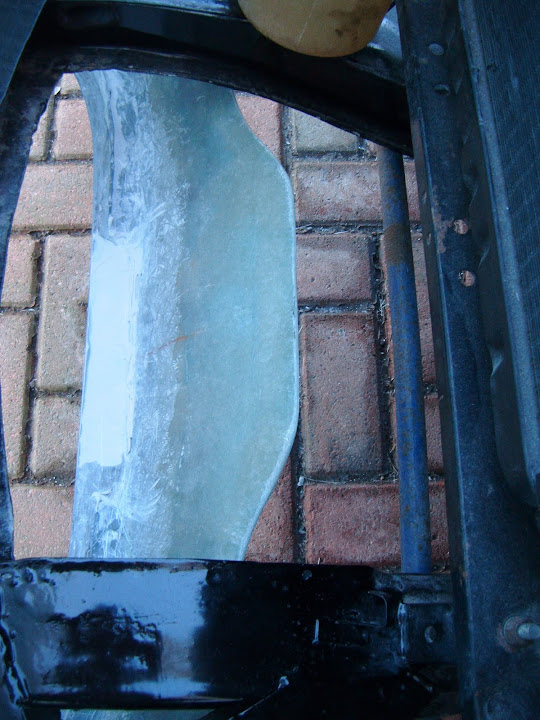


I am really pleased to see that my "wavy line" approach has worked a treat. :cool:

In fact, I am really happy with all the improvements I've made to the bonnet.

These photos were taken on the 11th of January.
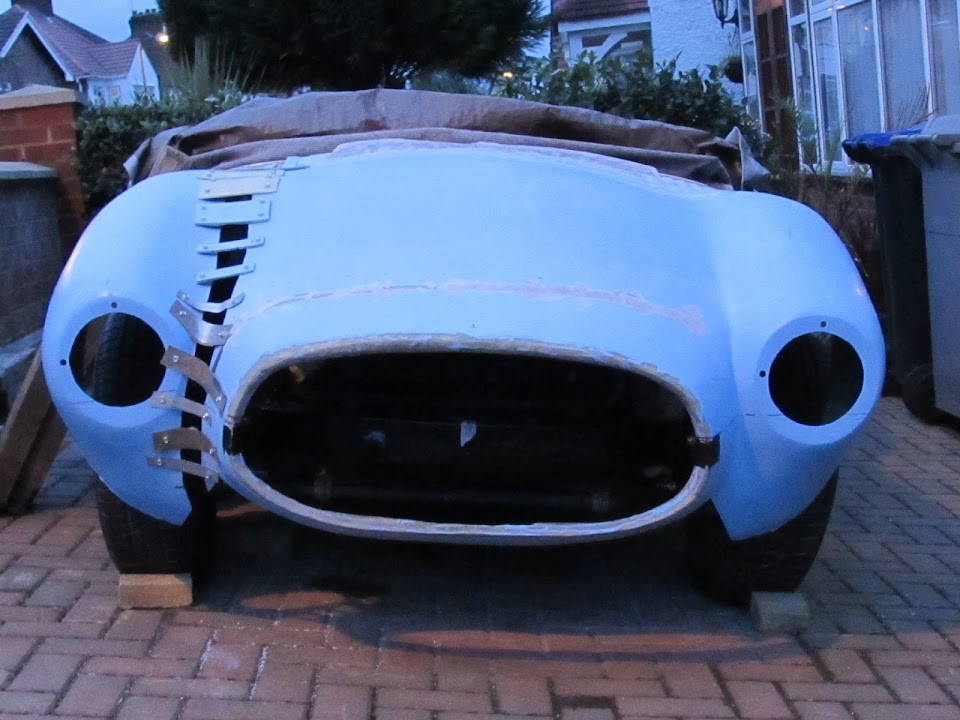


And these were taken today.


Even if this doesn't amount to a lot of new work, seeing the bonnet tilt still makes me smile. :D


Then everything was put back under the covers.

Until next time, take care, Paul. :)
1 Feb 2015, 2:08pm
February Already?
I decided to mark the first day of the month with at least a token effort on the car.

The next round of work relating to the bonnet & body shell will be a logistical nightmare.
As everything has to be removed from the chassis for the final small jobs before bonding the body on.
Given the weather and the space required to do this, I am not sure how I will tackle it.

So I decided to switch my attention to the "smallish" job of building a "ring" plate for the petrol cap.

I started off trying to match the position of the petrol tank feed on the body shell.


But the more I tried to measure, the less confident I got about the position. :rolleyes:

So I decided to drill a pilot hole and use a skewer to find my way around.


After drilling a few more holes and joining them up, I was slowly getting there.


At this point I trying to check the hole against the rubber ring seal on the inside & dropped it.

No problem, I'll just lift off the boot access panel as that will give me easy access to find it again....

... easy access...

... easy access...

Aaaaarrrrggghhhh!!!

:frusty:

Yes, I'd spent ages grazing my knuckles trying to work from the cockpit side of the tank.

I could barely feel my fingers anyway and clearly my brain was not working properly either. :rolleyes:

So working from the easy access side, I slipped the filler hose over the petrol tank feed.
( Note: I did straighten it up properly after this photo was taken. )


I need to go back and have another look at the Spitfire set up, but I might need a longer hose.

But the key point is that the petrol tank is at a slight angle.

Which means I shouldn't have been aiming "straight down" when making the hole.

So dropping the seal really worked in my favour as now I could mark the hole properly.


As you can see, this is further back that where I was originally aiming for.


The plan is to fit the rubber ring to some sheet metal, which will be bonded/riveted to the body shell.

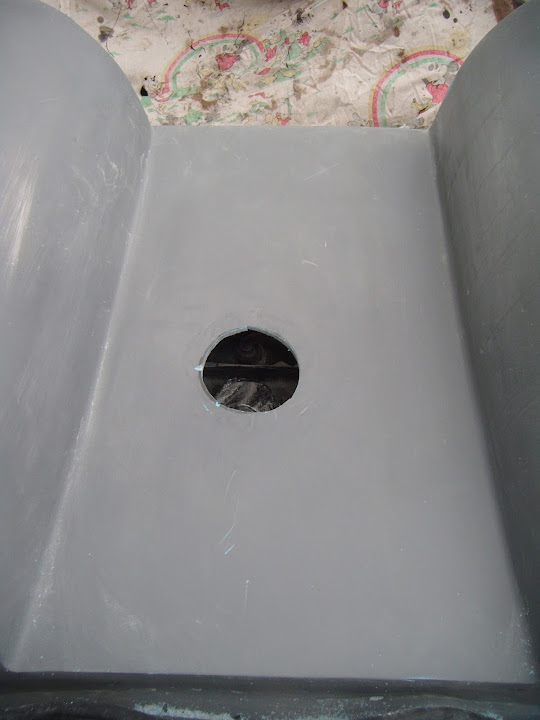
So the hole in the body shell needs to be big enough for the rubber ring to drop into.

Which means that I can cut out the big circle in the photo above and have no problems. :cool:
( Although I will cut it out smaller than marked and then file it to the required shape. )

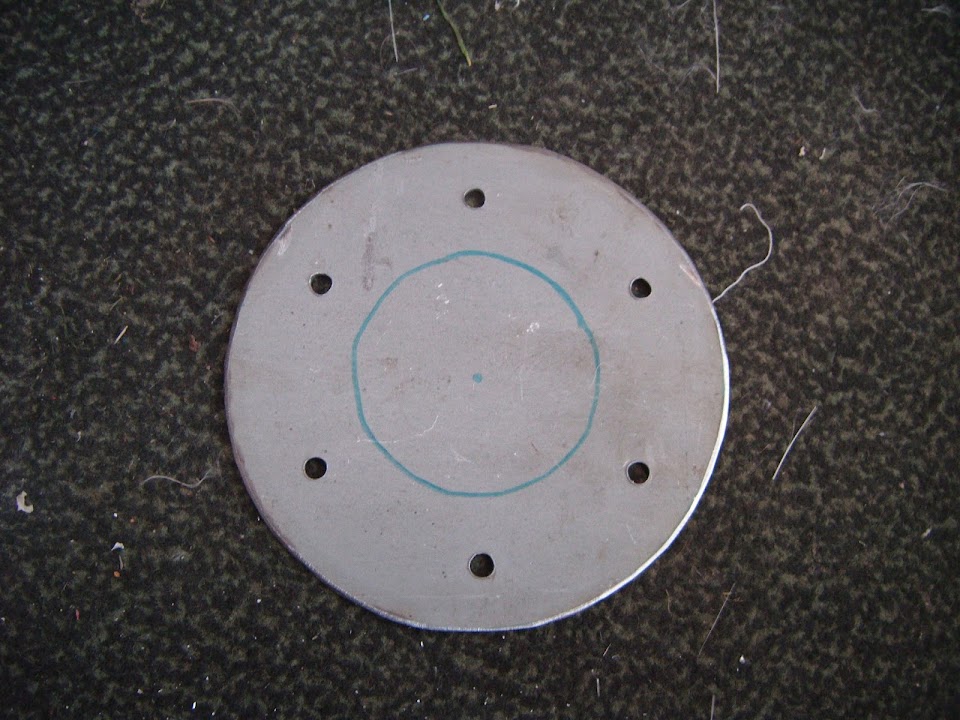
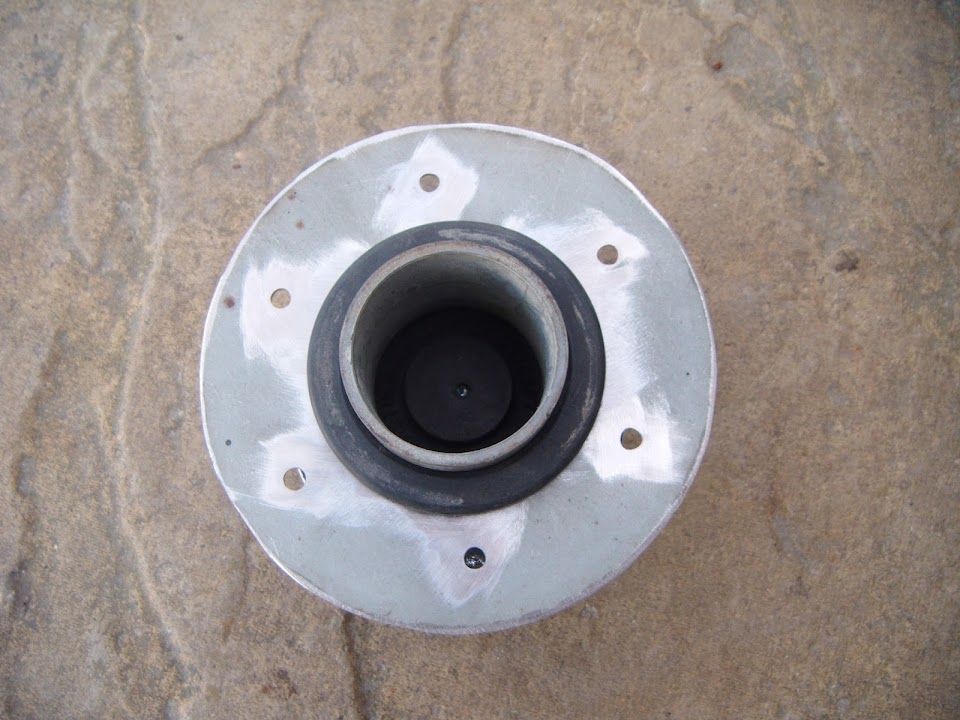
A small bowl provided the template for the metal ring.


I then cut this out of metal and marked the centre point.


Unfortunately, my few remaining metal jigsaw blades were not up to the task.

So I had to use my angle grinder to roughly cut it out & then grinder the final shape.

When I looked at the petrol cap "hole" from my 2nd hand body shell, it was a bit oval shaped.


So I used my torch to mark out a circle and checked the rubber ring was a good fit.


This allowed me to mark up the metal plate.


But I need to get some fresh jigsaw blades before I can cut out the middle circle.

That was where I've left it for today, as I am still behind in other stuff.

So until next time, take care, Paul. :)

PS
We have only had the lightest dusting of snow around here so far.

So here are two photos from a kit car company in Massachusetts, after they had snow ploughed their car park. :cool:


2 Feb 2015, 1:42pm
Another Flying Visit...
Still haven't got time to play with the car at the moment, but did find an old photo of my donor Spitfire's fuel hose.


Which does confirm my current set up is not long enough.


So I've ordered a new length of fuel hose that will fully bridge the gap from tank to body shell.

- - - - - - - - - - - - - - - - - - - - - - - - - - - - - - - -

It was good to see Simon (DonnySoutherner) post this photo of his Cordite yesterday. :cool:


This is same original "MkI" body shell that I started with, not the improved "MkII" version that Mac & Swifty have.

So this really brings home just how much I have altered my car to reach the stage I am currently at. :eek:

And I still have to attach the bottom sections of the bonnet to the sides of the body shell. :rolleyes:

- - - - - - - - - - - - - - - - - - - - - - - - - - - - - - - -

Until next time, take care, Paul. :)
3 Feb 2015, 7:46am
Very nice job Paul !


Thank you for showing me the job that I have to do on my bonnet. I didn't know what to do and now i've got the solution thanks to you.

Why everyone is obliged to modify the bonnet, why the bonnet 's mold is so bad done ? I thinck that he mold have to be modified to provide other builters to do all this work, are you agree ?

Few picture of my bonnet : incredible to buy a kit with a bonnet so bad done, due to the mold's quality !

The up part


the down part:puke:


Sorry for my level in english !:wave:

Best regards from France !
3 Feb 2015, 8:46am
Zebre69 - Merci Sebastien. :cool:

No need to say sorry for your English, it is much better than my French.

Have you seen the work Viatron & Swifty have done on their bonnets?
As I picked up a lot of my ideas from their work, so it might help you too.

I think the original Sammio Spyder was the best kit overall.
But modifying it to fit other cars doesn't seem to have worked as well.

It is good to know that you are still working on your car.
It would be nice to see an update your build thread & some photos.

- - - - - - - - - - - - - - - - - - - - - - - - - - - - - - - -

Spoke Too Soon...
I should have know better than to tempt fate by mentioning the lack of snow around here. :rolleyes:


I know it is still not much compared to other areas, but still enough to stop any significant work getting done outside today.

Although I might be able to spend a bit of time inside the Summer House later on.

Cheers, Paul. :)
3 Feb 2015, 9:58am
Thanks for your response !

I will work on my sammio on the month of may, the weather will be better than now, too cold for me !

Don't worry, during the winter I work in others projects and drive my others cars or solex ! Few pictures :


My traction 11BL 1955 during a trip with wife and childs with clothes acroding to the year 60's


My new project bought 2 weeks ago , a good barn find ! another citroen 11BL but older because built in 1952.


Thats all falks !

New pictures of my SAMMIO project here :
http://www.madabout-kitcars.com/forum/showthread.php?p=63208#post63208
3 Feb 2015, 4:34pm
Sebastien - Great photos, you have a lot of nice toys. :cool:

- - - - - - - - - - - - - - - - - - - - - - - - - - - - - - - -

Scratching The Surface:
The good news is I am slowly catching up on all my non car related stuff.

The bad news is that I just can't find the time for a decent session on the car.

But I do know that if I get out of the habit of working on it, it is much harder to start again.

So as long as I can do even a little bit of tinkering that is still a good thing.

- - - - - - - - - - - - - - - - - - - - - - - - - - - - - - - -

I plan to use a thin layer of bonding paste between the petrol cap base base ring and the body shell.

But I will also use some rivets to hold everything in the right place until the bonding stuff has set.

So whilst the ring will look like it is only fixed in by the rivets, but it will actually be more secure.

This meant drilling six holes around the outside for the rivets to sit.


Then I drilled a pilot hole so I can cut out the inner circle when I finally get some new jigsaw blades.


Finally, I just tidied up the hole edges with my angle grinder.


Although it did make a refreshing change to be pulling metal splinters out of my fingers, rather than fibreglass ones. :rolleyes:

- - - - - - - - - - - - - - - - - - - - - - - - - - - - - - - -

Then I found the box with my fog light switch in.
( I'm still lovin' my new box filing / index system. :cool: )


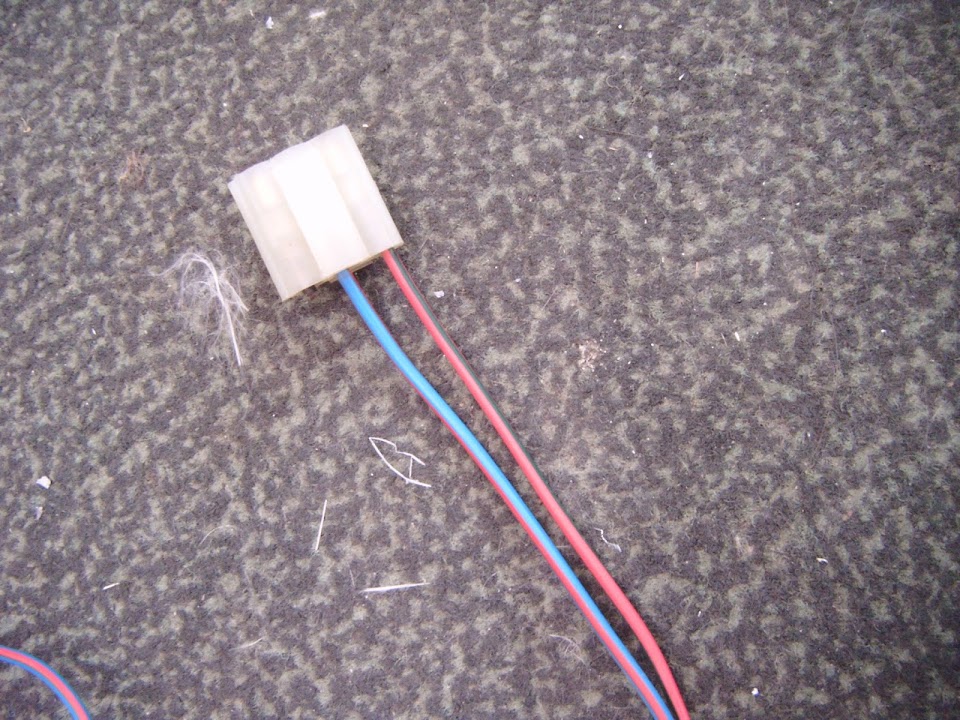
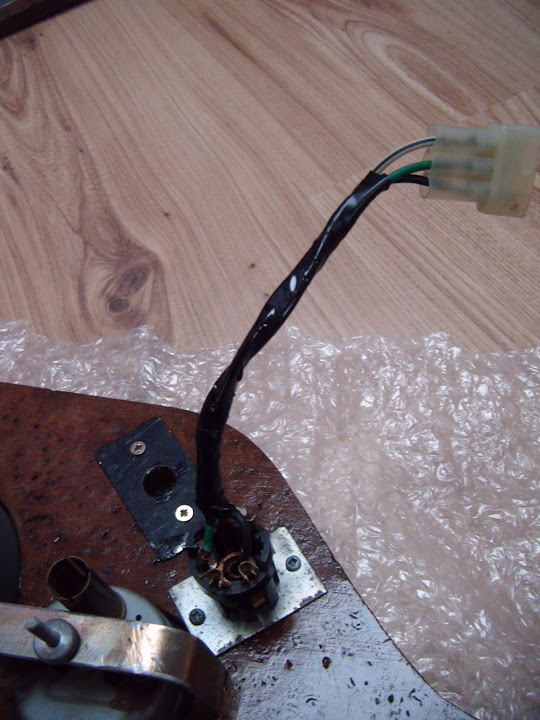
This originally came with a three pin socket fitted to it like this.


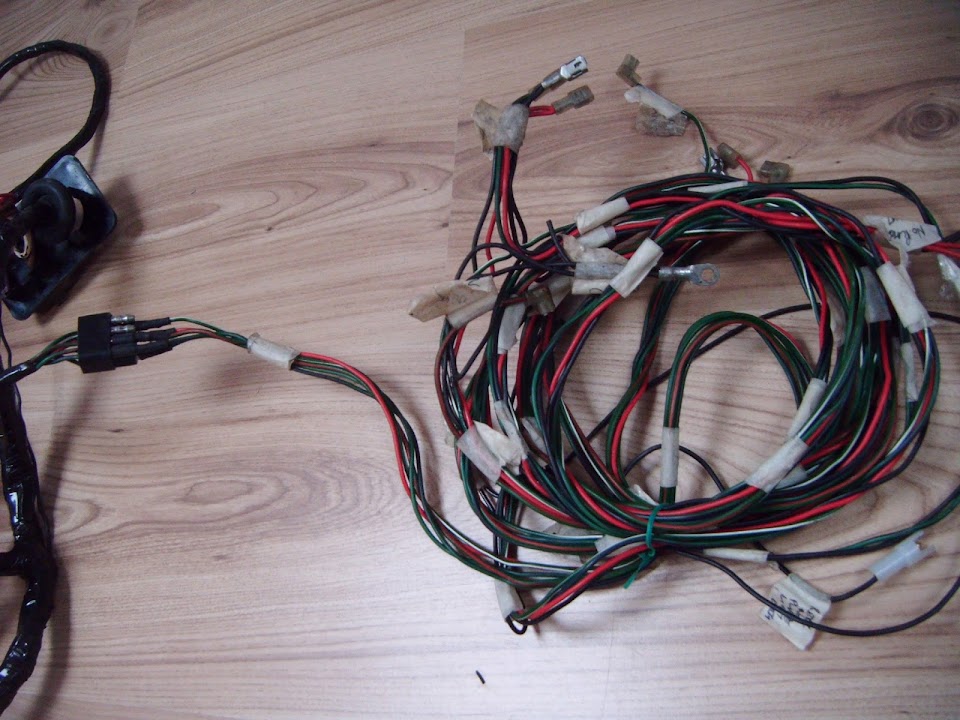
So I pulled out the box with all my spare wiring in it, so see if I had a match.

The good news is that I do have the other side of the socket.


The bad news is that it appears that I have already "recycled" one of the three wires for another part of the loom. :icon_sad:


Still, at least I can remove the pin and carefully re-wire it if I need to.


But first I just need to double check the Spitfire wiring diagram to work out just how many wires I need & where I will re-attach this to the loom.

Thankfully that is a job I can easily do indoors, regardless of the weather outside.

- - - - - - - - - - - - - - - - - - - - - - - - - - - - - - - -

Side Repeaters - To fit, or not to fit?
I posted a link to the rules about side repeaters on the Tribute side of the fence the other day, which got me thinking.

My car is actually old enough to be legally driven without side repeaters.

But given the generally poor driving standards in London, I thought they might be worth fitting anyway.

Plus I had a spare set after I decided they were too small to use as front indicators. :rolleyes:


I have already built in the required connections into the loom, but they would be easy to blank off.

The last time I looked at options for fitting them, I realised they would highlight the difference on each side of the body shell.

But now I plan to extend the body shell to include the bottom of the bonnet, so this problem will go away.

Anyway, thinking about the wiring for the fog light switch is tempting me to make a decision about this one way, or the other.

[color="red"]Question:[/color]
Do you think fitting these side repeaters is a good idea?
- Will it look like an old racing car put back on the road recently with modern lighting?
( Similar to my old style wooden dash, with some modern heater controls fitted underneath. )
- Or will it look more like a modern car pretending to be an old car?

Obviously I know the last statement is what I am actually doing, but I wont tell anyone if you don't. :icon_wink:

Note:
I will not be able to fit an ageless number plate until after the car is on the road with an MOT.
Although the decision to buy one may well depend on how much I have spent by that point.

- - - - - - - - - - - - - - - - - - - - - - - - - - - - - - - -

So that's all for now, until next time, take care, Paul. :)
3 Feb 2015, 5:15pm
Paul L wrote:


Scratching The Surface:

But I do know that if I get out of the habit of working on it, it is much harder to start again.

So as long as I can do even a little bit of tinkering that is still a good thing.


I had a two and a half week break while I rectified my ex-wife's car after a mammoth MOT fail. When I came back to the Marlin I had some very negative thoughts... I couldn't see a single task I felt like doing, although in fact there were several which needed doing. Gradually my interest has returned and I am now back at full steam. It take a great deal of will power and self control to keep plugging away, especially when you feel it could have been easier had you started from a different place. In my case this car is my second choice, I actually wanted the car I have already built but was rejected by DVLA.
3 Feb 2015, 7:48pm
Do you think fitting these side repeaters is a good idea?

Paul my feelings are i think side repeater will spoil the look of the car if you are trying to replicate a fifties style so if your car does not require them then don't fit unless you personally feel they may make it safer.
3 Feb 2015, 9:06pm
Do you think fitting these side repeaters is a good idea?

Hi Paul, I think side repeaters are a good idea for self and passenger preservation on today's roads. How about incorporating lamps with clear lenses and orange bulbs in some sort of stainless or aluminium motif to disguise them when not in use? In my opinion the orange lamps look wrong for your car and would spoil the overall look.
4 Feb 2015, 8:55am
Do you think fitting these side repeaters is a good idea?

umm.....

I think it's a totally personal choice, but lets evaluate the main pro's and con's

Pro's - Safety
Con's - Looks

There... as clear as mud! :)

TBH i'm also completely undecided about fitting side repeaters. All i do know is if i ever do then they will either have to be:
a) Hidden in some way so that you can only see them when they're on.
or
b) Period looking to fit in with the rest of the car.
4 Feb 2015, 9:45am
Side repeater are a good thing as are 4 way flashers.
As Paul said on today roads anything that tell the "idiots" which way your going can't be bad but as the side repeater's are nornaly on a blank panel they tend to show up more than the fixed indicators.

4 way flashers or hazzards are also a must, I personaly I would hate to brake down on a main road or motorway hard sholder with-out a set of 4 way hazzards flashing :fear:

If you look closly at my G-46 that had both fitted.
The side reperter where mini led style (about 15mm dia) with a chrome surround, small but very bright, and I think the look quite "period". :smile:
4 Feb 2015, 9:54am
I'm not being facetious, but the ultimate period-look for a car with an open cockpit is to back-up your indicators with hand signals.

Hazards are a must, and you can flap both arms for that.
4 Feb 2015, 11:33am
Hand signal are not in the highway code any more so you'll just get the "idiots" waving back :happy:
4 Feb 2015, 12:25pm
Ed - I know it is easy to get disheartened when there are so many things much left to do.
But in order to finish the car, every job needs to be completed, no matter how small.
So I do feel better if I manage to take even the smallest of steps towards the finish line.

Swifty, Froggyman, Dave, Micky & Oxford - Thanks for all the feedback chaps. :cool:

I guess the safety aspect needs to be put into the overall context of the car itself.
As we are not building sturdy Volvo estates with modern crumble zones and air bags. :rolleyes:

I only considered fitting side repeaters as they were "left over" & I like recycling bits.
However, I think I will stick to KISS principles and not make extra work for myself.

Note:
The original Spitfire hazard warning switch and all associated wiring has been retained.

- - - - - - - - - - - - - - - - - - - - - - - - - - - - - - - -

More Holes:
A new jigsaw blade made light work of the centre hole in the petrol cap base.


Although, given I could only 'clamp & cut' a small section at a time, it wasn't my neatest job. :rolleyes:


Once the inside edges were tidied up with a hand file I could test fit the rubber seal.


Whilst the jigsaw was "loaded", I dragged it to the front of the house and cut the body shell.


Unfortunately, the passenger hump was in the way this time, so another untidy hole. :icon_sad:

But at least the rubber seal fitted inside the hole.


This allowed me to test fit the metal ring over the hole with the seal in place.

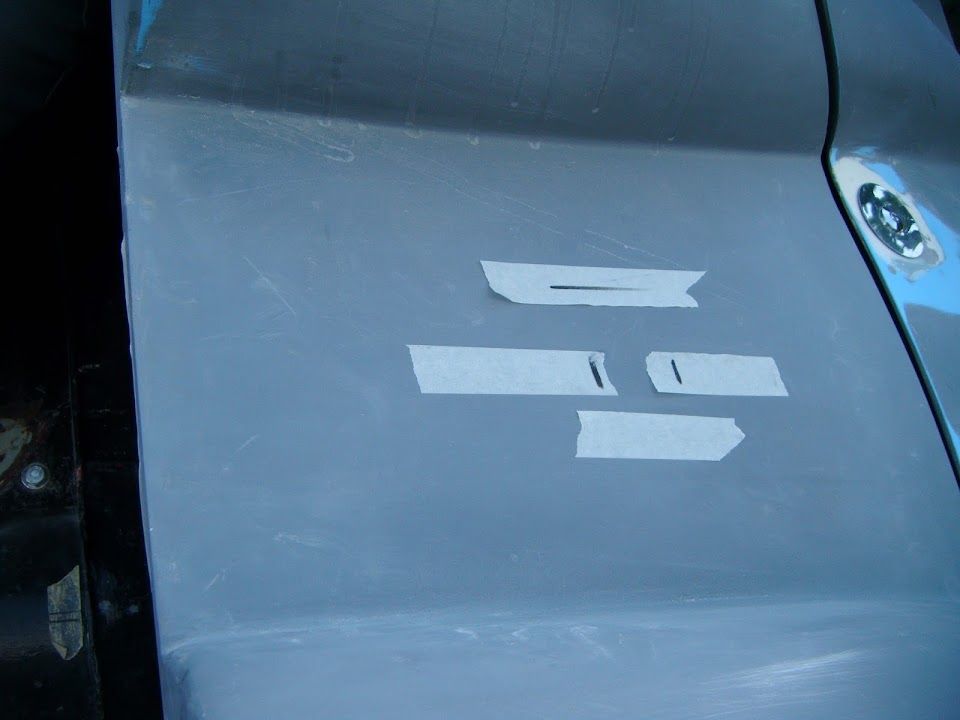
Then I marked up the rivet holes on some masking tape stuck to the body shell.


Before drilling them out.


Then I could test fit the petrol cap that came with my donor in position.


I had to use the flash for this next photo which isn't great.

But you can see that with just a smear of bonding paste & the rivets to pull the ring tight to the body shell, this will be a good fit.


So I am happy with that and thanks to Dave for giving me the idea in the first place. :cool:

Also the new fuel hose arrived today.


But I will not cut that to shape until the body shell have been bonded into position.

Even though this was a small job, it was a great boost to morale to see the petrol cap it place.

Until next time, take care, Paul. :)
4 Feb 2015, 12:26pm
I also think it will spoil the period look Paul.

I have had lots of cars without side repeaters and never had a safety problem with any of them
4 Feb 2015, 12:30pm
Scottie - Cheers. :cool:

Sorry we posted at the same time.
5 Feb 2015, 8:35am
Nice result on the filler ring! :)
5 Feb 2015, 3:02pm
Ed - I've seen a few hand signals whilst driving that don't appear in the Highway Code. :icon_wink:

Dave - Cheers, I like the fact I can now use the original Spitfire petrol cap seal. :cool:

- - - - - - - - - - - - - - - - - - - - - - - - - - - - - - - -

Wiring Diagram:
I've only had the chance to have a brief look at the wiring diagram for the fog light switch today.

It took me a little while to confirm that I did in fact have the two correct halves of the 3 pin connector.

As the switch has Black / Green / Black & White wires, but the other side of the connection has Black / Red & Green / Blue & Red ones. :rolleyes:

Despite this, the connections required are quite simple:
- Black to earth
- One wire to the fog lights
- One wire to the battery

The original Spitfire set up took the battery feed from the headlight switch.

But I also found this in the MOT rules:

[color="blue"]A rear fog lamp is permitted to operate independently of headlamp, position lamp or ignition systems.[/color]

So I could connect to any of the wires that lead back to the battery.

I'm sure Mister Towed mentioned something about the fact that the Herald headlight switch was independent of the ignition switch.
( In other words, someone could just flick the switch while you were parked and the lights would come on, draining the battery. :icon_sad: )

It appears that the Spitfire has a similar set up, although I didn't check this on the donor before taking it apart.

However, I think my battery cut off switch would prevent this (when it is turned off).

Either way, I need to have another look at my wiring loom and see where the easiest place to connect the fog light switch will be.

- - - - - - - - - - - - - - - - - - - - - - - - - - - - - - - -

Mirror:
The other thing I have been looking at is some sketches I made for a plinth design for the passenger side wing mirror.
( As I am actively looking for small jobs that I can fit around my time and the weather. )

Initially I was thinking of making this is metal in a similar way to Mr T.

But now I think I will be able to get a better "aero" shape if I make it in fibreglass around a foam mould.

I am only planning to raise the mirror on the passenger side, the driver's one can stay fixed to the body shell.

With a bit of luck, having an obviously difference from one side to the other will draw your eye away from other areas. :pray:

- - - - - - - - - - - - - - - - - - - - - - - - - - - - - - - -

Exhaust:
Finally I may steal another idea from Dave's Miglia, as I really like his exhaust shield. :cool:


Which would be a nice finishing touch to my twin pipe arrangement.
( Excuse the old photo. )


Although as I don't have any alloy sheet knocking around, I might make them is steel & then paint them body colour.

Which would match the look of the metal petrol cap base ring, especially if I added a few rivets to it.

- - - - - - - - - - - - - - - - - - - - - - - - - - - - - - - -

So until next time, take care, Paul. :)
6 Feb 2015, 7:51am
Reference the tail pipe bling Paul, if you like I will cut out a lump of stainless steel big enough to make what you want, and mail it to you?

That would look really nice, ( Just like chrome if you polish it and like ally if you don't) Let me know.
6 Feb 2015, 1:28pm
Scottie - Thanks for the kind offer, I really appreciate it. :cool:
Although I'd like to have a go at making them in steel first to see if they would look OK painted.
At least when I've made the templates I'll know how much I would need.

- - - - - - - - - - - - - - - - - - - - - - - - - - - - - - - -

A Collection of Small Jobs - Part 1:
It is never a good sign when I have to take ice off the cover, before I take the cover off the car.


I removed the dash from the car, so I could play with this section for the fog light switch.


Unfortunately, I dropped one of the fixing nuts and it has "disappeared" somewhere. :rant:

My luck didn't improve much when I realised I couldn't re-use the old choke hole.


Because my home made dash securing plate was bolted in behind it.


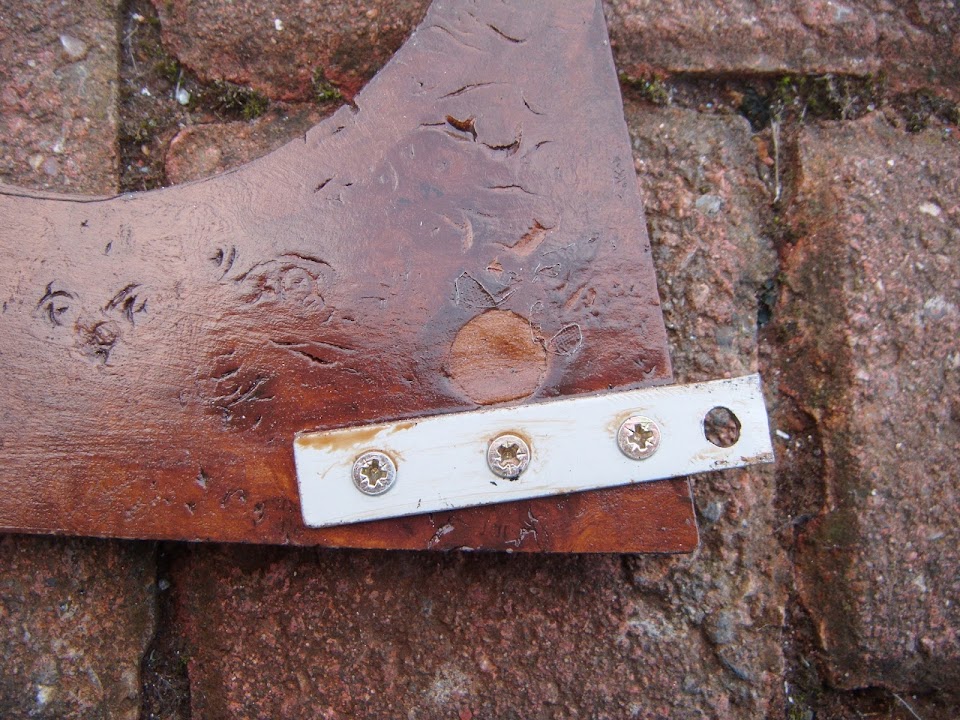
The next problem I had is that the back of the switch has to avoid the metalwork behind the dash too.


So I used some masking tape, and the right hand edge of the tape in the photo marks the edge of the metal.


The next "challenge" was the fact that when the switch was tightened into position, the backing plate was at an angle.


This limited my fitting options, so this was the best place I could find for the hole.


I just needed to file the hole out a big larger by hand until the switch surround could be tapped into place.


So this is where the fog light switch will sit, next to my new oil pressure guage.


And here is the view from the back.


- - - - - - - - - - - - - - - - - - - - - - - - - - - - - - - -

While this section of dash was out, I also refitted the switch for the hazard lights and the indicator warning light.


- - - - - - - - - - - - - - - - - - - - - - - - - - - - - - - -

I spent ages carefully trying to unpick the chopped earth wire from the original fog light connection pin.

Before I finally had the bright idea to have another look in my "spare" wiring bag.

Sure enough, I had another "spare" plug with a matching pin with wires already attached.


It literally took seconds to pop one of the pins out and fit it into the fog light connection.


I don't often think of an easy way of doing things, so I was very happy with that. :cool:

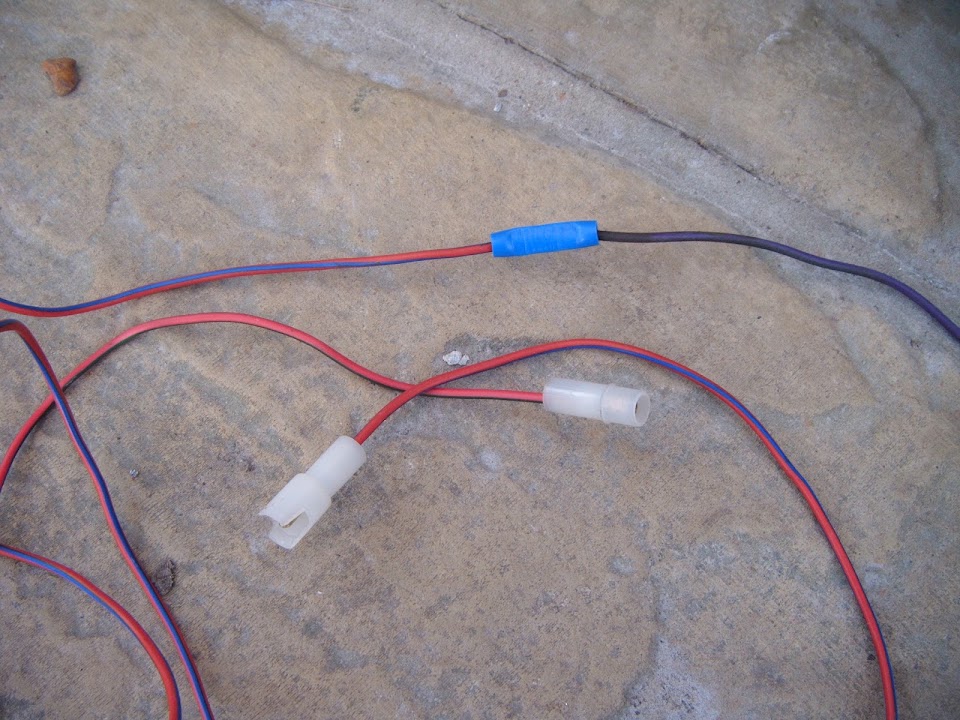
Then I was on a roll, as next I found one of the original fog light wires with a matching connection.

Although part of the other end of the wire had been recycled, so I crimped another section of wire on to extend it.
( This is the wire that will eventually run all the way to the back of the car. )


End of Part 1...
6 Feb 2015, 1:32pm
A Collection of Small Jobs - Part 2:
Sticking with the fog light theme, I started to fit connectors to the fog lights themselves.

Based on Big Scary Monster/Ed's advice, the two power wires are joined together.


As this will be either off (reflector mode), or fully on (fog light mode).

Although, just for a bit of added fun & games, both lights had different coloured wires. :rolleyes:


I did double check the wires with a battery before I joined them.

I am using simple blade connectors, because the wires will need to feed through a small hole in the body shell.
( The reflector mounting bolt is in the middle. )

I don't want to start wrapping the wires up just yet as I need to finalise my earthing points.

- - - - - - - - - - - - - - - - - - - - - - - - - - - - - - - -

Next I started the process of removing the "extensions" I had previously built into the loom for the side repeaters.


Given how well I had wrapped up the wires in the first place, this took a while. :rolleyes:


Eventually I was able to remove the extra wires.

But before I re-wrapped the loom I wanted to have a look at where I would re-connect the fog light switch.

So I started to lay everything out, so I could get a better look.


But at this point I realised I really should go back and double check the wiring diagram (again :rolleyes:).

However, I have a few other "non car" things to do first, so that is all for now.

Until next time, take care, Paul. :)

PS
I know I wasn't working outside for long, but it is very cold out there. :icon_sad:
10 Feb 2015, 11:20am
A weekend away with my family & then feeling under the weather has kept me away from my build recently.

Thankfully I did manage to get a small bit of wiring work done today.

The good news is I could do this work indoors and not get cold, which would not help my recovery.

But the bad news is that some of the indoor photos are poor.

- - - - - - - - - - - - - - - - - - - - - - - - - - - - - - - -

Dash Board Wiring:
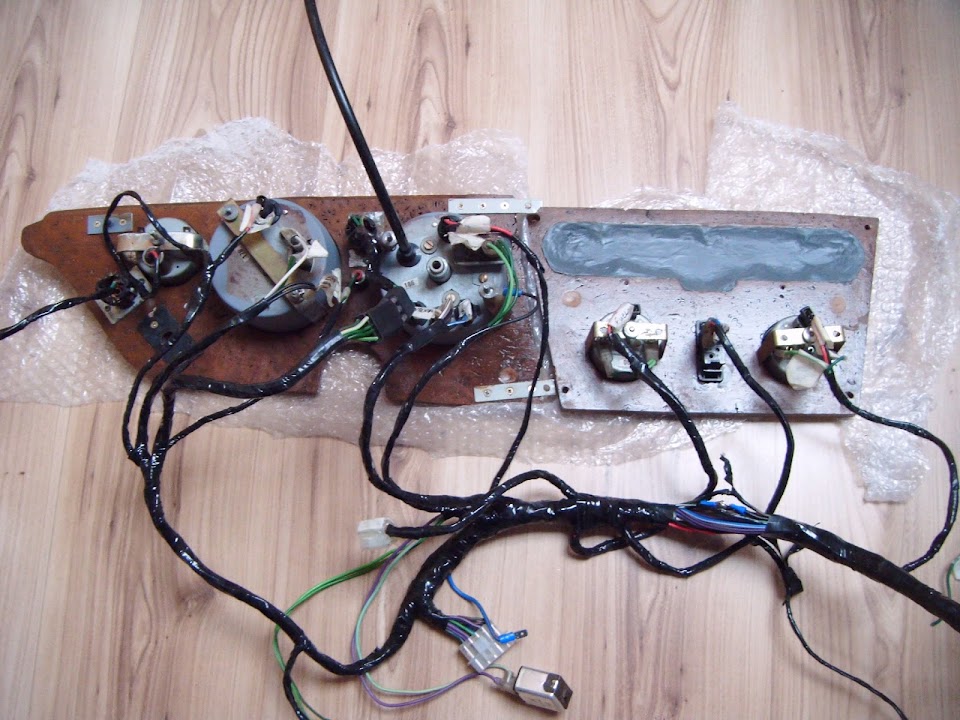
I dug out the new rubber seals I bought for the original dash board dials.


Then I refitted the speedo and rev counter.


Next I refitted the fuel & temp. gauges, plus the head light switch, to the middle section of the dash.


Then I simply wrapped the wires at the back of both the hazard & fog light switches.


The main reason for getting this stuff in place was to help me layout the loom at the back.


Which in turn, would give me a better idea of what I needed to do with the fog light switch wiring.

The easiest wire to sort out on the fog light switch is the one leading to the lights themselves.

There is a big block connector for all the wiring needed for the back end of the car (lighting & fuel gauge).


If I put the original fog light connector in the same place...


There is still enough wire leading back to the switch to run along the existing loom without any issues. :cool:
( I plan to simply wrap this wire to the outside of the existing wrapping, rather than unpick everything & start again. )

There is also an obvious point to earth the fog light switch, as it is near where the wooden dash is fixed to the metal one.


But rather than cut down the replacement earth wire I had fitted to the original connector, I swapped it for the other, shorter, wire.


This just left one fog light switch wire to sort out, which was the live/power feed.

After spending quite a bit of time looking at the wiring diagram, I think I have a solution. :pray:

There is currently a 3 way connector that is used by the hazard warning light switch (among other things).


This green wire allows the hazards to operate independently of the ignition.

So in theory, I could add the fog light switch to this circuit and it would operate in the same way.

I don't really fancy the idea of driving in conditions where I would need to put the fog lights on anyway. :eek:

So as long as I can keep the MOT tester happy, that will do for me. :cool:

The other good thing about using this connection is that is was in the same area as the side repeater extensions.

So I wouldn't need to unwrap any more of the loom to make the connection.

While I was at it, I also tidied up the wires where I removed the extension wires the other day.
( This will look a lot neater when the wrapping goes on over the top. )


Whilst wiring is one of the few areas I feel comfortable with, I want to check my fog light theory before making a permanent connection.

So at some point I will to connect the lights, switches, etc. up to the battery and see if it all works the way it should.

But for now, I think I will simply go and lie down, as I still feel rubbish.

Take care, Paul. :)
10 Feb 2015, 7:28pm
Hi Paul, I think the fog light has to operate with the dip beam and only with the dip beam ie; it shouldn't work with only the side lights or when the full beam is used, but I would check first as I could be wrong :icon_redface: