MadaboutKitcars

This is a read-only archive of the old Madabout Kitcars forum. New posts and replies are no longer possible, but every thread is still here to browse and read.

Another Cordite Is Born ...

21 Jan 2015, 7:55pm
The bonnet now looks symmetrical Paul, well done.
21 Jan 2015, 10:45pm
Wow and I thought cosmetic surgery was complicated..

Fantastic work considering the conditions..

I'm not going anywhere near mine 'till late Spring!
22 Jan 2015, 10:26am
Paul when I first saw where you had put the indicators I was horrified! Then I realised the shell was upside down!
Talk about feel an idiot!
Good job mate, that looks well balanced.
Your work-load has really put myself and others in the shade, and you don't even have a tent!!
22 Jan 2015, 12:56pm
Scottie you are not the only one to think at first glance, that the indicators were on top of the bonnet! doh!
22 Jan 2015, 2:39pm
Swifty, Nike55, Scottie & Froggyman - Thanks gents. :cool:

It is nice to get some positive feedback from other people looking at this with "fresh" eyes.
( Although some of those eyes are clearly fresher than others. :icon_wink: )

As I have slowly been driving myself crazy checking & re-checking the alignment. :rolleyes:
Deep down, I know that all the minor differences will not stand out when "on the road".
Which means it is time to "keep moving forward" and tackle something else.

- - - - - - - - - - - - - - - - - - - - - - - - - - - - - - - -

Making A Mess:
There were a few areas of the bonnet nose that I need to work on:

- The face of the top edge is "blunt" by comparison to the bottom edge.


- The internal lip that the grille rests against needed building up in some areas.


- The vertical face of that internal lip also needs to skimmed flat/even all the way around.


I did make an attempt to even out the internal face and the grille fit did improve a bit.


But I realised that I should really build up the edge first & then even it out after.

I also decided to build the lip up to a slightly lower height.


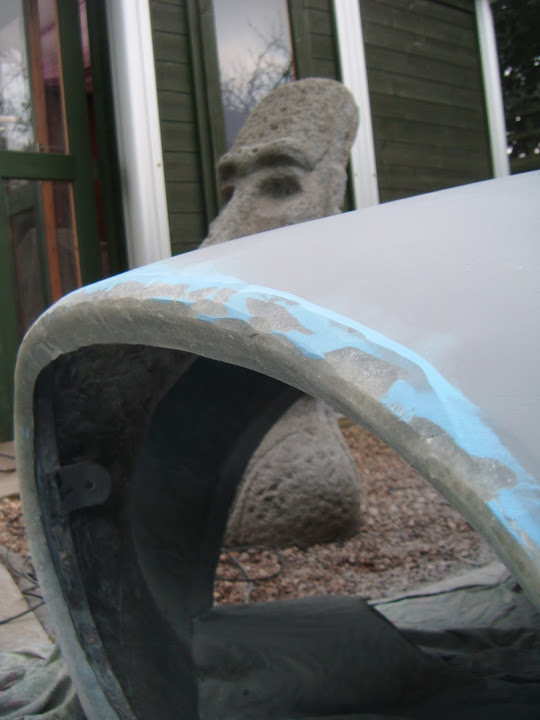
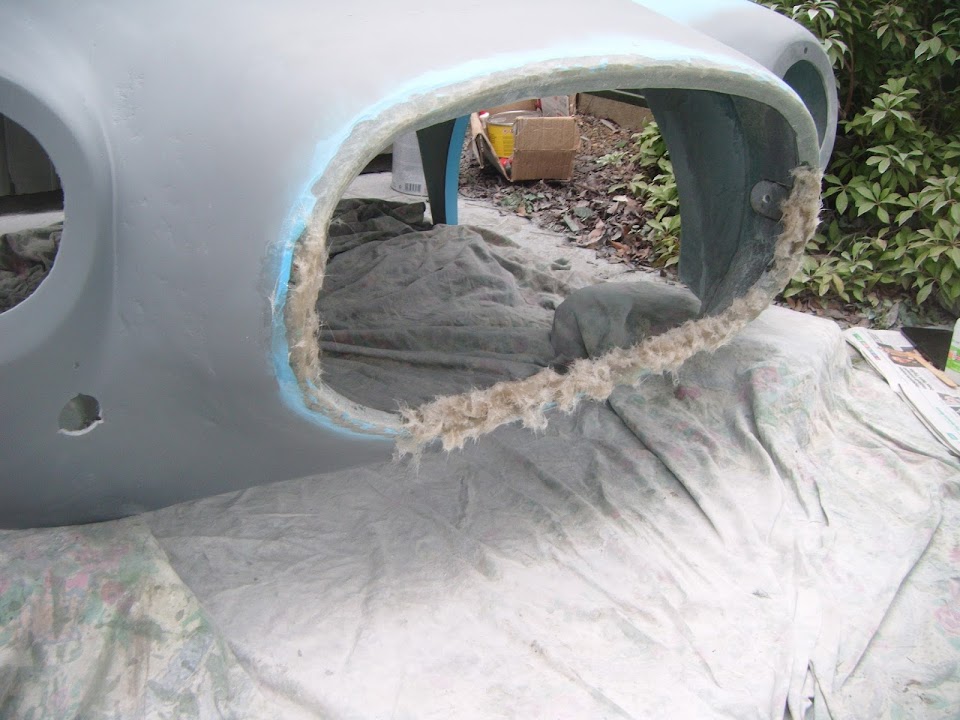
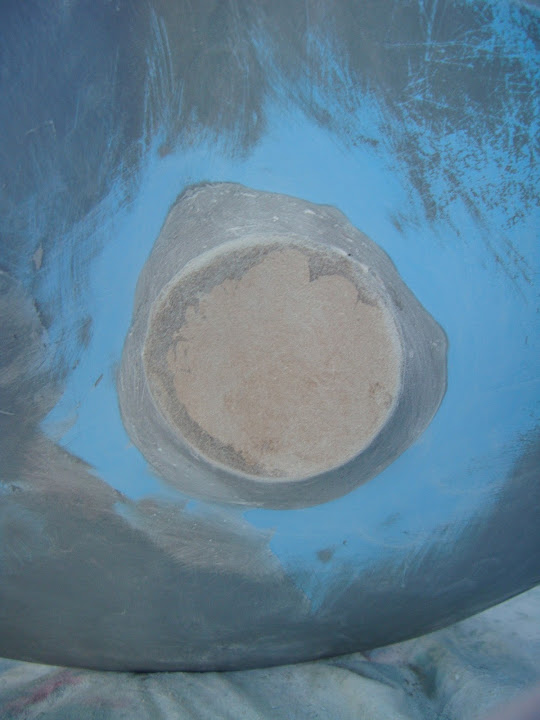
Next I took my angle grinder to the top edge to soften that up a bit.


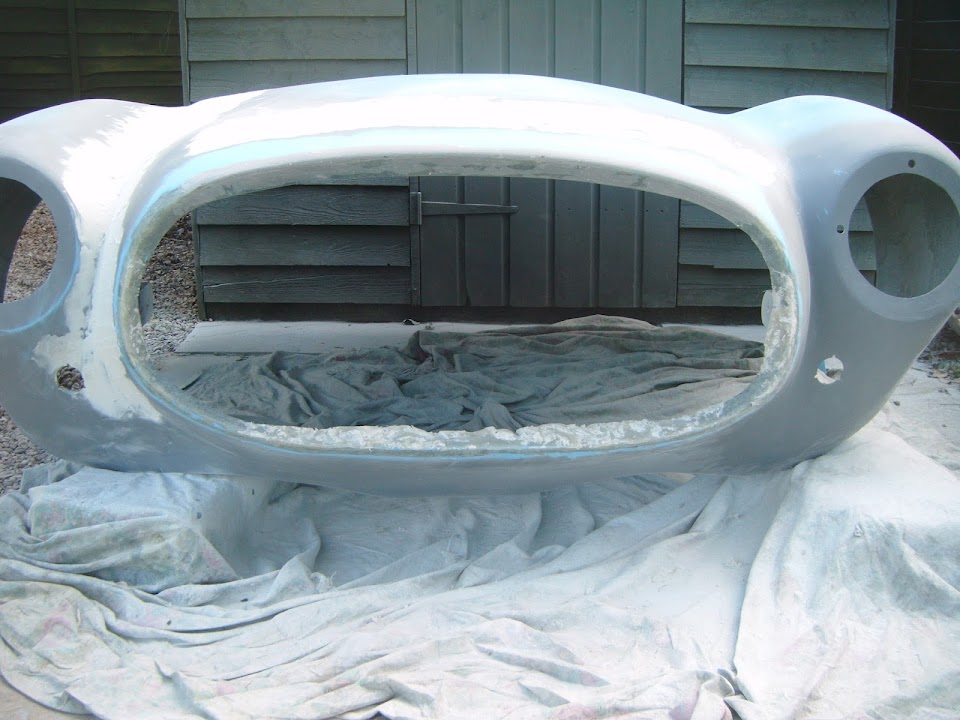
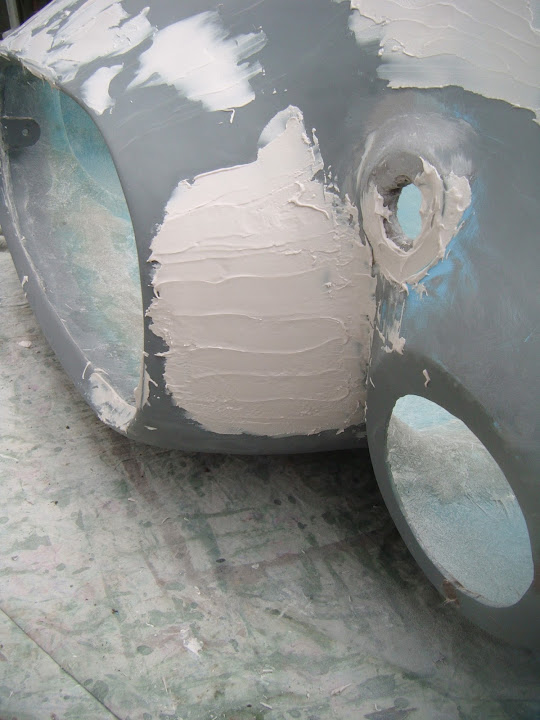
Leaving the nose looking like this before the filler work started.


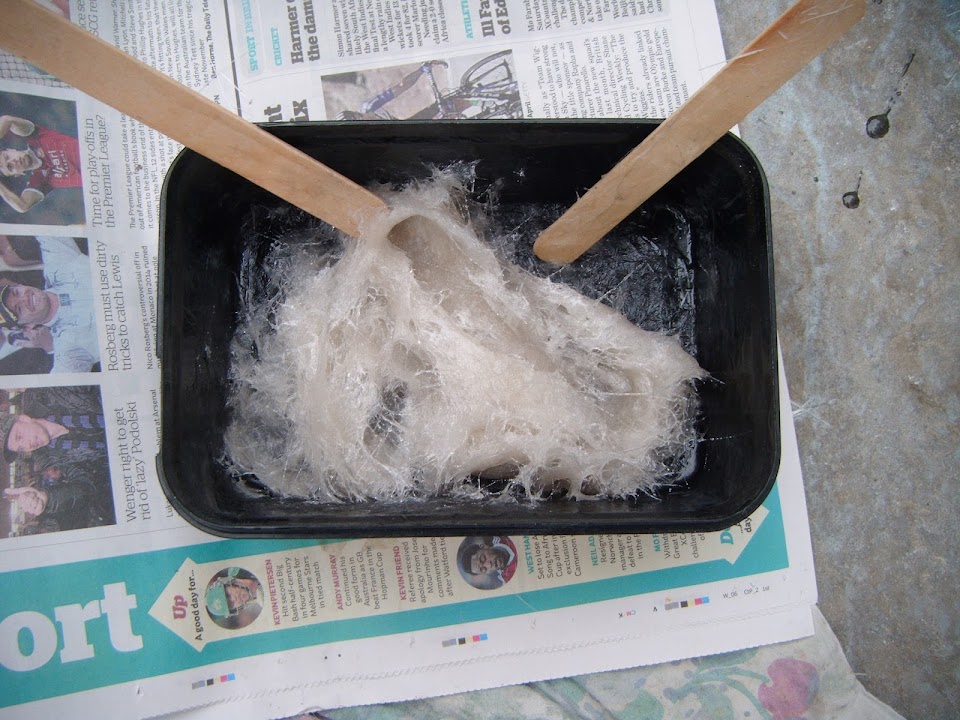
Then I mixed up some "home brew" fibreglass filler.

Although stopping to take this photo meant I almost forgot to add the catalyst.

But thankfully the ghost of Mister Towed reminded me to add it. :cool:


Which I used to start building up the lip where it needed it the most.


When sanded down, this will leave a good "rough" surface for the regular fibreglass filler to stick to.

Normal body filler was next, as I skimmed the "nose job" area.


I also covered the main bonnet join.


And the gap between the headlight and bonnet nose.


Whilst this looks like a lot of filler, it is a very thin skim in most places.

There was just enough normal fibreglass filler left in the tin to start work on the top edge.
( I do have another tin in the shed, but didn't want to mix the batches up. )


So by the time I left my morning's work to set, the bonnet looked a real mess.


But as the saying goes, you can't make an omelette without breaking eggs.

End of Part 1...
22 Jan 2015, 2:40pm
The Tidy Up Starts:
Unfortunately, I started sanding the normal body filler before it was set hard enough & a small chunk came off. :icon_sad:


Although, thankfully, this was not covering the repaired area and would have been sanded off the bonnet anyway.

Either way, I will leave all this filler to keep setting and will not start sanding it down until tomorrow at the earliest.

There were no problems with the fibreglass filler and that shaped up nicely. :cool:


Similarly, the "home brew" was also set, so that got a quick trim with the angle grinder.


I think it will look pretty good when the next round of normal fibreglass filler is applied around the edge. :pray:

But all of that will have to wait for another day.

Cheers, Paul. :)
23 Jan 2015, 10:59am
[color="blue"][SIZE="3"]Zip-a-dee-doo-dah, zip-a-dee-ay.

My, oh my, what a wonderful day.[/SIZE][/color]


Don't worry, the cold weather hasn't finally driven me mad.

No, as despite being very cold from working outside this morning, I now have a warm glow on the inside.

You see, as I was taking a cup of coffee upstairs to upload this morning's photos, I checked for any post.

There was a brown envelope from Swansea that rapidly turned me into a small child at Christmas. :rolleyes:

It was opened as I repeatedly chanted "Please let it be right" and I can now officially declare...

I have in my hand a piece of paper. :cool:

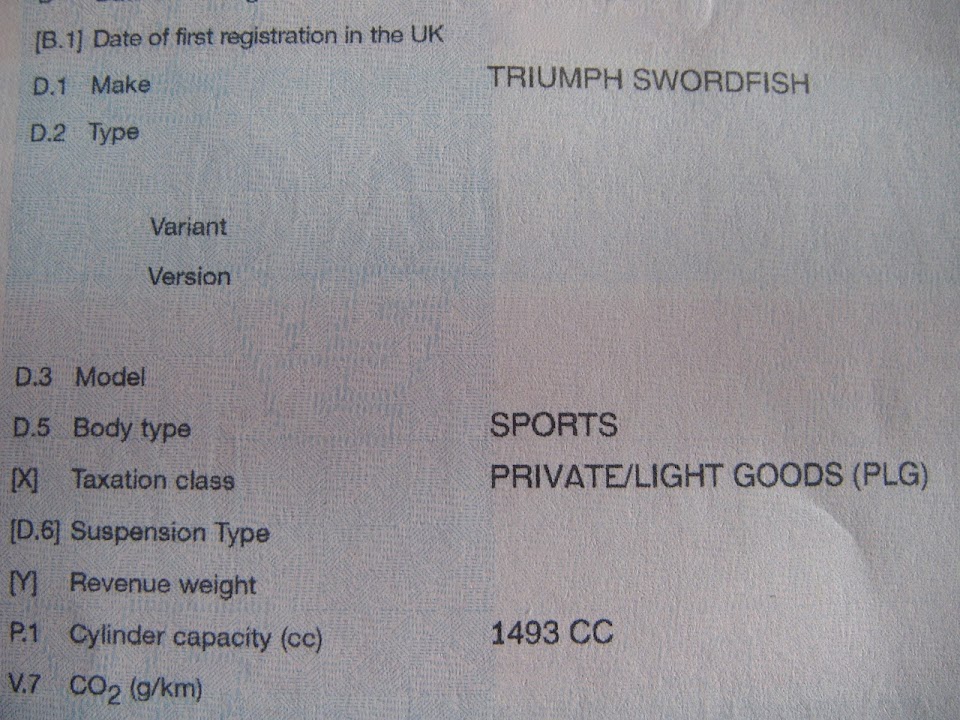
Which means it is finally time to reveal the Model name I have chosen for my V5C.

I didn't not want to use 'Sammio Cordite', as the original kit was such a stinking pile of :tape:.

( No offence intended to Sammio Spyders, Ribble Navigator MkIIs, Miglia Speedsters, etc. which were miles better all round. )

But I really liked the idea of using an alternative British WWII aircraft name to replace the original Spitfire. :plane:

Unfortunately, the obvious choice of Hurricane was already used by another car, a kit car & a motorcycle. :rolleyes:

However, I found something else, and thought its connection with water seemed appropriate for my outdoor build.

So it gives me great pleasure to introduce to you the world's first [color="blue"][SIZE="3"]Triumph Swordfish[/size][/color]. :cool:


Now I must admit to making a complete hash of the application process by asking all the wrong questions.

So finally seeing this revised Model name in black & white on my V5C is a huge relief. :thumb:

As an added bonus, there was no requirement for an inspection, which saved me hiring a trailer.

Whilst I remain a long way from getting this car on the road, this is still a high point of the build for me. :eusa_dance:

A special word of thanks to blooka & cbjroms for their help "behind the scenes".

Similarly, if I can help anyone else through this process, feel free to PM me.

Foot Note:
I originally wanted Swordfish 1500 as my Model name to tie in with my donor Spitfire 1500.

Whilst there would have been space for this in the Model line of the V5C, there wasn't in the Make line. :icon_sad:
( There appears to be a limit of 20 characters in that "box". )

Anyway, I have to go back outside shortly to continue today's work & will post a normal update later on.

In the meantime...

[color="blue"][SIZE="3"]Zip-a-dee-doo-dah, zip-a-dee-ay.

My, oh my, what a wonderful day.[/SIZE][/color]
23 Jan 2015, 11:07am
Nice name. Well done, Paul. I have been mulling WWII aircraft names for the similar reasons (despite mine being Herald-based!).

I did look at synonyms for "Herald" and suggestions include "publicize", "ballyhoo" and "tout"........................
23 Jan 2015, 11:24am
WHOO HOO!!!

Nice choice of a unique name for a unique vehicle :)
23 Jan 2015, 3:09pm
Oxford & Dave - Cheers guys. :cool:
I am actually going to send the nice man in the DVLA a thank you card this weekend.
As I am so pleased to have reached this key point of the build.

- - - - - - - - - - - - - - - - - - - - - - - - - - - - - - - -

Anti-Climax:
To be honest, after this morning's post, my normal update may appear quite dull by comparison. :icon_wink:

It was another ridiculously cold start to the day, which meant that the first job was more sanding.

Thankfully after a night in the Summer House the normal body filler was set solid.

So the "nose job" repair area now looks like this.
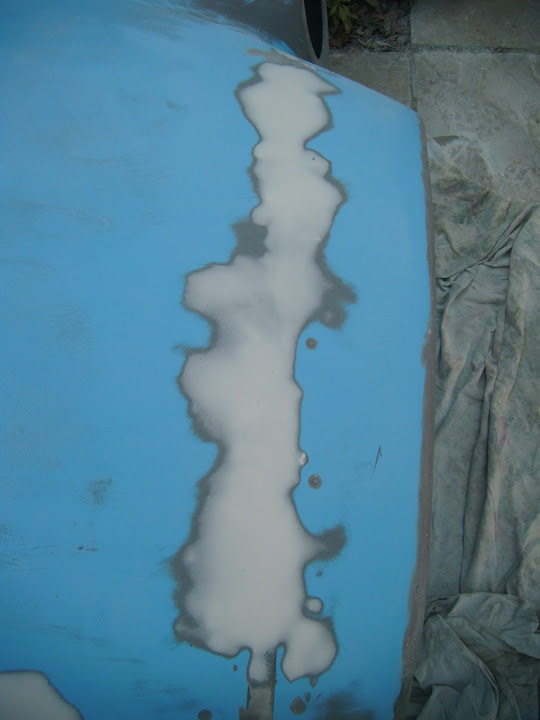


Here is the area between the headlight & nose.
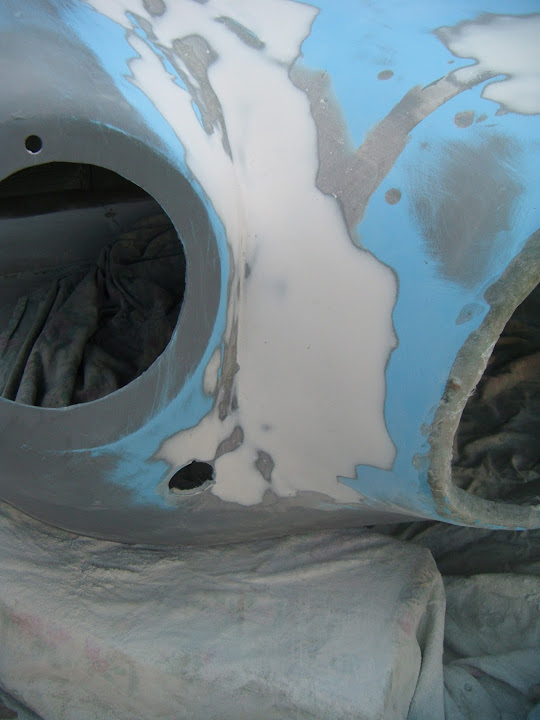


And finally the main bonnet join.
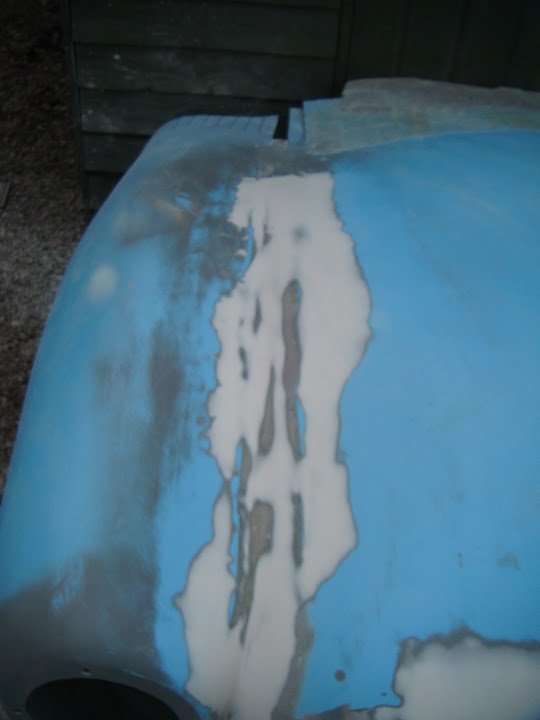


I need to do a bit more work on this join, but I am not going to attempt to mirror the other side.

As long as I can create a smooth flow across the bonnet I will live with the symmetry "quirks".

Whilst the sanding was hard work, at least it was helping to keep me warm.

When I removed my jacket steam was rising from me like I was a thoroughbred seaside donkey.

- - - - - - - - - - - - - - - - - - - - - - - - - - - - - - - -

Yesterday I was mainly thinking about the angles around the edge of the nose opening.

However, as I looked back on the photos, I realised the "height" of those angles mattered too.

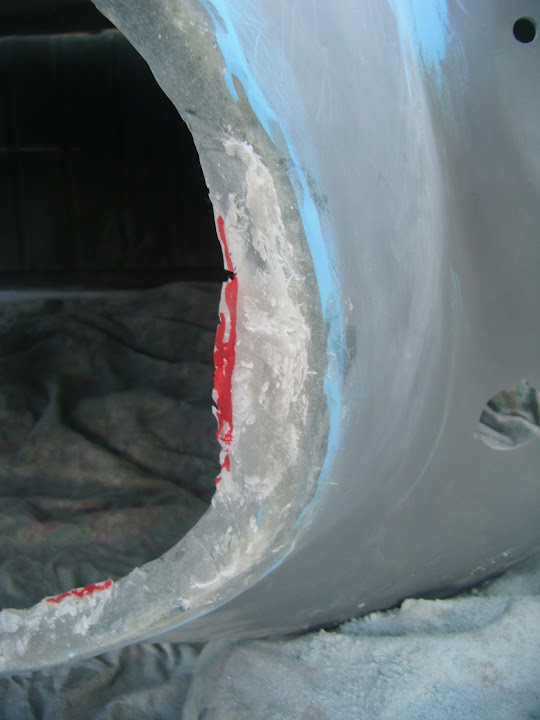
As it would be nice to get a vaguely even depth all around the inside when viewed from the front.

So using the size of the top edge as my guide, I marked up the "home brew" filler in a few places for a further trim.


- - - - - - - - - - - - - - - - - - - - - - - - - - - - - - - -

But before I started to trim this from the top, I had another look at tidying up the inside "vertical" face.

I found it very hard to grind this down to a flat and even surface all the way around.

However, it occurred to be that it would be a lot easier to build up the surface instead.

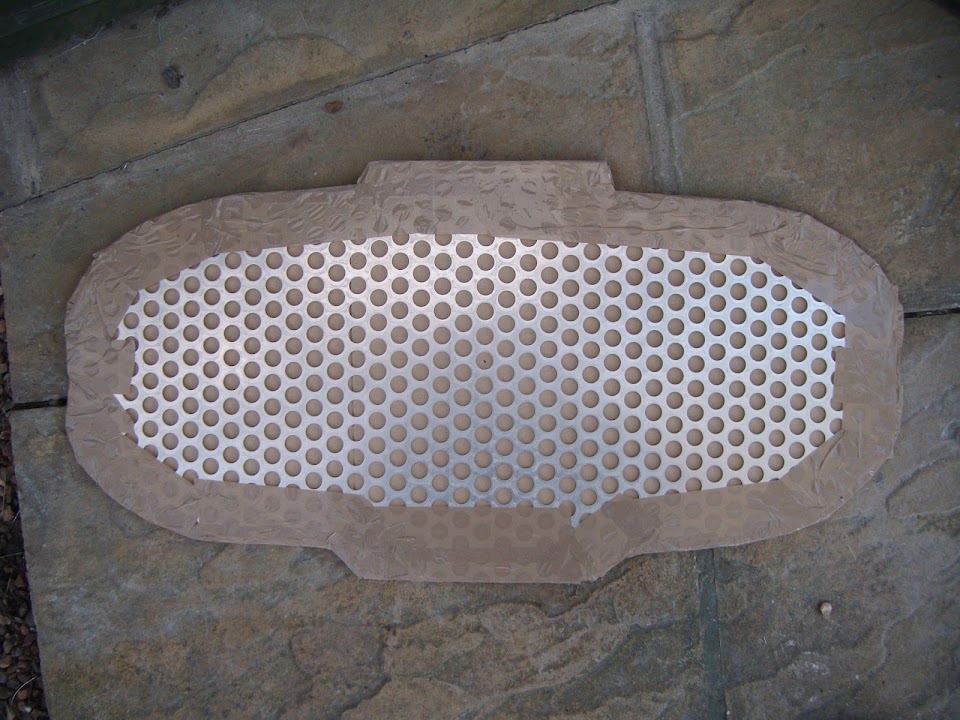
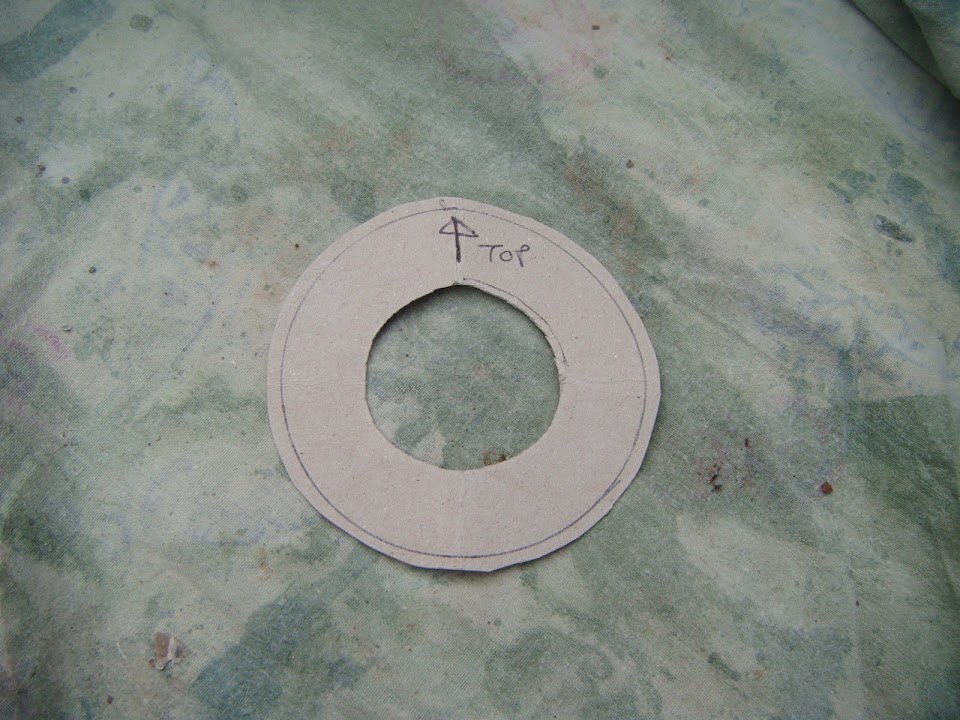
So I taped my cardboard grille template to the grille itself.


Before mixing up some fibreglass filler and spreading it around the whole inner lip.
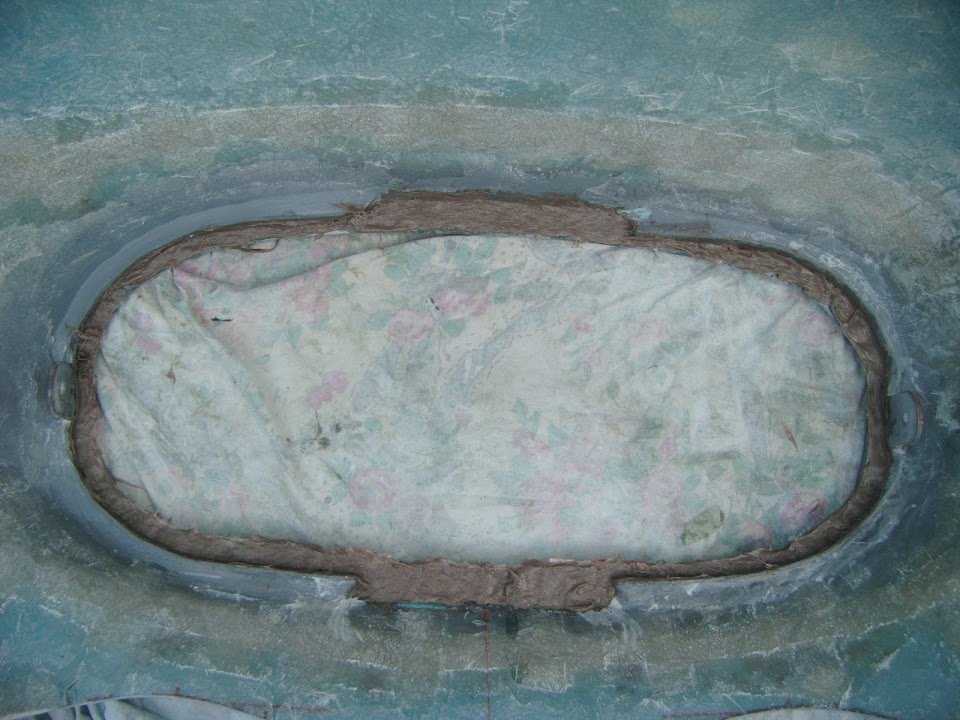


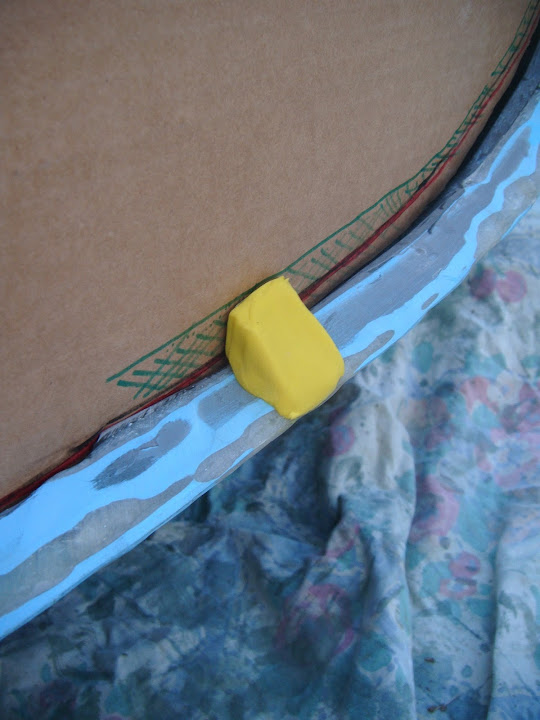
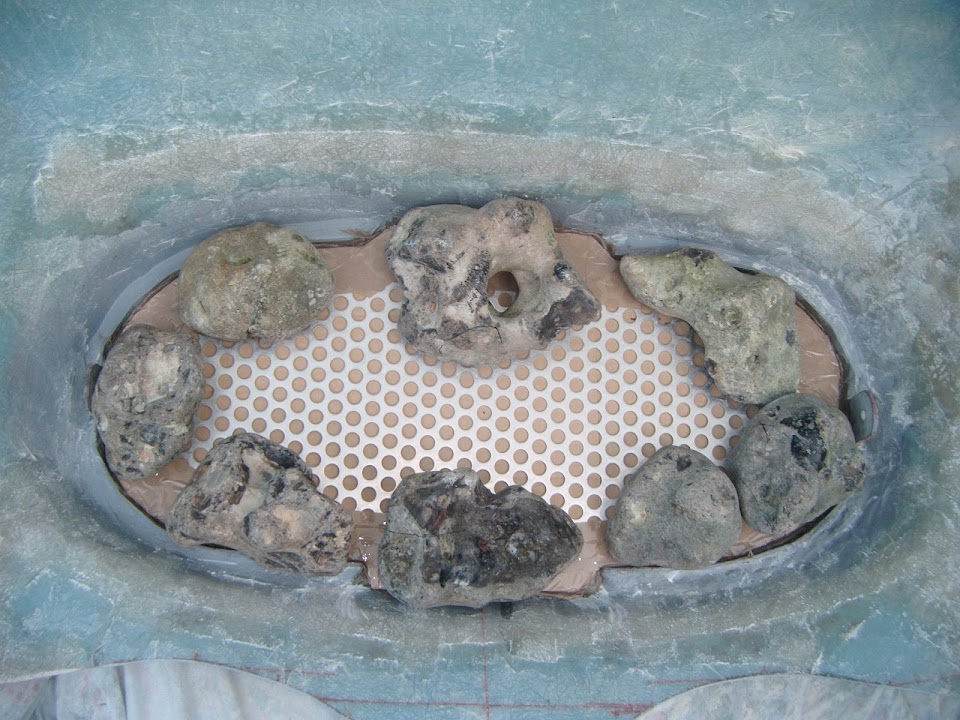
I pushed the cardboard/grille combo firmly into place to, hopefully, create a flat/even edge.

Then added a few rocks to hold it in position.


By this point I was so cold I was happy to come back indoors while I left that to set.

As you will have read above, that was when I found out my V5C had arrived. :cool:

- - - - - - - - - - - - - - - - - - - - - - - - - - - - - - - -

Whilst I added extra hardener due to the cold, I don't think I added enough. :rolleyes:

So it was a while before I could use a Stanley knife to trim off the filler squeezed out by the grille.
( I did this on both sides. )
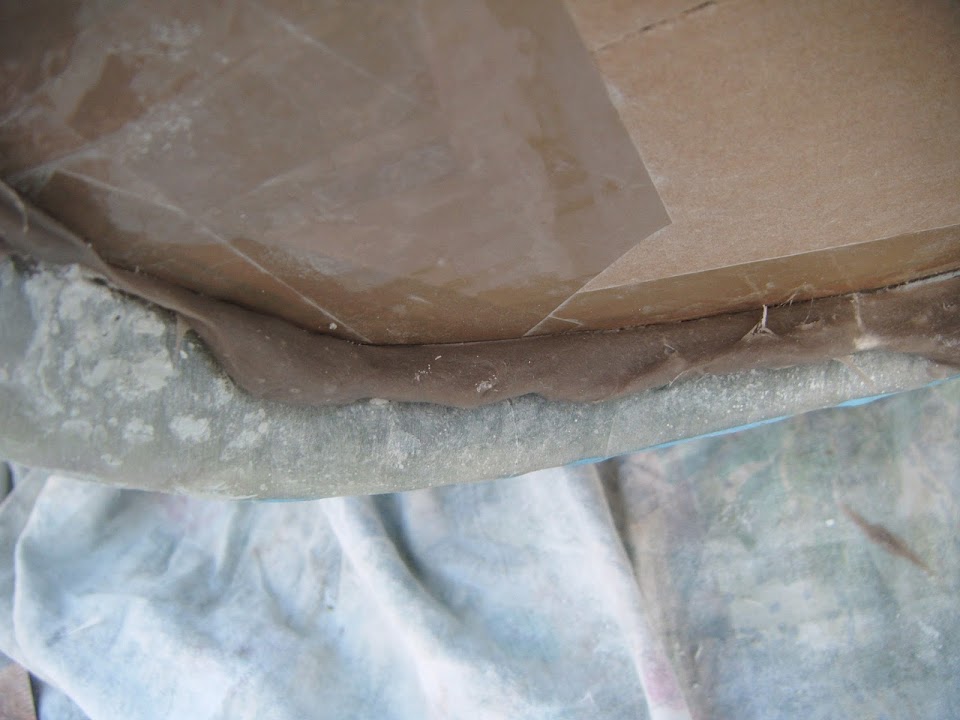


Then I could carefully remove the grille and trim down the previously marked "home brew".


I may have added too much hardener in the next batch of fibreglass filler, making it a race against time to apply it.

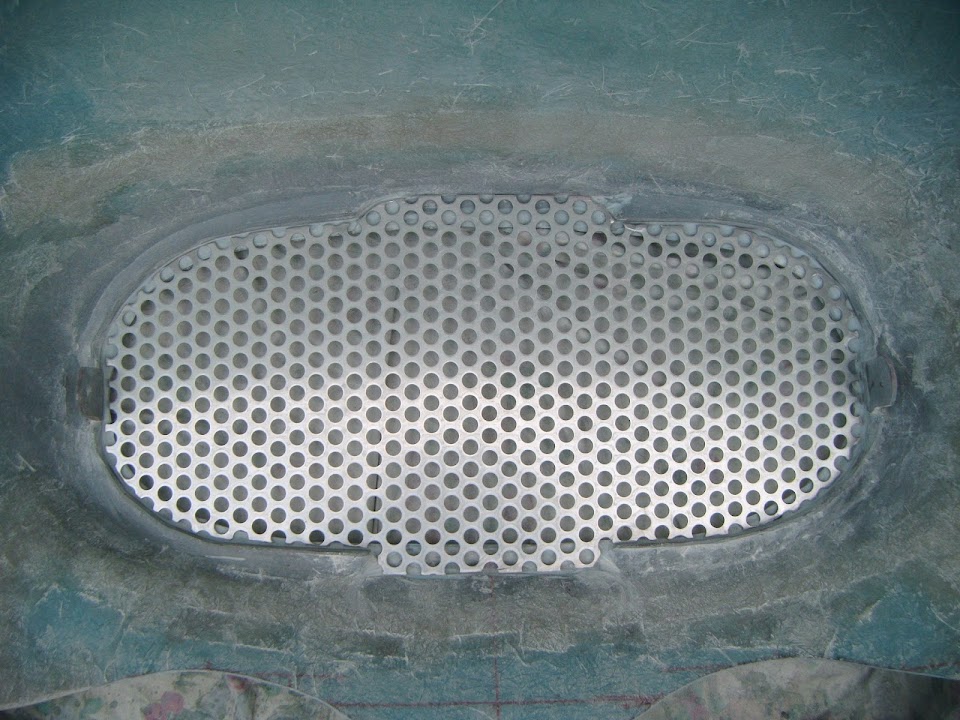
At least I got the remaining parts of the nose opening covered, I also pushed the grille back in place to give me a nice edge.
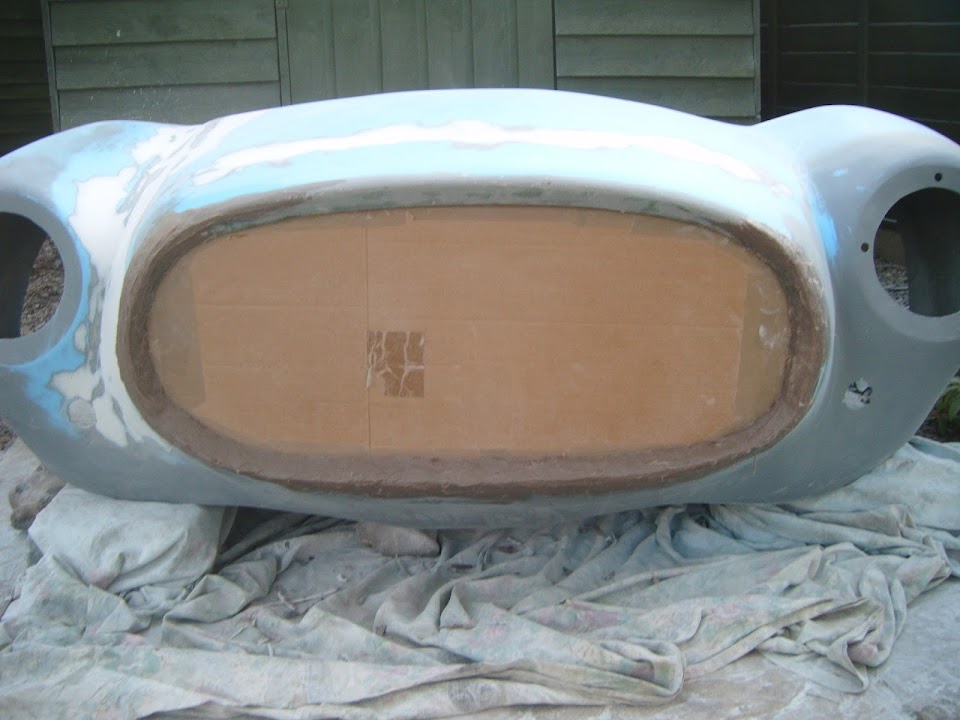
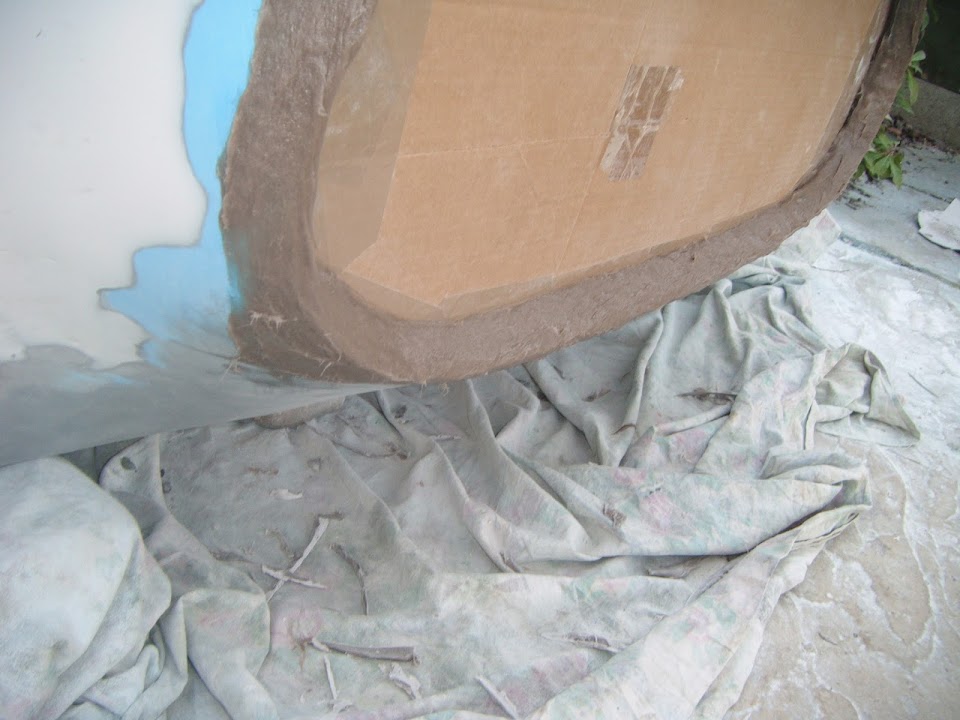


Note:
The end of the grille came away from the middle of the far edge when I took the photo.

I left that for a while before removing the grille again.
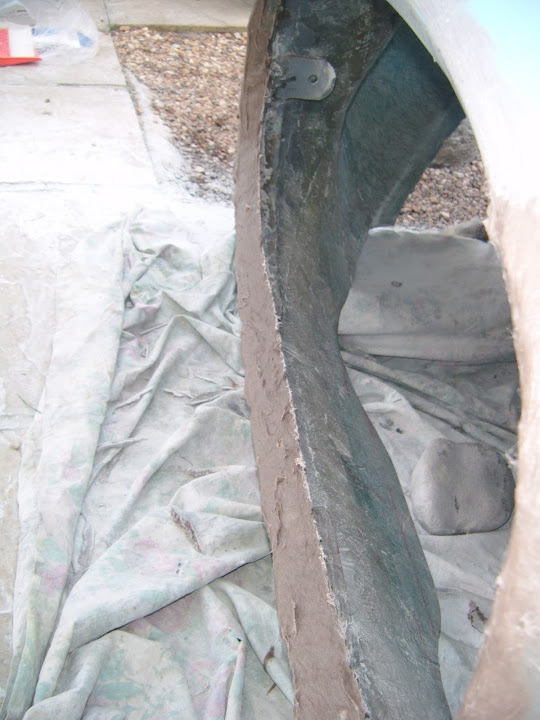


Note:
There is already a big improvement in the vertical face of the internal edge. :cool:

And obviously the whole thing will look better once I have sanded everything down.

But at this point I called it a day and tucked the bonnet away for the night to give the filler more time to set.

So until next time, take care, Paul. :)
23 Jan 2015, 10:08pm
Congratulations on the successful name change, but, given the headaches the bonnet has given you, and to keep with the WWII aircraft theme, wouldn't Triumph Focke have been more appropriate?
24 Jan 2015, 4:35pm
Mr T - Thanks. :cool:

Whilst not having to trailer the car to an old style inspection is certainly cheaper for me.
Those inspection photos were always a real progress land mark in earlier Sammio builds.

Finally, I completely forgot to consider names of WWII planes from the "opposition". :rolleyes:
Although another military expression might have worked, how does a "SNAFU 1500" sound?

- - - - - - - - - - - - - - - - - - - - - - - - - - - - - - - -

Another V5C Update:
I didn't notice these "Special Notes" yesterday, but thought I would mention it today, as they are on Page 1 of the new V5C.


This is an official confirmation that the car started out as something else (i.e. a Spitfire).

- - - - - - - - - - - - - - - - - - - - - - - - - - - - - - - -

Slowly Shaping Up - Part 1:
It was back to sanding and shaping again this morning as I tackled the bonnet nose opening.

There is still a bit of filler fine tuning to do, but this has turned out much better than I was expecting. :cool:


It took a bit more filler to smooth out the edge along the lower valance.


But the vertical face on the inside of the grille lip is miles better.


However, no sooner had I finished sanding one batch of filler, but it was time to mix up the next one. :rolleyes:

I made some cardboard templates for the front indicators and covered their backs with parcel tape.


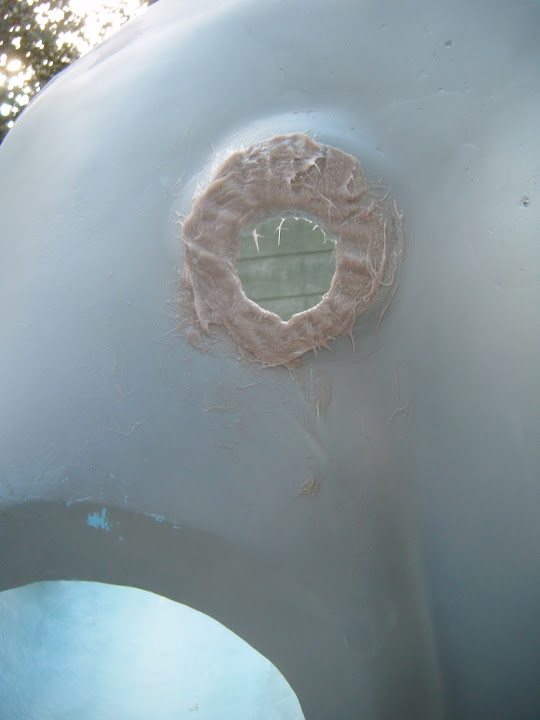
Then I made a "donut" of filler around the holes in the bonnet.


Before pressing the cardboard into place and smoothing the edges a bit.


This will be enough to give me a solid base to get the final shape from.

I used up some of the remaining filler to skim some of the low spots along the nose opening edge.


Note:
You can just see where I propped up the bonnet at the back, so the indicator templates would be closer to the "on the road" angle.

The rest of the filler was added to the side of the nose.


As this was not quite straight enough when compared to the other side.


Then it was simply a case of waiting for the filler to set hard enough for me to start sanding it back.

End of Part 1...
24 Jan 2015, 4:37pm
Slowly Shaping Up - Part 2:
In the afternoon I sanded down the area around the indicator template.


Then pushed it out from behind and clearly I need to add a bit of filler bring this up to a level surface all around.


Then I removed any filler in front of the original hole in the bonnet & marked up where the bottom edge of the indicator was.


After a bit more sanding to soften the bottom edge, I had a pretty good fit.


I also finished off the sanding of the grille opening edges & gave a rough sand to the extra filler on the side of the nose.
( As I will add a skim of normal filler to this for what I hope will be the final shape. )

All this work has left the bonnet looking very sorry for itself.


I wanted to double check these indicator positions on my computer screen before doing any more filler work.

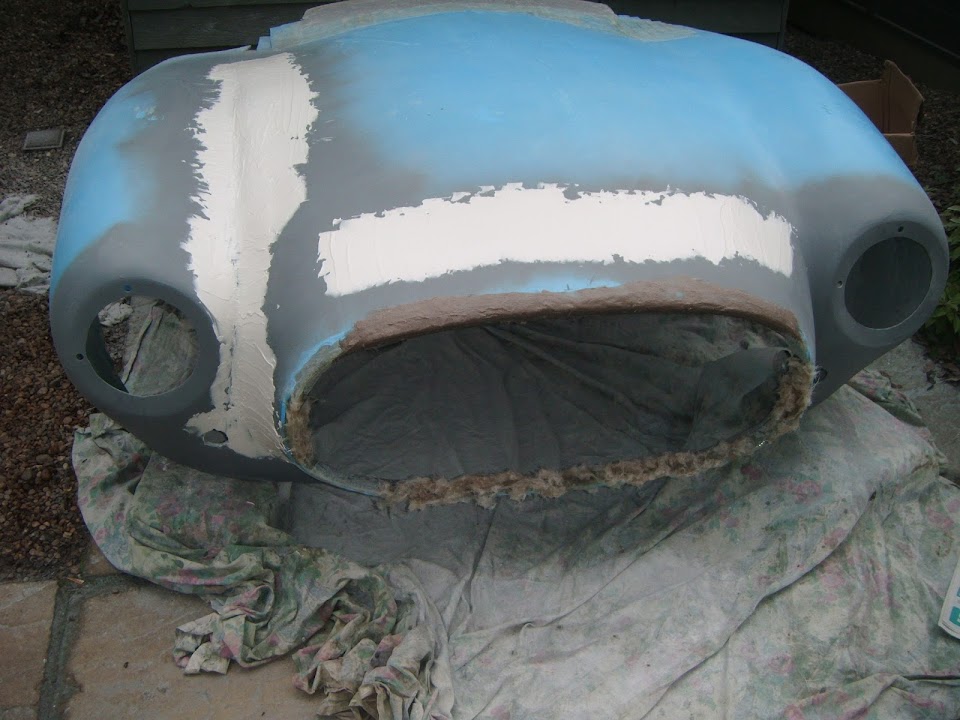
So I gave the front of the bonnet a dusting of etch primer to make it easier to see where I was.


I think the indicators mounts have ended up OK and will only required a small bit of filler "fine tuning".

Note:
I really like the way the grille opening edge has turned out, now I can see it in one colour. :cool:

I also came across this photo of the front view of a Miglia Speedster on Thurcroft Flyer's build thread the other day.


As I have often said, the Speedster is clearly a big improvement on the original Cordite.


But even if my bonnet still isn't perfect after all this work, it too is clearly a big improvement on the original. :cool:

Until next time, take care, Paul. :)
24 Jan 2015, 8:51pm
Looking good Paul, a covering of primer does make a difference and congratulations on the V5 that will be a big load off your mind.
25 Jan 2015, 4:44pm
Swifty - Cheers, knowing the V5C is now sorted has been a HUGE relief. :cool:

Also the coat of primer gives me hope that the car should look great when finally painted. :pray:
As it is easy to get caught up in the detail of all the repair work and miss the bigger picture.

Scottie - If you don't mind, I'll reply here to your post on the DVLA thread...
I certainly took the long & winding road to a new V5C, but I really like the fact I now have a "one off" name.
As I will have a "one off" look too, or at least I will have when I've blended the rear of the bonnet to match the new scuttle. :rolleyes:

- - - - - - - - - - - - - - - - - - - - - - - - - - - - - - - -

Lights... Filler... Action...
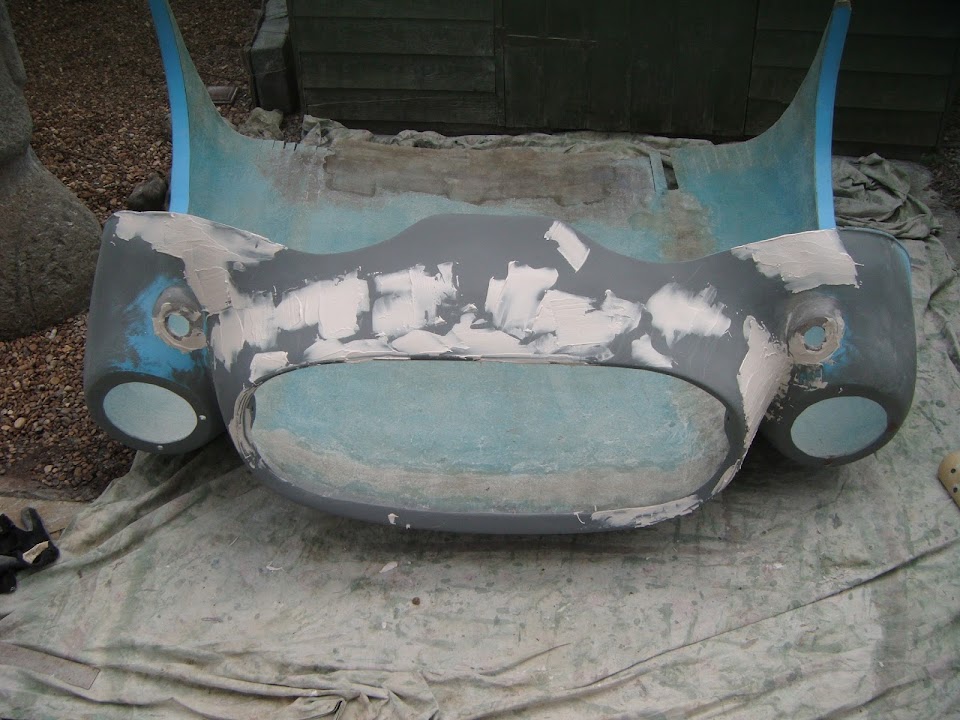
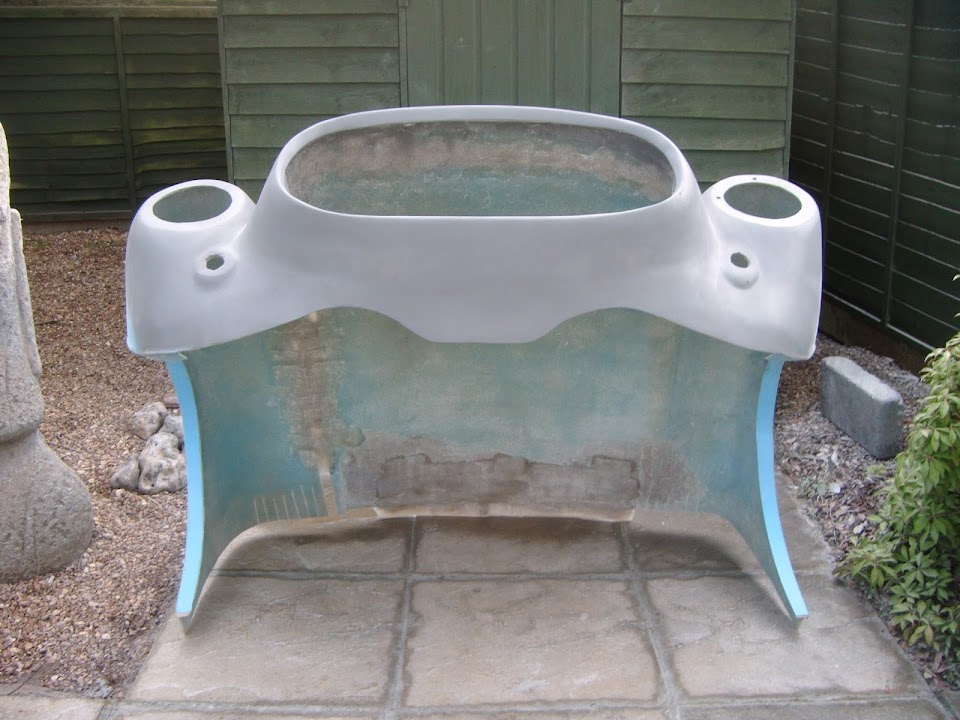
I mixed up a small batch of fibreglass filler to fill in gaps in the front faces of the indicator mounts.


I also filled in the headlight adjustment holes for the driver's side headlight.


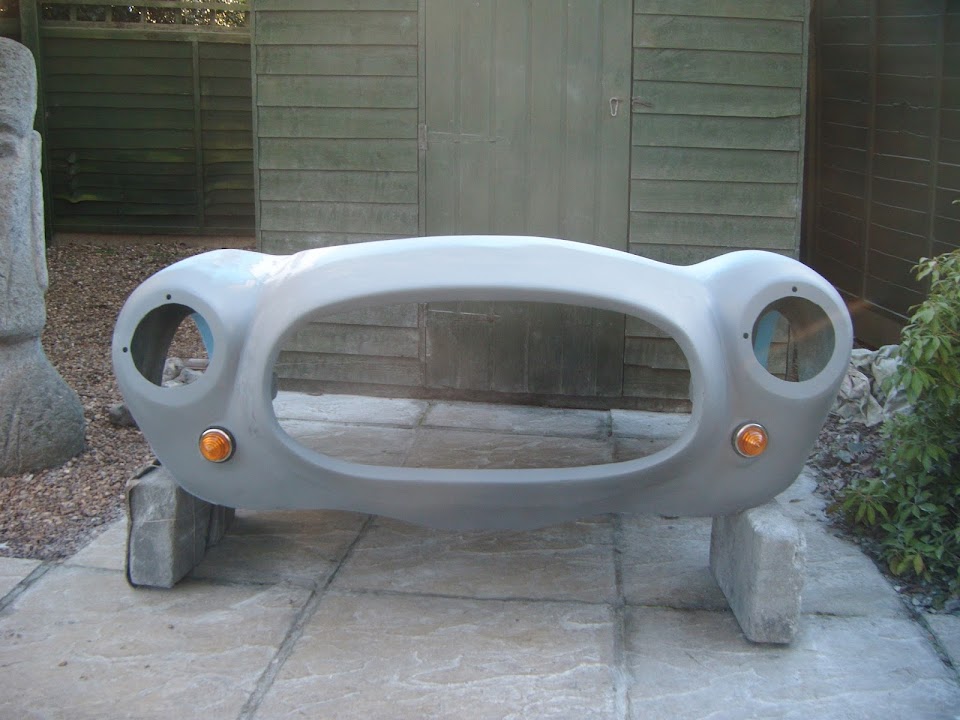
Just in case there is any confusion, the bonnet is upside down. :icon_wink:

- - - - - - - - - - - - - - - - - - - - - - - - - - - - - - - -

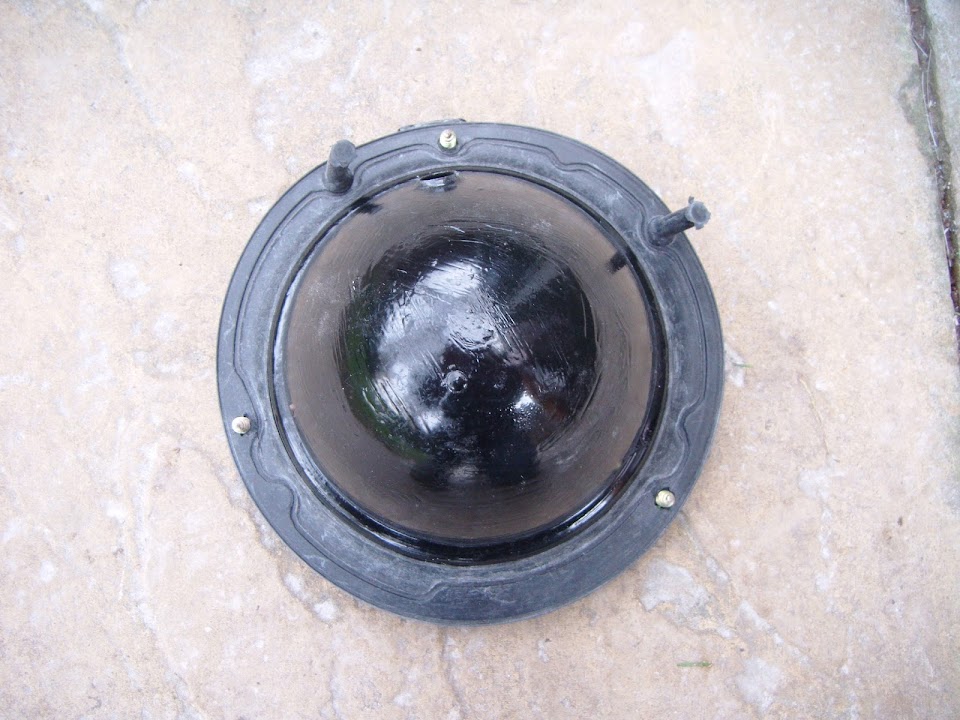
Yesterday I had a brief look at my two headlight assemblies (one assembled + one in bits) while waiting for the filler to set.

As I wanted to work out if I could get the headlight "straight" on the driver's side if the adjustment holes were at an angle.

The headlight lens has markings showing which way is up.


The issue for me is that I upgraded the headlight to include a built in side light.


Which, in turn, required a hole to be cut in the headlight mounting bowl.


The hole was cut with the adjustment holes at 9 & 12 O'clock when the mounting bowl is fixed to the main headlight shell.
( Although it is not easy to see in this photo. )


So, rather than re-work the hole in the headlight bowl, I will simply re-drill new adjustment holes in the correct position.

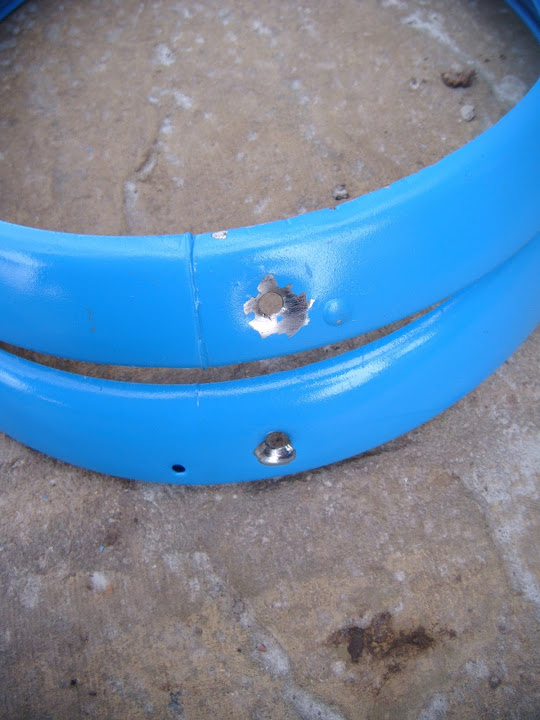
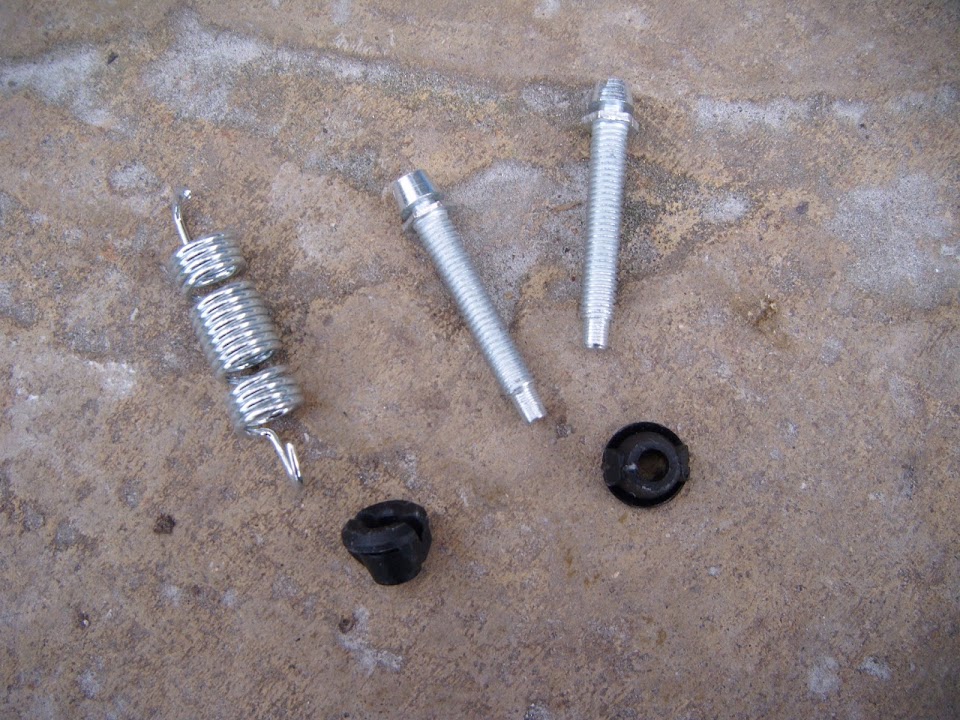
I also had a look how the new headlight outer rim retaining clips I'd bought is meant to work.


Which means I needed to drill a hole in one of my second hand rims that doesn't have a hole in it.


The hole was straight forward, but the countersinking took a bit of carefully hammering.

It seems like a very long time ago that I bought two new rubber headlight seals.

But today I cut out three holes in each of these for the main fixing screws.


I had also bought a set of replacement fixings for the headlights.


So hopefully everything will be "good to go" when I finally get the chance to fix the headlights in place.

Although I may need to do some work to ensure the faces on the wing where the headlights go are pointing in the same, forward, direction. :rolleyes:

Finally, as far as headlights are concerned, I gave both outer headlight rims a coat of etch primer after roughing up the blue paint.


As these rims will eventually be painted BRG to match the bodywork, but for now grey is better than blue.

End of Part 1...
25 Jan 2015, 4:46pm
Part 2:
Initially I made a paper template that matched both the inside & outside circles of the front indicator.


I was going to use this to check the basic symmetry of the mounts with the centre of the bonnet hole.

Although in the end, after an initial rough sanding down, I just put the indicators back in and marked around them instead. :rolleyes:

I just need to build up the mounting area above the indicators a little bit.


I did mention the bonnet was upside down, didn't I? :icon_twisted:

Then I made the mistake of mixing up too much normal body filler and adding too much hardener to compensate for the cold. :frusty:

So as quickly as I could work, I built up the areas around the indicator mounts & the side of the bonnet nose.

These were the two area I wanted to cover, but I then tackled some of the blemishes on the lower valance & grille opening edge.

By now the filler was already setting, which left everything looking like a complete mess. :rolleyes:


- - - - - - - - - - - - - - - - - - - - - - - - - - - - - - - -

My last session of the day was spent sanding everything back down before I packed up.

At least the surfaces are a lot smoother than they look. :rolleyes:


Finally, with the bonnet the right way up, here are the indicators shown side by side.
( Driver / Passenger )


It would have been easier to compare them if I had put some more etch primer on, but it was getting too cold & damp outside.

But I'm happy with them, especially as I am not even trying to achieve a perfect mirror image.
( And given the differences between the contours of the two wings, that is just as well! )

Until next time, take care, Paul. :)
26 Jan 2015, 4:03pm
Just Passing Through...
Only had time to give yesterday's work a quick coat of primer.


There is still a couple of areas I need to come back to and a load of pin holes. :icon_evil:

But that will be something I will deal with during the prepping for paint stage.

- - - - - - - - - - - - - - - - - - - - - - - - - - - - - - - -

After leaving that to dry for a bit, I did one final mock up with the indicators in place.


Which confirms my build theory that even if it isn't perfect, it is better than what I started with. :cool:

Until next time, take care, Paul. :)
26 Jan 2015, 8:14pm
Top Work

Keep going Paul, looks superb. The first thing I do when I get home is look to see if you have posted. What's next on the list?. Top Work chap.:eusa_clap::eusa_clap::eusa_clap:
27 Jan 2015, 8:01am
That's some transformation, well done.
27 Jan 2015, 12:49pm
Thurcroft Flyer - Thanks, are there any update/news from your own build?
As it was flying along last year, which I re-read when I took a copy of your bonnet photo.

ufo17 - Cheers, next on the list is re-enforcing the lower valance (see below).

Mr T Thanks, I found the work you did on your dash a great example of what can be achieved.
Because your "After" photo looked so good compared to the "cut & shut" "Before" photo. :cool:


- - - - - - - - - - - - - - - - - - - - - - - - - - - - - - - -

Restricted Play Time:
There was a bit of leg pulling recently on Scottie's build thread about making progress in the Winter.

So I went back and checked what I have managed to achieve since Christmas:
- Finished the hinges to give me a fully tilting bonnet
- Started the re-profiling and extension work at the rear edge of the bonnet
- Repositioned and reattached the driver' wing to the rest of the bonnet
- Sorted out mounting points for the front indicators
- Re-profiled the edge around the grille opening in the bonnet nose

I must confess that even I have been amazed at just how much I've managed to achieve in a month. :cool:

However, great progress on the car often means poor progress in other areas and this is no exception.

So I will be on restricted car duties for a little while until I can catch up with other stuff. :icon_sad:

But that is OK, as I have to balance the car with my family and there isn't a real finish date target.
( As I just have to accept that it will take as long as it needs, but will be done eventually. )

- - - - - - - - - - - - - - - - - - - - - - - - - - - - - - - -

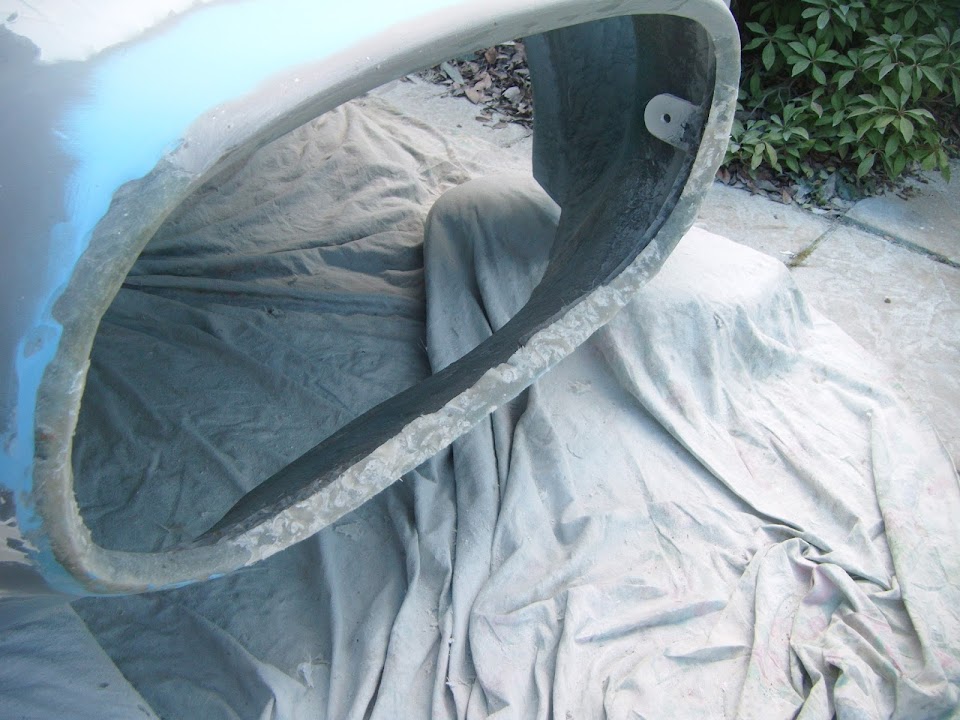
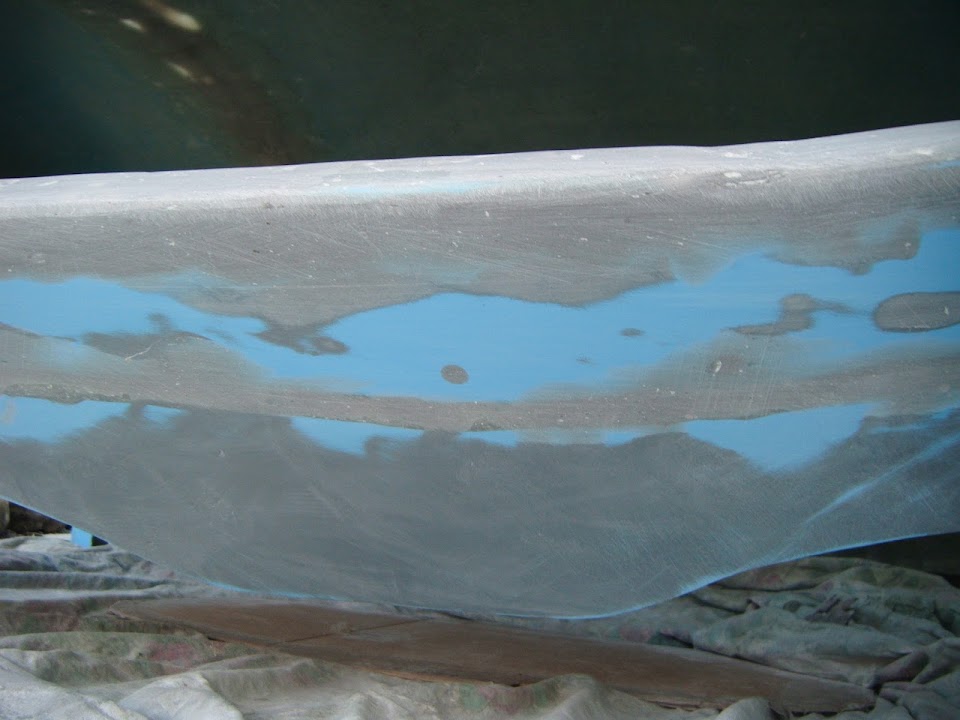
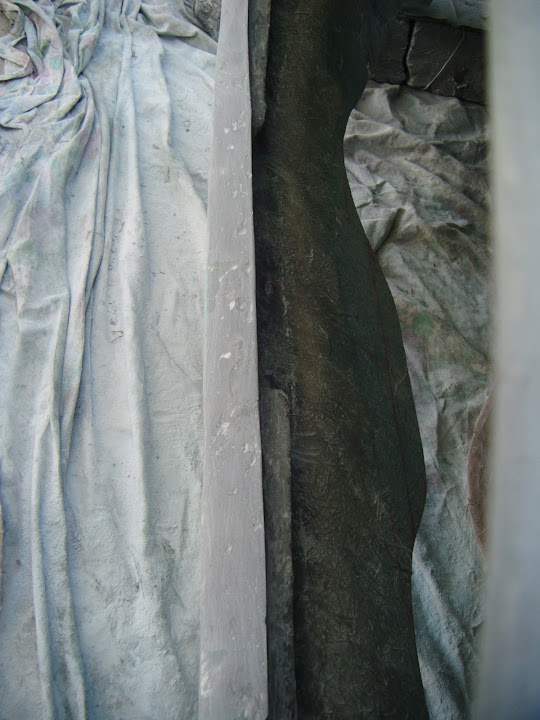
So today I limited myself to a single small task, beefing up parts of the lower valance edge.
( As it is already quite thick / stiff where the original section was reattached & the bottom edge extended. )

I started by cleaning up the surfaces.


Before I put a number of layers of fibreglass matting in place.


I will come back and tidy the matting currently overhanging the lower edge another day.

My "something is better than nothing" philosophy means that is still another small step in the right direction.

Well, I'd better go and do some other stuff.

So until next time, take care, Paul. :)
27 Jan 2015, 2:13pm
Paul, do you use a paintbrush to put the resin on?
27 Jan 2015, 7:48pm
Good question Gary, thanks for the repost Paul I'm just about to start doing some mods to my kit most not seen but never fibreglassed before. Watched far to many youtube video that eventually it all has been quite contradictory.

Your car is coming on well and impressive you have done so much outside.

Best of luck , Ian
27 Jan 2015, 8:55pm
thanks for the enquiry regarding my own build, but I have had to put it on the back burner over the last few months, other things have taken priority, keep up the great work as my only involvement is watching you guys on here put me to shame. hoping to re start sometime next week, but the question is where.i will have to pull my finger out to make it on the road this summer??????