MadaboutKitcars

This is a read-only archive of the old Madabout Kitcars forum. New posts and replies are no longer possible, but every thread is still here to browse and read.

Marlin Roadster (Re)Build

31 Mar 2023, 4:10pm
More refurb work

Doing a bit more on preparation.

First the front hubs. The good news was they still had the original Timken bearings - or so I thought.... However when I looked at one of them it was totaly trashed inside. It looks like a bearing had broken up at some time judging by the damage. Even the step which locates the bearing outer race was destroyed. Someone had done a quick fix and popped in a new bearing but that's not really an acceptable solution so I am looking for a replacement.
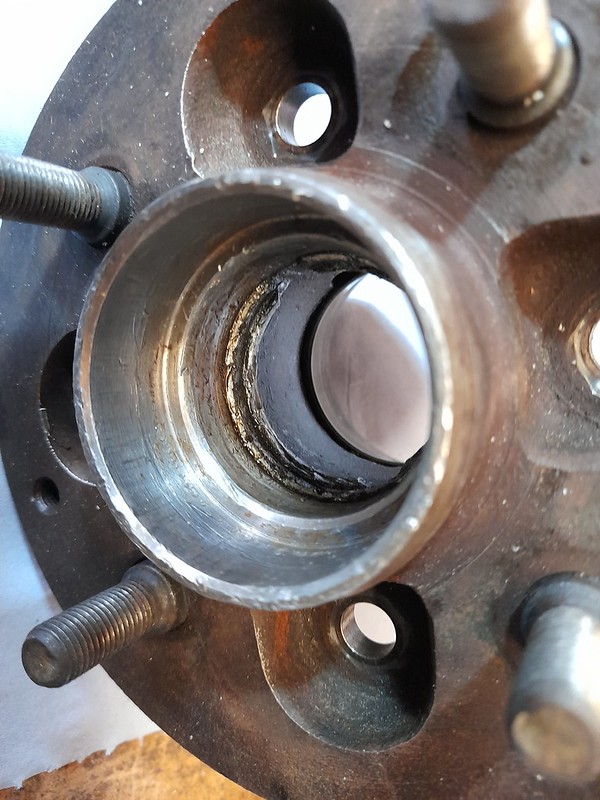
damaged hub by Robin Martin, on Flickr

And the brake calipers. They are almost the same as those used on the Triumph Spitfire (Girling type 14) so there are plenty of replacements available. But, after experience with buying bits for the engine I am a bit suspicious of some of the stuff that is available. So I thought I would have a go at stripping them - keeping in mind they are at least 50 years old and haven't seen any use for at least the last 30!
Following a good tip I cut the end off an old flexi brake pipe, screwed the uncut end into the caliper and used my compressor to blow down the other. This allowed me to have the caliper safely in a bucket at arms length just in case any of the pistons came flying out!
Three of the four came out "easily" but the last one wouldn't budge.
Now I followed another good tip! I put back the piston in the caliper with the stuck one but in an almost out position. I then filled the caliper with water (yes really) with the bleed nipple screwed up and then a spare bleed nipple where the brake line should go. I used a couple of clamps to push back the "good" piston and Hey Presto the water pressure was sufficient to get the stuck piston moving! Amazing!
Finally I split the calipers. You are not supposed to do this but I couldn't see any other way of properly inspecting and cleaning the bores. There is only a single O ring to worry about and this comes with the refurb kit you can get from Bigg Red. And, suprise suprise, everything looks good even though there was rusty crud in most of them!

stripped calipers by Robin Martin, on Flickr
10 Apr 2023, 9:29am
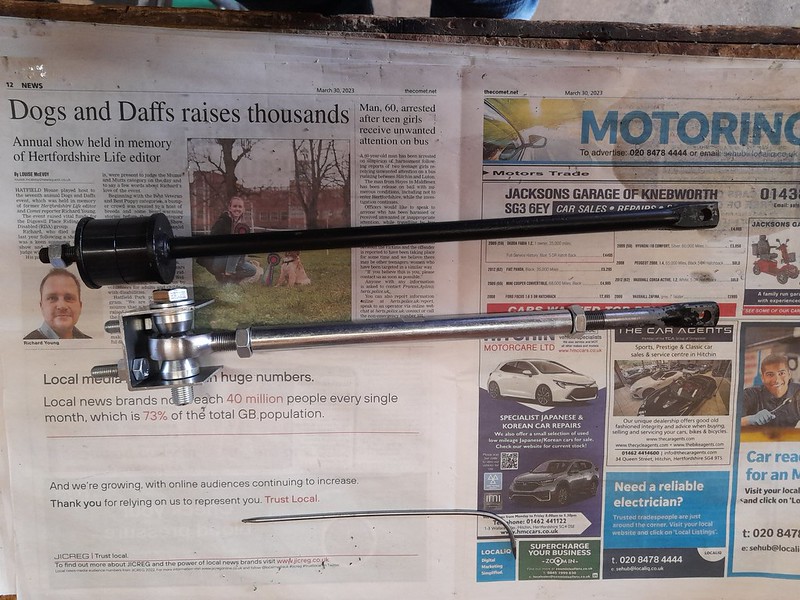
I have made some new adjustable tie bars following what has been done in the past by other Marlin owners. They comprise the front part of the old tie bar, a turnbuckle and some rose joints. The idea is not so much to make the suspension adjustable but to be able to dial out any inaccuracies in the chassis geometry. From what I have read this is not uncommon. I am going to remake the U shaped chassis brackets as I don't think my first attempt looks substantial enough.

tie_bar1 by Robin Martin, on Flickr
tie_bar2 by Robin Martin, on Flickr

Cutting the 1/2" UNF thread on the tie bar proved tricky. Ideally a lathe should be used for larger external threads but I don't have one. I do however have a decent pillar drill - so I used this to drill a perpendicular 1/2" hole through some substantial box section. I then attached this to the die holder positioning it with a 1/2" UNF bolt. The hole through the box section acts as a guide resulting in a perfect thread on the item to be threaded.

modified_die_holder by Robin Martin, on Flickr
die_holder_use by Robin Martin, on Flickr

I should say the guide wasn't my idea. I found the basics on t'internet after a failed attempt at cutting a thread.
10 Apr 2023, 9:40pm
Marlin Tie bars

What a brilliant hack and so simple. Thank you! But did you forget to mention the cap screws, or did I not read it right?
11 Apr 2023, 7:56am
Dpaz wrote:
What a brilliant hack and so simple. Thank you! But did you forget to mention the cap screws, or did I not read it right?


Yes - over simplified description! Once positioned using the bolt, you attach the box section guide to the die holder using whatever mechanism suits. I just drilled through the die holder and box section and use a couple of M4 screws.

Cheers, Robin
13 May 2023, 4:36pm
Front suspension rebuild has moved on to fitting the hubs. At this stage I was feeling fairly smug with the bargain triumph wire wheel adapters I had bought from Ebay as a trial fit seemed to be good.
However when I came to fit them properly I found they didn't (fit). The hub casting, where the grease cap fitted, fouled the inside of the adapter. "Easily" fixed by some heavy duty filing. I then found that the wheel studs have a large shoulder on them, great for centering the wire wheel adapter, but unfortunately preventing the nuts securing the adapter to be screwed fully home. Hmmm. after some head scratching I made a thin, 1mm, spacer which did the trick. now everthing fits OK :-).
So the front suspension is pretty much complete and I would have a rolling chassis - if my wheels had any tyres on them,
Some pictures....
hub_before by Robin Martin, on Flickr

hub_and_spacer by Robin Martin, on Flickr

front_suspension1 by Robin Martin, on Flickr
14 May 2023, 9:21pm
Looking good :)
11 Jul 2023, 6:48pm
I have been making slow progress once again. This getting old certainly slows things down a bit. Plus the more than occaisional holiday...

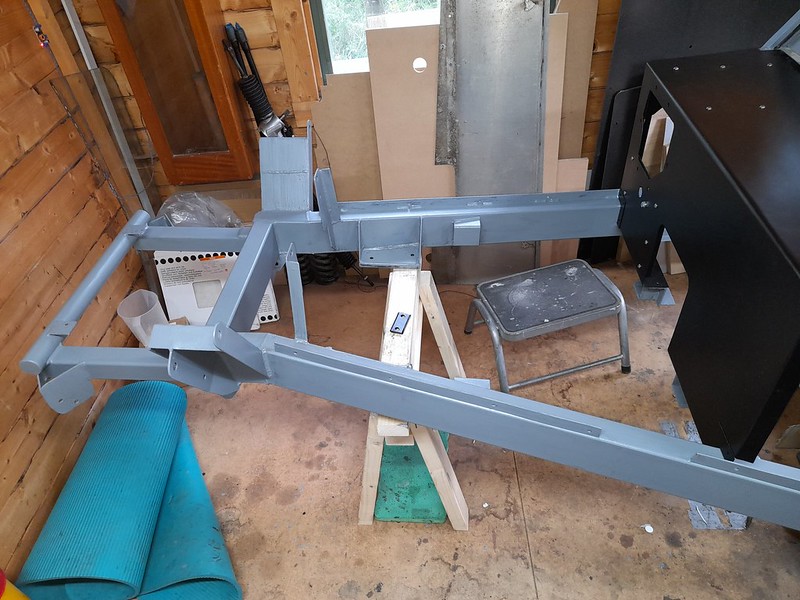
The chassis is finally all cleaned and primered. I am going to coach paint the bodywork so I thought I would practice on the chassis. This means a further coat of primer, 2 x undercoat and 2 x topcoat. Could take some time, especially as I am going to do it in two halves - first the front as far as the windscreen and then the rear. There is a convinient weld in the chassis at this point to which I can paint up to. I have also painted the front and rear bulkheads. I remade these from zintec some time ago and, although rust resistant, are not rust proof.

chassis_in_primer by Robin Martin, on Flickr

The plan was always to convert the car to cycle wings but I have seen a few Marlins where this has been done but where the rear wings were retained. So I have dug them out of the weeds and given them a clean. Before and after picture.

rear_wings_clean by Robin Martin, on Flickr

One of them though has a real bodge with part of it being ground away. I assume this was to aid fitting - who knows. Anyway, I don't like bodges so I have started to repair this.

rear_wing_bodge by Robin Martin, on Flickr

While the fibreglass is out, and my hands itching, I am also modifying the radiator surround, no pictures yet though...
12 Jul 2023, 6:46am
It's comming on well , looking really good

It's comming on well , looking really good,
14 Jul 2023, 5:36pm
After a considerable ammount of fettling I finally have an acceptable radiator surround.
It was orginally fitted very badly and I struggled to get a better fit until I finally discovered the whole moulding is on the sqiff! Once I had worked that out I managed to get a reasonable fit although still not 100% square at least it looks OK to the eye. In the process I filled many holes and extended the sides down so they touch the chassis rails. Needed as I will be using cycle wings so this part will be visible. I also did a bit of re-inforcing arround the edges and filled in the gap that is normally visible between the front horizontal edge and the bumper. (Later cars have a neater wrap arround bit that fitted arround the bumper and provides somewhere to mount the number plate.)

rad_surround by Robin Martin, on Flickr
29 Jul 2023, 11:17am
Rear wing fitting

I have repaired and trial fitted the rear wing that had been previously been bodged. Also filled the many holes previously used to fix it as I wanted to start again. And.... filled the ragged holes where the lights were fixed. I am planning on using some round Lucas style lights rather than the original Marlin supplied Rubolite ones
As I am fitting cycle wings at the front I have also shortened the rear wing removing the stub of the running board where it would have joined to the front wings. Considering the original plan was to fit cycle wings all round it actually looks pretty good. The fit of the wing is not the best though - nothing I have done - that's just how it was made. But by the time I fit some wing piping the gap that appears at the top will disappear (I hope). I could probaly pull the tub and wing together a bit more but I didn't want to over stress 40 year old fibreglass.
On to the other wing now....
rear_wing_repair by Robin Martin, on Flickr
rear_wing_fitted1 by Robin Martin, on Flickr
rear_wing_fitted2 by Robin Martin, on Flickr
29 Jul 2023, 1:24pm
Looking good :icon_cool:
8 Sep 2023, 6:13pm
I have almost finished painting the chassis using CraftMaster coach paint. This requires a minimum of 6 coats, 2 x primer, 2 x undercoat and 2 x topcoat hence the long delay since I last posted (Plus I have had Covid). Although it takes ages to do the result is worth it.
I have done the main chassis in black raddle which is a sort of semi gloss. It's tough as old boots once it has had a few weeks to dry.
The bit of the chassis that supports the windscreen frame, and the frame itself is MG Maroon and boy is it shiny. This will match the body colour. The final coat I applied using brushes made by Purdy which cost an arm and a leg but the result is worth it.
chassis_painted1 by Robin Martin, on Flickr
chassis_painted2 by Robin Martin, on Flickr
Now all I have to do is paint the rest of the body!
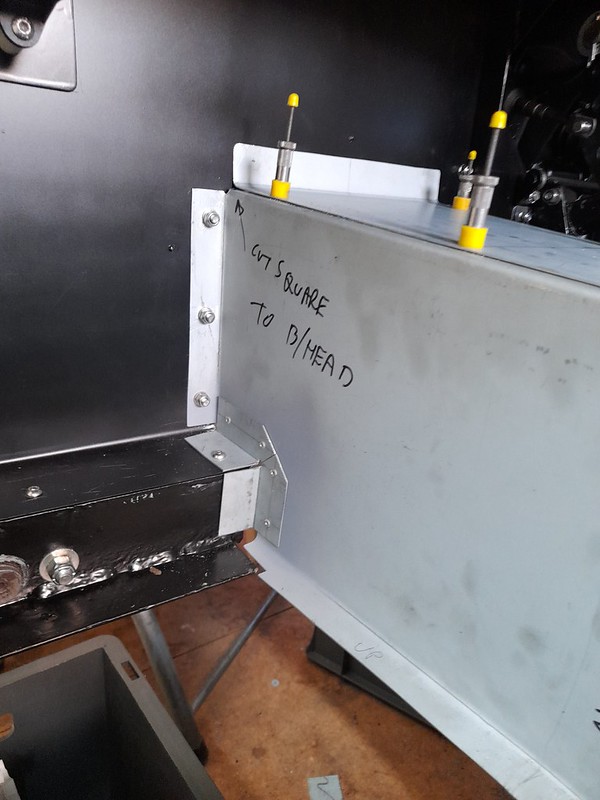
Now the chassis is painted I have permanently fixed the front and rear bulkheads using a combination of stainless screws and mastic.

I have also made a new front grill using some stainless mesh, as the old "crinkly wires" used by Marlin are no longer available. It's a bit of a b*gger to cut but the result is quite pleasing.
new_grill by Robin Martin, on Flickr
8 Sep 2023, 7:34pm
Nice colour :)
7 Oct 2023, 7:23pm
My first attempt at coachpainting some of the fibreglass. it's not bad even if I do say so myself. This was coat number 5 - the first topcoat. 6th coat (2nd topcoat) looked better but forgot to take a picture. Still a long way from perfect but good enough. The red, by the way, is considerably darker in real life.
coach_painted1 by Robin Martin, on Flickr

And now I have started to re-assemble the car in ernest. Near side front suspension is done. The big problem with the Marina is you cannot adjust the castor. Which in turn affects the steering self centering - big time. But at least with my adjustable tie bars you can tweak it. By measuring the angle of the torsion bar relative to the chassis I have established that the castor is bang on the suggested 2.5 degrees. Hooray. Note the Heath Robinson angle device!
castor_angle by Robin Martin, on Flickr
8 Oct 2023, 9:04pm
That's looking nice and shiny :bounce:
9 Oct 2023, 9:42pm
That is beautiful. I'm very envious that I am not young enough to do it and still be able to drive it. It feels very weird being the same age as old people!
10 Oct 2023, 11:04am
Dpaz wrote:
It feels very weird being the same age as old people!


I don't think any of us that visit here could be called young! I keep telling myself this will be my last build but you never know....
30 Oct 2023, 11:54am
I have mocked up the dashboard. I am going for the minamilist look - large Jaguar rev-counter in the centre, standard Smiths fuel and combined oil pressure / temperature for the smaller gauges. Bicycle speedo and oddometer discreetly mounted. No glovebox as the suggested one is uselessly small.
dash mockup by Robin Martin, on Flickr
Lucas windcreen wiper motor and boxes trial fitted. These are a real b*gger to get right but essential to do so as they are fitted in the clamp which holds the screen in place. As this is sealed in with mastic once the screen is fitted so you don't want to be taking it out very often!
wiper motor installed by Robin Martin, on Flickr
Front brake pipes all run. I didn't follow the suggested route from the manual. I know that one of them bridges the point where the side mounted exhaust exits the bonnet side panel - but I am not going to be doing that with the exhaust anyway. I had to make the brackets for the front flexi pipes as my (very early) chassis was missing them. The flexis are a bit tight but I think they will be OK once the suspension is at its working height.
front brake pipes by Robin Martin, on Flickr

front brake pipe bracket by Robin Martin, on Flickr
31 Oct 2023, 9:22am
Nice work Robin, looking really smart! :tea:
1 Nov 2023, 2:35pm
Looks great :)
19 Nov 2023, 11:11am
A litle bit of progress, probably the last for a while as my wife has just this week had a hip replacement and apparently being nurse and chief cook and bottlewasher is now more important lol.
I made a backing plate for the dashboard to take the three instruments I am using. The centre place is a giant rev counter from a Jag. Left and right of it will be a fuel gauge and combined oil pressire / water temperature gauge. The plan is to make the actual dash from aluminium recycled from the old bonnet sides which I will be remaking.
dashboard1 by Robin Martin, on Flickr
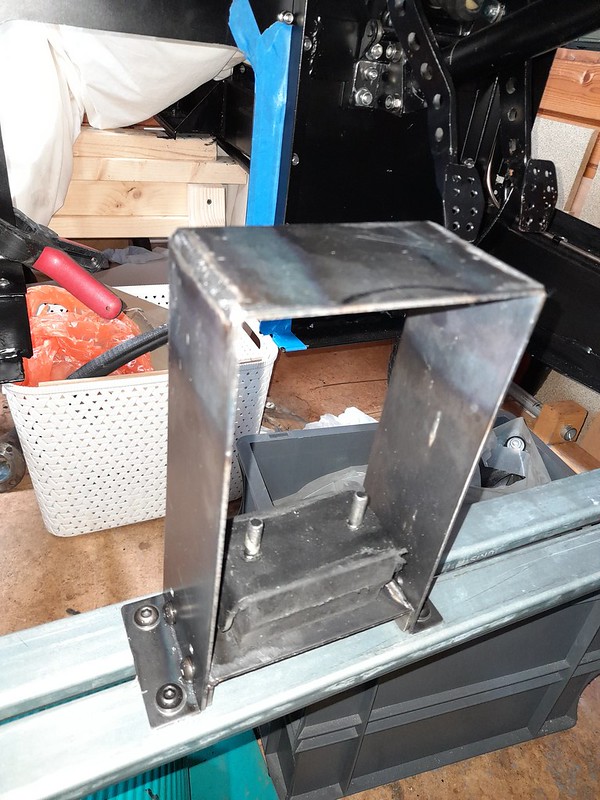
In the lower part of the picture you can see the start of my new gearbox support. Originally the gearbox was suspended from the transmission tunnel - an arrangement I didn't particulary like.
That's all for now...
8 Dec 2023, 7:45pm
I managed to find a few odd half hours in between being Florence Nightingale and Jamie Oliver :-)
I have completed the new gearbox mount which will also support the transmission tunnel and hence floor. It also means I can make the transmission tunnel sides in two parts that will fit in my bender.
gearbox_mount by Robin Martin, on Flickr
And I also made up and mounted the fuse/relay box which will also act as a distribution point for the electrics hopefully avoiding the spaghetti look. I used a similar arrangement in the Pembleton.
fuse_box1 by Robin Martin, on Flickr
And on the engine side two mate'n'lock connectors to avoid cables having to go through the bulkhead.
fuse_box2 by Robin Martin, on Flickr
The battery box may or may not be fitted below the fusebox. Undecided atm.
8 Jan 2024, 1:36pm
I have completed the transmission tunnel. Pleased with the result but folding the long lengths of sheet steel almost destroyed my home made bender. Steel is so much tougher than ally. Hopefully I wont need to do it again.
Getting a good fit at the bulkhead end proved tricky as the tunnel is not square to the bulkhead and the chassis that supports the torsion bars is also at a slight angle. But got there is the end after a lot of bad words....
The observant may notice that I used a stretcher / shrinker to acheive the flare in the tunnel at the diff end, and again at the gearbox end. You can still see the grip marks on the flange.

transmission tunnel 2 by Robin Martin, on Flickr
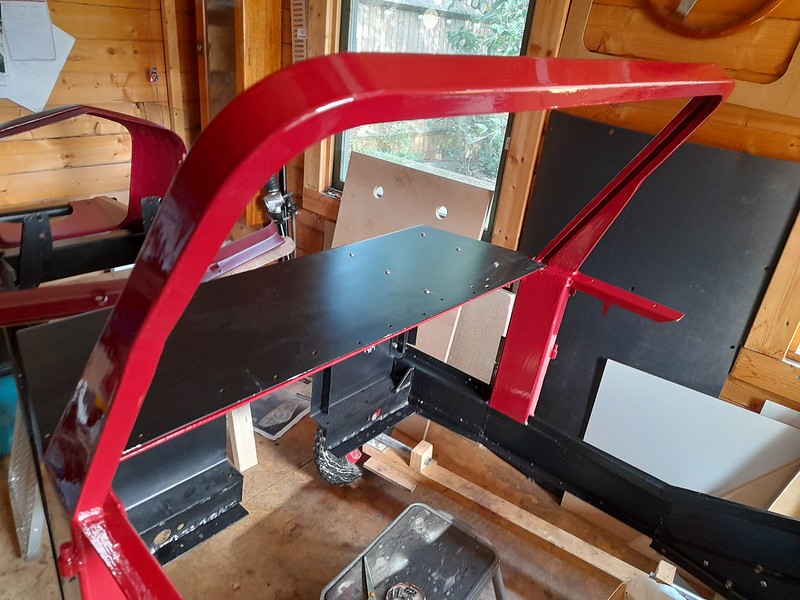
transmission tunnel 3 by Robin Martin, on Flickr

Next job - handbrake. I have purchased one of Richard Oakes trigger handbrakes and a lovely piece of kit it is too...
8 Jan 2024, 5:03pm
Beautiful Work Indeed!

Hi Martin

Kindly stop making me feel so amateurish!

Regards, Mick