This is a read-only archive of the old Madabout Kitcars forum. New posts and replies are no longer possible, but every thread is still here to browse and read.
Good luck with the new tyres, Chris.
We followed a lowered BMW saloon with wide tyres through Oxford today. The OSR tyre was smoking where it was rubbing on the bodywork. Surprised he couldn't hear or smell it- we could.
Cheers Paul. The tyres are due tomorrow (fingers crossed). I was meant to do the vents today, but ended up replacing the Z3 passenger seat with the new bucket seat.
Found 2 quid under the seat
I had to adapt the BB Classic runners to fit the Z3 holes. That took a while. The first attempt was no good. I forgot to take into account the seats need to be offset to the base. Otherwise the back of the BB Classic buckets don't sit central to the curved recess behind the seat. Second attempt resolved this.
I have 4 point harnesses to install and wanted to utilise the existing seatbelt, located inside the rollbar cluster. After a lot unscrewing and head scratching. Certainly a lot of faff for one bolt
The Kobra is looking very nice indeed. That front grill looks the biz. How did you affix it to the inside of the opening ? I sikkaflexed plastic plates for cable ties with mine which feels a bit unprofessional. I also have a black mesh directly behind mine to hide any poor workmanship hidden further under the bonnet.
Be interested in seeing a more detailed pic of the amended runners if you would be willing to share. I have considered those seats but not visualised how to fit them. How have you fooled the Zed that there is no bmw seat and therefore the airbag sensor(s).
My grill doesn't sit behind the opening, but inside it. If you look at the photo below, you can see the shadows of the bottom of the grill inside the opening. Check out post 118 for detail.
I have used pipe for the 4 horizontal slats of the grill, then fixed 2 bolts from the inside to either end of the 2 centre pipes. The ends of the pipes were filled with JB Weld, then tapped for the bolts to lock in to.
Initially I tried to fix the grill to the car, not the bonnet. It worked, as long as I never needed to open the bonnet again The front spoiler on the bonnet caught on the grill when I raised the bonnet. That's when I decide on fixing it to the bonnet (as shown above).
Your Kobra does look awesome. I love the 'purist' look. Stark and minimalistic ... very nice. Fixing the grill behind the opening works well. I am not sure that my approach above is any more professional. At the end of the day, passers by will not see the silaflex (awesome stuff by the way).
I will take some photos of the modded runners and post later. I haven't even thought about the seat belt sensor yet - but will.
The tyres never turned up today, as promised. This is the second delay from mytyres.co.uk. They were due last Friday, they told me DPD will deliver on Monday (today), but nothing arrived. I called them up, spoke to a different person, and they said they haven't left the factory. I cancelled the order and found some local. Should have done that first.
I ended up with Michelin 205/65R15, and the good new ... it drives perfectly. No rubbing on the arches on full lock and bumps. Nothing
The previous 1 week old set of 4 x 215/75R15 on now on ebay.
The tyres fit the arches with a nice amount of room, giving it a more understated and classic look.
I removed the fitted passenger BB Classic seat, now I know the dimensions are good, and welded the 40x20mm bars to the runners. Until then they were bolted together, which seemed solid enough ... but better safe than sorry.
DaveP - hope this help visualise what's needed. You will see below gaffer tape covering the first holes I drilled. This was before I realise the chairs need to mounted offset to the runners. I don't mind about the gaffer tape, as these bars will by carpeted.
DaveP or anyone else wanting a template with measurements, please see below. Between the photo above and the diagram below, hopefully it all makes sense.
Note: this is for the passenger seat. Just reverse the image for the driver seat.
DaveP or anyone else wanting a template with measurements, please see below. Between the photo above and the diagram below, hopefully it all makes sense.
Note: this is for the passenger seat. Just reverse the image for the driver seat.
Chris thanks for the pic and diagram I am in your debt for that blooming useful info. I am going to either fit BB seats or even a set of MGTF I have waiting. I expect the effort on the runners is similar.
The new tyres set it right off. I like how the arches are filled. I went with std size diameter wheels on mine and it needs lowering somewhat to get the stance just so. Doesn’t make it particularly good over Reading roads though
The rear window was extremely cloudy, I couldn't see through it through the rear view mirror. I bought a replacement window off ebay. When attempting to unzip and replace the rear window, the zip thread fell to pieces.
Also, the top of the roof had quite bit of wear and tear, and the lining was in poor condition. GaryR's roof was up for grabs from CC, so I met Belle and purchased his hood. Not a pleasent job with fresh paint, but it was well worth it.
I now have a brand new rear window for sale. I will put it on ebay, but if anyone on here wants it, let me know.
Gave the soft top a clean with Renovo and buffed the window with PlastX, and it looks fab.
It has been a couple of weeks since the last update. I took the plunge and started on the interior, including the dash.
I removed the stock dash, stripped it down (air bag panel, instrument cluster moulding, vents from the underside, etc.). Then inserted some MDF into the gaps, filled with fibre glass and body filler. I use some cable conduit for a round lip. It will all be covered with blue/white stitched faux leather once fitted.


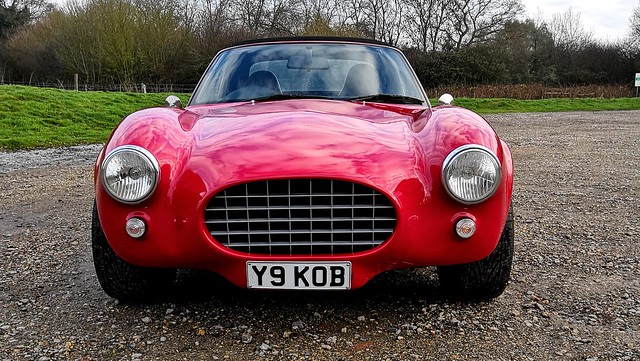 Kobra front straight on by Muddy_B, on Flickr
 The front spoiler on the bonnet caught on the grill when I raised the bonnet. That's when I decide on fixing it to the bonnet (as shown above).


