This is a read-only archive of the old Madabout Kitcars forum. New posts and replies are no longer possible, but every thread is still here to browse and read.
Sorry for the delay but It's been boxed in by other bikes. Owner collected it today.
I make the seats, fender eliminators and mudguards as a paying hobby.
This one is a standard Thunderbird that has been fitted with a Thunderbird Sport front end, down pipes and exhaust. 5.5 alloy rear rim with front to match. Pods with K&N filters. rear cowl had a custom airbrushed paint job.
Sorry but posted the first part on a separate post, should have kept it all in one place.
Roughly marked position and shape of petrol cap well.
Cut out with a 1mm disc on an angle grinder. Glued in place with resin.
The cap is held in place with M5 countersunk screws and nylock nuts. Problem is that it is almost impossible to get a spanner on the nylocks so I used 6mm rivnuts that you can just see in the picture. This makes attaching and removing very easy.
just need final finishing for paint. It is large but i like it.
There is very little room underneath for the pipe, I think I can trim 15mm from the underside of the petrol cap mounting tube but it still will be tight. I may have to cut a relief in the top of the boot to allow it to flow properly. Waiting for some pipe.
Chris gave me some flange clips to attach the door skin to the door but I cannot see anyway to fix them satisfactory, must be missing something.
I have drilled holes through the door and into the skin. I then removed the gap outer skin and attached some M5 rivnuts. Reattached the skin and it bolts up really easily and is much tighter than using self tapping screws. Forgot to take pictures so you will all just have to wait till the skin comes off again.
That was all the good progress, the bad progress was that I found the new front edge of the door id fouling the bonnet hinge when fully open. I missed it as I had the bonnet open when I was checking for gap with the bonnet open which puts the hinge in a different place. I will have to grind it back a bit and build up the trailing edge of the wing as Jeff has done.
Fitted the bolt on wire wheels today. They are monsters and weigh a ton, I struggled to lift the wheels onto the hubs do I fitted two studs to help align the holes. Worked a treat but I will put some electrical heat shrink on them so they don't catch the powder coat. I will keep them in the boot along with some standard bolts to fit the spare wheel.The standard studs are too short.
[URL=http://s803.photobucket.com/user/jaguartvr/media/z3gto/wheel4.jpg.html]
The new studs have a 45long thread + 10 collar so are 55 in total not including the head. They are wobble bolts. I also fitted collars to the hub to give the right diameter.
Before
After
I think the tyres may be a little too big but will do for now as I won them on Ebay for 99p
Just gone to move it as it's pouring and it feels as if all the brakes are locked on. I suspect that the wheel bolts may be fractionally too long. Will try and have another go tomorrow.
I also drilled some 5.5mm holes through the doorskin, then removed the gap skin and enlarged the holes to 7mm to fit rivnuts. I can now fit the doorskin very tightly and precisely. I have used M5 countersunk screws, the heads are almost invisible.Will take some pictures when I do the other side.
I think the tyres may be a little too big but will do for now as I won them on Ebay for 99p
Its great seeing your progress. The Gap from the edge of the door to the front section looks great. I tried lots of tyre sizes before settling on what I have now and love you can get them on ebay so cheaply. I found the fronts were where the most work was needed to get the turning circle right and height, ended up using some small spacers and adjustable suspension to get it right.
They are sleeves that fit in a hole, you then tighten them with a rivnut tool which compresses them. You are then left with a threaded hole. They are available in steel or alloy, I always go for the alloy so that they won't rust.
With GRP the panel is often too thick so you tighten the rivnut as much as possible, this makes it expand in the hole to give grip. I also give it a smear or cold weld epoxy to give it extra strength.
On the door skins I used M5 rivets with countersunk screws. Always buy rivnuts with the serrated shank as I find they grip better.
Front tyres are the problem, they are catching on the strut pan, the clearance between the tyre and wheel arch is also too small and to finish it off they catch the bonnet.
I have fitted 225/75 x 15 which gives a diameter of 718mm
225/70 x 15 =696mm
original tyres fitted were 225/50x16 =631mm
I'm now thinking215/65x15 =660mm
Nubodi fitted 225/70x15 and hasn't reported any problems.
Any thoughts or suggestions welcomed before I go and waste another 99p on tyres!
[URL=http://s803.photobucket.com/user/jaguartvr/media/z3gto/wheel2.jpg.html]
I think the tyres may be a little too big but will do for now as I won them on Ebay for 99p
Hope you can also get some nice discs on Ebay for 99p as well
Hmm, why didn't that photo reproduce?
As its going to be sitting for some time before it goes back on the road I thought I would leave them to last. I did rebuild the handbrake but the back plate is beginning to rot and its a lot of dismantling to replace them.
Trouble is I have quite a few cars on the drive that need things doing to them, I seem to waste the morning trying to decide which one to start that day. By the time I've decided its normally time for my nap and then of course its time for the pub.
Hi, I had the same issue so had to change struts for adjustables, they dont have the 'lip' that fouls on the tyre, then had issues with turning circle, so ended up with a small spacer to give clearance. You can trim a little of the inner body that touches the tyre, or just turn the front wheels before opening the bonnet section?
You have a picture on Flickr showing a low side view in front of the house. It shows the size of the wheel and tyre combo perfectly and they fill the arches perfectly.
Your 225/50 17 should have a diameter of 656mm, the closest I can get is 215/65 15 which gives a diameter of 660mm. Hopefully being slightly narrower they will clear the struts.
I've managed to pick up a set of tyres 215/65x15 from a Kia Sedona for £58 but the tyres are all nearly new. They fit much better and give a clearance that I'm happy with.
Grill and wiring
Just finished wiring up the front, thought it would be a quick job but seems to have gone on forever. I used 22mm plastic pipe for the main run and then 15mm plastic pipe across the front to wire up the drivers side.
Just waiting for some bulbs before I finish taping up the exposed ends.
I also started on the grill, every time you move it the bloody slats fall apart. I put it on the buff and it comes up very bright and shiny, I then wiped "ever bright" on it, this is a lacquer that will stop it going dull. A combination of the buffing slightly bending the slats and the ever bright making them slightly thicker meant that after assembling the slats they stayed together. I dabbed some thick superglue on the reverse side and it now stays together on its own.
There are two bars that Chris supplies that hods the grill firmly against the aperture panel. However when you fit the aperture panel to the bonnet you have to pull it apart to get a snug fit. Once the aperture panel has been fitted the bars that hold the grill in place don't fit, I bent them slightly and got them to fit but it pulled the aperture panel badly so it was distorted.
Cunning plan B
I used the mounting holes for the fitting bars and held the grill in place with zip ties. I then bent up some alloy 90 degree angles that I bonded to the inside of the bonnet, positioning then to hold the end of the grill slats. When dry I used zip ties to hold the slats to brackets. Holds the grill firmly against the aperture with no distortion. The length of the slats is marginal, If Chris were to supply the horizontal slats 50mm longer it would make fitting the brackets much easier but would save him from having to bend up the mounting brackets.URL=http://s803.photobucket.com/user/jaguartvr/media/z3gto/grill4.jpg.html][I
I hunted hard for my headlight trims and made sure they were stainless steel. Been fitted for a month and they have already gone rusty, not impressed so they have been sent back.


 [/URL]


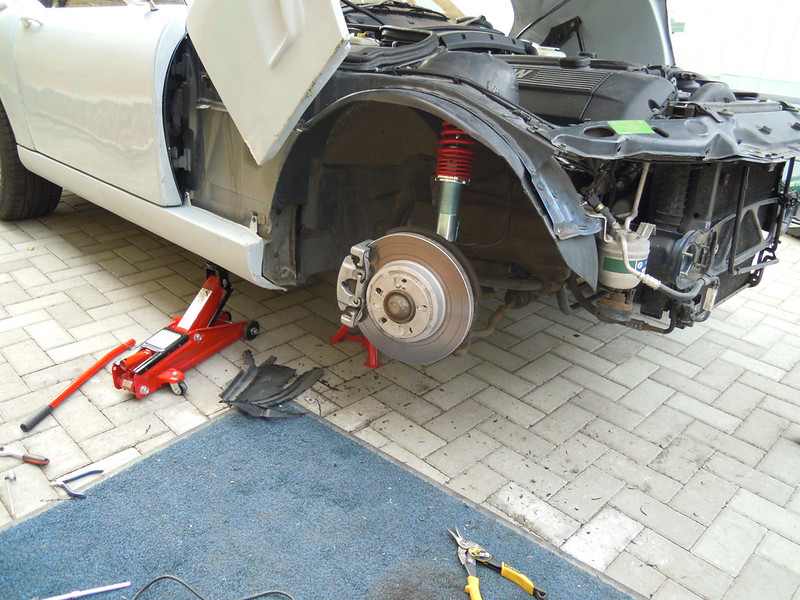 DSCN4801 by eric holm, on Flickr


 URL=http://s803.photobucket.com/user/jaguartvr/media/z3gto/grill4.jpg.html][I
