MadaboutKitcars

This is a read-only archive of the old Madabout Kitcars forum. New posts and replies are no longer possible, but every thread is still here to browse and read.

Another Cordite Is Born ...

10 Nov 2012, 9:43am
Missing Parts:
Thankfully I re-read the 'missed delivery' note as, unlike most places, they are closed at the weekend.
So collected my parcel after work on Friday which meant spending a long time stuck in traffic. :rolleyes:

A big thank you to AndyP57 for arranging this delivery before going on his holiday. :cool:


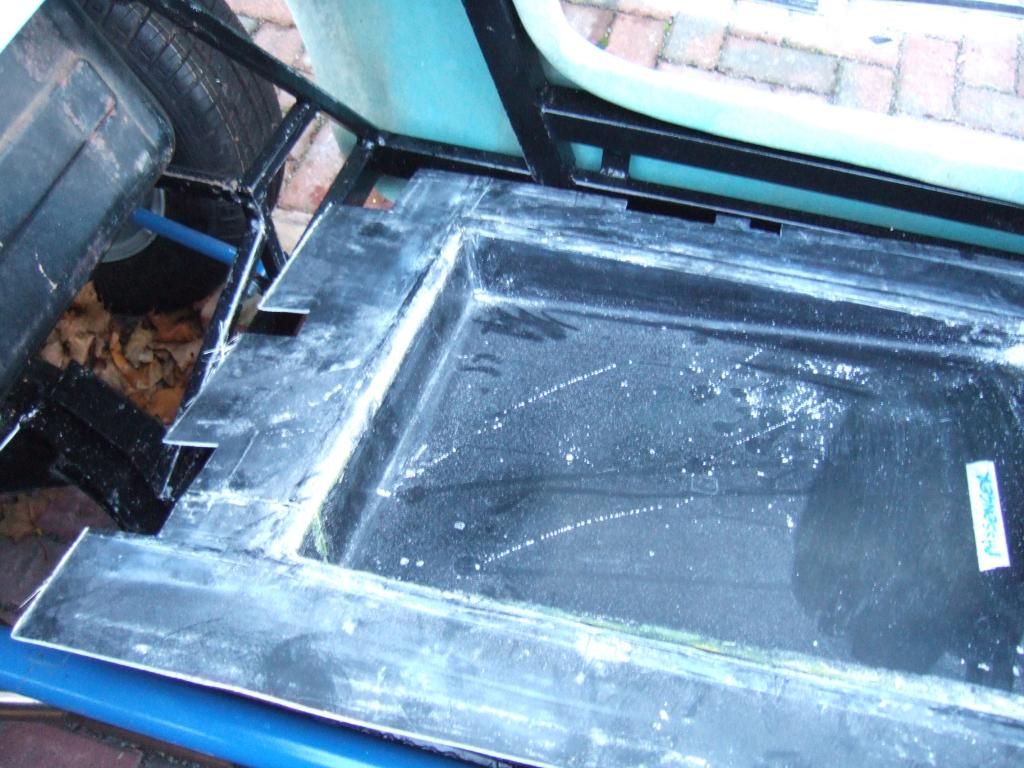
And this was what was inside...


I had a bit of a panic as the wide rims made the lowered section look very narrow.
This made me think that my seats wouldn't fit, which didn't really bear thinking about.
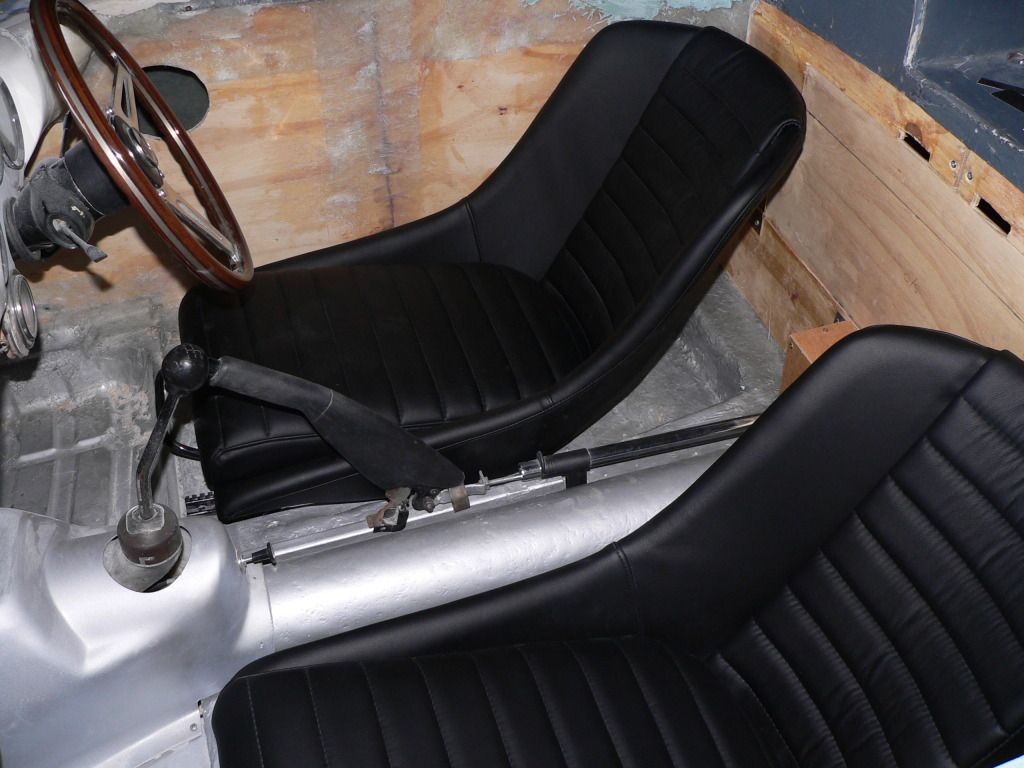
So despite the rain, it was a quick dash to the bottom of the garden to pull out a seat, and...


Phew!

OK, I might have a small issue with the seat rail handle, but I'll worry about that later.
I will wait for the rain to stop before I try to test fit the floors in the car, so maybe tomorrow.

I guess after waiting for over 4 months to get them, waiting another day wont hurt! :icon_wink:
But jokes aside, these are a great morale boost, when the delays were starting to get me down a bit.
( Although I'm still waiting for my grill and a few other small bits. )

Which leads me to the other thing that was putting doubt into my mind about the way forward...

Lead me not into the path of temptation...
Many of you have already seen the Tribute Automotive 'A352' on the forum 'Next Door'. (Thread Here).
I know Chris & Dan are professional car builders, but this looks like a very straight forward kit to me.


As my build has progressed I can now really appreciate the genius of the cut down donor approach.
I really thought the Cordite's frame would be more straight forward that cutting the bulk head for a Spyder kit. :rolleyes:
Whilst I am still convinced this will be the case when Andy re-lauches the Cordite kit next year.
For me there is a lot of work just to get simple things like my steering & pedals to work properly. :icon_sad:
Which together with the missing parts problems really made me question what I am trying to achieve.

I'm happy to admit that I underestimated all of the following:
- The work involved in building the car
- The amount of free time I would have to do it
- The logistical problems of trying to work outside

But when I was asked by one of my friends why I didn't just buy a finished car, the answer was simple...
Because I want to actually build the car myself and the building part is the reason to have the car.

I actually think the A352 is more suited to my limited skills and would be a much quicker build for me.
But the Cordite gives me a chance to expand my skills to include welding & working with fibreglass.
So whilst it will take me much longer to finish my Cordite, the plan is to keep building until I do!

To paint, or not to paint...
My original plan was always to try and get the car on the road without a professional standard paint job.
As I'd hoped my light blue gel coat would at least give my car some colour until it was painted.

But it looks like there will be a lot of body filler around the doors + where the bulkhead & bonnet meet.
And depending on my final brake master cylinder solution, filler may be required to tidy this area too.
So I plan to at least put some primer over the top of these areas before I take the car for its MOT.

There is also the small technical hitch that the paint I used on the headlight rims was a different blue. :rolleyes:
I know AndyP57 completed his 'low tech' paint job on the Cordite demonstrator with 4 spray cans.
So I am tempted to do something similar as a quick fix, as it is not exactly a huge financial commitment.
With luck, an unfinished / being repaired / restores look might be in keeping with my Spartan interior finish.

My thoughts on paint were prompted by our recent family half term trip to York where we saw this...


A really lovely blue in the daylight and a seriously impressive engine. :cool:
I also get the distinct impression that those rivets are not stuck on to look the part. :icon_wink:

Next Steps:
Catch up on some domestic chores today, watch "Skyfall" tonight & work on the car tomorrow.

Cheers, Paul. :)
10 Nov 2012, 10:39am
Don't lose heart Paul. I know what you mean about the A352, it looks like a very straightforward build. Looks can be deceptive though - with a ready to roll chassis, a fully equipped engineering workshop, the necessary mechanical experience and a few people to help, by going at it full-time a Spyder can be built in about a month. Just take a look at Patoune's timeline on this thread - body collected 2nd February 2011, car finished 13th March 2011.

http://www.madabout-kitcars.com/forum/showthread.php?t=2717&page=4

For the rest of us though, starting witha rotten donor and tinkering away in a shed in our precious spare time with a few basic hand tools, picking up the skills as we go along, one to two years is a more realistic timescale. As I've posted elsewhere on this forum though, that's the satisfying thing, after spending almost two years putting imagination and effort into building my car with my own hands I'll be able to step back and say with real pride I built that.

And for me that's the key difference between what we're doing and the more mainstream (read expensive) kit-cars, you don't just assemble a Sammio, you have to actually build it.

Anyway, enjoy Skyfall tonight, although I've heard Adele sing the theme song and I'm sure it's called Skyfow -

Let the sky fow
When it crumbow
We will stand tow
Or face it all togever...
10 Nov 2012, 1:14pm
I think you have to put it all into perspective and appreciate what your doing with the experience and facilities you have available. It will take time but as Towed has said it will be your creation and one you will be proud of. Your car with its fibreglass bulkhead and floors will stand the test of time. I know you had a good donor shell which you could have utilized, but those that don't will have to weld them up before the build and possibly more in the distant future so the level work can be there which ever way you choose.
Keep up the good work and updates.
11 Nov 2012, 10:28am
Hey Paul, your doing a great job, just keep going.
Like any project that has to be fitted in between all the usual life challenges its always a challenge.
The way I see it is well I will either sit on the sofa this eve and be numbed by the x factor or get out there and get a bit done.
I like Earnest Shackleton's family motto...'By Edurance we conquer' or is that conker?
Anyway building a car hardly compares to his achivements, but it keeps me going.
And with regard to the cost, some people drink and smoke there way through 5k a year, and have nothing to show for it!
It must be frustrating no having a garage though. Could you use a couple of pop up shelters or maybe rent a local lock up for these dark evenings?
Yrs,N
11 Nov 2012, 4:01pm
Perspective:


Mister Towed, Froggyman & SeaNick - Thanks for the encouragement.
I will try to keep the faith & simply accept that things take much longer than I expect/hope.
I am also sure that the more effort I have to put it, the more pride there will be at the end.

I think the fact that I am still at a "tinkering" stage at the moment doesn't help much either.
But once I start connecting things permanently I will feel real progress is being made.
And in the great scheme of things, this is only a car building project, no one has died.

Obviously I didn't want to be working on the car during the 2 minutes silence.
But I did get a few hours after that to get a bit more done...

Fuel & Brake Hard Lines:
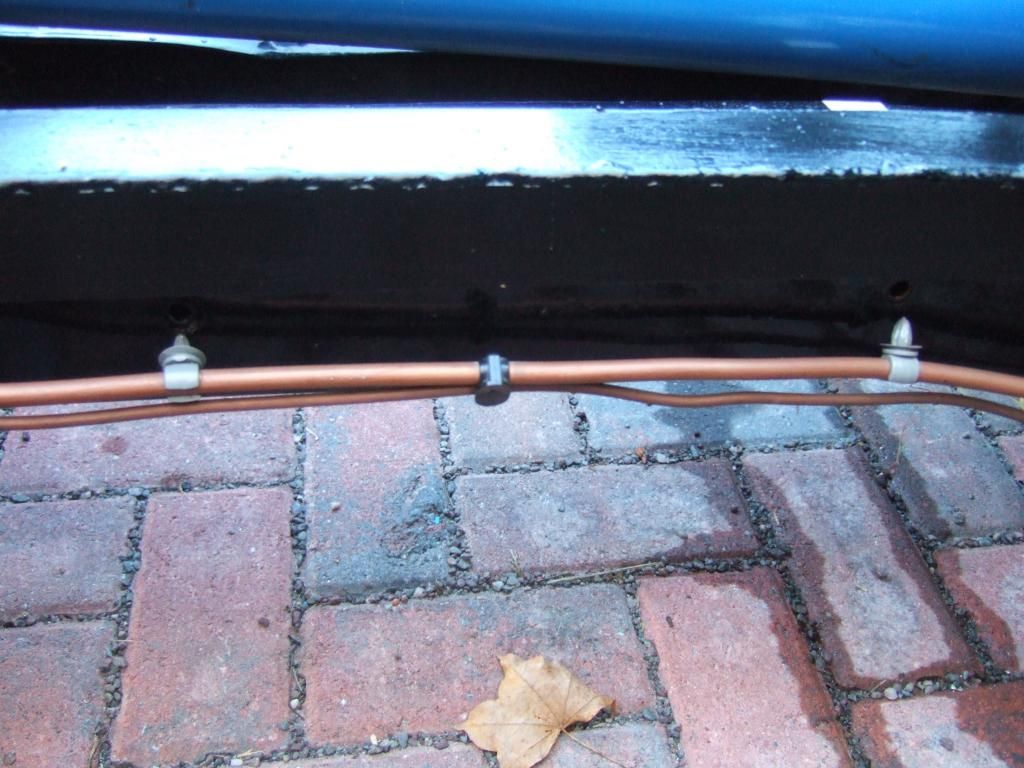
I need to order some new clips to re-attach these, but for now I have just unclipped them.
This means they will not be in the way of the Cordite frame or the floor pans.


Floor Pans
With my new positive philosophy in place, I think I took the initial fitting quite well. :icon_wink:


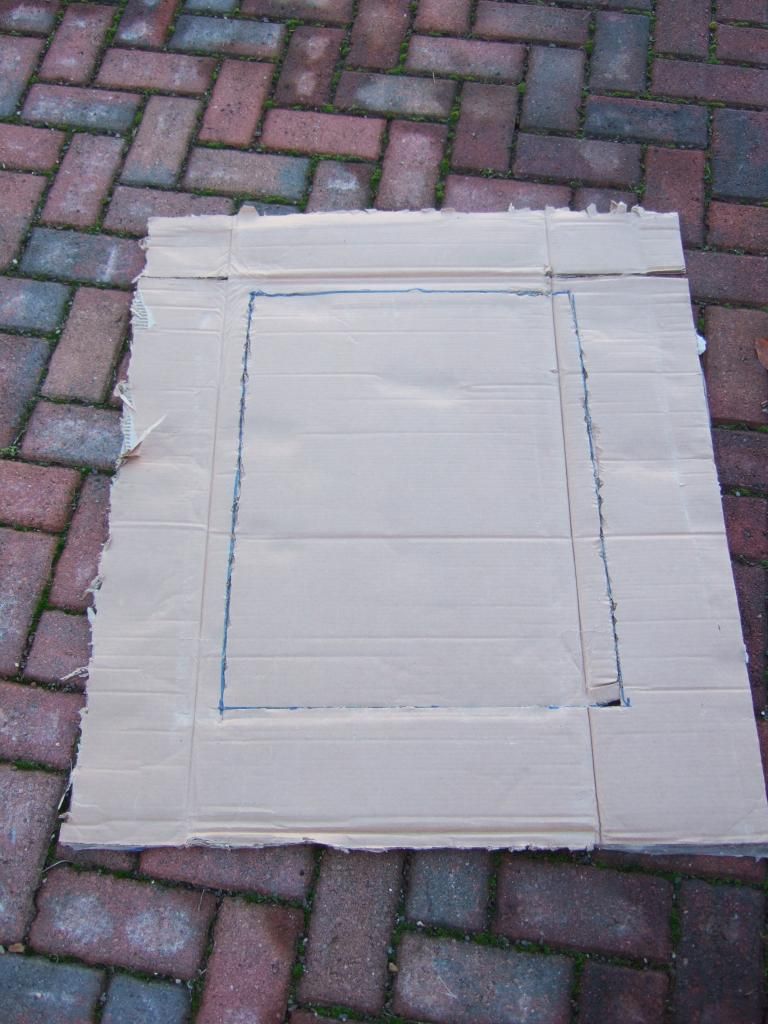
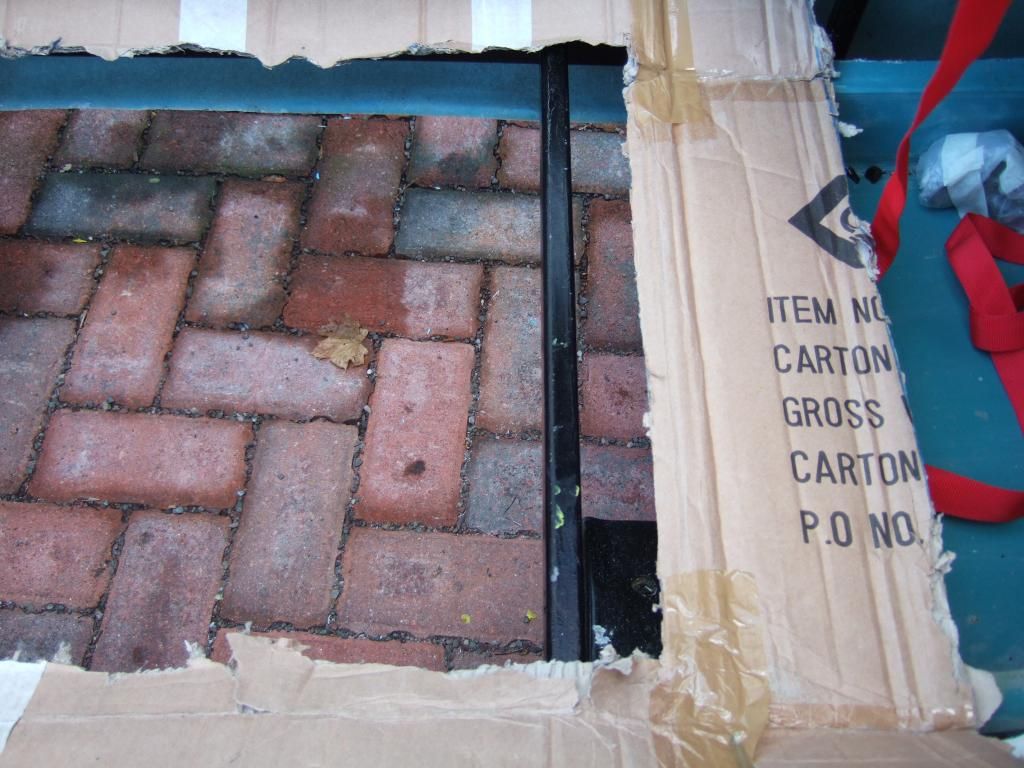
So it was time to attack the box they came in with my Stanley knife and make a template.
( I kept the "hole" for the lowered part of the pans so I could position it within the frame. )


I also put one of my seats roughly in place to highlight the impact of its reclining angle.


This means the lowered floor section needs to be in quite a forward position.


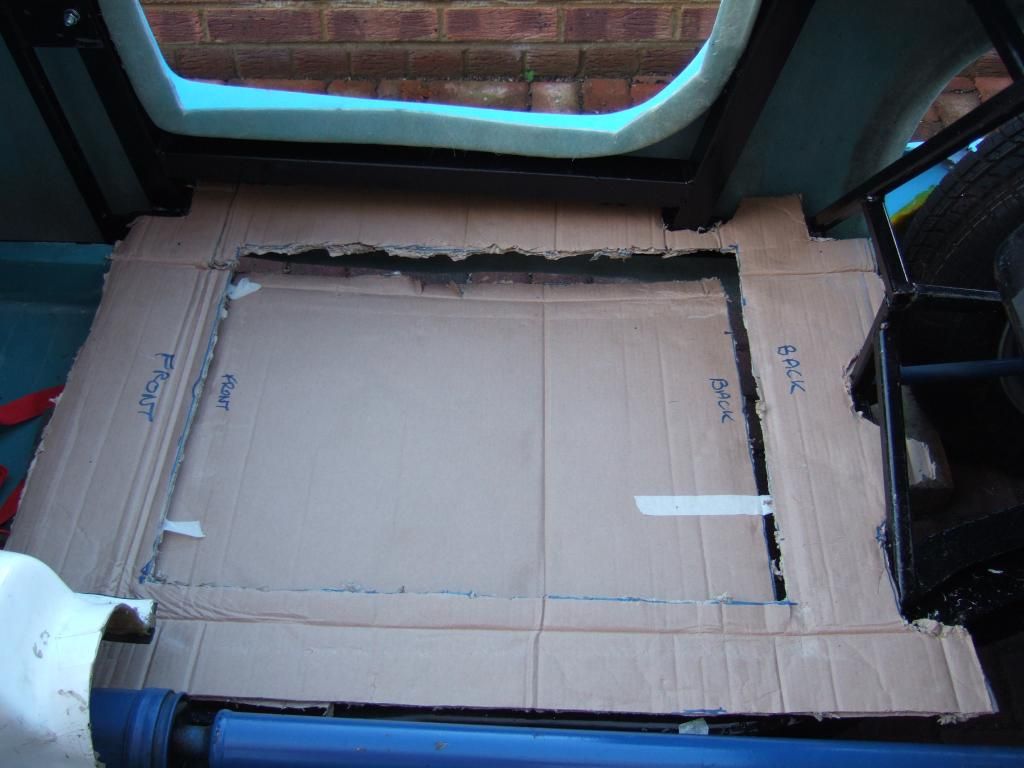
Once this was in place I could measure the relative locations of the framework.
I then cut sections out of the outer section of card to avoid the frame, until it fitted.


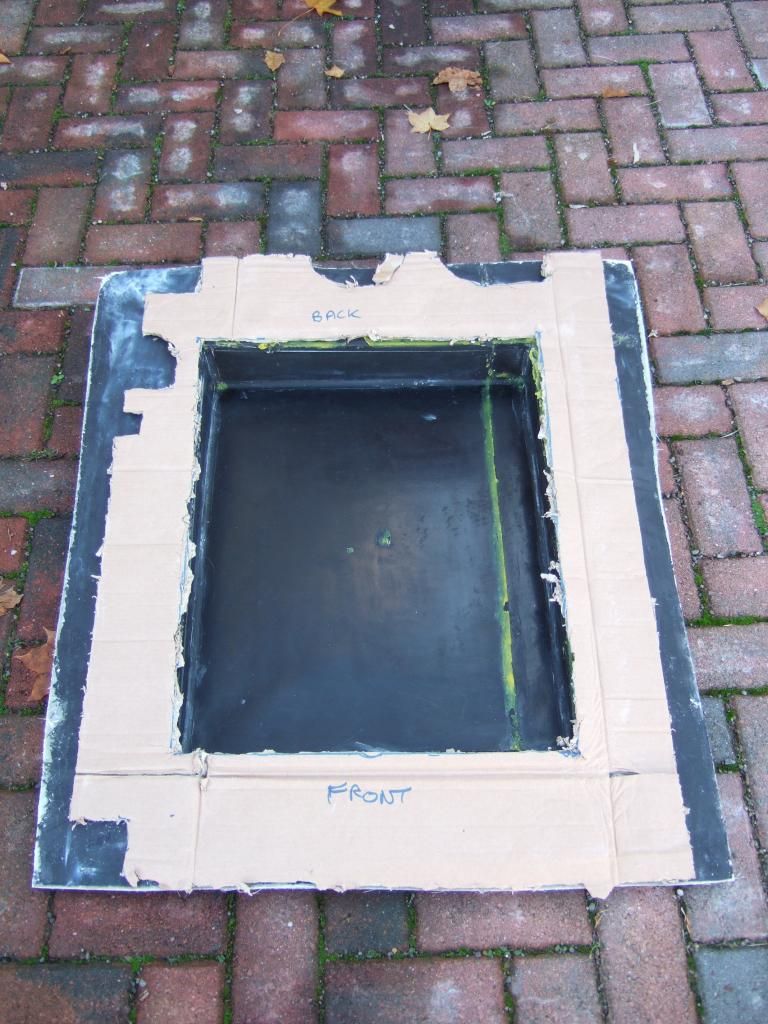
This gives me a guide to cutting the floor pan which now looks like this.


Before I started cutting the driver's side floor, I thought I'd practise on the passenger side.
My first thoughts were to simply flip the template over to the other side, but no.
The frame work spaced differently on either side which means the "hole" doesn't line up.


The gap in the driver's side frame is 13 cm, but it is 17 cm on the passenger side.


So I will need to cut another template for the passenger side.
At this point I had to stop for lunch with my family, so I will go back out soon.

The other things to note is the edges of the floor pans are very "wavy" in places.
If this causes a problem when fitting I will cut these sections out and replace them.


The other thing that occurred to me was to check AndyP57's floors.


He certainly has straighter cuts than I do (I thought I needed the curves to help fitting).
But I seem to have an extra bracket on the bottom of my frame that Andy doesn't.
( Initially I thought this was the seat belt bracket, but it isn't, I just need to take a photo of it. )
So if this bracket is not required I will cut if off and that might make fitting the floors easier.

Which means I will wait a bit longer before taking an angle grinder & hack saw to my floors.
This is definitely a job where you want to measure twice and cut once!

Skyfall:
Well my wife & I took advantage of a baby sitter to go to the cinema last night.
I really enjoyed the film and it was good to see the return of the ultimate Bond car...


Right I'm off out again to do a little more before it gets dark.

Cheers, Paul. :)

PS
SeaNick I can't get a lock up as I promised to be "around" when working on the car.
It wouldn't be fair at home if I had to go somewhere else to do the work & I can live with that.
Some form of pop up cover in the front drive may be an option a bit later in the build.
11 Nov 2012, 4:18pm
Paul L wrote:


I then cut sections out of the outer section of card to avoid the frame, until it fitted.


Looking good, but i think you may need a bit of reinforcement on that before you bolt the seat in? ;)
11 Nov 2012, 4:32pm
I think you're steaming along, at least it looks like a Cordite...
11 Nov 2012, 5:20pm
A little progress like that every few days and you'll be surprised how quickly you have something that looks like a car on your hands. Keep up the good work, it's nice to see someone else manning up to the same challenges as I've had, with a few more to boot, or doors to be more specific :)
11 Nov 2012, 6:10pm
Floor Pans - Final Photo
This is the bracket I have on either side of my frame and it appears Andy doesn't...


It can't be to bolt the body work on, as the bolt would be visible on the outside of the car.
So unless someone knows better, I will simply remove it completely.
This should make it easier to position the floors in around the frame work.

Rear Lighting Layout:
This is a rough guide to how things should line up at the back of the car.
( I will get a better horizontal alignment & even spacing between lights before drilling. )


But the main reason for looking at this now is to check the vertical alignment.
The body work is actually pretty flat at this point, so there isn't much work to do.
( Sorry about the blurry photo. )


I expect to file a little off the body behind the middle of the lights.
Then build up with filler a little bit behind the top and bottom edges of the lights.
I will also need to build up the area behind the number plate, but again not by much.

I need to buy fixings for the lights and wanted to check if the body needed reinforcing.
My plan is to list as much work required as possible before I remove the body & frame.
That way I can make adjustments before everything is bonded onto place & harder to get at.

Wrap Around Dash:
My final mock up work for the day was to stick the dash in place with some tape.


I wanted to check clearance issues, so got my speedo back out of the box...


This would need approx. 15 cm of space to allow for wires, etc.
And this would be in a 'behind the dash' depth of around 24 cm.
This in turn means there is room for the brake master cylinder to push back into this dash space.
Although I still need to work out the impact on the bulk head / bonnet of doing this before I commit to it.

There seems plenty of space on the front of the dash for the speedo too.
Although I'd want to see the steering column in place before working out my dash layout.


There may be a bit of work required to blend in the edges of the dash with the bodywork. :rolleyes:


But once again I will have a read of Mr T's build where he blended his dash in.

Seat Belt Bolt Brackets:
I've bought 2 x 2 brackets in two different sizes for the lower belt mounting points.


When I eventually get the floors in, this will allow me to see where the seats end up.
This in turn will allow me to test fit the seat belts I have and work things out from there.
Again, I will make adjustments to the frame when it removed from the chassis.

OK, that's all for now, cheers, Paul. :)

Replies:
DaveCymru - But once I've zipped tied the cardboard in place I will be OK, won't I?
GaryH - Cheers.
Mr T: - Thanks, I think seeing the floors & seats in place will be a big step forward.
11 Nov 2012, 6:14pm
That bracket is the lower seatbelt mounting point i think.
11 Nov 2012, 10:00pm
davecymru wrote:
That bracket is the lower seatbelt mounting point i think.


Thanks Dave.

In which case I will need to get a nut welded on to the outside face.

As this is what has been done on the upper mounting points.

Which is why I thought this was just some random bracket. :rolleyes:

Cheers, Paul. :)
12 Nov 2012, 9:57am
davecymru wrote:
That bracket is the lower seatbelt mounting point i think.


Hi Dave,

do you think that bracket is big enough to be a seat belt mounting point?
It also seems to be on the wrong side of the chassis rail? :noidea:

Also Paul,
it may be a trick of your photo, but it looks like the weld of the upright member next to that little bracket is cracked?
It might be worth getting a triangular plate welded across that corner to strengthen it.

Maybe Gary Janes should comment, as the designer of these frames?

...peter

(P.S. I have no axe to grind, but I am interested in your personal safety, etc.)
12 Nov 2012, 10:13am
No worries Peter, good constructive discussion is always worth while and you've got me thinking now... :)

My suggestion was based on the fact that while the frames are obviously different in order to cater for the doors, it does seem to be in roughly the same position as i put my lower belt mounting points (see below)

You can also see on my frame that inside the top rear corners of my frame i had similar brackets that i didn't find out until i'd nearly finished mine were top belt mounting points.

12 Nov 2012, 7:46pm
Peter & Dave - Thanks for the feedback, it all helps.

I don't think the frame is cracked, but I will double check.

I need to get my floors sorted out to test fit my seats & seat belt locations.

I have bought new mounting points (see one of my posts above) which I can use if needed.

I will certainly not be rushing this part of the build.

Cheers, Paul. :)
12 Nov 2012, 8:15pm
PS
SeaNick I can't get a lock up as I promised to be "around" when working on the car.
It wouldn't be fair at home if I had to go somewhere else to do the work & I can live with that.
Some form of pop up cover in the front drive may be an option a bit later in the build.[/QUOTE]

It is tricky, I think we have a young family of similar age. Finding time for the project and not missing out on time with the kids is difficult. Davecymru seemed to manage it well! As my car is not at home the only way I can, fit mine in is to work on it evenings, just afterthe kids have gone to bed, like now! (Just waiting for some filler to go off as I type this).

I wonder how many other builders are juggling families too, apart from Gary J?
12 Nov 2012, 8:27pm
Yup, kids and a new puppy. The children are quite useful helpers but they are 13 and 15 rather than "little". My daughter helped me to lift a short engine into the boot and was very proud. The workshop is in the woods, but I usually get one day a week when they are at school and occasionally pop down there when they are at cadets or doing sport or whatever it is they do. The dog on the other hand has slowed things of late. I convince my wife that it is important for them to see that I have a passion.........yeah, yeah.
12 Nov 2012, 8:31pm
I have an eleven year old son and a very demanding wife myself. I had hoped No.1 son would be able to help me with the build but he's still a bit young. Wife's been very tolerant these last eighteen months, but she really wants me to finish it now. :icon_neutral:

Current plan is to buy a shabby classic (mini, moggie or herald) in a couple of years, restore it with his help as a way of passing on some of the engineering skills and present it to him as his first car on his seventeenth birthday. My thinking is that if he's worked hard to rebuild the thing he won't drive it like he stole it. Should be a lot cheaper on the insurance and look pretty cool too. Just don't tell his mum...
12 Nov 2012, 8:39pm
Mine are 3 and 5, so they are in bed by 7.30.
I guess we all have [SIZE="5"]
Very lovely and understanding wives/partners, and we are very very lucky!
[/SIZE]
12 Nov 2012, 8:43pm
seanick wrote:
Mine are 3 and 5, so they are in bed by 7.30.
I guess we all have [SIZE="5"]
Very lovely and understanding wives/partners, and we are very very lucky!
[/SIZE]


[SIZE="7"]WHY YES, MY WIFE IS JUST PERFECT AND NEVER LOOKS OVER MY SHOULDER WHEN I'M TYPING...[/SIZE]
12 Nov 2012, 8:59pm
Well I dont know where you found a font that big!
13 Nov 2012, 8:21pm
Family Time:
Cheers SeaNick, Oxford1360 & Mr T.
Clearly trying to build a car & maintain a family life is a juggling act that a few of us are attempting. :juggle:
So I'm prepared to take longer to finish the build rather than spend too much time away from my family.

My daughters are 12 & 10 and have helped with frame painting, cleaning parts for Ebay & other odd jobs.
It is nice they show an interest & that they will be able to say they helped when the car is finally finished. :cool:

I've also thought about doing a project with them as a first car, but would definitely want a garage for that!
Either way, I'd like them to have a basic understanding of how a car works, be able to change a wheel, etc.

Lowered Floor Pans - More Thoughts...
I think I'm beginning to have nightmares about getting these floors to fit in the right place. :rolleyes:

The back of my seats already have a fixed reclined angle built into them when the seat base is horizontal.
But the seat base will sit in the reclined angle built into the lowered floor pans, effectively tipped backwards.
So now, when the back of the seat hits the rear of the cockpit, the front of the seat will be further forward.

See this rough (and I mean very rough) sketch...


Clearly there is a limit to how far forward the "drop" in the floor can go before it hits the frame work.
Also, as the floor edges need to be trimmed to fit around the frame, I can't really start adjusting in situ.

So I need to get my tape measure out again and really get my head around the space I have to play with.

Until then, take care, Paul. :)
13 Nov 2012, 8:37pm
You're absolutely right about the seat having to move forward when you fit sloping lowered floors. It's not a problem though, if you look at mine the front edges are near enough in line with the back edges of the front floorpans -


I find that to be a very comfortable driving position and keeps my swede out of the slipstream. As an alternative, if you lower the floors at the front as well, then the seats will be more upright so you would be able to fit them a bit further back. The only downside there is that it would make it much harder to fit runners. No problem if you're happy with a fixed seating position, not so good if you want someone much shorter to drive it.
13 Nov 2012, 9:59pm
Another first class reply Mr T. :cool:

I'll take a print of your photo with me when I am trying to figure this out.

As I'd like to keep working runners if I could. :pray:

Cheers, Paul. :)
18 Nov 2012, 7:10pm
Another Cordite Is Born ...

Only got a few hours in today, just as the sun was setting so I finished in the dark.

Lowered Floor Pan - Passenger Side:
I figured it was better to start with the passenger side and see what I was up against.
But before I tried to fit the lowered floor pan I simply lay a section on plywood on the frame.
This came me a better idea of how high the seat would be with a flat floor.


Obviously I could make the floor flush with the frame, but it would need to go lower still.
As there was quite a bit of seat sticking over the top of the body work.


So I pressed ahead with cutting out a few sections to get around the frame.
However, it was proving difficult to get the rear and outside edges to slot into place.


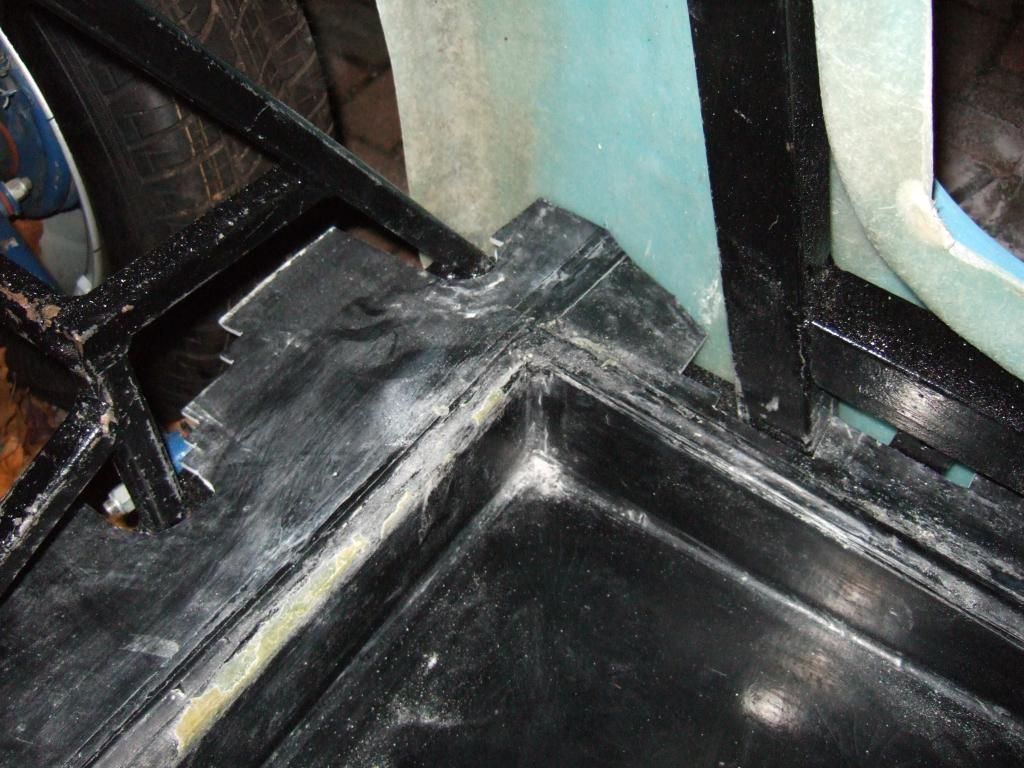
So I started to cut a series of "steps" out of the sides to give me the "wiggle" room I needed.
I took the time consuming approach of taking little bits off at a time & seeing what fouled next.
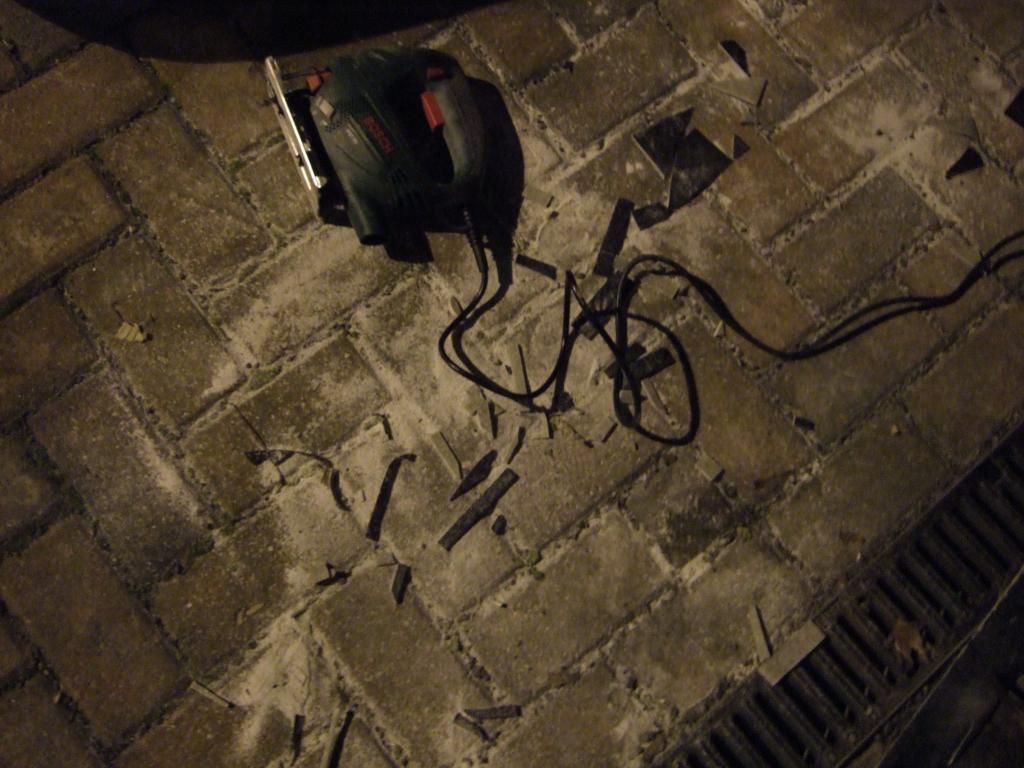
In the end this involved quite a lot of cutting with my jigsaw.


But thankfully it finally went in...


This position has the start of the lowered floor section butting up to the front frame.
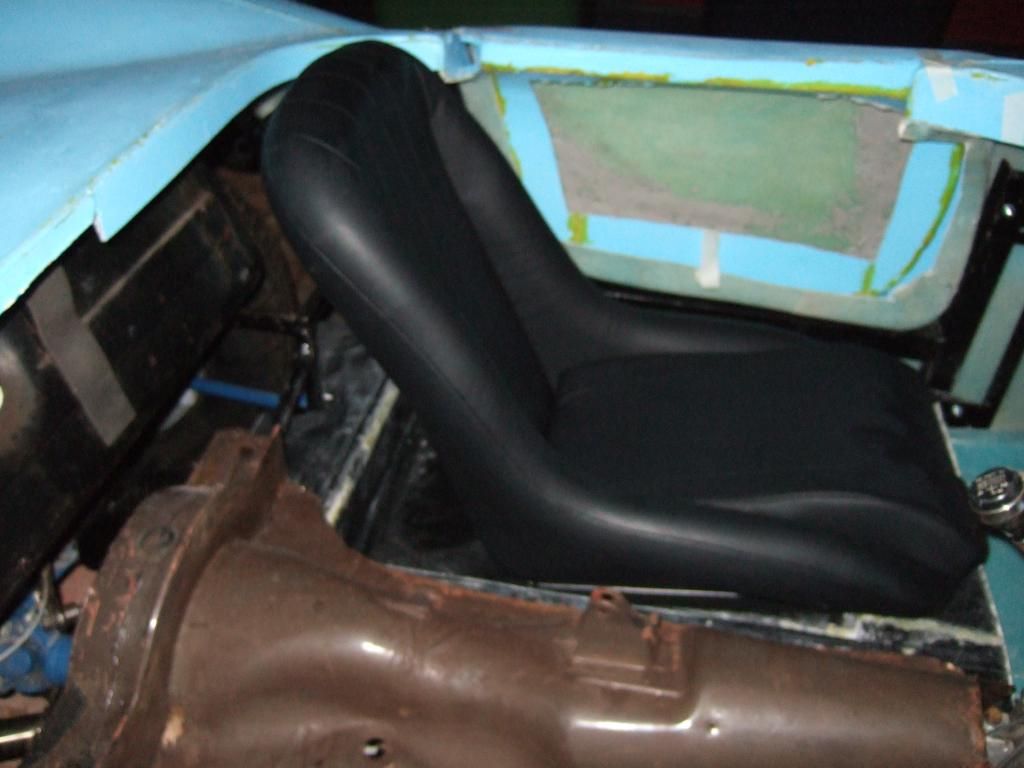
So this is a far forward as the floor will go and the seat looks like this in place...


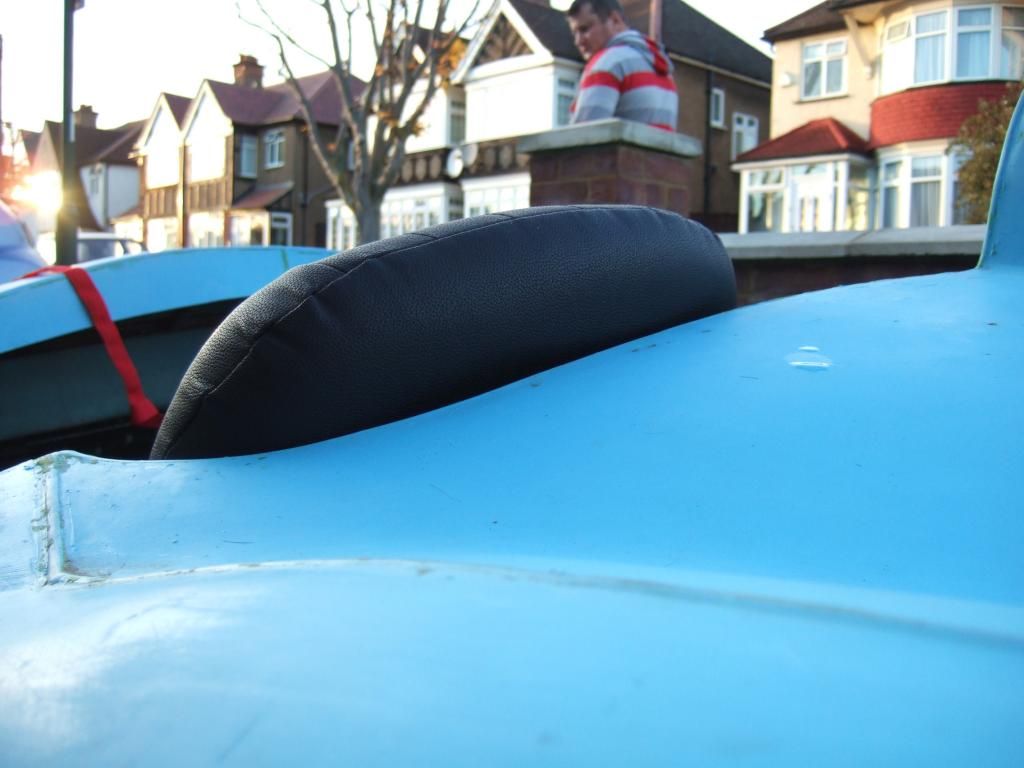
The top of the seat is definitely in a better position height wise...


But the outside top corner is fouling the edge of the body work a little.
Also it seems the seat runners can't work as there is no room for the handle to move. :icon_sad:
Not such a problem on the passenger side, but may be an issue on the drivers side.

I'll have another look at what is going on in daylight before tackling the other side.
As I think I could have trimmed more off the rear of the floor before fitting it.
Which in turn would have made it easier to slot into place.

Until next time, take care, Paul. :)
18 Nov 2012, 7:27pm
Good positioning height wise! Although you now know why i squared off the corners of my cockpit! :)