MadaboutKitcars

This is a read-only archive of the old Madabout Kitcars forum. New posts and replies are no longer possible, but every thread is still here to browse and read.

Mikes BMW Marlin Cabrio

16 Aug 2013, 9:53pm
jeremy wrote:
Mikee, it's looking great, really like the washer bottle and expansion bottle..can i ask where you purchased stainless steel strapping? I have sent your parcel ,it should be with you in 2 days. Regards Jeremy


Hi Jeremy
I have "made friends" with several of the lads at a local engineering company who specialise in stainless machines for all the local food companies. They cut me some 40mm wide strips from a 2mm sheet. I then cut them to length and folded them as required by bending in a vice. Quite easy to do.
If you would like to make some for yourself I can get some strips and send them you as a barter for your bumpers? Just let me know, and I 'll gladly organise it?
Mike

PS
Thanks for the bumpers - I look forward to trying them out on the Cabrio.
17 Aug 2013, 10:05am
Mike, its looking brilliant. The attention to detail is phenomenal. When you eventually get it finished I can see it will be a close run thing for the awards with you and Mr Cundall
1 Oct 2013, 9:40pm
How long can it take to fit one nut?....................TWO AND A HALF HOURS!!!

As my seat belts are fixed to both sides to the seast, the seat mountings to my chassis floor need to be particularly strong. I made a set of load spreader plates from 40x5mm flat steel bar for all 8 seat fixings, and with my son's help began fitting them.
We were able to locate and fit the nuts into the front runners and screw the bolt up into them quite easily, but the back ones certainly tested our patience!

The Audi A4 seats I have used are brilliant to sit in, but they were not designed to be installed into a Marlin Cabrio with very limited access. There is around 100mm maximum clearance at the back of the my seats to the rear chassis cross member, but then the seat runner is hidden a fuirther 100mm underneath and inboard of the seat back. So to fit a nut in the runner meant offering it up blind, by contorting hand and arm, and imagining where i might be.......and that was the easy bit!

We could push the nut along the runner with a finger end, and then line it up over the fixing hole from beneath the car with a screw driver, and even get the bolt started into the nut. However, because I had chosen nyloc nuts to make sure they never vibrate lose, it meant we had to hold the nut quite firmly whilst tightening the bolt head. This was where our problems began.
The passenger seat went in OK, but the drivers seat was a b****y nightmare!
The nut is positioned inside the Audi's narrow U shaped seat runner, so fitting a spanner is a non starter. My normal approach to this situation is to jam a screwdriver between the nut whatever it is close to, to stop it rotating but, because of the limited space and the angle we were working at, this proved impossible: believe me we tried everything!

After two hours of trying and failing our patience was being sorely tested - but they say the darkest hour is just before dawn, and the Marlin ingenuity gene kicked in. I decided I would make a special thin spanner:


The first version did not work as I made the side too thin, and it just splayed open when we tried to tighten the bolt. The Mark 2 version, seen above, worked perfectly. After 21/2 hours struggling we were able to do it up within a couple of minutes.
Quite satisfying in a perverse sort of way!

Big Milestone
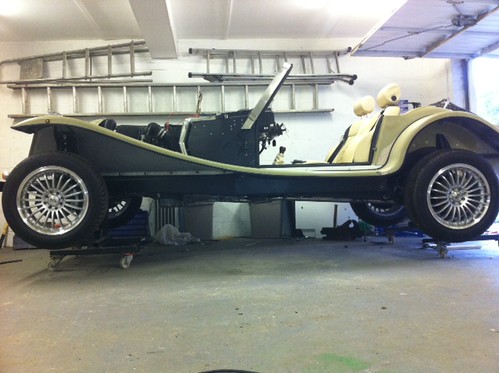
From the day I took delivery of my kit it has stood on a pair of home made mobile chassis stands. (Marlin offer to hire these but at their extortionate rates, and my slow build it would have doubled the cost of my build!). These stands have been fantastic, making access underneath easy, and to move the car around to get better access to each side. If any one is considering, or in the middle of, a major restoration I can not recommmend these mobile stands enough.
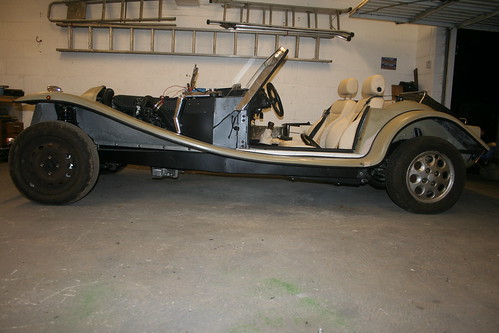
Fitting the seat spreader plates was the last task major I needed to perform under my car, so the time had finally arrived when I could take the momentous step of lower my Cabrio down from its stands, and hopefully dispense with them for good.


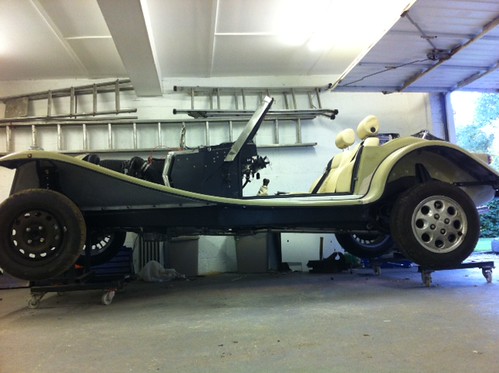
Before finally going ahead, I decided to change my wheel/tyres to narrower ones which will go through IVA without concern - my intended wheels are marginal on width relative to the wing sides.
My donor Sierra pepperpot alloys are in remarkably good condition, but two of the tyres were bald, so I bought a pair of scrapyard steel wheels and tyres for £10 the pair. I know they look awful, but the IVA test does not legislate against poor style or taste ......... yet!

Name: photo (1).jpg
Views: 17
Size: 37.2 KB

Off Its Stands

So finally...................
Name: IMG_5065.jpg
Views: 16
Size: 50.8 KB

Sad End to "My Best Marlin Birthday Present"
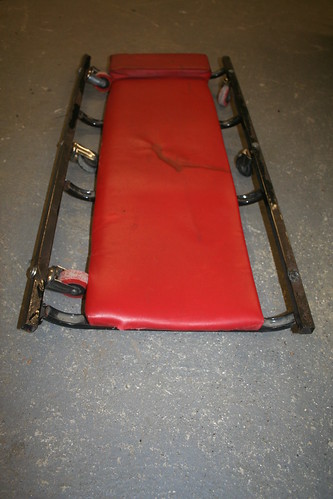
It was quite fitting that the same weekend I took my car off its stands, my mechanics crawler board, which has been my best "Marlin Birthday Present" - and I've had a few - gave up the ghost and fell apart. It has been brilliant - again thoroughly recommended if you have a flat floor to work on. It made life so much easier.

Name: IMG_5082.jpg
Views: 17
Size: 46.6 KB

Honey, I've Shrunk the Cabrio
After 7 years of seeing my Cabrio on stands it now looks awfully small, and very low sat on its own wheels - its going to take some getting used to.

Sump clearance was always going to be an issue, as it is with most Marlins. With these gash wheels I have 140mm (5 1/2"), and reckon with my chosen wheels and tyres this will go up to around 155mm (6"), though it may settle to below this. There is not much I can do, other than resort to a special sump and pump feed, which will cost a fortune.

Name: IMG_5071.jpg
Views: 17
Size: 51.6 KB

Not having to fit CATs has been a real bonus - my exhaust seems to be fine despite running the length of the car under the chassis.

Count Down To IVA
My list of "Jobs to do before IVA" has ceased to be so infinitely long that I have dared to create a definitive spreadsheet of tasks and times to complete. At the beginning of the weekend there were 23 items: and I reckoned I had around 70 hours work to do before I felt it would have a fighting chance of passing .

Rear Wing Extension
The rear wings on a Cabrio do not meet the IVA requirement to cover the rear tyre down an imaginary horizontal line 150mm above the wheel centre line: extensions are required:

Name: IMG_5091.jpg
Views: 17
Size: 29.1 KB

These were easy to make from stainless (ally would have been easier still, but I felt would be too soft, and not look like they were meant to be permanent. Stainless would go with the rest of my Cabrio, but is a pig of a job to drill for fixings, so I decided to glue them on using thick black body underseal gunge and clamps. Hopefully it will not prove too succesful, as I expect to "fall off" post IVA.

VIN Plate
What a pain!

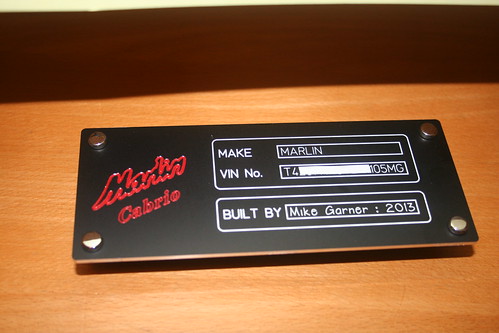
Some time ago I decided it might be a good idea to contact my intended VOSA test station to seek their views on how to present my Cabrio, and hopefully have them "on-side" on my test day. One of the items that came up in conversation with Andy (we are on first name terms!) was the VIN plate. He takes a very literal view of the IVA rules, and insisted the only two details that must appear on a VIN - "The Make of Car", and "The Chassis Number" should appear in a separate box, with the "Make" in CAPITALS, at least 3.5mm high. There must be nothing else in the same box - not even "Cabrio".

So this is the result, a minimalist VIN plate with a separate box for the essential information, and another for the non essential blurb!
Despite the trials and tribulations along the way, I'm pleased with it:

Name: IMG_5077.jpg
Views: 17
Size: 49.8 KB
(Many thanks to Jason for helping with the design)

My tester had better not have any objections to it!!

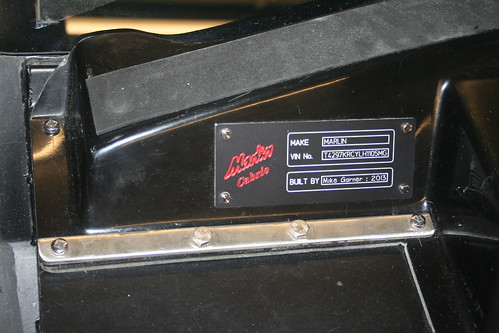
Oh, and of course, it has to be located on the offside in an easily accessible position!

Name: IMG_5086.jpg
Views: 17
Size: 57.7 KB

The steel bar over the heater cowl is a stiffener I've added to help strengthen the pedal box at the rear. It works very well, preventing its rotation and flexing when the brake is applied.


And at the end of the weekend, I've knocked off two jobs and 7 hours from my list............and I've still got 23 jobs and 70 hours work, as I found two other tasks that I'd over looked! Will I ever get there?!
1 Oct 2013, 9:43pm
Copying Photos Across?

Why is it not possible to copy photos hosted on the MOC forum by copying their URL and then inserting here?

example:


It shows as a link, not the actual photo?
1 Oct 2013, 9:57pm
You need to be logged in to view the attachment, if you're not you get an error message.

EDIT: The site is using code to pass the image data on to the browser rather than directly accessing the image on the server. Part of the code is an authentication check. The forum permissions have been set so that you must be logged in the view attachments, in this case an image.
1 Oct 2013, 10:39pm
How long can it take to fit one nut?....................TWO AND A HALF HOURS!!!

As my seat belts are fixed to both sides to the seast, the seat mountings to my chassis floor need to be particularly strong. I made a set of load spreader plates from 40x5mm flat steel bar for all 8 seat fixings, and with my son's help began fitting them.
We were able to locate and fit the nuts into the front runners and screw the bolt up into them quite easily, but the back ones certainly tested our patience!

The Audi A4 seats I have used are brilliant to sit in, but they were not designed to be installed into a Marlin Cabrio with very limited access. There is around 100mm maximum clearance at the back of the my seats to the rear chassis cross member, but then the seat runner is hidden a fuirther 100mm underneath and inboard of the seat back. So to fit a nut in the runner meant offering it up blind, by contorting hand and arm, and imagining where i might be.......and that was the easy bit!

We could push the nut along the runner with a finger end, and then line it up over the fixing hole from beneath the car with a screw driver, and even get the bolt started into the nut. However, because I had chosen nyloc nuts to make sure they never vibrate lose, it meant we had to hold the nut quite firmly whilst tightening the bolt head. This was where our problems began.
The passenger seat went in OK, but the drivers seat was a b****y nightmare!
The nut is positioned inside the Audi's narrow U shaped seat runner, so fitting a spanner is a non starter. My normal approach to this situation is to jam a screwdriver between the nut whatever it is close to, to stop it rotating but, because of the limited space and the angle we were working at, this proved impossible: believe me we tried everything!

After two hours of trying and failing our patience was being sorely tested - but they say the darkest hour is just before dawn, and the Marlin ingenuity gene kicked in. I decided I would make a special thin spanner:


The first version did not work as I made the side too thin, and it just splayed open when we tried to tighten the bolt. The Mark 2 version, seen above, worked perfectly. After 21/2 hours struggling we were able to do it up within a couple of minutes.
Quite satisfying in a perverse sort of way!

Big Milestone
From the day I took delivery of my kit it has stood on a pair of home made mobile chassis stands. (Marlin offer to hire these but at their extortionate rates, and my slow build it would have doubled the cost of my build!). These stands have been fantastic, making access underneath easy, and to move the car around to get better access to each side. If any one is considering, or in the middle of, a major restoration I can not recommmend these mobile stands enough.
Fitting the seat spreader plates was the last task major I needed to perform under my car, so the time had finally arrived when I could take the momentous step of lower my Cabrio down from its stands, and hopefully dispense with them for good.


Before finally going ahead, I decided to change my wheel/tyres to narrower ones which will go through IVA without concern - my intended wheels are marginal on width relative to the wing sides.
My donor Sierra pepperpot alloys are in remarkably good condition, but two of the tyres were bald, so I bought a pair of scrapyard steel wheels and tyres for £10 the pair. I know they look awful, but the IVA test does not legislate against poor style or taste ......... yet!


Off Its Stands

So finally...................


Sad End to "My Best Marlin Birthday Present"
It was quite fitting that the same weekend I took my car off its stands, my mechanics crawler board, which has been my best "Marlin Birthday Present" - and I've had a few - gave up the ghost and fell apart. It has been brilliant - again thoroughly recommended if you have a flat floor to work on. It made life so much easier.


Honey, I've Shrunk the Cabrio
After 7 years of seeing my Cabrio on stands it now looks awfully small, and very low sat on its own wheels - its going to take some getting used to.

Sump clearance was always going to be an issue, as it is with most Marlins. With these gash wheels I have 140mm (5 1/2"), and reckon with my chosen wheels and tyres this will go up to around 155mm (6"), though it may settle to below this. There is not much I can do, other than resort to a special sump and pump feed, which will cost a fortune.


Not having to fit CATs has been a real bonus - my exhaust seems to be fine despite running the length of the car under the chassis.

Count Down To IVA
My list of "Jobs to do before IVA" has ceased to be so infinitely long that I have dared to create a definitive spreadsheet of tasks and times to complete. At the beginning of the weekend there were 23 items: and I reckoned I had around 70 hours work to do before I felt it would have a fighting chance of passing .

Rear Wing Extension
The rear wings on a Cabrio do not meet the IVA requirement to cover the rear tyre down an imaginary horizontal line 150mm above the wheel centre line: extensions are required:


These were easy to make from stainless (ally would have been easier still, but I felt would be too soft, and not look like they were meant to be permanent. Stainless would go with the rest of my Cabrio, but is a pig of a job to drill for fixings, so I decided to glue them on using thick black body underseal gunge and clamps. Hopefully it will not prove too succesful, as I expect to "fall off" post IVA.

VIN Plate
What a pain!

Some time ago I decided it might be a good idea to contact my intended VOSA test station to seek their views on how to present my Cabrio, and hopefully have them "on-side" on my test day. One of the items that came up in conversation with Andy (we are on first name terms!) was the VIN plate. He takes a very literal view of the IVA rules, and insisted the only two details that must appear on a VIN - "The Make of Car", and "The Chassis Number" should appear in a separate box, with the "Make" in CAPITALS, at least 3.5mm high. There must be nothing else in the same box - not even "Cabrio".

So this is the result, a minimalist VIN plate with a separate box for the essential information, and another for the non essential blurb!
Despite the trials and tribulations along the way, I'm pleased with it:


(Many thanks to Jason for helping with the design)

My tester had better not have any objections to it!!

Oh, and of course, it has to be located on the offside in an easily accessible position!


The steel bar over the heater cowl is a stiffener I've added to help strengthen the pedal box at the rear. It works very well, preventing its rotation and flexing when the brake is applied.


And at the end of the weekend, I've knocked off two jobs and 7 hours from my list............and I've still got 23 jobs and 70 hours work, as I found two other tasks that I'd over looked! Will I ever get there?!
1 Oct 2013, 10:51pm
Patrick wrote:
You need to be logged in to view the attachment, if you're not you get an error message.

EDIT: The site is using code to pass the image data on to the browser rather than directly accessing the image on the server. Part of the code is an authentication check. The forum permissions have been set so that you must be logged in the view attachments, in this case an image.


Hi Patrick

I am logged into both sites, yet it does not show the photo when I copy my own thread across from the MOC site - it just shows the link.

I have had to copy across the photos and implant them one by one from my flickr site.

It has worked, but there must be an easier way?
2 Oct 2013, 12:13pm
Seeing your progress brings back memories.... It must be over five years now that I was getting to that exciting almost complete stage. In another couple of years I might be there again haha.

Mike - could you tell me how you fixed the VIN plate? I was under the impression they had to be welded on or at least fixed in a way they couldn't be removed. I would like to do something similar on the Pembleton (which doesn't currently have any markings on the chassis).

Cheers, Robin
2 Oct 2013, 4:54pm
the VIN plate doesn't need to be welded on but it must be permenantly fixed so rivets are acceptable. Obviously nothing is truly permenant if you're that determined to remove it but I think for instance screws or sticky pads wouldn't pass
2 Oct 2013, 9:20pm
MartinClan wrote:
Seeing your progress brings back memories.... It must be over five years now that I was getting to that exciting almost complete stage. In another couple of years I might be there again haha.

Mike - could you tell me how you fixed the VIN plate? I was under the impression they had to be welded on or at least fixed in a way they couldn't be removed. I would like to do something similar on the Pembleton (which doesn't currently have any markings on the chassis).

Cheers, Robin


Hi Robin

Yes it is the exciting/scary stage - my local test centre rang today and left a message asking what date I wanted for my test?
I 've had a long panic on my 2 hour drive home from work tonight and have decided to push it back a couple of weeks!

I have used plain head polished stainless steel rivet screws - the head is polished smooth with no slot or allen keyway, so it is "difficult" to undo the nuts from the back because there is no easy way of holding the rivet from going around.
Of course they could take the view that they are not "difficult" enough. If they do, I will change the nut to an ordinary stainless nut and apply a tiny spot weld.

I also have the original Marlin stamped logo plate VIN number, which was welded on the near side, bulkhead, (which I removed in less than 60 seconds with an angle grinder and slitting disk) and will weld this back onto the chassis, on the offside of the bulkhead.


Edit:
I was happy that my plain head screws would be enough, but as an after thought I will spot weld ordinary nuts on to the rivets before going for the test- but it will mean I have to grind them off to get the GRP cover painted. Oh what fun!

I wonder if they will claim that the GRP panel is not secure enough then?
2 Oct 2013, 9:45pm
I would stick it directly on a metal part of the chassis as they could argue that although the plate is well secured, there's nothing to stop you replacing the GRP
3 Oct 2013, 6:39am
When I IVAed my Cabrio the VIN plate was pop-riveted on the bulkhead. It did fail however because
1. The Marlin chassis number was mounted on the N/S and not the O/S as required.
2. The chassis number was split over two lines and had spaces that 'could' have had extra characters inserted in to it.

As a result I stamped the chassis number directly into the bulkhead next to the VIN plate and this seemed acceptable.
10 Oct 2013, 10:03pm
The Uxbridge Wobble

Major Setback - Front Hub "Wobble"


Just when all seemed to be going well..................I have the "Uxbridge wheel wobble".
( So named after "Peterux" who had the same problem earlier this year).

Whilst swapping my wheels over I discovered some play in the front hub/axle, but was not sure where from. After removing the wheel and testing and testing I became convinced it was in the bearings - this was particularly annoying as they are new.

So, I stripped off the brake calliper and beat the upper and lower tapered ball joints out, and finally the track rod end ball joint. Once free I could hold the hub in the vice, and sure enough the bearing has play in it. Oddly, as with Peterux, (and hence the reference), the play can only be felt when testing across the East-West pivot.ie holding North - South and trying to rock it. It does not appear to rock on the North -South axis?

I've spoken to the guy who supplied me the hubs re-furbished, fitted with new bearings and torqued up to 215ft lbs, and he is very surprised. Hopefully when I take them back he will accept they are faulty and replace the pair?

Quite a few hours wasted, and another job to do.
4 Nov 2013, 7:33pm
IVA Test Tomorrow

Its amazing how time flies when you are enjoying yourself............or are under pressure to get your car ready for an IVA Test.

Mine will commence at 8.30am on Tuesday Novemebr 5th - and I guess by 12.30pm I'll know what I have to do to get a pass!

Quite looking forward to it now its finally arrived.

Mike
4 Nov 2013, 8:19pm
Mike wrote:
Its amazing how time flies when you are enjoying yourself............or are under pressure to get your car ready for an IVA Test.

Mine will commence at 8.30am on Tuesday Novemebr 5th - and I guess by 12.30pm I'll know what I have to do to get a pass!

Quite looking forward to it now its finally arrived.

Mike


Best wishes and good luck for a first time pass tomorrow!!

....peter
4 Nov 2013, 8:48pm
Good luck, we'll all have our fingers cross for you :D
7 Nov 2013, 1:39pm
My IVA Test Day

November 5th 2013 - My Cabrio IVA Test Day

The day didn't start too well - at 5.30am it was wet, requiring us to fix a tarpaulin over the cabin:
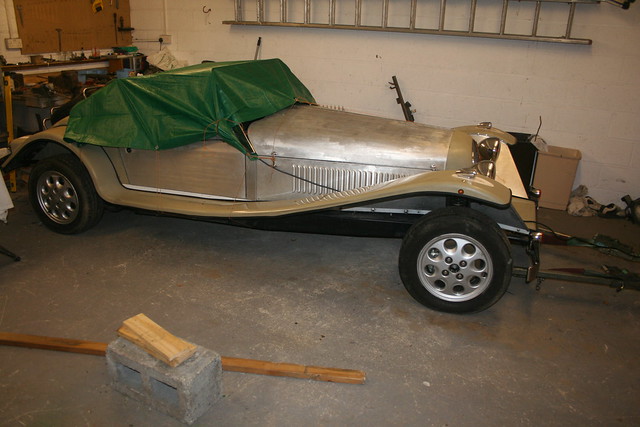


Towing with an A-Frame is an absolute doddle - so much easier than a trailer. Highly recommended.

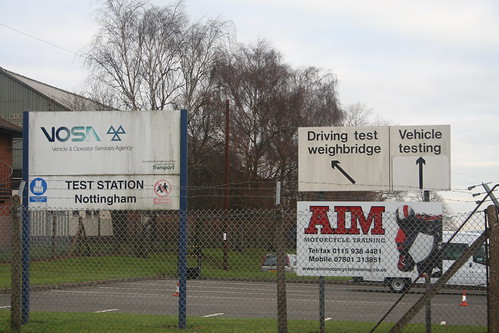
Despite leaving ourselves 45 minutes spare, the traffic into Nottingham was awful and we eventually arrived 10 minutes late - not a good way to start the test. However, I had phoned ahead, and Martin, our tester, made nothing of it.

Alan Hogg had kindly offered to come along to the test for moral support, along with David Sidall, and arrived in his very nicely prepared Cabrio - it really did make mine look bare, without paintwork.

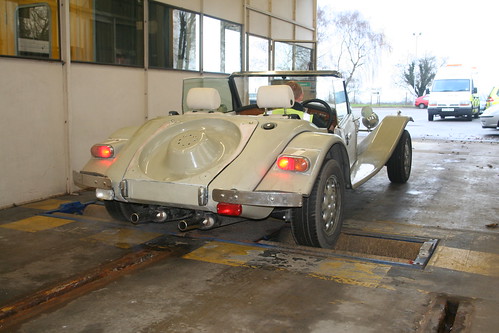
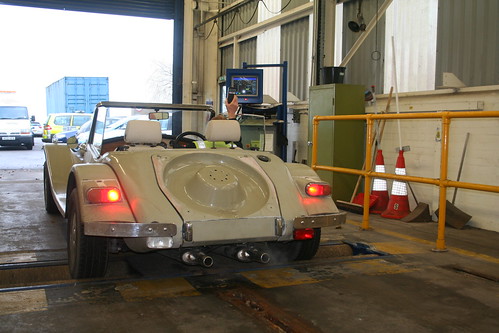
As soon as we had removed the tarpaulin we were directed into the test bay, and the examination began:


Inside the car he looked for sharp edges - no comment about my gash dash. He used two aluminium half moon dumbells, one 165mm diameter, and one 100mm (representations of ones head and knee) to test for access to sharp edges.
All seemed OK.
Then he looked in the drivers footwell and produced my brake pedal clevis pin! It had jarred loose on our journey to the station, because I had either forgotten to fit the retaining clip, or at some point it had come off without me realising. What kind of initial impression did that create? I felt awful.
Martin however took it in his stride - he's seen plenty of lorries with similar faults where the star washer has fallen off - and accepted I could fit a bolt and nyloc to replace it.

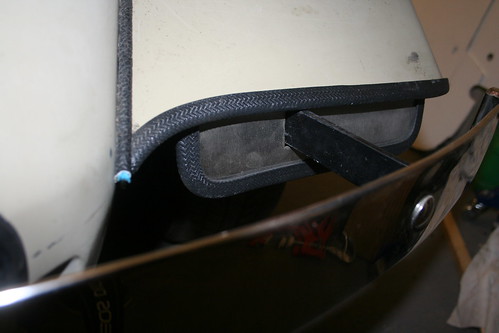
The cabin passed, except for one item - a new one to me - the side window top edge failed the radius test. They had been ground, but not sufficiently to meet the 2.5mm radius test.
When I asked how I could remedy this with an electric window, Martin advised fitting rubber channel over the exposed edge with the window up - he is not bothered that they are electric and could go down - he tests the car as presented. So, what I thought was a show stopper was going to be easy to fix on the day.

He asked about my seats, and their anchorage, as I have attached the seatbelts to them, and was satisfied by my photos of the seats in an Audi A4, then out of the A4, showing the runners, and fixings, and that I had fitted them exactly the same in my car, and fitted spreader plates beneath them.

All the controls were checked, and then he told me the special Cartek Fog light switch (which cost me £40) is not compulsory! Thanks!

Martin was happy with almost all of the outside of the car - he was going to pull the washer jets for lack of radius, and took issue with the radius on the front bumper. He then passed the rear bumpers - made of the same 5mm stainless: but to be fair there was a section about 75mm long where the radiusing had not been prepared very well on the front bumper. My fault for not thoroughly checking, but I had my angle grinder with me, so could soon deal with that, and then re-polish it at home.

Then another issue - again my own fault: the old Sierra tyres I'd fitted were different. I knew that - I had deliberately fitted the 195 profiles at the rear and the 185s on the front, to try to help with self centring. What I did not notice was a 60 profile on one side, and a 65 profile on the other. Twit.
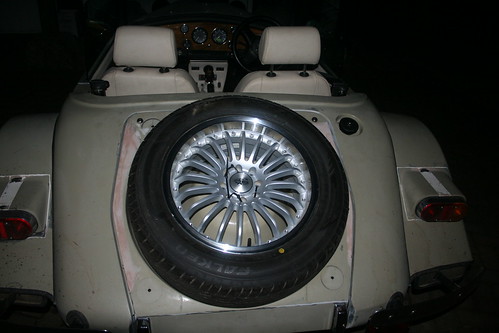
Unfortunately the spare I had taken along was one of my new wheels, which is a different size again - but it would have failed on a rim edge radius so that was ruled out as a replacement.
Alan then suggested we could borrow two wheels from his Cabrio, just to get through the test - Thanks Alan - very noble of you!

Before going up on the ramps he tested the speedometer, which was fine - I did well to set it up right with two different sized tyres on the back axle!

The emissions were tested for a 1993 engine, and were well inside the limits.

It then went up on the ramps with me in it, being directed to press the brake pedal, or turn the steering wheel, or flick switches.
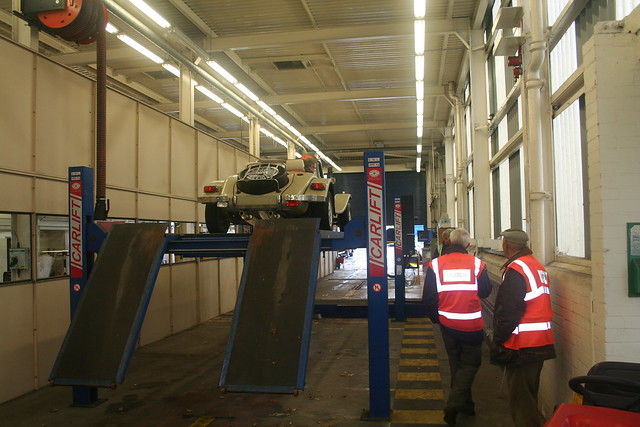
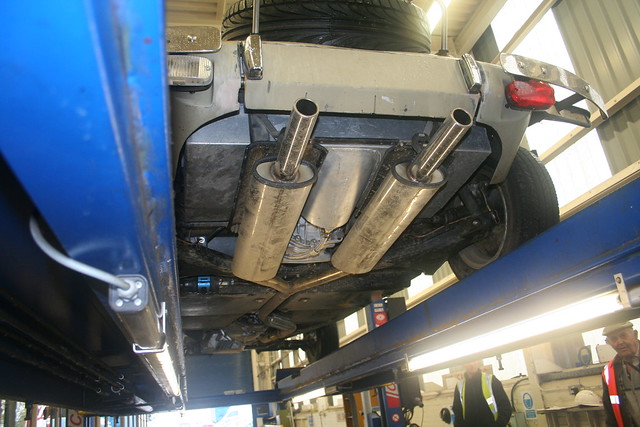

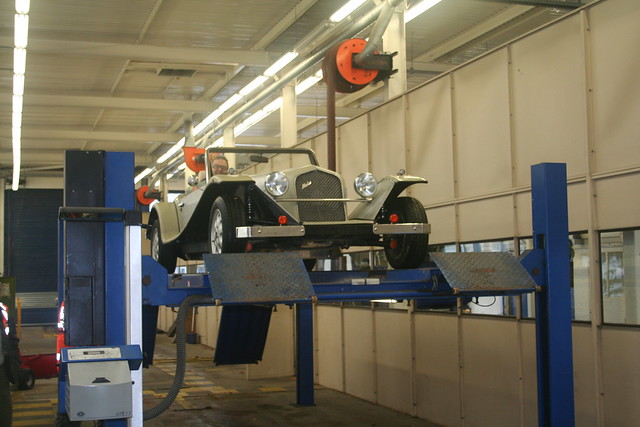


There then seemed to be a delay, but Dad advised the issue was the engine number. I had explained earlier I had a letter from BMW confirming the year of manufacture, which Martin was pleased to note. By this stage the test was going much better, and Martin was clearly warming to my Cabrio. He took some time to find the engine number, using emery paper, and yellow chalk until he could read it. This was well beyond his obligation to test what he could see, but we were close now.

Next came the lights test. Martin checked the basic functions, then without prompting adjusted the headlights to give the required settings.

The penultimate test was the brake test. Foot brake - both front and rear were good.


But then the show stopper................the hand brake failed, not generating sufficient force. The test reading figure must equate 18% of the vehicle Design Weight, but did not reached it. But, maybe we could come back to it?
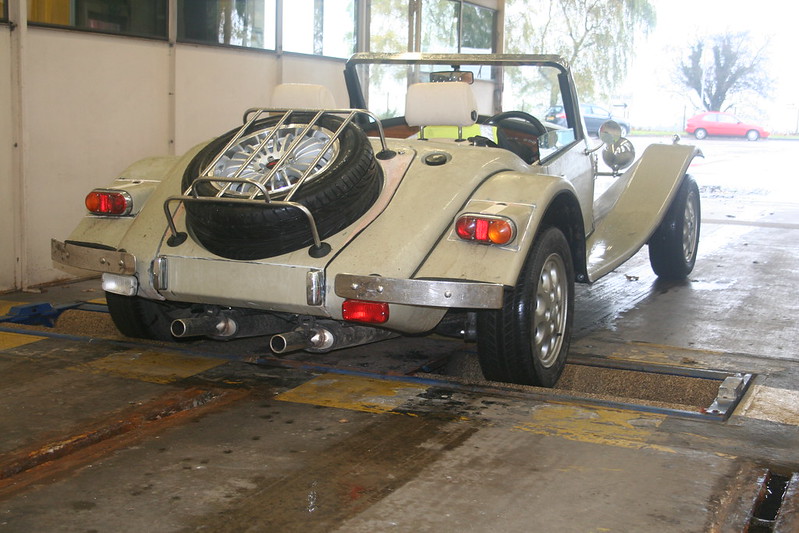


The final test was the noise - and it read 96db, just as my own cheap meter, and well inside the 99bd limit.

So, my initial test was a technical fail, but maybe we could address the small items for a pass on the day.

The Design Weight figures that I had submitted were made up, in the abscence of any meaningful figures from Marlin, and were too high at 1600kg.
My car's self weight with a tank full of fuel was weighed at 960kg on the day.
Allowing 150kgs for passengers they calculated a gross weight of 1,110kg. Martin advised a Design Weight of 1300kg was more realistic. Perhaps if I "re-submitted" my figures the hand brake would be acceptable? Martin did the calculations, but they were only good for 880kg.

So we went back up on the ramp, to adjust the hand brake cable, to generate more force. At this point the examiner was willing us to pass, and it was him adjusting the hand brake nylon nut, but despite his best efforts the cable would not tighten - the outer cable just kept slipping through the nylon nut.

This was a show stopper.

There was no way I could change the hand brake cable, as the standard Sierra inner cable for a disc brake car, has to be shortened, before it can be fitted.

So, despite Alan very kindly offering to loan me his wheels, there would be no point.

My Cabrio was officially recorded as failing the test.

Two sharp edges, one incorrect tyre, the brake clevis pin and a failed handbrake adjuster. (the washer jets were not recorded on the final document).

How do I feel about it?

The test itself is thorough, and I found the examiner (Martin) totally fair, and towards the end, very clearly wanted us to pass. He spent quite a while cleaning the engine block, to determine the number, and longer still trying to adjust the Sierra handbrake cable. When it became clear the nut had failed he even gave me the name of a local one man garage with a lift that I could go and change the cable.............and I would have done, were it not for the need to shorten the inner cable, but this is not a quick job.

From a personal perspective, I'll be honest, there is a large part of me that is very disappointed. Peter Edwards had encouraged me to aim high, and he was right: why plan to fail? I aimed for a first time pass, and a new (sub) standard Ford component has let me down.
My car was not perfect - the unequal tyres, and the brake clevis pin were embarassing, but they, and the two sharp edges could have been resolved in less than an hour, and a pass on the day would have been possible.

On the bright side, I have an afternoons work changing the handbrake cable, and 10 minutes pressing some rubber edging onto the windows, and front bumper, to be able to go back for an assured pass.

So close........................

Before signing off, and despite not quite passing, may I take this opportunity to thank everyone on the Madabout site who has helped me along the way. I know people say it, but it is true: without you this would not have been possible. This is going to sound like a BAFTA awards night and it may be unfair to single individuals out for praise, but I do want to thank : Chris Cunliffe, Simon Gregory, Peter Edwards, and Nigel Beats particuarly for their technical help and advice with my build. Chris Cunliffe, who built the first BMW M50 Cabrio, and drove 150 miles to meet me half way (between Lincoln and Exeter!) to allow me to try his Cabrio before deciding to buy an M50 based Cabrio kit: Simon will see one or two of his ideas blatantly copied into my car: Peter has been a great role model with his Sportster build, and offering encouragement, and Nigel who, quite literally, got my engine going!

For those of you too numerous to mention who have had a real input in to my car, and you know who you are - may I wish you all a very big thank you.

Last but not least - how do I say a big enough thank you to my wife, Sue, who has put up with me taking 8 years to build my car? In the usual way of course - we're going away for a 3 day weekend with friends tomorrow!

Many thanks to all: not far to go now!

Mike
7 Nov 2013, 4:33pm
Bad luck, Mike, but well done on being so close to a pass. After all your hard work you have a lot to be very proud of.
All the best
Tim
7 Nov 2013, 8:22pm
Very close Mike - well done on everything looks like some fairly simple fixes :)
10 Dec 2013, 8:41pm
Iva Pass!!!!!!!!!!!!!!!!!!!!!!!!!

Today my Marlin Cabrio passed the IVA test!

For the photos - have a look here:

http://www.marlinownersclub.com/forum/showthread.php?4589-Mike-s-Cabrio-Build

(why can't it be simple to copy one set of photos from one vbulletin to another?


I drove my Cabrio 120 miles without a number plate or tax disc........................and all quite legally! It was great fun. Several police cars passed me by, and I kept hoping they would stop me .............but none did!

Why was it legal? - because I took my Cabrio back for its IVA re-test today, and chose to drive it there!

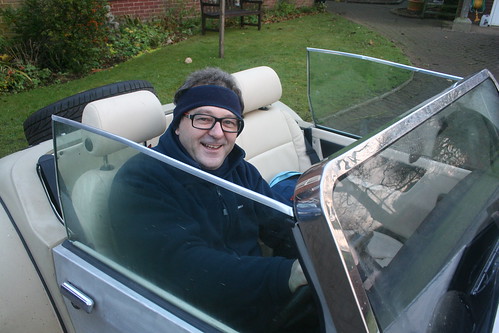
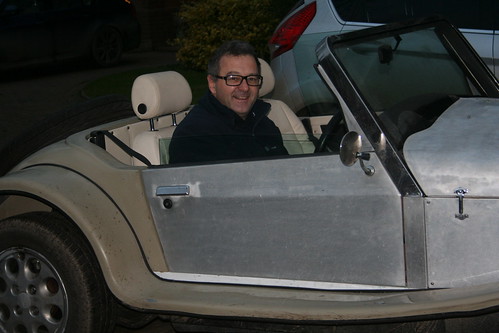
It was pretty cold when I set off:


But I was well wrapped up, and with the heater on all the way the only part to get cold was my right hand - the centre heating vent has already shown it was worth the effort.

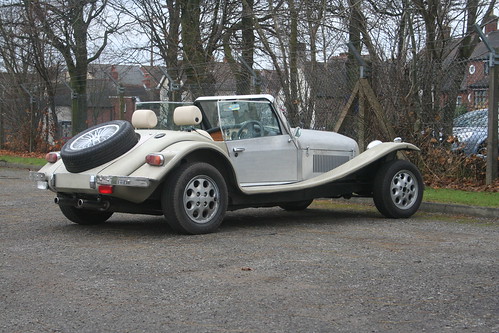
After a 90 minute drive I arrived back here:


This time I was an hour early - so I parked up, took a few photos and had lunch.


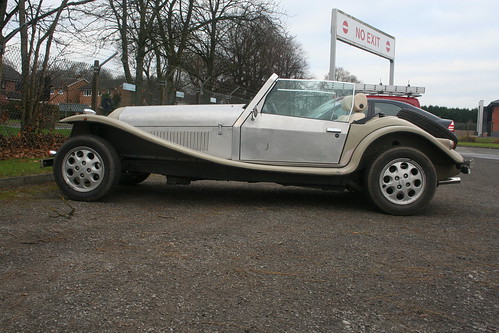
The ground clearance is pretty good as Marlins go........but that sump does look vulnerable.


I had arranged to have my Cabrio re-tested again by Martin, this time at 1.30pm to ensure I was not late! So after his lunch he began his inspection. As per last time, he was thorough in checking off the fail items, and within two minutes (literally) he ticked off the brake pivot pin clip, the matched rear tyre profiles, and window and bumper sharp edges, and so moved on to the final item - the handbrake.

Up on the ramps to see what I had done, and that when operated nothing now fouled - all was OK, and the test had now lasted all of 5 minutes.

Although I had added two steel adjusters into my handbrake cable, I still knew the efficiency test was, unfortunately, not going to be a formality.....................

Yesterday I took my Cabrio to the local MOT station to have them test only the handbrake efficiency, to make sure all was well, and give me the confidence to drive my Cabrio 60 miles over to Nottingham (and spend £90) for its IVA re-test.

Unfortunately it was much closer than I had hoped..............

Based on the 1600kg Design Weight I had filled in on my IVA application form this test only showed 17% - enough for an MOT pass (>16%), but a fail against the 18% required by IVA. Oh dear, not again!
Perhaps the pads were not bedded in and would be better after a 60 mile drive?

So, when I arrived at this part of the re-test I was genuinely nervous.
Martin set it up in the brake test machine, and I could see the back end squat down each time he applied the hand brake.


The good point to note at this stage were the exhausts clearing the centre plates even when squatting under hard braking.


However, I could also see the scores on the screen were just the same as the previous day, and a fail was the likely outcome.................

except................................?


(just teasing!)


..........I had agreed with Martin prior to my test that I would "re-submit" my Cabrios Design Weight to a more realistic 1300kg, which meant the efficiency now rose to a creditable 21% and a clear pass!

So - after 8 years, I have now achieved an IVA PASS!!!!!!!!!


The ride home was much more relaxed than the nervous one there and (in places) quite a bit quicker too! I thoroughly enjoyed it!


Although I had just achieved an IVA pass there were bits dropping off my car as I drove home!

The bumper edge covers fell off, but they were never really needed as I had radiused the edges, but I was not taking any risks..............


The gash dash fell off to leave a nice shiney one underneath!

[IMG]http://farm6.staticflickr.com/5543/11314859854_0e7c6805e8.jpg

Although these are sold as asfter market alloy wheels, they will not pass the IVA - part of the rim has a radius of less than 2.5mm: so I had to remove it for the test, and cable tie it back on to get it home safely!


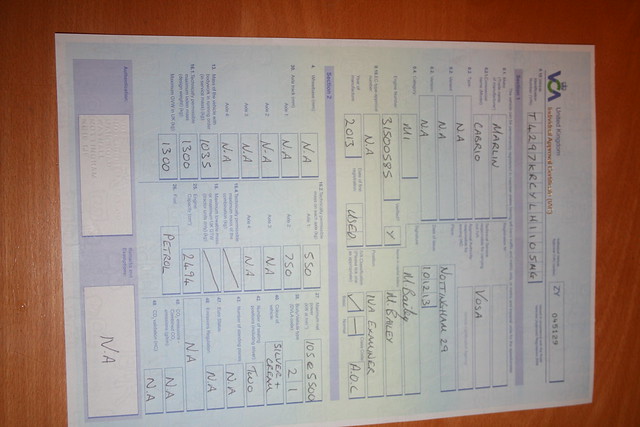
..............and this is what its all done for.............

IVA PASS certificate

10 Dec 2013, 9:16pm
Great result, well done Mike!!:high5: :high5: :high5:

Let's hope the registration is straight forward but don't forget to keep a copy of your IVA pass certificate as the DVLA keep it!!
10 Dec 2013, 9:30pm
peterux wrote:
Great result, well done Mike!!:high5: :high5: :high5:

Let's hope the registration is straight forward but don't forget to keep a copy of your IVA pass certificate as the DVLA keep it!!


Thanks Peter that is useful to know - I've scanned a copy.
If DVLA get it right it should come back with MAG 111D on the V5c.
11 Dec 2013, 8:58am
Well done, that's awesome :D
11 Dec 2013, 9:05am
Iva Pass!!

Photos added


Today my Marlin Cabrio passed the IVA test!

I drove my Cabrio 120 miles without a number plate or tax disc........................and all quite legally! It was great fun. Several police cars passed me by, and I kept hoping they would stop me .............but none did!

Why was it legal? - because I took my Cabrio back for its IVA re-test today, and chose to drive it there!

It was pretty cold when I set off:


But I was well wrapped up, and with the heater on all the way the only part to get cold was my right hand - the centre heating vent has already shown it was worth the effort.

After a 90 minute drive I arrived back here:


This time I was an hour early - so I parked up, took a few photos and had lunch.


The ground clearance is pretty good as Marlins go........but that sump does look vulnerable.


I had arranged to have my Cabrio re-tested again by Martin, this time at 1.30pm to ensure I was not late! So after his lunch he began his inspection. As per last time, he was thorough in checking off the fail items, and within two minutes (literally) he ticked off the brake pivot pin clip, the matched rear tyre profiles, and window and bumper sharp edges, and so moved on to the final item - the handbrake.

Up on the ramps to see what I had done, and that when operated nothing now fouled - all was OK, and the test had now lasted all of 5 minutes.

Although I had added two steel adjusters into my handbrake cable, I still knew the efficiency test was, unfortunately, not going to be a formality.....................

Yesterday I took my Cabrio to the local MOT station to have them test only the handbrake efficiency, to make sure all was well, and give me the confidence to drive my Cabrio 60 miles over to Nottingham (and spend £90) for its IVA re-test.

Unfortunately it was much closer than I had hoped..............

Based on the 1600kg Design Weight I had filled in on my IVA application form this test only showed 17% - enough for an MOT pass (>16%), but a fail against the 18% required by IVA. Oh dear, not again!
Perhaps the pads were not bedded in and would be better after a 60 mile drive?

So, when I arrived at this part of the re-test I was genuinely nervous.
Martin set it up in the brake test machine, and I could see the back end squat down each time he applied the hand brake.


The good point to note at this stage were the exhausts clearing the centre plates even when squatting under hard braking.


However, I could also see the scores on the screen were just the same as the previous day, and a fail was the likely outcome.................

except................................?


(just teasing!)


..........I had agreed with Martin prior to my test that I would "re-submit" my Cabrios Design Weight to a more realistic 1300kg, which meant the efficiency now rose to a creditable 21% and a clear pass!

So - after 8 years, I have now achieved an IVA PASS!!!!!!!!!


The ride home was much more relaxed than the nervous one there and (in places) quite a bit quicker too! I thoroughly enjoyed it!


Although I had just achieved an IVA pass there were bits dropping off my car as I drove home!

The bumper edge covers fell off, but they were never really needed as I had radiused the edges, but I was not taking any risks..............


The gash dash fell off to leave a nice shiney one underneath!


Although these are sold as asfter market alloy wheels, they will not pass the IVA - part of the rim has a radius of less than 2.5mm: so I had to remove it for the test, and cable tie it back on to get it home safely!


..............and this is what its all done for.............

IVA PASS certificate

11 Dec 2013, 6:25pm
Well done Mike, that's great news.

So, what's next, paint I guess? Or are you just going to direct all your funds for the next few months into copious amounts of petrol to burn tearing up the A roads of the local countryside.

Once I get through IVA (one day maybe) I think that a dry sump will be my number one priority. Every time I see a side on shot of a marlin cabrio or sportster with that M50 sump sticking out the bottom centimetres from the ground it makes me wince.