MadaboutKitcars

This is a read-only archive of the old Madabout Kitcars forum. New posts and replies are no longer possible, but every thread is still here to browse and read.

Another Cordite Is Born ...

3 Dec 2014, 1:22pm
Scottie - Cheers. :cool:
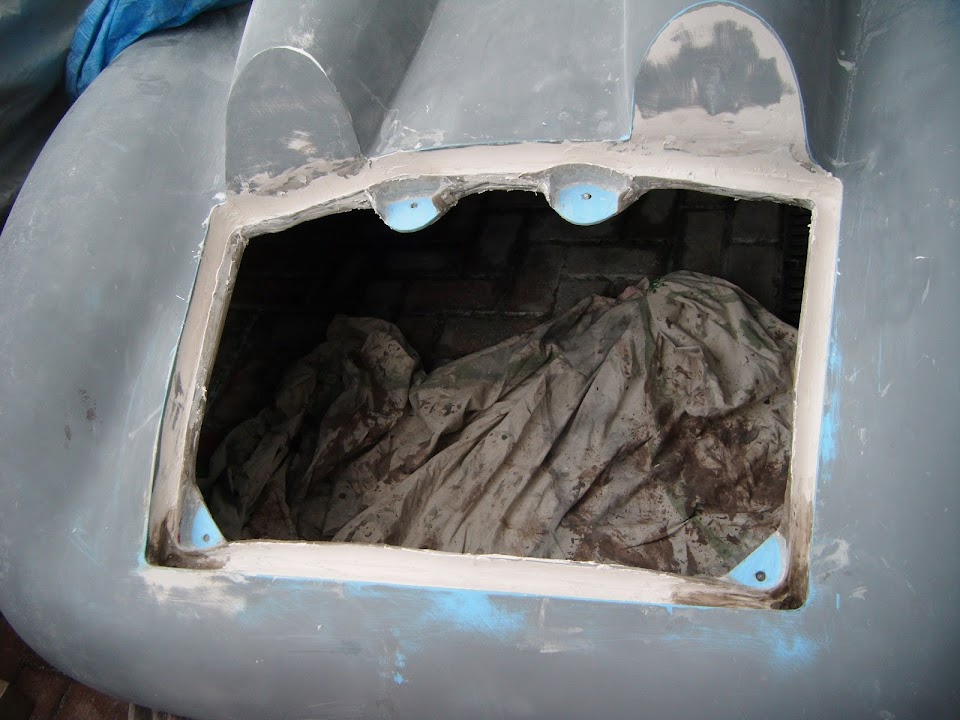
Whilst my progress has slowed down lately, at least the bulk of the boot lid work is done.
I'd be happy if I have got the lid sorted and made a start on the bonnet before Christmas.
Then I've have the Christmas break to recharge my batteries and carry on.

- - - - - - - - - - - - - - - - - - - - - - - - - - - - - - - -

Drain Holes:
I turned the body shell over, and then realised I should have done the next job first. :rolleyes:

Rather than turn it back over, I simply did the work while lying on my back instead.

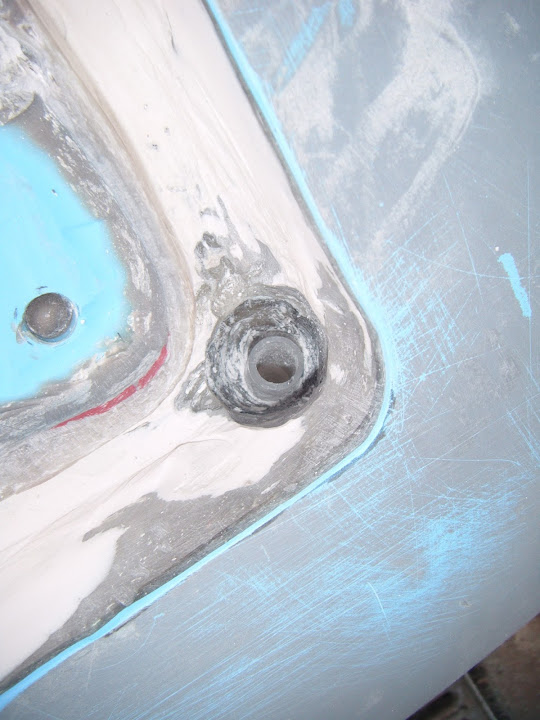
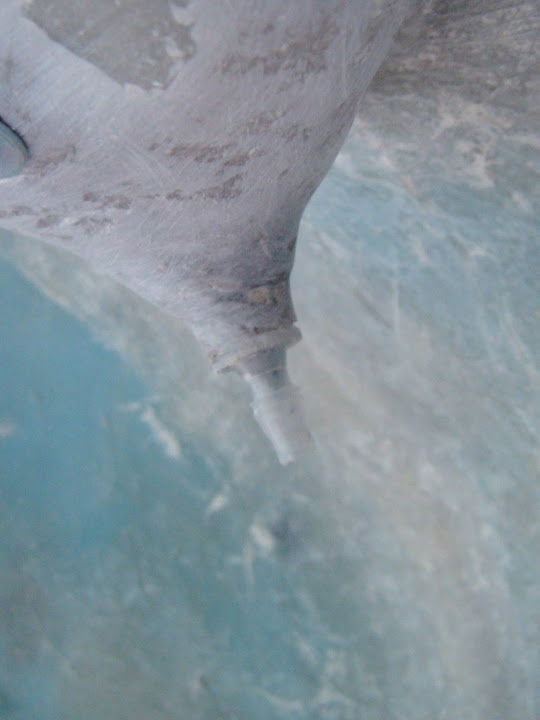
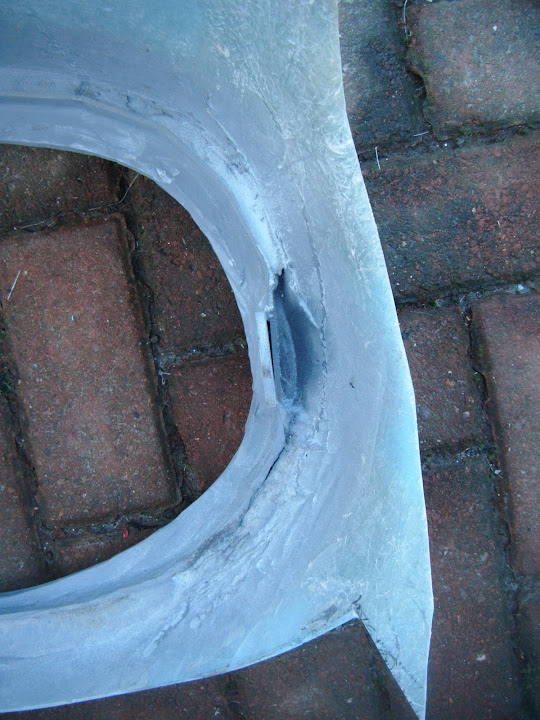
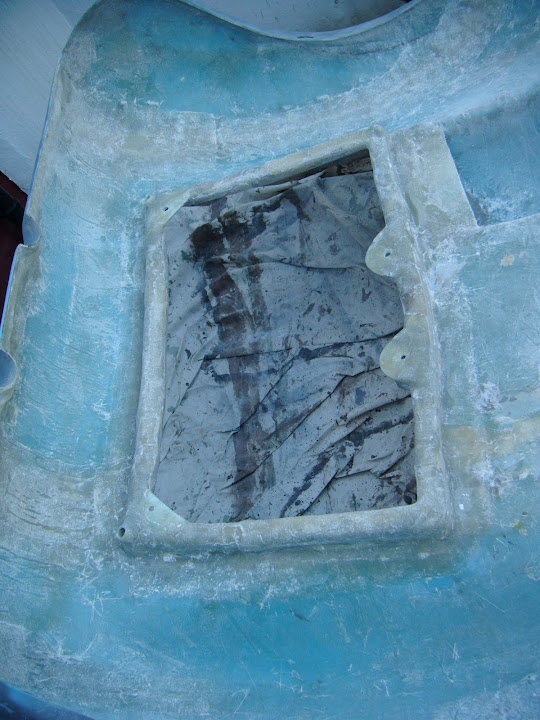
I opened out the inside of the rain channel hole so that it "joined up" with the fibreglass funnel I'd built around the bottom corners.


Note:
I was happy with the rough finish, as I will be using filler around the pipe. + Obviously the photo was taken upside down too.

Then I tidied up the other side of the holes.


I also tidied up all the other edges of the rain channel while I was at it.


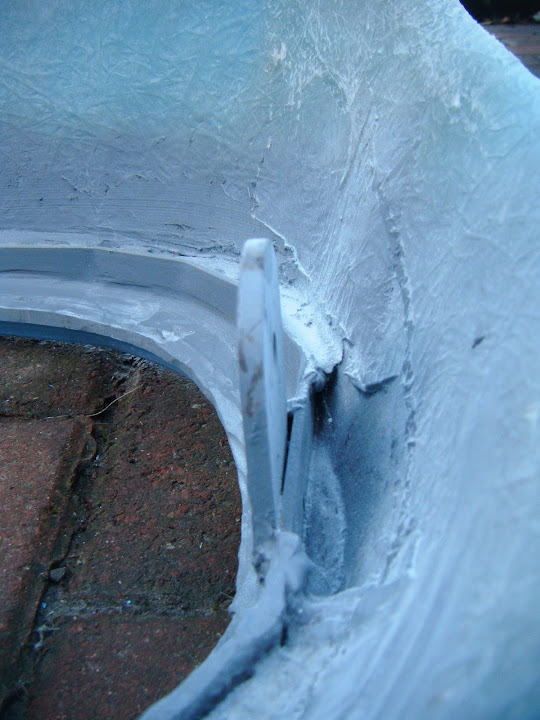
A blob of plastercine was enough to temporarily hold the plastic pipe in place.
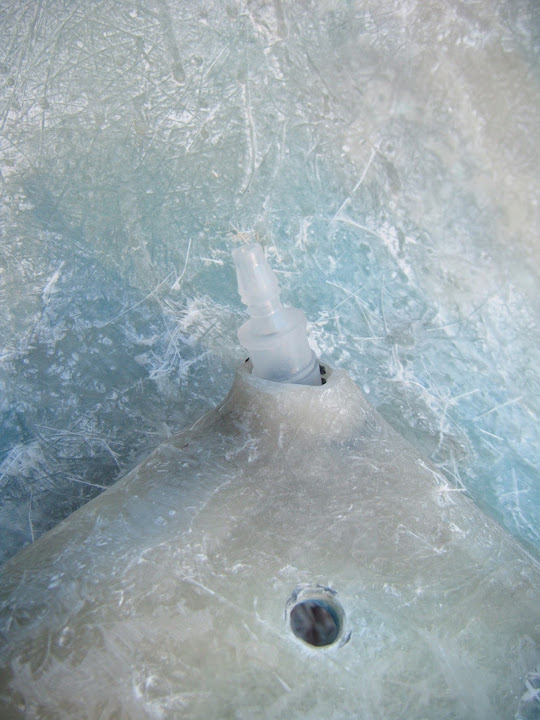


Then some fibreglass filler was used to set the position a bit more permanently .


I also used the same filler to tidy up more of the rain channel edges.


Note:
Although I have covered the bolt holes with filler, the holes are "intact" on the other side, so easy to re-drill.

As it was so cold outside, I had to leave it a bit longer than normal before giving it a rough sanding down.


I will now leave this to set fully overnight before giving it a skim of normal body filler.

With rain due later, I've tucked the body shell away and will now be returning to my Christmas duties.

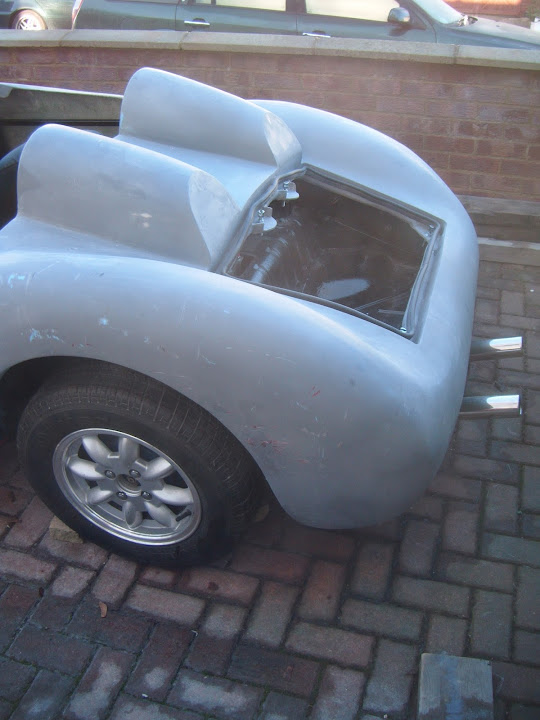
Not a great photo, but I hope you can see that the wide end of the tube is below the level of the rain channel.


Once I remove the plasticine, I will be able to add some fibreglass filler around the tube to hold it in place.

I will also use the filler to form an internal funnel from the outside edges of the drain hole to the tube.

Until next time, take care, Paul. :)

PS
Did I mention it was cold outside?
As despite typing this post up indoors, my nose is running and my fingers and toes are still cold! :eek:
4 Dec 2014, 8:57am
Paul L wrote:

PS
Did I mention it was cold outside?
As despite typing this post up indoors, my nose is running and my fingers and toes are still cold! :eek:


You're a braver man than me :) i had loads planned for the car last night but when i got home it was freezing in the garage so i just applied a bit of filler and called it a night!
Time to dig out the thick jumpers and electric heaters i think....
4 Dec 2014, 4:26pm
Dave - Whilst the cold is bad, it is the constant drizzle at the moment that is a real pain. :icon_sad:
Having said that, I have also dug out my thermals just in case it gets much colder.

- - - - - - - - - - - - - - - - - - - - - - - - - - - - - - - -

Fog Lights
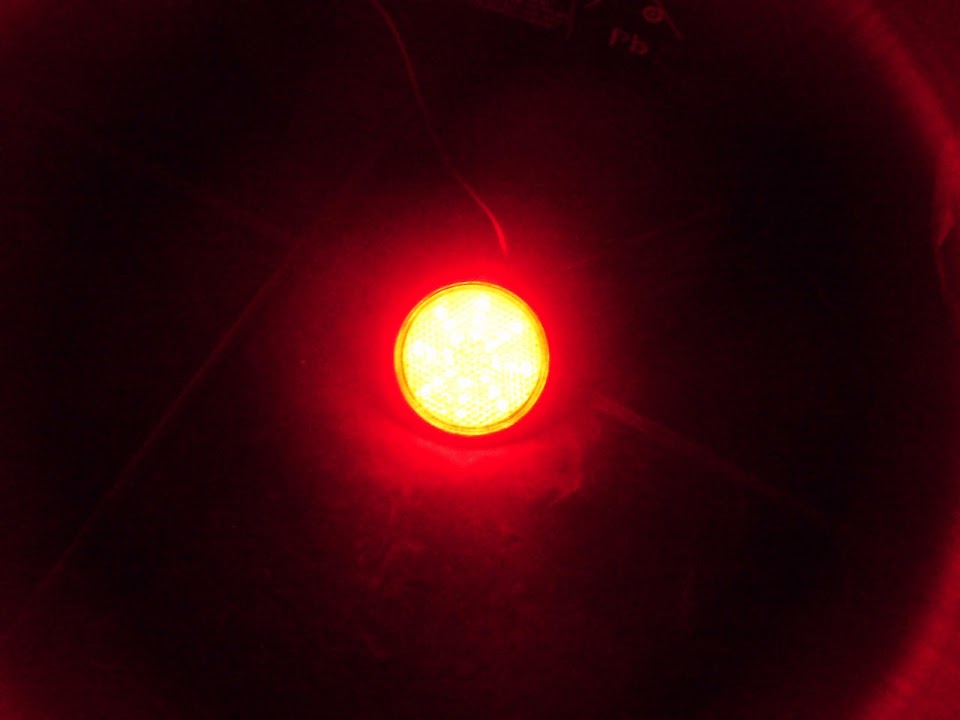
Well the slow boat from China finally arrived with my Reflector / LED Fog Lights. :cool:


Thanks to Ed for the link, as I am very happy with them.

They are normal reflectors until you connect then to power, at which point they become very bright lights.


Simple, yet brilliant.

Cheers, Paul. :)
4 Dec 2014, 4:49pm
Nice touch Paul. you'll be bolting stuff on before you know it!
Mac
4 Dec 2014, 7:17pm
Your most welcome Paul, thanks for the recognition it made me smile, I enjoy the anticipation of will it come today and checking the post when ordering bits and bobs from China. Did you also order the little eagle eye bolt LEDs to use as number plate bolts and reverse lights? Ed.
4 Dec 2014, 7:58pm
The drain hole is a simple but effective solution Paul it's great to see how others approach a problem and the rear reflectors/lights again are a simple solution which look good.

Keep up the great work and i hope the weather turns warmer for you down in the big smoke, its freezing where i am so the work in the garage has virtually stopped for now, may be have to look at a calor gas heater but i am little concerned about the amount of moisture they produce.
5 Dec 2014, 12:38pm
Mac - With all of the rain lately, bolting things on still seems a very long way off at the moment. :rolleyes:
However, seeing you bolting things on is still a great motivation for me to keep chipping away.

Ed - Fair play, these were a great find. :cool:
Obviously fog lights are not a requirement for most Sammio\Ribble\Miglia owners, as their donors are pre 01/04/80.
I am not planning to fit reversing lights and I already have some LED number plate lights.

Swifty - Cheers, thankfully some of the problem solving required on this build has been more straight forward than others.
I do find the winter a frustrating time, as it becomes harder to co-ordinate my available time with decent building weather.

- - - - - - - - - - - - - - - - - - - - - - - - - - - - - - - -

Still working on the drain holes:
Having learnt my lesson from the other day, I started work with the body shell the right way up this time.

First job was to remove all the plastercine that I used to hold the plastic tubes in place and tidy up the hole a bit.


Then I blanked off the tubes with some rolled up kitchen towel / masking tape, before adding some fibreglass filler.


There is a bit more work required to smooth out this area, but this first batch of filler will ensure the plastic tube is held in place on both sides.

Before the filler had set, I pushed the "bung" out from the underside.


I also applied some more normal body filler to the inside edges of the rain channel that I didn't get to last time.


I left that for a while before starting to sand the filler down.

Unfortunately, I hadn't finished this before the rain started.


So it was time to pack everything away, again! :rant:


So I'm off to do some more Christmas stuff.

Take care, Paul. :)
6 Dec 2014, 2:51pm
It's beginning to look at lot like Christmas...
Spend the morning with my daughters putting up the Christmas tree and decorations. :cool:

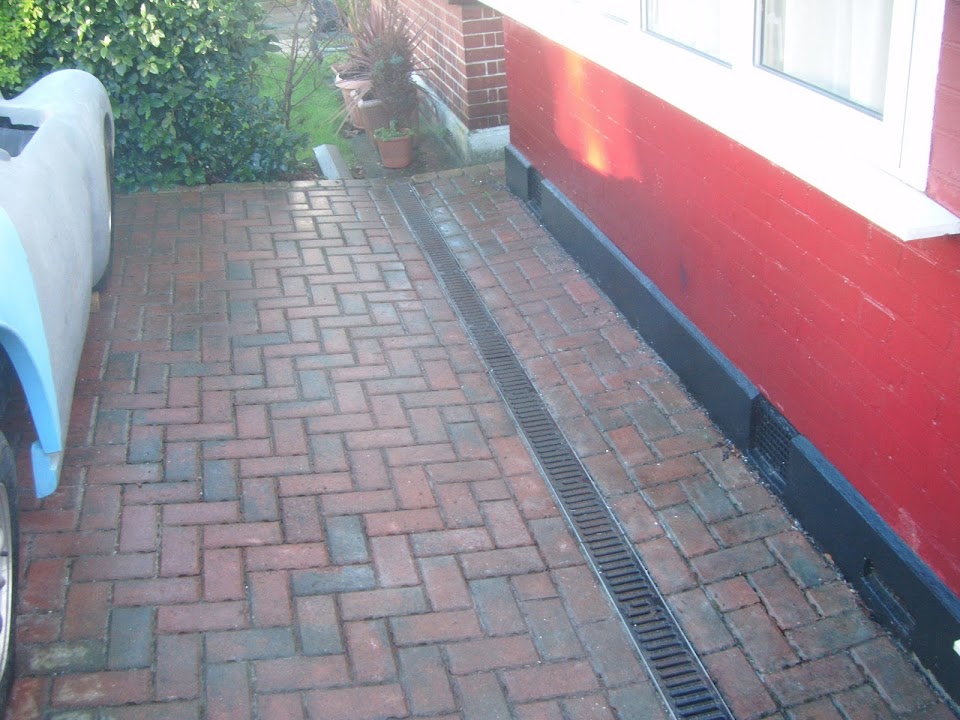
The low winter sun leaves my North facing driveway in the shade, which means this was the scene at midday! :eek:


I figured this meant it was probably too cold to start mixing and applying filler. :rolleyes:

So I finished sanding the rain channel and at least this helped keep me warm.


The passenger side drain hole is pretty much there.


But the driver's side will need a little bit more filler as it is set slightly deeper.


In an attempt to create the illusion of progress I gave everything a quick dusting of etch primer.


Even though this did highlight all the areas I need to come back to and finish off, it does look better.

- - - - - - - - - - - - - - - - - - - - - - - - - - - - - - - -

The alternative quick release pins have arrived.


And so has the flat bar to play around with bonnet hinge options.


- - - - - - - - - - - - - - - - - - - - - - - - - - - - - - - -

But that is for another day, which will hopefully be a bit warmer.

Take care, Paul. :)
7 Dec 2014, 8:16am
All the hard work that you've done on the rain channels and drain holes, makes me smile Paul!

I have done just the same sort of stuff on my car, yet neither of us has the slightest intention of EVER driving in the rain, or parking the roofless car out in the rain!

Strange world we live in, but I guess we must plan for the worst case scenario. Good stuff.
7 Dec 2014, 8:17am
PS. do you have the link for those reflector/ led things please?
9 Dec 2014, 4:52pm
Scottie - Given my luck, I am sure I will get caught in the rain one day, even if it is dry & sunny when I leave home. :rolleyes:
So I plan to have a towel and some spare clothes tucked away in my boot just in case, so I need them to stay dry.

Ed - Thanks for giving Scottie the link for the LED rear reflectors.

Just incase anyone else is interested, this is the Ebay Item Number - 121440956978

- - - - - - - - - - - - - - - - - - - - - - - - - - - - - - - -

Another Blind Alley...
Just too many other things going on at the moment to get any chance to play with the car. :icon_sad:

However, I did have a revelation that the alternative quick release pins I bought are actually a non starter. :rolleyes:

The original locking pins have a rubber gasket under the big metal washers to provide a water tight seal.

Which is why the bolt mounting plates can be outside the rain channel.

Whereas, these alternative pins would need to be mounted inside the rain channel as they use an open/unsealed hole.

Having just changed the rain channel to accommodate Option 1, I have no intention of starting again for Option 2.

So I need to work out a way of making the original ones work and thankfully I had a couple of revelations about that too.

The locking pins themselves need to be lined up parallel to the the sides of the car when in the "open" position.

As I think this will make it easier to slot the lid into place.

The other thing I need to ensure is that all the pins are pointing "straight down" towards the bolts.

This may mean adjusting the top surface of the boot lid to remove any gentle curves under the big washers.

This is a bit like the work Swifty had to do on his boot hinges to ensure they were square.

Finger's crossed that after a bit more fine tuning, I will finally be able to call this job done. :pray:

Take care, Paul. :)
9 Dec 2014, 7:59pm
Hi Paul, what about these221629732290 at whichever side would be the hardest to level up, failing that these221496877222 and a bracket? Or two angled fingers that locate under the lip at the hump end , have you held a normal hinge like on a house internal door between the slit in the hump? It would be incredibly cool and add to the sophistication of your build if it where to hinge. I am still in favour of automated scissor hinge lifting the whole lid up similar to this201219653167 it would be a rite Faff but put the heater on in the summer house and work at it when everything else is frozen. A small second hand hatch back strut would easily lift the boot.If it where mine I think I would try and fabricate a hinge from thin plate cut two plates the same as the hump cuts and have it hinging a few mm above the hump I can sketch something if you are interested. All that said it's looking good you will be proudly showing your handywork to very soon. Ed.
10 Dec 2014, 2:02am
If I may add a 1.50am can't sleep musing. What about a -----z___ type mechanism operated by the handle locating into the sides? Plonk lid on twist the handle to locate, lock it with the key. 2 external pins cockpit side or internal locating fingers.Ed.
10 Dec 2014, 8:28am
Ed - Thanks for the links, they actually reminded me that I already have a pair of these locks. :rolleyes:


There were part of an earlier plan to fit boot hinges, that was changed to the "simpler" access panel.

At first glance, the shape of the barrel looks very similar to locking pins, so that may be another option.

With a bit of luck I will be able to get outside to do some work on the boot today. :pray:

Cheers, Paul. :)

PS
It's bad enough that I wake up in the middle of the night thinking about my build! :icon_wink:
10 Dec 2014, 4:21pm
A New Hope...
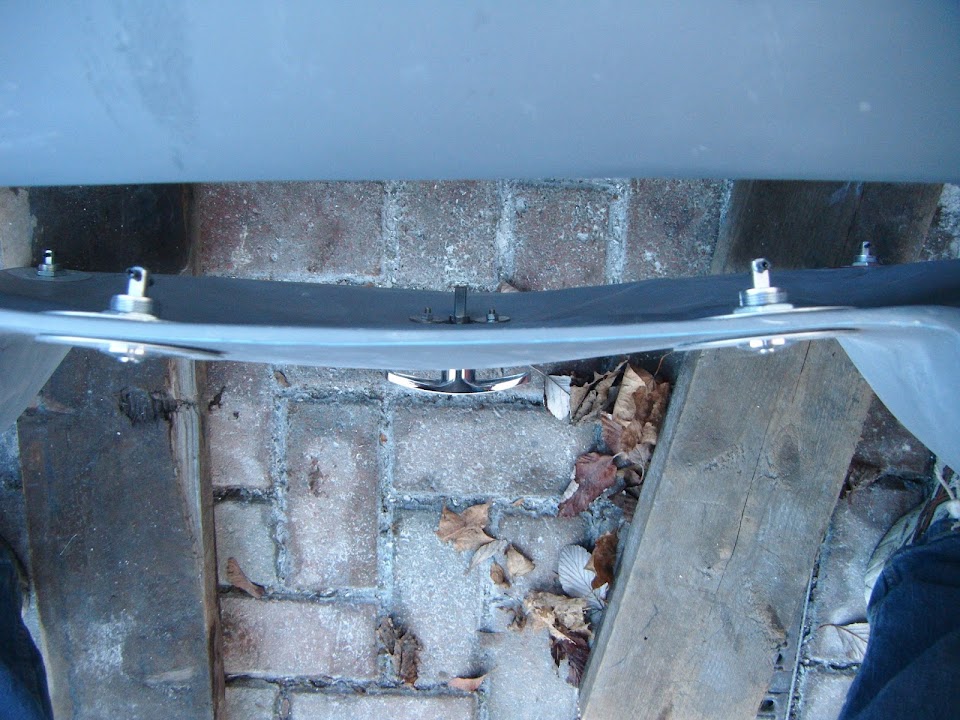
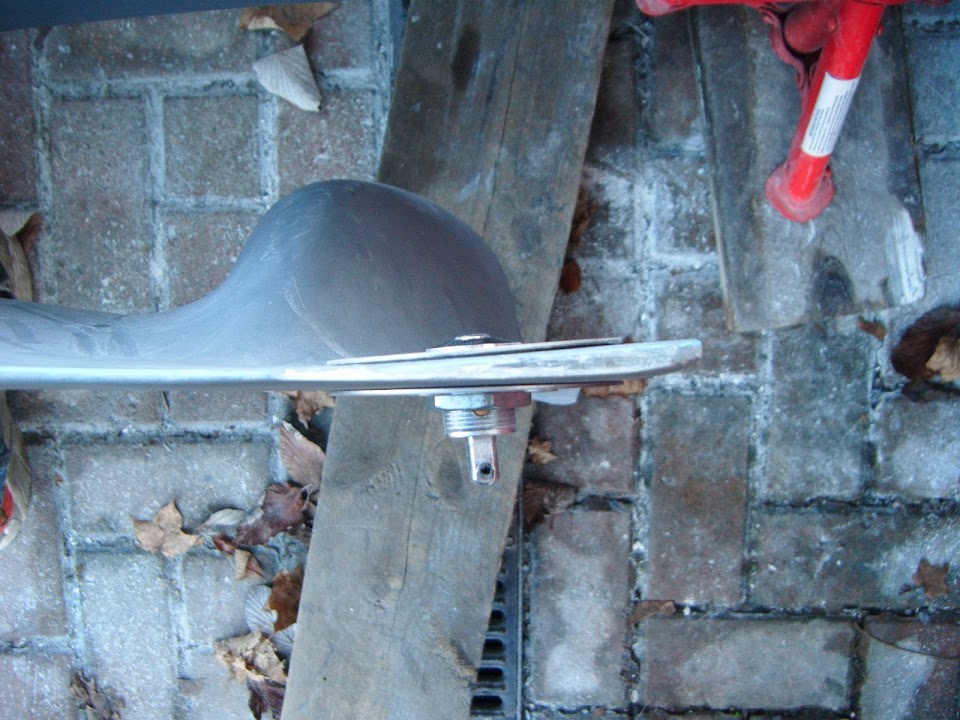
In my defence, I have done most of the work on the boot locking pins on my back, underneath the body shell.

Similarly, I just fitted the pins before trying to get the mounting bolts into the correct position below them.

However, as I now look at the pins, trying to work out why this approach didn't work, it is pretty obvious. :rolleyes:

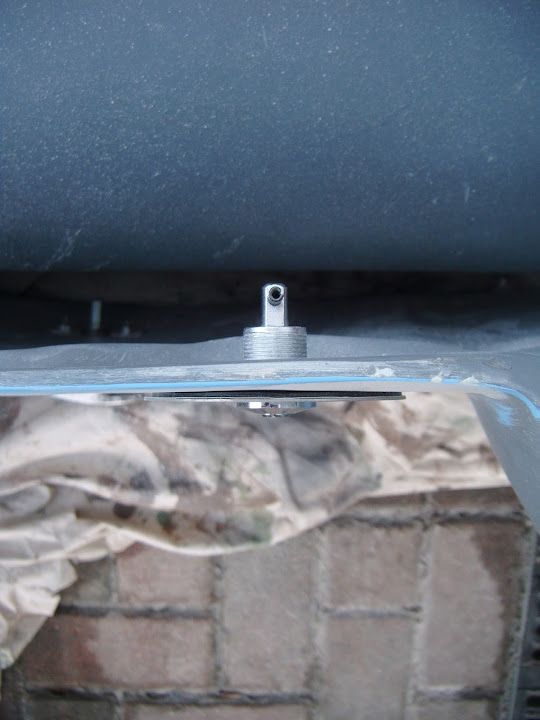
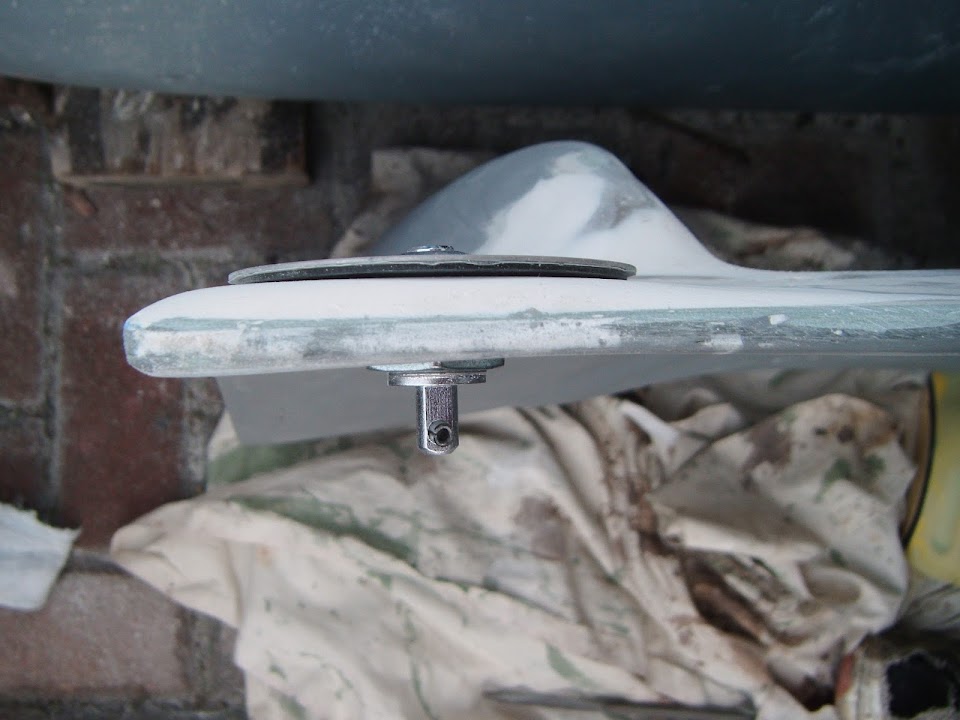
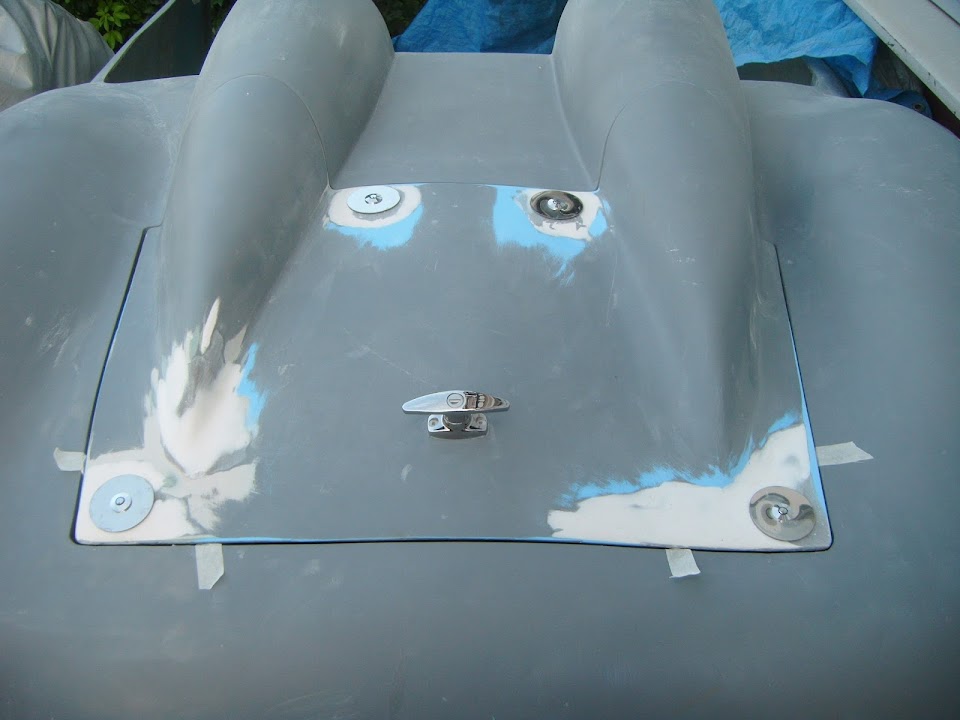
These are the top edge pins and they are clearly set at an inward angle towards each other.


Similarly, the bottom right pin points outwards instead of straight down.


Note:
The area to the left of the pin (as you look at it) is also a bit thin compared to the rest of the boot lid.

So my plan is to "square" all the locking pins up a bit by adding filler.

Although if I increase the thickness of the lid, I will need to file access slots in the corners so the pin will fit through.


So I roughly sanded the four pin locations, plus the area I want to "beef up" a bit & the tail of the passenger hump.
( As this is currently too sharp compared to the end of driver's side hump. )


For the bottom left pin, I needed to remove a small section of the lid.


As this pin needs to be dropped at the top and raised at the bottom.


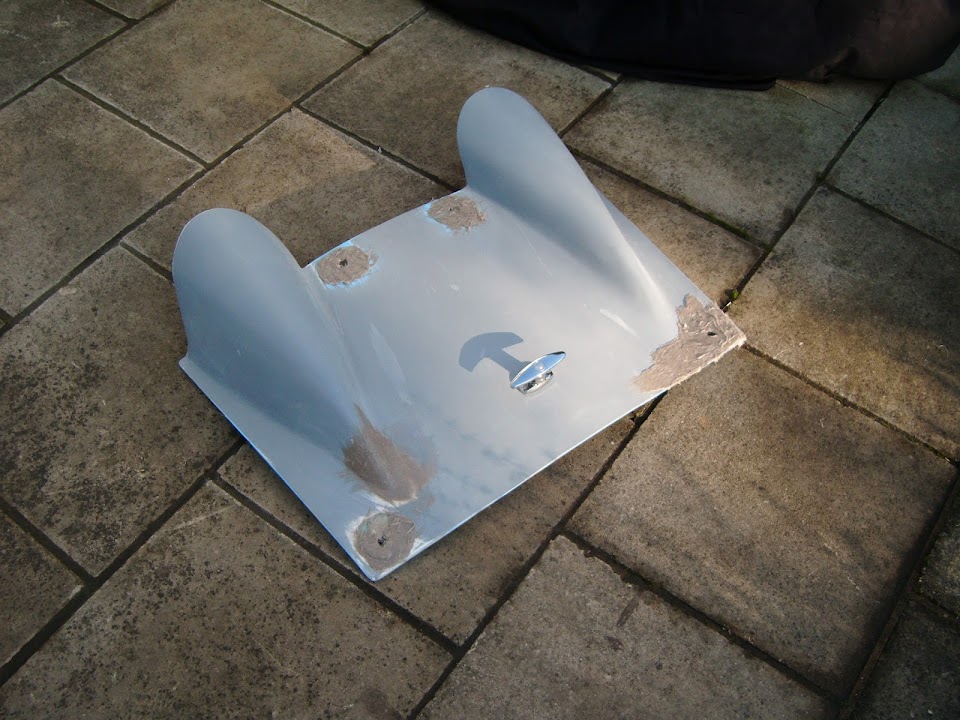
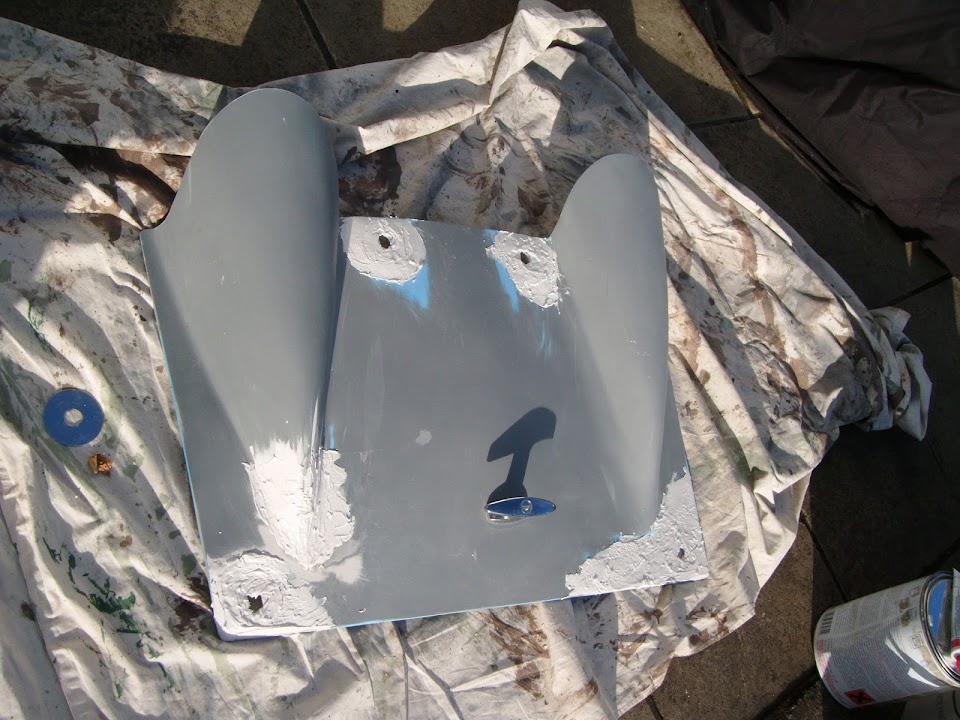
After some fibreglass filler had been added, the lid looked like this.


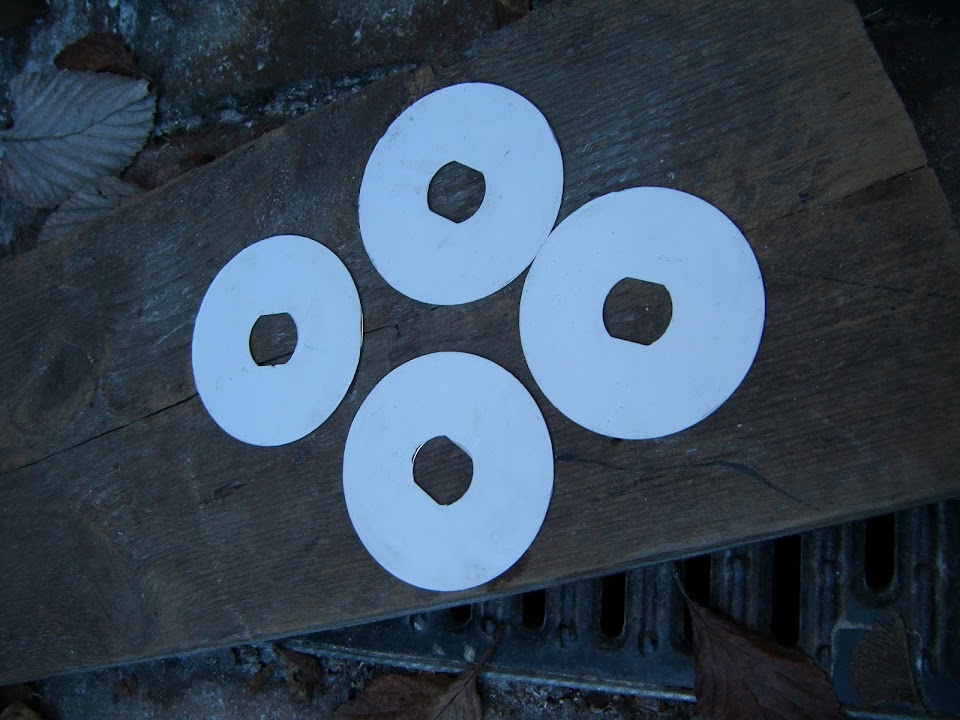
I re-fitted the lid to the body shell and tried to use the big washer to set the filler in the right position.

This was not a very good idea as the filler stuck to the protective film on the washers and made a right mess of everything.
( I've already scraped off most of the filler by the time I took the photo. :rolleyes: )


So I had to smooth out the filler as best I could and clean up all the washers before the filler set.


Then I carried the boot lid through the house so I could leave it in the weak winter sunshine on the patio.


At least this is marginally warmer than the driveway which now stays in shadow all day.

When that had set enough, I roughly sanded it into shape.


It had quickly become clear that by trying hard not to "over do" the filler, I hadn't quite added enough in some places. :icon_sad:

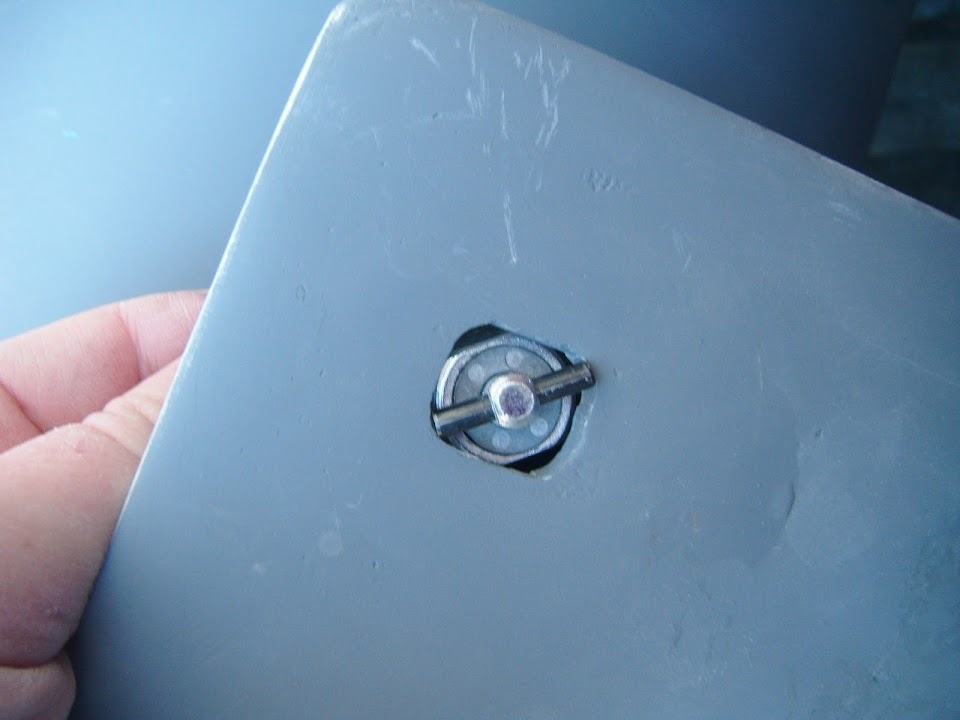
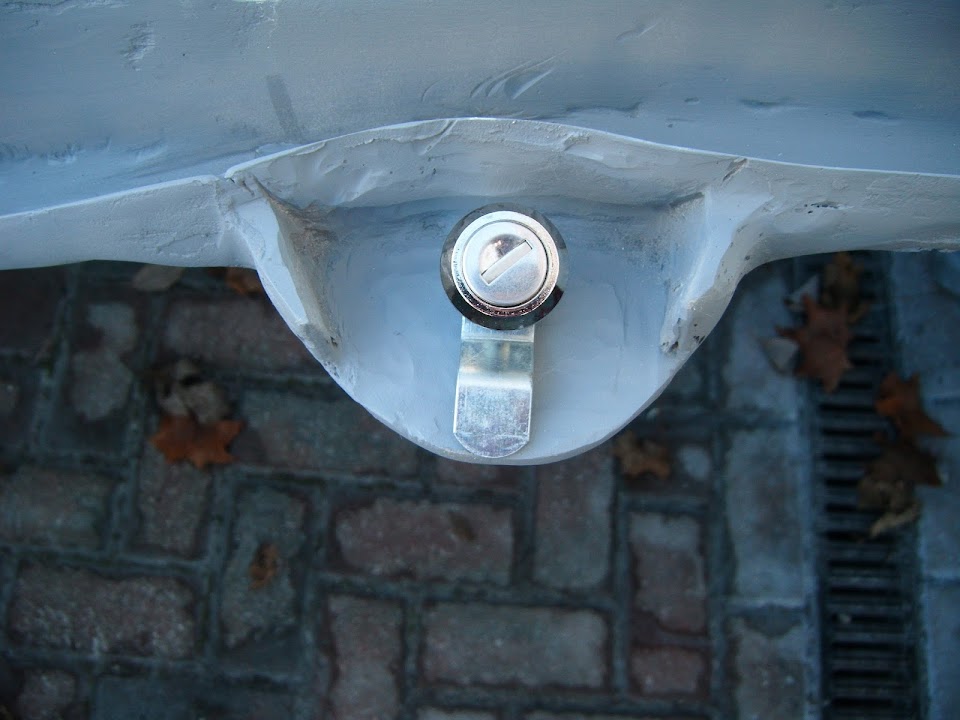
I also found the easiest way to fit the locking pins was to simply file a slot in both the top & bottom edges like so.


Then I relocated back to the patio to added some normal body filler.


If anything, I probably added a bit too much filler this time. :rolleyes:

End of Part 1...
10 Dec 2014, 4:22pm
Part 2:
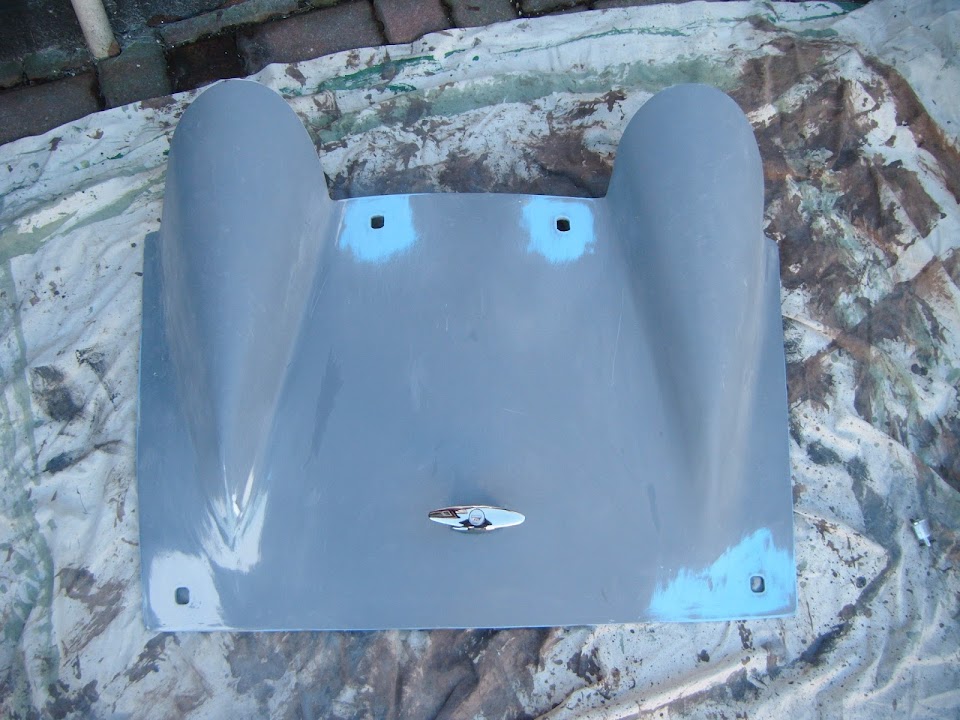
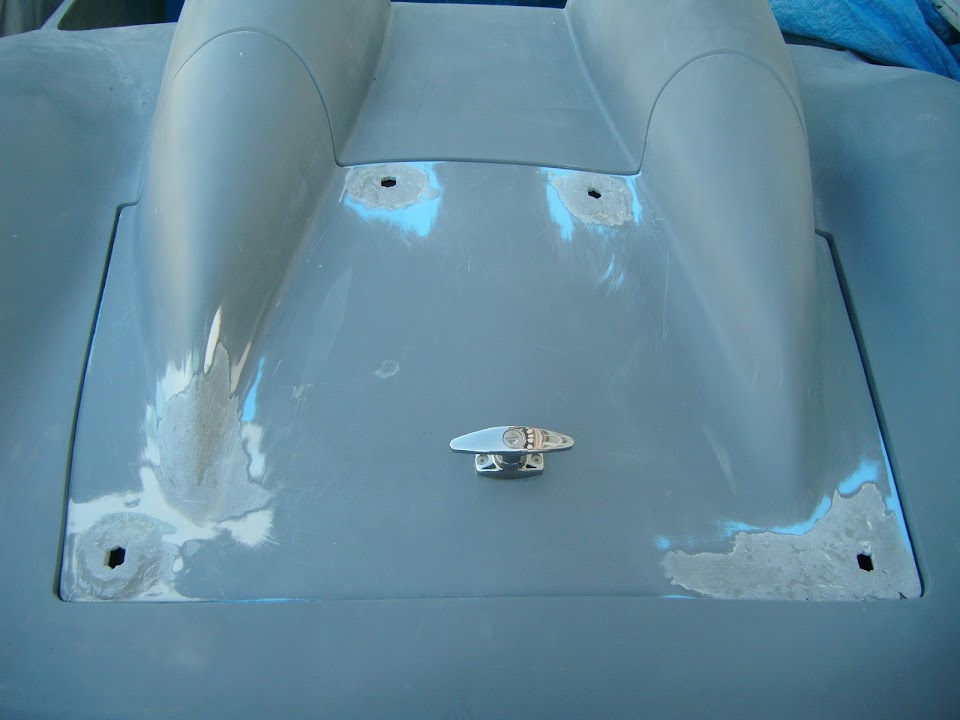
After another round of sanding, the lid was looking like this.


Note:
The rubber seal is not in place, as it was removed so I could spray some etch primer on the other day.

Unfortunately the light was fading fast at this point and all my attempts to photo the pins themselves failed. :icon_sad:

Still, the good news is that the pins are much straighter than they were & a bit more sanding should help.

Then I can start work on getting the inside edges of the lid around the pins to match the top edge profiles.

After that I will see if I can get the locking bolts into a suitable position for all four bolts to work. :pray:

Also the "softening" of the end of the passenger hump's tail seems to be working out OK too.

- - - - - - - - - - - - - - - - - - - - - - - - - - - - - - -

Alternative Locks:
I had a play with these this morning & they are the same size as the locking pins, so I could re-use the existing holes.


However, there isn't enough room for the latch to turn 180 degrees if I set them up here on the top edge.


Although it does look like I could get the 180 degree sweep I need if they were set up like this.


So just in case the filler work I've been doing doesn't solve the problem, I could have a Plan B.

Until next time, take care, Paul. :)
11 Dec 2014, 3:53pm
A Tactical Withdrawal...
Stepped outside this morning and was just about to peel off the covers when it started to rail. :rolleyes:

So it was the afternoon before I could finally continue with the sanding down of the new locking pin "mounds".

Although it doesn't look like it in this first photo, the top edge pins are now vaguely straight.


A photo taken "head on" shows the angles a bit better.


Note: I still have to work on the inside edges of the boot lid.

And these are the bottom edge pins.


So far, so good.

Then I removed the pins and re-marked the bolt plates.


Thankfully all the original holes were pretty much in the right place, so I was just removing the excess filler from the other day.

I then spend a long time crawling back and forth under the car to see if I could get the bolts set up properly.

I did some fine tuning to the angles of the bolt holes which helped a bit.

But it now seems that the rubber seal is still sitting a little too proud.

I managed to set the bolts in the "locked" position and tighten them so the lid was pulled down flush(ish) with the body shell.


But at this point, there was so much pressure on the locks, I could only undo 1 out of 4, for fear of breaking the key. :icon_sad:

So I need to trim a little bit more off the rain channel so I can finally see if these pins will actually work.

However, to be brutally honest, I am seriously fed up with working on this part of the build, as it is doing my head in. :rant:

So, as per today's title, I am making a tactical withdrawal and simply walking away from the boot lid for a while.
( Although I will loosen the bolts tomorrow if I get the chance. )

Obviously I will come back to this and finish it off, one way, or the other, at some point, but for now I need a break away from it.

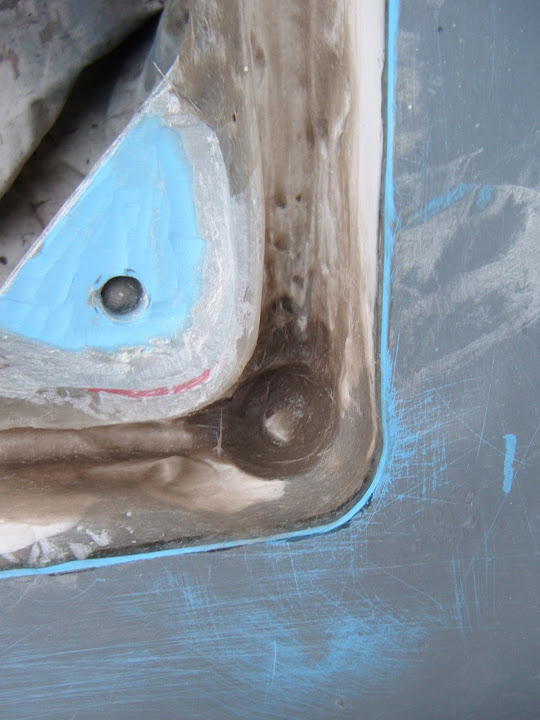
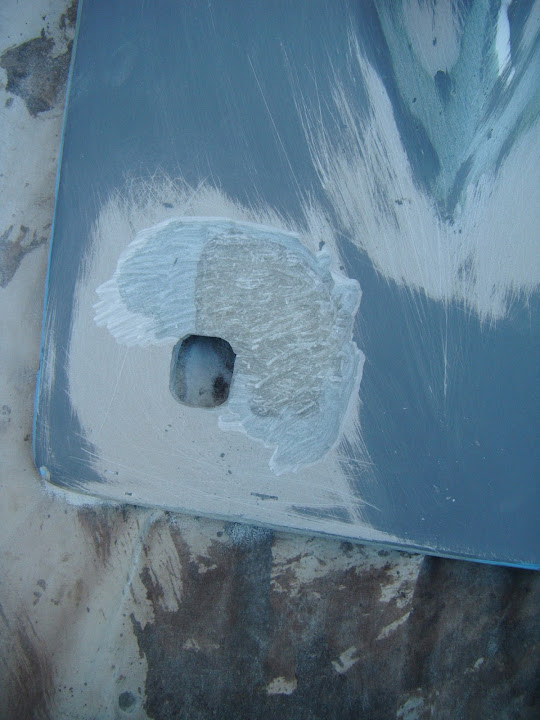
To end on a slightly more upbeat note, while crawling around under the body shell I finally remembered to take a photo of the drain hole.


I just need to give this a final skim of normal body filler and then it will be ready to connect the drain tube to.

Until next time, take care, Paul. :)
13 Dec 2014, 9:31am
I felt a bit like that about making my windscreen Paul, I think some times its possible to work yourself so hard at one thing you become
"stale" and really have to have a break to re-group and approach the job with new enthusiasm.

You will fell much fresher after a break!
13 Dec 2014, 2:16pm
Definitely agree with Scottie22, you sometimes have to walk away from a problem, do something else then come back to it after a few days (or in my case 2 years!).
13 Dec 2014, 3:58pm
Scottie & Nigel - Cheers chaps. :cool:
Even though I have opened an even bigger can of worms today, the change has done me good.

- - - - - - - - - - - - - - - - - - - - - - - - - - - - - - - -

Frosty The Sammio Builder...
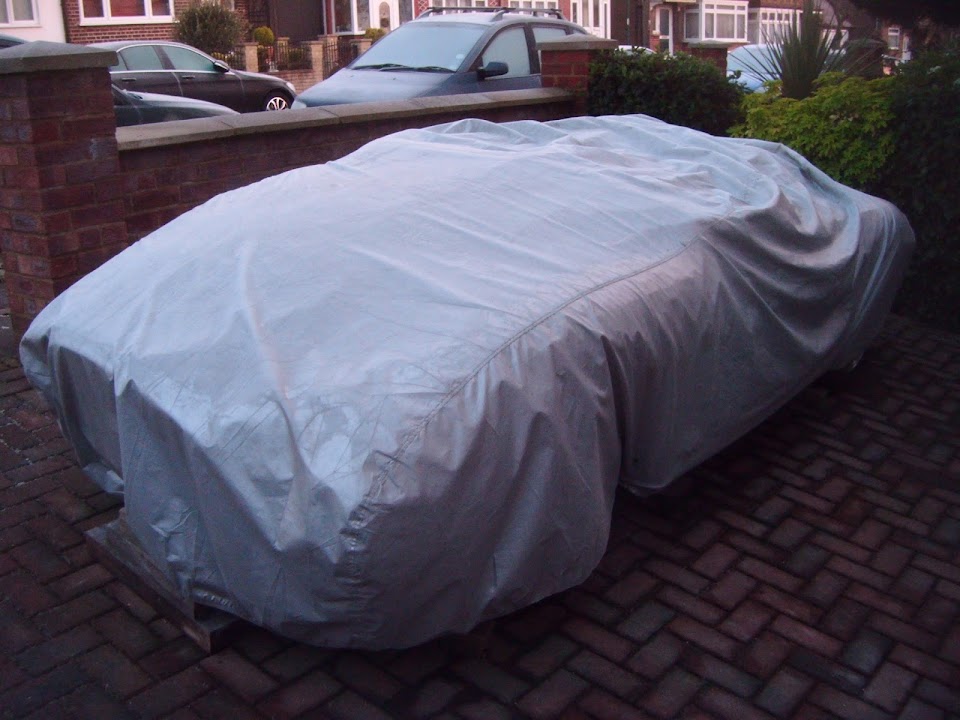
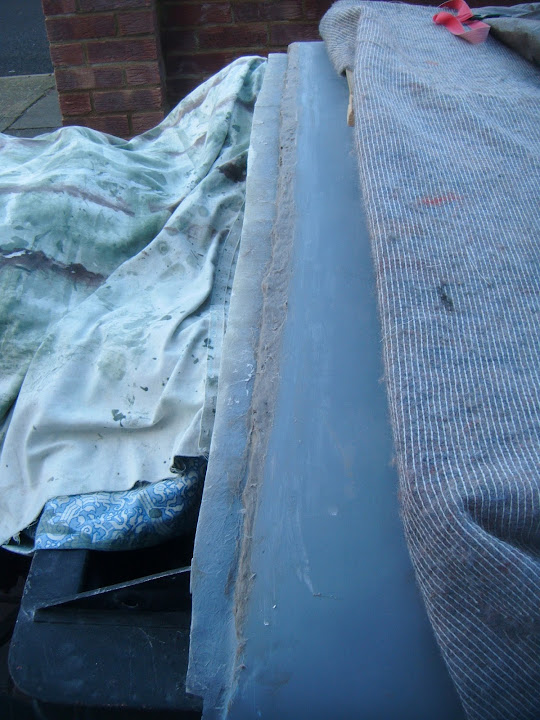
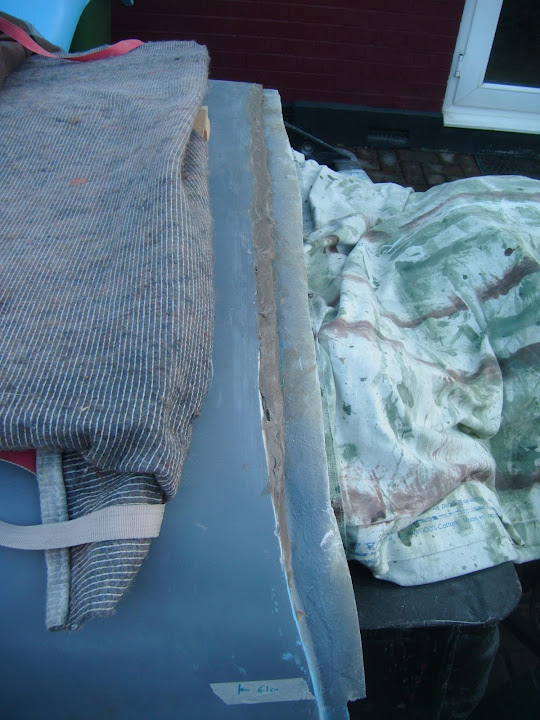
With high winds forecast the other night, I had put some wood on top of the car cover.

The fact the wood was still covered in frost when I started this morning was not a good sign.


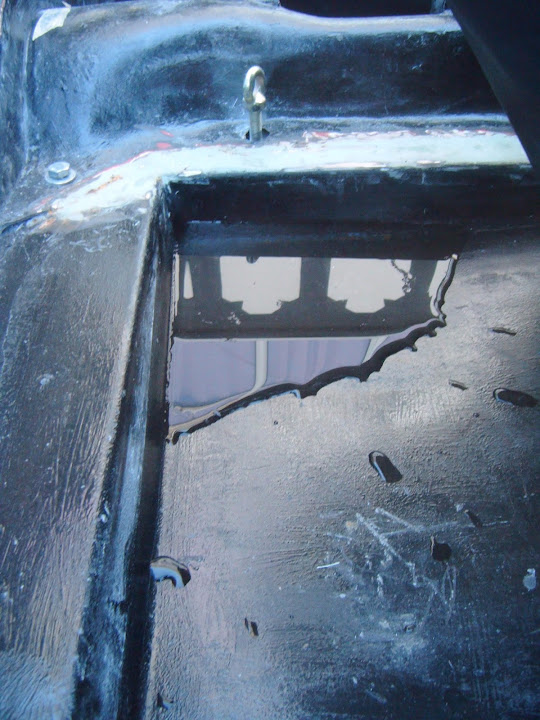
Without the body shell in place, water finds it way past the sides of the covers & into the lowered floor pan. :icon_sad:


Thankfully the it wasn't cold enough to freeze the water, but my hands still felt it when I was mopping this out.

My wife helped me move the body shell back onto the framework and this exposed a bit of a mess. :rolleyes:


Cleaning the drive is on my "Pre Christmas Chores" list, so that was the first thing I did.


I had a very brief glance at the bolts for the boot access panel.


One thing is clear, I need to set everything up based on the angles when the body shell is in position.
( As I am not getting the true picture when the body shell is off the framework. )

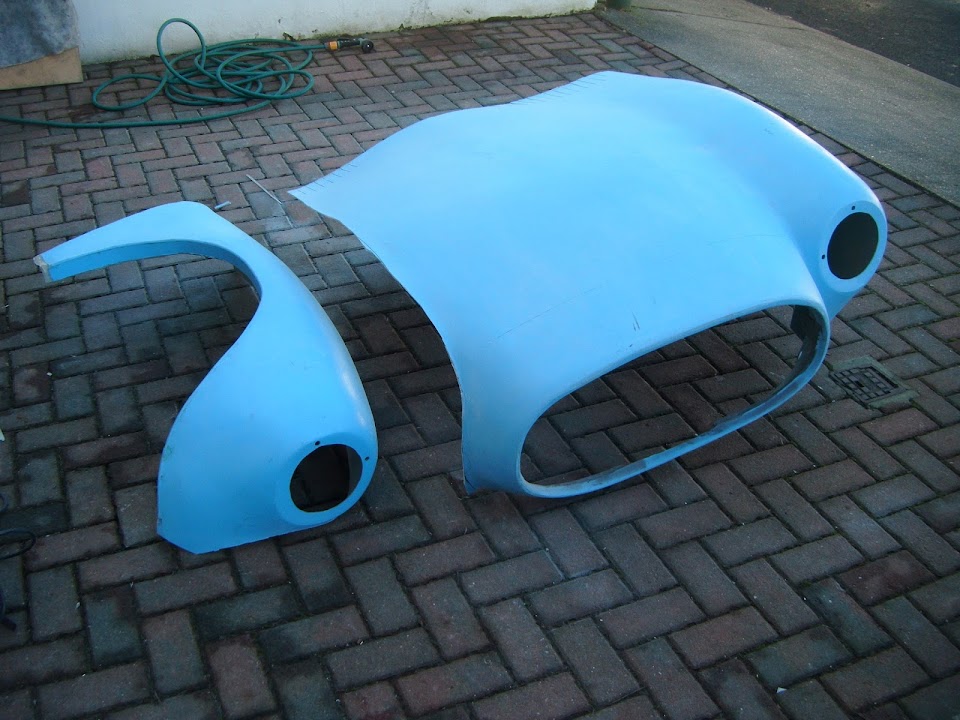
But that is a problem for another day, so I switched my attention to the bonnet.

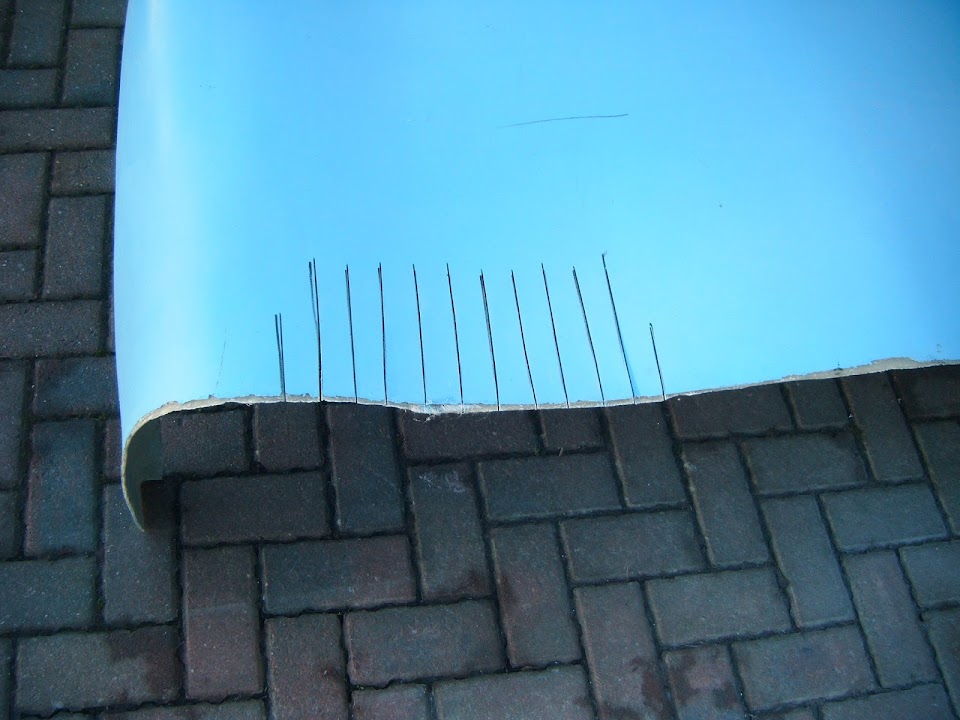
The first thing I needed to do was to stop the low points of the bonnet hitting the scuttle before the corners.


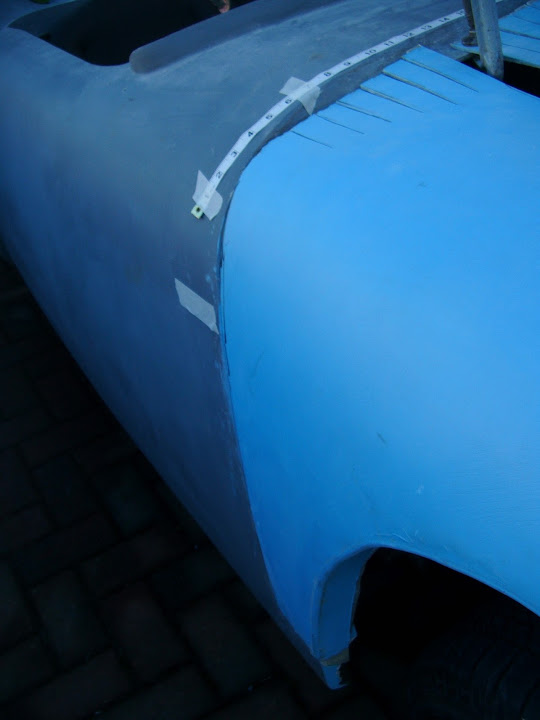
So I marked up a series of slits on both sides and cut them with my angle grinder.


Note:
Eventually these slits will be extended to the faint black line you can see further down the bonnet.
( Which should give me the space required to blend the old & new curves together. )

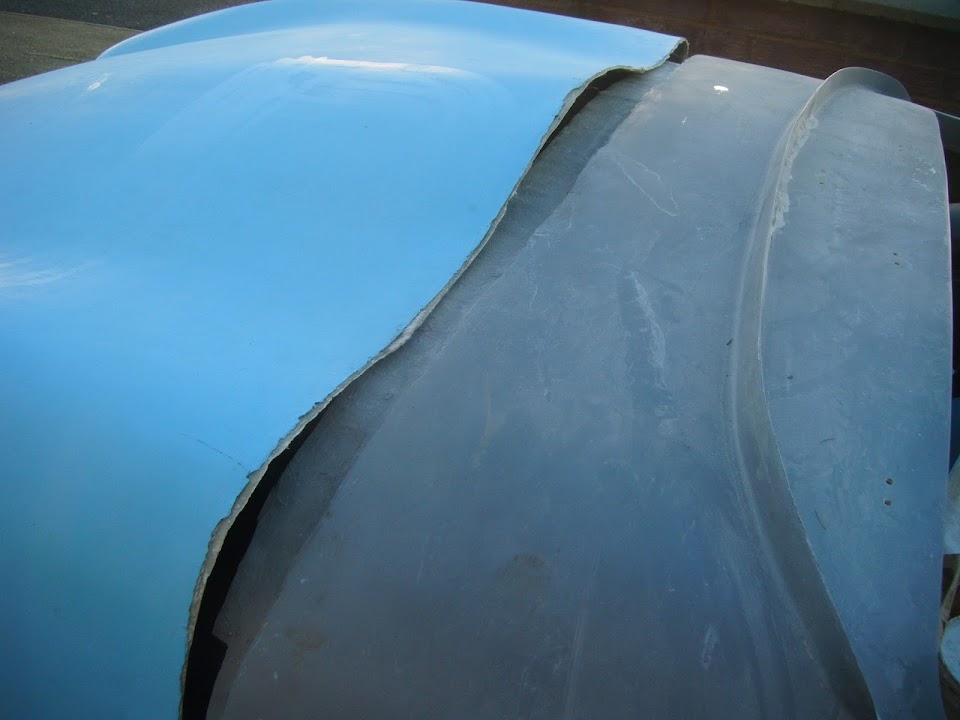
Despite the slits, I still couldn't get the bonnet to sit neatly on the passenger side.


This was because the bottom edge was too long.


After trimming the bottom edge, it was then the angle of rear bonnet edge that wasn't right.


So that was trimmed and I could now clamp the bonnet into position on this side.


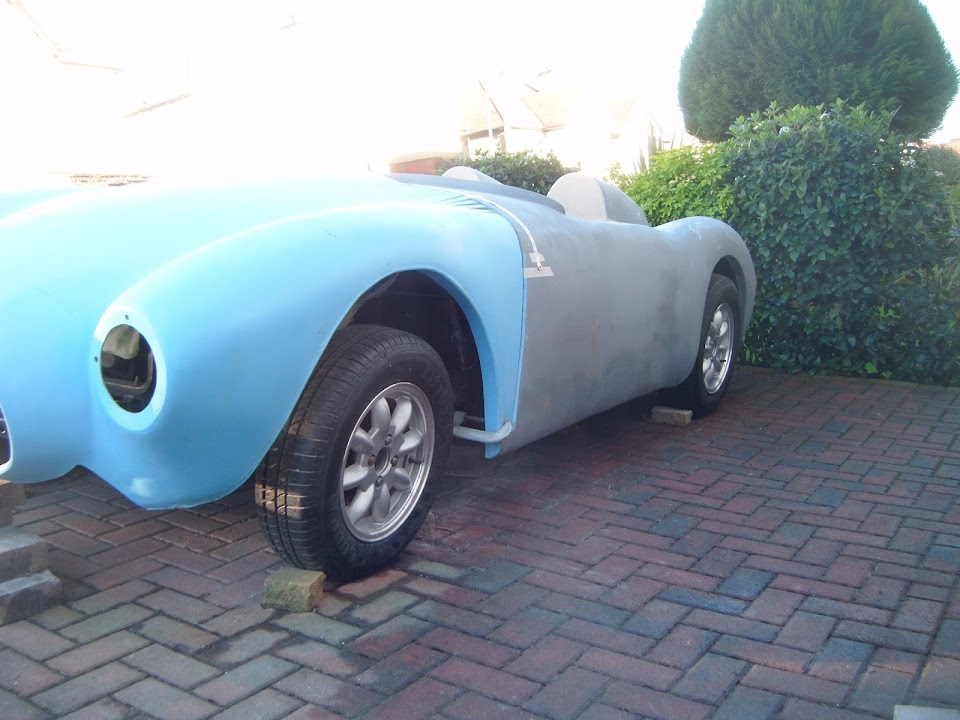
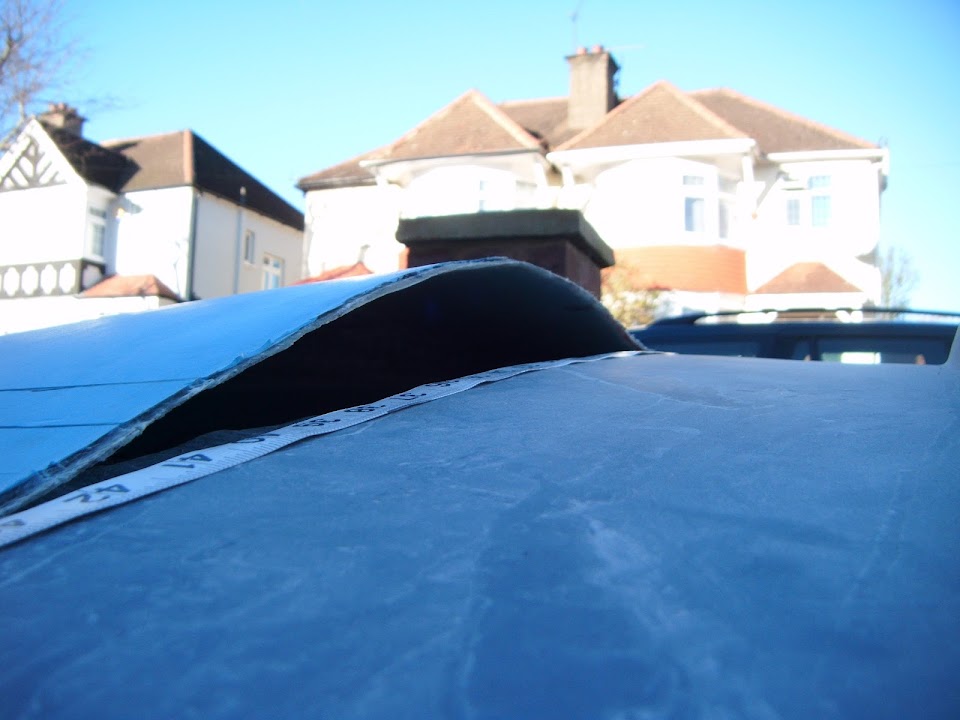
There isn't enough space on my drive to get a full "side on" photo, so this is the best I could do.


I am really happy that it looks like I might be able to make a good join of the old bonnet & new scuttle. :pray:

Although the less said about the work required to re-shape the wheel arch the better. :rolleyes:


End of Part 1...
13 Dec 2014, 4:01pm
Part 2:
I also need to make a final decision about whether to attach the bottom of the bonnet to the sides of the body shell.

If I do, then this section of my Spitfire bulkhead will provide the level for the join.


In addition, I need to square the front edge of the bonnet lip on the body shell to match the cockpit edge of the scuttle.


Over to the driver's side of the bonnet, where the biggest problem is still the fact the wheel is exposed.


If anything, the driver's side appears to "tilt" inwards.


Although it is not easy to see in this photo, but with the passenger side in position, the driver's side comes up a little "short".


I knew what Mac did to fix this bonnet problems so I got my marker pen out.


Then after taking a deep breath, I channelled my inner Frankenstein...


And made the cut...


Although I'm blaming the cold weather for the slight wobble in my cutting. :rolleyes:

Again, the bottom of the bonnet needed to be trimmed on this side to bring the top corner into line.


In order to start putting all of this back together, I will need to temporarily screw the bonnet to the body shell in places.

As I couldn't even clamp the main section into position properly.


However, at this point, my wife and children were returning from their Christmas shopping & my time outside was at an end.

So for now I've had to leave the bonnet in a bit of a mess.


But past experience has shown me that this can be re-built (eventually).

I will also have to flatten the central bonnet bulge as part of these bonnet modifications.


I have been dreading sorting this mess out, but now I have made a start, I will try to get on with it.

Until next time, take care, Paul. :)

PS
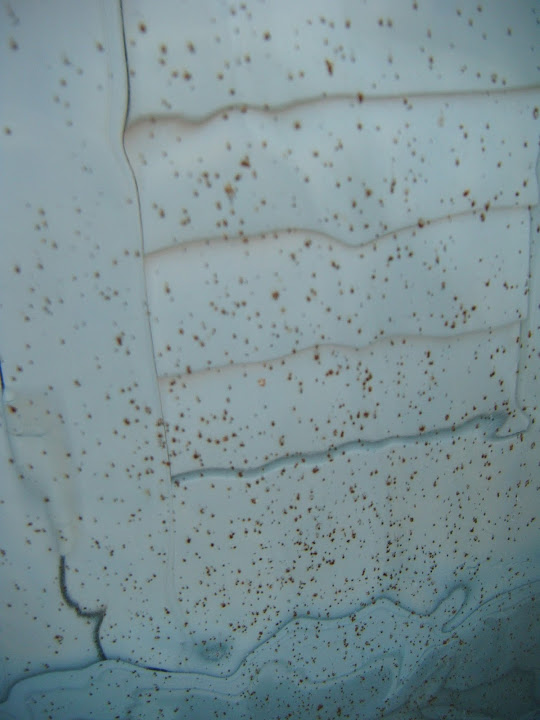
As part of my Christmas cleaning, I started on the front windows too.

To my horror, something I thought was dirt, turns out to be old metal angle grinder sparks burnt into the glass. :eek:


Any suggestions on how to clean this before my wife spots it would be most welcome.
14 Dec 2014, 4:10pm
Small Beginnings...
Had to ferry one of my daughters to a birthday party first thing this morning and it was COLD outside.


Thankfully by the time I'd finished my other chores it had warmed up a bit.

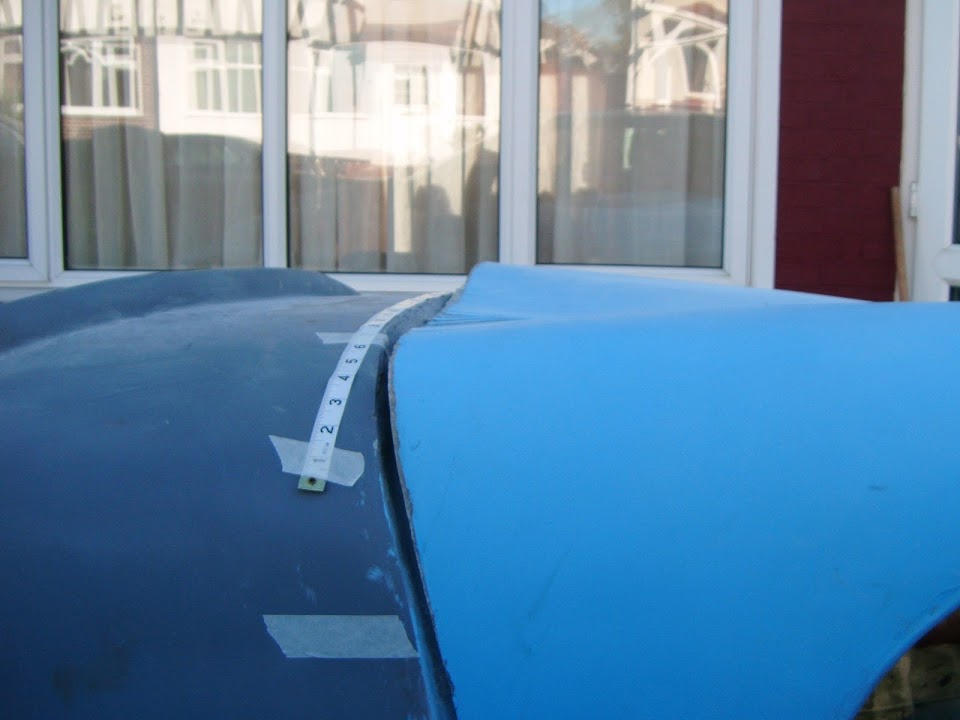
I marked the bonnet lip at a one inch gap from the tape measure (which is parallel to the dash).


Then I ran into a small stock control problem when I couldn't find the "spare" tub of fibreglass filler in the shed.

Whilst I did buy two tubs last time, it turns out I am already at the bottom of the 2nd tub. :rolleyes:
( I've now ordered two more tubs. )

Still, at least there was just enough to make a start on the scuttle.


This will provide a good enough base for me to add a layer of normal filler over the top.

I will also trim the bottom edge of the bonnet lip next time I have the body shell off the frame.

- - - - - - - - - - - - - - - - - - - - - - - - - - - - - - - -

[Color="red"]Question:[/color]
Is there anything I should be aware of concerning the angles of the bonnet lip on the body shell?
As I am beginning to worry that the bonnet make catch the body work when it opens if I make a mistake.
Or does the way the bonnet opens always clear the body shell?

- - - - - - - - - - - - - - - - - - - - - - - - - - - - - - - -

I had closer look at my factory hinge points and it turns out the driver's side was set at a slight angle.

These are not great photos as the grey primer and a dull day do not make a great combination.

Passenger Side:


Driver's Side:


So I might need to straighten that side out in some way.

- - - - - - - - - - - - - - - - - - - - - - - - - - - - - - - -

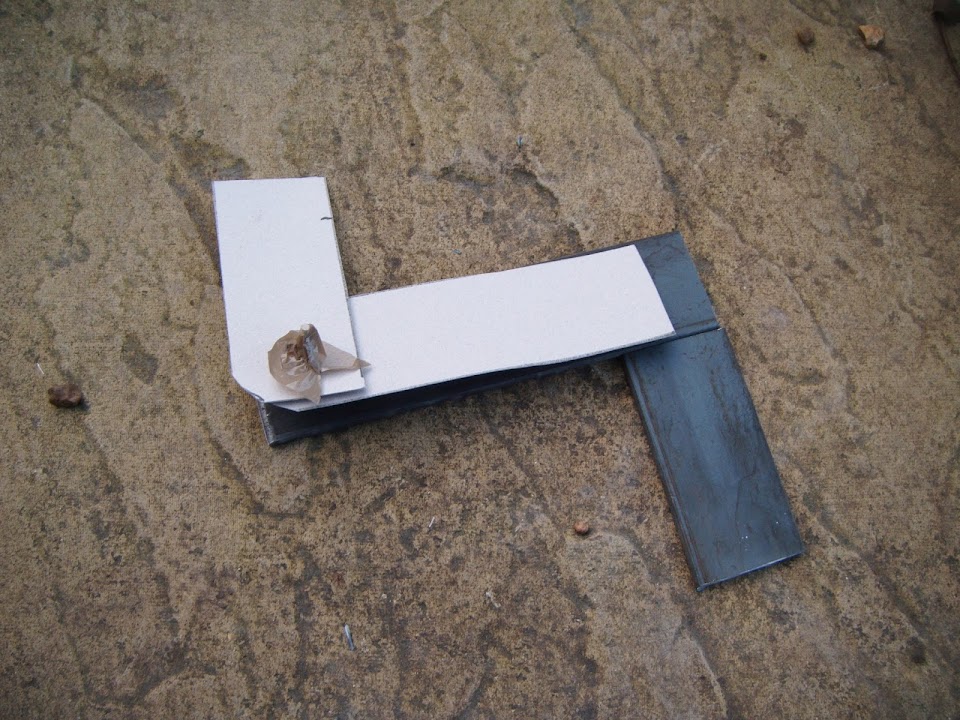
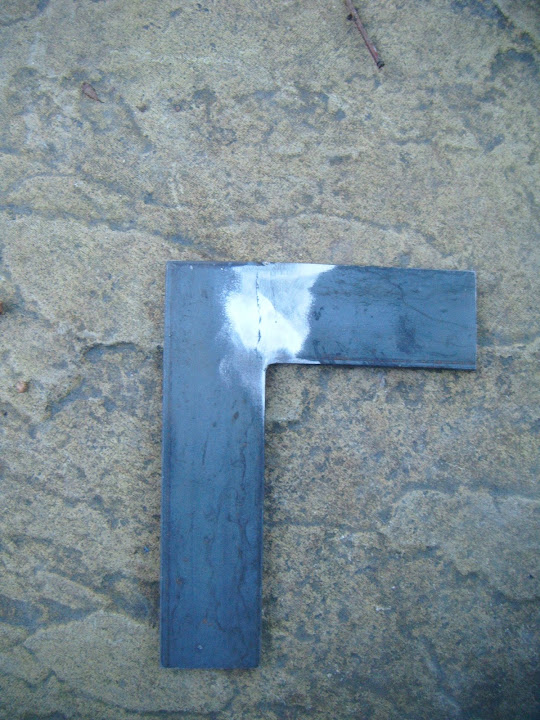
Next I went to play with my flat steel bar and cut off couple of lengths.


I want to see if I can make a scissor hinge similar to Mister Towed's for my bonnet.

So in the next photo, the card pointing "up" would be attached to the chassis.
And the lengths pointing "out" and "down" would be attached to the hinge points above.


Note:
At this point I have made the lengths oversize, so I can trim them down to shape later.

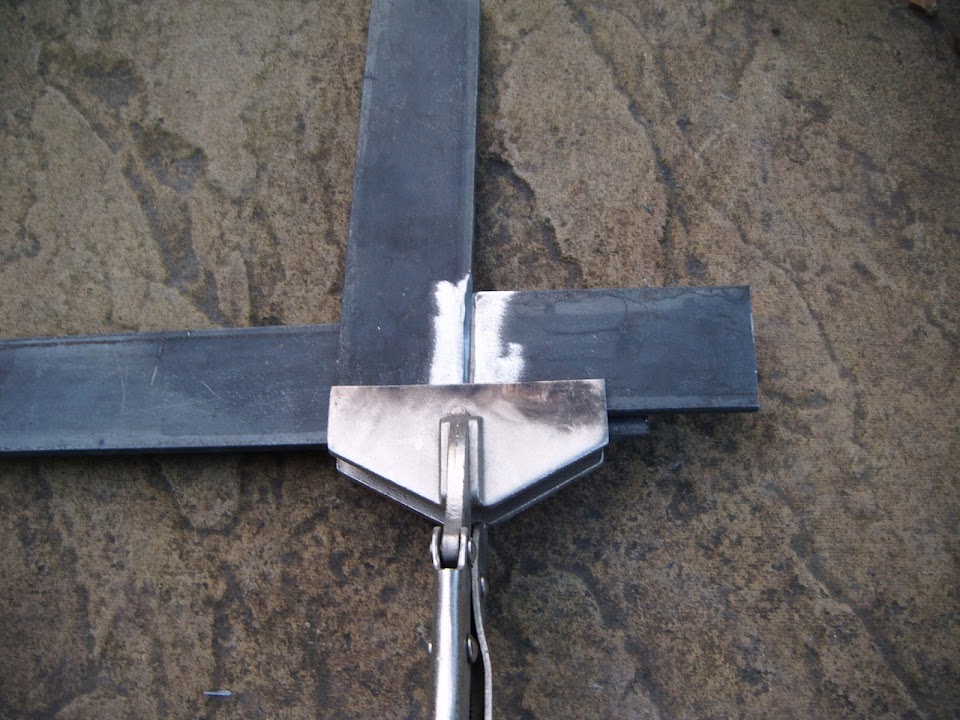
So I cleaned up the edges and used the rest of the bar to keep the clamped sections "flat"


It has been a while since I did any welding, but thankfully I make a good join. :cool:


Although that was as much as I managed to do today as I now back on taxi service duty.

Until next time, take care, Paul. :)
14 Dec 2014, 4:57pm
Hi Paul I used a Stanley knife blade to knock the tops off weld splatter on a windscreen then buffed it with cutting compound and electronic sponge mop.you may be able to disguise it plus It will look better if its not rusty. Ed.
14 Dec 2014, 9:29pm
Neat welding paul, it did look cold at your this morning with the frost on the cars, we had a fairly reasonable day today which makes a change.

Sorry i can't help with the grinding splatter, i hope you mange to disguise it.

Keep up the progress Paul.