MadaboutKitcars

This is a read-only archive of the old Madabout Kitcars forum. New posts and replies are no longer possible, but every thread is still here to browse and read.

Another Cordite Is Born ...

24 Nov 2014, 3:21pm
Scottie - Thanks, today's weather was much better. :cool:

- - - - - - - - - - - - - - - - - - - - - - - - - - - - - - -

Slowly Edging Forwards:
Spent most of the weekend down in Sussex for my mate's birthday bash.

As we drove home through the pouring rain yesterday, I did contemplate the wisdom of building a car with no roof. :rolleyes:

Still, at least it wasn't raining this morning, so I finally managed to get some car work done.

When I peeled off the covers, it was clear I have put the rain channel drain holes in the right place, as that is where the water gathers.


I also put the boot lid back into position to check the gaps I needed to fill & thankfully it is just the centre section.


Note:
The lid is sitting a bit higher at the moment due to the fact I haven't trimmed back the re-worked bottom corners yet.

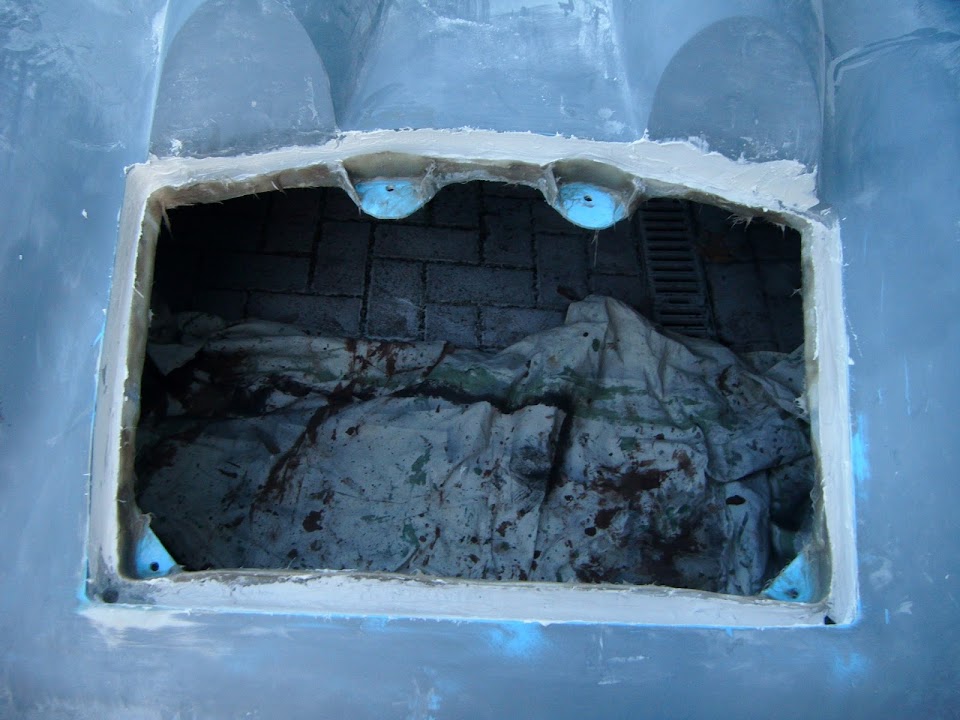
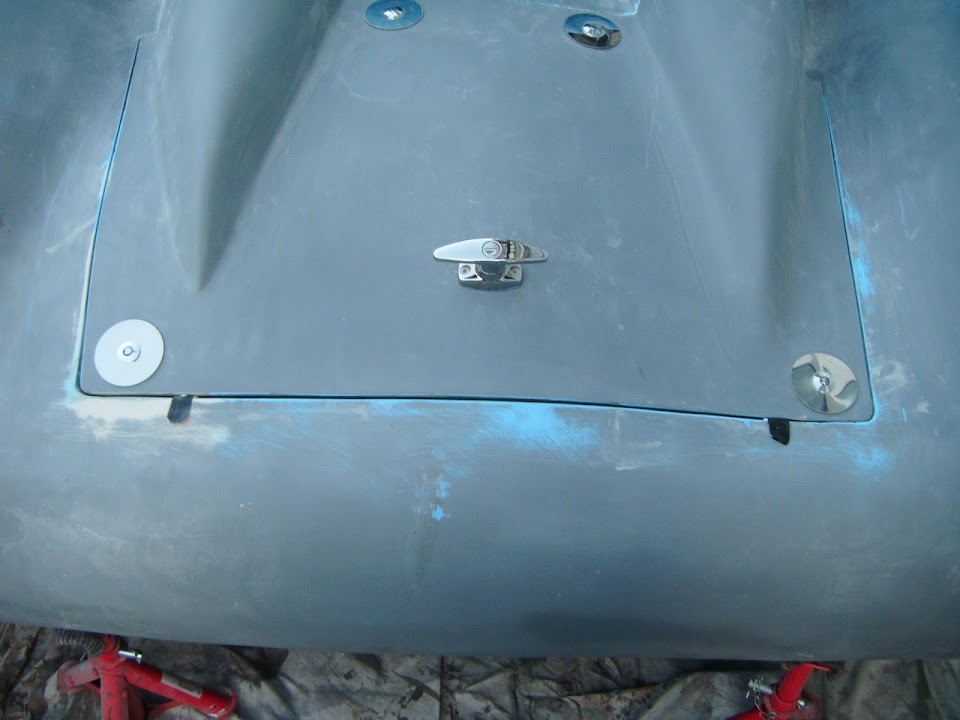
So one small fibre glassing session later and this is what the rain channel looked like.


Given how cold it was, I decided not to attempt any upside down fibre glassing, as it was bound to end in tears.

So I waited until the first round was initially set before turning the body shell over.

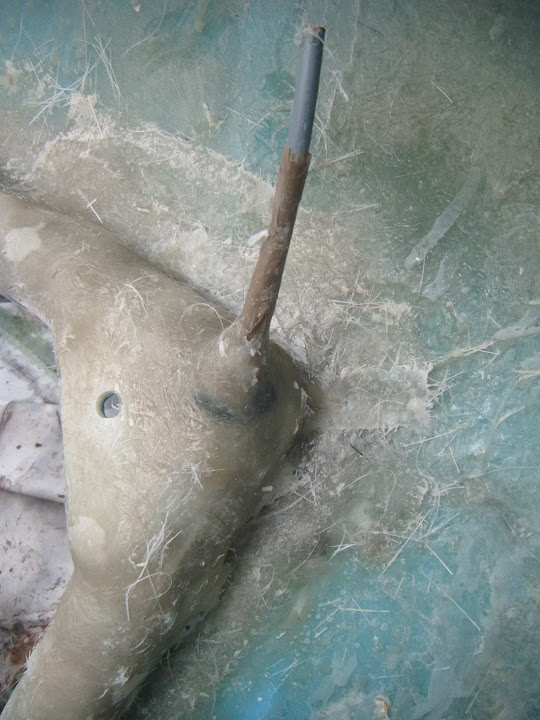
I wanted to build up the "pipe" section of my drain holes...


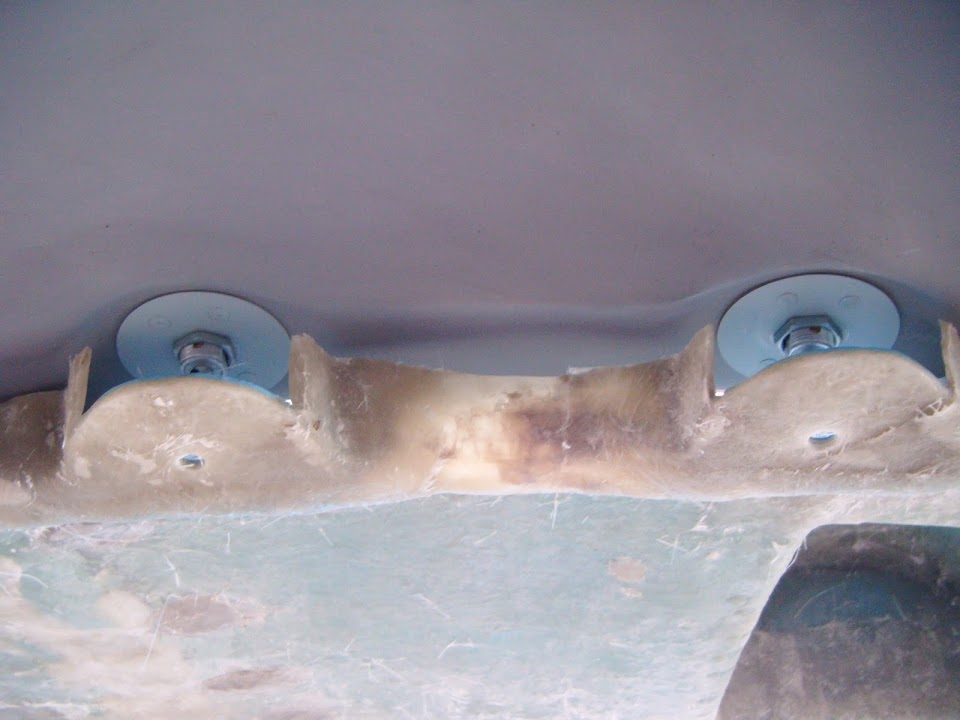
And add a bit more "cross bracing" to the top edge bolt mounting plates.
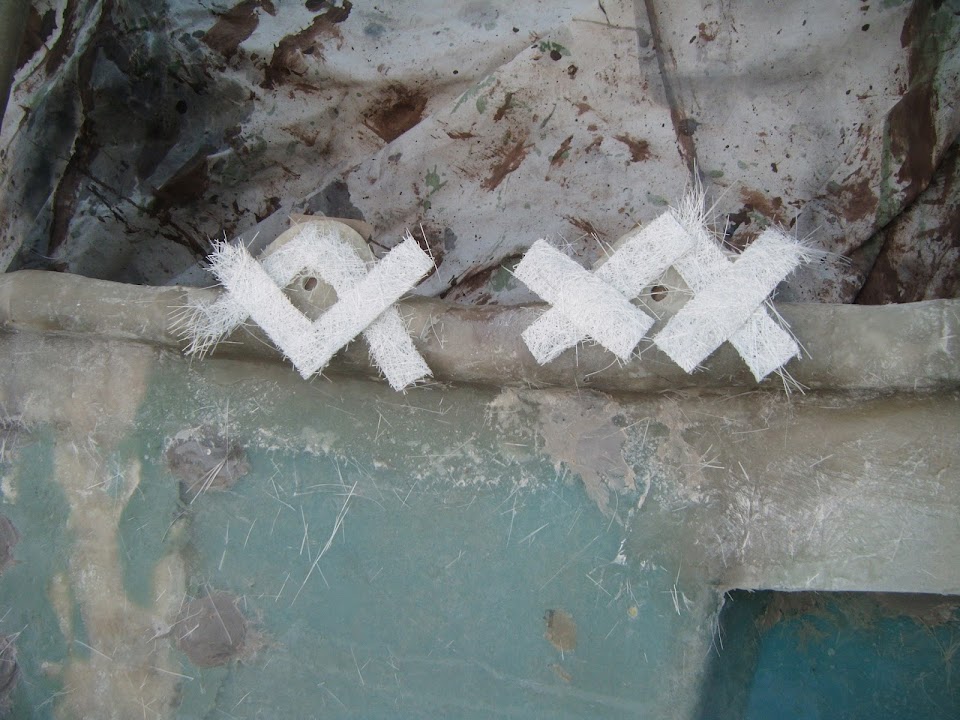


One part of this plan went well.
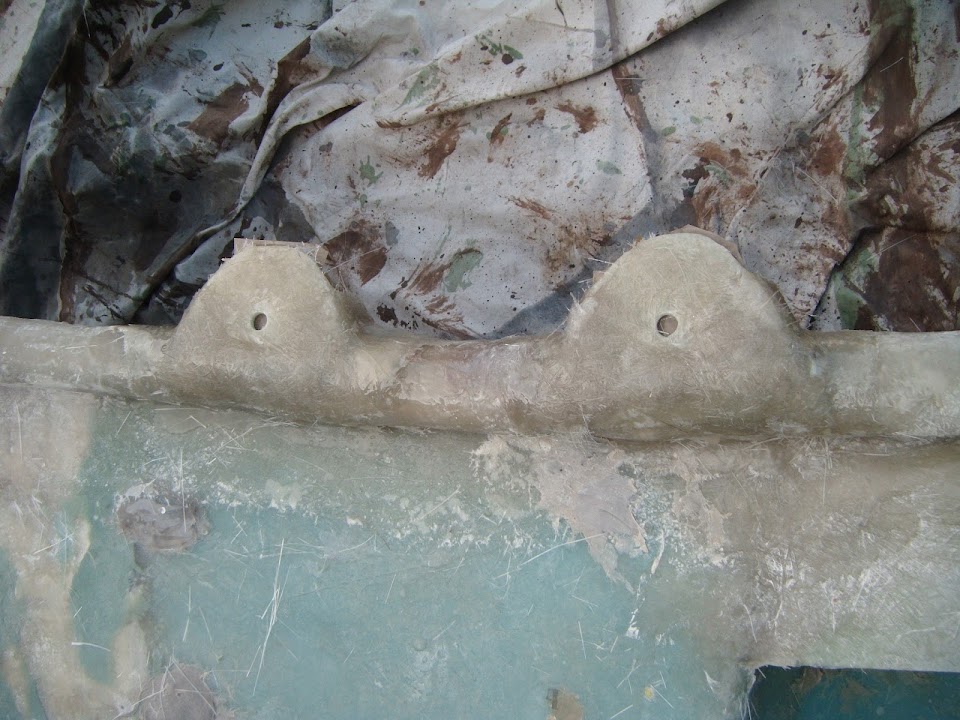


But the other turned into a complete mess. :icon_sad:


Somewhere along the line, water/moisture got into the resin/matting for the drain holes. :icon_evil:

When I saw the matting going "milky" I knew it was time to stop, abandon ship and remove everything.

As it turns out, this may be a blessing in disguise, as getting the matting around the cable was a real struggle.

So I may have a look for small section of plastic pipe and 'glass that to the bottom of the "funnel" instead.

It was only when I moved the shell out of my wife's parking space did it dawn on me what went wrong.


I removed the foam formers from the rain channel.


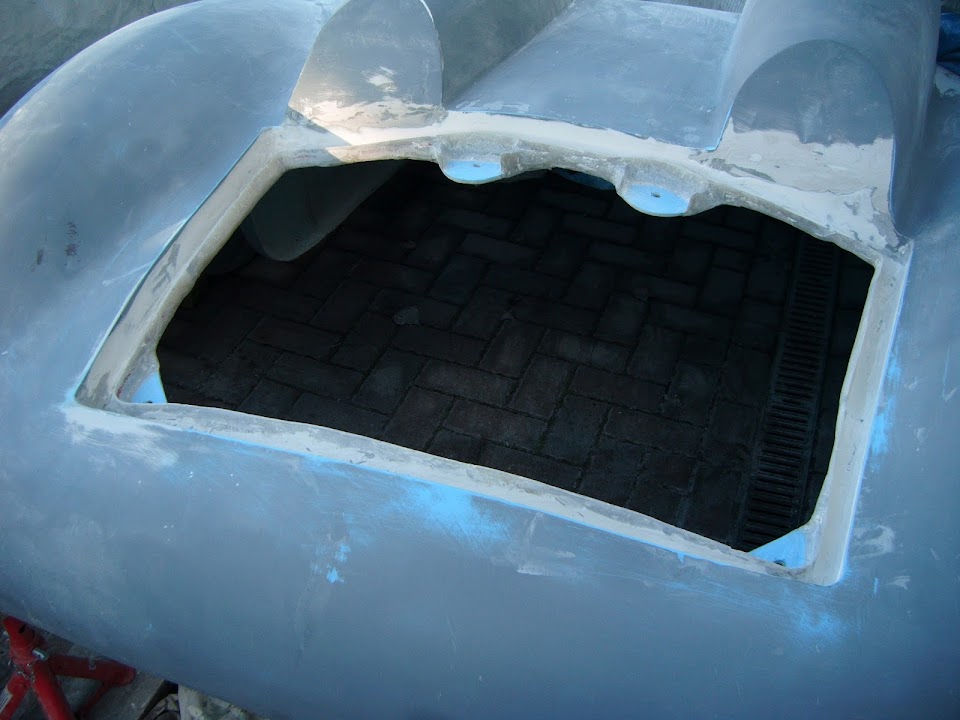
There is still a bit of work to do here, but at least the basic shape is in place.

As I wasn't going to be using the cable in the drain hole, I removed it and most of the plastercine.


Trapped water kept leaking out while I was doing this, so that was the source of my earlier problem. :rolleyes:

My next job will be to tidy up the inside edge of the rain channel so the rubber seal will fit.

I will also be adding some filler to provide a smooth surface on the bottom of the rain channel.

So until next time, take care, Paul. :)

PS
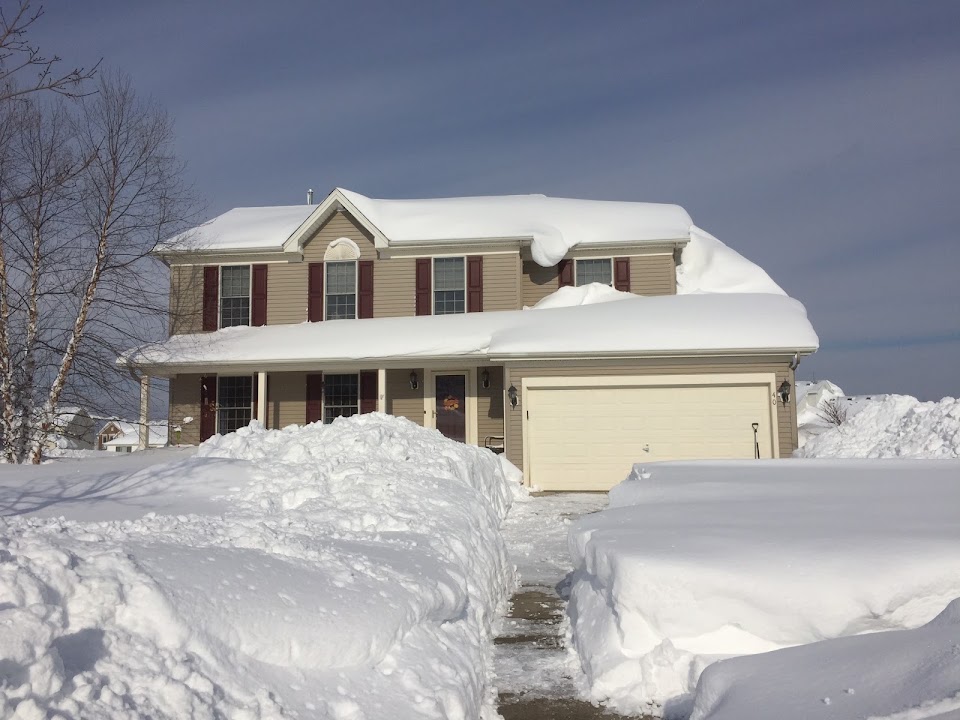
I can't really complain too much about the conditions on the front drive.

As my mate in Buffalo sent me this photo of the front of his house! :eek:

24 Nov 2014, 7:49pm
Paul the rain channel is certainly coming together now, i was thinking along the lines of bonding in a plastic insert into the channel corners then attaching some silicone tube to take the water away.

That snow at your mates looks fantastic, my kids would love that and most likely try to build an igloo like we did a few years back when the snow fell hard and deep up here.

Keep up the good work it's getting there.
25 Nov 2014, 2:01pm
Swifty - Thanks for your support & encouragement. :cool:

My girls also love the snow, but living in London it is rarely very deep.
So we tried to make the most of it when it really came down back in 2009.


- - - - - - - - - - - - - - - - - - - - - - - - - - - - - - -

Barely Making Progress...
Weather and other stuff is conspiring against me at the moment, but I started tidying up the rain channel.

This involved a lot of checking, marking, trimming, test fitting and repeating.

Rather than move the body shell, I just propped up the rear end so I could crawl underneath.


Although next time, I think I will actually take the time to dig out my axle stands. :eek:


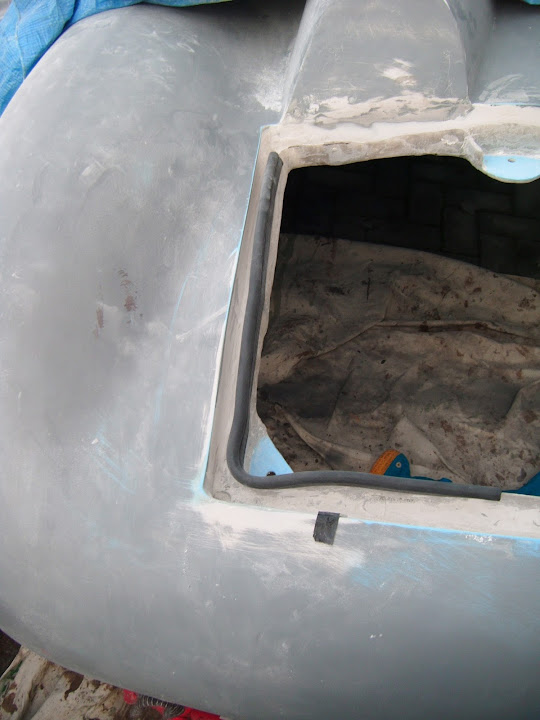
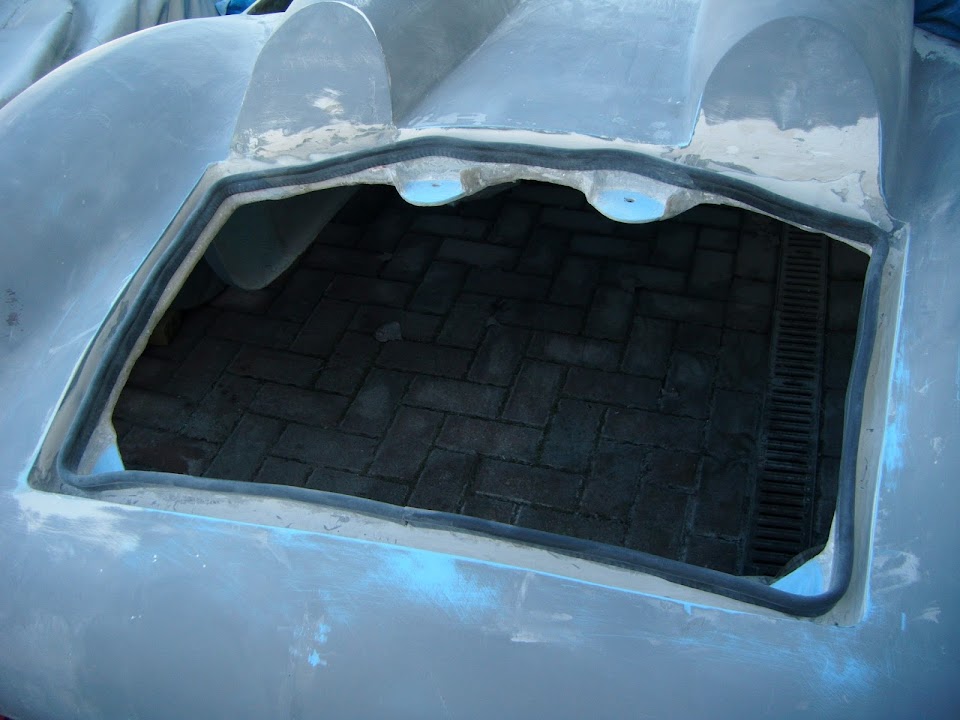
Eventually I got to the point where I could test fit the rubber seal.


And here you can see how the seal will by-pass the top edge bolt mounting plates.


Obviously I still have to trim a bit more off as the lid doesn't sit flush yet. :rolleyes:


[color="red"]Question:[/color]
- Should I use the weight of the lid to determine the right level for the rubber seal?
- Or should the lid sit a little high, until it is pushed down when locking it?

I'd rather take my time and reduce the height of the lip slowly, rather than trim off too much at this stage.

But if I look at Swifty's boot opening, the lip for the seal looks quite small to me.


- - - - - - - - - - - - - - - - - - - - - - - - - - - - - - -

DVLA Update:
Spoke to the DVLA today & the original Model section of my V5C has to stay blank.

So the new Model name has to be added to the Make line next to Triumph (as per Dave's Miglia).

The good news it is easy to modify the name I picked so it fits into the space available.

Which means that everything should now finally be in order. :cool:

- - - - - - - - - - - - - - - - - - - - - - - - - - - - - - -

Until next time, take care, Paul. :)
25 Nov 2014, 3:21pm
Paul L wrote:

DVLA Update:
Spoke to the DVLA today & the original Model section of my V5C has to stay blank.

So the new Model name has to be added to the Make line next to Triumph (as per Dave's Miglia).

The good news it is easy to modify the name I picked so it fits into the space available.

Which means that everything should now finally be in order. :cool:

- - - - - - - - - - - - - - - - - - - - - - - - - - - - - - -

Until next time, take care, Paul. :)


:whoo:
25 Nov 2014, 5:19pm
How 'squashy' is the rubber seal?

If it's anything like the foam strip I put under the rear edge of my bonnet you might find that the seal will need to sit at a level where it leaves the boot lid flush with the body surface rather than leaving it proud and compressing it with the locks.

The issue is that the foam, which is easy to squash at any point with your fingers, doesn't compress anywhere near as easily when it's an extended flat surface that's trying to squash it. Hopefully your seal will compress more easily along the rain channel.
25 Nov 2014, 5:45pm
Paul my gut says let the lid sit a couple of mm high then let the catches pull it down. That said how water / air tight does it need to be? with the depth of the rain channel you would be unlucky to find more than a few drips making it down the channel and up the other side and then up and over the seal?
Mac
25 Nov 2014, 6:51pm
Paul i set mine up the way Viatron has said, the lid sits a little high under its own weight so will pull down when locked, if its the same seal from CBS as i have then it has about 8-10mm compression.

Hope that helps.
26 Nov 2014, 9:19am
Hey Paul I love the snow Wallace!!

On the bootlid, there are two issues to consider:

One is water tightness
The other is looks

As you are building a car with no roof, and don't intend to wear a wet suit, when you pose about in it, looks take priority!

So whatever you do, it has to look right when its just sat on the drive with the boot lid in place.

Its looking good, and I think we all know the finished car will be quite special.
26 Nov 2014, 1:26pm
Dave - Thanks, although I'd certainly recommend everyone follows your KISS DVLA approach.

Mr T, Mac, Swifty & Scottie - Cheers gentlemen, that all makes sense. :cool:

As when I did my first test, the weight of the lid easily squashed the very small section of rubber seal I used.


Clearly when the full length of rubber seal is in place, the same weight of lid will not squash it down as much.

Guess I really should have paid more attention during those Physics lessons at school. :rolleyes:

So I will continue to trim the lip a bit at a time until the lid seals nicely when locked. :cool:

- - - - - - - - - - - - - - - - - - - - - - - - - - - - - - -

Play Misty For Me...
The dampness in the air is stopping the rain channel from drying out enough for me to add some fibreglass filler to it. :icon_sad:

And I want to use the filler to consolidate the lip a little bit before I do any more trimming just to ensure it will not crack / break.

So instead I spend ages looking through my pile of boxes in the Summerhouse before I could finally track down the original fog light switch.

I knew I had put all the bits in a jar (just in case I ever got around to selling it on Ebay), but I really need to check & re-label all the boxes.
( As it is no good keeping things if I can't find them when I need them!)


I have plenty of spare wire, so I just need to study the wiring diagram again to work out the best way of re-connecting the fog lights.

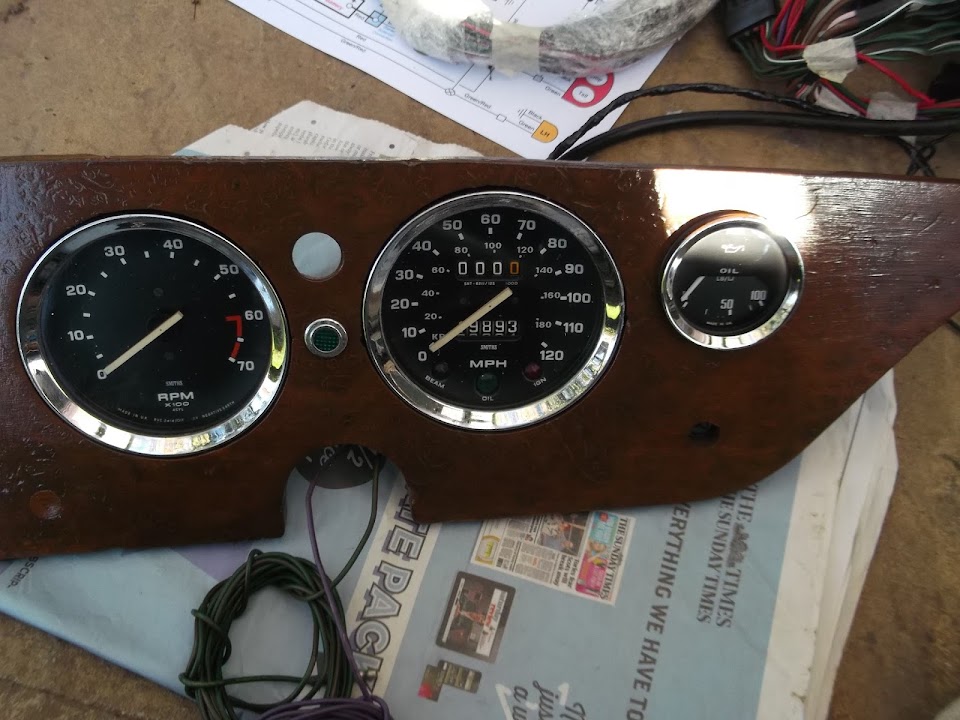
I will also need to drill a hole in the dash board and will probably use the original choke hole I filled in (bottom left of rev counter).


The original fog light switch was fitted beneath the oil pressure gauge in the photo above, but I moved the choke lever over to there.

- - - - - - - - - - - - - - - - - - - - - - - - - - - - - - -

Last Big Jigsaw Pieces:
It is great to see paint going on Mac's car. :cool:

However, it does remind me that I still have a long way to go & I really must finalise my plans for the body shell / bonnet.

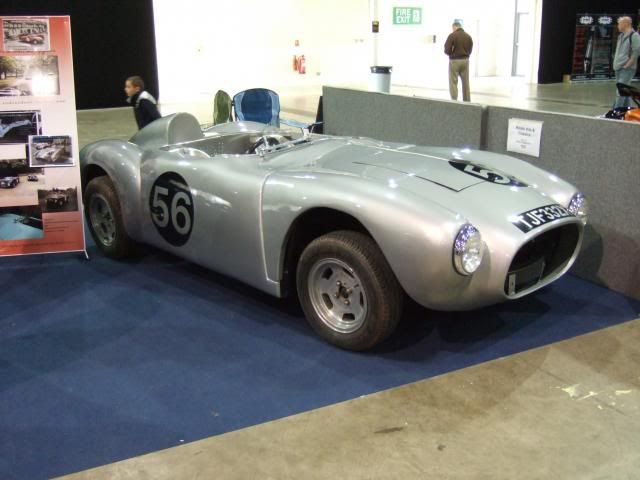
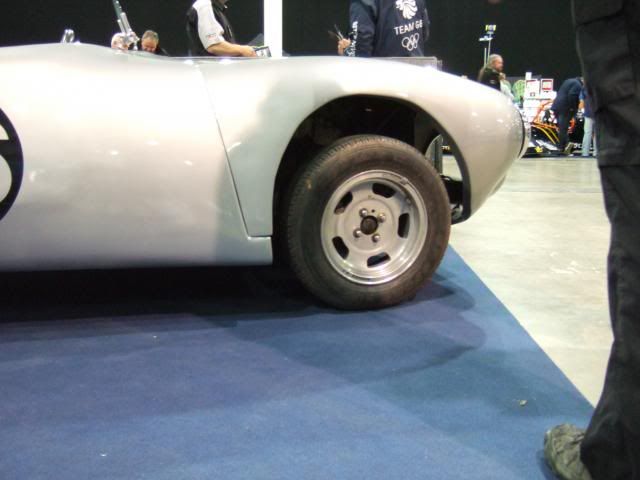
So I've been looking back at these photos of the original Ribble Cordite demonstrator at Stoneleigh 2013.


As there is no escaping the fact that my own 13 inch wheels will also look "lost" in the front arches. :icon_sad:

In addition:
- The small section of body shell that extends beneath the bonnet is a different length on both sides.
- The sloping angles at front of the body shell, where the bonnet sits, are also different on both sides.

This last point lead me to build the new scuttle bonnet lip at a slight angle so the two sides of body shell would meet up.

Finally there is Spitfire chassis issue which seems to stop the Cordite/Navigator bonnet from opening as far as a Spyder one.

E.g. Mister Towed


As with a lot of issues I have faced on this build, I can't fix one thing without a knock on impact on many other things.

Bonnet Plan:
- Sort out the hinging arrangement.
Clearing the chassis may be helped if I pull the bonnet forward & down a bit (compared to the Cordite demonstrator above).
Whilst this would move the position of both the wheel arches & rear edge, these areas already need work (see below).

- Follow Mac's approach and cut/extend the driver's side to cover the wheel.


- The rear edge needs to be re-profiled to match shape of the my body shell's new scuttle area, using a similar "slit" technique as Micky1Mo.


- Create a "tighter" opening in the wheel arches to match the wheels & tyres I am going to use.

- Extend the nose/grille opening to provide a square front edge and a deeper lip to support the grille.

- I might also need to build a small "bubble" over the brake master cylinder depending on how the other work goes.

Body Shell Plan:
- Cut the lower rear sections of the bonnet off to extend the body shell, as per Mac & Michiel.
This will allow me to set the same gap between the body shell and tyres on both sides.
It will also give me the option of fitting side repeaters as they will no longer highlight the different gaps/angles.


- "Square up" the bonnet lip on the scuttle so it matches the newly formed body shell extensions above.
Given all the remedial work I did at the back of the car, I might as well make the front square as well.

Writing down a "To Do" list that is clearly going to involve a ton of work may seem like madness.

Especially when I am currently struggling to finish off the boot lid work at the moment. :rolleyes:

But if I want to finish the car, then I just need to have a plan and keep chipping away until all the work is complete.

So until next time, take care, Paul. :)
26 Nov 2014, 2:58pm
Paul, my bonnet opens that far because of the 'scissor' brackets I made -


These allow the bonnet to pivot from the lower edge and lets it open much further than if it pivots from the centre as with my first attempt. Just make sure that wiring/fingers/cats tails are kept clear when closing it.

Can't see any reason why the same design couldn't be adapted for use on the Spitfire front cross-member.

That no.47 sure is a great looking car btw. :)
26 Nov 2014, 9:31pm
Mr T - Thanks for that photo, as I really think that might be the way I need to go. :cool:

Can I ask a couple of quick questions?
- How thick is the steel you used?
- Is there a washer between the two sections?

Cheers, Paul. :)
26 Nov 2014, 10:01pm
The brackets are 50mm x 5mm strap iron and there's no washer between them, just a bit of axle grease.
27 Nov 2014, 3:27pm
Thanks Mr T. :cool:

I've now re-read the part of your build thread that covered both your MkI & MkII hinges.

I'll certainly bare in mind the fact you had a small fire while trying to weld to the bonded in hoop. :eek:

Although I do take comfort from the fact you were able to remove the MkI hoop.

As I've always assumed that removing my "factory fitted" hoop & hinge point would cause too much damage.

My factory hinge points were fixed to the middle of the nose, whereas Mac, and others, have hinged theirs much lower down.


Either way I am planning a Blue Peter style engineering experiment with some cardboard cut outs to test my options.

So if your scissor hinge arrangement allows my bonnet to clear the chassis I will be a very happy bunny. :pray:

Cheers, Paul. :)

PS
Comparing Mac's bonnet to yours, it is clear that having the Herald chassis in the middle of the Spyder's bonnet nose is a big help.

27 Nov 2014, 9:25pm
Paul,

Are you planning to stay on 13" wheels or swap to a larger diameter? I am just thinking about my rear wheel arch clearance and whether to reduce by means of a cut & shut. My preference would be to go for 14" wheels as the wheel/tyre size thread suggests that 14" is doable without any clearance issues.

So I am thinking that 14" (as Trevor used in the first Sammio Spyder build thread) is the sweet-spot to avoid clearance issues and wheel arch mods. Problem is I am not sure what 14" wheels are available with correct offset and PCD other than the steel MGF spares which look pretty basic.

Chris
28 Nov 2014, 6:24pm
Chris - I'm going to stick with the brand new 13" wheels and tyres my donor came with.
I know this means more work in some areas, but the smaller wheels should keep the car a little bit lower.
Given that I'm only 5' 8", with a 30" inside leg, I'm keen to avoid the need for a step ladder to climb in! :icon_wink:

- - - - - - - - - - - - - - - - - - - - - - - - - - - - - - - -

It Has To Get Worse Before It Can Get Better...
I peeled the covers off the boot opening in the vain hope that it might finally dry out.


Then I spend ages staring at the bonnet in an attempt to work out what I need to do to make the hinge work.

There is simply no escaping the fact that this bonnet was not designed to play nicely with the Spitfire chassis. :icon_sad:


Based on Dave's research with ACE, I am now happy that the original chassis does not include the outside edges.


So a quick trim with the angle grinder and I had this.


Based on DonnySoutherner's Cordite, I believe you can cut off the outside "shoots" as well, but this will do for now.

Although at this point the bonnet still will not fit as the area below the grille opening is in the way.


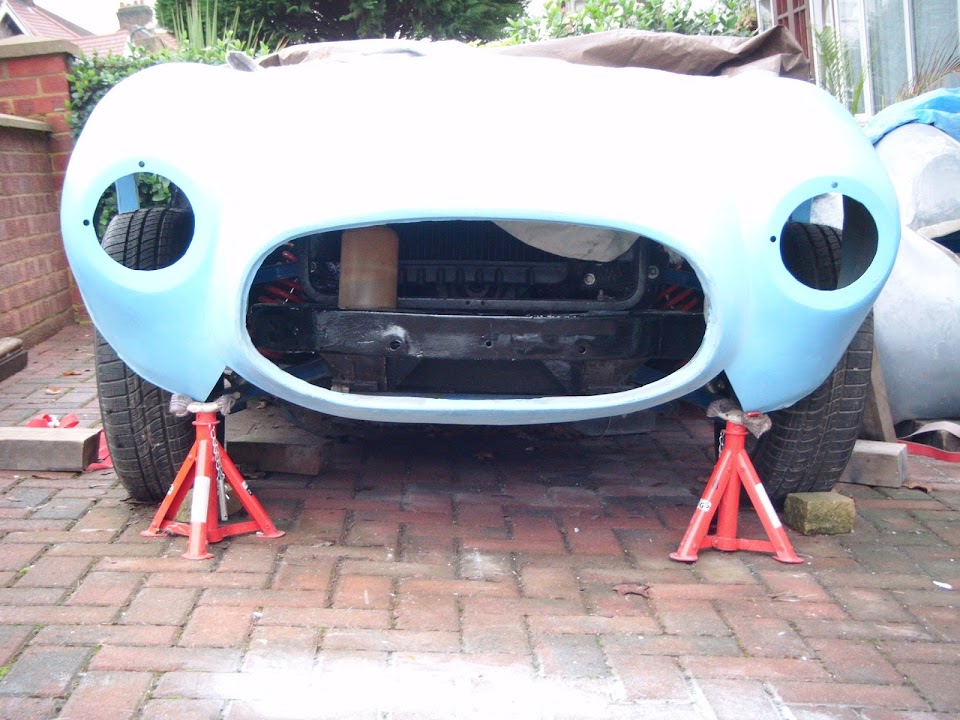
I propped up the bonnet to get a rough idea of where I wanted it to sit.


In this position there is still a small gap above the radiator, including the cap.


If I was ever going to find a way to hinge the bonnet, I needed to do some more drastic surgery.


So out came the grinder again and I got to work.


With this section removed, the bonnet can get a lot closer to the chassis. :cool:


But I still need to do some fine tuning to clear these end sections. :rolleyes:


End of Part 1...
28 Nov 2014, 6:26pm
Part 2:
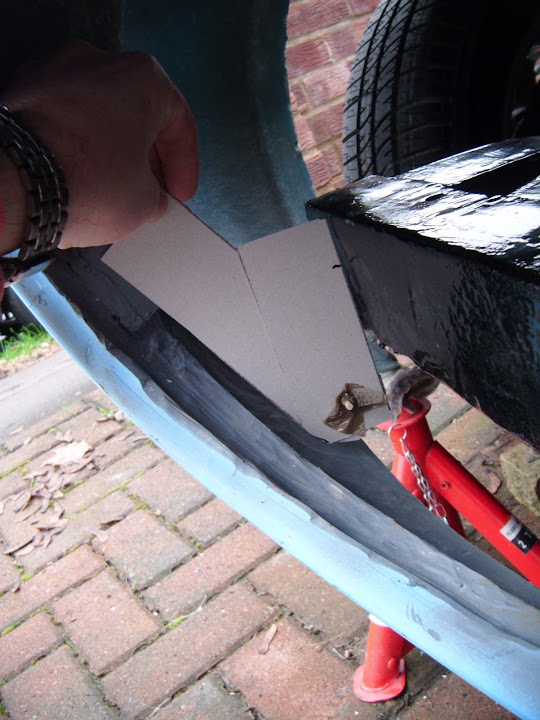
I mocked up a very rough scissor hinge out of some cardboard and tested it with the bonnet both closed and open.


It looks to be there, or thereabouts, so I have ordered some 50mm x 5mm flat bar to play with.

At this point, the bonnet looks like this.


I will have a think about the best way to re-attach (& re-shape) the section I removed.

If I keep the original length it would give me a very deep front profile. :eek:


Or I can create the same front view as it originally had by cutting this down to size based on the new angle required.

I may do the Mac "cut & shut" along the length of the bonnet before I attempt to sort out the hinges.

- - - - - - - - - - - - - - - - - - - - - - - - - - - - - - - -

By now the rain channel was dry enough for me to get some filler on it.

I started with some fibreglass filler along the rubber seal edges.


Then I added some normal body filler along the other side and along the bottom of the channel.


It was dark by the time I'd finished the first round of sanding, so excuse the flash.


After I finish the sanding, I'll need at least another round of filler before all the insides of the rain channel are smooth.

Plus I need to finish off the trimming of the rubber seal edge too.

So until next time, take care, Paul. :)
29 Nov 2014, 5:30pm
Busy Going Nowhere...
Wasted a bit of time in the morning waiting for the family to get ready so we could go Christmas shopping.
( Really hard to believe it is December on Monday, and we have already received our first Christmas card! :eek: )

Back at the car, I did a bit more sanding of the filler in the rain channel.

Then decided to finish trimming the rubber seal edge before I added some more filler.

Despite using axle stands, I should have set them farther apart to avoid the risk of me clipping them with my shoulders while crawling underneath.


I lost count of the number of times I checked, marked, trimmed. :rolleyes:

Part of the problem is the lid is not the same thickness all the way round.


With hindsight, it would have been quicker to build up the lid edges to the same depth, rather than mess about the way I did.

I tried cutting a length off the rubber seal to see if it would be easier to check one sections at a time.


But that was a complete waste of time. :icon_sad:

So it was back to the painfully slow, check, mark, trim, repeat routine.

Eventually I was able to cut the seal to the correct length for a final test.


I also cleaned up the treads on the locking pin bolts and "borrowed" a bolt from the bonnet set.

This allowed me to "pull" the boot lid down by tightening the bolts into position.

The good news is that the bottom edge is now pretty close.


Unfortunately, the top edge is still sitting a little proud and needs more work. :icon_sad:


This is the view of the seal in action from the inside.


At this point I felt that I was at least making progress, even if it was very slow progress.

But then it all seems to turn to dust when I unlocked the bolts...

My first school boy error was that I'd forgotten to tighten the nuts above the mounting plates.

So once the lid was removed, the bolts dropped and when I re-tightened them the lid wouldn't fit back on. :rant:

It seems that getting the slots in the bolts to be 100% perpendicular to the locking pins is a black art.
( Or at least making the bolts stay in the correct position is. )

I think the source of the problem is mounting plates are at a slight angle, so the nuts don't sit flush.

In the end it was getting dark, cold & damp and I was having a major sense of humour failure so I called it a day.

As despite hours of work today, I have very little to show for it.

However, to end on a more positive note, I am pretty sure that the problem can be fixed.
( It may just required a thin layer of fibreglass filler to fine tune the surface angle of the mounting plates. )

But first I will finished trimming the rubber seal edge until the boot lid finally sits nicely.

I know it will be worth it in the end, but the boot access panel has been a serious pain in the :tape: !

Until next time, take care, Paul. :)
30 Nov 2014, 2:46pm
Crawling Along (Both Physically & Metaphorically):
Once again I was back to the old routine of crawling under the body shell, checking, marking & trimming.

Eventually the edge for the rubber seal looked like this.


Which now looks a lot more like Swifty's rain channel, which has to be a good thing.

With the rubber seal back in place it looked like this.


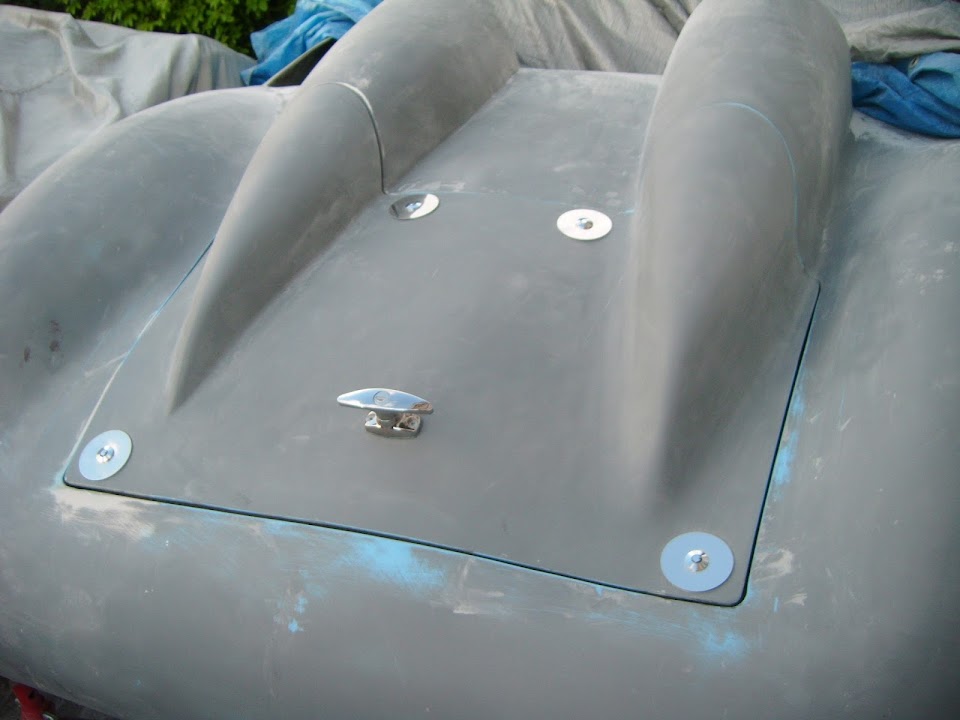
The boot lid now sits just a little proud of the body shell, but "squashes" down easily with only light pressure required.


That the good news when viewed from above, but there is a slight problem underneath...

As the rain channel got lower, it exposed a gap along the inside edge of the driver's hump.
( Sorry the photo is a bit blurred. )


So I will need to add some filler to build this section up a bit so that water doesn't simply pour in.

The next job will be to adjust the mounting bolts for the locking pins.

I've dug out some washers and the plan is to apply a blob of fibreglass filler on the mounting plate.

Hopefully when I tighten the bolt into position, the washer will move the filler into the correct "square" angle for the nut.


Well that is today's theory anyway. :rolleyes:

However, by now, the sky looked like this and I decided not to risk the rain and called it a day.


To be honest I am not feeling 100% and the damp conditions outside are not helping.

So another day where the hours worked don't seem to have generated much forward progress.

But at least the progress is forward!

Until next time, take care, Paul. :)
30 Nov 2014, 3:04pm
Paul your just about there with the rain channel and it looks good, yet another way to add a boot lid.

I must admit these shells lend them selves to the diy experimenter due to the initial cost you can't be frightened to cut the body up.

Looking forward to your next installment Paul.
30 Nov 2014, 3:05pm
Paul, your making great progress mate, keep at it. I'm now bolting on "the good stuff" and the rate your going you wont be far behind.
30 Nov 2014, 6:09pm
Looking good matey! I look fwd to a Miglia / Sammio run-out at some point next year :)
1 Dec 2014, 3:16pm
Swifty, Mac & Dave - Thanks for the encouragement chaps. :cool:
I know the path to getting the car finished will not always run smoothly ( see below :rolleyes: ).
But I firmly believe that the day will eventually come when I am finally on the road.

- - - - - - - - - - - - - - - - - - - - - - - - - - - - - - - -

Square Peg & Round Hole:
I spent some more time on my back earlier trying to work out what is the matter with my locking pin arrangement.

As I just can't seem to find a position for the bolts that will allow the locking pins to fit & engage properly.

I've now come to the conclusion that the curves of the boot lid mean some pins are working against each other. :icon_sad:

Setting this up now is a major pain and I am effectively able to put my head inside the boot to see what is going on.

My biggest fear is that if any fine tuning is required in the future, it would be nigh on impossible for me to do.

So I have just ordered four conventional bonnet pins and I will have a play around with them when they arrive.

I might be able to get away with 2 x quick releases + 2 x locking pins, or I might have to use 4 x quick releases.

This was meant to be a simple access panel, so I really need to make opening & closing it a lot simpler than it is at the moment. :rolleyes:

Cheers, Paul. :)
1 Dec 2014, 3:26pm
I have a pair of those locking pins holding the sides of my bonnet in, Paul.


Very chic and secure, but probably should have mentioned that they can be a right pain in the you-know-where to line up and lock every now and then...
2 Dec 2014, 5:07pm
Mr T - It's good to know it is not 100% operator error on my part. :icon_wink:
So I wont give up hope of getting two of the locking pins to work properly just yet.

- - - - - - - - - - - - - - - - - - - - - - - - - - - - - - - -

Holding Pattern:
Wet & very windy today, so I switched into "Santa's Little Helper" mode instead.
( No harm in earning a few brownie points for writing Christmas cards & wrapping pressies. )

However, I did go back and have another look at how Chris had set up his boot panel.

Tribute Automotive wrote:
The bottom pushes onto the 2 pins first and then you "hinge" the lid down onto the other pair of pins.


With a bit of luck I will be able get this to work if I stop trying to engage all four pins at the same time. :pray:

- - - - - - - - - - - - - - - - - - - - - - - - - - - - - - - -

I've also been working out the best way to connect the rain channel drain to some tubing.

I had a few things lying around that might have worked, but then bought this to use instead.


It steps down from 12mm to 8mm (the size of the tubing) and I will set that into the fibreglass funnel I built.

Then I will shape some more filler so that the internal size of the funnel reduces to the connector's 12mm hole.

As always, that is today's theory anyway. :rolleyes:

Until next time, take care, Paul. :)
3 Dec 2014, 11:57am
Looking good Paul, I'm sure you'll sort the pins out eventually!
I can sympathise with you, as I have, and continue to have problems that are similar.
But as you once said, when hand building a one off car, it will take time, as its all trial and error. Seems to be the only way to get it right! Keep it up.