MadaboutKitcars

This is a read-only archive of the old Madabout Kitcars forum. New posts and replies are no longer possible, but every thread is still here to browse and read.

Scottie's Tribute A352 build

5 Sep 2014, 8:20am
There is scope there for some disc brakes with red calipers.
5 Sep 2014, 8:23am
Mister Towed wrote:
Is the woman about to crash her buggy into his? :fear:


At Donington up at the Jago end of the camping field, we were parked next to a guy whose car and trailer had been side swiped on a slow moving dual carriageway by a car travelling in the same direction whose driver had fallen asleep.
5 Sep 2014, 8:40am
Scottie22 wrote:
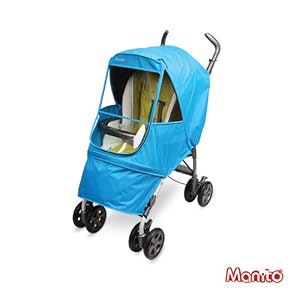
Rumour has it that WCA has taken on a baby walking job, he was snapped in the park chatting to locals...........

[IMG][/IMG]


Oh is that the latest model 'Maclaren Pushchair'
5 Sep 2014, 9:18am
Well, it is definitely not a 1.9.......
5 Sep 2014, 12:48pm
Scottie22 wrote:
Well, it is definitely not a 1.9.......


oh oh, here we go again!!
5 Sep 2014, 2:44pm
And here is Scotties effort


Notice that he had to add a quarterlight to get the side to shut properly...

:-)
5 Sep 2014, 2:57pm
WorldClassAccident wrote:
And here is Scotties effort


Those handles look like the steps from my swimming pool that got nicked!
5 Sep 2014, 3:05pm
WCA, until I get the door back on the car with the side window on it, I still don't really know for sure if the quarter light idea will work or not!!

Oxford- Its too late now....... :-)
5 Sep 2014, 5:42pm
Keeping to the topic of gently ribbing Scottie, I can see some of his work in this one too.

5 Sep 2014, 6:20pm


Even with wide rubber, WCA junior struggles to control his rear end.
5 Sep 2014, 7:23pm
Friday

Terrific stuff guys! A sense of humour is essential as they used to say in the military. (To be in the military, I think survival is impossible without one)

Right! Apart from cleaning out my sons fish-tank, killing several fish by mistake,
spending about forty quid replacing them so he wouldn't notice, and several other mundane tasks, I actually did a few hours on the build.

I filed down the drivers window to shape, and also filed down the outer and inner stainless trim strips. And polished them to a high shine.

I still have more work to do on them yet, but we're closer than we were.

I only have one miserable pic, but it shows what it looks like now.

[IMG][/IMG]
5 Sep 2014, 10:07pm
Very nice too!!
7 Sep 2014, 8:52pm
Sunday

I spent a lot of today re-fitting the drivers door, and trying to find out whether the cunning plan worked or not.

I.E. Will the door open with the window in place with the quarter light?

After a very frustrating time, the answer is still inconclusive.

I find this very irritating and negative, so I have decided to go ahead with the rest of the build, and leave the side windows off the car for now.

Steve McQueen took his off his car for most of the time, but he did not live in Hereford.

I have more experience than he did of trying to look cool at the lights in the pissing rain. Basically it cannot be done.

I owned my seven car for five years, and it never had a roof or side windows,

but I did want this car to be different.

Still, I can go ahead and put the roof on it eventually, even without side windows that should keep a lot of the H20 out.

Mmmmmmmm.

I also put a chromed metal badge on the boot lid in place of boot lid handle.

I will go ahead and finish the stainless door top trims and bolt them on the car without the side windows for the time being.
I have several pictures of XKSS replicas with no side windows fitted, and I am wondering if they have the same problem I am having?

And have left theirs off for the same reason.

[IMG][/IMG]

[IMG][/IMG]
9 Sep 2014, 7:30pm
Tuesday

So today I did a reasonable amount of work on the car.

I finalised the stainless trim for the drivers door and bolted it on.

I was well pleased with the result. Each little thing that I do now, makes the car look tantalisingly more like it is supposed to, yet so far from being finished!!

I have found from reading Paul's thread, that he has similar experiences to me.

He says that sometimes when you do work on your build, it often has a "knock-on" effect on other things.

Tell me about it!

When I cut out the inspection hatch on the rear of the bonnet area, I had no idea that later in the build when I came to fit the windscreen wipers, I would have to raise the motor by 4 inches.

I just found out that the knock-on effect this had was to render the inspection hatch fixing system totally useless.

The room that I needed to fix the hatch from under the bonnet had evaporated, and I would have needed lessons from Houdini on how to wriggle the hatch into place and fix it in securely without tearing all the flesh off my fingers and hands. (I'm good at that)

So it was back to the drawing board.

I fitted 4 locating lugs and held it in place with an elastic bungee.

It is really quick and easy to get the hatch on and off now, so its an improvement over the original system.

I still will use the safety line to prevent hatch loss if the system fails.

Just before I drove the car back into its tent for the night. I noticed a weepy water leak from the heater valve under the bonnet, so I attempted to undo the tiny bolts so I could get the valve off and fix it.

Of course, having been on the car since the battle of Hastings, they both sheared off.

I had a real job getting the bloody thing off, and when I did I had to drill out the sheared bolts which is always lots of fun.

Somehow I managed it without any damage to the valve, and replaced the rubber "O" ring thingy to fix the leak.

I drilled the holes out to about 5mm, much bigger than they were, so I could fit some stainless bolts and nuts.

It is a better job now than Triumph's original effort, and does not leak any more.

Just about all the nuts and bolts I have had to put on the car have been stainless steel. As I said before, I am totally, pissed off with rusty seized up sheared bolts in awkward places, and the long fight to get them off.

[IMG][/IMG]

[IMG][/IMG]


[IMG][/IMG]
10 Sep 2014, 1:58pm
Wednesday

Thanks for that redratbike.

I was impressed by the car and I think it deserves a place here, up for grabs if anyone wants it, really cheap too, as its not costing £3 million pounds.

Apparently once owned by Nicholas Cage, one of only 9 replicas made by Lynx.

If I had known this was coming on the market, I would not have started building mine! (He lied)

[IMG][/IMG]
10 Sep 2014, 4:54pm
Scottie - I know it seems to take forever, but your car is coming together very nicely. :cool:

Good luck, Paul. :)
10 Sep 2014, 6:18pm
Later on Wednesday

Thanks for the encouragement Paul, yes it does seem to go on and on at times.

I have a friend who knows a guy building his own aircraft, and when asked how far he had got with the build, he replied,

"I've done 95% of it now, so I only have another 50% left to do"

Which I think sums it up for most of us!

I actually put in 6 hours on the car today, mainly shaping, filing, grinding,
drilling and polishing the last two bits of stainless trim for the passengers door top.

Stainless is a marvelous metal, and I am glad I kind of "discovered" it, and bought a fair amount of it very cheaply from the scrapyard.

It is invaluable as trim, and is forever, with no rusting and of course polishes up like chrome, BUT, it is an absolute nightmare to work with.

It is a very hard metal, and is very difficult to drill sand grind etc.
Which is mainly why it took me 6 hours to do what looks like not very much!
To be honest, after 6 hours of it, I'd really had enough, and just wanted a shower and some clean clothes.

Still, its done now, and as far as I can see the only dreaded thing left to do in stainless steel are the headlamp surround trims.

I will cut them out of a sheet, and make them only about half an inch wide,
and that way, they should be flexible enough to follow the curves they need to. We'll see.

[IMG][/IMG]
12 Sep 2014, 11:34am
Friday

In the last picture, where I have put:

"Will trim these ends later" That was a big mistake not trimming them first!

When I fitted the door today, the "ends" were like razor blades, and I cut my arm several times during the fitting.

Really impossible not to.

I'm covered in plasters at the moment!


So once the door was fitted and shimmed, off came the sharp bits and now its all smooth and silky like it should have been before I fitted it.

[IMG][/IMG]

[IMG][/IMG]
12 Sep 2014, 12:36pm
Looking good. I like the continuity of the stainless steel trimming
12 Sep 2014, 12:42pm
Why thank you kind Sir.

On the subject of your interior, I really do hope you will keep your "clock" if only to stick it on with tape sometimes, just for the piss-take value!!

Its kind of become part of your personna if you will!
Be a shame to lose it altogether. I know others feel the same way too!
12 Sep 2014, 12:59pm
Hear, hear regarding the clock. It has a certain ironic value!
12 Sep 2014, 1:38pm
its really look good those polished steel pieces look great! however i was expecting to see some blood splatter!
12 Sep 2014, 1:57pm
I am sure you guys will find something to take the piss out of what ever I do. After all I do deliberately set myself up for it sometimes.

When I first looked at the picture it looked like the door bulged out sideways too much but it was just the effect of having the straight hood hoop at the end.

Are you planning stainless steel around the back of the cockpit?