MadaboutKitcars

This is a read-only archive of the old Madabout Kitcars forum. New posts and replies are no longer possible, but every thread is still here to browse and read.

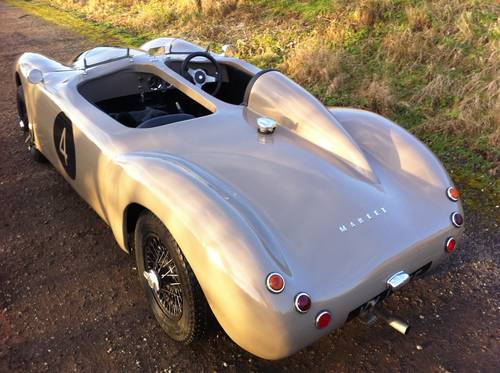
Another Cordite Is Born ...

22 Sep 2014, 6:44pm
Dave - Nice bit of detective work. :cool:

- - - - - - - - - - - - - - - - - - - - - - - - - - - - - - -

Whilst I haven't had the chance to work on the car recently, I have been able to put a bit more thought into a few areas...

Boot Lid / Access Panel:
I have been following the work Swifty has been doing on his Navigator boot lid.

I also liked the way Andreas used DZUS fasteners on his boot lid "next door".


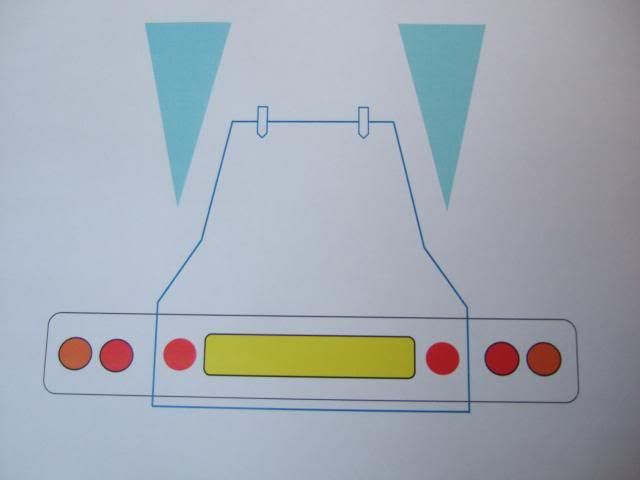
Due to the fact that I have the longer "MkI" humps, my boot lid needs to cut through them.

In my head there are two ways of doing this:
- Attempt to make a straight vertical cut across the humps
- Make the cut at an angle "going forwards"

I've tried to draw these two options below...


I think the angle works best, as depending on how the car sits, the vertical line might be a bit out.

Whereas, a deliberate angle would always look like it was meant to be that way.

While looking for more images of how this sort of thing had been done on other cars I found this.


So if that approach is good enough for the Jaguar Project 7, it is good enough for me. :cool:

- - - - - - - - - - - - - - - - - - - - - - - - - - - - - - -

Prepping For Paint:
Lots of good advice on Scottie's build "next door" about painting and I had a real "deja-vu" moment.

Because I had just re-read Mister Towed's build thread to see how he had prepared his car for paint.

Then shortly afterwards, Mr T posted a summary of what I had just read on Scottie's thread, spooky.

Clearly there is no such thing as a short cut if you want to get a decent finish.

Allow me to summarise one of his posts here...

Mister Towed wrote:
My word, prep for paint is a laborious process.

It's like painting the ruddy Forth Road Bridge

every time I go round sanding down the primer I find more dints and scrapes to fill that I hadn't noticed before.

It's now taken almost a whole tube of knifing putty and it's still not completely smooth.

After spending eighteen hours sanding over the last two days I'm absolutely knackered.
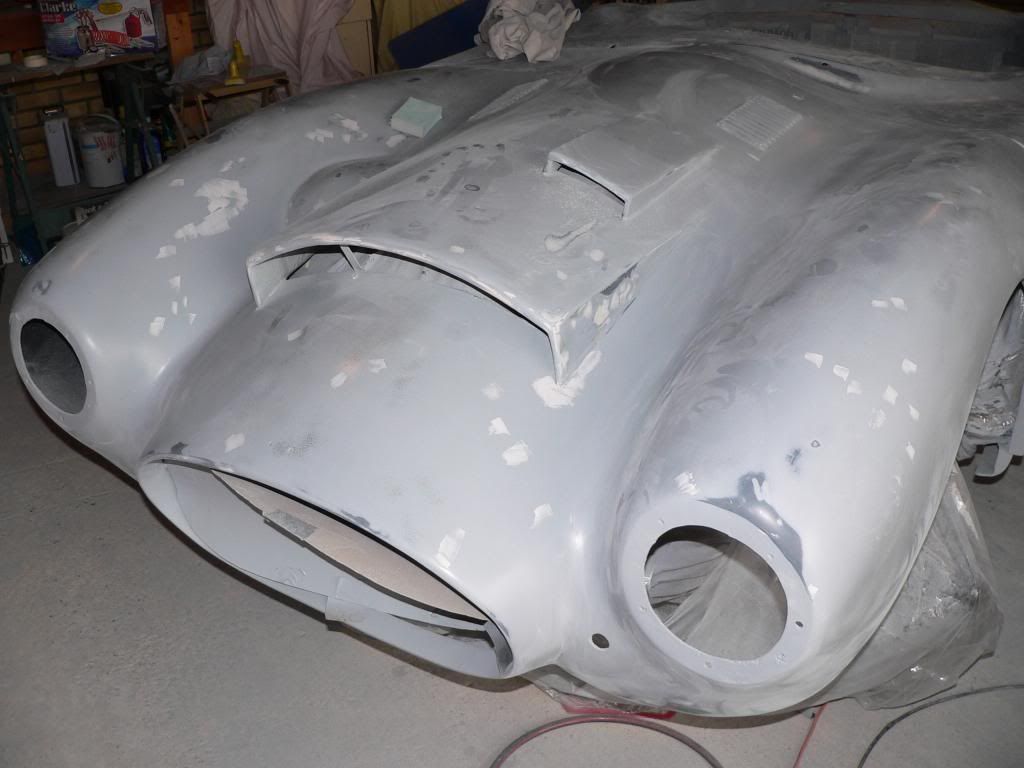


So clearly I need to take my time and do the best job that I can.

After all, the body shell has so many symmetry issues that a "professional" paint job would be a waste of money. :rolleyes:

- - - - - - - - - - - - - - - - - - - - - - - - - - - - - - -

[color="red"]Question - "Knifing Putty" :[/color]
What do people use / recommend as knifing putty / stop filler?

There seems to be various options, dolphin glaze, liquid gold, etc.

Or are they all pretty much the same?

- - - - - - - - - - - - - - - - - - - - - - - - - - - - - - -

Anyway, that's all for now, take care, Paul. :)
22 Sep 2014, 8:03pm
You've been on Rods n' sods again... i recognise the lingo!
23 Sep 2014, 5:59am
Guilty as charged. :icon_wink:
25 Sep 2014, 5:33pm
Odds & Ends - Part 1:
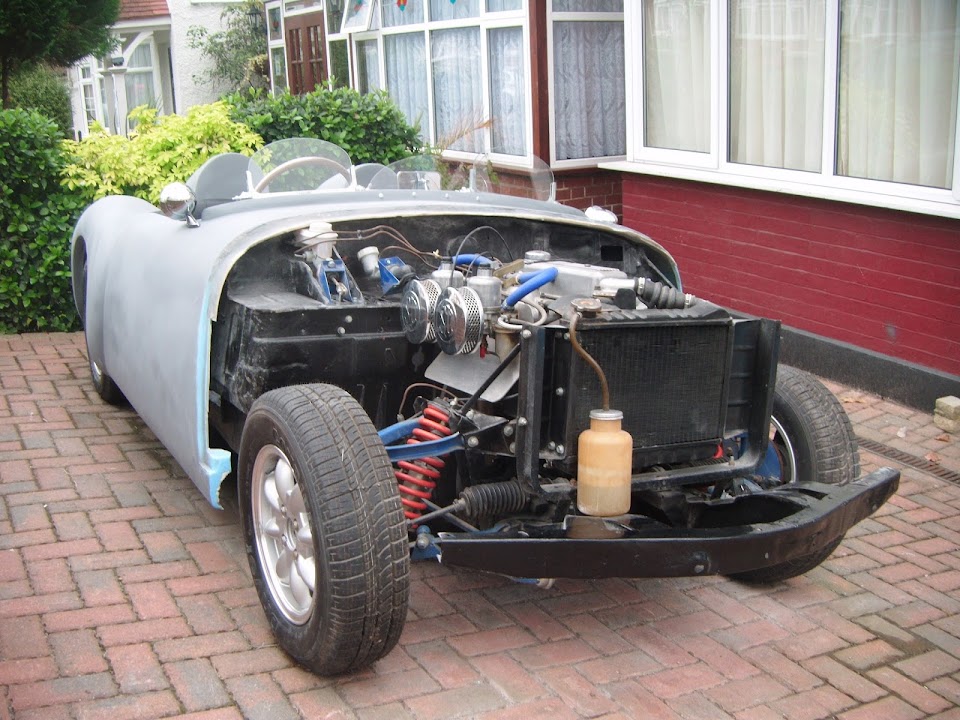
Well for the first time in what seems like ages, the covers came off the car.

Following up on the pointlessness of getting a professional paint job on a lopsided car theme...

I saw Swifty marking up the positions of the his arches vs. the cockpit corners.

Whereas, this is one of the many mis-matched areas that I am just leaving as they are.

Passenger Side:


Driver's Side:
( Unfortunately, the primer makes it a bit harder to see the position of the arch clearly. )


- - - - - - - - - - - - - - - - - - - - - - - - - - - - - - -

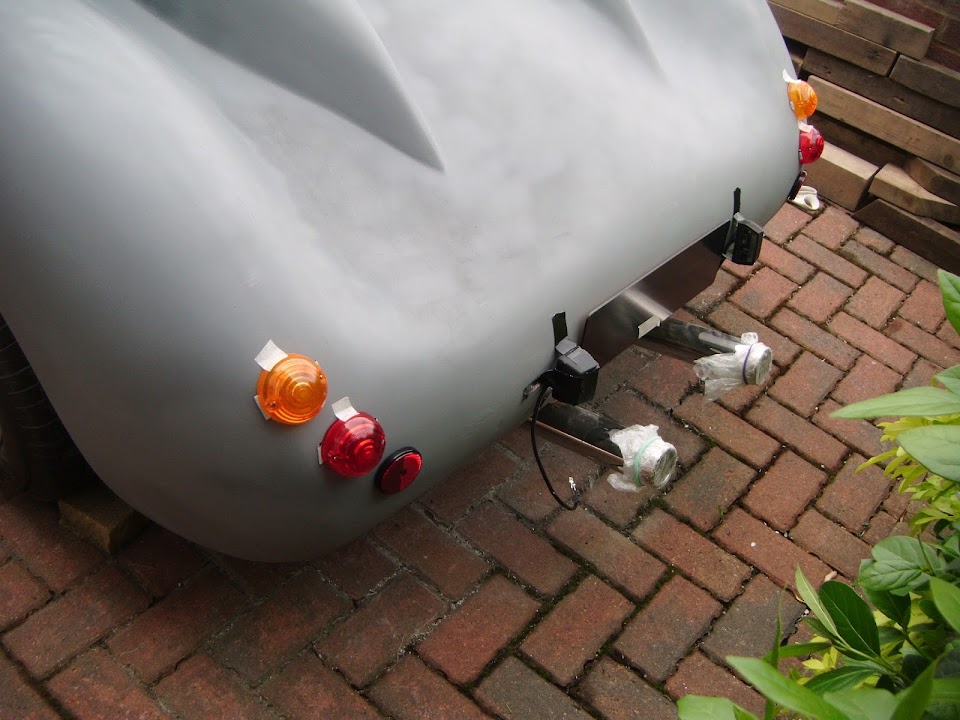
The last time I mocked up the rear lighting, the body shell hadn't been chopped about.

I am going to line the number plate up with the middle of the twin tail pipes.


But I need build up a flat mounting surface with some filler at some point.


Originally I bought some LED number plate light bolts, but I also picked up some "normal" lights too.


These give me the option of fixing the lights either side of the number plate like so.


I was planning to use the 4 LED bolts to mount the plate and light it at the same time.

However, this Spyder passed an MOT with just two LEDs fitted like this.


Note:
I'm normally pretty good at finding things on this forum, but it took me absolutely ages to track that photo down. :frusty:

So I will also just use two, but fixed a fraction closer to the edge of the number plate than the example above.


I may extend the number plate mounting plinth to include these LEDs.

Next it was the turn of the rear lights and I found one of my indicator's fixing points was broken. :icon_sad:
( And it was in too many pieces to glue back together. )


This was always the layout I intended to use.


But I fear this layout may highlight the fact the body shell had different widths either sides of the tail pipes.
( Due to the different "sweep" angles of the two rear wheel arches. )

I saw how Swifty mocked up his rear lighting.


Note:
The Spyder LED photo above finally gave me the coding required to include Swifty's attachments on my thread. :cool:

I've also seen a similar rear lighting layout on this Spyder.


So I tried it out on my car....


I think this layout will draw the eye to the lights at the edges & the number plate / exhaust pipes in the "middle".


So hopefully, some of the symmetry issues will not jump out during a "first impression".

I also tried stacking them vertically, but that didn't really work for me.


End of Part 1...
25 Sep 2014, 5:34pm
Odds & Ends - Part 2:
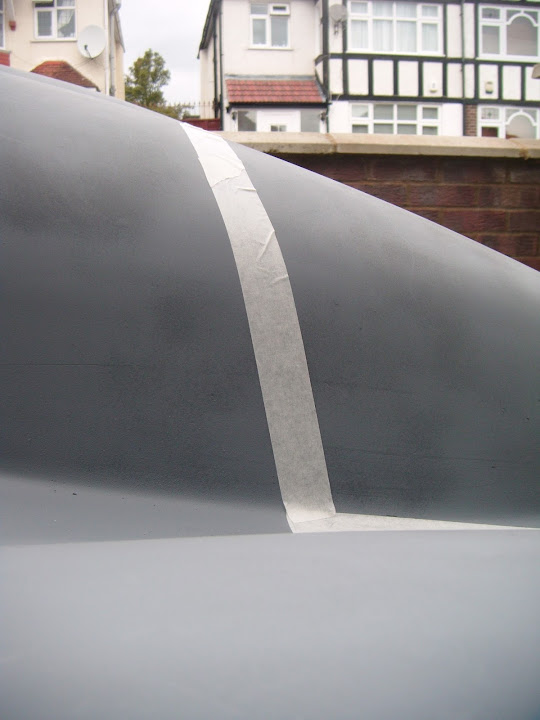
The other big job I need to tackle at the back of the car is the boot lid, which I roughly taped out.


The big advantage of mocking this up with tape was that I got a better idea of what I need to do to cut the humps.

Again, this is just a rough tape line at the moment, but if I make a cut on the hump from the "inside".


It will actually extend further down on the "outside".


Which means the "top" (nearest the cockpit) of the boot lid will not be a "straight" line that joins up across the humps.

But it does mean that the lines cutting across the hump should line up.
( Assuming I can cut them properly! )

- - - - - - - - - - - - - - - - - - - - - - - - - - - - - - -

Next, I turned my attention to the front, which is going to be a complete nightmare.

The more I look at it, the more I think I need to extend the body shell with the bottom edges of the bonnet.

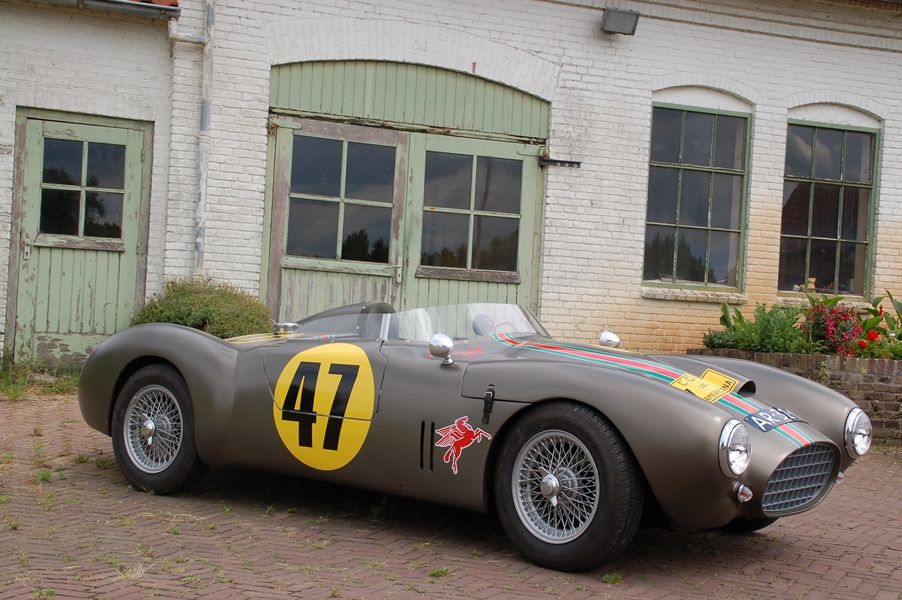
It looks like this approach has worked for Mac and any excuse to include a photo of Michiel car. :cool:


But this may turn out to be my most challenging project yet, as the distances from the body shell to the front wheels are different on both sides.


But it I can fix this issue, I will be able to sort out the bonnet shut line once and for all.

Plus I still need to copy Mac's cut & shut of the bonnet to cover the driver's side wheel and improve the gap between the nose and the headlight.


Then, depending on how the bonnet hinge works, the hose of the bonnet may be sitting up quite high at the front.


Which will leave gaping holes between my tyres and the wheel arches.


So there needs to be some wholesale butchery and major re-constructive surgery before the front end of the car looks halfway decent.

The only good news is there is an obvious place to extend the Spitfire bulkhead horizontally to meet the side of the body shell.


The final problem area on the bonnet is the nose, which Mac fixed by shortening it.


But I am hoping to get away with extending one side to match the other with some fibreglass filler.

At the moment, the top edge of the nose is a lot thicker than the bottom edge.


Which corresponds with the different depth behind the lip for the grille to sit against.

Again, much deeper at the top compared to the bottom.


This cardboard template for the grille I prepared earlier also highlights this.


So I try to improve the inside for the grille when I am playing around with the nose itself..

Overall, this was one of those days when the "To Do" list stretching out in front of me became a little bit overwhelming.

So I simply will start looking at the boot lid first and worry about everything else another day.

Until next time, take care, Paul. :)
25 Sep 2014, 6:47pm
Paul that boot lid will look great, i did consider something similar as i liked the look of the lid hinging from the two humps and a few points that sprung to mind at the time i considered the same was if you are using hinges then the mount points have to be level with each other otherwise the lid will not hinge up correctly, if that makes sense.

I can only try to explain what i mean by using a piece of cardboard laid flat on a table and hinge it up, both sides rise up parallel to the car sides, now place a block under one of the hinge corners to lift it higher than the opposite corner and hinge the cardboard up you will see that the sides now rise off to the lower hinge point which when viewed from the back of the car will look wrong if that makes sense.

Also check that there is room below the lid area marked out to fabricate a boot compartment i.e. no suspension obstruction etc other wise you might have a boot that when opened has a smaller compartment size to the lid.

I look forward to seeing how you acheive the boot lid along with the bonnet issues which are looming nearer on my build.
25 Sep 2014, 9:00pm
I have not been on your thread for a while Paul, and your car is starting to look amazing!

When its in primer, it looks as though its ready for the top coat, believe me, this is a cruel illusion!

The primer doesn't show you what's wrong with the surface, it hides all the crappy bits!

What shows up all of those bits, is some sort of shiny guide coat.

I've learned that much from my boot lid.

We both have an awful lot of rubbing down and flatting to do yet!

I am interested in your boot lid, and will follow that one Paul, good luck with it.

Scottie
26 Sep 2014, 6:09am
Swifty - Whilst I would have loved to have hinges on the boot lid, I know my limits. :icon_sad:
To be honest, just building a "simple" removable panel will be a test of my emerging skills.

I will double check the boot lid size, but it should clear the rear framework. :pray:
( As the "gap" I left in the passenger hump fixing brackets was meant to line up with that. )


I am hoping the boot lid will allow me to use the rear frame to support the back of the body shell.
The access it provides should allow me to add some plywood similar to the internal cockpit panels.
( I'll try to remember to take a better photo of the back end today. )


The boot access will also allow me to join the old Spitfire wheel arches and boot floor to the body shell.
Plus other construction jobs like wiring the rear lighting, attaching the petrol cap, etc.

I've also ordered a "T" Handle for the boot, which will not open it, just help me lift it off.
Although I still need to make a final decision on what fasteners to use to hold it in place.

- - - - - - - - - - - - - - - - - - - - - - - - - - - - - - -

Scottie - Cheers, and don't worry I could see you were busy "next door".
Which is why I have been closely following all the work required to paint your boot lid. :eek:

Your work, and re-reading Mr T's build thread have highlighted the ton of work still required.
However, just seeing the body shell in one colour was still a great morale booster.
Especially when I realise just how many other things are required to finish this build.

- - - - - - - - - - - - - - - - - - - - - - - - - - - - - - -

Right, things to do, before I can start working on the car today, cheers, Paul. :)
26 Sep 2014, 3:11pm
Another Inch...
A very frustrating day, where I couldn't get my free time and the weather to line up. :icon_evil:

Still, I managed to get a small bit done, so here goes.

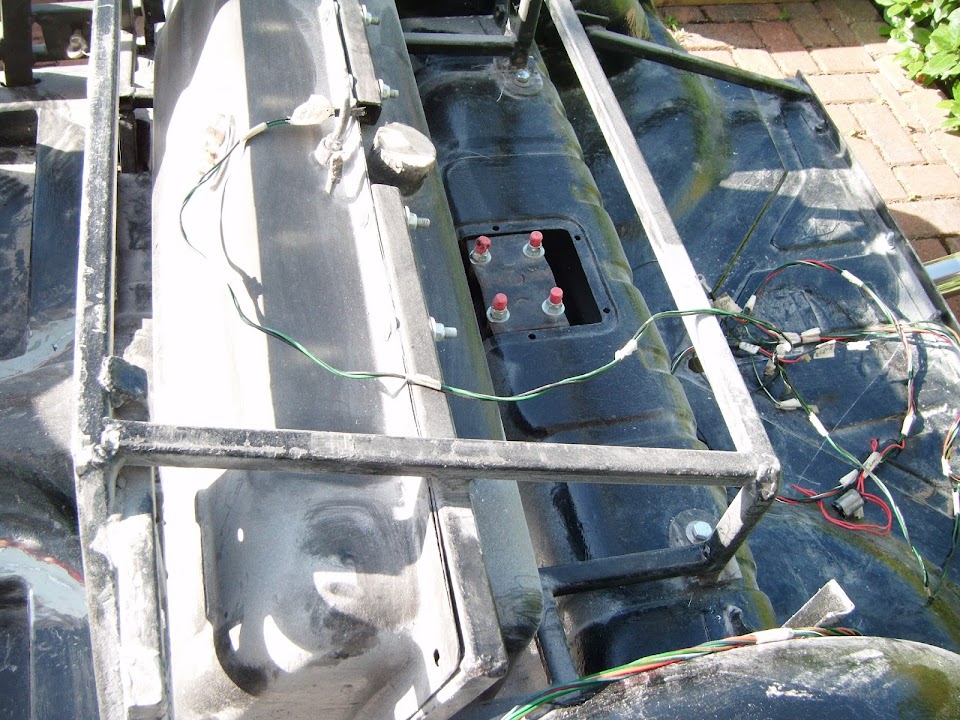
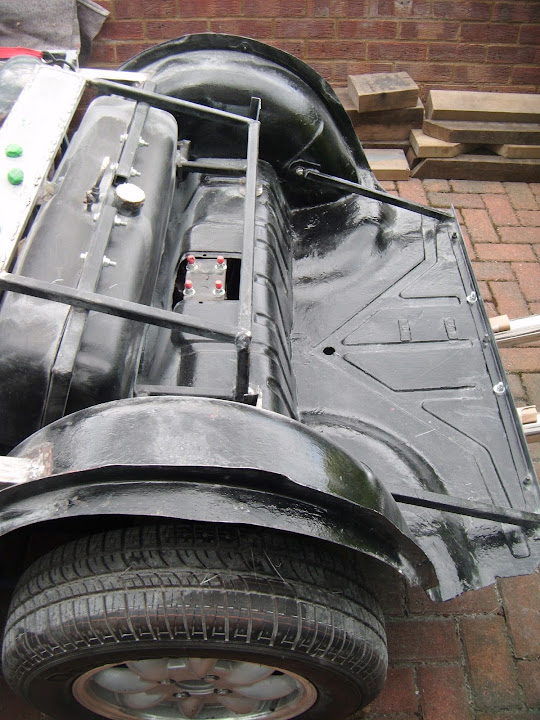
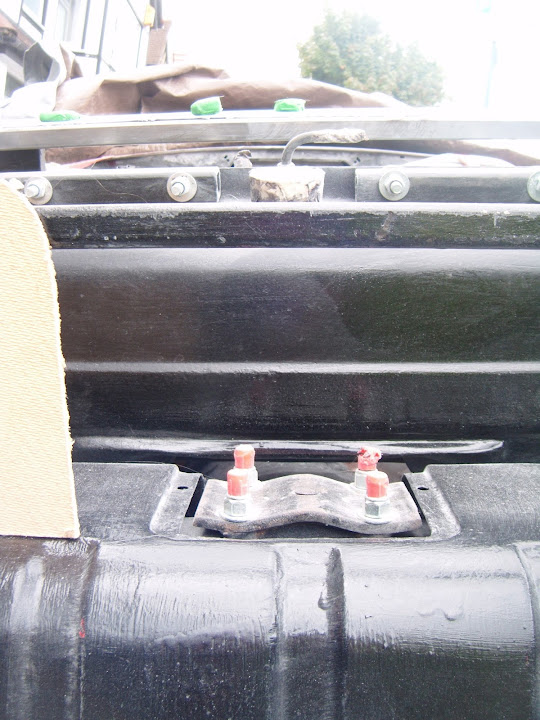
These are some better photos of the area I will have to play with under the boot lid.


The vague plan is to attach some sort of panel to this part of the rear frame.
( So I can fibreglass part of the rear body shell to it. )


The panel will not be as wide as this "off cut" and there will be access to the mounting bolt.


But it I have two narrow panels this will leave me access to the suspension & petrol pipe.


Leaving the space in front of the panel for boot storage.


I am not expecting to use the boot on a regular basis, which is why I hope fasteners will be OK.

- - - - - - - - - - - - - - - - - - - - - - - - - - - - - - -

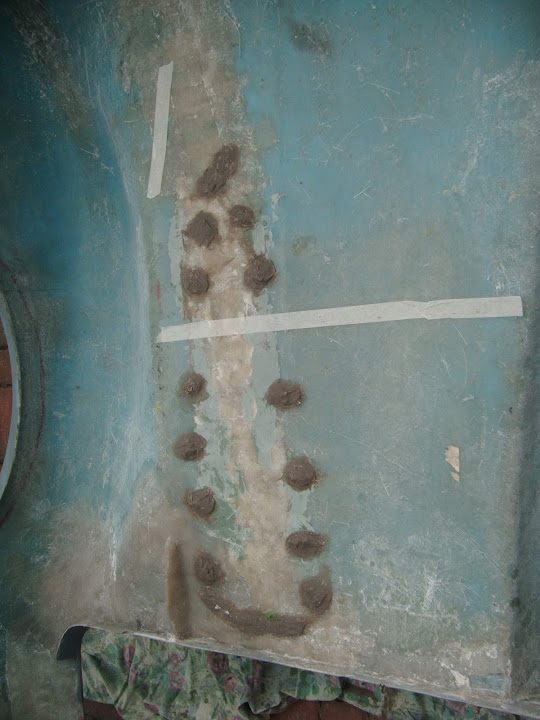
With the body shell upside down, you can see how the boot lid will line up with the gap between the hump brackets.
( I will take my time to measure & check the line before I make a final cut. )


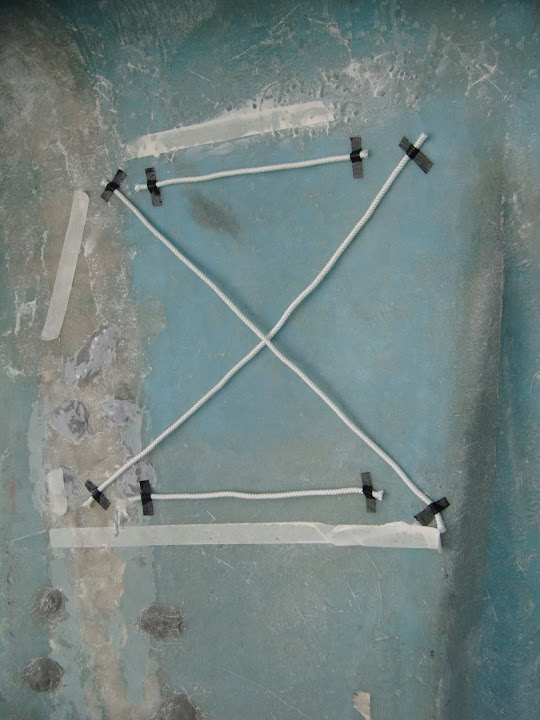
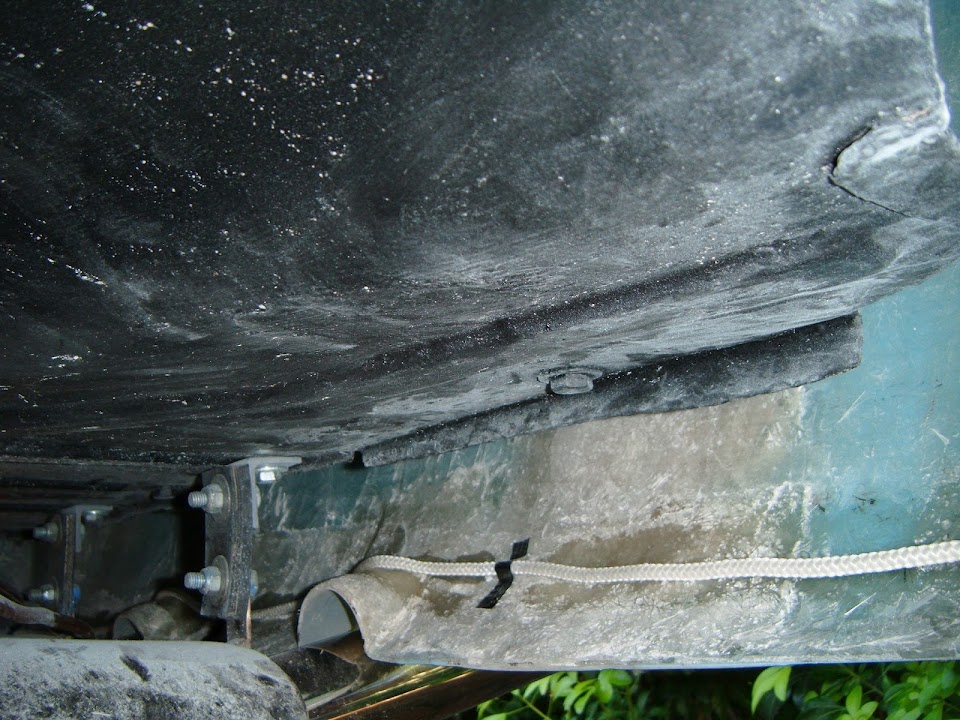
But before I start cutting I wanted to re-enforce the lid area, so I followed Oxford's rope trick.
( Which I'd also seen used in my fibre glassing book. )


And the bottom edge of the body shell.


Unfortunately, time was against me and I only managed to fibreglass the lid area.


The matting lifted up either side of the rope a lot more than I was expecting.

But I believe it is the curved fibreglass shape that provides the support.

Either that, or I have just made a complete mess of it. :rolleyes:

[color="blue"]Answers on a postcard to the usual address.[/color]

Busy family weekend coming up, so unlikely to get another chance to work on the car for a few days.

Which reminds me, I still have domestic chores to do, so I'd better go.

Take care, Paul. :)
26 Sep 2014, 6:45pm
Paul, Slow down or you'll be overtaking me! The rope trick will work if you want to add real strength though I would use foam pipe lagging cut in half and stuck down first with PU Adhesive then glass over the top of it, Will probably be doing so on my bonnet to fix the shape. Keep up the good work

Mac
30 Sep 2014, 7:29pm
Mac – Thanks for the fibreglass strengthening tip. :cool:

- - - - - - - - - - - - - - - - - - - - - - - - - - - -

Quick Update – I’ve not had much time on the car itself recently.

But I have been pulling all my DVLA information together following cbjroms recent experience.

Chris made a similar point to Micky1Mo about keeping it simple.

So I’ve made more work for myself by asking questions in an attempt to play by the book. :frusty:

My top tip for others is to just follow Chris’s example and fill the forms in.

I’ve been specifically told by the DVLA to supply some photos, so that is what I will do.

I hope to take the last photos I need tomorrow and then my application is going in.

Until then, take care, Paul. :)
1 Oct 2014, 3:56pm
All Dressed Up And Nowhere To Go...
Following on from yesterday, I have a contact name & case reference number at the DVLA linked to my registration number.

So I must supply the photos they asked for to support my V5C change application.

The final fly in the ointment is that both my invoices say I bought a Sammio Cordite.
( Deposit invoice with Sammio and balance invoice with Ribble. )

However, given the amount of grief this Cordite has given me, I want to use a different name.

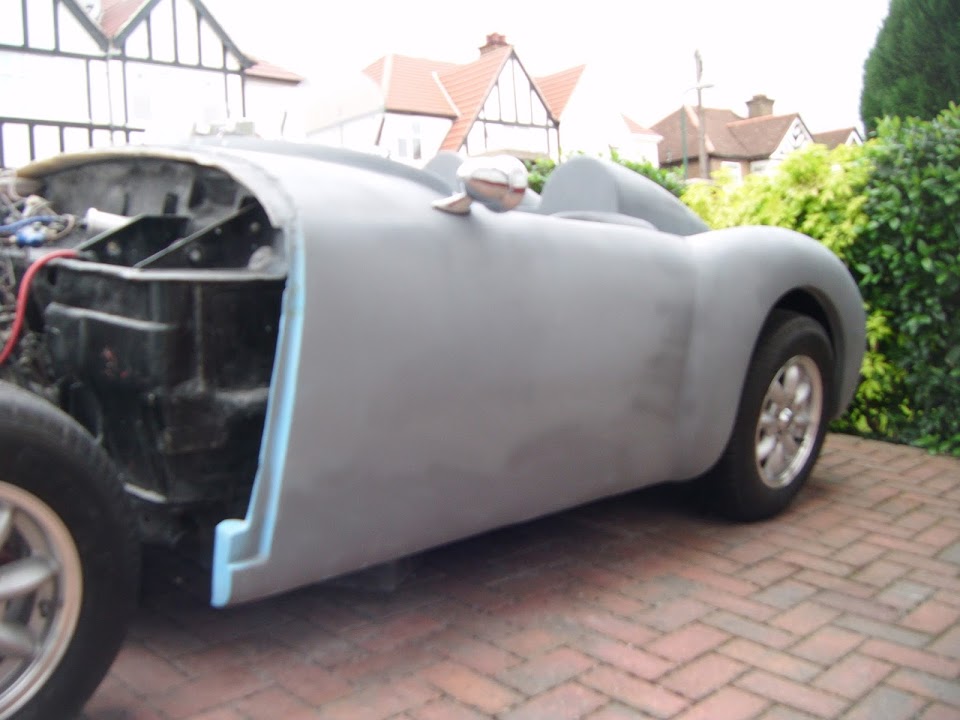
Also, the reality is that my Frankenstein build has created a unique 50s era body shell. :cool:

So far, I have pulled together 5 x A4 pages of photos covering the following:
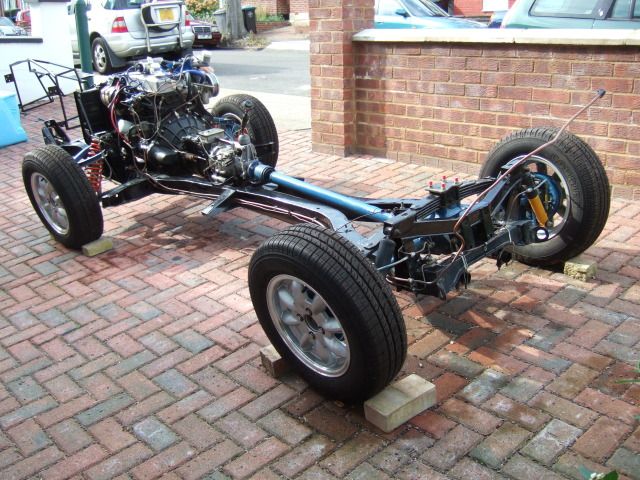
- Donor car purchase, delivery & driveway storage as it remains SORN
- Donor car strip down to reveal Triumph rolling chassis supporting my 14 DVLA points claim
- Rust repairs to the front chassis cross member (specifically requested)
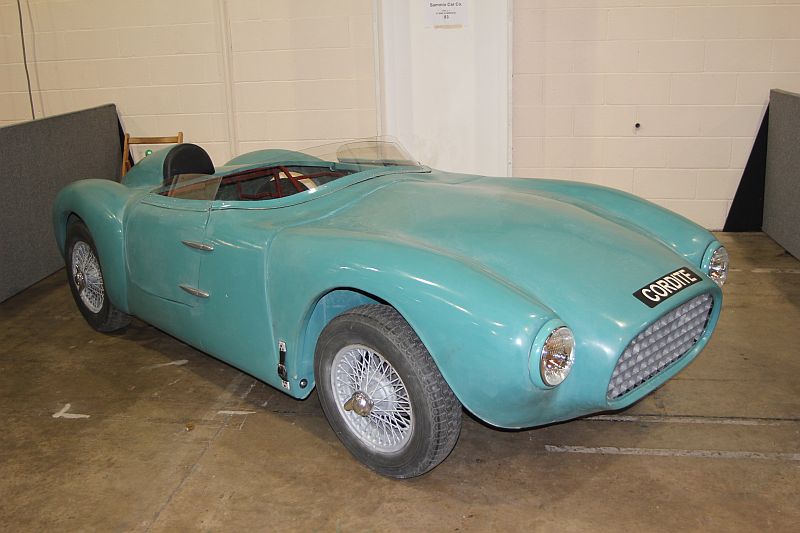
- Original Sammio Cordite demonstrator (linked to my supporting invoices)
- Converting purchased "Cordite" body shell to my "one off" "Frankenstein" body shell
( Sorry, I'd like to keep the new Model name to myself until I get it officially confirmed. )

Which leaves me just one page of photos left to pull together showing the new body shell on the Triumph rolling chassis.

So that was the main task for today and this involved putting some of my shiny things back on.

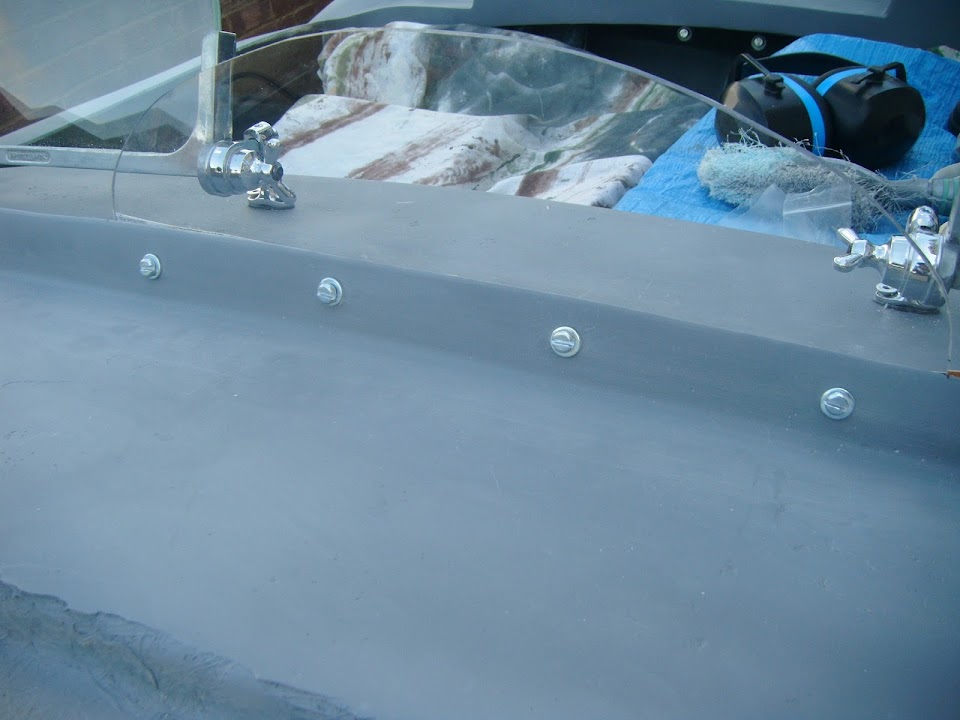
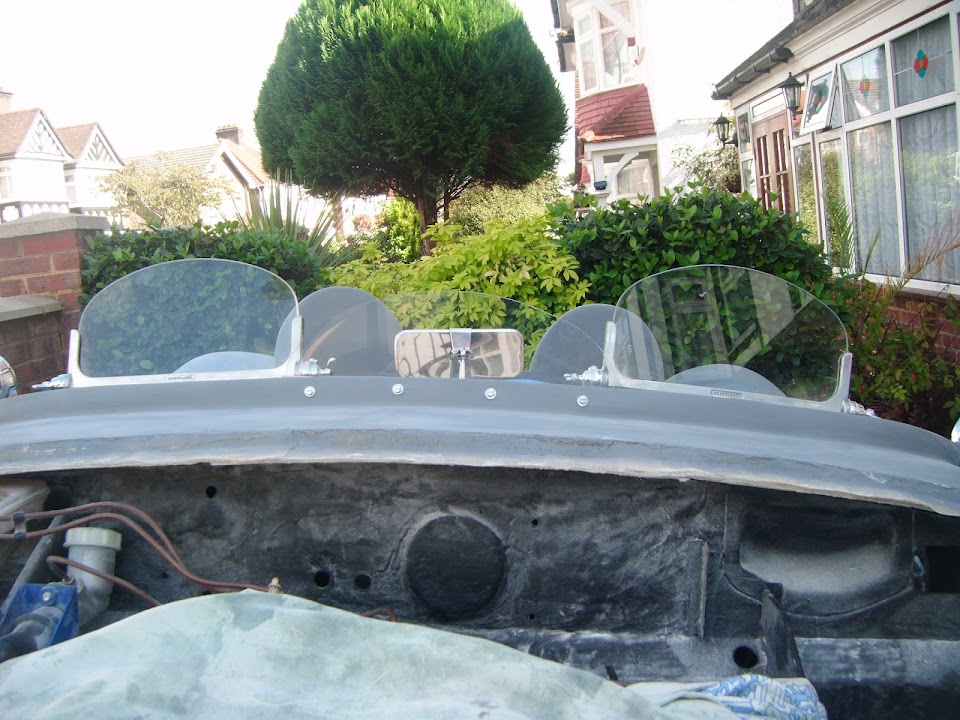
Also, as I have completed the bulk of the filler work on the scuttle I was now able to fit the perspex screen.

I gave it a very gentle trim along the bottom edge to match the basic contour of the scuttle.


Initially, I thought the size of the drill would determine where the holes in the perspex screen & wind break lip went.


Then I remembered that I would need to drill at an angle from the front of the lip so the bolt head would sit flat at the front.

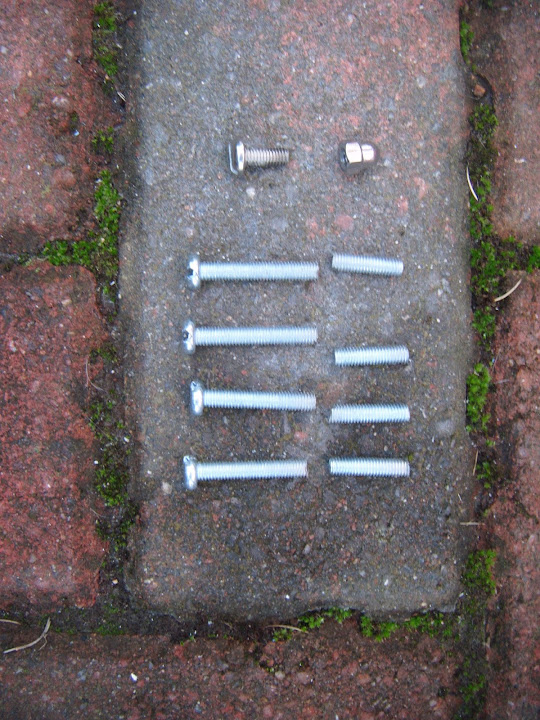
The bolts I had on the original Cordite side screens were too short, so I made an initial cut on some longer bolts.
( I'll fine tune the length later, so I can re-use the original "dome" nuts. )


With the holes drilled and the protective film removed, I could temporarily bolt the perspex into position.


I was in a bit of a rush when I made a cardboard template for a strip of metal to go on the "inside". :rolleyes:


So I will take my time and do this properly next time so the metal strip matches the lip and it will be painted to match the car.

Whilst it all looks OK from the front...


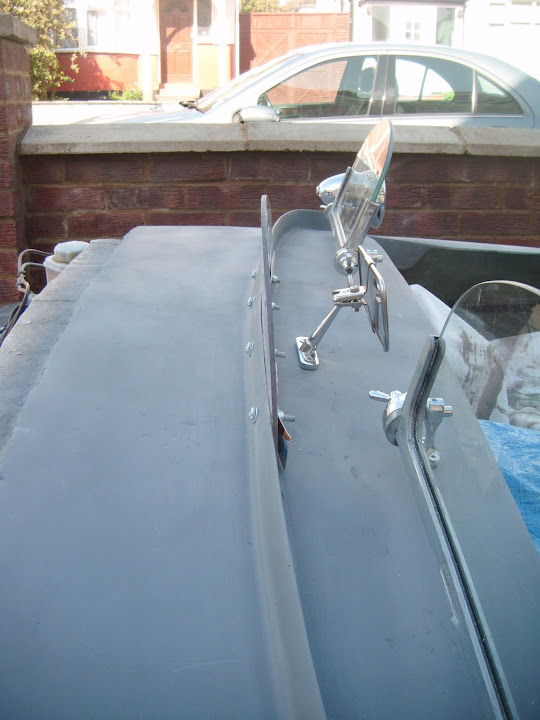
When you look at it from the side, you can see I have to re-work the profile of the inside of the wind break lip.


As the tightening up of the bolts leaves it at the wrong angle, but it will do for now, so I could take the final DVLA photos.

Although I had to empty the cockpit of this lot first, as it has become an extra storage area.


Then I had to brush and hoover the whole thing so it looked a bit more respectable.

Finally I could take these photos...

The first clearly shows the original Triumph Spitfire rolling chassis in place.


Which ties in to my claim of 14 DVLA points in this photo.


It also ties in with the photos of the repairs to the chassis's front cross member that I have been asked to supply.


Unfortunately, it was only when I down loaded all the photos that I noticed my side view photo was blurred. :rant:


I may have set a new record for the number of continuous expletives used without taking a breath when I saw this on my computer screen.

As by now, I'd already covered up the car for the night.

So I had to go back outside, take all the covers off again and take some more photos.

This time I came back in and downloaded them before I went back out and covered the car again.


In addition to showing the body shell in position, these two photos highlight that this is no longer a Cordite.
( No doors, different scuttle, different fly screen arrangement, twin humps, etc. )


I actually took another DVLA photo last night, after putting on the "super sized" rear number plate that came with my donor.


Again, there was a specific DVLA request to include my number plate in both a "before" and "after" photo.

So I hope that these three photos with the body shell "fitted" are what the DVLA are looking for.

As far as I am concerned, this is a permanent V5C change, as I no longer own a Triumph Spitfire.

So fingers crossed that everything is in order. :pray:

End of Part 1...
1 Oct 2014, 3:57pm
Other News:
When I finally get all the DVLA paperwork out of the way, I will return to building the boot lid.

And a couple of related ebay purchases have arrived in the post recently.

Currently, I am thinking about fitting this "T" handle to the boot lid.


It would stay "locked" and have no working function other than to help me lift off the boot lid.

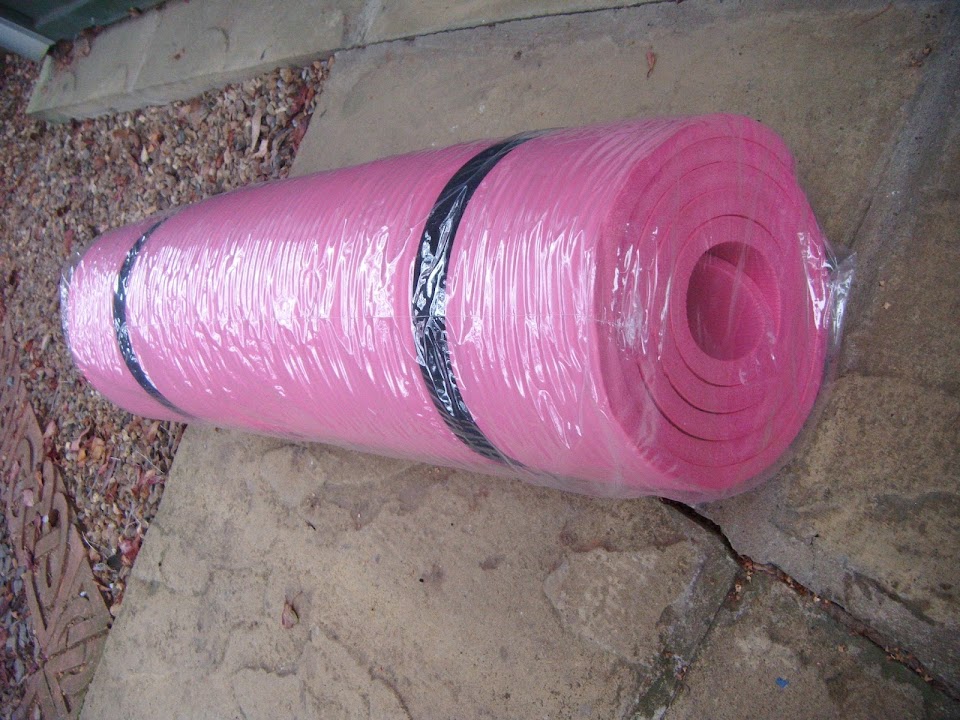
Following Oxford's use of a roll mat to help make a rain channel on his build, I bought a 1cm thick yoga mat!


Thankfully, it is just for the fibreglass mould and I will not be adding pink to my colour scheme. :icon_wink:

- - - - - - - - - - - - - - - - - - - - - - - - - - - - - - -

Colour:
Talking of colour, I have also committed to a final colour on my V5C changes application.

Again, I want to keep the final choice under wraps until I get a bit closer to painting.

Although, given how much preparation work is required, that is still a very long way off. :rolleyes:

However, I did see another hand painted car on "Rods 'n' Sods".


Total cost £35 including the brushes! :eek:

By his own admission you can see the brush marks because he hasn't flatted it back yet.

I must confess, this car supports my original light blue colour choice as it looks great. :cool:

But I have decided that another period colour will work better for Frankenstein.

- - - - - - - - - - - - - - - - - - - - - - - - - - - - - - -

Until next time, take care, Paul. :)
1 Oct 2014, 7:10pm
Looking good Paul I hope all goes well with the dvla as I can sense your angst each time you write about it.I wouldn't worry too much about hand painting your creation as if its not to your standard you can flat it or even do areas again, don't forget all cars used to be hand painted and the queens carriages still are.Have a trial with a foam roller but don't buy the cheap ones as the paint dissolves the glue and the foam falls off. Have you looked at [url]www.coachpainting.info[/url] . I was watching a chap foam roller a narrow boat today and the finish he got was superb, although granted that's his job, and don't forget when it all gets on top of you that your build and willingness to try new tasks has inspired me and no doubt countless others to crack on, I for one log on each day just to check if you have posted any progress. Ed.
2 Oct 2014, 2:57pm
Ed - Thanks for the link, I think I may have stumbled across it before when looking into hand painting.
At the end of the day, I'm aiming to end up with something that looks like a 60+ year old race car. :pray:

I'll certainly be very happy when my V5C is sorted out.
Even if I have to supply photos that other people don't, this is still cheaper than hiring a trailer for an inspection.
So I'd really like to get this out of the way now, before the rules change again.

- - - - - - - - - - - - - - - - - - - - - - - - - - - - - - -

It's In The Post...
I can't believe just how much work I have had to do to prepare my case for the V5C change.

Especially after Chris just filled the forms in. :rolleyes:

But I am on the DLVA system for trying to play by the rules and at least it is all done now.

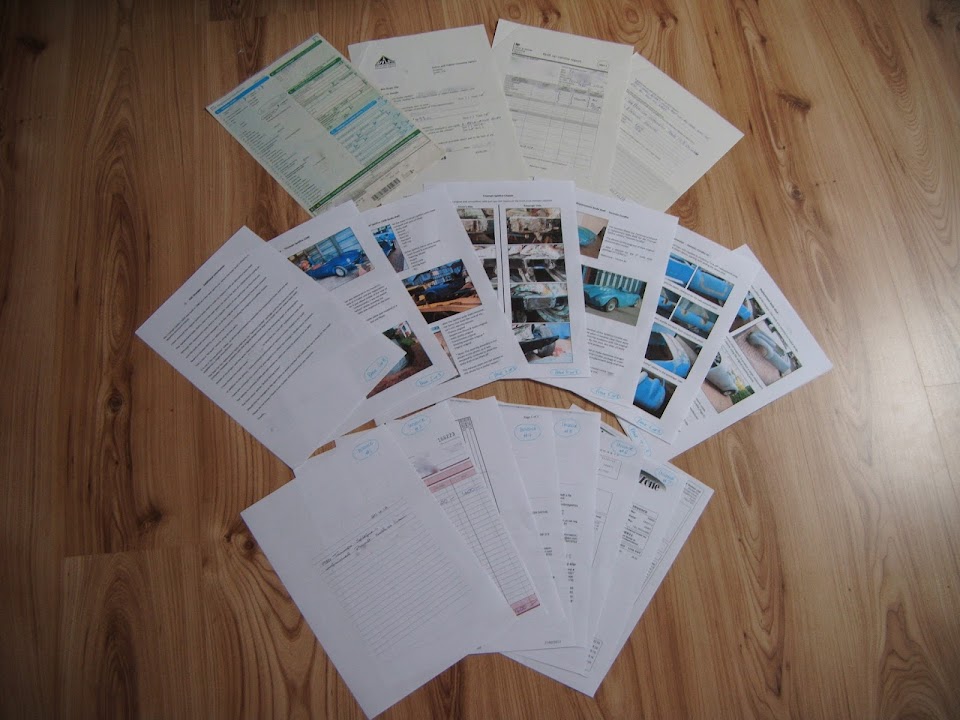
Obviously I have blurred out the personal information, but here is my "case".


V5C
V894 Reply Slip
V627/1 Built up vehicle report
8 pages of additional information & photos
8 invoices covering donor, Cordite & other parts
( To support my argument that this is NOT a kit from a single supplier. )

Now I just have to wait to see if they are happy with what I have done.

At least I can now get back to working on the car itself.

Cheers, Paul. :)
2 Oct 2014, 9:29pm
Dont think you will have a problem Paul .I did similar preparation but not as in depth as you for the DVLA and it all came back fine. Just be prepared to wait mine took five weeks
good luck
Dave :biggrin:
3 Oct 2014, 12:24pm
Dave - I remember you posting about the need to send photos, which tied in with what the DVLA told me to do.
I actually don't mind waiting for the V5C at this stage of the build, provided it gets changed at some point.
But I would have gone mad if I couldn't apply until the project was finished and then I was delayed waiting for paperwork.

It would be great to see a few photos of your build if you ever get the chance.

- - - - - - - - - - - - - - - - - - - - - - - - - - - - - - -

Gran Torino
Not sure if you have seen this film with Clint Eastwood in it.

But the main character had a garage full of tools that he had accumulated over a long working life.

When I first saw this film, it reminded me of the garage / man cave that my mum's friend, Michael, had.

Back when I was a teenager, with my first 125cc motorcycle, Michael always had anything I needed and was happy to help.

A few years back he retired and went to live in Ireland, yet he has always taken a keen interest in my build.

He & his wife are over in the UK at the moment staying with my mum and he is due to see the car for the first time today.

So I've left all the shiny parts on the scuttle for now.

And this morning I put the dash back on to give a better impression.


I must confess I really like how well the scuttle lip works with the "recessed" dash board. :cool:

I just need pick something suitable to "fill in" the gap above the dash.


It is funny how just seeing roughly how things will look can lift the spirits.

I know there is still a long way to go, but I do have hope.

Cheers, Paul. :)
3 Oct 2014, 1:08pm
Looking like a classic, now.
3 Oct 2014, 6:44pm
Oh i do like that recessed dash look!!! I'm toying with how i'm going to do mine atm and that has to be an option now i think! (idea duly pilfered! :) )
4 Oct 2014, 4:32pm
Gary - Cheers. :cool:
I'm hoping the dash will really look the part when all the dials & switches are in place.

Dave - Well I have stolen more than my fair share of ideas from other builds. :icon_wink:
I'm just glad that my decision to use an old Spitfire bulkhead has worked out so well.
Especially as I was effectively making it all up as I went along. :rolleyes:

- - - - - - - - - - - - - - - - - - - - - - - - - - - - - - -

Just too many other things going on at the moment to get any sort of time on the car.

Boot Lid Prep.
I had to remove the masking tape acting as my boot lid guide in order to take the DVLA photos.

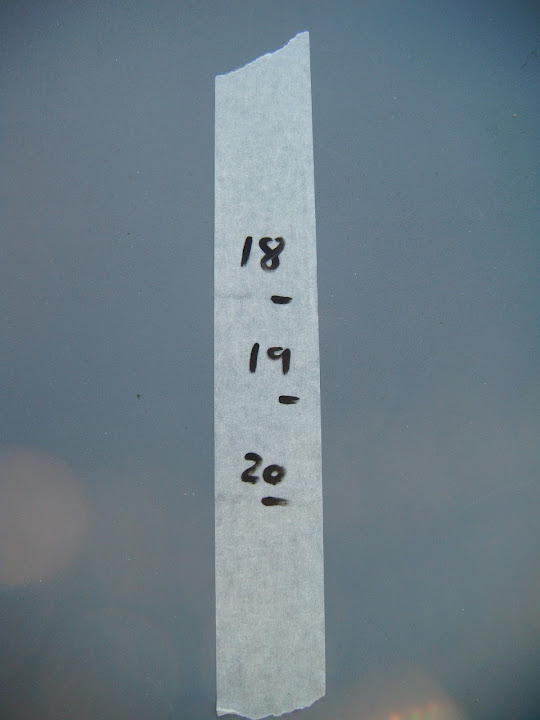
So I re-measured the distance from the rear cockpit lip & marked it up in one inch steps.


As it has dawned on me that I need to really check how the cut will work or I am going to make a mess of it.

Going back to previous photos, the general idea is something like this.


I had left a gap in the fixing brackets to allow for a "straight" cut between the humps.


But the humps will actually be cut at an angle, again something like this.


So I need to make sure that when I mark out and cut this angle that it will clear the "tops" of the fixing brackets.

In addition, the rain channel needs to finish in front of the cross bracing I've already added.


So I am going to take my time and make absolutely sure I am cutting in the right place before I start.

More Double Checking:
While the body shell is still fitted, I had a quick check on where I had put the rope on the rear edge.


Not a great photo, but you can see the Spitfire boot floor is at a much higher position, so there will be no clearance issues. :cool:

So the next time the body shell is off I can get on with adding some matting over the top of the rope.

Note: The boot lid will also provide access fibreglass the boot floor to the body shell after it has been bonded into place.

That's all for now and I know it isn't much. :rolleyes:

Cheers, Paul. :)

PS
My mum's friend really liked the car when he came around to see it yesterday.
He couldn't believe how much work I have already had done, or for that matter, the amount of work I still have left to do!
4 Oct 2014, 5:54pm
Boot lid

[IMG][/IMG]
5 Oct 2014, 8:53am
Scottie - Thanks for taking the time & trouble to mock up an alternative boot lid shape for me. :cool:

Believe it, or not, but I actually posted something similar myself way back in April 2013!


OK, I cheated and looked that photo up this morning, as it is scary how long this build has taken. :icon_sad:

Without a doubt, a lid that avoided the humps would be miles easier to build.

But it would really restrict the access to the various bits that will be "locked" in between the rear shell and Spitfire arches.


So unfortunately, it is the "hard road" choice for me (again :rolleyes: ).

The only bright side is that I think the "through the humps" cut will make it appear more like a racing car. :pray:

But we will see, cheers, Paul. :)

PS
Depending on how the rest of my day goes, I might make the first cuts late this afternoon.
5 Oct 2014, 9:46am
Good luck with it Paul!

I understand the reasons for the "hard" choice, as I have done exactly that several times.
When it comes out right (and it WILL) its really worth the extra effort. Go for it Paul!
5 Oct 2014, 10:17am
Well I am sure you will pull it off and create a boot opening incorporating the lower part of the humps, it will certainly look in keeping with the period race car look you are after. Good luck.
6 Oct 2014, 2:56pm
Scottie & Froggyman - Thanks for the vote of confidence chaps. :cool:
I'll certainly do my best.

- - - - - - - - - - - - - - - - - - - - - - - - - - - - - - -

Well, it looks like summer is finally over. :icon_sad:

As it is too wet to work on the car today, I have bit of spare thinking time...

Moon Rover:
Back in the Spring, I was really hoping to have reached the working 'Moon Rover' stage by now.
But in the end, I decided that the major body shell "cut & shut" work should take priority.

However, I have made significant progress towards this target over the last six months.
- The Spitfire bulkhead repair work was finally finished.
- I made a support bracket for my twin exhaust pipes.
- Repair work on the Spitfire rear wheel arches was completed.
( Which included extending the access panel over the lowering block. )
- The rear frame work was modified to fit over the Spitfire rear arches.
- The rear frame work was also modified so it could be bolted to the Spitfire bulkhead.
- The fuel & brake hard lines were re-routed and fixed to the chassis.
- The chassis had four extra holes added to allow the framework to be bolted into place.
- The two lowered floor pans have been welded to the rear frame work.
- The rear framework has been welded to the Spitfire rear arches.
- The original bumper "brackets" were removed and the front chassis cross member was repaired.
- A "hand support" panel was added to the rear frame between the two humps.

So on that positive note, I'll worry about all the work left to do another day. :icon_wink:

- - - - - - - - - - - - - - - - - - - - - - - - - - - - - - -

Sammio Spyder vs. Sammio Cordite:
Micky1Mo intends to re-launch the Sammio Spyder as a single body shell in Herald/LWB & Spitfire/SWB form.

This has sparked some debate in other parts of the forum about the merits of the original Sammio offerings.

Just so there is no mis-understanding, I want to make it clear here that I loved the original Sammio Spyder. :cool:

I also agree with Mr T, DaveCymru & others who say that the Spyder could be built into a lovely car with a bit of effort.

So I don't want any of my frustrations with the Cordite model to "rub off" on the Spyder in any way.

The truth is that if I had actually ordered a Spyder, I would be on the road by now and able to join the "Norfolk convoy".

I decided to mention this now, after I saw Swifty post this photo on his build thread last night...


Attempting to mount my own pedals lead me to open a whole can of worms concerning the Cordite design.
( Having gone back to check my old photos, this was actually 2 years ago, late Sept. / early Oct. 2012. )

The good news is that my Frankenstein build approach has made all of these problems go away.

In addition, it has actually worked out miles better than I could ever have hoped. :cool:

- - - - - - - - - - - - - - - - - - - - - - - - - - - - - - -

Bonnet Hinge Arrangement:
Obviously I have also been following Mac's build thread with great interest to see how his bonnet hinge would work.

Here it is opening part of the way (and more about that later).


In order to achieve this, Mac has installed his hinge brackets at the base of the bonnet nose opening.


Which means I will have a bit of a problem copying him, as my "factory" hinge bracket are in the middle of the nose opening. :rolleyes:


My fear is any attempt to remove the metal "hoop" bonded into the nose will end up destroying the bonnet itself. :icon_sad:

So I need to look into the options for adding extra brackets to the bottom of the hoop, or some other arrangement.

It also seems that the Spitfire's front chassis cross member has become the equivalent of the Herald's "rear out riggers" on a Spyder build.

I pulled a couple of photos from the red Ribble Navigator's ebay advert.


I must say I do like the front indicator set up on this car, although I will still use my classic Mini indicators.

But it is the photo with the bonnet up that I have been studying the most.


You can see that the ends of the chassis appear to have "fallen off" which helps the bonnet tilt fully.

It also looks like the body shell area below the nose opening has also been trimmed to improve clearance.

So I will wait until I have my new V5C before I look very closely at how my bonnet hinge will work.

Although a final decision on the hinge arrangement will allow other areas to be finalised too:
- Does the radiator need to be lowered, or will the bonnet clear it as it currently sits?
- Should I cut off the lower rear sections of the bonnet and use them to extend the sides of the body shell?
- Will I need to reduce the size of the front wheel arches to match my wheels?

- - - - - - - - - - - - - - - - - - - - - - - - - - - - - - -

So as my 3rd winter of building outside approaches I feel I am in a pretty good position.

Obviously there is a ton of work ahead of me, but lots of good progress has been made in a number of areas.

So until I have some actual building work to report, take care, Paul. :)