MadaboutKitcars

This is a read-only archive of the old Madabout Kitcars forum. New posts and replies are no longer possible, but every thread is still here to browse and read.

Royale Sabre - Take two!

24 Feb 2013, 12:28am
Hi Peter
I believe the MGB was upgraded using a remote servo and ebay have a few entries for 'MGB brake servo'. Might be a bit cheaper than the one you found but may only be single circuit. Further to JG's comments, you could even put the headlights in the front wings - Morgan style!!! However, I really like the Sabre as it was designed.
24 Feb 2013, 10:57am
Sorton wrote:
Hi Peter
I believe the MGB was upgraded using a remote servo and ebay have a few entries for 'MGB brake servo'. Might be a bit cheaper than the one you found but may only be single circuit. Further to JG's comments, you could even put the headlights in the front wings - Morgan style!!! However, I really like the Sabre as it was designed.


Hi Sorton,
Thanks for the tip. I've had a look at those and yes, I'd need two servos for the dual circuit brakes which is a requirement for the IVA (and good sound engineering anyway :wink:)
They look a bit bulky and have to be mounted at an angle of 25-45 degrees which adds to the space issues. (the Iruna seems to have bleed valves to get the air out)
On styling, I think you and John have watching the Sammio/Tribute threads too much :lol:
I'll be sticky rigidly to the kit design i've bought!!

:smile:.......peter
25 Feb 2013, 8:49am
peterux wrote:

There is also one fundamental problem and that is the bodywork is still jacked up on 40mm blocks of wood. My original plan was to carve up the gearbox tunnel to lower the body but if I do this the servo will certainly not fit.
If I do fit this type of engine I will need to modify the chassis to lower the engine and gearbox by about 45mm.


Could you not just lower the engine/gearbox at the back? Comparing the chassis to the Sportster I can see you have a crossmember towards the rear of the box which I guess is the main problem? As I remember (haha - few years since I crawled underneath) the Sportster is a peripheral chassis with little in the way of crossmembers allowing the back of the box to be quite low and supported by the transmission tunnel on a bracket.

Cheers, Robin
25 Feb 2013, 2:05pm
MartinClan wrote:
Could you not just lower the engine/gearbox at the back? Comparing the chassis to the Sportster I can see you have a crossmember towards the rear of the box which I guess is the main problem? As I remember (haha - few years since I crawled underneath) the Sportster is a peripheral chassis with little in the way of crossmembers allowing the back of the box to be quite low and supported by the transmission tunnel on a bracket.

Cheers, Robin


Hi Robin,
yes, I could drop the back end of the gearbox down a bit but can't go too far or the propsahft will foul on the crossmember. But i'll end up with an extreme angle difference between the gearbox output flange and the diff input flange. All I've read on propsahft theory is the difference should be less than .5 degree and I'm already at 1 degree.
To compensate I would have to rotate the diff casing so it's pointing up at the front, not impossible, but quite difficult to do.

You'll have to come down and take a look... :eusa_think: :eusa_think:
25 Feb 2013, 6:58pm
peterux wrote:
Hi Robin,
yes, I could drop the back end of the gearbox down a bit but can't go too far or the propsahft will foul on the crossmember. But i'll end up with an extreme angle difference between the gearbox output flange and the diff input flange. All I've read on propsahft theory is the difference should be less than .5 degree and I'm already at 1 degree.


Peter

Is the limitation due to the rubber doughnut? The guy who made my prop-shaft up told me not to fit the BMW rubber doughnut as they will shred if there is any mis-alignment. I think you will be fine with any amount of angle that you are likely to create.
Have a look at lorry U/Js the next time you go passed one - they usually have an angle, and are subjected to huge torque loads without a problem.

Have a word with a U/J supplier before writing off the idea of running your prop at an angle.

Mike
25 Feb 2013, 8:20pm
Mike wrote:
Peter

Is the limitation due to the rubber doughnut? The guy who made my prop-shaft up told me not to fit the BMW rubber doughnut as they will shred if there is any mis-alignment. I think you will be fine with any amount of angle that you are likely to create.
Have a look at lorry U/Js the next time you go passed one - they usually have an angle, and are subjected to huge torque loads without a problem.

Have a word with a U/J supplier before writing off the idea of running your prop at an angle.

Mike


Hi Mike,
I meant to add a link in my last answer.....
http://www.vibratesoftware.com/html_help/2011/Diagnosis/Propshaft/Propshaft_Angles.htm#Specifications

It seems that you can have large working angles but the difference between the working angles must be < 1 degree.
I wasn't planning on using a rubber doughnut so that was not affecting my thinking.
I'll try dropping the back of the gearbox and see if that gives me enough clearance. Ian's already mentioned that the M50 runs in the BMW at an angle pointing down at the back, so that should not be a problem.
But apart from the price, I am getting quite keen on the Iruna servo option.
I hope to try some more options later this week.....
1 Mar 2013, 5:23pm
Week 26 update.

Not a lot to report on this week due to being busy with other things this week.

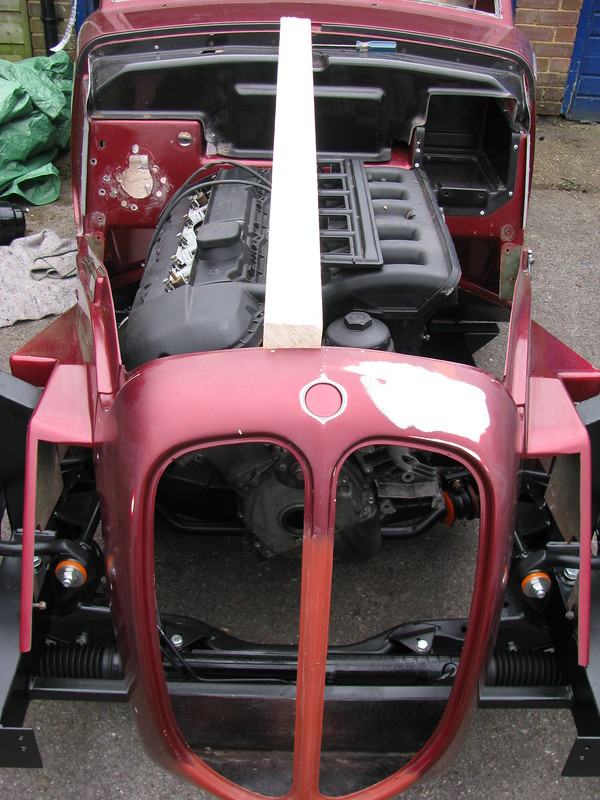
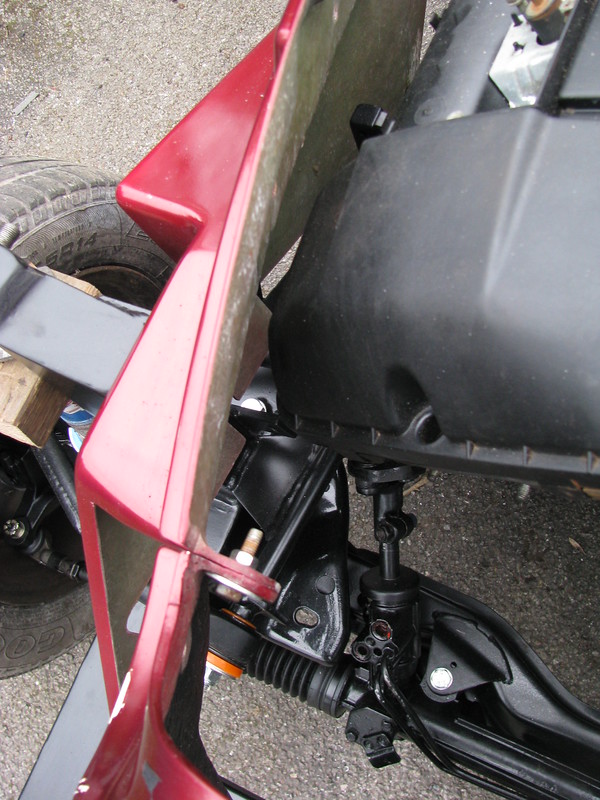
I did put on the engine compartment sides, the heater cover thingy and the front nose to check for engine clearance issues.


Engine clearance by marlinpeter, on Flickr


Engine clearance by marlinpeter, on Flickr

And I'm please to report there are no new issues!

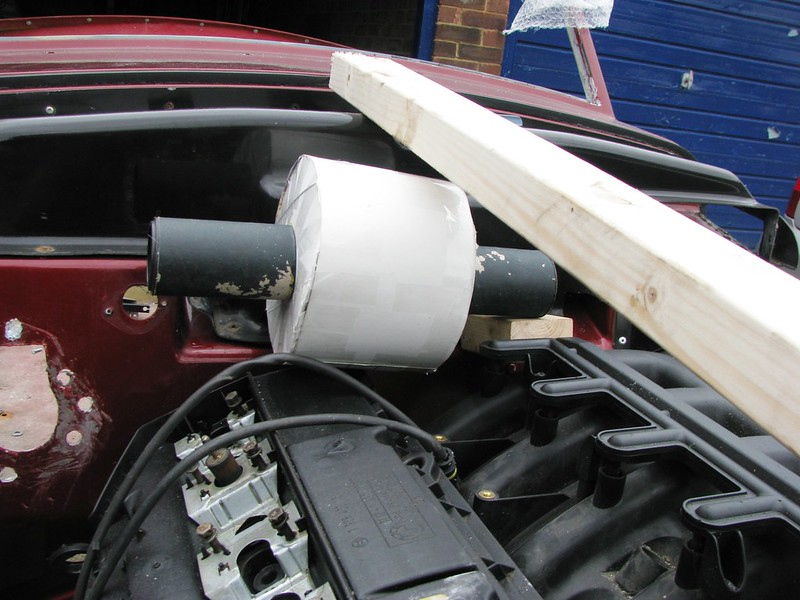
I also made up a cardboard mock up of the Iruna brake servo, thanks to my Blue Peter training.

I'd like to mount it up near the master cylinder but space is a bit tight....


Possible sevo location 1 by marlinpeter, on Flickr

....but it will easily fit below the inlet manifold and it can sit on the chassis. And probably easier to bleed the brakes in this position as well.


Possible sevo location 2 by marlinpeter, on Flickr

Not had any time to try out any new engine mounting positions and the angle grinder is locked away for now :wink:


:smile:.......peter
14 Mar 2013, 8:20pm
Week 27 and 28 progress report.

Week 27 saw no physical progress due to some higher priority indoor DIY jobs and some horrible weather outside. But it did give me some thinking time to weigh up the options of modifying the chassis or the GRP bodywork.
In the end I deicide to have a go at the bodywork on the basis that I could put that back together again if it didn't work.

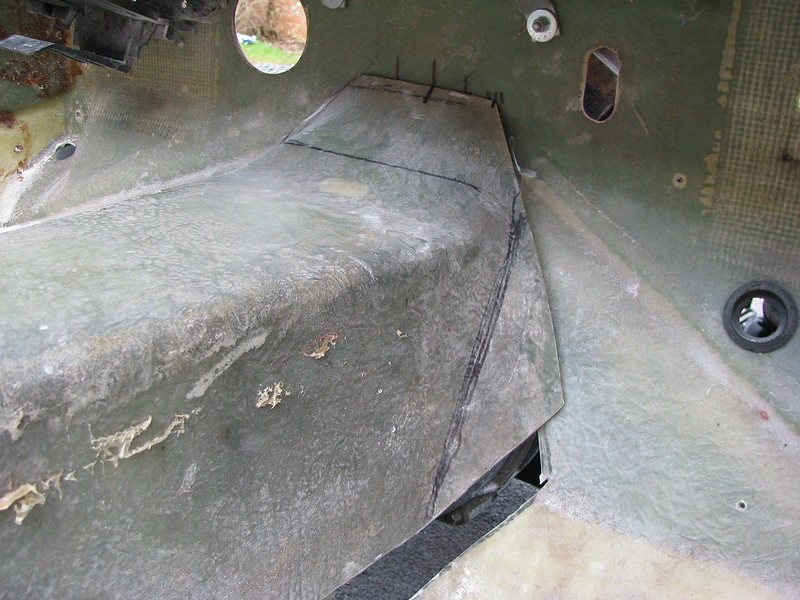
So yesterday I did some thinking and drawing.....the pen marks were to enable me to think about which cuts would be the best and enable me to visualise the different options.


Gearbox tunnel mods by marlinpeter, on Flickr

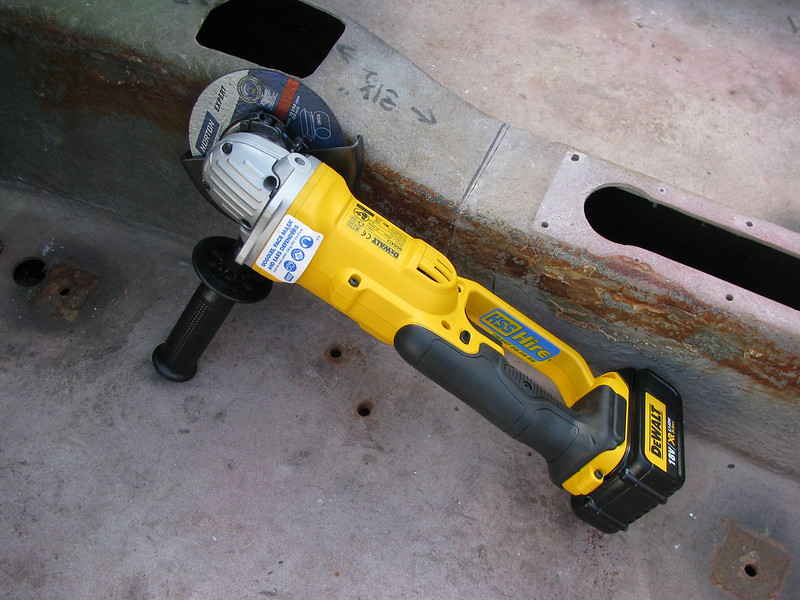
I had a go at cutting with a hand held hacksaw blade but quickly decided I needed something bigger. So I went and hired this little beauty. Only £14.90 for a days hire and it was brand new!


Battery Angle grinder by marlinpeter, on Flickr

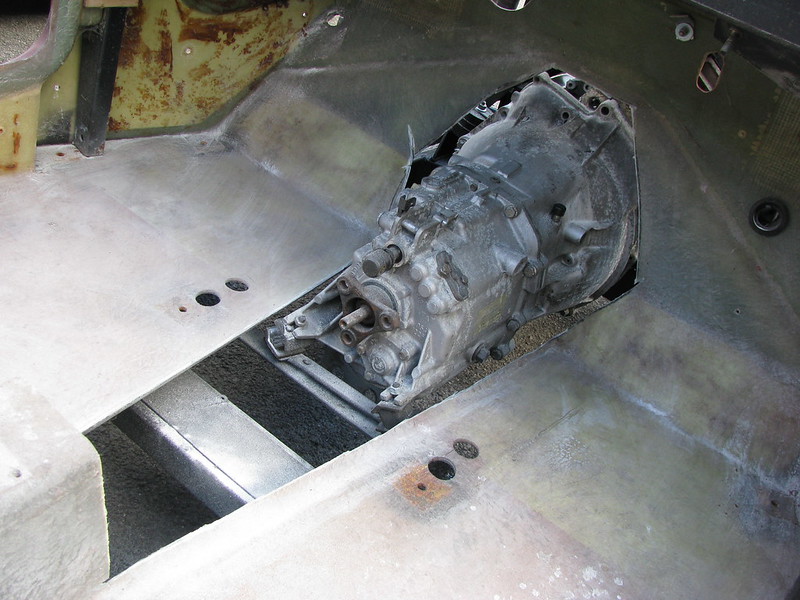
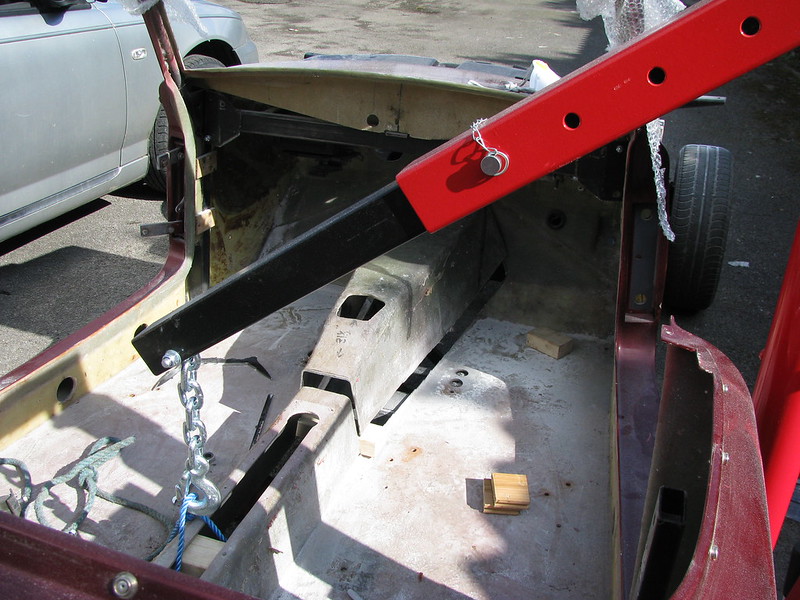
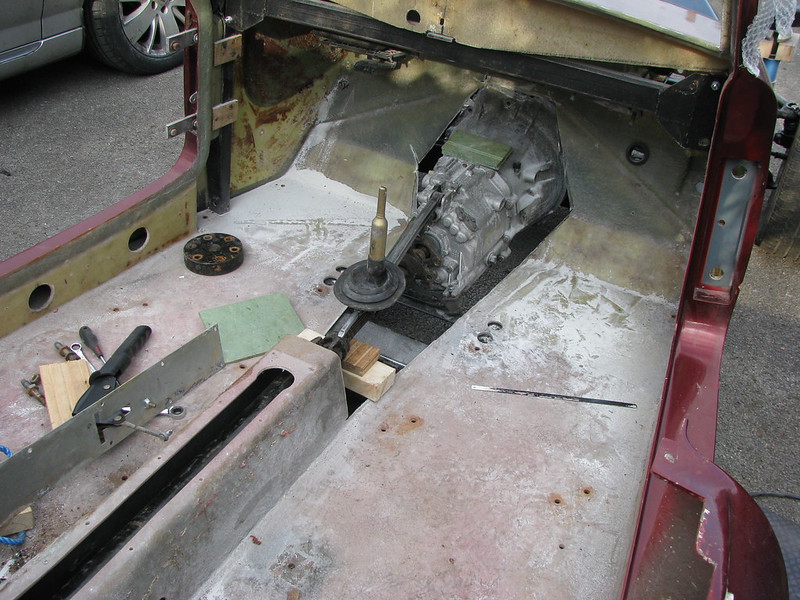
With some fully charged batteries and some nice spring sunshine it didn't take very long to have the tunnel cut out allowing me to finally lower the bodywork back on to the chassis.


Gearbox tunnel mods by marlinpeter, on Flickr

Which left me this....

Gearbox tunnel mods by marlinpeter, on Flickr

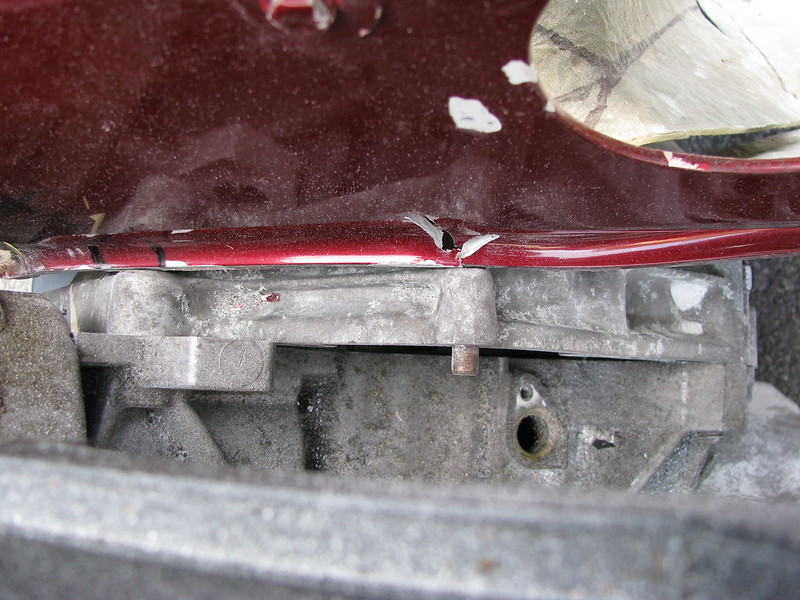
Here you can see my body lifting technique required to get the final trimming for clearance.

Gearbox tunnel mods by marlinpeter, on Flickr

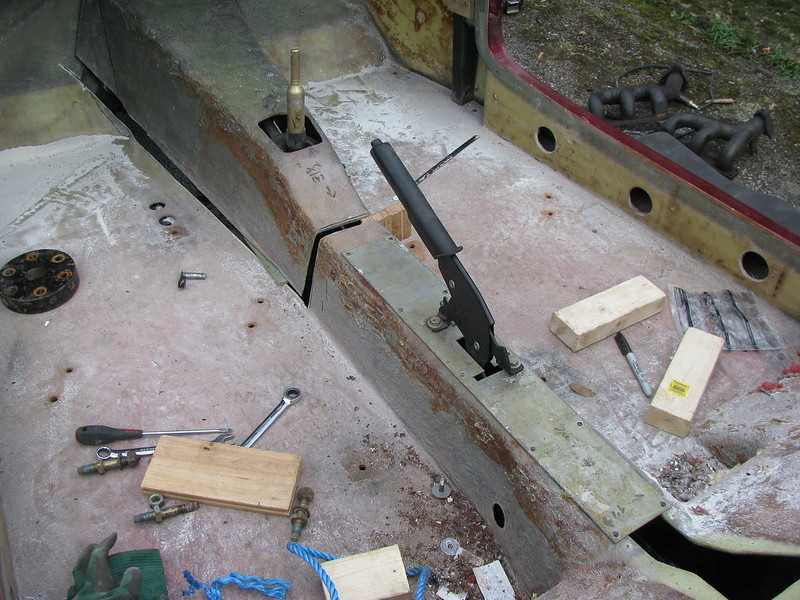
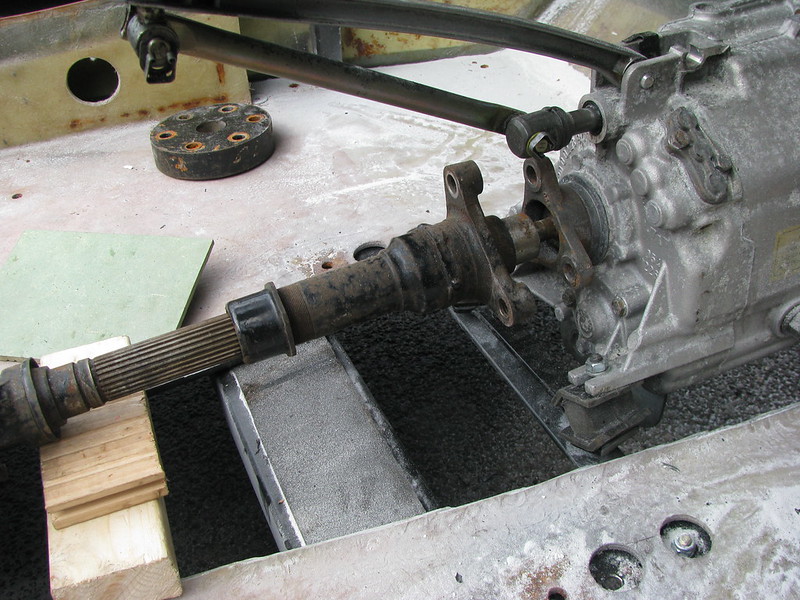
Next I installed the propshaft and gear change mechanism to check for any issues. The gearbox mechanism will need to be shortened by about an inch.


Gearbox tunnel mods by marlinpeter, on Flickr

I also checked that the propshaft didn't foul on the handbrake.


Gearbox tunnel mods by marlinpeter, on Flickr

I originally envisaged just raising the tunnel parallel with the floor but then realised I could mount it at an angle making this joining point much smoother and simpler.


Gearbox tunnel mods by marlinpeter, on Flickr

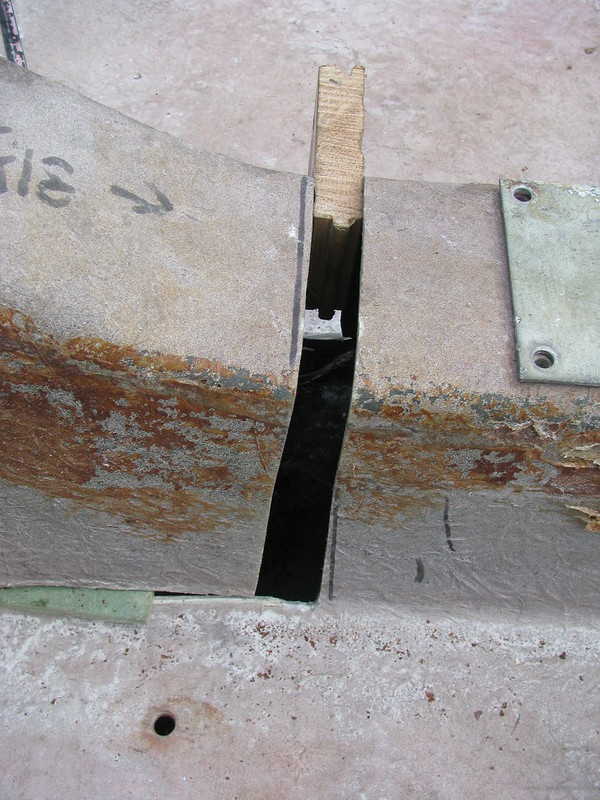
I think I'm going to leave those bits overlapping to increase the strength.


Gearbox tunnel mods by marlinpeter, on Flickr

....to be continued........
14 Mar 2013, 8:34pm
............Week 27 and 28 progress report (continued.....)

Clearance at the bulkhead is very tight so I think I'll have to trim this flange back a bit. This is looking down at the back of the engine.


Gearbox tunnel mods by marlinpeter, on Flickr

In the next shot I'm checking the clearance of the gear mechanism to the propshaft.


Gearbox tunnel mods by marlinpeter, on Flickr

The propshaft will need lengthening and a different gearbox mounting plate is required. This was not unexpected.


Gearbox tunnel mods by marlinpeter, on Flickr

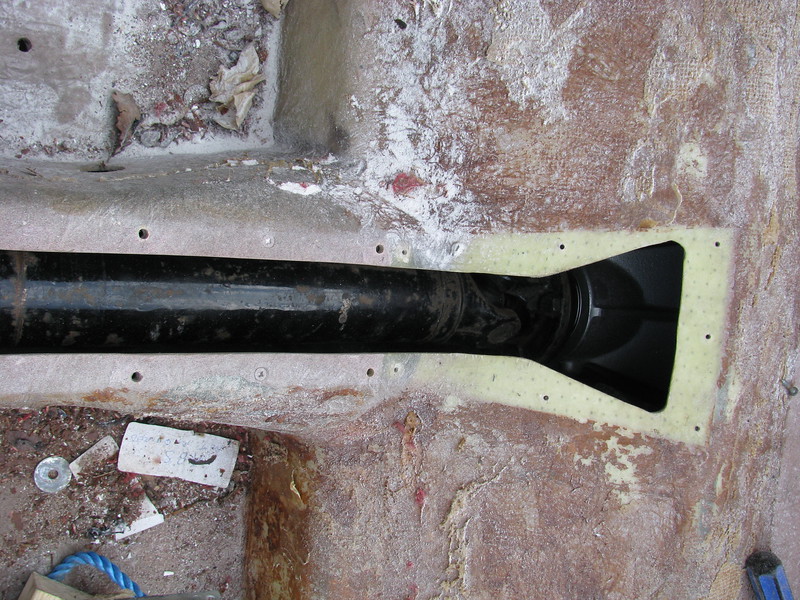
No issues at the diff end of the propshaft.....


Gearbox tunnel mods by marlinpeter, on Flickr

Here is an overall shot with tunnel removed. It's tempting to make the tunnel removable for servicing the finished car but I'm worried there might be too much flex in the body?


Gearbox tunnel mods by marlinpeter, on Flickr

I've got a few more things to check (like the dashboard!) but I think it's going to fit!

Now.....how do you get rid of the smell of polyester dust from your nose?? :lol:


....:smile:....peter
14 Mar 2013, 9:39pm
Nice neat work, and fibreglass is reassuringly thick :thumb:
15 Mar 2013, 4:27pm
peterux wrote:
............Week 27 and 28 progress report

Here is an overall shot with tunnel removed. It's tempting to make the tunnel removable for servicing the finished car but I'm worried there might be too much flex in the body?


You could reinforce the floor by glassing in some ally box sections (or angle sections) around the hole perhaps? Could also be used to re-fix the gearbox cover to perhaps? Having a removable gearbox cover would be a great service asset methinks.

It's not the smell of glassfibre I hate. It's the itching afterwards. It doesn't matter what gloves I wear it always seems to get through some how.

Still - no glassfibre on the current project :-)

Cheers, Robin
15 Mar 2013, 5:31pm
MartinClan wrote:
You could reinforce the floor by glassing in some ally box sections (or angle sections) around the hole perhaps? Could also be used to re-fix the gearbox cover to perhaps? Having a removable gearbox cover would be a great service asset methinks.

It's not the smell of glassfibre I hate. It's the itching afterwards. It doesn't matter what gloves I wear it always seems to get through some how.

Still - no glassfibre on the current project :-)

Cheers, Robin


Thanks, Robin, that's a good idea that'll I'll take a look at. If not I'll be drilling some holes and/or some access panels because at the current moment I couldn't get the engine out without removing the gearbox (because the sump is trapped behind the chassis cross-member) and I can't get the gearbox bolts out with the tunnel in place :doh:
There is always the option of lifting the whole body off on a Sabre but that could be a lot of work once the carpets, seats, doors and hood are fitted again.
If I do glass it in again and then need to get access it would be easier to just cut it out again and glue it back afterwards but a bit of a drastic solution. :dizzy:
The upside of glassing it all back together is in restoring the bodies original structural strength and rigidity.

BTW I forgot to mention, I did try your previous suggestion of dropping the rear end of the gearbox but even at 'full droop' the body was still about 20mm suspended by the gearbox cowling off the chassis.

...peter
20 Mar 2013, 4:24pm
Week 29 update.

I've started this week on remaking and refitting the transmission tunnel in it's new position so that it clears the BMW M50 gearbox. I have decided to try and make it removable and will strengthen most of the joins with steel angle.
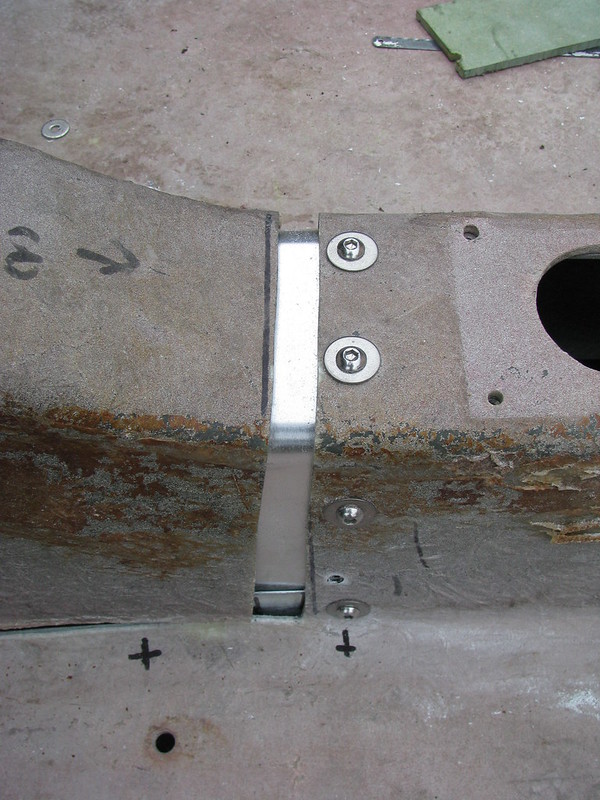
I started at the rear point first. I've made up a aluminium 'hoop' to join the tunnel at this point. I need to remake it in thicker aluminium and make it slightly longer. I'll probably just use filler to smooth the gap once fixed in place. It provides a good location point before any other fixing.


Transmission tunnel mods. by marlinpeter, on Flickr

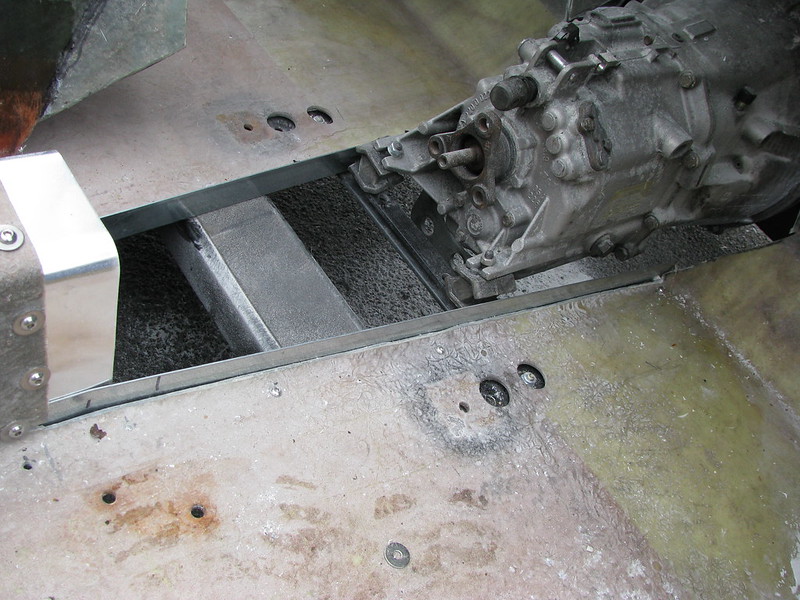
I then made up and fitted strips of steel angle to the floor to provide a fix point for the sides of the tunnel. This is just bolted at the moment but will be screwed and bonded when finalised. The tunnel sides will be fixed with screws into rivnuts and sealed with RTV silicone so that it can be removed, if necessary.


Transmission tunnel mods. by marlinpeter, on Flickr

I've now extended one side of the tunnel down to the floor.


Transmission tunnel mods. by marlinpeter, on Flickr

The other side has been 'glassed up this afternoon and is currently setting. All rather time consuming work so it doesn't look like much progress this week.


:smile:.....peter
6 Jun 2013, 8:13pm
Archive film from 1998

Sorry about the lack of updates but in the meantime I came across this video, so I'd thought I would share....

https://www.youtube.com/watch?v=xorLniPLTdY

the piece on Royale starts at 18 mins 30 secs.

Great bit of film.... I wonder what the 'secret' new car was??

I think the Sabre was launched in 1994 and in the film they say that about 200 had been built, so they were shipping about 1 kit every week!! :eek:
The chap featured is a now committee member of the Royale Owners Club.
2 Oct 2013, 7:39pm
I can't believe I haven't updated this thread since March!!

Well actually I can because I've been consumed with moving house and taking on a full time work assignment.
I've not had time to work on the Sabre so no progress to report.

But the good news is my work assignment completes this Friday and we are moving house next Friday!!:high5:

The Sabre will have to follow on later once I get the new house sorted. Hopefully, I plan to be back in the garage in the spring next year but I'll keep you all posted when I move the Sabre and two lock-ups full of parts!!

If I can I'll grab a picture of the new 'man cave' which needs a lot of work itself so I am going to be very busy.:icon_wink:
4 Oct 2013, 9:32pm
peterux wrote:
I can't believe I haven't updated this thread since March!!

Well actually I can because I've been consumed with moving house and taking on a full time work assignment.
I've not had time to work on the Sabre so no progress to report.

But the good news is my work assignment completes this Friday and we are moving house next Friday!!:high5:

The Sabre will have to follow on later once I get the new house sorted. Hopefully, I plan to be back in the garage in the spring next year but I'll keep you all posted when I move the Sabre and two lock-ups full of parts!!

If I can I'll grab a picture of the new 'man cave' which needs a lot of work itself so I am going to be very busy.:icon_wink:


Good luck with the move. It sounds like you've got your work cut out.

Don't loose any important bits in transit. Two lock ups of parts is a lot to move and at the moment you probably know exactly where everything is.............

I hope all goes well. Are you going far?? Will you still be peterux!!

Nigel
6 Oct 2013, 6:34am
NigelB wrote:
Good luck with the move. It sounds like you've got your work cut out.

Don't loose any important bits in transit. Two lock ups of parts is a lot to move and at the moment you probably know exactly where everything is.............

I hope all goes well. Are you going far?? Will you still be peterux!!

Nigel


Thanks for the best wishes.
I think finding stuff after we move is going to be a major problem with so many boxes!!

Not going too far, just a few miles from J9 of the M1.
TBH I had completely forgotten about the 'Ux' in my user name so i'll think i'll leave it the same or I will confuse everybody including myself!

...peter
27 Oct 2013, 1:01pm
Hi I&#8217;m Steve, the owner of the Blue Sabre in post No. 26. I don&#8217;t know if you have decided on wheels yet, but the steel wheels are available from [url]www.wheelwright.co.uk[/url], they are Ford Sierra winter wheels but in 15&#8221;. Wire wheels look great but the adapters can increase track width and this seems to shorten the life of the front wheel bearings. Build is looking good keep it up. Steve
5 Nov 2013, 10:48am
Steve wrote:
Hi I&#8217;m Steve, the owner of the Blue Sabre in post No. 26. I don&#8217;t know if you have decided on wheels yet, but the steel wheels are available from [url]www.wheelwright.co.uk[/url], they are Ford Sierra winter wheels but in 15&#8221;. Wire wheels look great but the adapters can increase track width and this seems to shorten the life of the front wheel bearings. Build is looking good keep it up. Steve


Hi Steve,
your car looks superb and is a very nice example.
Thanks for the link to wheelwright which coincidental I saw an advert for about the same time you posted this. I do like the look of wires but the cost, the cleaning and potential wheel bearing wear may put me off. The steel wheels do suit your car nicely so may go with steels.
I'm still hoping to re-start my re-build next spring but have a long list of house jobs to do!!
...peter
19 Jan 2014, 9:58pm
I've not updated for a while due to moving house. I've still got a long list of jobs to do, not least is to empty and refurbish my garage.

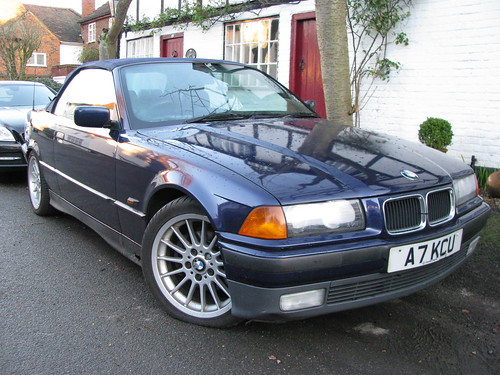
But I couldn't resit this car as a donor car that came up on Autotrader.


It's actually a pretty cool car and I enjoyed the 75 mile drive home around the M25 and up the M1 :madgrin:
I plan to give it an oil service and then drive it around for a couple of weeks to see if it has any issues. It'll then be SORN'd and parked up in my back yard until I have time to start work on it.
Now, back to my list of DIY jobs....

P.S. it's a 1995 328i with a M52B28 engine and has clocked up 153k miles.
20 Jan 2014, 5:41pm
Nice bit rag top down driving ;)
21 Jan 2014, 7:21pm
Patrick wrote:
Nice bit rag top down driving ;)


a bit chilly in this weather :badgrin:
22 Jan 2014, 4:56pm
peterux wrote:
a bit chilly in this weather :badgrin:


But you're a hardened (ex) Marlin driver. :icon_wink:

No such thing as the wrong weather, just the wrong choice of clothes!!
23 Jan 2014, 7:55pm
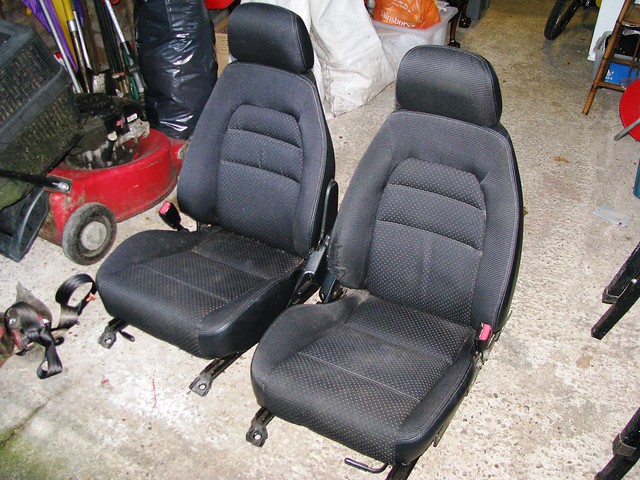
I've also picked from ebay a pair of MX5 seats. It's going to be sometime before I can trail fit them in the Sabre but they came up at £40 and only a few miles from home. They'll be trial fitted and if OK will be recovered or traded in for a pair with new covers.


....peter