This is a read-only archive of the old Madabout Kitcars forum. New posts and replies are no longer possible, but every thread is still here to browse and read.
I was busy in the garage this afternoon, making up some bonnet stays like Robins. I've poached the rivnut bearing idea attached to the side bonnet panel, but have my own twist on the stay clips when they're stowed.
The drivers side one had to be cranked to clear the master cylinder.
The stay clip is a brass 50mm cupboard catch, which is a perfect fit for the 6mm round bar I used for the stays. The catch has two spring loaded ball bearings that spring in and out when you clip the stay in.
The other side has a straight stay, but is mounted to the plate that holds up the AFM, as I couldn't get to the bonnet panel due to the long mounting bar.
Both stays are different lengths, due to the locations on each side, but I've tried to make both sides open the respective bonnet side to the same angle... I think it's pretty even. If you squint.
I've taken them all off and have sprayed all the parts with chassis black, and I'm going to add some heatshrink to the tops of the stays to stop the paint from flaking off in the clips.
Like Chris I wondered for ages what to use until I came across a couple of spare BMW brake pipe clips. (The ones from the rear suspension arms) These work great but I don't know how long they will last with the constant pinging in and out of the bonnet stays. I know what to do now when they fail!
Jason, are you into birds of prey? My wife and I are members of the Hawk Conservancy at Andover and regular visitors. In between running, car building and birds I also am a (very) amateur photographer, and have had a few photos published.
Attached is a photoof a black kite.
Sorry to go off subject.....
Meanwhile I've got just the speedo to sort out before re-applying for IVA. I decided to move the pickup from the tail of the gearbox to the diff. ETB supplied two new magnets to stick onto the nose of the diff and I managed to destroy the pick-up when removing it. A new one is now waiting at the Royal Mail parcel office for collection so you can guess what tonights job will be.
I've been to several birds of prey exhibitions in the local area, and have seen the falconry displays at Warwick Castle several times - they're always an impressive site.
I'm not an afficiando though - most of my knowledge on the subject comes from reading too many fantasy books set in medieval worlds and playing way too much Pendragon
Just got off the phone with Terry regarding my MIA bumpers.
Apparently other work has taken priority over my fully paid order, outstanding from February when my stage 3 kit was ordered and I can enjoy another month's wait for them.
Just got off the phone with Terry regarding my MIA bumpers.
Apparently other work has taken priority over my fully paid order, outstanding from February when my stage 3 kit was ordered and I can enjoy another month's wait for them.
Other work?? Must be over run with new orders??
I'd stick to pestering rather than getting them made somewhere else. The bumpers are substantial items with curved formed and polished Stainless faces so probably quite expensive as a one off. The windscreen escutions are complex laser cut stainless pieces and not easy to measure once fitted. (I thought you weren't having a windscreen?)
Just email Terry every week and she'll get the message
In the course of wiring up the dash, I have found out that the fluid level switch on the coolant header tank is open when the float drops, and closed when full.
I have it wired up to a warning light on the dash, and of course it's always on at the moment, unless I unscrew the switch and pull it out of the tank.
How can I make the light come on if the fluid level drops? The only thing I can think of is a normally closed relay, activated from the float switch. If the fluid drops, power is cut to the relay coils and the switch springs back closed, turning on the light.
Is there another way? Am I (as I'm always doing) complicating matters, and it can be done in a much easier way?
Unless you can take the switch to bits and re-fettle it - it has to be a relay. Use a low power one though - one of the little read switch jobies would be sufficient.
Jason,
your car is looking superb, well done.
I guess it's just the interior and seats and you'll be off to VoSA for your finals!
Two little things I spotted in your pictures.(hope you don't mind?) That handbrake button will fail the IVA radius test and one of your pictiures shows the upper wishbone stud with very little thread sticking through the self locking nut. The IVA men look for two clean threads showing and I believe sometimes take off the plastic nut covers to check!
Good job I still have the manky plastic sleeve for the handbrake then!
The plastic button is still on it - the aluminium button sits over the top.
I still need to go round and check all the bolts again, but thanks for spotting the upperwishbone nut.
I've made a start on the interior - I've been busy bashing alumnium sheeting for the boot and side closure panels. I think the neighbours will be happy when I'm finsihed this part, as it's involving a lot of banging, clattering and swearing. 3mm ali sheet can be quite resistant to bending where you want it to.
I've got my closure panels for the boot and side wing areas done now (thank god - what a palaver that was :/)
I'll be cutting holes for a hatch and into the boot and for the harness webbing to come through next, but wanted some advice.
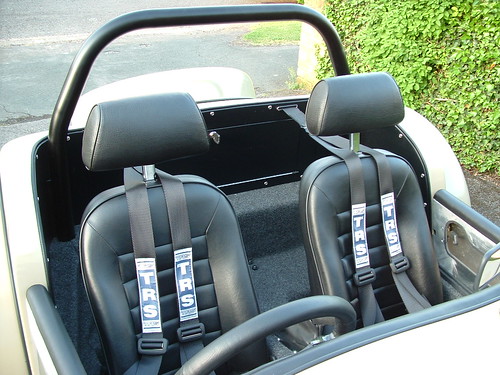
When it comes to the harness slots / holes, how have you trimmed them? I notice Peter has done some sort of chrome surround.
Also - my boot panel is one piece, and I need to cut the boot door from it with out too much material loss the piece that is removed, as that will be the door. whats the easiest way of getting a start into the material (3mm ali plate)? I was considering a chain of 2mm holes drilled and then plunging a jigsaw blade in.
Last question - what diameter trim ring did everyone use on the gearstick gator? I've seen some nice ones at Europa, but can't make my mind up on how big I want it.
I'll be cutting holes for a hatch and into the boot and for the harness webbing to come through next, but wanted some advice.
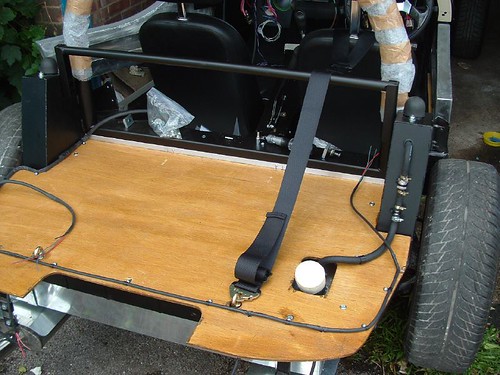
Whatever you do you need to make sure that it runs freely with no edges that can cause the webbing to rub and fray. I think Peter obtained some chrome "rings" from a chandler. Before you do this you need to fit the bar that behaves as the top mount (turning point) for the belt. This has to be high enough above the seat base to meet the IVA criteria and probably means cutting something out of the rear tub edge to clear the belt after. As I haven't panelled in the boot area yet this was all I did.
GreatOldOne wrote:
Also - my boot panel is one piece, and I need to cut the boot door from it with out too much material loss the piece that is removed, as that will be the door. whats the easiest way of getting a start into the material (3mm ali plate)? I was considering a chain of 2mm holes drilled and then plunging a jigsaw blade in.
Good luck with that! I guess you must have a steadier hand than me as I have never managed a straight line with a jigsaw yet! I would have thought that chain driling some holes is the way to go although I am not sure that 2mm is enough. By the time you cover everything in leather cloth and fit a hinge (piano?) I would have though you could get away with slightly more than that.
I will be re-starting my trim again soon once the car is sorned for the winter. What are you planning for the transmission tunnel? I found this a real B*gger to do and will be having a second attempt....
There are some seatbelt escutcheons on Europa which look nice...
I was going to fit some stainless hinges of some description, but not piano hinge - I've still got post traumatic stress syndrome from doing the bonnet hinge.
I've got some Stainless 10mm roundbar for my turning hoop, which I've yet to bend into shape.
I think I'm going to do the same as patrick on the tunnel and carpet it and the other portions of the interior bar the seat pans in burgundy carpet. The pans will have rubber matting.
When it comes to the harness slots / holes, how have you trimmed them? I notice Peter has done some sort of chrome surround.
Also - my boot panel is one piece, and I need to cut the boot door from it with out too much material loss the piece that is removed, as that will be the door. whats the easiest way of getting a start into the material (3mm ali plate)? I was considering a chain of 2mm holes drilled and then plunging a jigsaw blade in.
Last question - what diameter trim ring did everyone use on the gearstick gator? I've seen some nice ones at Europa, but can't make my mind up on how big I want it.
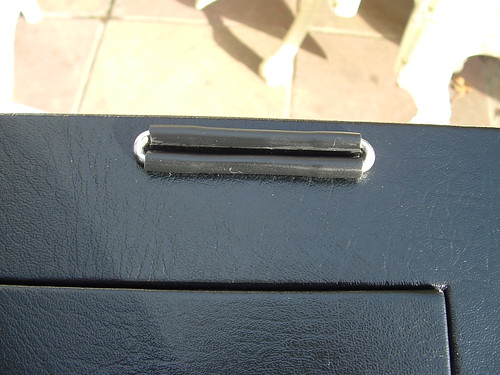
My seat belt slot trims are really simple, but from normal browsing distance look quite smart. I looked around for some suitable slots but ended up making some. It's two pieces of plastic wing piping (the hollow type) with two miniture stainless steel 'u' clamps. Robin is correct I bought them from a yacht chandler! The wing piping has the flappy bits inside and is just Evostuck to the panel.
2mm holes and a jigsaw sounds good to me, to cut the boot flap.
I used the Marlin supplied gearstick surround. I can measure it if you want some idea of its size?
I've got some Stainless 10mm roundbar for my turning hoop, which I've yet to bend into shape.
I think the Marlin seat belt bar is a bit more than 10mm? The way they weld it to two bits of 'u' channel bolted to the chassis makes it surprisingly stiff and solid. I'd get Terry to supply you one if she will, to save messing about with something that might spoil your IVA day.
Or maybe get your local blacksmith to make something similar.