MadaboutKitcars

This is a read-only archive of the old Madabout Kitcars forum. New posts and replies are no longer possible, but every thread is still here to browse and read.

Mikes BMW Marlin Cabrio

2 Apr 2012, 7:28am
Mike wrote:
Out of interest, why would it need to be physically installed vertically - or is this just a sop to the old days when it would have been a bi-metallic strip?


I think you hit the nail on the head there. Just a hang over to when it was an electro-mechanical device. In general, anything electronic is not sensitive to orientation - unless it is designed to be so.

Cheers

Robin

PS - Even us electronic engineers blow stuff up occaisionally. You get used to the smell of burning chips...
3 Apr 2012, 1:57pm
Not happy again!!

I'm getting pee'd off with Smiths/Caerbont/Speedycables whatever they want to call themselves.

I ordered a new voltage regulator yesterday, cost £16.21 from Europa, and it arrived this morning - well done Europa.

I tested the regulator - it gave 10.44 volts - ( notice past tense!)
It got quite hot, while I left it connected to the battery, and when I tested my gauge it would not work
Re-check the output voltage - it now gives zero volts!

This is exactly what the last one did too. I assumed with it I must have got my wiring wrong: and being an enquiring sole decided to pull the first one to bits to see what it looked like in side.

Now I suspect Smiths may have a production problem.

The wiring can not be any easier to wire up:
Battery positive to the B terminal
Case to Earth
Instrument to the I terminal
Instrument (via sender) to Earth

Input voltage checked + 12.5v from the car battery
Output voltage can then be checked by measuring I terminal to Earth - Zero, Zilch Nothing!

Rang Smiths - they advised it should cope comfortably with pulling 0.25 amps all day long under load, and certainly not get warm with no load. So he is going to test one in their work - and get back to me -
in 2 days!
How long does it take to test a b***dy circuit!

Grrrrrrrrrrrrrrrrrrrr!

Bloody electrics!!
Give me a piece of metal that I can cut, weld, grind, and polish any day!!


MartinClan wrote:
Just my 5 penneth.....

You will certainly need a voltage stabiliser if the instrument is designed to work that way. The theoretical 12v that comes from your car's electrical system is not actually 12v anyway, and also not particularly stable.

Using an electronic regulator may or may not work well - although a linear one is better than something fancier (digital). Car electrical systems are full of noise which plays havoc with anything electronic.

Personally I would try to stick with stuff specifically designed for the job. I would use the smiths regulator - even if you have to fix it the right way up!

Robin
25 Apr 2012, 10:35pm
"The Dreaded Electrics!"

Whooooooh!:whoo: :whoo: :whoo:

I have :
Side lights all round
Brake lights
Hooter - from centre push:horn:
Wiper - slow, fast and park!

The only item that I have wired up (so far) and does not work is the intermittent wiper, but I'll take that!!!

That was a good evenings work
Yes!!!!!!!!!!!!!!!
26 Apr 2012, 7:35am
Hey! well done you - you might even get to like electrics at this rate! - John
26 Apr 2012, 8:55am
Well done!
I found the hazard warning light switch wiring the most challenging, so good luck with that.
26 Apr 2012, 9:24am
oaktree11 wrote:
Hey! well done you - you might even get to like electrics at this rate! - John


Don't think so John! - Its a case of "Intellect over Interest" at the moment, though I was pretty chuffed last night - and who knows , I may have headlights tonight?
Mike
26 Apr 2012, 9:28am
peterux wrote:
Well done!
I found the hazard warning light switch wiring the most challenging, so good luck with that.


Cheers for the encouragement Peter!!!!

I'm going to make it harder for myself as well, by trying to use a BMW hazard switch mounted on my dash, rather than the Ford one on the column.
As you once said, a good seat, and plenty of cups of tea!!:ranger:

Mike
26 Apr 2012, 9:36am
Mike wrote:
Cheers for the encouragement Peter!!!!

Mike


Sorry Mike, didn't mean to put you off! Just sharing with you the most complex bit, from my perspective.
If you can crack that, then you are a qualified auto electrician :lol:
26 Apr 2012, 7:38pm
More Whooooooh!

Headlights - yup
Main beam - yup
Dip - yup
Hazards - yup:eusa_clap:

Indicators - well, sort of! :ohwell: Front right & left rear!:juggle:

My Premier wiring loom is either made incorrectly, or labelled wrongly - I've checked it twice - Black/white to offside is the wrong side. Still, fairly easy to resolve. Chris -did you experience the same problem?

Still defeated by the intermittent wipe though.
26 Apr 2012, 9:13pm
Mike wrote:
More Whooooooh!

Hazards - yup:eusa_clap:


Wow! Hole in one :whoo:
26 Apr 2012, 9:42pm
peterux wrote:
Wow! Hole in one :whoo:


Pride comes................


I've managed to sort out the intermittent wipe this evening, and checked the indicators in Haynes: Premier have printed the wrong instructions - Black /White is for the N/S. So was quite chuffed, then...............

:icon_redface: the bl**dy horn started by itself and I could not stop it:horn: :horn: :horn: - in the end I had to rip the wire off the horn terminal.

I guess the slip rings don't work too well with the Momo steering wheel, and it has allowed a direct earth.
20 May 2012, 5:20pm
it's great when a plan comes together.......eventually.

Bit more wiring completed now.

I added a water temperature sensor collar to my radiator, and fitted a Ford sender, wired up on the lower setting (93.5C) to a relay and on to my Pacet fan.
With my first test the water boiled, and the fan never kicked in. The first thing I suspect in these situations is my wiring, but all checked out OK. I changed the relay - and promptly blew the 15 amp fuse. After I had changed it to a 30 amp fuse the fan kicked in exactly on cue. I now have an electric thermostatic fan!
Its great. I've just left my car idling for an hour, and the fan cuts in and out, and in and out, and in and out........................I could have watched it all afternoon!
It's great when a plan comes together.

I've also re-wired my front indicators, so that the fronts come on with their partner at the rear. Premier Wiring instructions were at fault on that one!
22 Dec 2012, 6:03pm
Christmas 2012 Update

With only 9 days to go to the end of the year I have failed on a promise I made to my wife......................to have my Cabrio finished this year!
Progress has been limited by the usual things in life getting in the way - illness, elderly parents needing looking after, my wife going back to teaching full time (and I mean full time - 70 hours a week!). So, progress has been a little slower than I would have liked.

Anyway, for those that are still interested I thought I'd post a few shots of key steps since May:
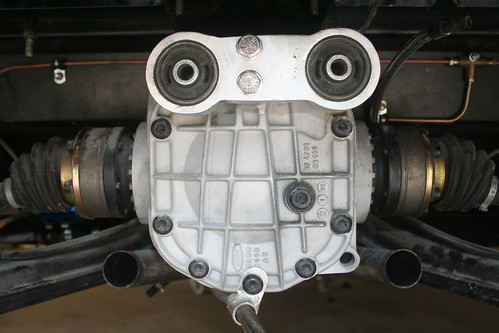
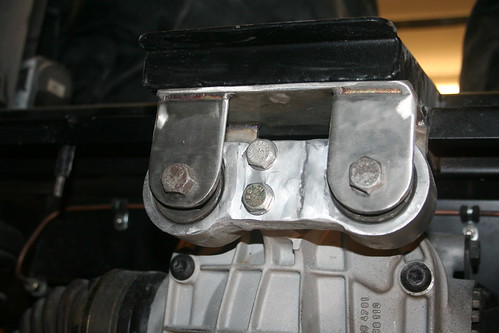
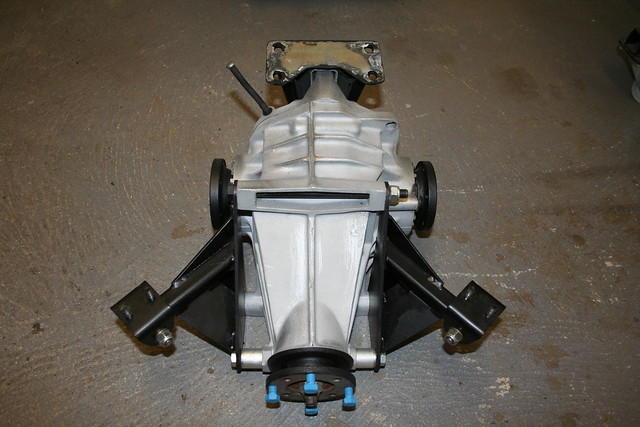
I've finished the new rear diff support bracket, and its all reassembled.
[IMG] Standard Sierra Diff, with Scorpio Style Rear Supports by Mike's Marlin BMW Cabrio, on Flickr[/IMG]

[IMG] Rear Diff Mount Fitted by Mike's Marlin BMW Cabrio, on Flickr[/IMG]

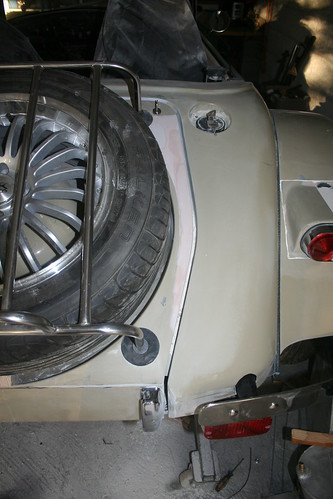
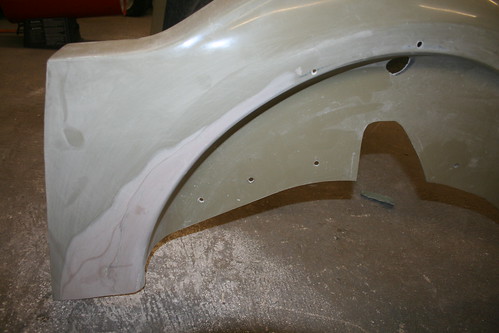
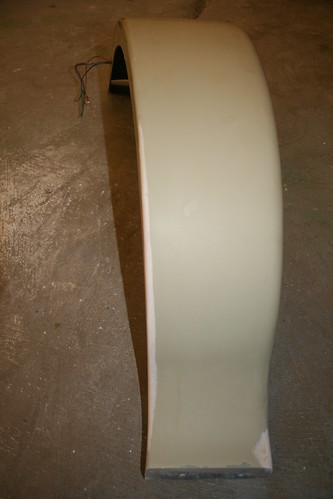
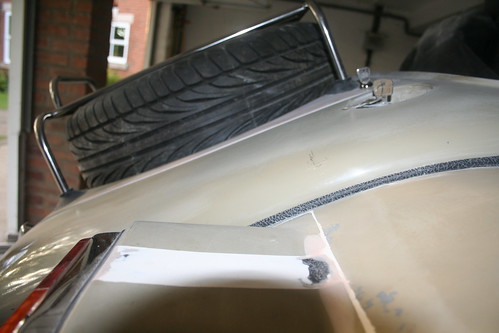
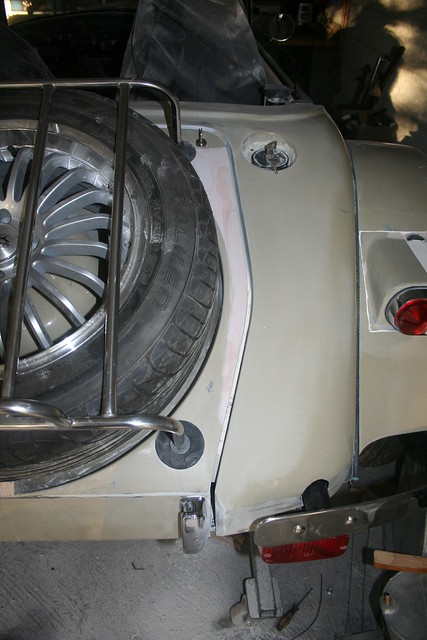
The Marlin GRP boot lid does not fit the rear tub very well so requires a lot of fettling and filling to bring all the shut lines parallel, and surfaces level........but I got there in the end.

[IMG] Making The Shut Lines Parallel by Mike's Marlin BMW Cabrio, on Flickr[/IMG]

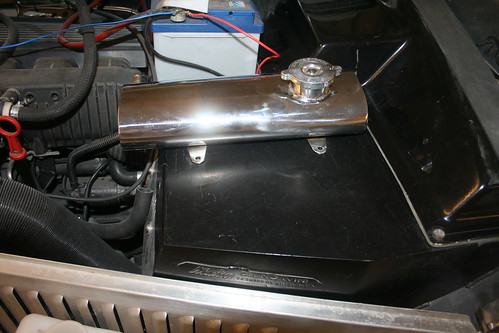
My original header tank did not work, as it was too low, so I made a new one from a surplus piece of stainless exhaust tube:

[IMG] Expansion/Header Tank by Mike's Marlin BMW Cabrio, on Flickr[/IMG]

I was so pleased with it, I decided to make myself a new washer bottle, which I had to extend after Dave Kitson kindly pointed out it must hold 1 litre!

[IMG] Capacity Increased! by Mike's Marlin BMW Cabrio, on Flickr[/IMG]

..and I've made a new set of stainless petrol tank straps:

[IMG] Stainless Fuel Tank Straps by Mike's Marlin BMW Cabrio, on Flickr[/IMG]

Not achieved as much as I would have liked really......

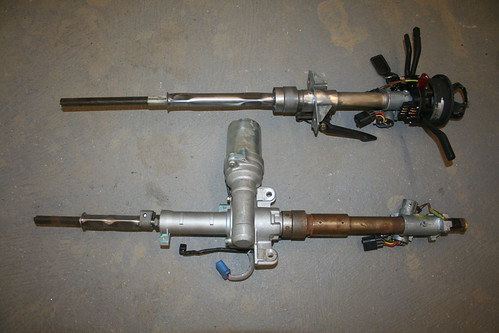
.....but I did have a dabble with an Electronic Power Assisted Steering column from a Corsa, after another Marlin owner pioneered the idea. Its all ready to install, but it will have to wait until after the IVA, as it could lead to possible problems with a non standard item used in the steering mechanism :

[IMG] EPAS & Standard Sierra Steering Column - shown at the same length by Mike's Marlin BMW Cabrio, on Flickr[/IMG]

I've finally resolved a tiny fuel leak from the fuel tank output collar by having a new collar welded on, so I'm now ready to re-fit the fuel tank, and hopefully start her up again over the holidays - yeah!

[IMG] IMG_3356 by Mike's Marlin BMW Cabrio, on Flickr[/IMG]
22 Dec 2012, 9:40pm
Mike wrote:

I've finished the new rear diff support bracket, and its all reassembled.
[IMG] Standard Sierra Diff, with Scorpio Style Rear Supports by Mike's Marlin BMW Cabrio, on Flickr[/IMG]

[IMG] Rear Diff Mount Fitted by Mike's Marlin BMW Cabrio, on Flickr[/IMG]


No charge... ;)

Mike wrote:
My original header tank did not work, as it was too low, so I made a new one from a surplus piece of stainless exhaust tube:

[IMG] Expansion/Header Tank by Mike's Marlin BMW Cabrio, on Flickr[/IMG]

I was so pleased with it, I decided to make myself a new washer bottle, which I had to extend after Dave Kitson kindly pointed out it must hold 1 litre!

[IMG] Capacity Increased! by Mike's Marlin BMW Cabrio, on Flickr[/IMG]


Nice!
22 Dec 2012, 10:53pm
Hi Jason

.............you captured the idea beautifully in your drawing...........its remakable how my efforts turned out to be so similar to your drawing!


[IMG]
Diff Mounting Proposal
by Mike's Marlin BMW Cabrio, on Flickr[/IMG]
Drawing courtesy of Jason Cundall - alias GOO


[IMG] Standard Sierra Diff, with Scorpio Style Rear Supports by Mike's Marlin BMW Cabrio, on Flickr[/IMG]


Not the first idea you have given me......................!!
Nor the last - I want some "Marlin" logo door thresholds, and .....and....


And on that note, can I say a big Thank You to all you guys on MAKC - you make it a great community - may I wish you all a very happy Christmas.
Wishing you all the very best
Mike:tea:
14 Aug 2013, 11:00pm
Update - August 2013

Its a while since I have updated my diary on MAKC:

Finally I have completed my electrics - its only taken 18 months! I can not say I enjoyed the experience, as it should be so logical, yet my intuitive logic often did not mange to get it right first time! Red/Black may be live, but it depends which end it comes from, so splicing into it does not always result in a live splice!

Any way its done - yippeee! The dash is all wired up: everything works, and it can all easily be disconnected, and re- connected, allowing me to go back and finish the dash fixings, and heater controls etc.
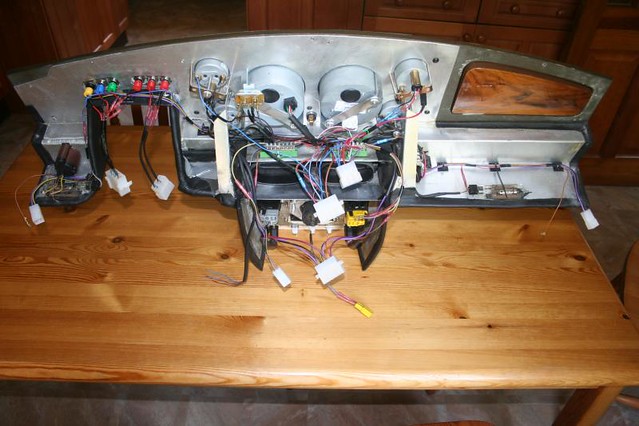
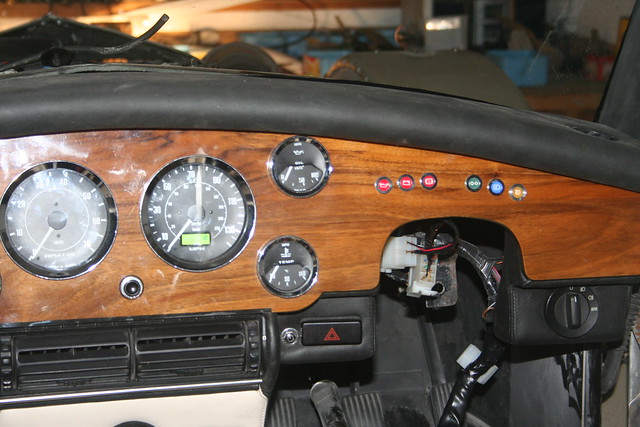
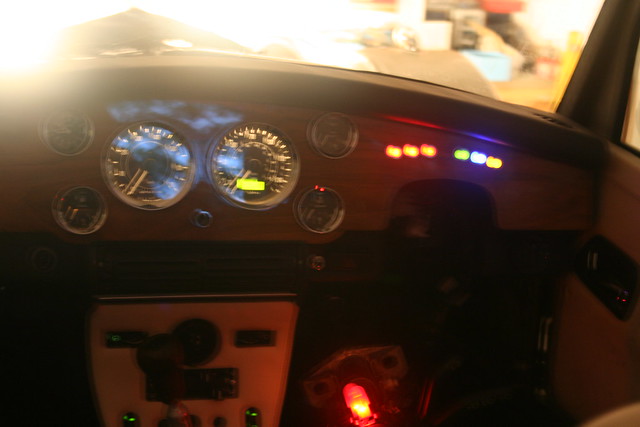


Dash lights all lit up - (I need a tripod for time delay photos!) Even managed to get the old Sierra switch back lights to work


Rear ligts all working - hazard only coming on with main lights, as required by IVA

I've also completed the fabrication of the rear diff support for the Sierra diff. The T bar I made was fine, but I was concerned that with two fixings so close together there was a lot of torque being generated through a small lever, so I have triangulated the T bar support:
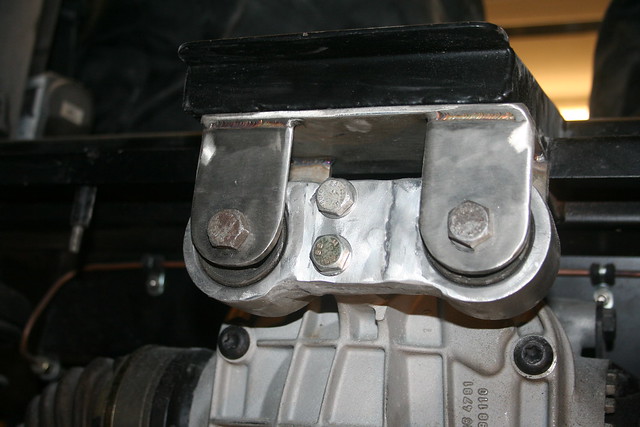


Now that ther electrics are complete I can fit the dash for the final time before the IVA, except I want to fit my carpets before doing so.......


So, its carpet time.................

But................it never ceases to amaze me how jobs become inter-dependent.

I have finished my electrics, so theoretically I could fit the dash.

But to fit the dash for the final time before the IVA I need to fit the sound proof felt and carpet beneath the centre console and along the transmission tunnel
To do this I need to remove the rings for the gearstick, and handbrake
To do this I need to drop the prop shaft to get at the fixings under the tunnel.
To do this I need to remove the diff - to be able to pull the prop shaft out through the rear bulkhead hole

( I wanted to change the diff anyway, and strengthen the diff carrier bracket, so its not all bad news)

To remove the diff I need to remove the boot floor and the petrol tank, and so it goes on.......


............until finally, with all these steps backwards done (again!) I'm now ready to start fitting my carpets.

Woooooow! - its scary cutting up expensive bits of felt and carpet!

"Measure twice - cut once" is my mantra, but even by cutting out paper templates to get the final shape, I find I have to be ultra careful about marking out silhouettes in reverse and remember which side up the carpet is relative to my template!

But its exciting - this really does feel like I'm on the home straight now:

Cutting the 1/2" thick felt for the front of ther transmission tunnel to reduce noise, vibration and heat from the engine/exhaust.
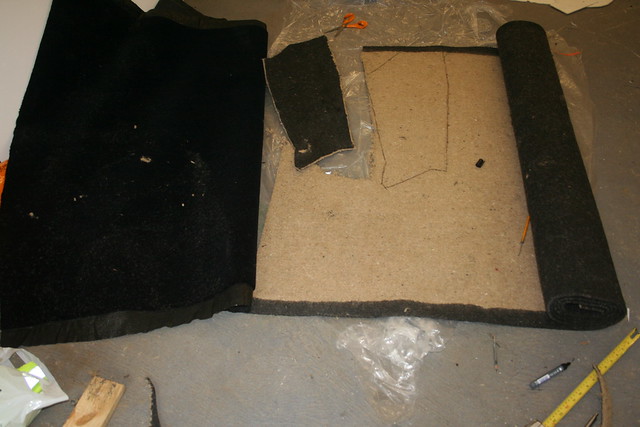

1/2" Felt marked out and cut ready for gluing to the transmission tunnel sides

Although its not a big part completed, I am really happy with the way this bit of the carpetting has turned out. As its the first, and likely to be the most difficult, I was not sure how well I could make carpet fit around compound curves, but by making paper templates, then cutting the felt/carpet and trial fitiing (and adjusting several times!) it has gone on very well.

I deliberately cut the felt 20mm short all around the perimeter of the carpet, so that it creates an under shelf along the floor. This will allow the floor carpet edges to be pushed under the overhanging vertical carpet, making the floor edges slightly less critical for neatness as they'll be hidden.
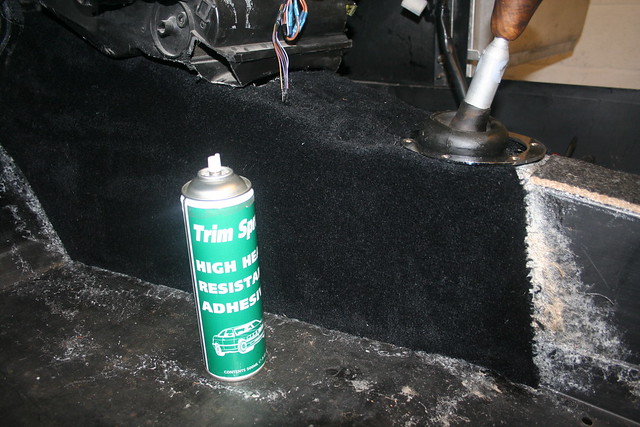


This spray on adhesive was suggested to me by an upholsterer I used for the door cards, as it is never lumpy, and I find it is brilliant to use (and easy to wipe off the over spray using white spirit).

For the very sharp eyed, I have fitted felt to the top of my centre tunnel section, between the seats, as width is at an absolute premium for my Audi A4 seats - even after reducing my tunnel down to only 95mm wide: even the thickness of the carpet will press against my seat sides, but hopefully it will all still fit when I come to re-fit them!?!
Just have to keep fingers crossed on that one - but its like so much of my car - I have pushed the limits all the way.

I've also trimmed the edges off the Sierra heater at the front/sides, as these would certainly have failed IVA unless covered up - and to have done so would have reduced the leg room.
15 Aug 2013, 8:23am
Can't see your pics :(
15 Aug 2013, 8:28am
On the point of the IVA, have you made provision for the rule change on the rear fog light.

Look on other forums, people have mixed views on interpretation.

Basically, the fog can come on with the lights, but if turning the lights off or engine off and then back on, you have to repress the fog light switch. So the fogs cannot come back on automatically.

Mine isn't like that :(
15 Aug 2013, 9:08am
AcC8braman wrote:
Can't see your pics :(


Here you go...........have another look.
(I obviously can't cut and paste from a different host site!)

Regarding the Rear Fog Light - mine is like yours - I was not aware of it having to go off if the main switch is turned off and back on again - though it makes sense.

I guess it means adding a relay ?
15 Aug 2013, 9:34am
All working now :)

I was reading up on the IVA section on Locostbuilders.com, new version was released on the 17/06/2013:

Rear fog lamps;
1. They must be operational
2. The correct number must be fitted to the vehicle (Table 1)
3. They must only emit a red light
4. The rear fog lamp(s) must only illuminate when dipped beam, main beam or front
fog lamps are lit (See Notes 3 & 4)

So note 3 and 4 says:

Note 3: front fog lamps may be illuminated with the side
lamps only.

And the important bit :-

Note 4: Either of the following applies:
1) The rear fog lamp(s) may continue to operate until the
position lamps are switched off, and the rear fog lamp(s)
must then remain off until deliberately switched on again

or


2) An audible warning, additional to the mandatory tell-tale
light, must be activated if the ignition is switched off or the
ignition key is withdrawn and the driver's door is opened,
whether the lamps in (RS4) are on or off, whilst the rear fog
lamp switch is in the "on" position.

On my Audi, there is no way of leaving them on as the stitch is part of the light switch.

If I leave the lights on and remove the key, I get a buzzer.

So on the Lambo, I will need to figure out the same. Some people are putting in relays.

There is a company stating the have a fix for this too - CARTEK Automotive
15 Aug 2013, 9:41am
More updates

There are few other things I've done that I'd not realised were not posted here:


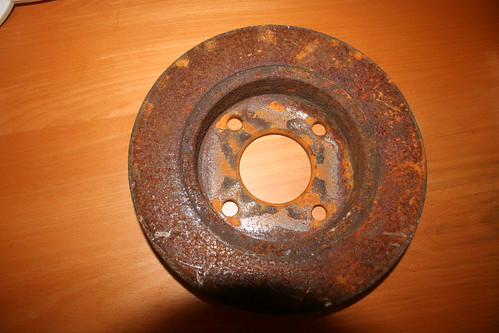
What use could this be?
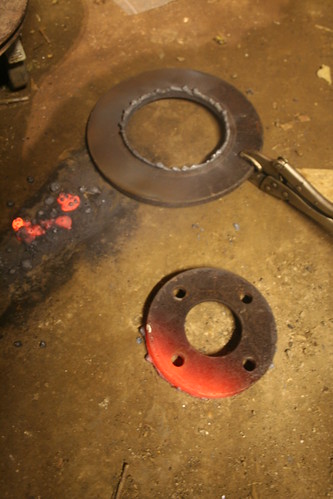
With the brutal use of oxy-acetylene


then an angle grinder to this


and then cleaned up on a lathe:


Three of these made a spare wheel support braket to bolt to my GRP boot lid -two to sandwich either side the GRP for strength, then a spacer, and this one on top for the spare to attach to.
Although it is robust there were two problems - brake discs are made to wear from a cast steel which can not be welded, so the spacer had to be bolted between the layers.

And the second? - its b***dy heavy!
15 Aug 2013, 10:08am
Updates

I've had some nice stick on Marlin logo wheel centre discs made by the guy who advertised his services on here a while back.They are very good, and not expensive: a set of 7 (I've fitted one to the gearstick) cost less than £15inc p&p.


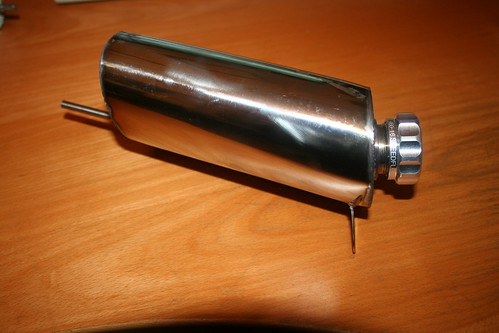
I made myself a stainless washer bottle from a spare piece of 90mm diameter exhaust tube squashed into an oval:


....................only to be told by a fellow Marlin builder the minimum tank capacity must be 1 litre, and of course when I checked it was only 900mls !

So........


.............I extended it to follow the profile of my firewall - it looks odd but fits beautifully.

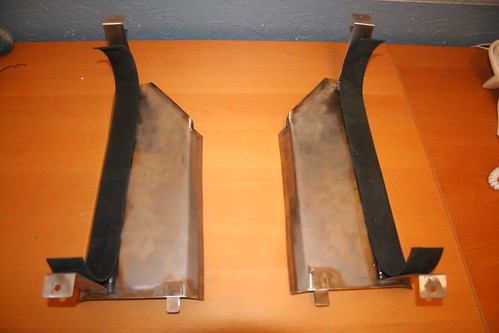
While working with stainless, I made up two new tank straps in stainless, following horror stories of Marlin's thin galv. ones rusting through and a couple of owners having their fuel tanks drop!


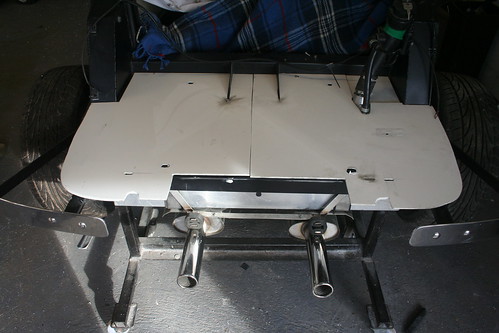
To meet IVA rules I've fitted two defelectors beneath my fuel tank and above my two exhaust silencers, as IVA states fuel leakes must not be able to spill directly onto hot surfaces


I wanted the boot floor to be water proof - so have used two sheets of polypropylene: the first had to have cut outs made to fit over bolt heads, fuel sender electrical connectors and various wires: the second fits over the top whole, with sealer between.

Whilst I had the exhaust off I have added a flexi pipe at the front, to remove the rigid section I originally made. This should take a lot of the stress out of my stystem, as I have made the mountings fairly rigid, as I do not have the space for it to move around in the transmission tunnel.

I've changed the rubber 'cotton reel' type exhaust supports, as they had already begun to show signs of perishing, for simple rubber loops. If ever these fail unexpectedly, it is easy now to effect a repair with a bit of wire as a "get you home" fix!

[IMG][/IMG]

I've spent a lot of time sorting out minor panel fit tolerances in the GRP, adding filler and sanding down.


The shut lines are all now consistent at 6mm, and the surfaces are level


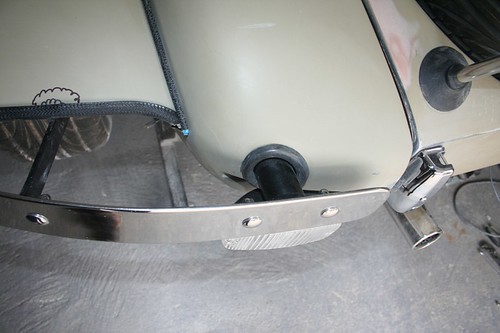
In my efforts to improve the boot lid shut lines I ended up with holes that were too big for the bumper struts - rather than try to fill them with filler I fitted a rubber grommet (made from a Sierra front firewall plug with a hole cut to fit) which will better tolerate any vibration between the GRP tub and the steel chassis.


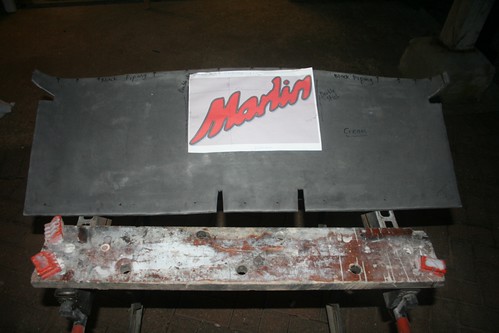
To finish off the rear tub, I need a firewall between the boot and the passenger compartment. This is a sheet of thin ally covered in a very tactile dense foam. I'll have it leathered, and add an embroidered Marlin logo - its surprisingly cheap to get done - £20 for this logo done to full A4 size- and the finished article looks really cool.


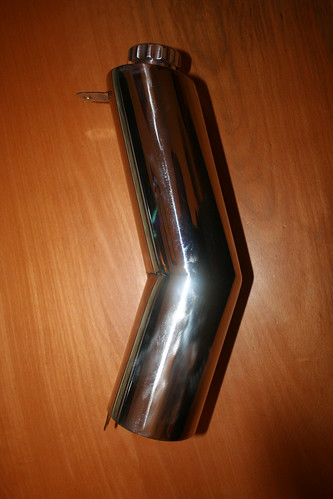
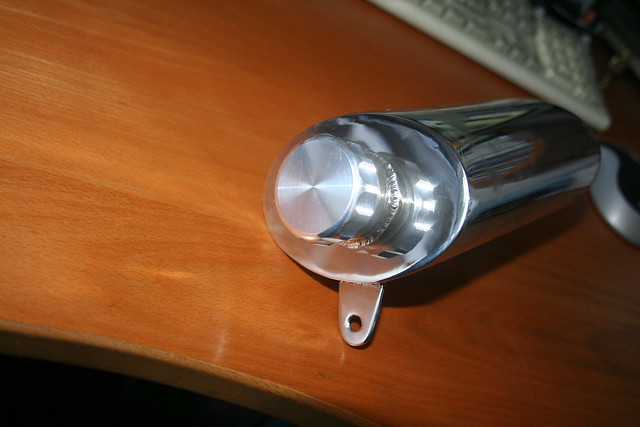
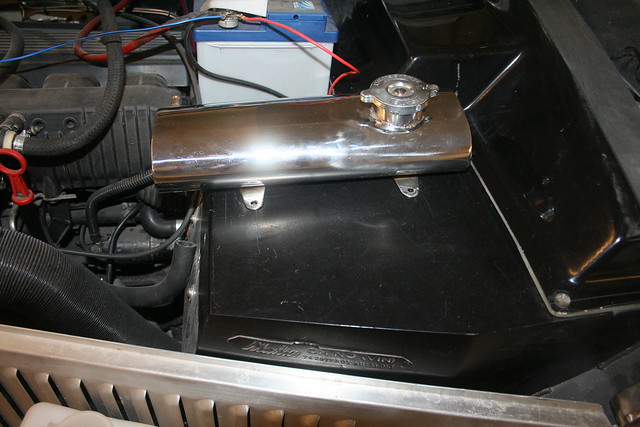
I had problems with my original expansion tank emptying, and concluded I did not have enough tank volume above the top of my radiator, so needed to raise my tank, and have at least 500mls capacity. Space under the bonnet with the BMW M50 engine is very limited, so the only place available was on top of the bulkhead, using a long thin tank.
Another piece of spare exhaust tube, squashed into an oval (much harder to do than say!) has made an attractive tank - the stainless pressure neck was difficult to obtain, but AK Sports cars kindly sold me one that they make for their Cobras (and charge their customers £280!!).


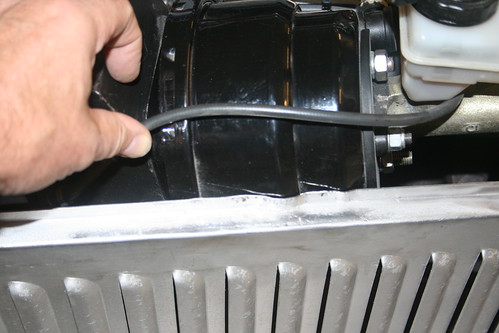
My engine bay side panel bugged me ever since I crudely cut a section out to avoid the Metro servo. The itch has now been scratched - after fitting the new Dual servo, I've welded a section back in, and panel beaten it around the two tiny interference points. This looks much better, and makes the panel much stiffer again.


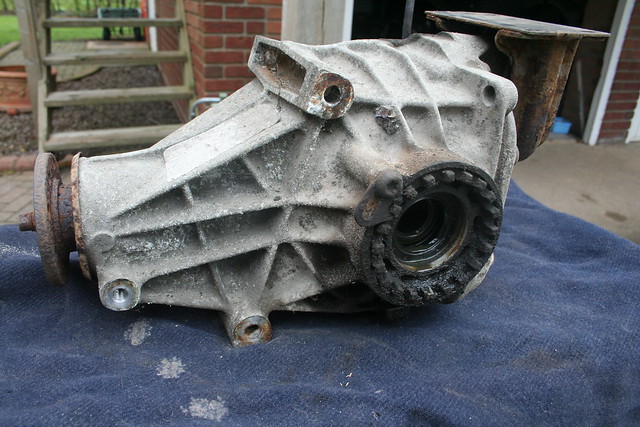
Oh, nearly forgot............after 5 years of looking I have bought a 3.14 diff which really are like rocking horse droppings to find: So I'll re-fit that when everything goes back together. that will be the third diff in my car, and I've not driven it (legally) on the roasd yet!


3.14 diff - very rare these days: as bought, prior to clean up, and new seals being fitted

If anyone wants a very good Sierra 3.38 diff, sand blasted, with new seals all round, PM me or give me a call on 07968 835101.


3.38 diff - sandblasted and fitted with new seals -(set up for Lobro, but can readily be changed to push-in)


Mmmmmmmmmm, didn't think I'd achieved much in the past 12 months, but proof reading this there has been a reasonable amount of progress....................more to follow.................
16 Aug 2013, 10:33am
Looking good Mike, when is the IVA date??

I have done lots of work on my Hunter rebuild, must get round to posting some pictures. Just about to start putting the loom back together and splice it into the M20 engine management, 18 months for the wiring sounds scary, I was hoping for 3 weeks !!

John
16 Aug 2013, 11:33am
Progress

Mikee, it's looking great, really like the washer bottle and expansion bottle..can i ask where you purchased stainless steel strapping? I have sent your parcel ,it should be with you in 2 days. Regards Jeremy
16 Aug 2013, 9:47pm
cabrioman wrote:
Looking good Mike, when is the IVA date??

I have done lots of work on my Hunter rebuild, must get round to posting some pictures. Just about to start putting the loom back together and splice it into the M20 engine management, 18 months for the wiring sounds scary, I was hoping for 3 weeks !!

John


It probably only took me three weeks in actual time, but I just kept putting it off! It wasn't as bad as I had let myself believe in the end.