This is a read-only archive of the old Madabout Kitcars forum. New posts and replies are no longer possible, but every thread is still here to browse and read.
Mr T - Hope you get the chance to keep ticking those last few things off your list.
Good luck, Paul.
Thanks Paul. The snag list is getting smaller by the day.
Just had an hour or so to work on the car today due to it being mother's birthday, so I fitted the odometer reset cable into the dash. This required yet another retro-fitted brace bar attaching to the internal frame to stop the dash flexing, which meant more keyhole surgery was necessary, through the speedometer hole this time.
Two hours, three more broken drill bits and some very bloody knuckles later and that's another little job done. Should get five or six hours on the car tomorrow, but it's surprising how quickly a day can evaporate without much to show for it, unless your name's Patoune...
I will be putting on a black guide coat after the etch primer, then at least two coats of high build primer after initial flatting and more flatting between coats. :
I can't see any advantage in a guide coat over your etch primer. You dont want to sand back anywhere near that. You may be better off not flatting back your guide coat until you have as much hi-build primer on as possible. 3 coats or more. It's only 20 mins between coats, so by the time you have mixed up another 750 ml, had a breath of fresh air (!) and let your compressor cool down, its time to go again.
More fettling today including plumbing in the oil pressure gauge -
Showing a rock solid 70psi at idle (cold), just hope it doesn't drop through the floor when it's hot.
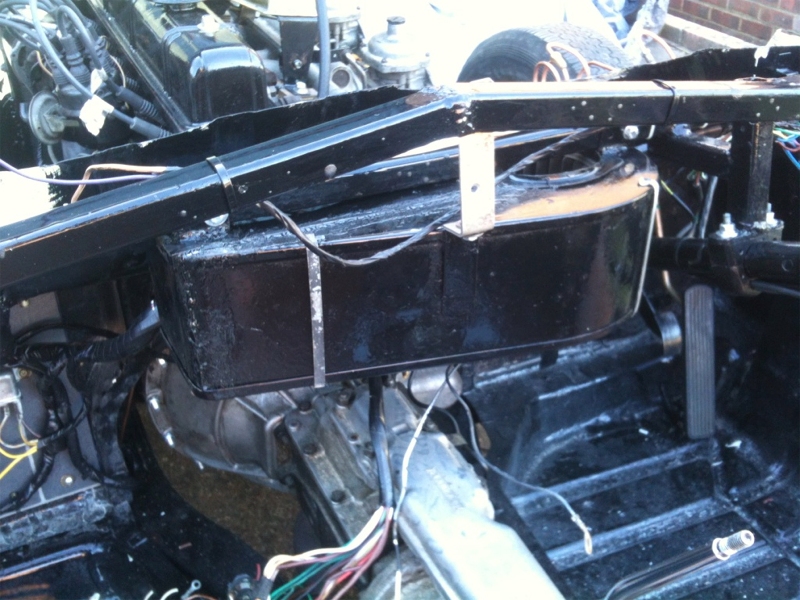
Also fitted some ducting and vents for the heater. Thought about making some panels to fit them into but ultimately decided to go with the simplest solution and just mount them on top of the gearbox cover -
The vents can be swivelled to direct the warmth to your feet or upper body, or closed off on one side to put all the heat through the other vent when driving alone.
Back to work tomorrow but should get some more done next week.
On the cool summers evening on the way back from the pub, the heater was a godsend and stopped 'er indoors from moaning.
The other alternative as I found out was to have an ill-fitting gearbox tunnel that let all the engine heat through and cooked your feet when stationary in traffic. Had to try and keep moving to keep cool!
So have a well sealed bulkhead area and a nice controllable heater. That's the answer.
I used a standard Smiths heater that I chopped and mounted to brackets under the dash. A simple inline heater control in the passenger footwell is all that is needed. I didn't run any vents anywhere, it just blew at your feet.
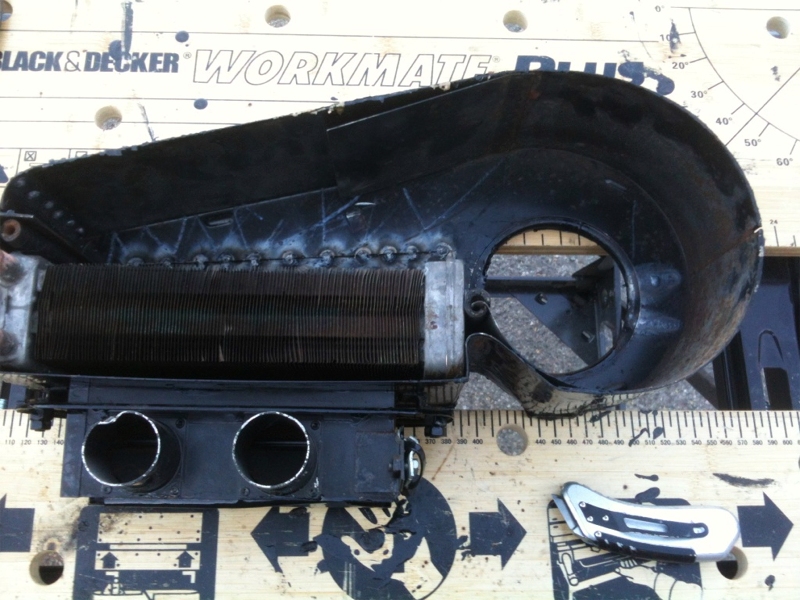
I do like Tone's approach to modifying the standard heater, unfortunately mine was just a solid lump of rust and completely beyond repair. So I went with a micro heater - it's at the left hand end of the ducting above the passenger footwell.
It does blow out hot air once the engine's warmed up, but it's difficult to tell how effective it's going to be on the move until I get my car roadworthy.
The blurb says it's 2.2kw output, but I don't know what a modern car heater can produce so I've nothing to compare it with.
Secondary reason for fitting a heater is to provide extra engine cooling if it starts to overheat. Hopefully I'll never need to use it for that though...
Oil pressure gauge does look the part and it was cheap as anything from ebay -
It doesn't have internal illumination so I'm fitting a little post light above it on the dash.
Just re-read the listing for the gauge - I paid about £8 for the 63mm, dry, panel mount rear entry (ooh er) gauge, but that was about eighteen months ago.
Not much progress to report. I'm afraid the freezing weather's put the spraying on hold, but I've decided to get on with those time consuming little finishing jobs instead.
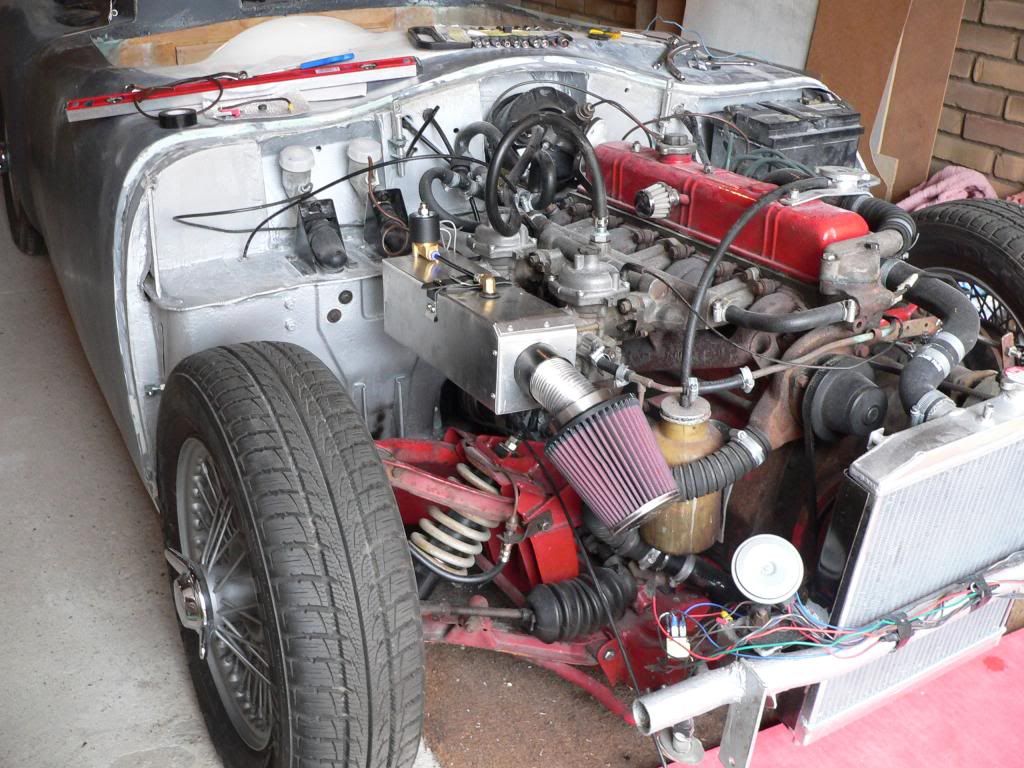
Today I was able to make a start on the air box for the water injection system -
Off to work in a few minutes but should get a bit more done tomorrow
hi mate still looking good soon be summer mate ..well look at it to day hay..snow
Cheers Phil, looking forward to a bit of warmer weather.
My water/methanol injection system is coming along nicely now. I've tested the pump and mist nozzle which work fine, but the vacuum actuated switch isn't sensitive enough to trigger off the suction created by the strombergs
This has meant a change of design, so it'll now be triggered by a micro switch on the throttle linkage. The last couple of hose connectors to attach the flow control solenoid arrived yesterday so I can now connect the whole system up and test it when I've got the time.
I've also found a local supplier of methanol in Watton
At 80p per litre it's cheaper than the distilled water it needs mixing with. I was going to go with a 20% methanol to water mix, but as it's cheaper than water I might just try the 49% to 51% brew recommended byTurboNutterJapModder specialists, Devil's Own.
Once my car's on the road (!!!) we'll have to book a rolling road dyno session and find out whether water injection makes more difference than conventional tuning. As there's going to be a manual arm/disarm switch (so it doesn't fire when the engine's cold and emulsify the engine oil), I'll be able to get a power output reading with it and without it.
I'm expecting it to add about 15 to 20bhp, but the biggest subjective difference I've heard about on classic n/a engines rather than overboosted forced induction motors is a huge boost in torque and 25% improvement in fuel economy.
And if it doesn't make any difference at least it'll look cool.
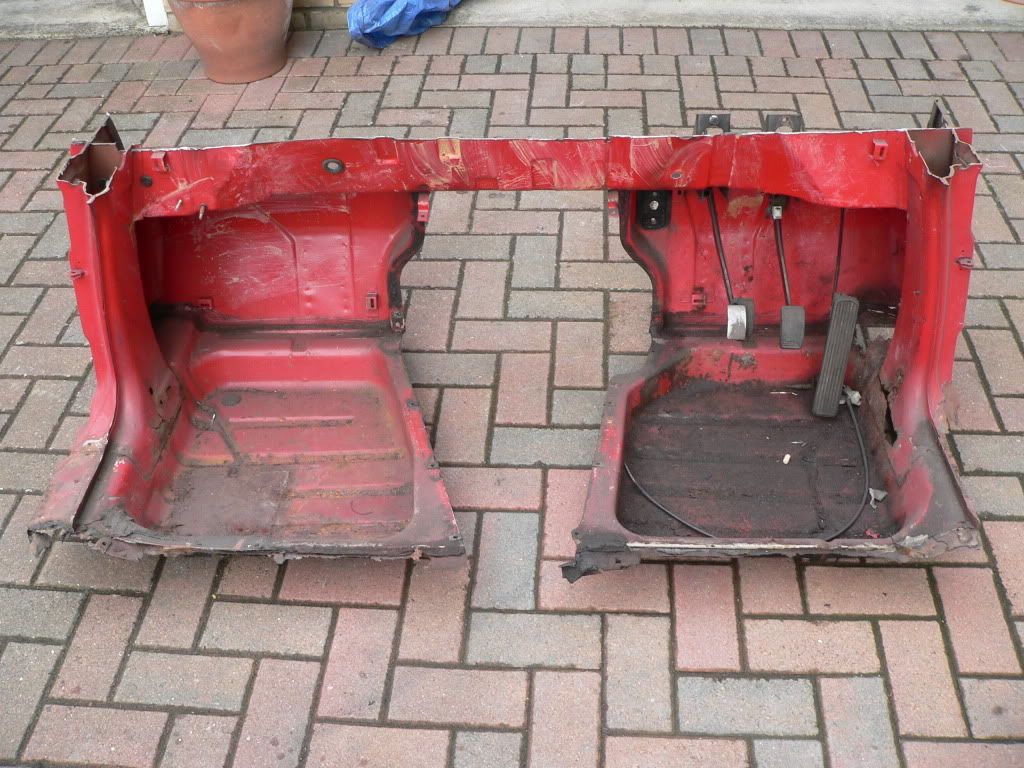
Hi Paul, I'm afraid my picture record for the bulkhead restoration is a bit sketchy. It goes from this
to this
without much in between.
I grit blasted the whole thing, then cut out the knackered floorpans and welded new ones in.
I also had to weld up a crack that appeared across top of the bulkhead on the bit that's parallel with the ground, directly above the gearbox on the opposite side to the starter motor.
That's something to watch for as it's caused by flexing of the bulkhead once it's unbolted from the chassis.
One thing I missed that I now regret is that I didn't seam seal the joins after welding in the floorpans. A year later and I've got some rust spots blooming through the hammerite, so I'm going to have to strip the paint off the seams, apply some anti rust treatment and smother the joins with tetroseal to keep any water out.
Mind you, if I ever built another one I'd have the chassis and bulkhead galvanised for long term peace of mind.
Good luck sorting your bulkhead out, if there's anything I can help with just give me a shout.
Managed a few hours before and after going out for a family lunch today. The airbox is now pretty much finished and the methanol injection plumbing is all done -
Just the electrics to do and a means of triggering it to fire. I've got a suitable micro-switch, but it'd be neater if I could use the vacuum actuated switch I paid rather a lot for.
This isn't sensitive enough to operate from the suction on the inlet side of the carbs, but I have thought of a way I could use it: Plumb it into the vacuum hose to the brake servo and connect the wiring to a solenoid switch that cuts the power to the flow control solenoid when there's a vacuum.
That way, when the throttle's closed it'll automatically close the flow control valve, but when you accelerate it'll open the valve and fire the methanol spray. That's the plan anyway...



 )
) 

 but should get a bit more done tomorrow