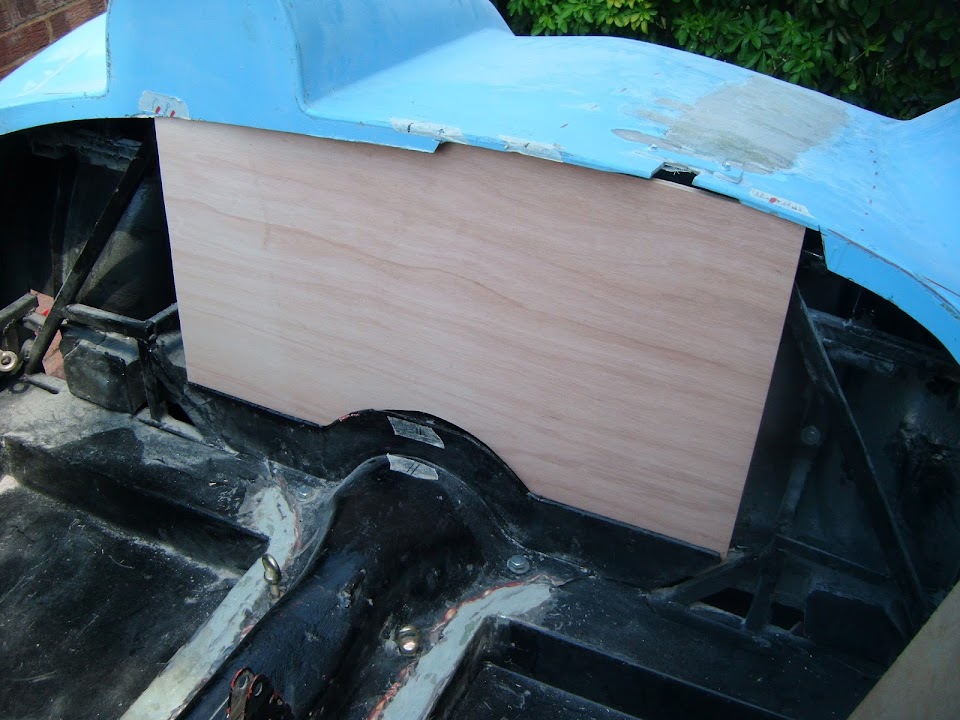
MadaboutKitcars

This is a read-only archive of the old Madabout Kitcars forum. New posts and replies are no longer possible, but every thread is still here to browse and read.

Another Cordite Is Born ...

23 Jul 2014, 7:30am
I was thinking the same Dave, the "baking effect" is better in this weather than the winter for sure!

Paul, you are becoming a bit of a wizard at this fibre-glassing!

Does not take take very much to make a bloke an expert, and you are certainly up in that league now! Well done mate.
23 Jul 2014, 4:14pm
Dave & Scottie - Cheers gents. :cool:

I will still take a heat gun to the body shell before I get to the painting stage, just to be on the safe side.
I do find the constant mixing and cleaning up afterwards a bit of a drag while doing fibreglass work.
( I can't mix more than 200ml of resin at a time in this heat as there is such a short pot life. )
However, I am really enjoying the fact I can make "something from nothing" as it were and that it is so solid.

When I first cut out the Cordite scuttle I did start to panic a bit, thinking I'll never be able to fix it.
But now I know I can get it to a decent, if somewhat Hillbilly, standard that will work well enough for me.
Plus the "Mr T in the supermarket car park" test means most people will not know what it was supposed to look like.

- - - - - - - - - - - - - - - - - - - - - - - - - - - - - - -

Slow Progress...
Yesterday I managed to get a lot of time on the car, today "not so much", but that is the way it goes.

First short session saw me finish off the re-enforcing of the underside of the spare hump.


In addition to making use of my matting left overs, I was also using up some of my "old" resin which wasn't helping either.

You may recall that I had left all my fibre glassing stuff sitting in my shed for over a year, so I bought some new resin for comparison.


This was been much easier to work with, so I have been predominately using that, but working my way through the old stuff when I can.

- - - - - - - - - - - - - - - - - - - - - - - - - - - - - - -

I removed some more of the fixing brackets from the body shell.


Then I roughed up the edges, removed any flaky fibreglass & applied a layer of filler to fill any of the small voids I found.
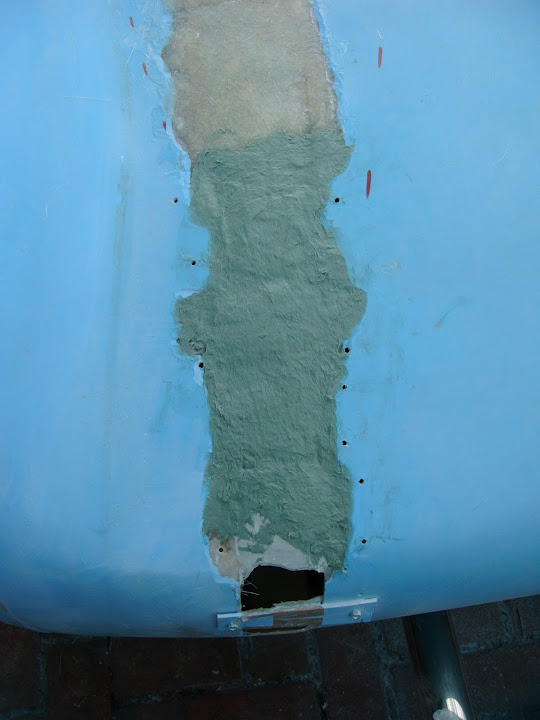


That leaves just two gaps remaining.


But these will not be filled in until I move the body shell into the back garden to tackle all the other work required.

Thankfully, the repair work I have done so far has restored more than enough strength to allow the body to be carried.

- - - - - - - - - - - - - - - - - - - - - - - - - - - - - - -

The only other thing I worked on was the gearbox tunnel cover.

I gave all the edges a final sand to ensure I had flat surfaces to play with.
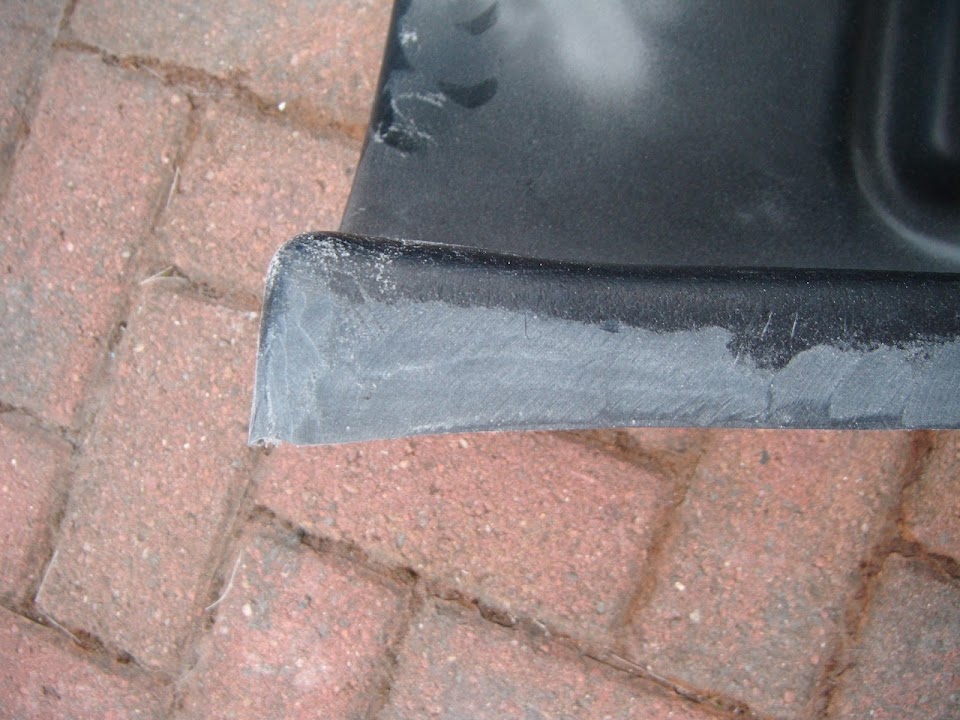


I cut up an old bicycle inner tube to act as a "spacer" to represent sealant between the cover and the bulkhead.


Which ever way I look at it, there seems to be no way to get a tight fit between these two parts.
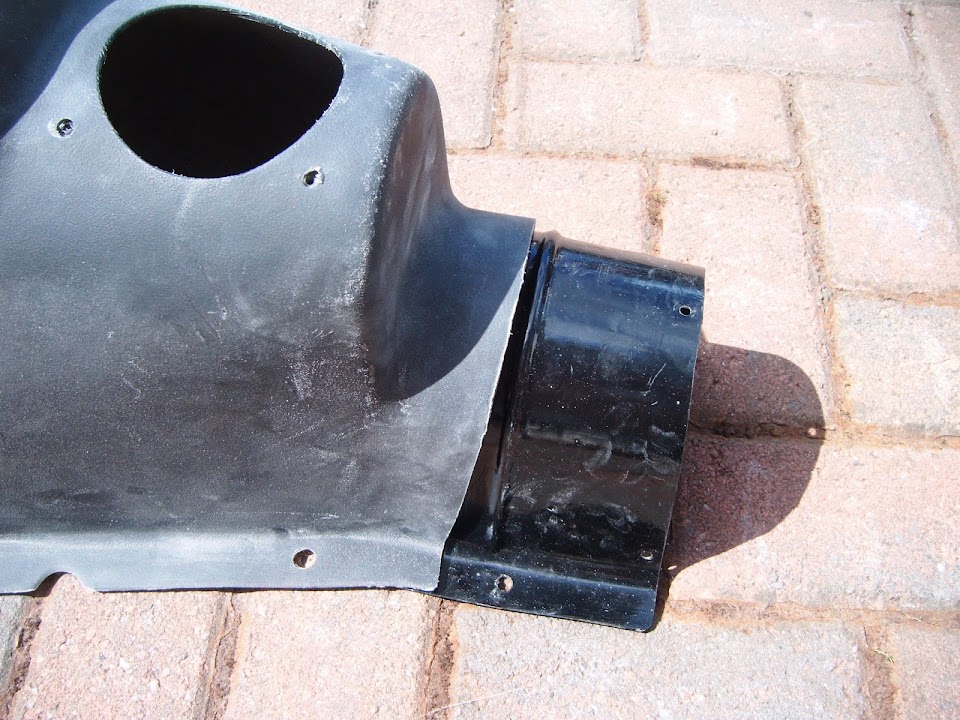


Looking at old photos, this whole area was a mass of sealant and simply covered in carpet. :rolleyes:

Thankfully, the three holes in the joining bracket line up with the three holes in the hand brake panel.


But I will need to drill two new ones for the base of the bracket through the panel / floors.

Initially, I was simply going to mark where I needed to drill holes in the bulkhead.

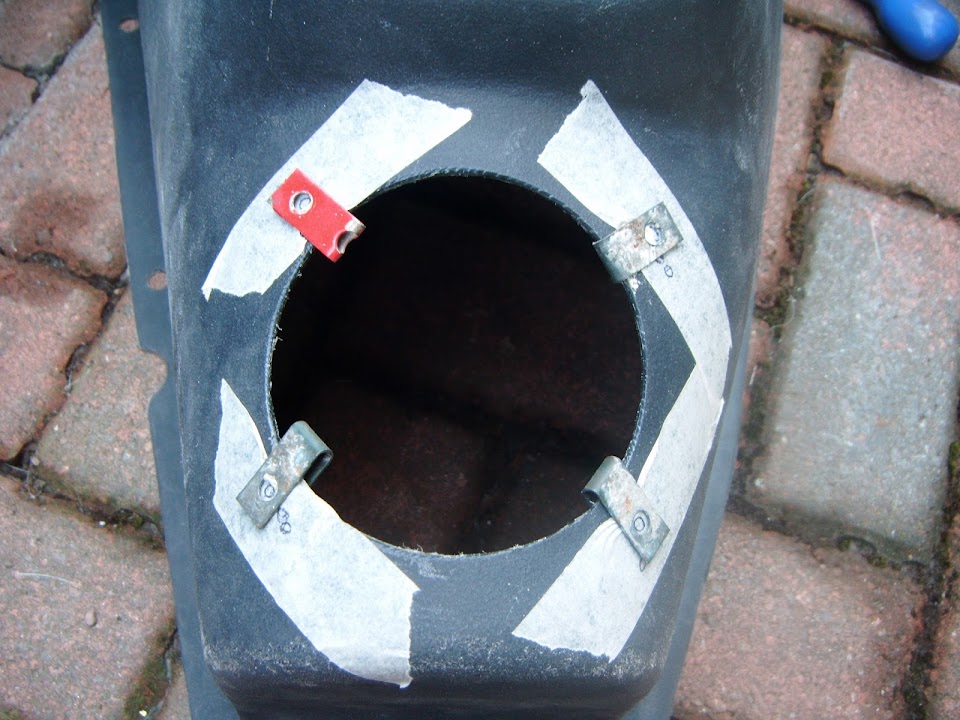
But looking in the bag of fixings that I had removed from the donor I found the self tapping screws' "clips".
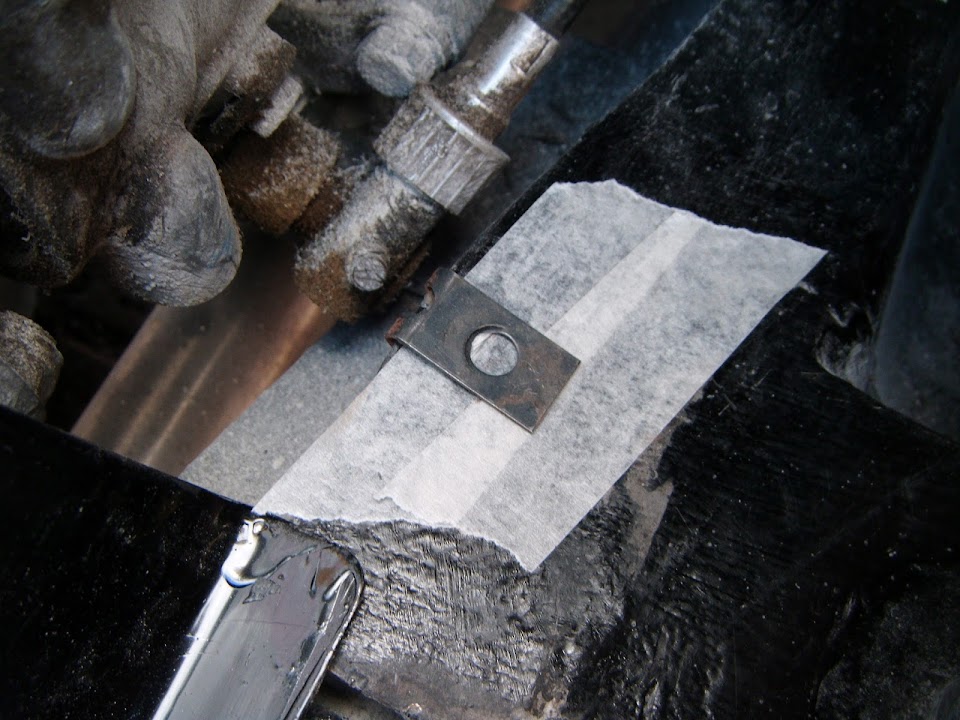


Clearly I needed the holes to be the correct distance from the edge of the bulkhead for the clips to work.

So with my bits of inner tube on the front face of the bulkhead I could align the clips on both sides.
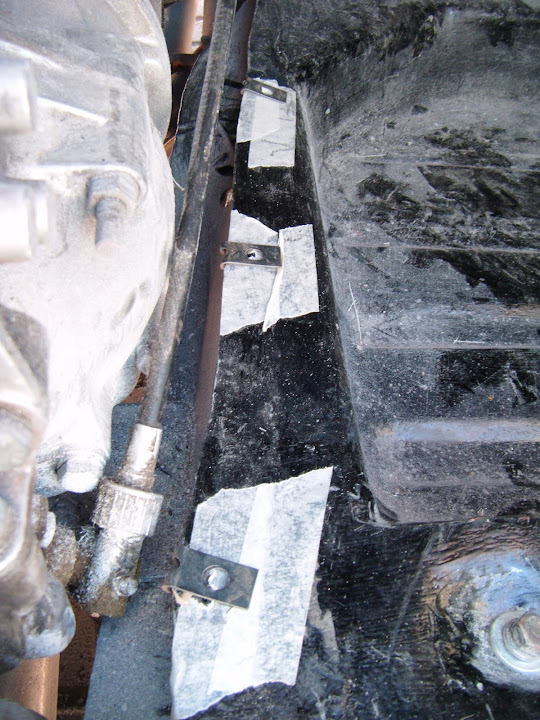


However, with the holes in the tunnel lined up with the clips, the hole for the gear lever is off to one side.
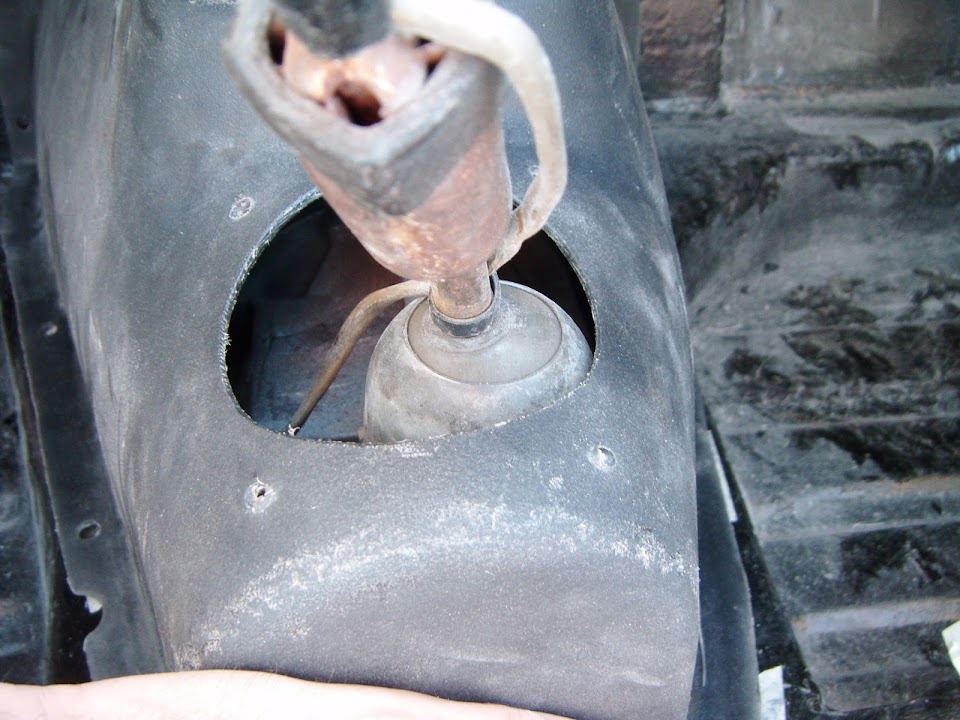


I don't appear to have any photos of the original gear lever in position without the gaiter in place.

Question:
Does anyone think this is going to cause any problems?

Next time I will dig out the gaiter and test fit that before I start drilling any holes.

I will also wait until I have drilled the six holes on the bottom edges of the bulkhead before I mark up the holes required on the front of the bulkhead.

As this will be a lot easier to do when the bulkhead is off the chassis.

- - - - - - - - - - - - - - - - - - - - - - - - - - - - - - -

Shopping List:
I've ordered another tub of the green fibreglass filler as I still have a bit of shaping work to do.

But I make a big mistake by thinking about the extra fibreglass supplies I needed...

Another 5kg of resin seemed fair enough, and I have used up most of the first 5kg roll of matting that I bought.

So I started to quickly write down all the remaining jobs involving fibreglass I could think of.

What was I thinking?

I should simply have just ordered another 5kg roll and not have created yet another "To Do" list. :icon_sad:

However, since I have written this down, I might as well share it...

Fibre Glassing Jobs - To Do List:
- Finish repairing the major cut along the rear of the body shell
- Re-enforce the final section inside the spare hump - Now Done
- 'Cut & Shut' the rear of the driver's side rear wheel arch to a similar shape as the passenger side
- Reshape / reposition the wheel arch openings front and back as required
- Reshape the rear cockpit corners, including a new lip along the rear line
- Realign the front face of the driver's hump (may just leave as is)
- Build the wind deflector base across the top of the scuttle
- Build a lip along the cockpit edge of the scuttle in front of the dash board
- Re-enforce the sides of the body shell where the old scuttle was cut away
- Add extra matting on the under side of any "flash line" that reveals fibreglass when sanded down
- Add the tail pipe mounds to the body shell
- Re-enforce the bonnet lip on the body shell
- Seal the gaps between the rear wheel arches and the rear frame work
- Extend the Spitfire rear wheel arches to join the sides of the body shell
- Bridge the small gap between the Spitfire bulkhead and the rear frame / floors
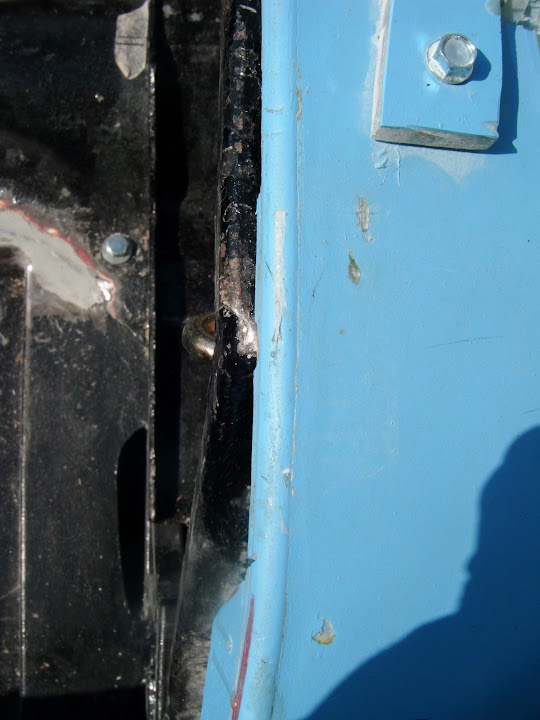
- Seal the gap between the sides of the bulkhead and the bodyshell
- Major surgery required to bonnet to ensure front wheel on driver's side is covered
- Possible "hockey stick" bracing on the inside of the bonnet
- Other bonnet work vs. extending sides of body shell (see Mac's build)
- Fibreglass the body shell to the "Moon Rover" after bonding the shell in place
- Rebuild top edges along both cockpit sides to cover a plywood support structure attached to to the framework
- Build front inner wheel arches (not really sure what I am going to do here yet)
- Sort out a boot opening of some sort with appropriate cross bracing, rain channel, etc.
- Something else I am bound to have forgotten

So much for starting to dream about joining Mr T for a drive in 12 months time. :rolleyes:

On the plus side, I had another chat with Mac on the phone today and he really does give me hope.
Seeing the work he is doing on his Navigator is a real inspiration and a great way for me to learn.
Whilst he has done car bodywork before, seeing the finish he has been able to create gives me something to aim for.
Not saying, I can achieve it mind you, but my body work will be much better than I initially thought possible.

- - - - - - - - - - - - - - - - - - - - - - - - - - - - - - -

Next Steps:
- I need to tidy up the filler on the underside of the scuttle and test fit that to the bulkhead.
- Then I can start marking up all the changes I need to make to the body shell & rear frame work.
- Then I can start removing the bulkhead and rear frame / arches / floors, to allow me to work on their undersides.
- Once I have finished working on those pieces off the chassis, they will be bolted into position for the final time.

That's all for now and I'd better go, as I am meant to be doing something else!

Take care, Paul. :)
23 Jul 2014, 6:17pm
Paul,

Where do you get your fibre glass supplies from.

Can you give me the details also details of the product you have used.

Keep up the great work. Enjoying your thread from Vietnam.
23 Jul 2014, 6:25pm
MAS don't know who Paul uses but I have always found east coast fibreglass to be very helpful. Just google them they will be top of the list, there web site has some good how to's as well.
HTH
Mac
23 Jul 2014, 11:12pm
Have you got references for the Matting (grade/grams/size etc...) and the Resins used plus can you recommend any other useful tools required, never tried fibre glassing before looking forward to it and the splinters.
24 Jul 2014, 6:08am
I love updates to this thread,and the underlying time restraints as you keep the mrs /family happy doing all the other stuff.

The amount of work you've done recently is amazing ... Keep up the good work and the detailed posts
24 Jul 2014, 8:43am
Mac - East Coast were recommended by the fibre glass book & DVD I bought.
( Although I can't remember why I ended up using someone else. :rolleyes: )

RedRatBike - Thanks for the kind words. :cool:
It is only when I look back at the detail that I can see just how much effort I have put into this project.
Which in turn explains why it is taking me so long, as this has been nothing like a "standard" build.

Mike - I took a few photos this morning for you and hope the following makes sense.

I've ended up using Glasplies.co.uk for the stuff I've bought so far.

They call this "Resin A", AKA General Lay Up Resin.


Just ask for the corresponding catalyst and they will know what to send.

I use a plastic syringe to measure this out and in the heat use a 1% mix.

I've simply marked up old milk cartons with 100/150/200 ml levels.

As this makes working out the catalyst mix easier to do.
( 200ml resin = 2ml catalyst @ 1%, or 4ml @ 2%, etc. )


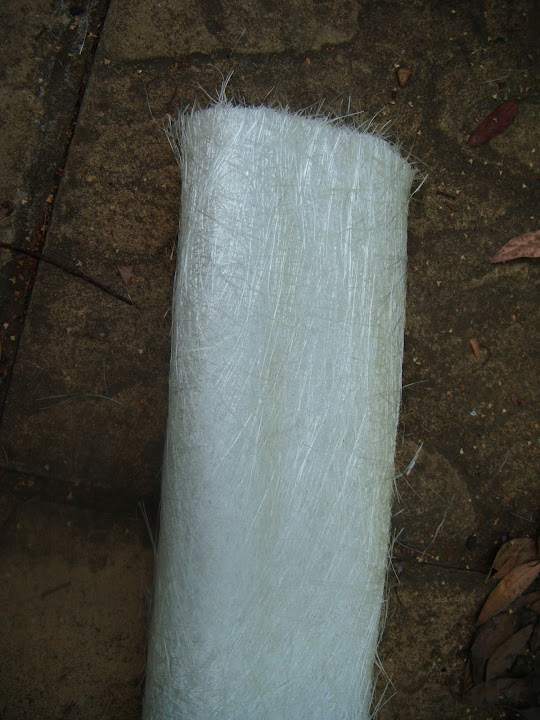
I use the 600g weight of CSM (Chopped Strand Matting) and initially got a 5kg roll.


As for tools I use a small brush to apply the resin.

A small roller to press over the matting to ensure no air pockets and that the resin in soaked through the matting.

I ordered some "lollypop" sticks for mixing, but when they run out, any old stirring stick will do.

You may have seen the photo I posted of the brush and roller handles wrapped in newspaper when in use.

This just makes the cleaning up operation a bit quicker.


Talking of cleaning up, I use acetone to clean the brush & roller.

So I have a couple of pots with lids to store the stuff I am currently using.

My system is wipe off an excess resin & wash in pot #1.

Wipe any excess off again and then wash in pot #2 before leaving to dry.

Once pot #1 is too dirty, empty that out, clean it & refill with fresh acetone.

That then becomes pot #2 and the previous pot #2 becomes pot #1 etc.

( The book recommended a 3 pot system, but two pots have worked OK for me. )


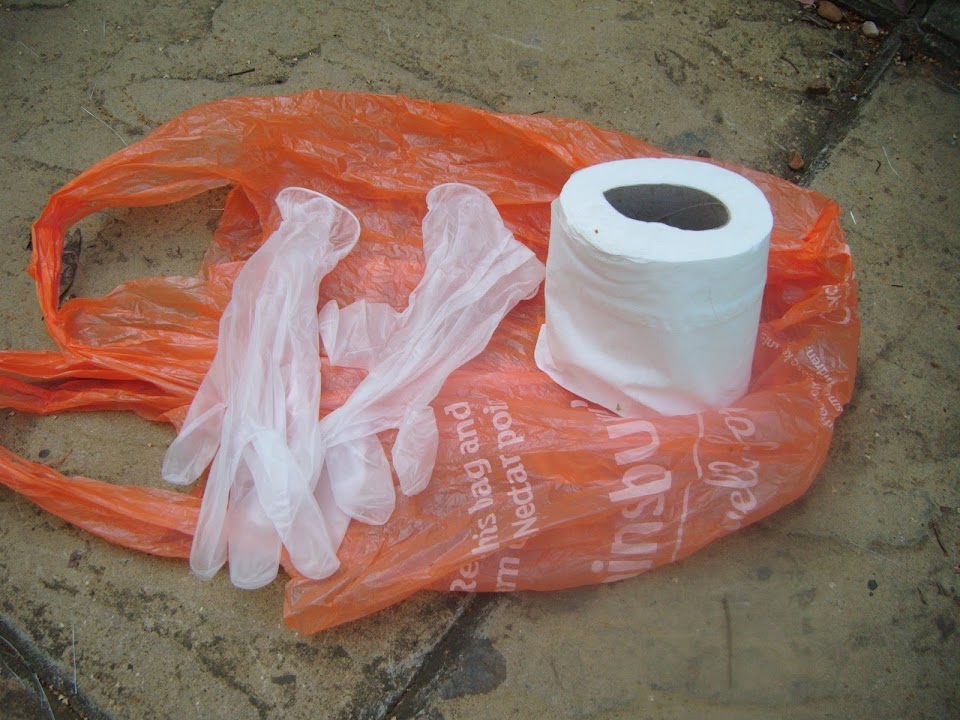
You will need a stack of rubber gloves.

I simply use loo roll for wiping things and an old carrier bag for the waste.

This really is a messy job, so I use newspaper and dust sheets as well.

- - - - - - - - - - - - - - - - - - - - - - - - - - - - - - -

Have a think about the fibreglass work you need to do to gauge how much stuff you need.

I'm sure your Speedster will not require any of the wholesale butchery you see going on here.

Just bare in mind it had a short shelf life, so don't order it miles in advance like I did. :rolleyes:

Hope that helps, Paul. :)
24 Jul 2014, 9:14am
I used Glasplies stuff too. Worked a treat but as Paul says, it's a very messy job.

Oh, and acetone dissolves nitrile gloves in about five seconds, so I borrowed a pair of marigolds from the kitchen. Permanently it turns out as for some strange reason my better half didn't want them back...
24 Jul 2014, 9:56am
Always wear eye protection. You really don't want resin and catalyst in your peepers. Whilst stirring a recent batch (vigorously I admit), a blob flew out and hit my protective glasses.

I did get some in my hair yesterday, but that was just me being an idiot.
24 Jul 2014, 6:30pm
Mr T - No doubt I was copying you when I started to use Glasplies.

Oxford - Good point, I should have mentioned for safety I also wear a proper filtered mask.

Although ditching the NCIS white suit has stopped me boiling over in the heat...
Wearing shorts has occasionally seen me get resin in my "hairy legs". :rolleyes:

- - - - - - - - - - - - - - - - - - - - - - - - - - - - - - -

Not Much To See Here...
RedRatBike's comment about juggling the build with family life sums up today nicely. :juggle:

Family = 99% + Car = 1% (although that involves some generous rounding up. :icon_wink: )

But I did manage to do a few tiny bits that will help next time I am playing with the car.

I dug out my best photo of the original gear lever set up.


Thankfully my donor came with both a spare metal bracket (original was cracked) and a spare rubber seal.

Although it did take me quite a while to find the box with these parts in it. :rolleyes:

After some significant elbow grease, I did get the rubber seal looking pretty good.


Unfortunately without a "before" photo, you can't really tell how crusty it was when I started.

So I should now be able to test fit this to the gear box tunnel cover and see it everything works OK.

- - - - - - - - - - - - - - - - - - - - - - - - - - - - - - -

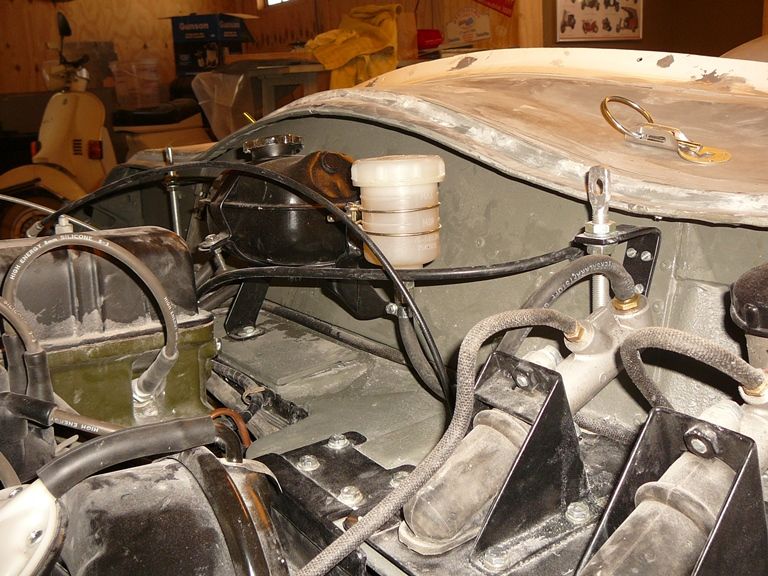
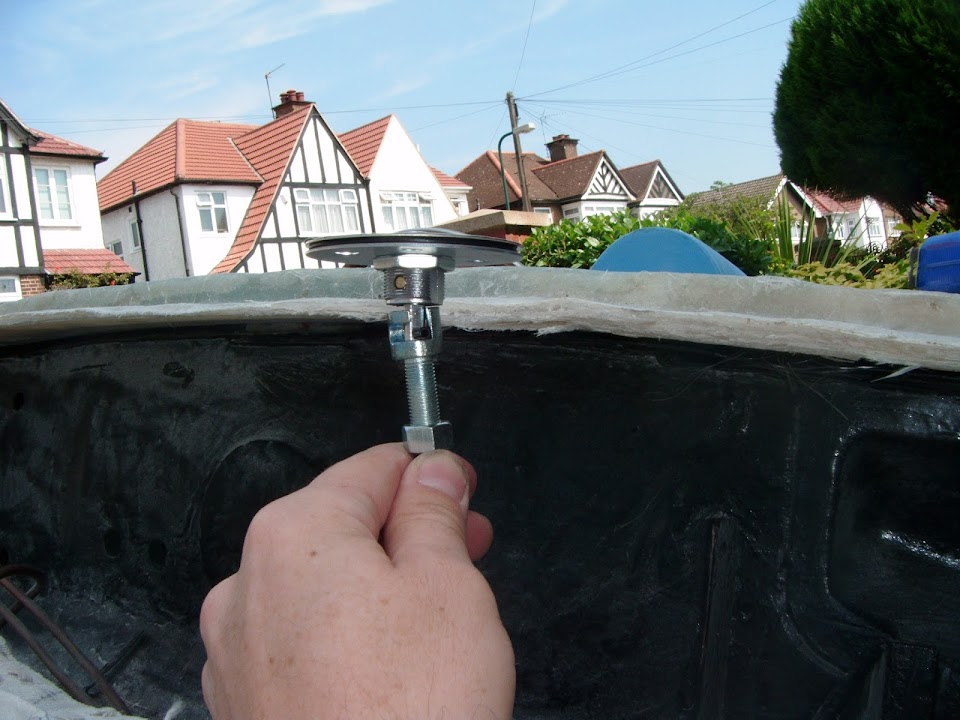
I also found the box with my locking bonnet pins in, as I need to mark up where they will go on the bulkhead.

To help me do this, I also tracked down a few photos of bonnet pin brackets from other builds.

TlrTone


Mr T


Michiel


I also found some "L" brackets I had in a box, but I'm not sure if they are suitable.

So I might have to buy / make something to hold the threaded rod part of the bonnet pin in place.

- - - - - - - - - - - - - - - - - - - - - - - - - - - - - - -

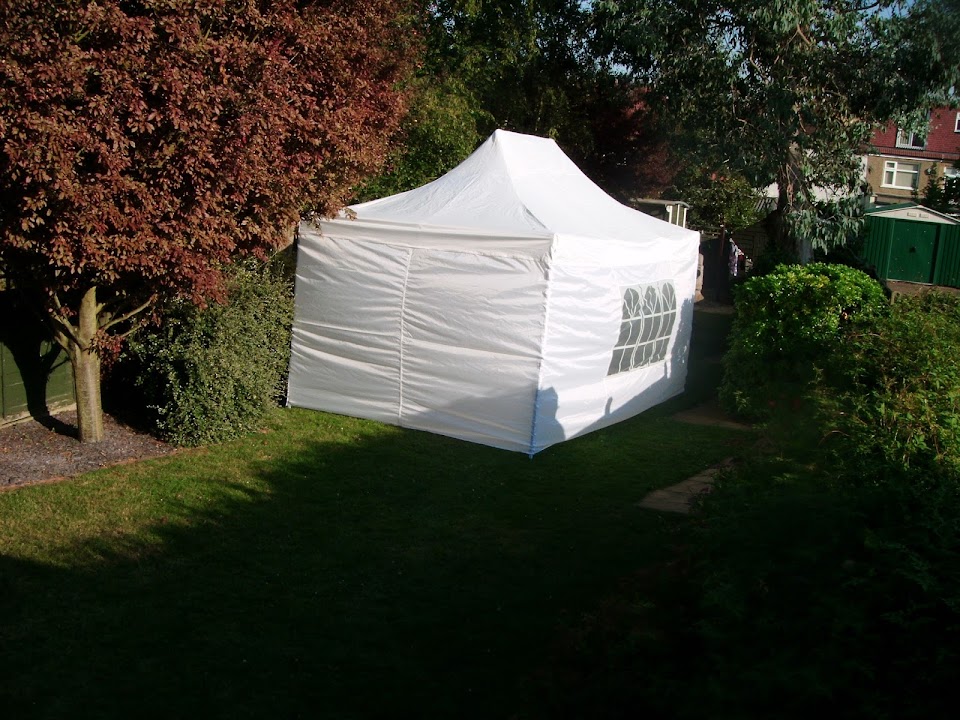
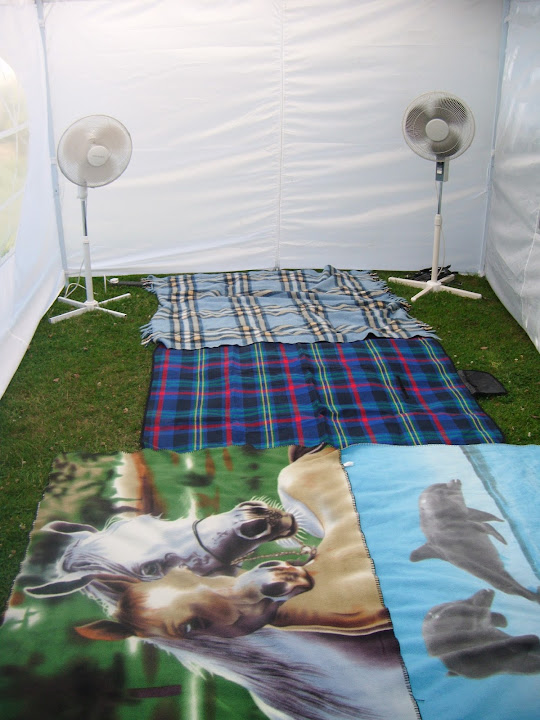
Finally we put the "Circus Tent" up in the garden as my daughters have some friends coming around tomorrow.


At some point, this will become my "Body Shop" for the all the remaining "fixes" to the body shell.

Although I still need to get the body shell through my neighbour's garden, before it can reach mine!

- - - - - - - - - - - - - - - - - - - - - - - - - - - - - - -

Given the huge amount of progress I have managed recently, I am relaxed about missing the odd day here and there.

So until next time, take care, Paul. :)
25 Jul 2014, 1:58pm
Another few millimetres, but only just...
Spent the early morning sorting things out in the house/garden before my daughters' friends arrived.

This left me the smallest of opportunities to work on the car, so I grabbed my chance.

I unwrapped just the back of the car and gave the last round of filler a quick buzz with the angle grinder.
( I will return with the sanding set to do a proper job on this another day. )


This was my feeble attempt at multi-tasking as I really wanted the grinder for my next job.

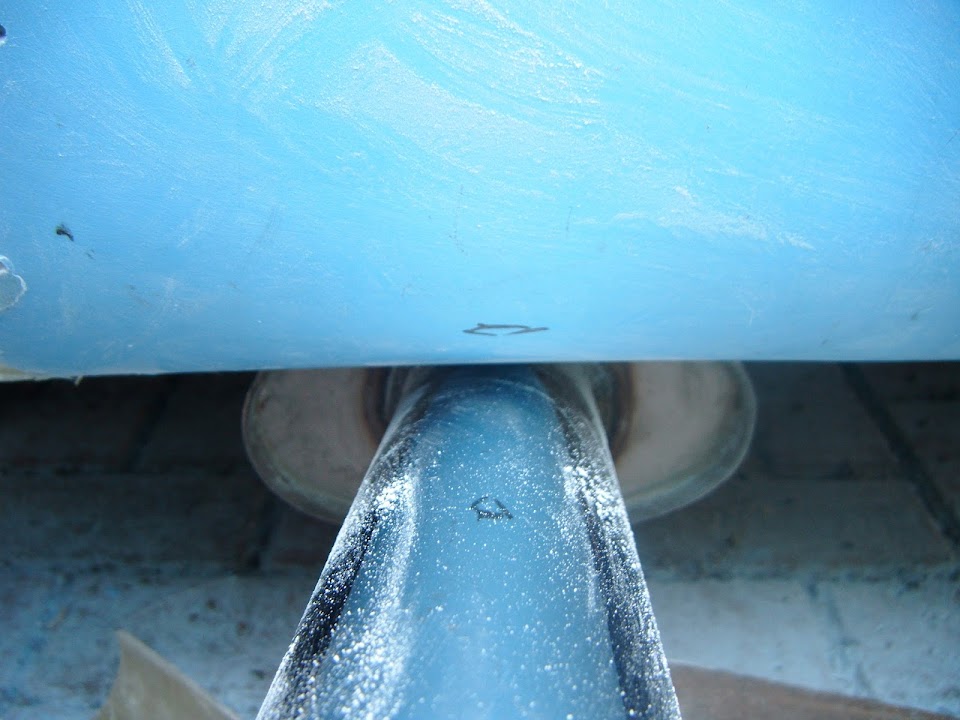
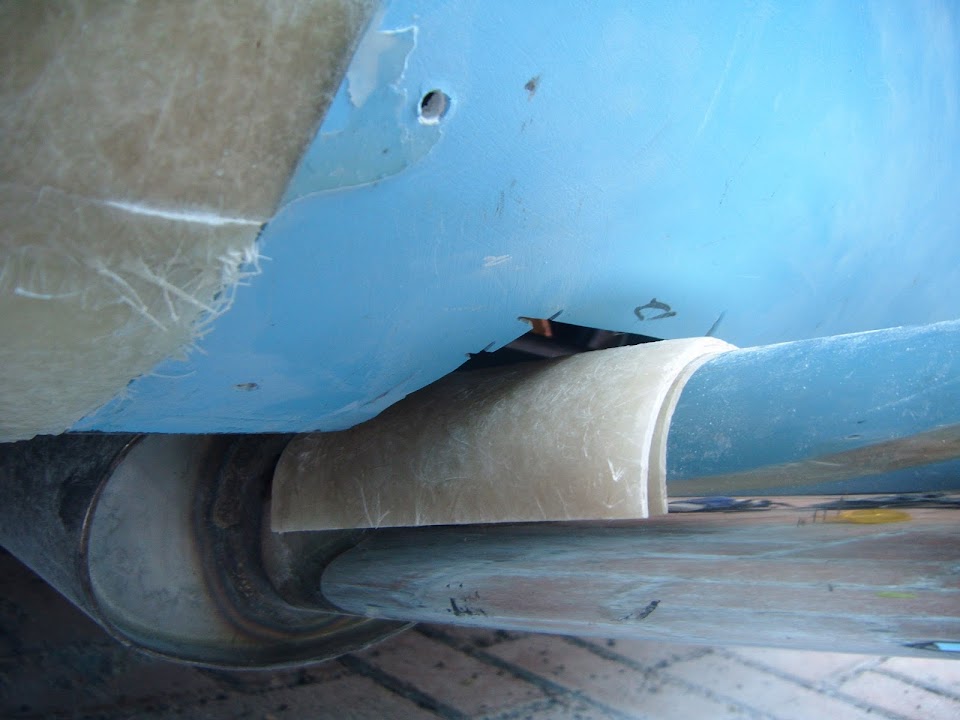
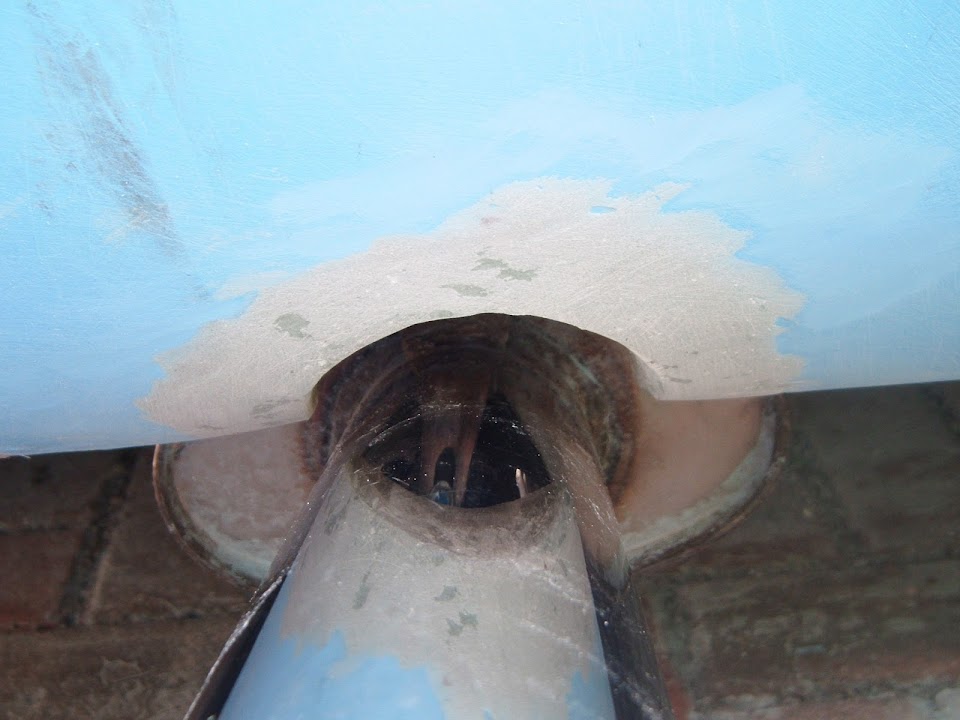
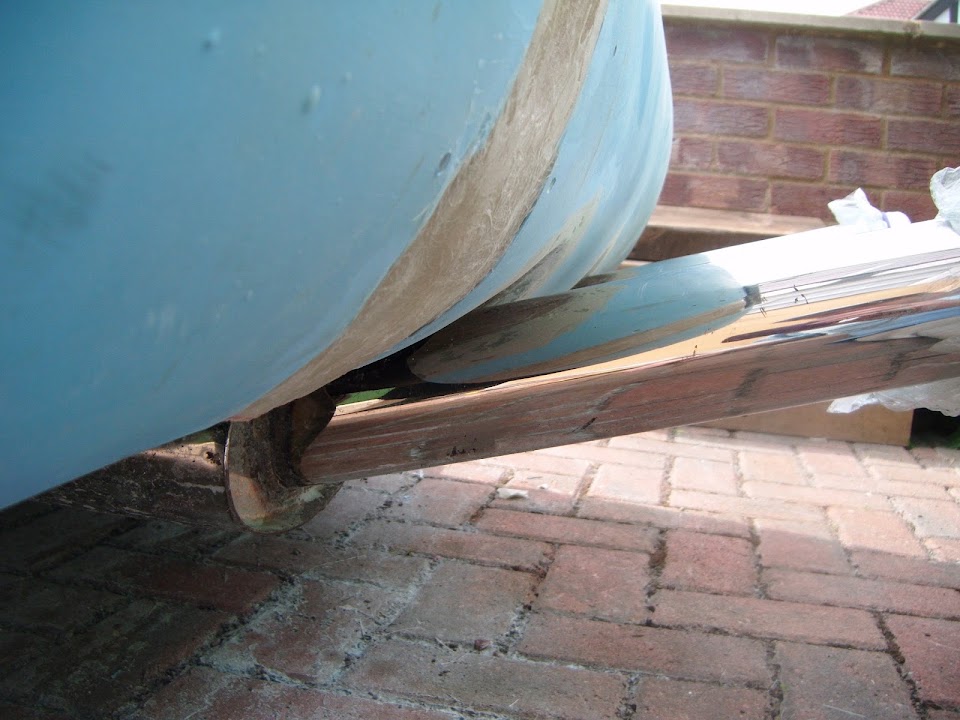
So after fitting a cutting disk, it was time to remove a bit of the rear body shell to allow for the twin tail pipes.

Before:


After:


Note:
The angles of the photos make these look like gaping holes, but they are not as big as they look!

I will also be extending these holes when I get around to blending in the beer can casts.

But for now, I just needed to ensure there was a small gap between the top of the pipe and the bottom of the body.


As this will allow me to do the final round of body shell measuring.

Then it was a frantic round of tidying up all my car related mess and re-using my long extension lead...

- - - - - - - - - - - - - - - - - - - - - - - - - - - - - - -

As we had turned the inside of the 'circus tent' into a bedouin tent, or at least a Tribute to one. :icon_wink:


I then had to man the Bar-B-Q which was seriously hot work.

Thankfully the sound & sight of the thunder & lightening slowing rolling in gave us enough time to clear the tent.

As went the rain finally came it really did hammer down. :eek:

If I don't get another chance to play outside this evening, then I hope I will get a decent run at it tomorrow. :pray:

Cheers, Paul. :)
25 Jul 2014, 6:14pm
I was in that shower coming out of east London Paul, manhole covers were popping on the north circ!
Left East Ham at 12:50 and drove onto the drive at 19:00
!@£$£@@£$£ traffic!
26 Jul 2014, 7:46pm
Mac - I would not have fancied driving in that downpour. :eek:
If you are going to be working in town, perhaps I can buy you a beer one day?

- - - - - - - - - - - - - - - - - - - - - - - - - - - - - - -

A Long Day - Part 1:
Had a good run at the car today and covered a number of areas.

So I've grouped the different things together, rather than follow a strict time line.

Gearbox Tunnel Cover:
This was actually the first job of the day and it was painfully slow progress.

I did a side by side comparison of the old & new & the hole in the old is off set to the right a tad.
( Which ties in with my previous test fit of the new cover. )


The holes in the old cover also line up with the bracket, whereas they don't on the new.


The good news was that the rubber seal had plenty of room to move from one side to the other.


My first attempt at marking up the new holes failed as one was right on the edge of the hole.


So I used the self tapping screw clips to come up with a best fit location.


Then I could finally drill the holes, fit the seal & test fit it.


At some point I need to work out what I am going to do for a gear lever gaiter.

- - - - - - - - - - - - - - - - - - - - - - - - - - - - - - -

Indicator & New Scuttle Design:
I mocked up the Spitfire indicator and re-fitted the steering wheel.


There is absolutely no potential clearance issues at all.


Although I did go back at find this old photo of my original donor set up.


Not easy to see, but it does show the plastic steering column cover does sit in front of the dash.
( I have only temporarily fitted the top end of the column & was worried it was in the wrong position. )

The even better news is that when I was viewing the clearance from above...


It dawned on me that I could actually extend the scuttle back a couple of inches with no issues.


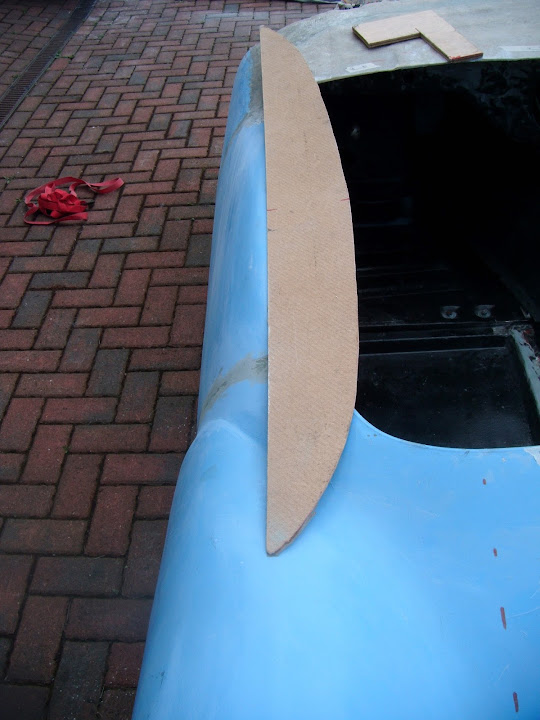
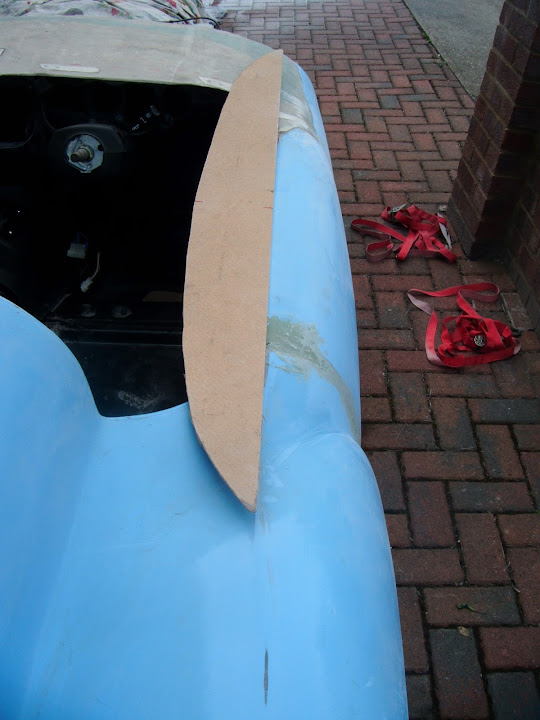
I swapped the hardboard former around so you can see the gap that I can now fill.


This means I will be able to mound the aero screens further away from the actual scuttle edge.

I can also commit to a simple "visor" design for the top of the dash.


End of Part 1...
26 Jul 2014, 7:46pm
A Long Day - Part 2:

Blending Scuttle to Cockpit Sides:
I needed to work out how the front cockpit corners were going to work if there was no lip in front of the dash.

As my original thoughts were to make the lip deeper at the corners to cover the ends of the Spitfire bulkhead.

This is the view of the inside, where the frame joins the bulkhead.


I can run a plywood panel along the frame so that the bulkhead make a nice 90 degree join.


So rather than cover the view of the end of the bulkhead with a lip sitting in front of it.


I will try to blend the bulkhead to the cockpit sides, although the cardboard doesn't really help illustrate this. :rolleyes:

Plus the plywood would extend further upwards as well.


Either way, that is one less thing to worry about for now.

- - - - - - - - - - - - - - - - - - - - - - - - - - - - - - -

Locking Bonnet Pins:
I had a couple of these brackets lying around, but there were too small.


As what I'd forgotten is the bonnet lip on the new scuttle is a long way in front of the bulkhead.

The pins would sit somewhere around here, or maybe a bit closer to the bonnet lip.


Which means a bracket bolted to the bulkhead would need to extend 6 inches (or a bit less) to support the threaded rod..


So I will have a look for a longer bracket, so make something myself.

- - - - - - - - - - - - - - - - - - - - - - - - - - - - - - -

Cockpit Sides:
On the surface, it appears one side of the body shell is "fatter" than the other.


But I also need the sides to work relative to the frame underneath.

So I pressed a plywood off cut up against the frame rails.


This allowed me to mark where the internal panelling would touch the inside of the body shell.


This is what the markings look like on the underside.


But there is also the added confusion of the frame actually running at an angle to contend with.

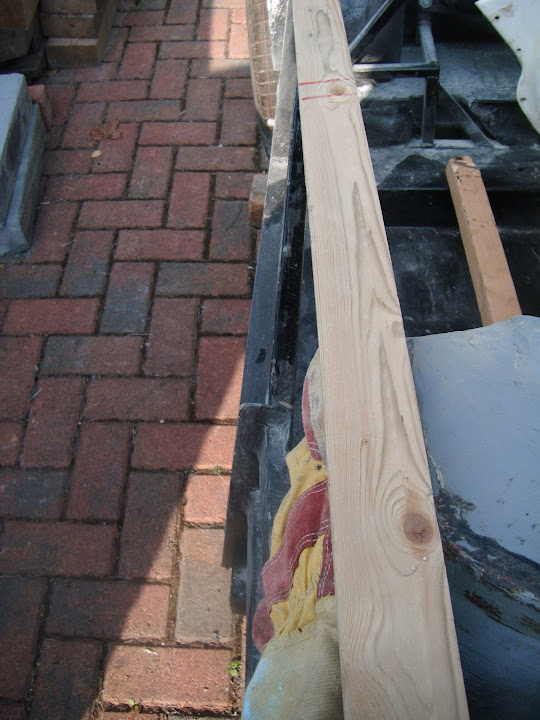
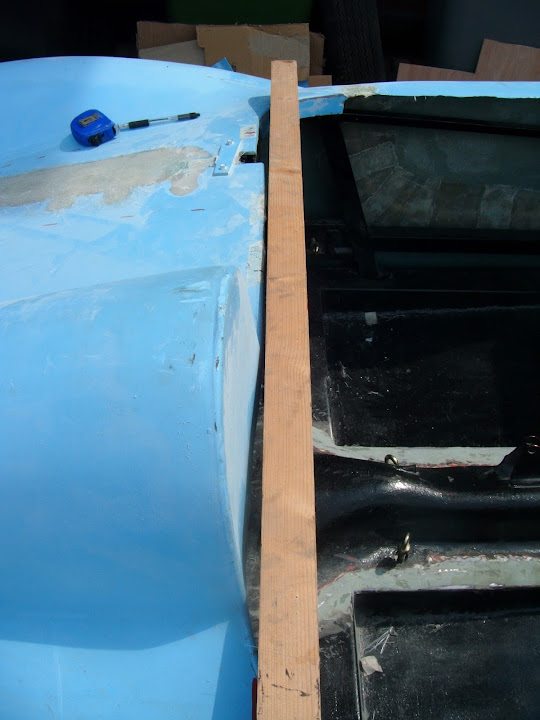
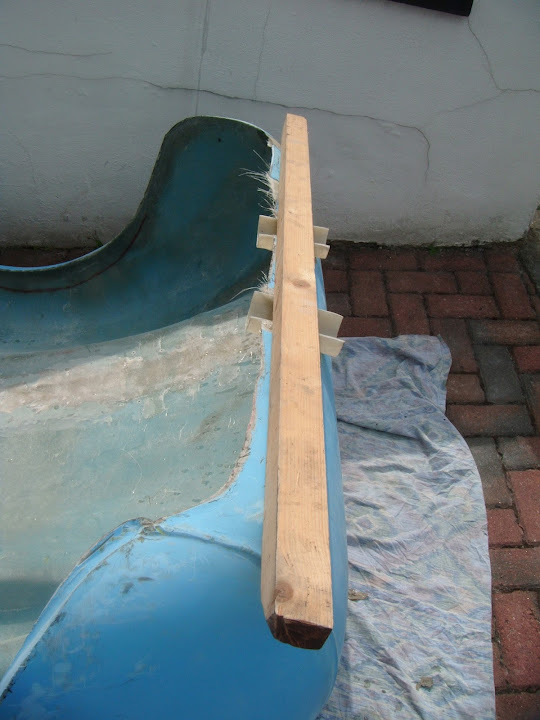
I ran a length of wood from the edge of the bulkhead to the rear corner of the frame work.


I should be able to re-create this line on the underside of the body shell.

As you can see the angle of the framework here.


So I need to run the internal panels at the same angle as the frame.

But try to keep the top edge of the cockpit sides running square to the front and rear edges of the cockpit.

I am sure I will be able to work this out eventually. :rolleyes:

End of Part 2...
26 Jul 2014, 7:47pm
A Long Day - Part 3:

Tail Pipe Exits:
For some reason I was struggling to picture how the casts I had made were going to work.

So I decided to start the fitting process, so I could cut them out & start again if I made a mess of it.

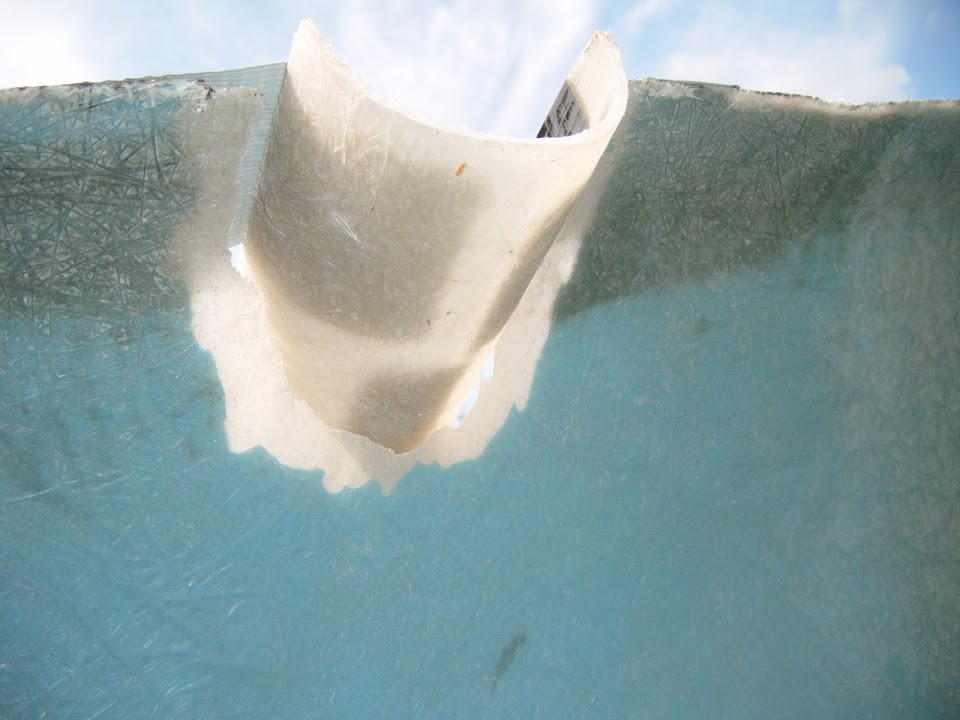
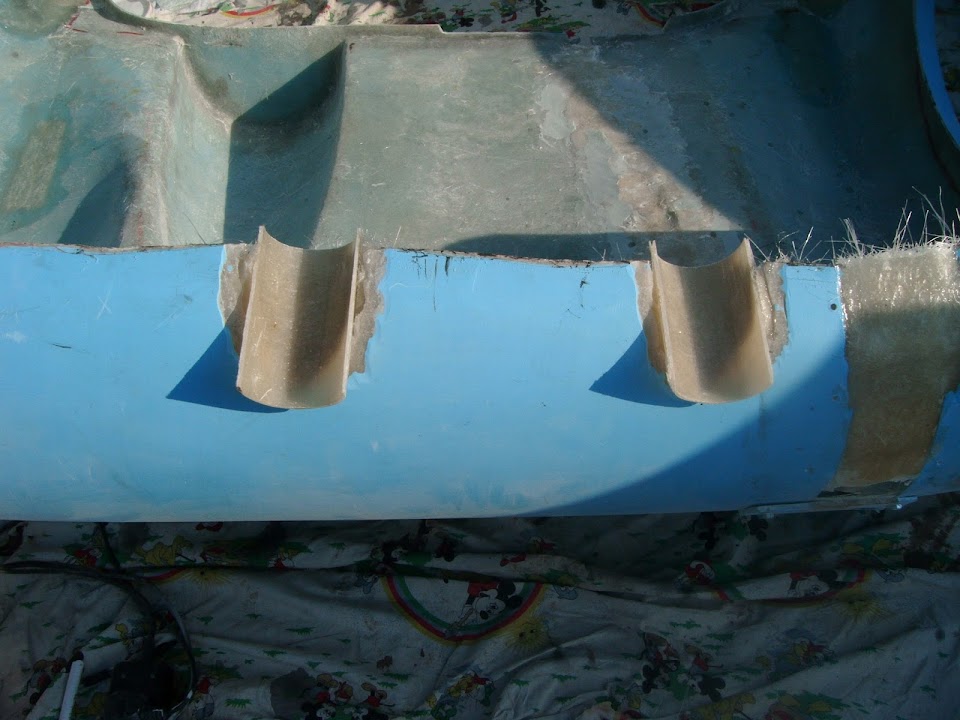
I started by making two messy holes in the body shell.


Then I taped my beer can casts into position from the outside.


Which left me this area to seal from the inside.


Multiple layers of matting later and both casts were fixed into position from the underside.


Which means I just need to trim these casts to match the shape of the body shell & seal them from this side too.


With the body shell back in position, the tail pipes do actually line up with the curves. :cool:


And when this has all been trimmed, there will just be a gentle curve in rear edge.


Even though I didn't get a chance to finish this job off today, I am happy that the idea works well.

- - - - - - - - - - - - - - - - - - - - - - - - - - - - - - -

Damage Report:
Moving the body shell so often was bound to end in tears at some point...

I managed to break off the bottom corner of the bonnet lip on the driver's side.


But I will not worry about fixing that until I know what I am doing with the bonnet itself.

There has also been a crack in the rear passenger corner for some time.


This was something that I did fix today.


- - - - - - - - - - - - - - - - - - - - - - - - - - - - - - -

Other Fibreglass Jobs:
I added the first round of extra matting to the driver's side of the body shell.


Plus the second round to the passenger side.


I also added some matting to the underside of four areas where removing the flash lines revealed the fibreglass below.


I added some extra layers of matting to the very bottom edge of the "gaping wound" repair.


End of Part 3...
26 Jul 2014, 7:47pm
A Long Day - Part 4:

Matching Spitfire Arches to Body Shell:
My plan is to join the Spitfire arch to the side of the body shell.

But it occurred to me that these arches could give me a reference point for the body shell arch openings.

So I jacked the car up, put it on axle stands and removed the wheels.


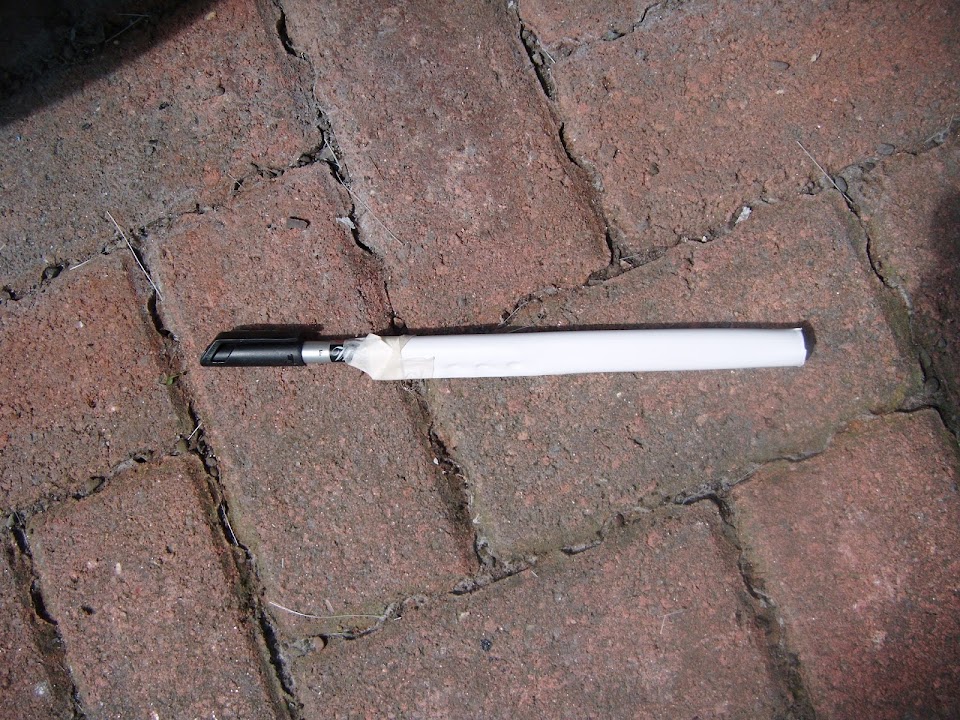
Made a "low tech" guide rail for my marker pen.


And after going over the black line with a thicker red marker, this was the result.

Driver's side:


Passenger side:


I will come back at look at this a bit more closely another day.

- - - - - - - - - - - - - - - - - - - - - - - - - - - - - - -

Other Odd Jobs:
I sanded down the filler on the inside of the scuttle.


And the filler on the inside of the body shell repair.


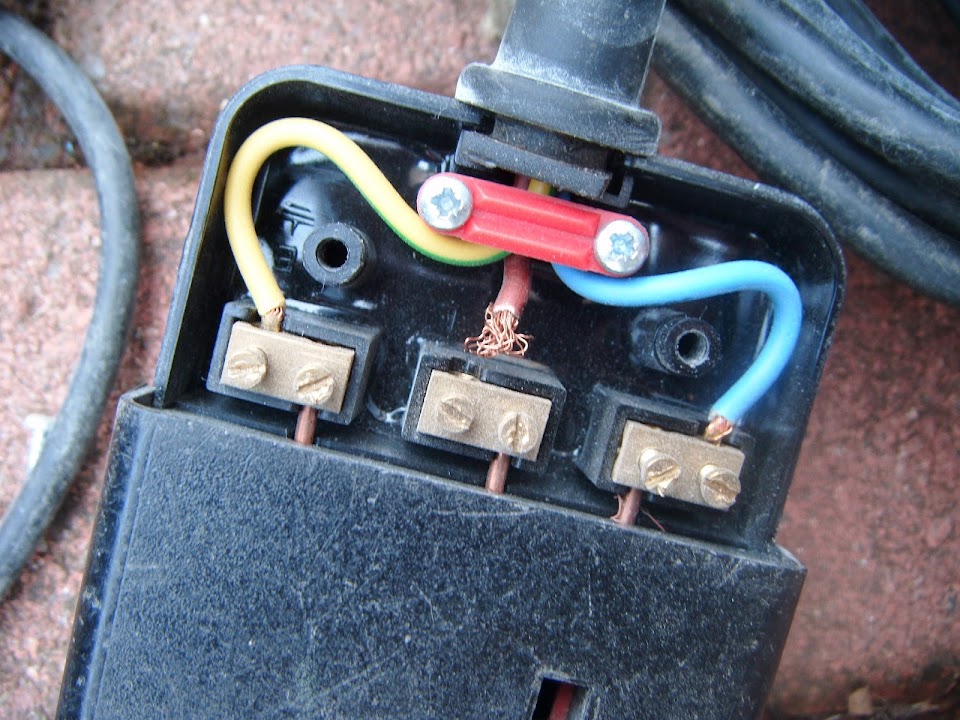
That was after I had re-wired my extension lead, as a wire had come loose. :rolleyes:


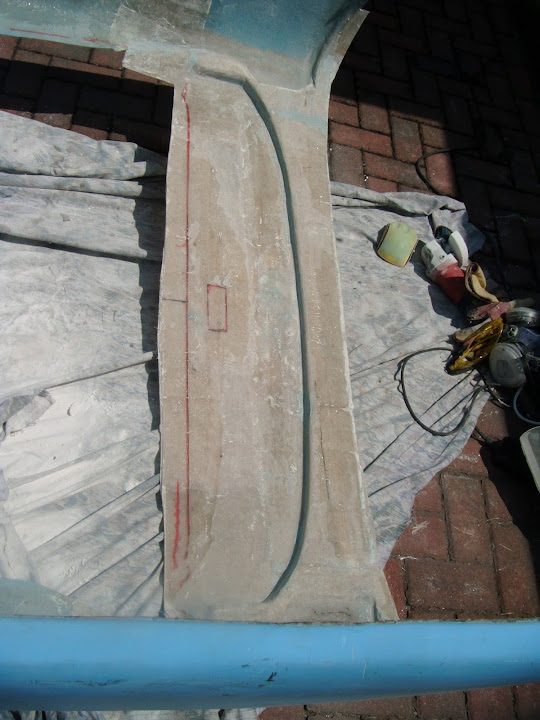
I have marked up a straight line across the back of the cockpit.


Which means I will have something to aim for when I try to build a new edge here.

- - - - - - - - - - - - - - - - - - - - - - - - - - - - - - -

Right, I need to have a rest now, so I will catch up later, Paul. :)

PS
I must end with some praise for my wife who helped me move the body shell multiple times today. :cool:
26 Jul 2014, 9:05pm
Good work Paul, good work.
27 Jul 2014, 5:38pm
Scottie - Cheers. :cool:
I know there is still a long way to go, but it does feel good to keeping ticking the jobs off.

- - - - - - - - - - - - - - - - - - - - - - - - - - - - - - -

A Short Day:
Too many other things to do today to repeat yesterday's long car session.

But I did make a bit of progress, so at least I am still heading in the right direction.

I decided to give the bottom edge a bit of a trim / tidy up.


Although there is no point in drawing a straight line, if I then cut a slightly wonky one. :rolleyes:


With the back edges of the tail pipe exits trimmed, I used a cutting disc to roughly get the shape at the front.


Before using a grinding wheel to finalise the shape and get rid of any flaky fibreglass.


Then I stuffed fibreglass filler into all the small voids around the edges.


While that was setting I added more matting to the inside of both the tail pipe exits.


Later on, the filler was given a rough sanding down.


I am currently debating whether to build up the edge of the cut out, or keep it flush.

With the body shell back in position, you can get a good idea of how this will finally look.


I must confess that I am very happy with how this has worked out, not perfect by any means, but good enough. :cool:

- - - - - - - - - - - - - - - - - - - - - - - - - - - - - - -

I also added a second layer of matting on the driver's side.


A quick check of the rear cockpit framework showed that it was not strictly square.


So I will stick to the line I drew on the body shell rather than take any measurements from the frame.

As I've said before, I need to pick my battles if I am ever going to finish this build.

Until next time, take care, Paul. :)

PS
Not sure if it is the good weather, but the number of people stopping for a chat while I work these days is unbelievable.

The most common question remains "Is it a AC Cobra / D Type Jag ?"

Whilst two different groups of "yoof" have confirmed that my car is "sick".

Which I believe is as complimentary as it gets these days.

But my favourite conversation to date remains an elderly couple passing by...

Husband to me - Is that an MG?

Wife to husband - Don't be silly, can't you see it's a E type.

:icon_twisted:
27 Jul 2014, 6:38pm
Looking good, Paul. I like the exhaust contouring - very neat.
28 Jul 2014, 4:10pm
Oxford - Thanks, I am still amazed that they have worked out as well as they did. :cool:

Fibreglass work is still pretty new to me, so I am picking up ideas & tips from you, Mac, Mr T, etc.

Can I ask where you got the foam strip you used before cutting the back end of your body shell off?

- - - - - - - - - - - - - - - - - - - - - - - - - - - - - - -

Bonnet Pin Support Brackets:

The weather has got in the way of me doing anything constructive outside today. :icon_sad:

However, I did managed to sneak a quick trip to my local Wickes to have a look at some bracket options.

At this point, all I know is that I need to support the pins anywhere from 3" to 6" away from the Spitfire bulkhead.


Unfortunately, the brackets I could find that that reached out 6", also went down 6", making them rather large overall. :rolleyes:


Still, this wouldn't be the first over-engineered solution to find its way into my build. :icon_wink:

I will test fit them as they are, but they will probably be trimmed down before they are finally fitted.

Either way, using something ready made will certainly save me the time & touble of making something from scratch.

Until next time, take care, Paul. :)
29 Jul 2014, 8:24pm
A Slow Grind - Part 1:

I decided to sort out the rear cockpit "line" before I move the body shell into my back garden.

But first I need to decided how the rear panel was going to fit.

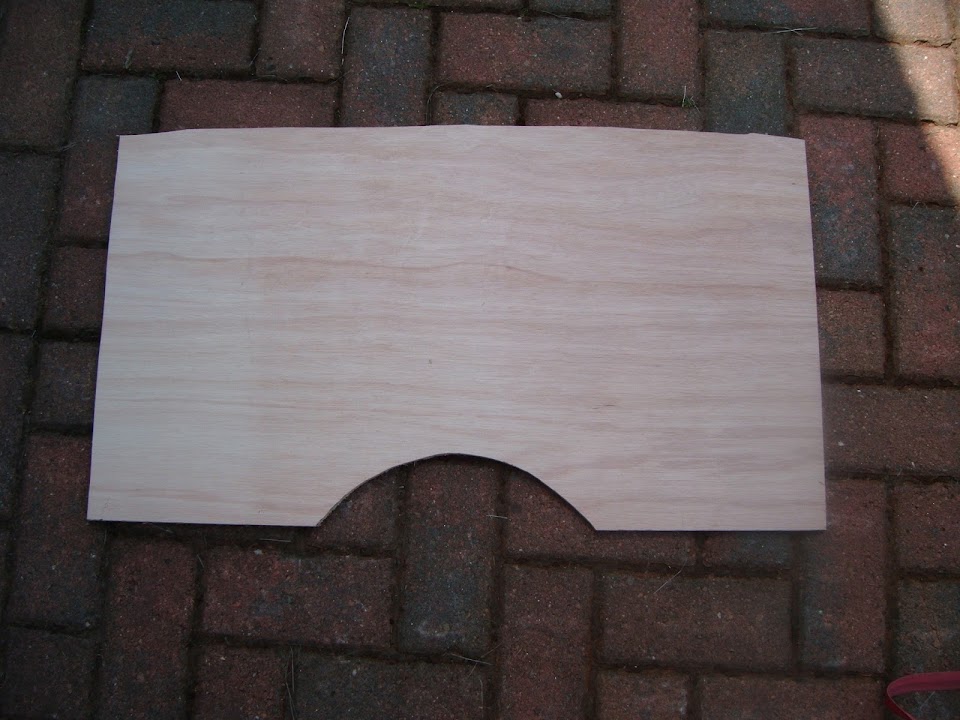
So I cut out a shape in plywood that would fit in front of the rear frame.


I know this is the traditional approach taken by Spyder builders.

But there is no little room for my seats, that this will not really work for me.


A quick trim later and the panel was able to sit inside the rear frame work.


I will need to make some holes for access to the fuel gauge wiring and the seat belt anchor points.

- - - - - - - - - - - - - - - - - - - - - - - - - - - - - - -

The other part of the rear cockpit I wanted to look at was an extra support panel in the middle, between the two humps.

Not a great photo, but this is the area I have to play in.


So I lifted the body shell a bit, to get access to frame work underneath.


An off cut of plywood from making the cockpit panel seems to be about the right size.


But the more I looked at it, I realised I would need to add extra frame rails to support the plywood.

In which case, I might as well just weld a metal panel on top of these extra frame rails.

- - - - - - - - - - - - - - - - - - - - - - - - - - - - - - -

I did some careful checking on the way the scuttle was fitting over the Spitfire bulkhead.

At which point the edge of the cockpit on the passenger side shifted slightly behind the frame work.


So I could actually shift the edge back a little bit further than my initial mark.


I still have a problem with the way the face of the driver's hump sits.

Part of this problem is due to a "dip" in the face itself. :rolleyes:
( It actually gets worse the lower down the face you go. )


By now, I knew I would just have to do some more "cutting & shutting".

So the body shell came off and the angle grinder & jig saw came out.

I cut away the rear lip, both cockpit corners and trimmed the sides of the cockpit while I was at it.

Note:
After doing a bit of playing around with plywood, I think the cockpit sides need to follow the angle of the frame.
Otherwise, the internal walls will appear to be going in a different direction to the external ones.


I will come back and fine tune the corners and sides after I have sorted out the centre of the cockpit first.

End of Part 1...
29 Jul 2014, 8:25pm
A Slow Grind - Part 2:
This is the effect of my handiwork with the body shell in position

Before:


After:


- - - - - - - - - - - - - - - - - - - - - - - - - - - - - - -

Then it was time to start rebuilding the lip I had just removed.

I dug out the cardboard that was initially going to form my aero screen wind deflector.


Then I chopped it into sections, added some parcel tape and clamped it into position.


I added an extra bit of tape to the top edges of the "gapping wound" in the rear body shell.


So after turning the body shell over, this was the first area I could work on.


Multiple layers of matting later and the new cockpit lip was starting to form.


By now it was getting rather late, so I decided to leave the body shell on the drive with the clamps still in place.
( You will notice I had to do my cleaning of the drive around it. )


I just threw a tarpaulin over the top to tidy the whole thing up a bit.


This was one of those days when I had to take some steps backwards to move forwards.

But at least I am still moving forwards.

Until next time, take care, Paul. :)
29 Jul 2014, 8:57pm
Nice work Paul.

At the stage you are at now, have you thought about access to the rear transverse spring?

When I put my rear seat backs in my car, I used self tappers rather than rivets, in case I ever busted the spring, or needed to remove it for any reason.

Just a thought..........
I'd hate you to weld it all in then, think Oh sh*t!
30 Jul 2014, 7:03am
You could always cut the back off.........
30 Jul 2014, 7:30am
oxford1360 wrote:
You could always cut the back off.........


That's not a bad idea and will be duly stolen if I ever build another.

I have been wondering how the builders who're fitting Spitfire rear floor/inner arches are going to access the rear spring/diff bolts.

Both Phil J and I have had the odd issue with the diff bolts coming loose (especially when we had lowering blocks fitted). With no inner arches access is 'not bad' but it's not what you'd call easy. A flip rear would give you much better access and would look really cool too.