MadaboutKitcars

This is a read-only archive of the old Madabout Kitcars forum. New posts and replies are no longer possible, but every thread is still here to browse and read.

Mister Towed's Tai Chi build

21 Jan 2013, 10:13pm
Paul L wrote:
PS
Love the "Hall of Mirrors" self portrait reflection in the close up photo. :icon_wink:


Hadn't noticed that, I do rather look like I'm doing it 'Gangnam style' :party:
22 Jan 2013, 9:58am
Nike55 wrote:
No idea if this link will work but here's an earlier mirror pedestal

http://i1272.photobucket.com/albums/y390/CaptLockheed/036_zpsdddf340c.jpg


oh and a quick addition shows the mirrors are not boxed in:-

http://i1272.photobucket.com/albums/y390/CaptLockheed/035_zps9676d9ce.jpg


I do like this car, there's some lovely detailing - I especially like the door bin to keep fruit pastilles in and the bonnet louvres.


In fact, I like the louvres so much I might just have to add some to my bonnet, both for the looks and to provide an escape route for air coming in the grille and scoops and prevent the back of the bonnet 'balooning' at speed.

I'm aware that you can buy hideously expensive louvring machines to punch vents into aluminium, but how do you add louvres to fibreglass? I'm inclined to have a go at bonding some of these in -

http://www.ebay.co.uk/itm/Aluminium-Louvre-Vent-9-x-3-/281053993443?pt=LH_DefaultDomain_3&hash=item41701f99e3

It's so simple it might just work...
22 Jan 2013, 1:02pm
And then there were two -


They're slightly asymmetrical as the passenger side one had to go a little further back for the mounting holes to clear the loom on that side. That's not an issue for me as the car's not symmetrical anyway, and it just looks as if it's been done to aid functionality, even if anyone notices, which they probably wouldn't.

I've now identified the car with the oblong mirror stacks as an original C-Type Jag, so I'm following a thoroughbred design!

Oh, and thanks for the link to the demon tweeks bonnet vents. My ebay search failed to throw that one up as an option because I know how to spell bloody louvres, and they don't. :frusty:

Although I'm tempted to use the cheap vents from the hardware store I might just go for a pair of the purpose built ten fin type instead - I reckon long and narrow would probably fit the bonnet design better than short and wide. Decisions decisions...
22 Jan 2013, 1:49pm
My brain is now on mirror design. Wife says Had no bath room for 5 months consentrait on the Car! sorry bathroom, Car, Bathroom,
22 Jan 2013, 3:26pm
Decision made - I'd like to have a go at fitting some louvres, but I don't want to pay twenty odd quid and then find they won't fit anywhere, so, I've ordered one of these -

http://www.ebay.co.uk/itm/271084381873?var=570120662432&ssPageName=STRK:MEWNX:IT&_trksid=p3984.m1497.l2649

Plan is to cut it down into two narrow strips, each with twelve louvres, and let them into the surface of the bonnet so they're flush. And if it doesn't work, it's less than four pounds down the swanny. :)
22 Jan 2013, 5:06pm
If anyone fancies the OBP louvred then please don't by them from Demon Thieves, you can get them cheaper direct,

http://www.obpltd.com/obp-shop/cooling-louvers


if a few can get an order together Grant is usually happy to do a club discount, just whatever you do don't start looking at the other parts they do, unless you have a credit card with a large unused balance, on a serious note the OBP stuff is top notch stuff.
22 Jan 2013, 9:13pm
Sorry for the delay in responding. The vehicle in the pictures was indeed a replica C-type, I photographed at the Exeter Kit Car Show in October 2011, I believe it might have been a Proteus, but don't quote me - the owner wasn't around to ask.

It has a lot of features which inspire.
22 Jan 2013, 9:19pm
Nike55 wrote:
Sorry for the delay in responding. The vehicle in the pictures was indeed a replica C-type, I photographed at the Exeter Kit Car Show in October 2011, I believe it might have been a Proteus, but don't quote me - the owner wasn't around to ask.

It has a lot of features which inspire.


Wow, pretty good replica as it had me fooled. Mind you, I don't know that much about old Jags apart from my sister insisting on driving them even though they keep breaking down...

Nice car though.
22 Jan 2013, 10:37pm
Mister Towed wrote:

In fact, I like the louvres so much I might just have to add some to my bonnet, both for the looks and to provide an escape route for air coming in the grille and scoops and prevent the back of the bonnet 'balooning' at speed.


I was thinking about this ballooning of the bonnet at speed. I think it may in some part down to the increase in pressure RAM effect with no where to go but also the fact that the bonnet in nicely curved so that the air would accelerate with respect to the free stream air. Exactly like that caused by an asymmetric aerofoil or an aircrafts wing. This would cause a large drop in pressure and cause the bonnet to lift not helped by the inherent flexibility of fibreglass. As the bonnet lift the high pressure air is able to escape and the large pressure difference between above and below is allowed to mix causing turbulence and the vibrating flutter effect that can be seen in Phil's video.

I think to remedy this secure fastenings and maybe a length of steel bar bonded into the bonnet near the windscreen would help to stop the flex and to mass balance to reduce the flutter.

Just a thought though....:plane:
23 Jan 2013, 8:22am
What you need to do to keep the bonnet ridged, is make a template of the profile of the bulk head. Basically get some thin card press against the edge of the bulkhead were the bonnet sits and draw the shape . Make a template seperate for both sides as they wont be the same, basically you will end up with two like hockey stick shape templates.
The reason you draw the shape from the bulkhead side is that you will then transfar the shape to some 12mm ply and cut them to fit inside the bonnet.
I offer up the ply ribs to the inside of the bonnet making sure they a at a distance away from your master cylinders and so on, so mark them in with a pencil and then drill a number of 8th holes on the pencil line, one you have drilled the holes fix screws from the opposite side to hold the ribs in place. You will find that you will have to pull the sides of the bonnet in when you fix, well thats fine as that s good as its copying the shape from the the bulkhead side , so when you shut the bonnet the bonnet fits the bulkhead shut line.

You will need the round the top edges of the fitted ribs in place , and then they can be glass in place to make a strong frame inside. And once glass has dried remove the screws and make good the holes on the out side of the bonnet.

Long bloody winded way of explaning , may need to read twice to make sence lol
23 Jan 2013, 9:12am
I think we should have some more videos... now everyone has the hang of posting pics!
23 Jan 2013, 6:53pm
That was a pretty good explanation of how to make the bonnet rigid Mike, I'm going to see how mine works out with vents and bonnet pins first though. If it lifts or distorts too much at speed I'll go with the hockey stick strengthening ribs as a retro fit option.

As for videos, everything takes me so bloody long to finish that unless I went with time-lapse photography, like that excellent Spitfire engine build video, then I'd need a thousand gigabyte memory card just to capture me picking my nose while I'm thinking about how I want the next bit to work out.

Looking forward to posting a road trip video though...
23 Jan 2013, 9:08pm
MikMiglia - Hi Mike, as they used to say on Blue Peter...

Here's one you made earlier...


This was from Barry May's build thread, the Ecosse Blue one with a tail fin. :cool:

While looking for this photo it was interesting to see how the doors were done on this car.
If you get a chance to update your own build thread one day Mike, I'd love to see some photos of your doors too.

Mr T - I think the vents will make be a nice addition.
Although would it be worth fitting the vents after you've got an MOT?
Sorry, I've forgotten if you are going with the MOT before final paint plan. :rolleyes:

Cheers, Paul. :)
23 Jan 2013, 10:01pm
Well paul, well done for finding them pics. You will see what im up too from next week with pics, keep and eye out.:icon_cool:
24 Jan 2013, 7:21pm
mikmiglia wrote:
Well paul, well done for finding them pics. You will see what im up too from next week with pics, keep and eye out.:icon_cool:


Looking forward to the update Mike...

Now, the best thing about Sammio building imho is the complete lack of rules. You may find this surprising given what I do for a living, but, in my working life I've always been one to view rules as a flexible concept that're there to be stretched to the limit if not actually broken.

So, when a challenge manifests itself, rather than consult the comprehensive build manual for the 'right' way of tackling it as you would if you'd bought a Caterham or Westfield, you invariably have to start a lateral thinking process instead. And nobody can tell you you've got it wrong, with the possible exception of M*cha, who no-one listens to anyway.

And the latest challenge is the fly-screen. I don't know if anyone's noticed, but my perspex fly-screen hasn't been attached properly since I bonded in the Porsche 550 Spyder dashboard I bought from Gary J about a hundred years ago. Well, last summer.

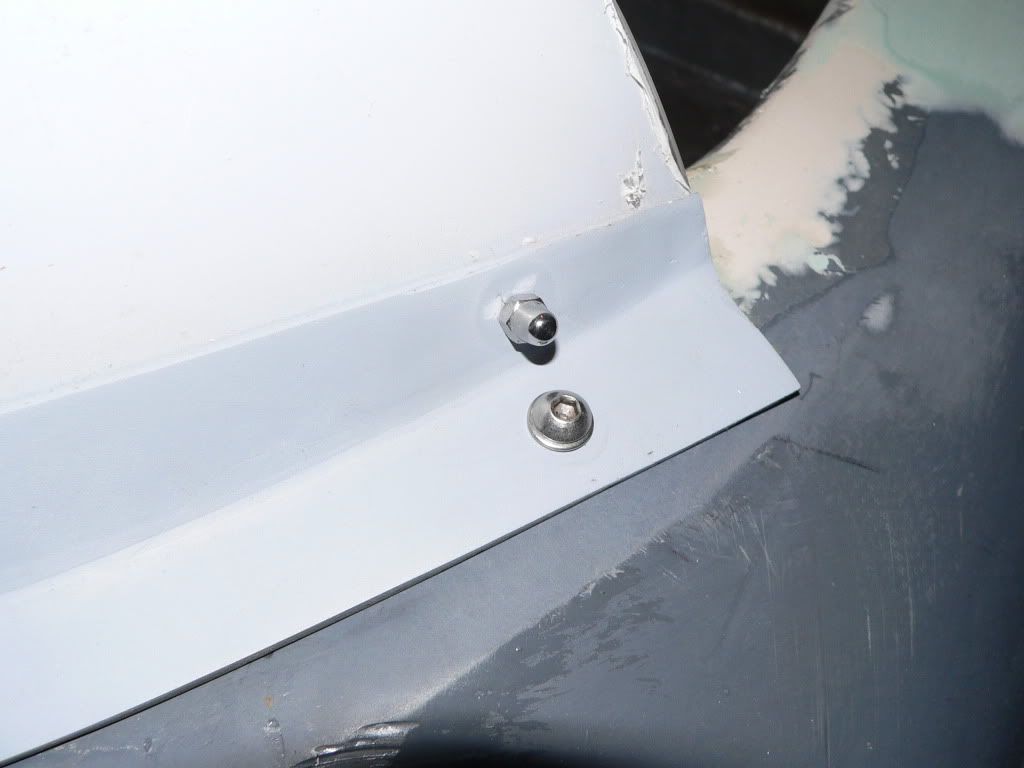
The problem is that my fancy dashboard has completely blocked access to the underside of the body at each end of the 'screen frame. I can get at all the other fasteners across the middle, but the very ends are totally inaccessable. This isn't the best illustration of the problem, but trust me, you can't get at the underside at all.
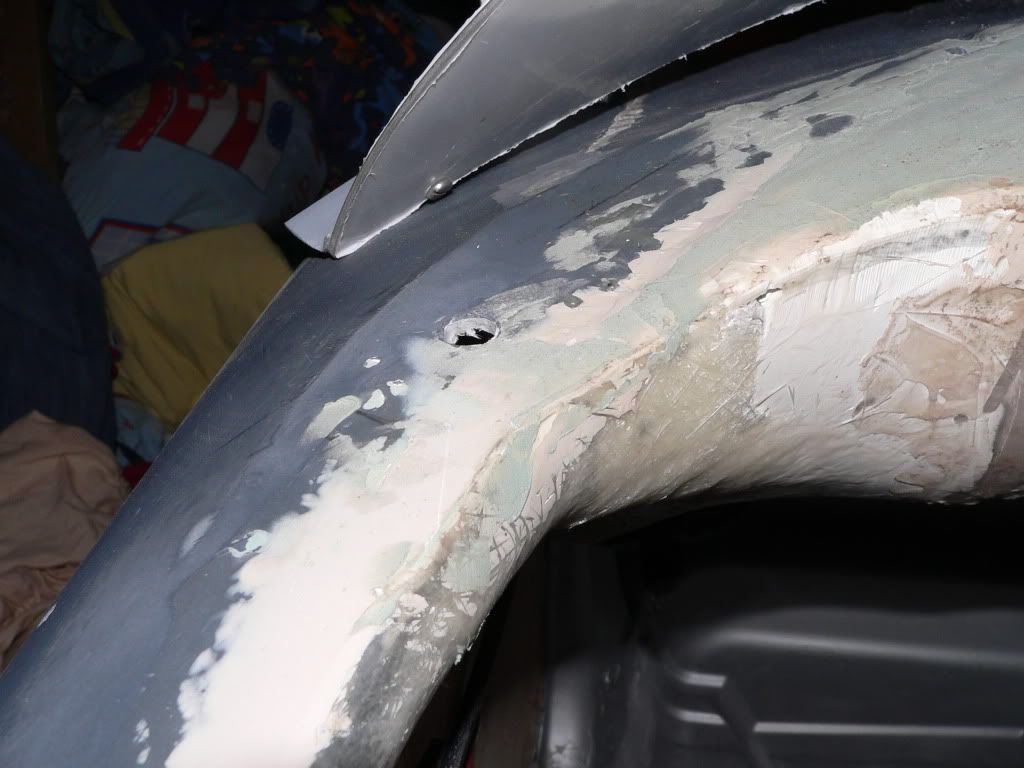


As I don't particularly want to cut access panels into the sides of the dashboard, some type of blind fastener was needed.

Whilst sitting on the toilet, netbook on knees, pondering the not inconsiderable expense and pitfalls of having to buy a decent 'rivnut' tool - looking at a few forums it seems they quickly get loose if attached to fibreglass - it suddenly struck me that I might actually be closer to a solution than I could've possibly imagined.

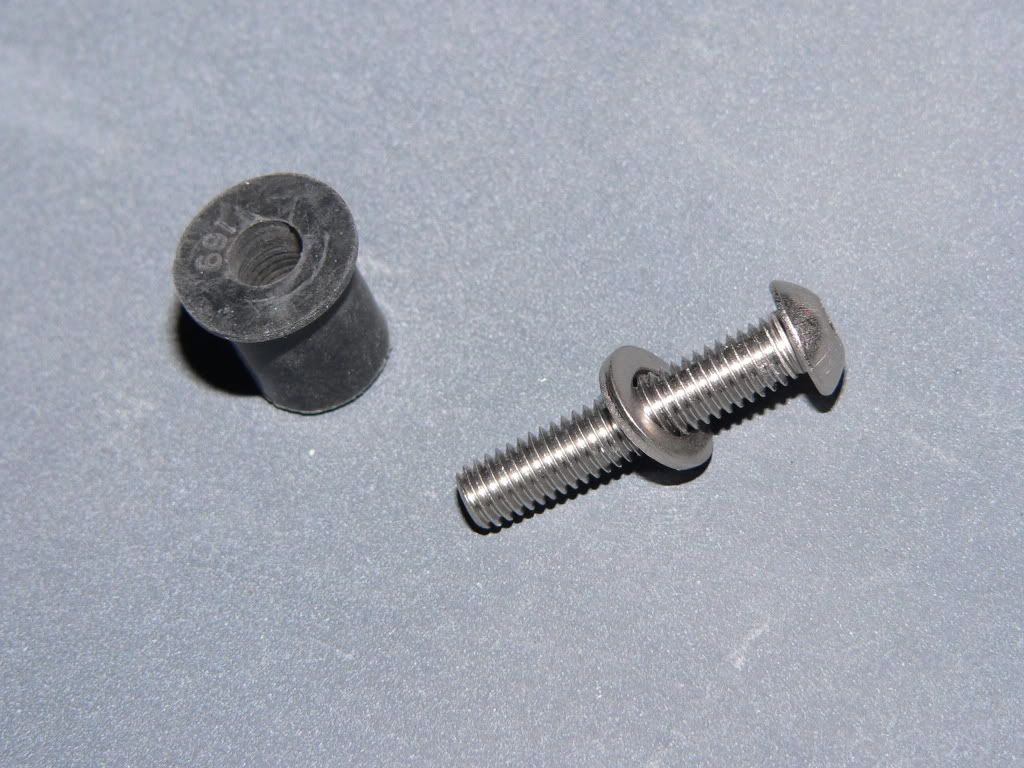
You see, a year or so ago I replaced the broken toilet seat in our downstairs 'cloakroom' (posh talk for spare shi**er) with a fancy, soft closing one that came with ingenious, shake-proof fasteners called 'well nuts'. If you're not familiar with these, they consist of thick rubber tube with a brass nut set in one end and a matching bolt. You push the tube into a hole that's near enough an interference fit (hole too small for object going in), put the bolt in, and when you tighten it up it pulls the rubber tube up into a doughnut shape under the panel and jams it in place.

And a quick ebay search revealed that for the princely sum of less than six pounds I could buy the same toilet seat technology on a smaller scale, M6 in my case, and solve the problem without having to cut access panels in my car.

So here it is, straight from bog to car, a very effective way of fitting the screen without requiring access to both the inside and outside of the body shell. :)


Next time we'll be looking at bonnet vents hopefully...
24 Jan 2013, 8:31pm
Mr T - Another top tip. :cool:

I'll have a look at these well nuts as they might solve a number of issues.

Cheers, Paul. :)
29 Jan 2013, 4:27pm
My £37 aluminium radiator arrived from China this morning, hooray!


It's very good quality for the price, but, as I almost fully expected, it arrived damaged. It was packaged well enough, but the courier had made a special effort to crush the box. :icon_neutral:


Thankfully it's only the overflow pipe that's sheared off, which I was going to block off anyway. The core's fine and I'm not sending it all the way back to China, I'll just block up the hole somehow.

I'll get around to fitting the alloy rad soon, but I decided to have a crack at the bonnet louvres today instead. They're actually going to be cosmetic rather than functional as I didn't want to weaken the rather thin bonnet moulding more than necessary.

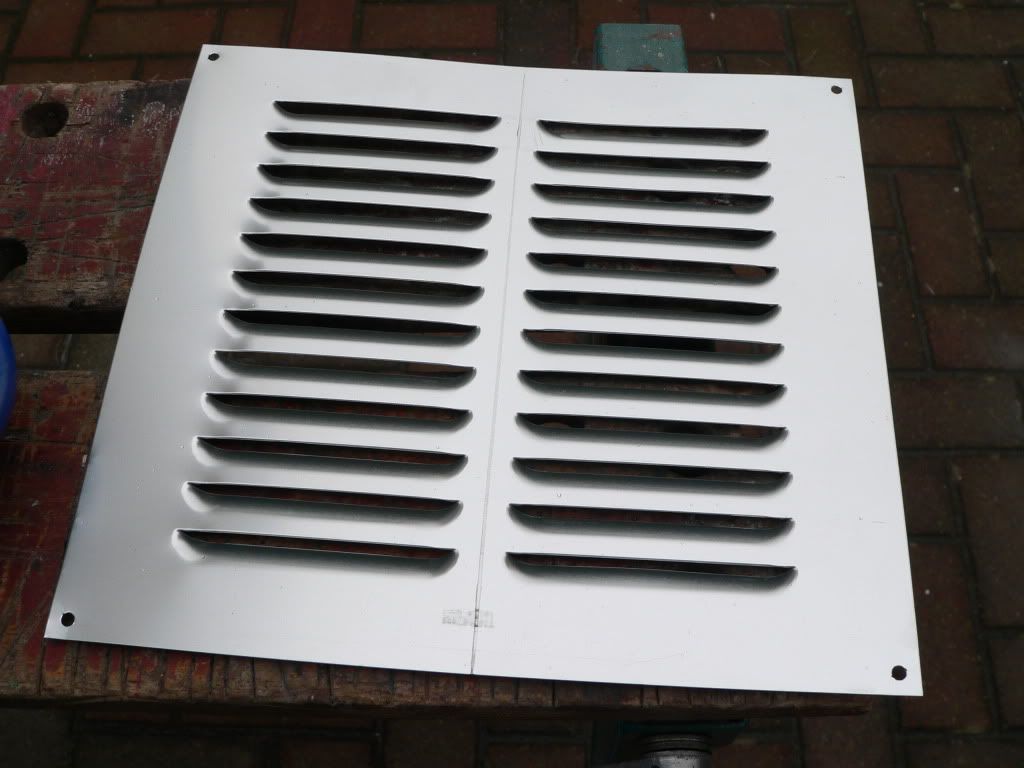
So, we start with one of these for £3.95 delivered (ebay) -


Then we take the angle grinder fitted with a really thin disc to it -


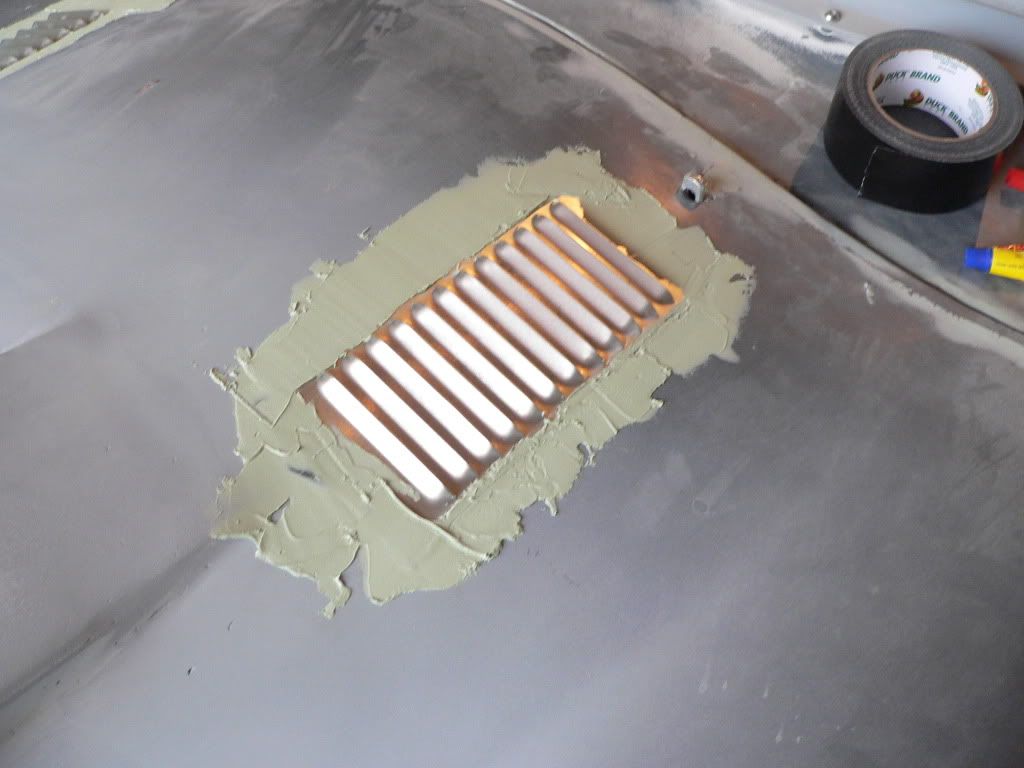
After cutting both down so we have a pair of 100mm wide louvred inserts, draw round them at the desired location, grind out recesses to suit, stick them in place with mega strong glue then blend in with filler once they're set in place -


I'll sand them down tomorrow and see what they look like, but so far, so good. :icon_mrgreen:
29 Jan 2013, 5:11pm
Mr T,
are you going to cut away underneath for some ventilation or are they a decorative item?
29 Jan 2013, 6:15pm
Viatron wrote:
Mr T,
are you going to cut away underneath for some ventilation or are they a decorative item?


They're going to be decorative I'm afraid. The original plan was to have them fully functioning, but the bonnet moulding is very thin and I'd be concerned that it may crack if I cut them out underneath.

The aluminium panel the louvres are stamped into is also too thin to be a structural part of the bonnet, they'd allow it to flex which would probably crack the paint. They do look the part though at a fifth of the price of purpose made ones. :hippie:
29 Jan 2013, 11:34pm
Did you put extra fibre glass underneath, i have put in side vents but built up the underside first. will up load picture when i can locate my:frusty: phone cable. Why not cut slots with disc cutter.
30 Jan 2013, 8:56am
I haven't reinforced the area under the vents, I've only recessed the bonnet about half a mm so I shouldn't have weakened it too much. I'll see how flexible it is once it's finished and maybe add some 'glass underneath if necessary. I can cut slots underneath the vents if the bonnet lifts at speed, but I'm hoping that won't be necessary as I've got the bonnet pins on top to hold it down and I'm not sealing the back edge of the bonnet all the way around - I'm just sticking foam rubber strip in short sections under the bonnet to give the right stand off, but leaving gaps between them to let the air out. That's the idea, anyway.
30 Jan 2013, 9:50am
I have done the same puting in spacers to leave the air flow for the gap.
30 Jan 2013, 4:13pm
My £3.95 Heatrae louvres are now blended in and I'm rather pleased with the result -


Rest of the day spent sanding, filling and sanding. :(

Shopping with the wife tomorrow apparently, but should make some more progress on Friday.