MadaboutKitcars

This is a read-only archive of the old Madabout Kitcars forum. New posts and replies are no longer possible, but every thread is still here to browse and read.

Another Cordite Is Born ...

22 Jun 2014, 8:40am
Hi Paul , does your brain hurt? Remember a few posts ago you wrote of a raising panel for your fly screens. Have a Google I think it was an mg TD had a lovely curved bulk head dash top. Now you need to get the bonnet as close as possible to position get a chair and a pencil and pad and sit and stare is it feasable to to meld the cordite bonnet to flow to aero screen fly screen mounds. If you have a trade window manufacturer or upvc ancillary trades supplier nearby they do upvc trim panel many widths and thin and flexible it is ideal to diy Frankenstein gaps like tribute do and costs pennies. Have a productive day. Ed.
22 Jun 2014, 9:09am
Hi Paul, can you just remind me (and yourself?) why you wanted to keep the Spitfire bulkhead? Wasn't it to make it a quicker and easier build?

Is it too late to have a rethink and remove it - maybe Andy or Mike Miglia could do you a deal on a 'glass replacement (there are some similarities in the original designs I believe) or go with Scottie's idea of radically cutting and shutting the bulkhead to fit the body/bonnet?

Just remember the military adage - no plan survives first contact with the enemy - so abandoning your initial idea and coming up with an alternative is sometimes the only way to achieve success.
22 Jun 2014, 5:12pm
You can do it Paul, you have all the skills you need, hack the bulkhead to the shape you need to match the bonnet, and go for it mate!
22 Jun 2014, 5:37pm
Hi Paul, you have to remember I used the original Spitfire bonnet edge to line up the original windscreen scuttle.
This was then bonded to the Ribble bonnet giving the extra length :icon_smile:.

As I am a wear the original Ribble bonnets are built to long and have to be cut back. Did you cut your bonnet back before or after you decided to use the Spitfire bulkhead?

Right now I have a Spitfire bonnet that's FOC, your welcome to come and cut off the wanted section :icon_smile:.
I also have some thin fiberglass sheet which might help.

Swindon, Wiltshire, 10 min from J16,M4.
22 Jun 2014, 5:38pm
Mac - I'll hang on to those brackets a bit longer, in the vain hope of getting a reply from the DVLA.
Thanks for the heat gun tip, as I saw tlrtone use a thin fibreglass sheet as a basis for his bonnet scoop.
So I might give that a go and see how I get on for now, rather than get professional help.

Scottie - If I chopped the bulkhead down to match the bonnet shape I'd cause other problems.
I would quickly run out of space for the dials, steering, heater hoses, etc. even the fuse box would be in the way.
So I am stuck fixing one problem while causing another problem somewhere else for a bit longer.

Ed - This build has been hurting my brain for a long time now, but this is something else.
I think that uPVC strips may be an ideal way for me to build up some of the shapes I need.

Mr T - Are you sitting comfortably? Then I'll begin...

Well my plan for building this kit certainly didn't survive first contact with the Spitfire rolling chassis!
Bizarrely, my decision to use the Spitfire bulkhead actually slowed the build down and made it harder to do.
However, given all the problems I had, I really felt this was the only way I could make the kit work at all.

If you remember AndyP57 effectively shut the Cordite production line down and started again.
The new Navigator model has a different body shell and different internal framework to go with it.

What I should have done is return the whole lot as "not fit for purpose" and got a refund.
But Andy had only just taken over the company this mess wasn't really his fault.
So I decided to support him, keep the kit, and try to build it to the best of my ability.

I would use the faults as an excuse to learn how to weld and work with fibreglass.
Clearly I had no idea just how much work I would be required to sort out all the issues.

I know that the "revised" lines of my car will not look as good as a "standard" Sammio / Ribble.
But if I can ever reach the point when this car is on the road, I'll live with being the "inbred, hillbilly cousin" of the family. :icon_wink:

I certainly hope I am not coming across as someone simply ignoring good advice.
I really do appreciate all the time and effort people have taken to reply to this build thread. :cool:

- - - - - - - - - - - - - - - - - - - - - - - - - - - - - - -

A Start...
I dug out my brake pedal.
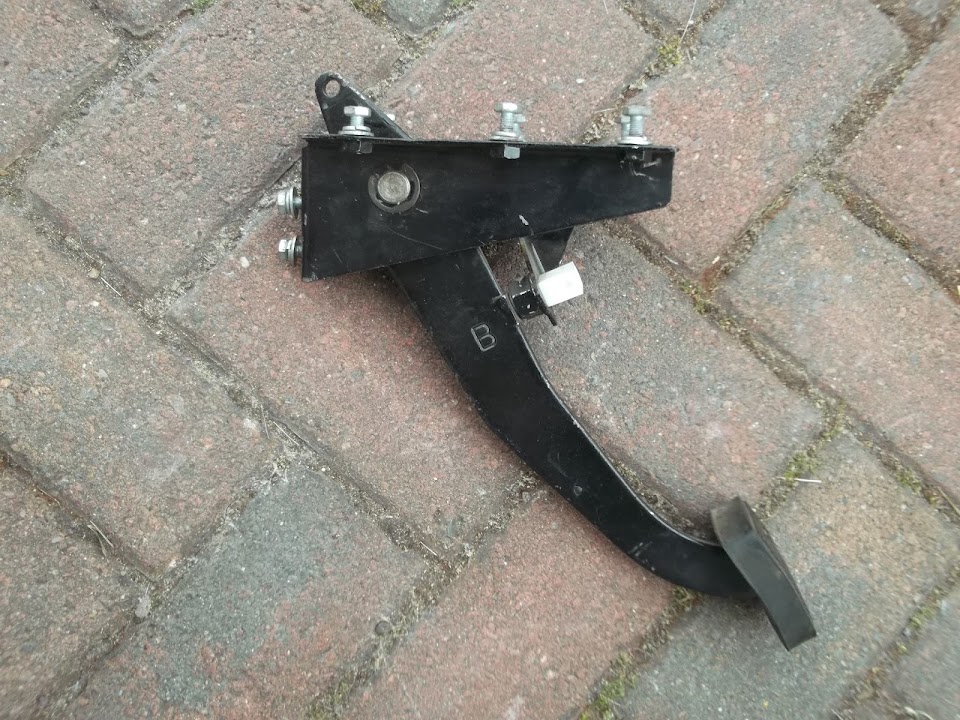


Then bolted the master cylinder to it just so I knew where the top of it would be.
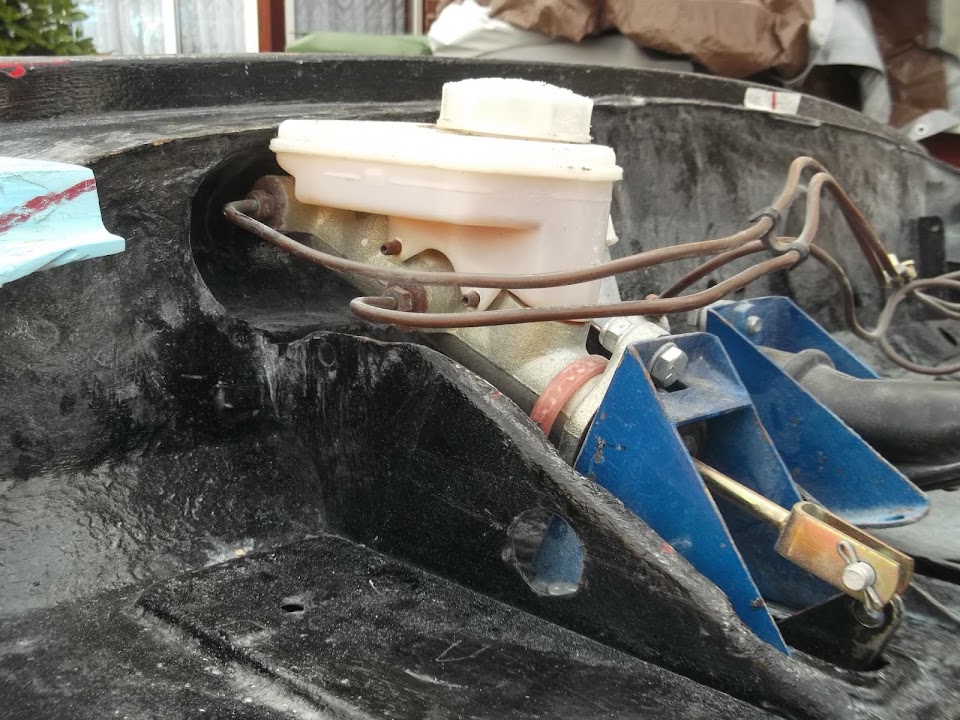


Then I marked up the hardboard template I made the other day using the bulkhead as my reference.


I then realised I could use the "off cut" from that template on this part of the bulkhead.


So I marked that up too, then the two panels were ready to be jigsawed.


After cutting they looked like this.


Then after applying some parcel tape & weighing the ends down I was ready.


I cut out a selection of matting for the start of the centre section.
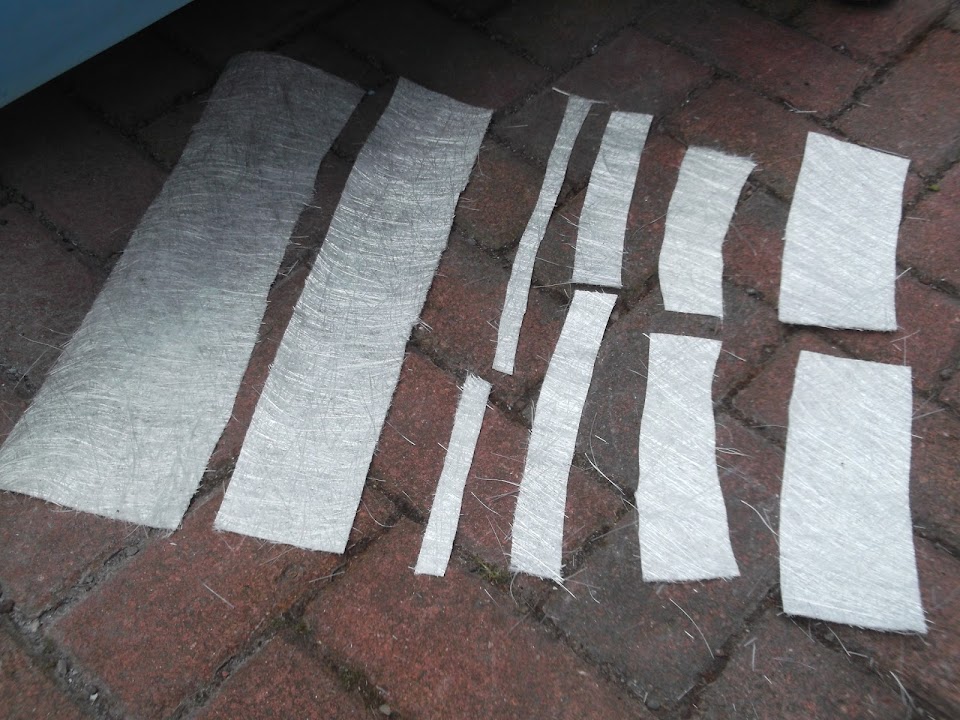


After the second round of fibreglass I had this to show for my efforts.
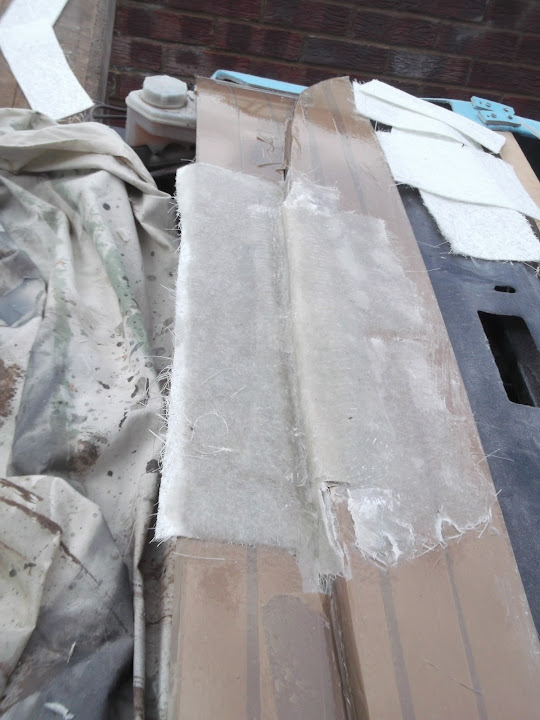


Once that was set I added an off cut of hard board to the top of the master cylinder.


This should ensure that the body shell clears this with ease.

Then I was able to weigh down the ends of the body shell like so.
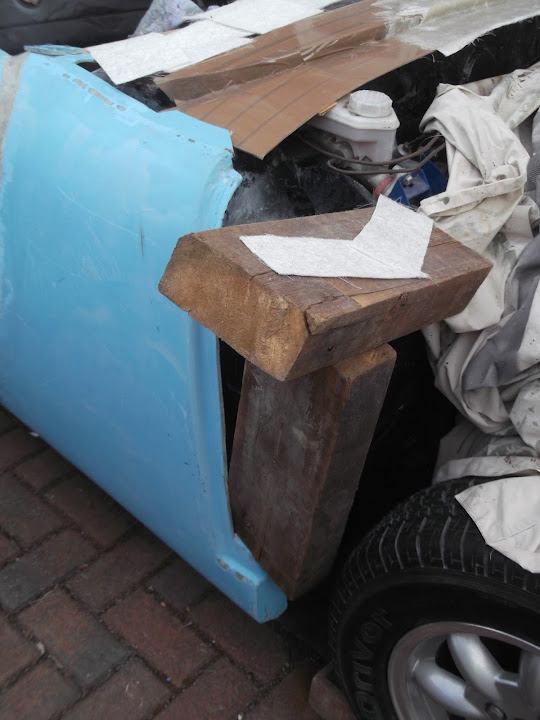


So that the hardboard was pinned down by the top edges.
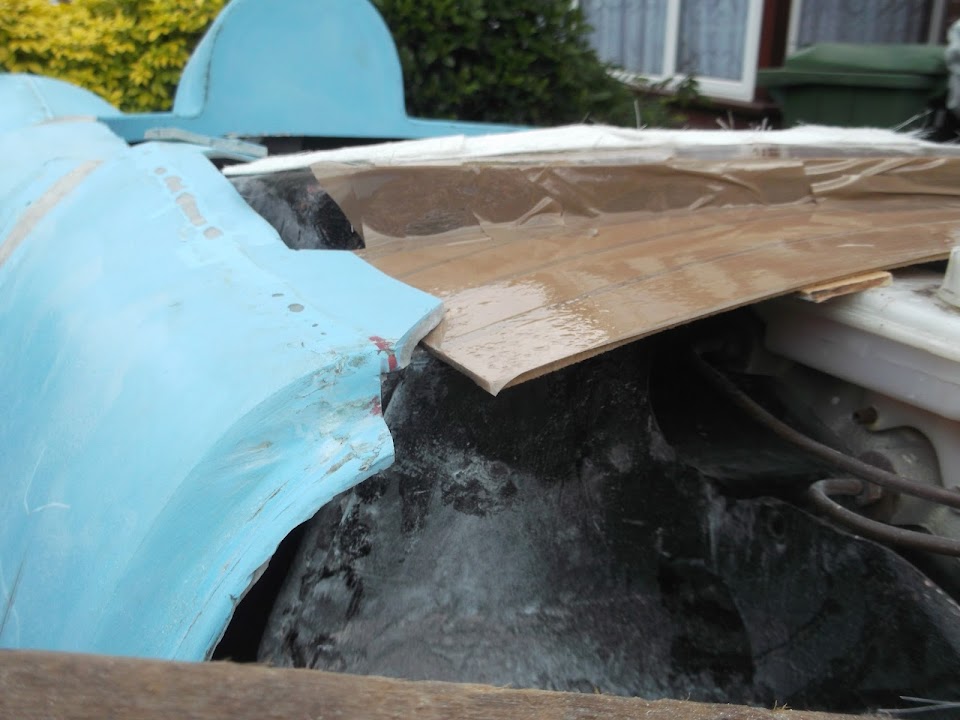


Note: I needed to do a bit more trimming of the body shell "lip" so the hardboard could pass through.

After a couple of layers of matting had been added I was left with this.


Now it has taken me a long time to get my head around how this will work.

But the piece you see above is both the bonnet lip and a body shell locating edge.

When the hardboard is removed I will be left with something that fits on top of the Spitfire bulkhead.

This will be the "unseen" bottom surface of the scuttle, regardless of the final shape on the top surface.

Note:
I can't join the two sides of the body shell to this new piece until the hardboard is removed.

But I will be adding some more matting over the top before I worry about doing that bit.

Finally I clamped a thin strip of hardboard to the bonnet to get a better idea of different profiles.


The gap is around 4 cms at its biggest point (centre of bonnet on left of photo, edge of bonnet on right).
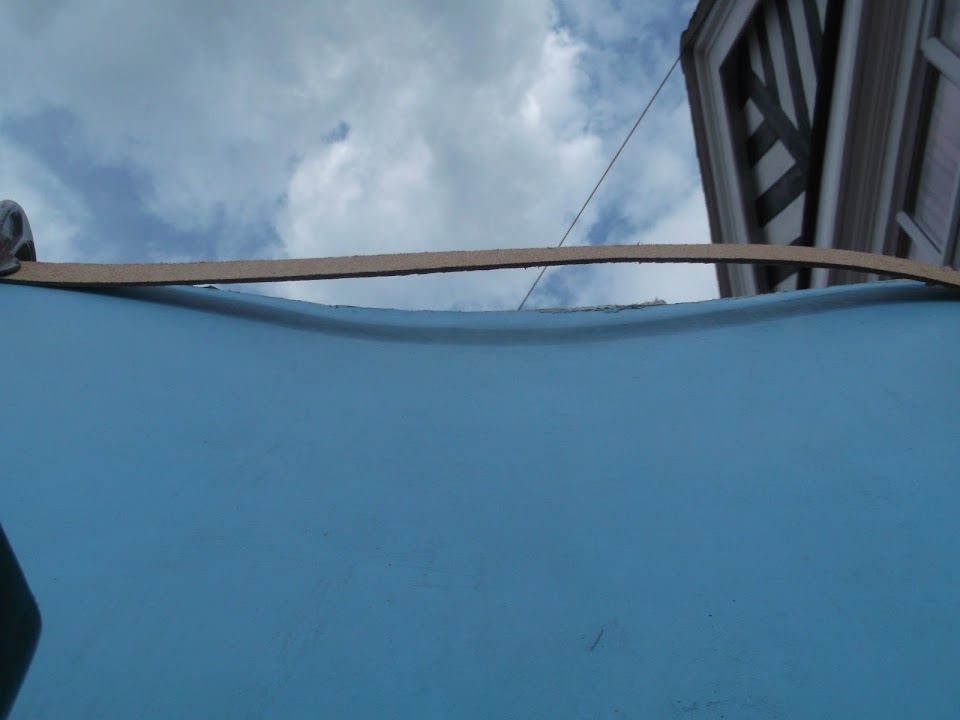


After today's effort I am reasonably confident I can re-join the two sides of the body shell back together which is at least something.

Until next time, take care, Paul. :)
22 Jun 2014, 6:05pm
I may have only followed "some" of what you are planning as my head started to hurt, but by no means will you be the hill-billy relative with all the hard work and effort you're putting in to getting the car _you_ want! :)


Damn that sounded cheesy... apologies, but it's Cider o'clock down ere in Somersetshireland
22 Jun 2014, 7:36pm
Paul, as you know, I have mounted my bodywork lower than others. As a result I have very little space for instruments. When I have finished scratching my beard, I'll let you know. Keep going!
22 Jun 2014, 8:02pm
Good work Paul when I look at the picture looking up the gap of hardboard to the sky I can picture exactly what I wrote this morning the curves you love on your bonnet blending up into 2 bumps for the aero screens. Can't wait to see this at stoneleigh next year,intact I intend to buy you a beer. I have loads of lengths of the upvc infill strip about 3mm thick varying from 2" to about 10" wide I asked my courier driving friend this aft if he was going anywhere near London this week and he said I doubt it I'm in the Italian lakes for 3 weeks.
22 Jun 2014, 9:50pm
Paul, whatever you do, you will make a success of it, I know.

Please do not sell your self short, your car may well be better
Than the Ribble/Navigators already around. It most certainly will be special and also unique, as your own creation

I am looking forward to seeing the ugly duckling emerge as the swan!

Keep at it, I believe you have the whole Forum backing you!
22 Jun 2014, 10:11pm
Message

Hello again Paul, its a bit late, but I just received an email from Big scary monster, and he sent me a picture, requesting that I pass it on to you.

He says it is the rear of a Porche, but his idea was that if you perhaps made something similar, it may help to graft the scuttle to the bonnet.
Here is what he sent me:

[IMG][/IMG]
23 Jun 2014, 3:10pm
Micky - Thanks for your very generous offer, but I am actually keeping the Cordite bonnet the standard length.

The following isn't as high tech as Scottie's updates, but I hope it will make things a bit clearer...

I will need to reshape the end of the bonnet is a similar way to your car, but my bonnet will be shorter.


You were able to re-use the final edge of the Spitfire bonnet as you cut away more of the Navigator body shell.

However, I am trying to keep the original sides of the Cordite body shell in place, like so.


So what I am currently working on is building a bonnet lip for the body shell that will extend beyond the Spitfire bonnet shut line.


I will then build the rest of the bonnet shut line and the rest of the scuttle around that lip.

I hope that makes some sense, as I can hardly get my head around what I am trying to do myself. :rolleyes:

Dave - Well this project has certainly driven me to drink at times!
( Hopefully the explanation above makes things a bit clearer. )

Oxford - I'm sure a man of your skills will find a suitable place for all your instruments. :cool:
I wanted to re-use my Spitfire dash to by-pass the need for skill, and that means I can't butcher the bulkhead.

Ed - I will definitely try my best to get some sort of flow around the aero screens.

Scottie - Thanks mate, I know we'll both get there in the end (touch wood).
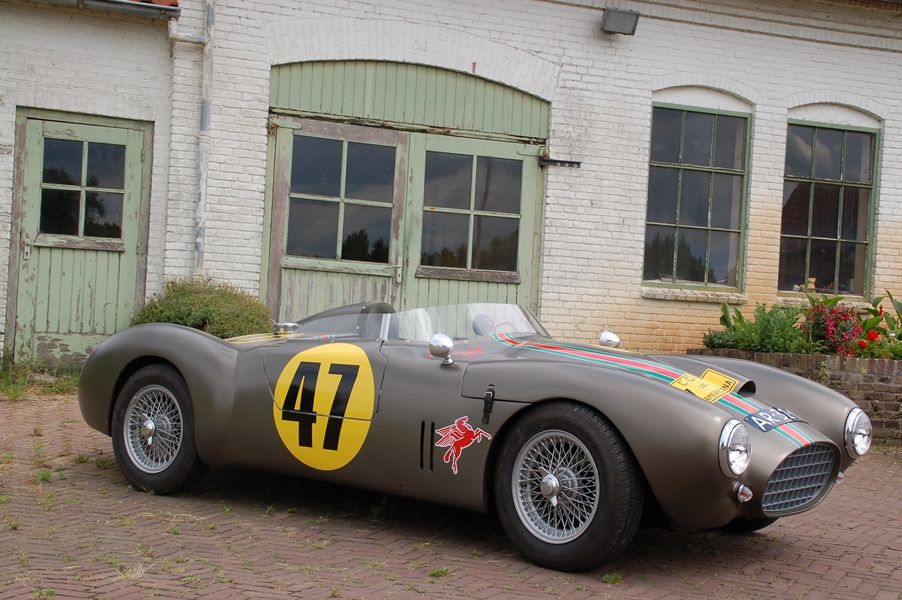
The way I look at it, Michiel has just raised the bar for the "Swan" standard.


If my car only looked like a distance "dirt poor, inbred, hillbilly" relative of this one, I'd still be happy. :cool:

- - - - - - - - - - - - - - - - - - - - - - - - - - - - - - -

Project Hillbilly - Part 1:
I started the day by jacking the car up in an attempt to get a level playing field to align the body shell.


However, I should have know better than to bring spirit levels, straight edges & a tape measure out. :rolleyes:

Instead I will adopt the true Sammio "you can't see both sides at the same time' ethos and carry on.

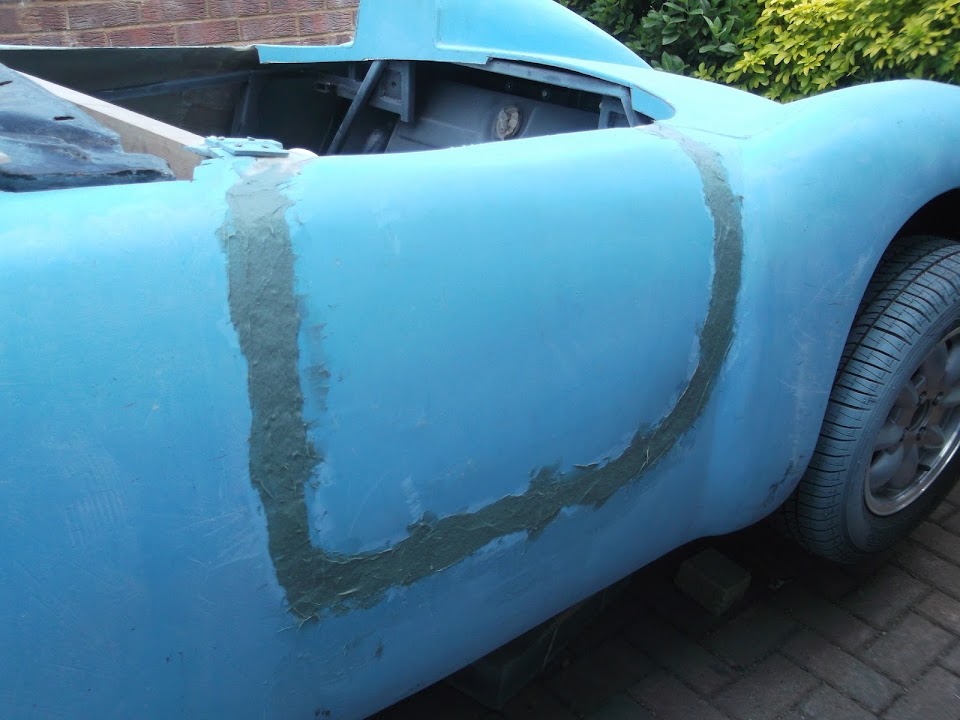
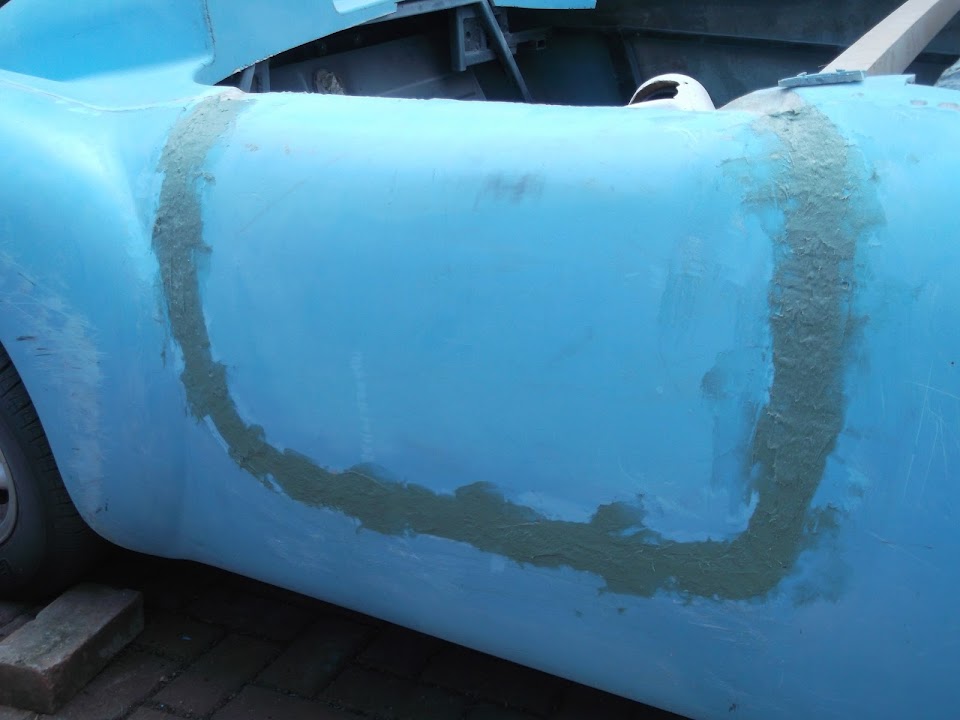
To cheer myself up a bit I added some fibreglass filler to the door gaps, after I had cleaned them up a bit first.


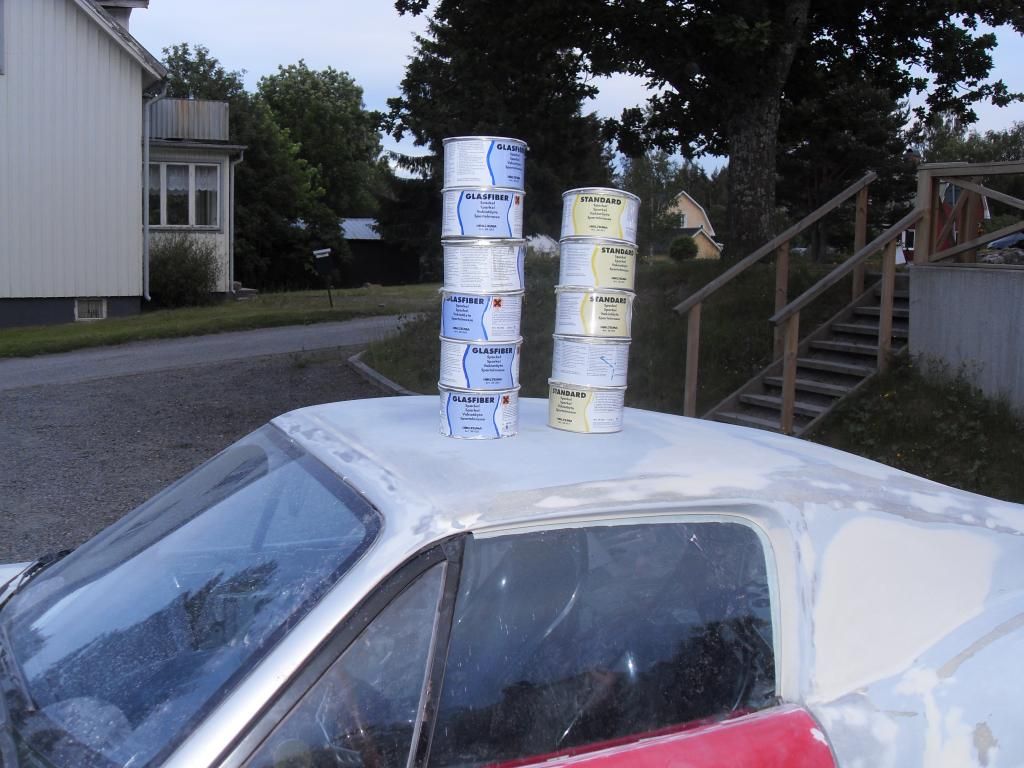
I've bought a tub of the stuff that Mac is using.


But based on Andreas' Tribute build I may have under estimated the quantity of filler required! :eek:


Question:
What sort of electric sander would you recommend for filler / body work?

- - - - - - - - - - - - - - - - - - - - - - - - - - - - - - -

Then it was time to cut out some more matting and do the next round of fibre glassing on the scuttle area.


Then I left everything to set for a while

End of Part 1...
23 Jun 2014, 3:12pm
Project Hillbilly - Part 2:
My plans for the afternoon changed when the dark clouds returned and it felt like rain was coming.


So I was just about to put all the covers back on when I took at chance with my scuttle base.

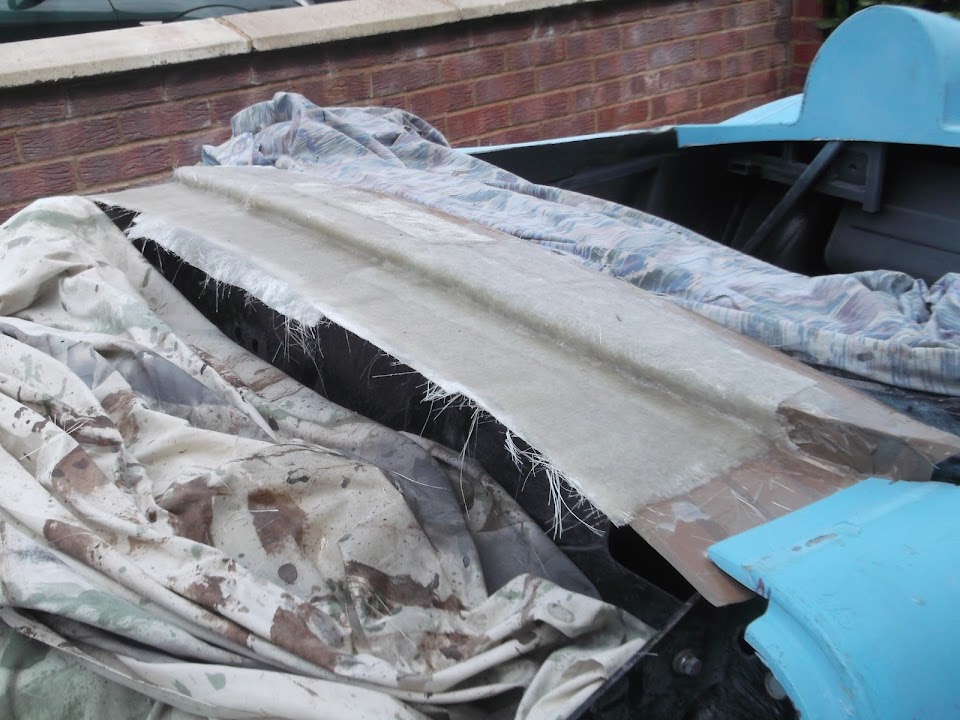
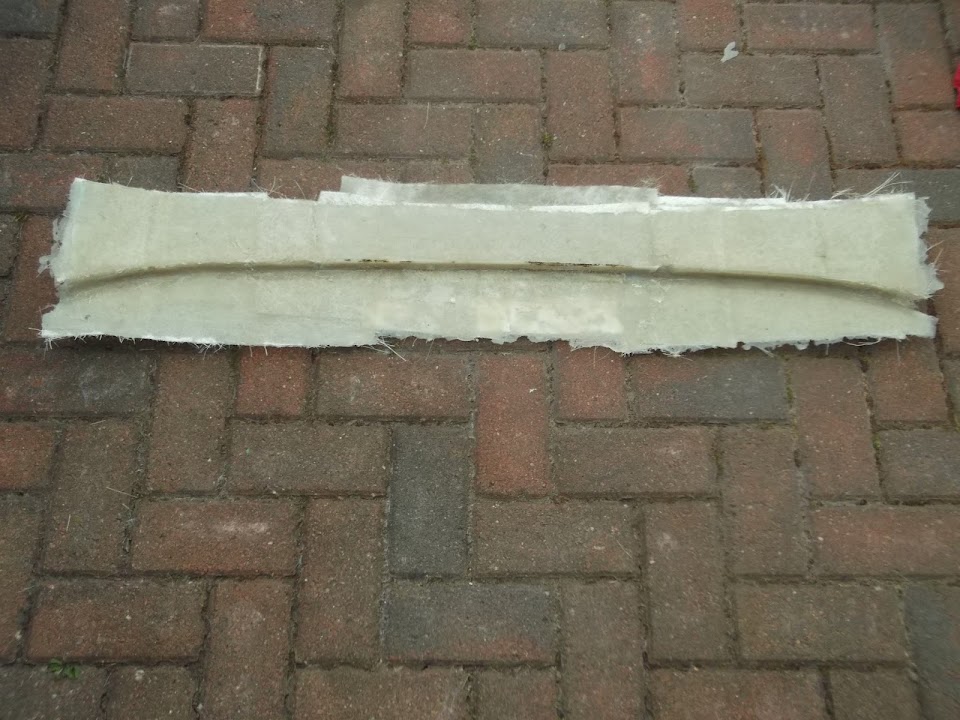
I carefully peeled the whole thing off the bulkhead.


Then I took even more care to remove the hardboard from the fibreglass.
( This is the view from the under side. )


I can not quite believe it myself, but I have actually made something solid out of fibreglass. :cool:

A quick test fit over the bulkhead and it sits there very nicely.


This design will provide me with a large surface area to apply bonding paste to.

The lip even clears the back of the brake master cylinder.


The next stage will be to join the driver's side of the body shell to this "middle" section.

In order to do this I will simply have to commit to a "best fit" alignment and get on with it.

Then I will be able to mark a line from the driver's side, across the bulkhead to the passenger side.

This line will decide the fate of the passenger side of the body shell, which will then be cut to match if required.

But all that had to wait as the car was wrapped up and I switched to other chores.

Until next time, take care, Paul. :)
23 Jun 2014, 5:52pm
That filler is good stuff Paul, it's good and strong but shapes really quickly using 180 grit and powders nicely with 240 and above.
Quick tip for next time is to let it go off but rough shape it with 80 grit while it's still green, it makes getting the basic shape a much easier job, it does knacker the sand paper though.
Mac
24 Jun 2014, 12:01pm
Mac - I know you use air tools, but can you suggest any electric sanders for me to buy?
At the moment I have nothing to tackle the filler with other than my grinder & belt sander. :rolleyes:

- - - - - - - - - - - - - - - - - - - - - - - - - - - - - - -

Driver's Side Corner:
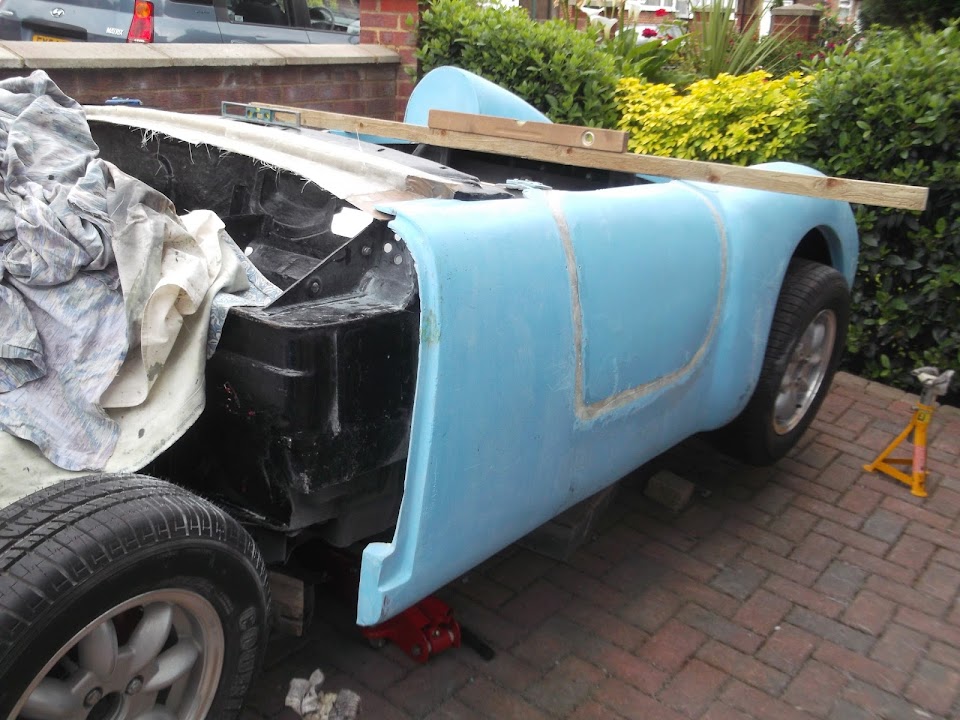
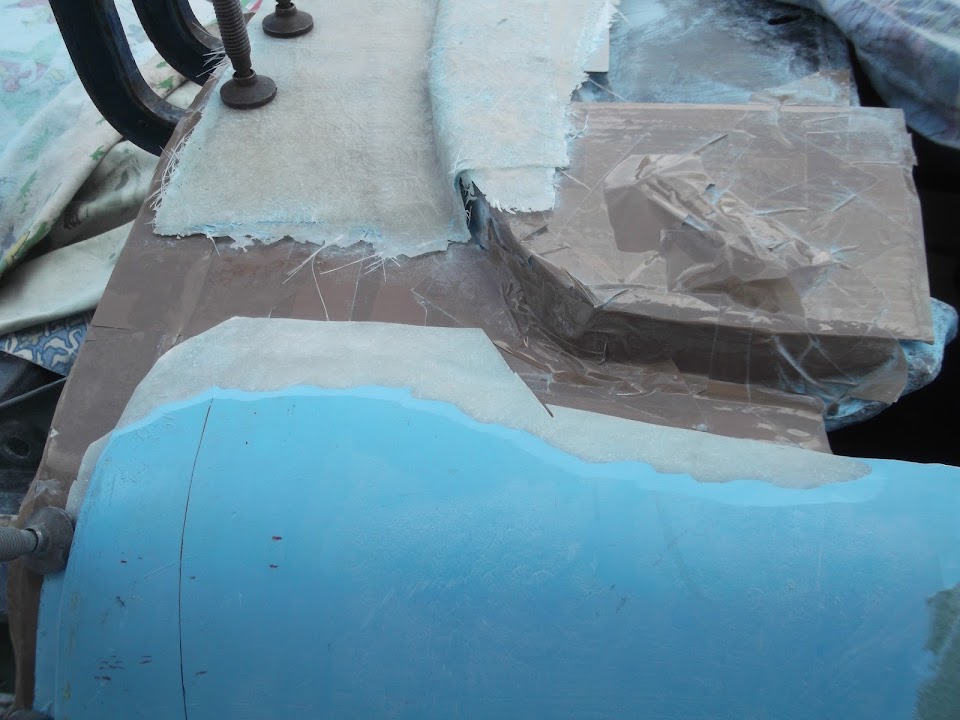
Only had time to do one job today, so I stuck with the scuttle base and tackled this area of the driver's side.


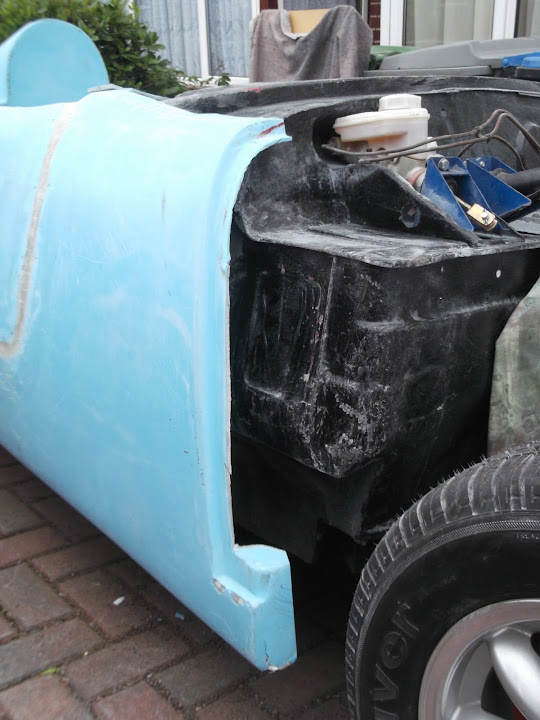
As you can see in this photo, there is also a "lump" that needs to be removed.


Its removal will allow for a better line across the top of the door / body shell.

But I can't remove it all just yet as that is where the body shell brace is attached.

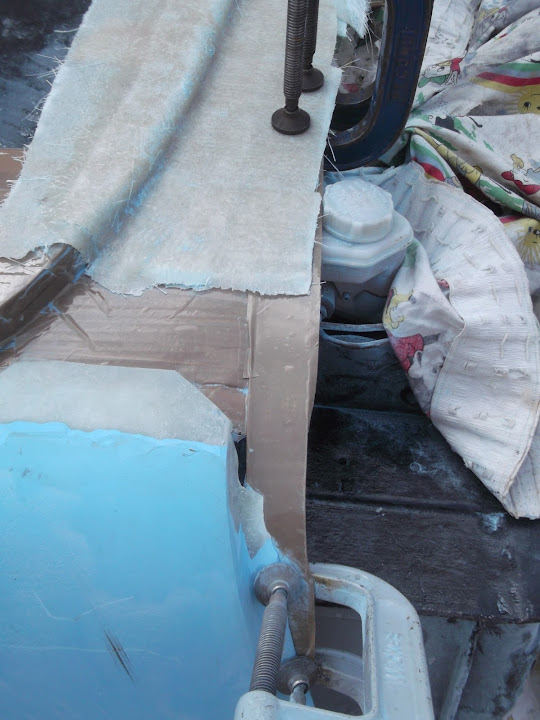
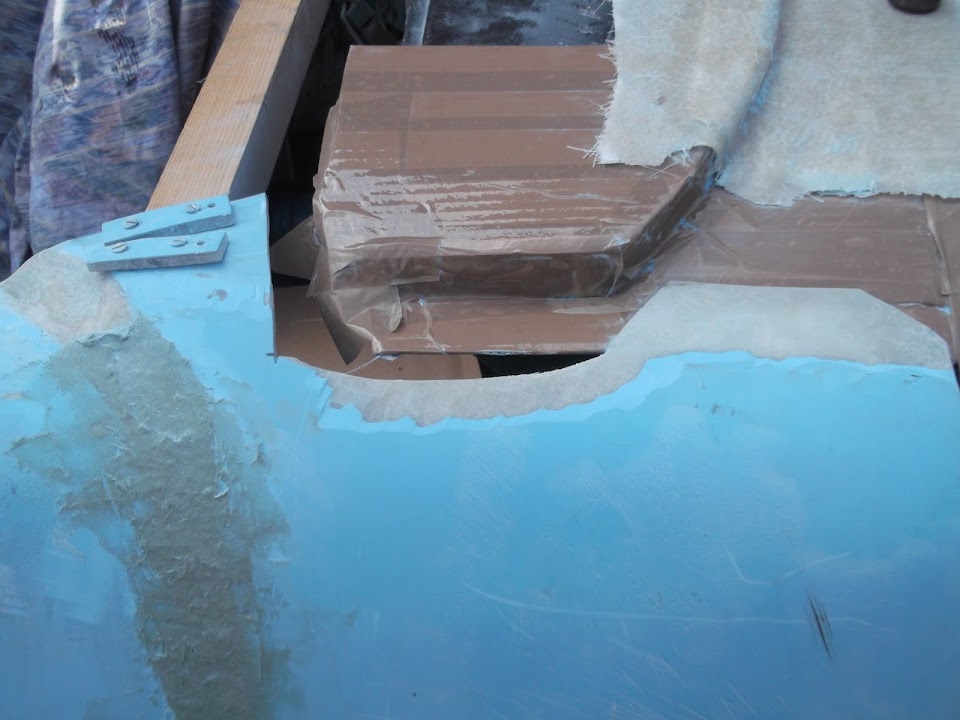
So first job was to tape up the bulkhead and a layer of cardboard I cut to fit on top of the corner I was working on.


The cardboard represents the fact that the bonding paste will "lift" the body shell off the bulkhead a fraction.

I also put more cardboard along the length of the bulkhead to get an even (ish) gap all the way across.


I had a thin off cut of metal from the lowered floor pans to play with.


So that was also covered in tape and then clamped into position.


Thus forming the bend required for the existing and new body shell bonnet lips to join up.

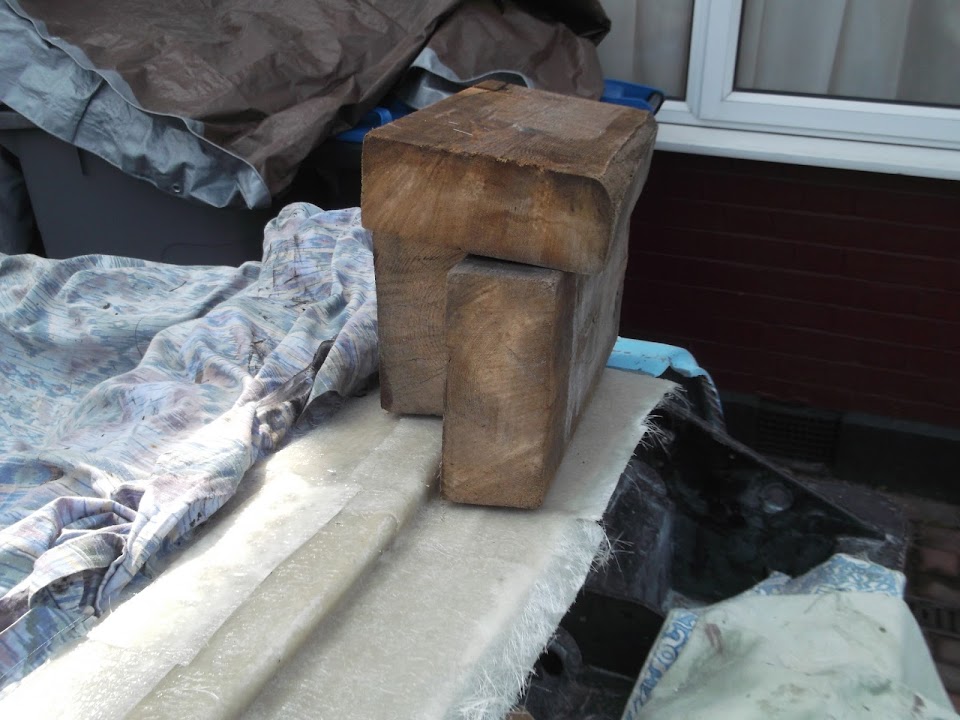
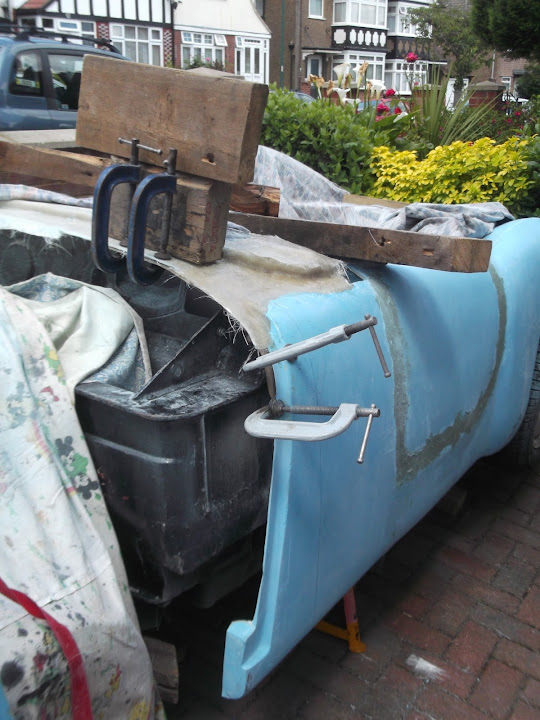
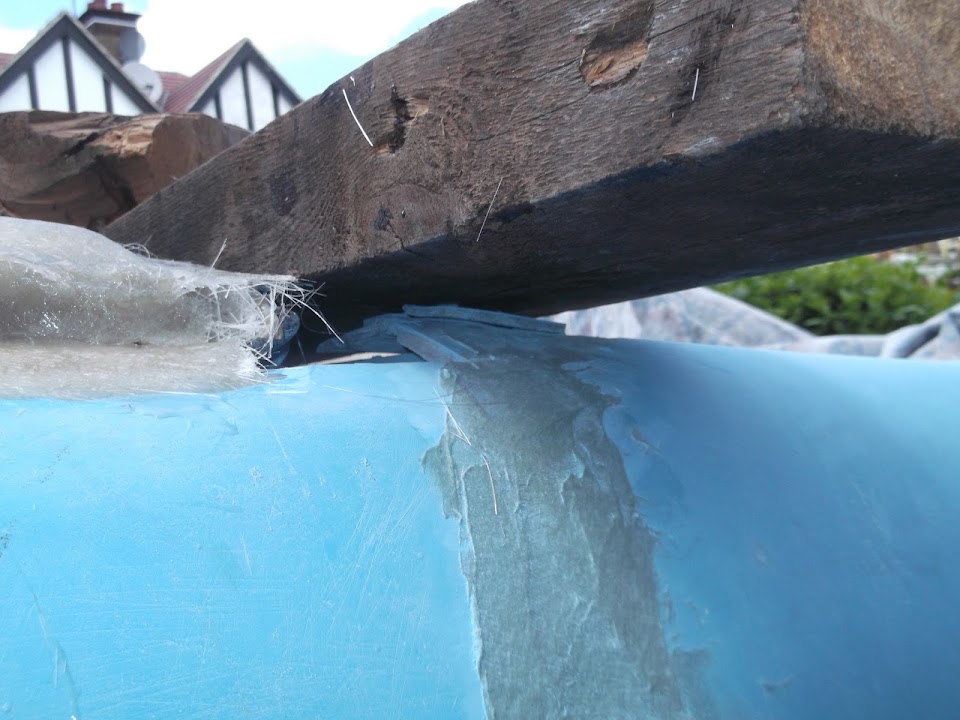
I used some of my "skip" wood to weight the rest of the scuttle based down.


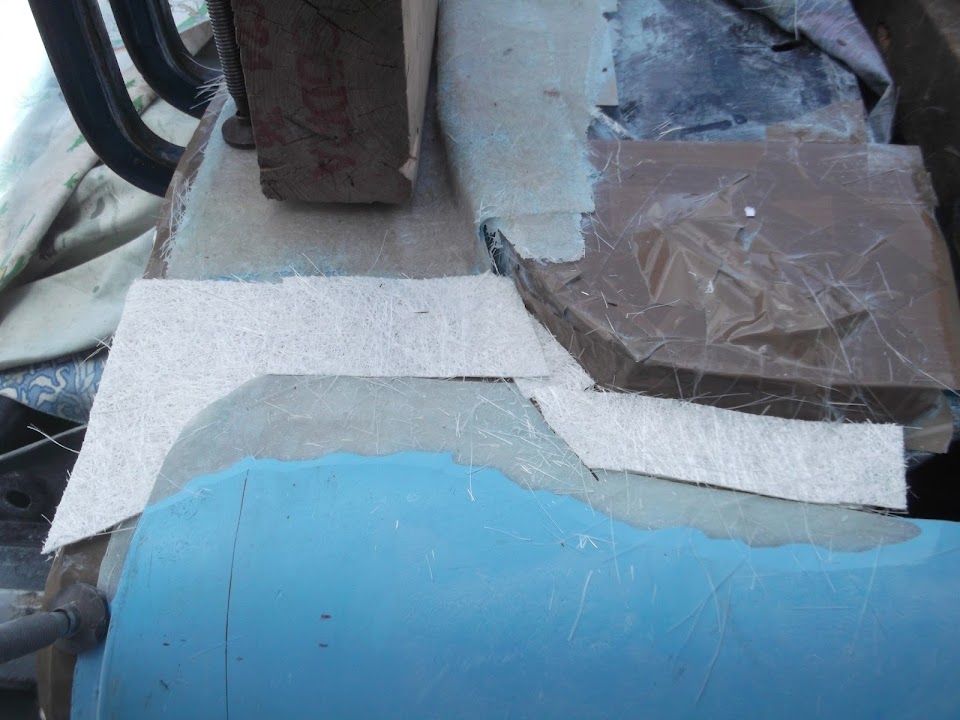
Then I removed a section of the body shell and cleaned off the gel coat to reveal the fibreglass below.


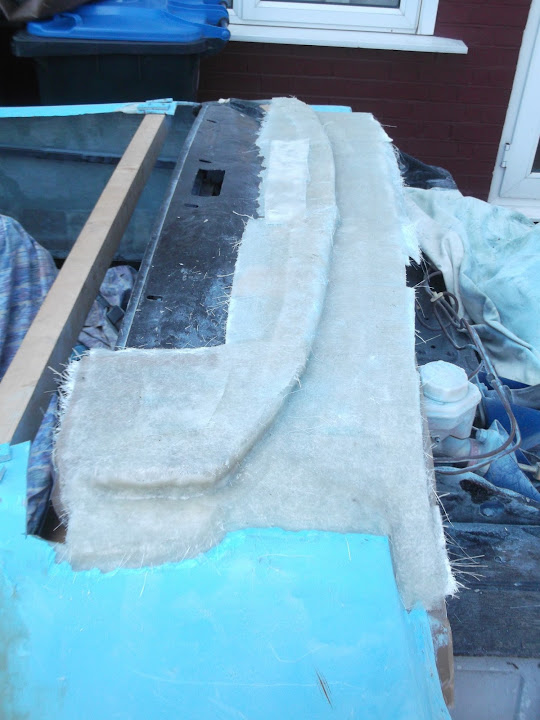
After two sessions of fibre glassing, the corner now looked like this.


I must say I am really pleased with how this has actually worked out. :cool:

Just remember this is the base of the scuttle and all the real sculpting work has yet to come.

You can also see the work still required to get a decent line from the back of the cockpit to this area.


At least once the "lump" has been removed the line will look a look better and give me a base to work with.

I will leave all this to cure for as long as possible before I cover it up for the night.

- - - - - - - - - - - - - - - - - - - - - - - - - - - - - - -

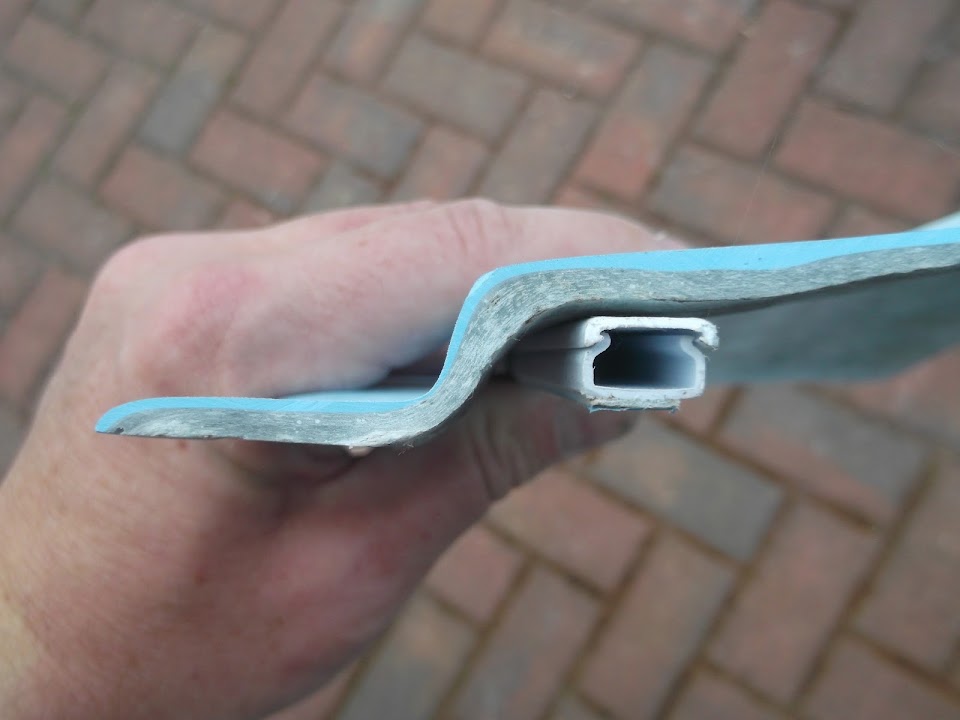
I only other thing I did today was to pick some uPVC cable trunking.


I will use this to form the bonnet shut line as it should give me the right depth when covered in fibreglass.


With all the wood resting on the scuttle, I couldn't really position this properly.

But hopefully this photo gives you the general idea on the passenger side.


I will also be using this to measure across the bonnet lip to see if I need to 'cut & shut' this side of the body shell.

- - - - - - - - - - - - - - - - - - - - - - - - - - - - - - -

Whilst I have too many other things to do today, this was still a very good session.

Got to go, so take care, Paul. :)
24 Jun 2014, 2:18pm
Paul, this could end-up looking really good, and it could do you a big favour........I had decided to fit Brooklands screens like you, and I spent lots of time looking at the contours of the scuttle which are complex, irritatingly asymmetric, and designed for the wrap-round screen.

If you carry on what you are doing, you will have a neat looking flat(ish) topped scuttle that will look great with two screens and a rear view mirror (and a neat shield) fitted.

Keep going! I'm just off to buy some shares in your local filler supplier.
24 Jun 2014, 6:18pm
Paul,
Nice work keep at it mate your skills and confidence seem to be growing with gathering pace!
To be honest most of what I have done so far has been with hand tools, I have an air powered DA which I used on the top of the aluminium sides but for everything else a long board a several good sanding blocks will do you. Contrary to popular opinion air tools won't save you as much time or effort as you think when working with fibreglass. The other problem with electric da sanders is they tend to use a grinder chassis and are therefore quite heavy and unwealdly , is that a word?
If you don't have a good paint and suppliers place near you I'm happy to pick you up one of those £19.99 sets and a longboard and send them on for the cost of p&p
Let me know
Mac
24 Jun 2014, 10:55pm
Bosch pex220 at b & q should be an OK sander for not much, any random orbit sander works like a DA the velcro pads are not cheap though and the bases don't last forever. I have a makita one that cost a lot and a Argos own that didn't they both do the same job the makiy is smaller and much more pleasant to use. Get yourself a good dust mask is my tip. My brother used to work in fibre glass and they always wore marigold type gloves and air fed masks while sanding. Have a look on eBay might get some cheaper Velcro sand pads. Ed.
25 Jun 2014, 7:19am
Strongly agree with Oxford, that flat plinth across the bulkhead is going to look as if it's designed in once it's sanded and painted.

I used a B&D 'mouse' sander -

http://www.ebay.co.uk/itm/Black-amp-Decker-Mouse-Detail-Sander-15-Accessories-inc-Sanding-Sheets-Storage-Bag-/321170223211?_trksid=p2054897.l4275

one of these wobbly jobbies -

http://www.ebay.co.uk/itm/Long-Bed-Sander-Flexible-Sanding-Rubbing-Block-Velcro-Flexi-70mm-x-800mm-FMT2090-/191151638855?pt=UK_Body_Shop_Supplies_Paint&hash=item2c81868947

and a whole bunch of these sponge blocks -

http://www.halfords.com/webapp/wcs/stores/servlet/SearchCmd?srch=sanding+sponge&action=search&storeId=10001&catalogId=10151&langId=-1

I also bought a random orbital sander but it was pretty much useless as there isn't a flat panel on the body. The mouse was much more effective.

The wobbly thing worked really well on the rear wings and head fairing while the medium sponge blocks made flatting the high build primer a doddle and the fine ones were equally effective on the top coat before finishing with traditional wet 'n' dry paper.

The dust mask tip is good advice btw...
25 Jun 2014, 7:35am
I'm sure we all have certain images (I'm talking abut cars) that keep us going when life in the garage is not going to plan. This is one of mine -


Nothing wrong with a flat-top scuttle. Lots more images of this at -

http://www.1952allard.com/slideshow.html
25 Jun 2014, 4:19pm
Oxford - Whilst I need to keep the scuttle design simple in order for me to make it, it should hopefully look OK. :pray:
I'm not sure I can get it to look as nice as the car in the link you supplied, but I'll give it a go.
Finally, I was actually re-reading your build thread the other day & seeing all the re-shaping work you did.
I do take comfort from the amount of 'cutting & shutting' other builders have done to their cars.

Mac - I still can't quite believe I am making something out of fibreglass myself. :cool:
I did see your post about the new sanding block set you got the the other day.
I will send you a PM at the weekend after I have quickly checked something else first.

Ed - Thanks for the suggestions and I will look into the air feed mask too.
This is what I am using at the moment.


[color="red"]Please Note:
This is not an excuse for others to start posting their "gimp selfies" again! [/color]:icon_wink:

Mister Towed - Thanks, as I was worried about not following your advice to match the bulkhead with the bonnet.
The irony of all this is I picked the Cordite over the Spyder as it was supposed to require less body work. :rolleyes:
Cheers for the links as whilst I remember the flexible long board you got, I forgot about the sponges.

- - - - - - - - - - - - - - - - - - - - - - - - - - - - - - -

Measure Twice, Then Don't Cut At All - Part 1:
It's officially time for me to order some denim dungarees & a banjo, because I've gone native. :icon_wink:

But let's start with the daily "un-peeling ceremony"...

As there was rain promised before I left yesterday afternoon, I covered the car with the clamps still in place.


Once the "shaped" cover is off, I can remove the heavy duty tarpaulin that actually keeps the water out.


Then the wooden "tonneau" cover that stops the covers sinking into the cockpit can go.


Finally, I can remove the "braces" that hold the bonnet in place & get that out of the way.


Then at last I can reveal what 2/3rds of my scuttle base looks like now. :cool:


Today's plan was to take a deep breath and "cut & shut" the passenger side of the body work.

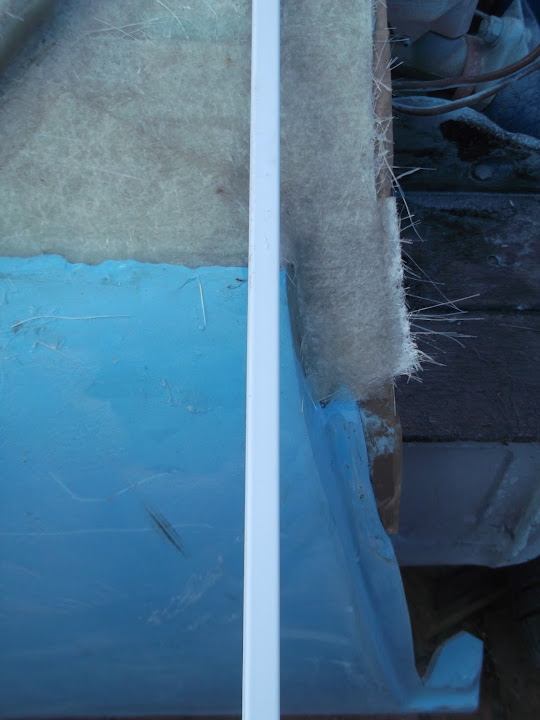
I lined up the uPVC trunking with the "fixed" driver's side.


Then I measured the trunking to the back edge of the Spitfire bulkhead to give me a "straight" line.


And sure enough, the passenger side was around 2cm too long. :icon_sad:


So I marked up a reference line on the body shell, ready to mark a 2 cms "waste" section next to that.


However, at this point, I found myself trying to double check everything before I started cutting.

Normally, this approach would be a good thing, but on this build, it is like rubbing your tummy, while patting your head. :rolleyes:

End of Part 1...
25 Jun 2014, 4:23pm
Measure Twice, Then Don't Cut At All - Part 2:
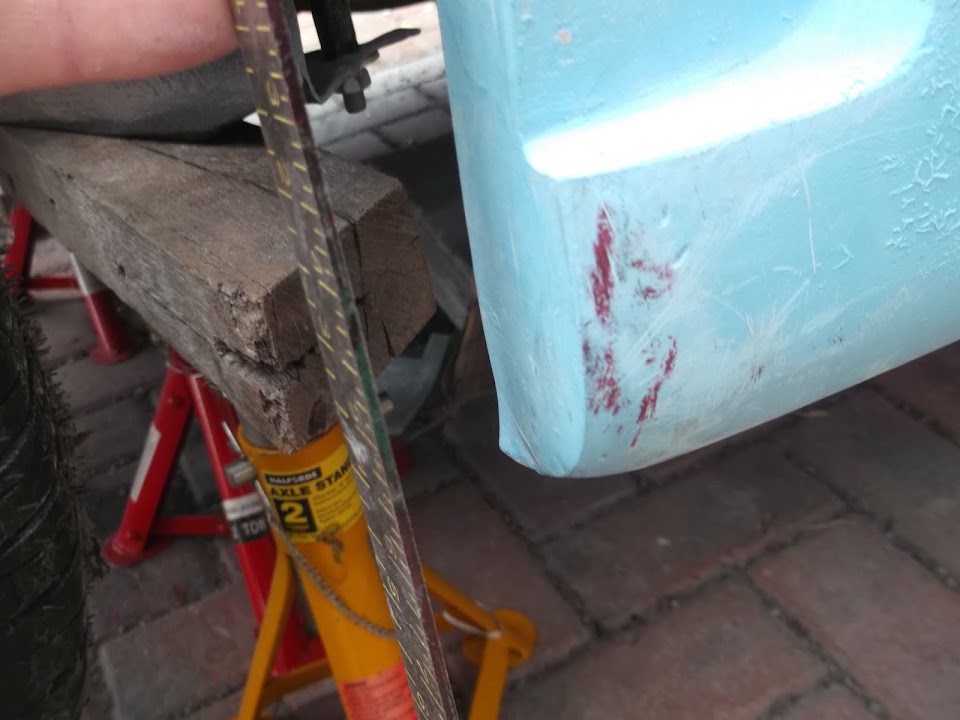
Where is all went wrong for me today was differences between both sides at the bottom of the body shell.

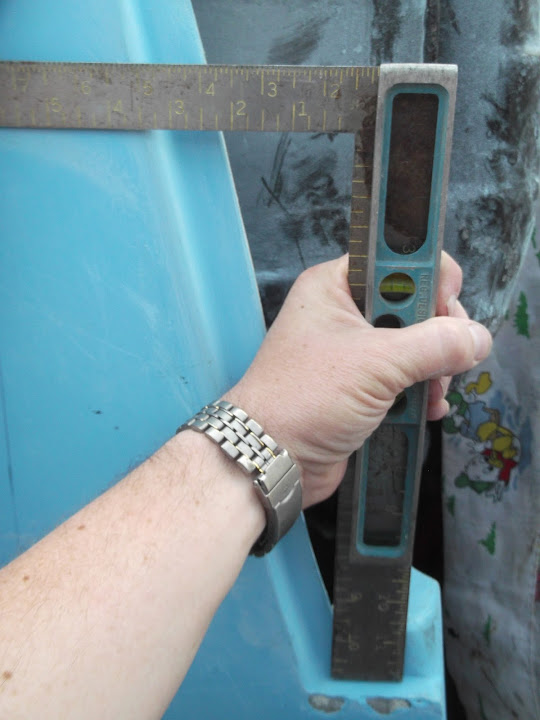
In this photo, one end of the set square is in line with the bulkhead chassis mounting plate on the driver's side.


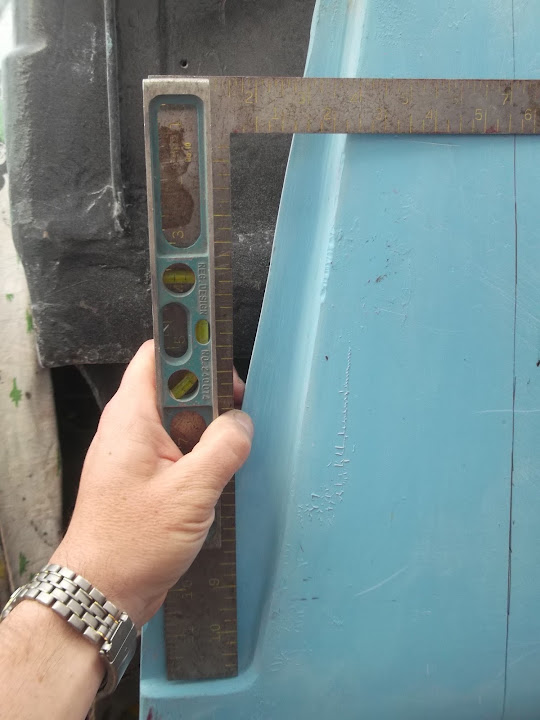
Here is the set square in exactly the same position on the passenger side and the body work comes up short?


Part of this problem is due to the fact the bottom of the "L" shape bonnet lip is a difference length on either side.

But the real problem is that the angles of the main length of bonnet lip are different on both sides.

Driver:


Passenger:


Note:
I had to resort to adding a spirit level to the set square as my brain was slowing melting at this point. :rolleyes:

So the today's key discovery is that if I move the passenger side backwards to fix the mis-alignment at the top of the bonnet lip...

I would actually be making the gap at the the bottom of the bonnet lip worse than it already is. :frusty:

Now I read the forum a lot and I'm sure another builder has mentioned this before, but I didn't really pick up on the issue.

The only good news is that this means it is pointless for me to "fix" the bonnet shut line at the top.

Unless I am going to attempt to rebuild the entire passenger side bonnet lip as a mirror of the driver's side.
( And let's be clear, I have got too much work to do as it is to even contemplate this. )

Therefore I am going to embrace my inner hillbilly and simply join the two sides together, as they are, like so...


This means the bonnet shut line will be at a slight (and thankfully it is only slight) angle running from one side to the other.

If I ever want to finish this build, I simply can't lose sleep over things like this anymore.

- - - - - - - - - - - - - - - - - - - - - - - - - - - - - - -

So after much measuring and beard scratching I was able to start work on the passenger side corner.

Unfortunately, I came across my first issue within minutes of starting.

There is a residual "lump" left where I cut the windscreen off on this side.
( Which was not a problem when the Cordite scuttle sat over the Spitfire bulkhead. :rolleyes: )


Thankfully I am finally getting my head around working in "reverse" with fibreglass.

At this point I just need to ensure the base of the scuttle can sit on top of this without being pushed up.

Which actually means making a hill on the bulkhead to form a valley in the base of the scuttle.

So I simply cut an opening in the cardboard like so.


Then by adding some more cardboard on top of the lump I was left with this.


Then I cut back the edges of the body shell and removed the gel coat.


I also removed the metal strip I used for the bonnet lip on the driver's side and clamped it in place.


One thing I forgot to photo yesterday is the layers of matting I use to build up the gap in between the two sections of fibre glass.


Note:
Each layer overlaps in a different place / way in an effort to avoid building in weak spots along the edges.

I build up the front edges by laying up thin strips along the edge itself.

Followed by large strips that can be pressed in to match the contours of the edges.


I've found this much easier than trying to make a single edge "fold & stick".

This all of this is then covered with matting that reaches across the two ends of the body shell / scuttle like so.


Then extra sections of matting are added on top in a patchwork quilt style, again to avoid weak points.

Whilst I don't have a laminating table, I do have some newspaper on the ground. :icon_wink:


This allows me to add resin to the "underside" of the matting before I lay it into place.

Then I simply brush / roller more resin on the "sunny side" to fix it into place.

Note:
This photo was taken before I added the catalyst and the fibre glassing "frenzy" begins.

As I always seem to be a tad over optimistic about how many small sections I can finish within the resin "pot life". :rolleyes:

End of Part 2...
25 Jun 2014, 4:24pm
Measure Twice, Then Don't Cut At All - Part 3:
Anyway, after two fibre glassing sessions, the passenger join now looked like this. :cool:


Which means that my body shell is now "whole" again after all my previous scuttle butchery.

There is a "bump" in the body work on this side too, but it is not as high as the one on the driver's side.


All of this will be taken care of when I trim the cockpit sides and start to build up / shape the scuttle area.

I've now left everything to cure before I start the "covering up ceremony" for the night.

I think I will leave the clamps in place again, just to help hold the shape for a bit longer.

Until next time, take care, Paul. :)

PS
I've been looking at lots of finished Sammio / Ribble photos recently.

As far as I can see, TlrTone is the only person who has fitted side repeaters.


He has wired his into the bonnet, whereas I was planning to stick mine into the body shell.

Given that I live / drive in London i think these are a useful addition, even if they do not appear to be a popular choice.


PPS
One thing I forgot to mention with my newspaper "laminating table" is be careful where you step.

I managed to tread in the resin soaked paper, then walk over a load of stray fibreglass matting strand.

Thus giving the soles of my trainers a white beard! :rolleyes:
25 Jun 2014, 6:41pm

I managed to tread in the resin soaked paper, then walk over a load of stray fibreglass matting strand.

Thus giving the soles of my trainers a white beard!


This made me laugh Paul, keep up the good work.

You look like you have taken to working with fiberglass like a duck to water and the cutting off of bits does look daunting, it makes you wonder how the original kits sold but hey its certainly is a challenge, keep it up.
25 Jun 2014, 8:21pm
Well done Paul, you are a brave soul!

ou've almost got as many clamps as me now!

Like they keep saying,you can't see both sides of the car at once!

My body shell has its quirks and faults like all the others I guess,
but as long as you can live with that yourself, most people will never ever notice.

Keep posting, you are really at an interesting stage!
26 Jun 2014, 3:32pm
Swifty - It appears the original Spyder kits were actually in better shape than the Cordite.
The Cordite was supposed to have all the improvements that your new Navigator actually has.

Scottie - Cheers.

Scottie22 wrote:
... most people will never ever notice ...


I think you have really hit the nail on the head there.

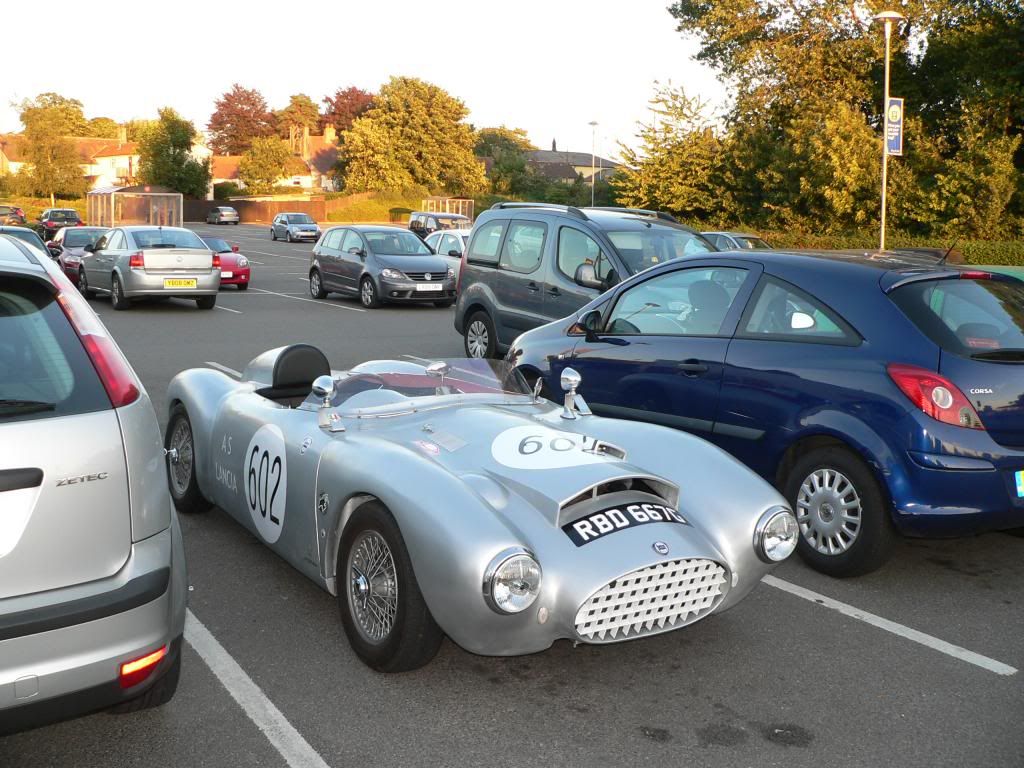
I am now re-naming this photo as the "Mister Towed Supermarket Car Park Test"...


He clearly has the most unusual / coolest car in the car park and that is what anyone else will notice first.

So hopefully my car will be "stand out" different first, and not 100% "straight and true" second. :pray:

- - - - - - - - - - - - - - - - - - - - - - - - - - - - - - -

One Step At A Time...
Well this is what my scuttle base looks like after yesterday's work has set.


Which gives me a vaguely curved bulkhead / bonnet shape.


I compared the trunking I have with a cross section on the original bonnet lip.


So I need to allow for the curve of the fibre glass and can add "sharp" edges with filler later on.

I have two lengths of trunking to play with so I marked up both ends of the body shell like this.


Although I had to cut a channel in one of my re-enforcing layers of matting on the passenger side.


I've decided to build a curve into the shut line like so.


My theory is a "wobbly" curve shouldn't stand out as clearly as a straight line at an angle. :pray:

Note:
I did trim the front edges of the fibreglass, but this is not the final shape.
I'm just getting very fed up of removing fibreglass splinters from the hands & arms. :rolleyes:

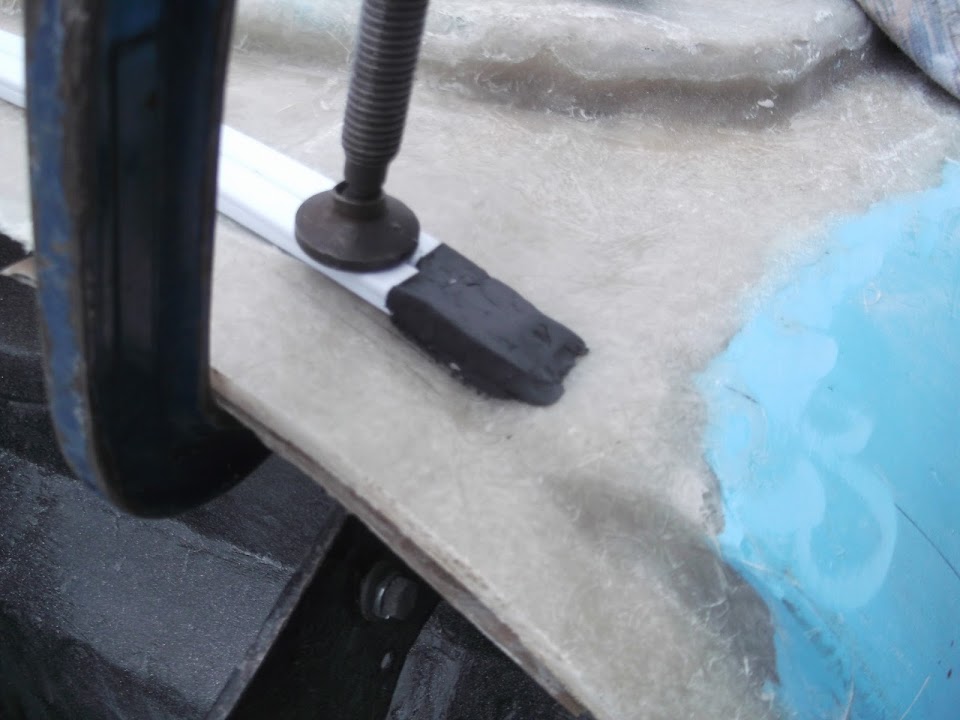
I used some plasticine to bridge the gap from the end of the trunking to the edge of the body shell.


Although, as you can see I added clamps to either end just to be on the safe side, so I will do this section another day.

Then I cut a couple of layers to build up the area on the inside of the trunking.


Plus some big sections to fold over the trunking.


I must confess it was a real struggle to get the matting to lay nicely in the right position.

But eventually I had at least two layers of the bulk of the bonnet shut line.


With the edges on both sides still to do.


I should point out that the "overhead" photos involve me standing / balancing on the top of this wall...


...desperately trying to avoid falling off and getting a comedy injury. :rolleyes:

Right I've got another appointment down the pub, so I've got to go.

Take care, Paul. :)