This is a read-only archive of the old Madabout Kitcars forum. New posts and replies are no longer possible, but every thread is still here to browse and read.
I've refitted my bonnet and cut the rear edge down to match the bulkhead today. It'll still need a little filler to get the shut line perfect, but a hell of a lot less than last time. Still need to fit the pins and locks again though.
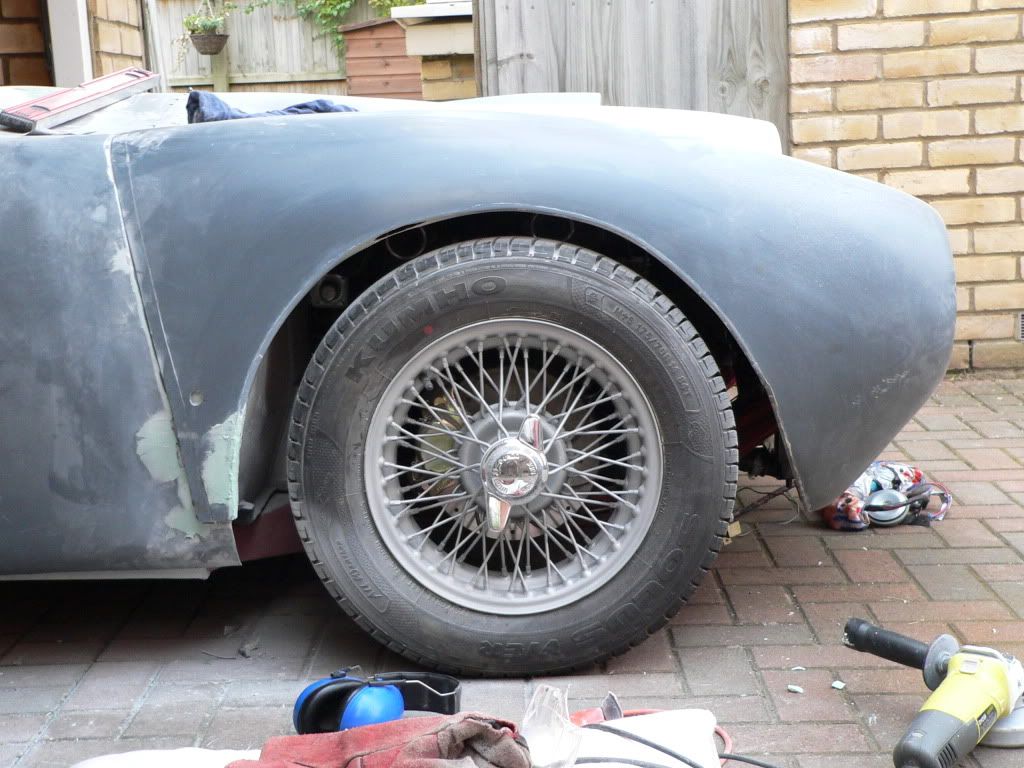
I've also started tackling the off-side wheel arch which has a big flat edge at about the 11 o-clock position spoiling the curve
So, my front wheel alignment in the arches has gone from this -
Through this -
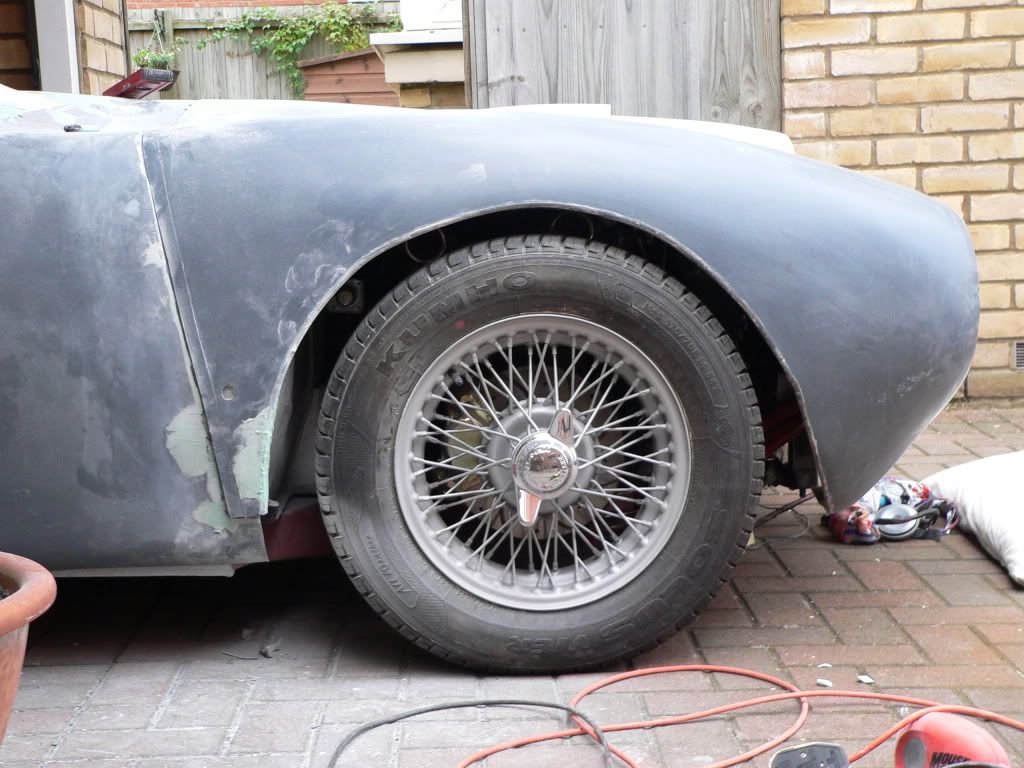
And now looks like this -
which I'm a lot happier with even though there's still a bit of work to do to finish it.
Couldn't agree more. If you don't do it now you are going to have a long time wishing that you had. Nice job. How did you remove the flat spot? Attack with the grinder?
Couldn't agree more. If you don't do it now you are going to have a long time wishing that you had. Nice job. How did you remove the flat spot? Attack with the grinder?
Yep, sanding was taking forever so I went at it with a grinding disc, having marked where I wanted the curve with a laundry pen. It's starting to all come together...
Hi Towed
So your bonnet remains the original length after surgery and reattachment, have you just managed to drop the front down through having the scoops in place, therefore achieving the better wheel arch alignment?
Mr T - This is why yours is my favourite build thread on this forum.
You know what you want and are prepared to keep working until you get it.
Keep up the good work, Paul.
Thanks Paul, I do want my car to end up just how I have it pictured in my head. One or two things I had in mind wouldn't work though - the umbrella handle handbrake and the tail-pipe exiting through the centre of the body at the back, for example, while a couple of things have evolved through necessity, like the bonnet scoops and lowered floors.
It's taken twice as long to build as I anticipated and part of that is down to taking bits apart and rebuilding them, but it's probably the only car I'll ever build and I'm thoroughly enjoying the challenge.
If I'd paid £15k+ for a seven replica that bolted together in a few hours I'd have finished it more than a year ago. I'd have also not felt as if it was really mine and I would certainly have sold it by now.
The Sammio, however, is a different animal altogether. To misquote a popular American bumper sticker -
I will give up my Spyder when they prise the keys from my cold, dead fingers.
Hi Towed
So your bonnet remains the original length after surgery and reattachment, have you just managed to drop the front down through having the scoops in place, therefore achieving the better wheel arch alignment?
Hi Pops, after much cutting off and reattaching of bits of bonnet it's ended up about an eighth of an inch shorter than it left the factory.
In order to get the wheelarches right it had to be lowered almost three inches at the front though. To acheive this I needed the large scoop to clear the front carburettor and the the thermostat housing, the small scoop to clear my in-line coolant filler cap and the dynamo had to be rotated down on its original engine bracket, which needed a new adjustment bracket fabricating.
Having looked at a few Vitesse and straight six converted Herald Sammios now, it seems that there are different engine mountings out there. My Vitesse 2 litre mk1 engine sits very high at the front. In Phil J's BRG car, which uses a 2500 engine on a Herald Courier van chassis, the engine also sits quite high at the front, but not quite as high as mine, while in Barry's dark blue car, which is also 2 litre mk1 Vitesse based, the engine sits level and sits about two inches lower at the front than mine.
Anyone any idea whey there's so much difference?
If so, it'd be worth changing your engine mounts at the chassis refurb stage to give better bonnet clearance later on. Having said that, I rather like my scoops.
The bolt on suspension towers (or rather the engine mount brackets on the towers) are different between the 4 and 6 cylinder models. I've even seen an engine leaning to one side because the towers were mixed.
Spent a couple of hours this afternoon getting the bonnet locks refitted. Didn't finish until it was dark so I'm sorry about the flash photographs, they don't show it in its best light, so to speak. I'll get some in daylight tomorrow, but it's looking much better now
Looks great,We all have the same,not round arches.
Please explain what you,ve done,and how,to get your wheelarch that good.
I know you did so before,but please some more explanation for us Dutchman...
The passenger side is just how it left the factory, and it's round!
The driver's side had a big flat spot at about the 11 o-clock position though. I thought about marking it up with a template but instead I just drew where I thought it needed rounding with a laundry marker pen by eye and then ground out the flat spot with a grinding disc in the angle grinder. The result is good enough imho. It just needs a bit of fibreglass to reinforce the return and it'll be finished.
"Saw this and thought of you" , no, I really did. Medium coffee lid from fair trade coop coffee jar. It would possibly make a nice plug for a mould for your rear lights. Might help the power/weight ratio.
That would've been a good idea if I hadn't already made up alloy moulds.
Funnily enough I was looking at a plastic box that a chocolate cake came in earlier and wondering if I could use it as a mould to make some fibreglass fake finned brake drums. Not sure if fibreglass would be up to the job without catching fire though... The idea is from a classic kit car Phil J saw where the owner had made some big finned drums from alluminium to hide the modern brakes. Details, details.
Those brake covers are a good idea. We saw a really 30's style Riley at the VSCC meet a couple if weeks ago. It had big ali covers over the brakes front and rear. It was only on really close examination we spotted the familiar Triumph front suspension. Ut had 17" wires with very narrow tyres. Looked fab.It would be worth it for a bit of brake fade........
Thinking about your alloy mould, if you were to place it on something flat, seal the alloy to flat thing (Formica shelf say) with some wax or a bead of plastercine, tooled to a radius, you could laminate a few layers of grp in there an have hollow light mounts, or lighter hollow mounts!!
Yes, I did wonder about the effect they'd have on cooling, especially on the front discs. I think the 'drums' will be something to think about in the future, I just want to get on with getting the basics right for now.
Slow but steady progress today, not helped by the weather turning to sh!te after lunch
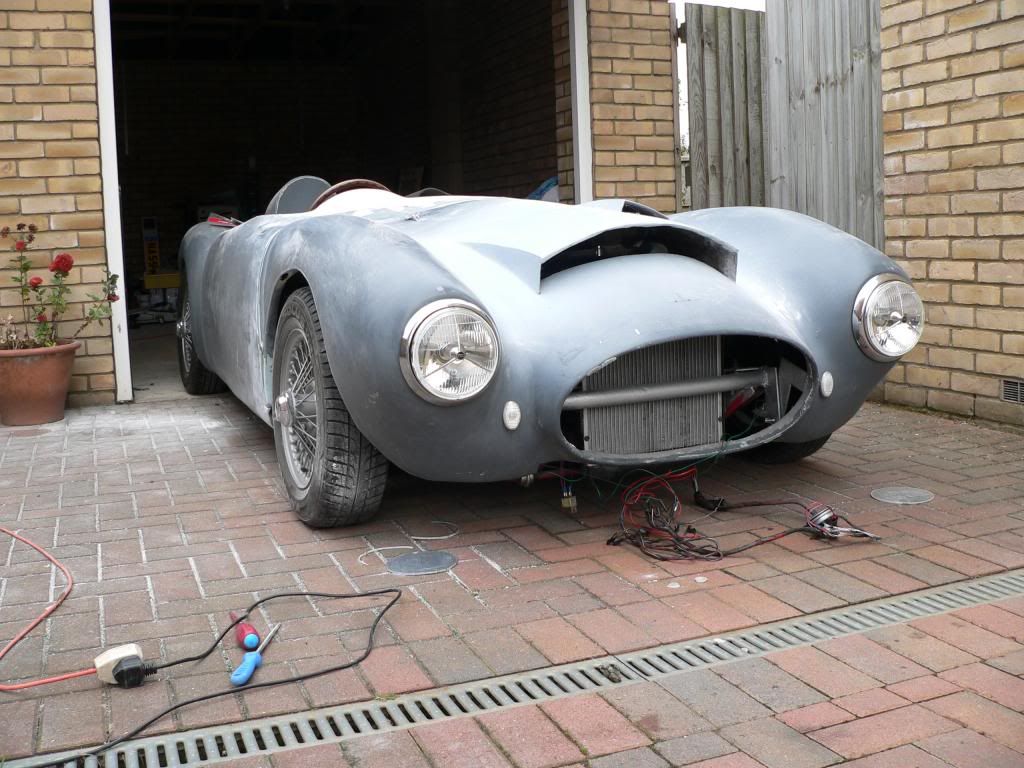
Jobs I did manage were to trial fit the headlights and front indicators. I love the P700 replicas, they really add to the fifties feel -
I also made the decision to use the 'egg crate' grille after all, having bought some black aluminium mesh to use instead. The mesh just looks too modern fror the main grille I feel, but it'll do fine for the scoops so long as I bury it far enough inside that you can't really see it.
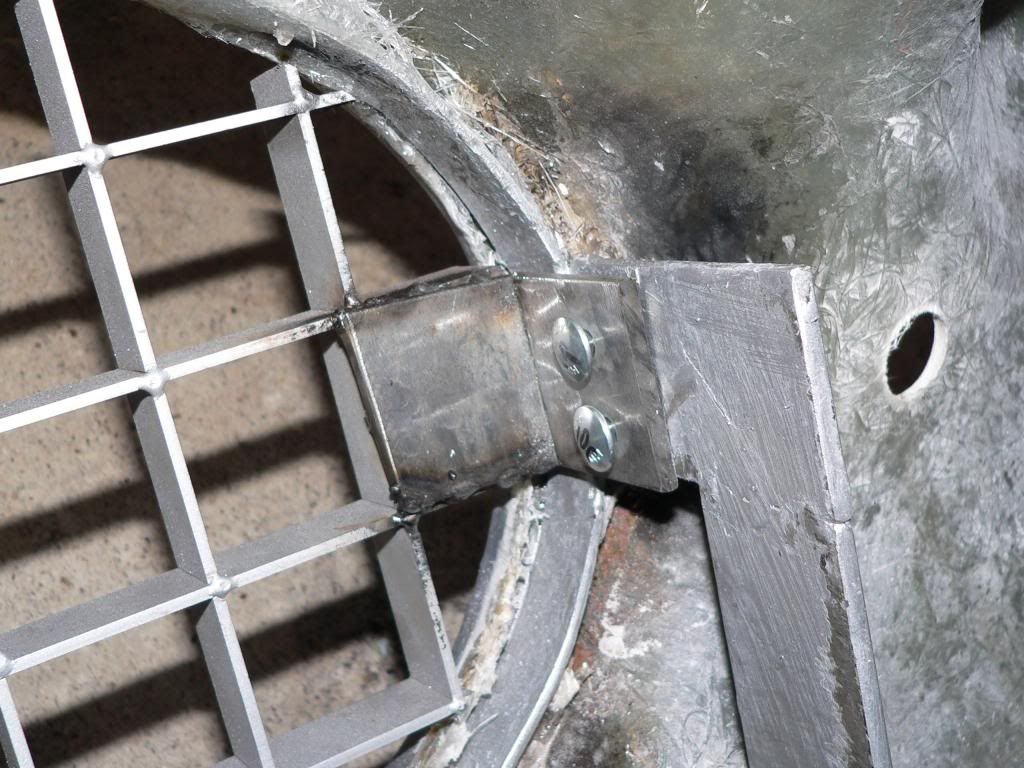
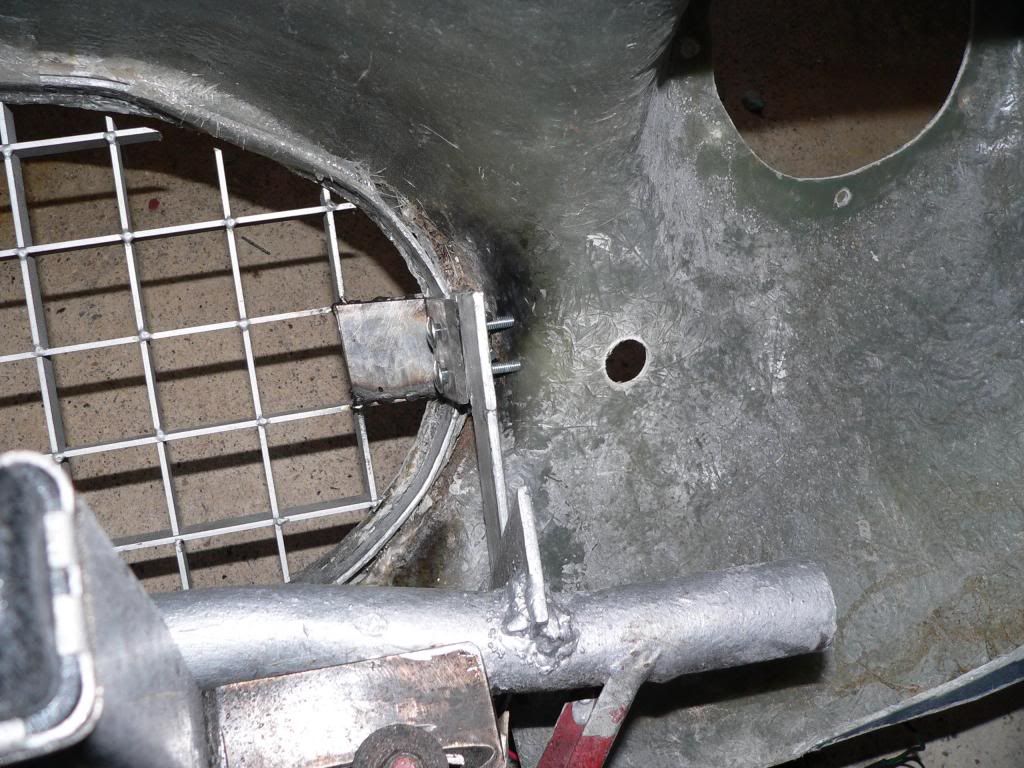
After considering bonding the grille in place I decided I'd like to be able to remove it, so I've fabricated a couple of brackets and welded them onto the grille. They then bolt to the bonnet brackets. Quite pleased with the result -
One step at a time and it's all coming together...
The top of your front wing line looks so good it was worth the extra effort!
When I had the 289 I got a stone through the rad when dashing for a car ferry returning from Le Mans it was only a tiny stone but it did the job, my point is wouldn't you need to use a fine mesh behind the egg crate as well!
Love the headlights you have probably told us this before but what diameter are they and where did you find them. (they look very Germanic to me)
The light configuration looks great. I've got a pair of P700s sitting in a box and I am very glad that I have. As you say, they add some more 1950s to the overall effect. Funnily enough, I think they look very British.




 [/IMG]