
MadaboutKitcars

This is a read-only archive of the old Madabout Kitcars forum. New posts and replies are no longer possible, but every thread is still here to browse and read.

Mick O'Malley's Moss Monaco

10 Mar 2017, 8:38am
The outer edges of the front cross member would make s nice mounting point for a pair of chrome headlights. The pods look a bit bulky.
Is it true that you have to wear a Dick Dastardly outfit when driving the Moss?

I see with the front wheel set up you are intending to go oval racing:bounce:
10 Mar 2017, 9:41am
Found My Colour

I went out to work on the Monaco, and it's raining! What a difference a day makes :(. I decided to search the web for a colour and paint code as I'll be going to the Spring Autojumble at Beaulieu where my suppliers exhibit and sell. They need plenty of notice to mix it so now's a good time.

After going down many blind alleys I finally found what I had in my mind's eye: Jaguar Regency Red :).


Regards, Mick
10 Mar 2017, 11:26pm
Bloody nice colour.

Loving the man cave in the sun

Dave
10 Mar 2017, 11:30pm
Mick O'Malley wrote:
I'll be going to the Spring Autojumble at Beaulieu Regards, Mick


Going in the A352 ?

regards Paul
11 Mar 2017, 5:05am
One Man Band

Yesterday I decided to address the problem of having to wait for help each time I needed to remove the body. Now that the Monaco was in the cave I resorted to the method I used when the same difficulty arose building the A352.

I'd screwed stout hooks from Wilko's gardening aisle into the cave's 4" x 2" roof timbers. I'd cut suitable lengths of nylon rope with looped ends to support it and hung it high enough to roll out the underpinnings. This was easy with the A352 as the front end was separate and I could stand inside the tub, not an option with the Monaco.

Anyway, I propped up the front end, made the bespoke rope support, looped it over the hooks, propped the rear and rolled out the chassis. It only just scraped by so a little shortening will be needed, but at least it worked :).


I decided to drill the holes for the centre outrigger attachment bolts while I had access. I'd already carefully marked their positions on pieces of white self-adhesive label stuck under the floor so, after putting a safety plank supported by two garden chairs underneath I drilled 5mm pilot holes then opened them out to 11mm from both sides to prevent splintering. On replacing the body I trial fitted the M10 bolts which aligned perfectly. Result! Previous owners have drilled a variety of other holes in the floor to the extent that I may name her 'Emmental'. The wood sandwiched in the floor is quite wet so a summer in the south facing cave won't do any harm!

I socialise on Friday afternoons so that was it for the day.
paul_n wrote:
Going in the A352 ?


I've been going every year since '94 with an old kit car friend who built one of the first Westfield IIs in the early 80s. We camp in the New Forest, making a weekend of it, so practicalities demand we use his Mercedes, especially since the likelihood of our buying bulky automotive items is high!

Regards, Mick
11 Mar 2017, 10:56am
Mick O'Malley wrote:


I've been going every year since '94 with an old kit car friend who built one of the first Westfield IIs in the early 80s. We camp in the New Forest, making a weekend of it, so practicalities demand we use his Mercedes, especially since the likelihood of our buying bulky automotive items is high!

Regards, Mick


Hi

yes I went last September and camped , couple of good down pours and I needed a boat on the camp site , however had a great time and will probably go again.

regards Paul
17 Mar 2017, 11:17am
What a diff-erence a week makes.

Mick O'Malley wrote:

My thoughts then turned to the diff so I inserted my vacuum pump into the filler hole and sucked. Nothing, apart from a rusty looking smear of some indeterminate liquid on the pipe's end. I decided a drain hole was needed to further investigate. Jack up, axle stand, 4mm pilot hole, 5mm hole, (Cobalt bits - brilliant!) then 6mm tap. Some more of the above juice seeped out so I screwed in a suitable M6 bolt and pondered the best flushing medium to rinse the inside - [COLOR="red"]any ideas?[/COLOR]

As no suggestions were forthcoming I put some broad search terms into Ebay and decided upon STP Engine Flush, which sounded quite aggressive. Scrutiny of the label on its arrival confirmed that its toxicity was akin to that of Ricin - just the job!

Donning my border patrol gloves, I poured half the container into the diff. and rolled the car quickly back and forth about ten metres to ensure the gears had a good rinsing. I left it overnight, repeated the rolling the next day and drained the day after. The crud that emerged dissolved in the juice was disgusting, so I let it drain overnight and repeated the whole process, which was completed this morning. The second draining was almost clear. Result! I filled to the hole with fresh EP80/90 and did a little more rolling to ensure the internals were well coated. It now feels super smooth.

Regards, Mick
19 Mar 2017, 3:35pm
Mick - Good to see lots of good progress being made here. :cool:

I also like your choice of red, it should look great when painted.

Good luck, Paul. :)
22 Mar 2017, 11:01am
D'Oh!

Mick O'Malley wrote:
......it's not unknown for me to make real howlers!........

In view of the inclement weather yesterday I decided to fit my new headlamp bowls and P700 lookalikes to the GRP pods which came with the kit. Imagine my surprise when I realised the pods are for 5¾" lights and I'd bought 7" :rolleyes:.

These are therefore surplus to requirements. They cost me £73.40 so, if anyone on here would like them before I list them on Ebay, make me an offer. I can deliver to Beaulieu, Prescott, Shelsley Walsh, Castle Combe or Stoneleigh, you can collect from GL1, or I'll post at cost.

I did offer them up to my spare set of S4 Seven bowls but they're incompatible.

Regards, Mick
22 Mar 2017, 11:54am
Same post already elsewhere on the forum
22 Mar 2017, 10:11pm
So why would you put this one someone else's thread to start your own and leave this alone please
25 Mar 2017, 5:24pm
More Floor

Today I was determined to go for a spin in the A352 as the weather forecast was so good and the poor old girl's been sat there for ten days since her MOT. As I was taking the top cover and tonneau covers off I remembered I was supposed to be taking up a carpet for my daughter. I pitched into that and an hour had gone. I thought, I'll wait until it's a bit warmer as the wind was quite bitter, and I'll do some Monaco in the meantime.

My son's away for the weekend so I had to resort to my rope trick to remove the body. By the time I'd managed this, wheeled the chassis out of the way, dropped the back end of the body onto my Machine Mart trolley, pulled it onto the grass (which I'd interrupted proceedings to cut) and pushed the chassis back into the cave, another hour had gone.

I then remembered that the 'lift the dot' studs made it very difficult to single handedly manoeuvre the body inverted, as they turn it into a harrow, so I removed the front fibreglass coaming and the top five rear studs and rolled the body over. Yet more time gone.

I'd decided to use a classic Mini petrol tank in the tail and had bought a refurbished one a couple of weeks ago. I offered it up and cut a hole for the filler neck which protrudes at a weird angle, although the tank itself sits quite nicely in the space. I'll have to cut and shut the neck.

I refitted the first bit of boot floor, after carefully drilling the holes for attachment to the rear suspension turrets - I'd drawn around the latter from underneath during the last trial assembly. I then measured where the bottom of the tank would sit and prepared a cardboard template to fit parallel to the plane of the other bits of floor.

Out came the ply, the jigsaw and the support blocks, I drew around my template and cut the new bit of floor which only needed very slight trimming to fit snugly. I cut four doorstop temporary supports, screwed them to the body and rested it in place. I'm quite happy with it although I think it's possible the two big eyes on the very back of the chassis frame might foul it. Time will tell and, if so, something will have to give.


By this time my concentration was waning so, rather than press on, I tidied everything away. As the body will live upside down on the grass whilst the dry weather continues, I taped over the tops of the multitude of holes so that drying of the sandwiched wood isn't compromised. Some of the mounting holes had definitely been drilled on a 'hit and hope' basis. Mine is the one with the white tape - apologies for the rubbish picture!
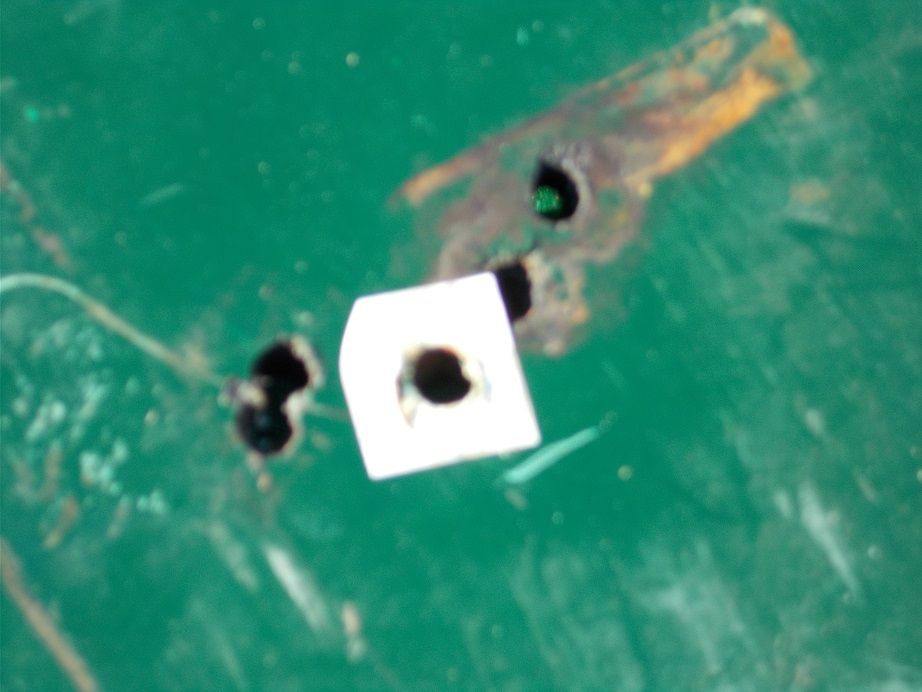


As for the blat in the A352, mañana.

Regards, Mick
26 Mar 2017, 8:08am
Hi Mick,
just to say, I'm really enjoying your build updates :icon_mrgreen:

...peter
27 Mar 2017, 9:25pm
I've been enjoying your build while work has been keeping me from overdue retirement and my Marlin Roadster re-work. Excellent stuff.
On the subject of your body hoist, Aldi/Lidle sometimes have a cycle hoist with pulleys. I made one with some sailing dinghy pulleys to lift a Canadian canoe.
Makes life a lot easier and with forethought all ropes can be pulled at the same time for a vertical lift.
28 Mar 2017, 3:58am
Dpaz wrote:
Aldi/Lidl sometimes have a cycle hoist with pulleys.
Thanks! I'll keep my eyes peeled for that.

Regards, Mick

p.s. And thanks to you and peterux for the kind words :).
28 Mar 2017, 6:31pm
GRP & Dash

Today, as the morning weather forecast was good, I decided to do some work on the rear body, where the petrol tank will eventually sit. I temporarily re-fitted the second piece of floor to the inverted body, and attempted to manoeuvre the petrol tank through the hole I had cut in the seat back area, This was to help me decide whether to make the floor permanent or removable in the event of tank maintenance or replacement at some future date. It almost not quite fitted through the aperture so I decided on permanent, as only an additional thin sliver would need to be removed. I took the floor back out and, as you can see, the rear body is far from symmetrical.


I then cleaned the areas that I was going to repair, first with production paper, then acetone to ensure surgical cleanliness. Where the bottom of the skin in front of the wheel arch meets the seat back there was a nasty crack and split, and another split at the bottom of the opposite corner. I filled the former with a wedge of U-Pol. When this had cured I bridged both cracks with two layers of mat and resin. I'll add another two when weather permits.


While the GRP kit was out I decided to cover the bottoms of the redundant mounting holes with more mat and resin, following the same cleaning regime. I now only have to tape over my two holes of a night whilst it's inverted on the grass. I'll wait until I'm good and sure that the wood sandwiched in the floor is dry before sealing the other side.


The nice man had delivered my dashboard blank yesterday. The same friend who turned my A352 wheel spigots and steering wheel boss laser cut it for me. Top bloke! I decided I'd trial fit the clocks, switches and lights to boost enthusiasm and was very pleased with the look of it. I won't cut the top profile until I've fitted the upper steering column mounting as it may slightly affect positioning. The top two on the left are dip switch and horn; the outer two beneath, accessory socket and lights. The indicator switch looks as though it fouls the oil pressure gauge, but it's well clear.


By this time black clouds were piling up and another nice man had just delivered the plywood I'm boarding my daughter's loft with tomorrow. The 8'x4' sheets have to be jig-sawn down to 4'x2' to fit through the hatch. This was my last job of the day.

Regards, Mick
28 Mar 2017, 6:41pm
Looking good!
31 Mar 2017, 3:34am
Tank Mounting

Yesterday, after a wet morning, I decided to press on with the Mini fuel tank. First job was to find a way to sit it upright in the inverted body. I considered wedging it with wood off-cuts but, as both surfaces are curved, I discarded that idea. I took off the number plate and threaded a loop of para cord through the holes. With the filler neck in its hole I then knotted and re-knotted the ends until the tank sat nicely.


I laid a straight edge along the bottom flange and marked the inside edges of the body. I put the floor back in place and transferred the marks to its edges, then cut an oblong of ply against which the rear face of the flange will locate. I stuck it to the floor temporarily with four small blobs from my Machine Mart hot glue gun and offered it up. I could see that my idea would work. As the base of the tank is curved, further ply will have to be fixed to support it across its width. I'll probably use Sikaflex and short countersunk wood screws for final assembly.


A matching but removable ply locating plate will sandwich the front of the flange. I'm unsure how I'll locate the top of the tank but there's a handy mounting hole and I can fabricate a removable neck escutcheon, once the odd angle at which it protrudes has been sorted by cutting a V and welding.


That was it for the day.

Regards, Mick
1 Apr 2017, 7:19am
Mick - Great progress as always and I like the dash layout. :cool:

Good luck, Paul. :)
11 Apr 2017, 6:29am
Back on The Job

I've been side-tracked for a week and a bit by other jobs, plus another half day sortie in the A352, but on Sunday and yesterday I was able to get back Monaco-ing.

When I'd offered up both levels of my boot floor I realised that the front one, which will bolt to the suspension towers, wasn't long enough to enable the ply joining the two to be vertical. Fortunately, one of the jobs which sidelined me was fabricating new gates between the houses from 13mm ply (the old ones were modified fence panels and hadn't stood the test of time), so there was enough spare to make a new extended floor using the old one as a template.

When cut out I noticed that the ply was de-laminated quite badly so I made up some resin, brushed it liberally into the gap and weighed it down flat (there's a car battery in my bin) whilst the resin cured. This worked, but I haven't offered it up yet.


I then turned my attention to the front body and bonnet which had been cut for the 40DCOE (now sold) which the project came with. Luckily the previous owner had kept the bonnet section and part of the body side. The latter first needed screwing to the length of strengthening angle I'd fitted. I set to with the GRP gubbins, completing the underside of the bonnet and one of the gaps left either side of the body bit.


Number two son then arrived for his birthday get-together so, at lager o'clock, I tidied everything away.

Regards, Mick
13 Apr 2017, 4:02pm
Carbs, Gearbox & Engine

On Tuesday I decided to neglect the bodywork and do some chassis work instead.

I'd found a pair of 1¼" SUs on a four inlet port Spitfire manifold when I cleaned out my shed. I think it came as a spare when I bought my Marlin Roadster about ten years ago. Maybe. I'd bought an overhaul kit so I set to, firstly with a bannister brush, then dismantling fluid (I find this an excellent cleaner). It took a good morning to fit the kit and give the dashpots a quick once-over with Autosol.

Next job was to bolt the manifolds to the head which revealed that the two tapped extensions which are meant to be bolted to the exhaust manifold were too long. I cut ever smaller slices (three) off them until I obtained a good fit and tightened everything up. The carbs sit nicely now, albeit without cable operated pivots for either the throttle or choke, or return springs. Beaulieu Spring Autojumble awaits!


Yesterday morning, again not wanting to do bodywork, I decided to re-fit the clutch and gearbox. The days when I could fit a gearbox with a loop of old seat belt around the back of my neck have gone, so my trusty Machine Mart engine crane was pressed into service. While this was handy I renewed the engine mountings as well as the gearbox ones, the former looking like 60s originals. I thought I'd check the gearbox oil level whilst I was down there and found it was empty, 1½ pints of hypoy later all was well :). I also fitted the oil feed pipe to the rockers. The Christmas tree arrangement necessary for this, an oil pressure gauge and switch can be seen in the picture. The end switch is to blank the hole until it's time to fit the dash (crap photo' alert).


This morning I decided to tackle the mini tank problems. From Ebay I ordered a neck grommet, locking petrol cap and sender unit, the tank having come bare. I offered it up in the boot area and decided that the two original holes in the flange were insufficient for secure mounting and cut two fishplates (there'll be two mountings top and bottom) from an old joist hanger which will be welded to the flange by my demon welding contact. I also marked out and made the V cut in the filler neck to correct its odd angle with the body. He'll TIG this for me as well. I toyed with the idea of whizzing over to his workshop with it in the A352 but decided that Maundy Thursday afternoon wasn't the best time to be distracting him from his real customers' jobs. Tuesday will have to do.


I packed up and called it a day.

Regards, Mick
19 Apr 2017, 5:59am
More Tank & Boot Floor

Yesterday I set to and offered up the tank and boot floor to the inverted body. I decided that, on my previous attempt, I hadn't optimised the tank's orientation in regard to the outlet, which wasn't quite as low as it should have been. This slight angle would also have compromised correct operation of the fuel gauge sender.

After a bit of jiggling I realised a new neck hole would be needed in the body. Its new location would be almost perfectly central, so I marked the new position, drilled a pilot hole and used my hole saw from both sides to ensure a clean cut. This I hadn't achieved the first time :rolleyes: as I'd used the 'ring of small holes' method, which was ugly, to say the least! This will obviously need to be glassed over!

The very bottom of the tank and the middle of the plywood floor now occupied the same space so, using Cardboard Assisted Design, I made a template, transferred the outline to the floor, and cut the hole. It needed a bit of tweaking with my jigsaw's angled cutting facility coming in very useful. After three or four attempts the floor and tank mated perfectly.


The nice man had delivered the large headed rivets I intend using for my demon rear floor section supports, but not the aluminium strips that they'll fix to the body. Last job of the day was to cut and drill the short lengths of aluminium angle which will support the front edge of the forward boot floor section and temporarily bolt them in position. Regular readers will notice that the access hole for the spring mounting has miraculously healed itself. My first attempt wasn't measured accurately enough but luckily I had more than enough spare ply from my gate building to make another which is just a little longer :)


Regards, Mick
20 Apr 2017, 2:14pm
Fuel Tank & Supports

Yesterday I took the Mini fuel tank over to my welder in the A352. It was the first time he'd seen the so-say 'D' and was impressed. I pointed out the bits he'd done: folding the transmission tunnel; welding the flip front hinge; the neck and blanking plate on the tank; the hand brake support; the gear lever; its mounting bracket and the extended gear change remote. I explained the jobs I wanted doing on the tank: he's busy at the moment after the holiday but will give me a ring next week when it's done.

Today I fabricated the rear boot floor section supports from 3mm x 25mm aluminium flat. There are five of them: two for each side and one for the back. They'll be attached with 4.8mm large headed rivets through from the outside of the body; the floor will be M8 bolted to them with penny washers each side. Having seen the structural engineer's calculation for the box beams in my cottage using wire ovals through ply (it was many tons shear force per nail), I'm confident that the 20 rivets will be more than secure.


That was it for today, apart from 'phoning my Spitfire breaker contact and ordering a large flanged propshaft and a fuel pipe, the hard plastic type. He's frequently up and down the M5 from Devon so they'll arrive in a week or two.

Regards, Mick
25 Apr 2017, 9:53pm
That'll be Steve then ...I use him as well ...