This is a read-only archive of the old Madabout Kitcars forum. New posts and replies are no longer possible, but every thread is still here to browse and read.
Thanks Chris, that is exactly my motivation and I know what you mean.
Ned yours served as perfect motivation, I might have gone too large with the opening but looks like it makes reversing and overtaking a bit safer.
Ed thanks for recommendation, I have got free samples from a store through ebay called quicksellshop but trade as 'I Want Fabric'. My first samples were delayed by a bank holiday and I called to chase and had great service the next day I had my samples and funnily the first batch arrived on the same day.
Paul you're not wrong there and guess what... It's raining again today and forecast for the whole weekend
So my Jag is with my Indy for 4 wheel alignment after fitting my shocks. I wonder if Chris has a spare kit laying around as this is my courtesy car for the weekend
In all seriousness though I would be interested in hearing from the people that have a completed 250SWB and see if the driving experience is more engaging? Disappointed as was looking at doing one after the mx250
So plans today will be take some rubbish to the tip to free up more garage space I want to do some work on the roll cage as I noticed a few areas I'm not happy with after painting. That sadly might be it for the day or will see if I can get the front into the garage and finish mocking up the new hinges I have come up with for the bonnet.
So the weather played it's part and Saturday i managed to only get a few hours in and today was no better other than I had to catch up on some work this morning and got out this afternoon.
Unfortunately I didn't take any pictures on Saturday but I did keep honest to my intentions, the lovely Mrs Jones allowed me very graciously to use her pride and joy Mini to take some rubbish to the tip. I then decided that the constant drizzle will not stop me! I got the front of the car under the protection of the open garage door and as far in as I could get it and still move around. I set to work on the front N/S front wing area, for me the wing cure flattened out a little on top so started by removing the flash lines and building up some filler on top to help raise its curves a little. In Between drying times I continued to plug away at the hinge idea, it will work and I will not be beaten by this.
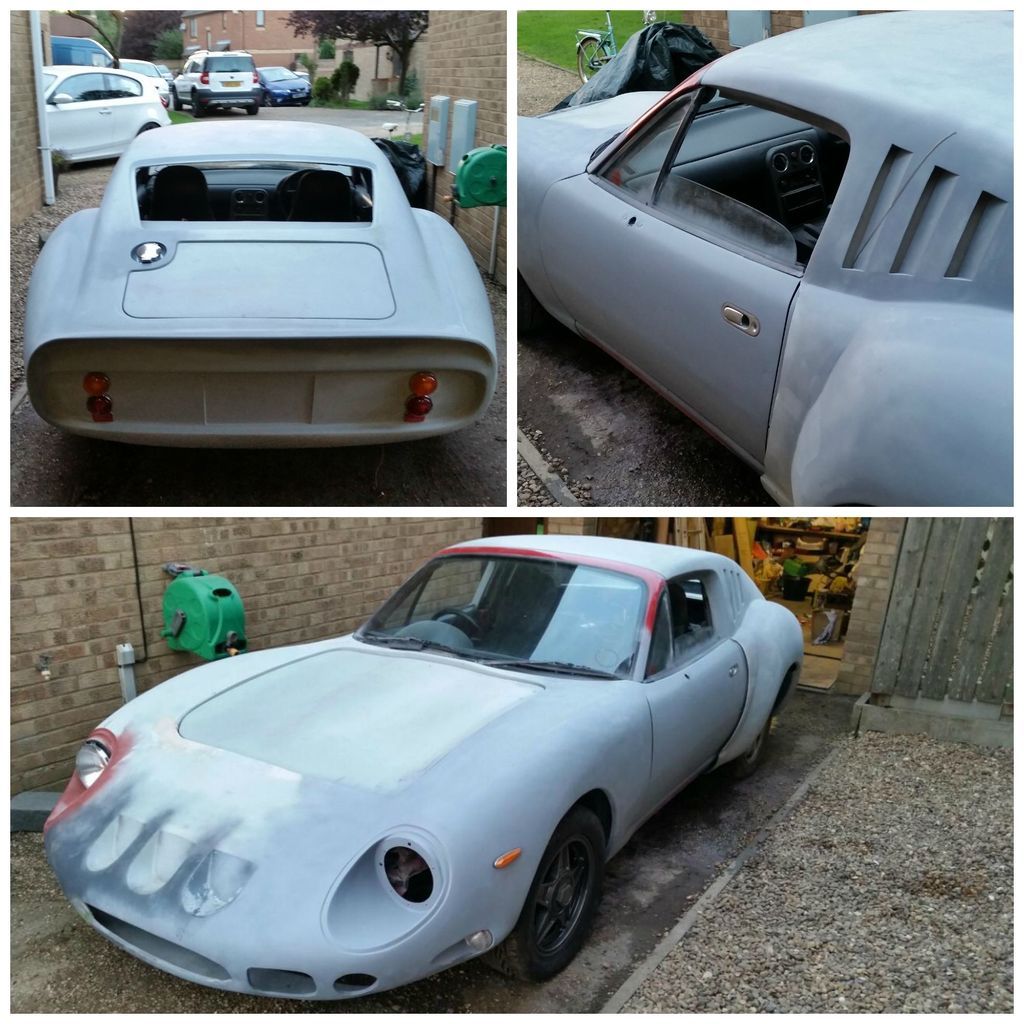
I had lingering clouds all day today so I was not confident in pulling the tarp off and removing the back end to sort out the headlining. So I nudged the car forwards under the garage door and set to work again. Today my focus was on a couple of small things building out the front a little as it was a bit flat where the new vents and slots for the fog lights were cut in. the second was for me so small and 99% of people will never know but it could not go unresolved. the perspex headlight cover recess was not even all the way round and on the O/S at the top it was non existent. So that is what i got stuck into for the rest of the afternoon it's now 1.2cm all all around with one more final fill an sand for final shape etc. not much to show for the effort but I know that it means one more small job done and something achieved to nudge the car closer to the finish line.
obviously the obligatory pictures, I couldn't find a great pic of the before so this goes back to when i first got the Kit- quite liking the two tone primer effect for the headlights though...
p.s. the darker primer is the areas that have been sanded to primary stage rough shape that I am happy with before proper body prep takes place.
Hey Jones, in your pictures, it looks as though the drivers headlight is pointing way out to the right, I had this problem with my headlight.
It was so far out, that I had to slice the mounting out and re-positoin it, as the headlight adjustment would not have been enough to compensate.
Better to do that now if need be than after the paint job!
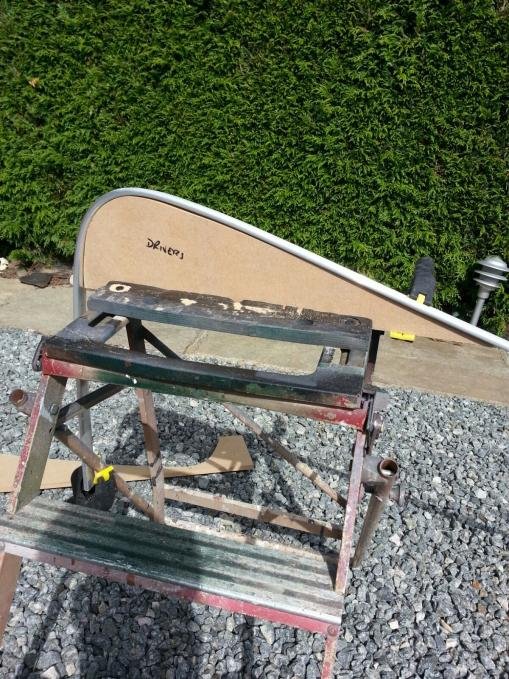
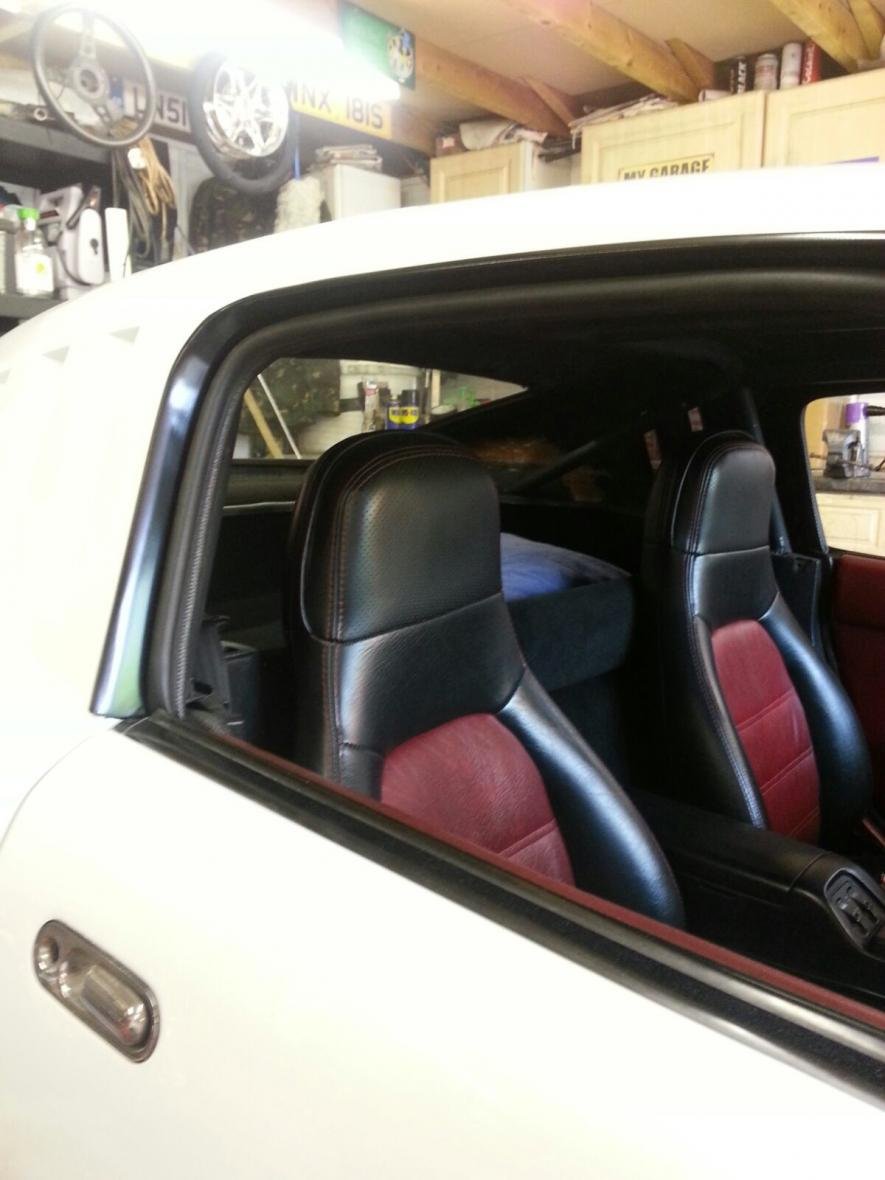
Hi Jones, seeing yours has inspired me to cut out my rear vents, how are you going to finish the insides, fit perspex and use it as semi window (give some rear quarter vision). If so do you we need drain holes in case water does get in ? Or box them in solid ?
Scottie - Apologies I could have sworn I had responded to your post, you had me worried! however the camera and to be honest they were only loosely fitted for give a idea of final dimensions.
2manytoys - At the moment they are solid and will be filled with perspex, I had researched the Mustang solution but I wanted it for visibility issues as well as in my opinion improving the profile look. I am creating a headlining that has a negative version of the vents so it finishes it off well inside. With regards to drainage I have an idea but need to look into it more, the car project is sadly back on the back burner whilst I sort out a few other things at the moment.
hi 2manytoys my vents are filled with smoked perspex sealed with clear silicon with no drainage and i have not had any leaks .... the extra vision you get is good to have as there is a huge blindspot otherwise good luck with the build Ned
Hi Jones, Thanks for further info , will keep an eye on your future progress. Incidentally , what part of the country do you reside in, I am in deepest, darkest Somerset in case we could see each others "work in progress"
...So over a month has passed and we are not that much further down the road of progress that I would have hoped for. Weekends away, entertaining the wife and a few rain stopping play scenarios I have managed to get some work done, much of it is undocumented but is simple body work initial prep I want to get it to a stage that one bonded there is just the minor amends but body symmetrical.
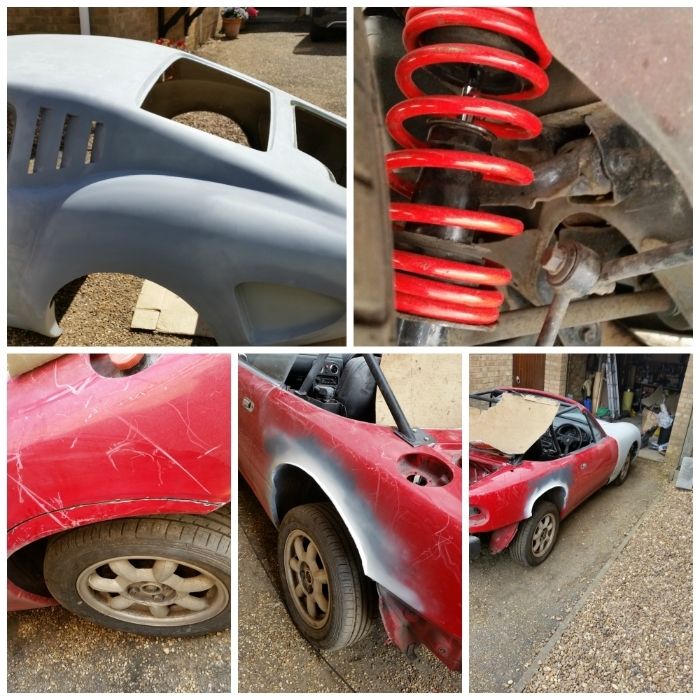
This past weekend however did see some chunky bits ticked off that I had put off as there was no turning back once the grinder had done its job! I decided to tackle the rear wheel arches, I wanted to look good from underneath and as professional as this amateur to make it. I worked out that to make a smooth rounded arch it needed to be 5.5cm higher so I cut at 4cm to leave enough of a lip to drill and weld. I then etch primed, and then normal primer followed by stone chip which the only can I had was white. The whole 'old' body will be painted silk black prior to the shell being bonded on.
Whilst access was so good now I decided that fitting the lowering springs was a good idea and it will give me a better idea of stance as I am not fitting hugely different circumference tyres onto the new wheels. I will also say that the car has been well maintained and everything came apart nicely and the only thing I have to do is to order some new dust covers for the shocks.
I also continued with the body prep, I will complete the near side first and then use that as a template for the offside. I will say that getting a nice crisp line on the vents has been a little time consuming but it's almost there and with one last final fill and sand prior to paint I am happy.
Not many pictures as my phone was hooked up for Spotify to the surround sound system I have installed in my garage to keep me entertained!
So I haven't posted in a while, there has been a lot of changes my end since the last post but I have managed to steal some time here and there to work on the car.
So in my haste to do some work on the car I removed the rear section... some might say a little to quickly as I had forgotten to unclip all of the rear lights and pulled most of the wires out of their respective plugs. So I had to remove all the lights and corresponding wiring loom in order to spend a whole evening soldering and repairing/replacing a number of the damaged plugs.
I have finally got around to fitting the new side repeaters although a bugger to get them symmetrical with no square line to work from! I am happy with the result and intentionally put a slight slant on them for visual preference only. I have got the front end as square as physically possible with a 5mm variance between the two sides. On the subject of lights I ordered new headlights, in the continued attempt of trying to make this car look retro I replaced the flat faced headlights for domed ones - only time will tell as to the answer of it will add to the effect but first impressions were a thumbs up from the wife!
Since the last time, I have shaped the O/S vents, a much quicker process than the other side. Both sides need trimming internally but not rushing it as I want them to be absolutely symmetrical in depth. This will make the corresponding headlining holes a lot easier to do too.
Today I re-profiled the O/S front wing panel gap to the drivers door and shaped the inner flange to prevent the door catching it as it opened. I believe the original profiles was the reason for the original damage by the door opening. I prep'd the boot extender panel ready for final fit by sanding and filling, so now if you peek in the boot it looks all square etc.
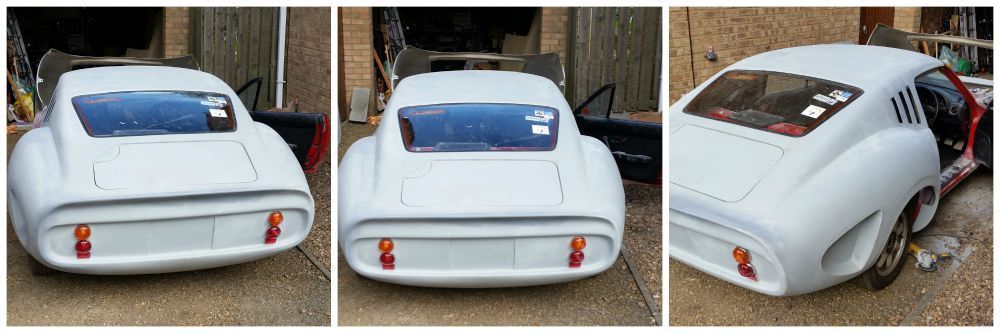
With excitement of this regained enthusiasm and determined focus I thought I would treat myself to giving a sneak peak of what it will look like. Amazing what a pane of glass will do for the effect. It was surprisingly an easy fit too so that was an added bonus. This was the only time that I stopped to take a picture.
Sooooo I have some time this week weather permitting to hopefully get the rear bonded by Friday... fingers crossed!
Sounds like you are making good progress and will be happy to see some pictures if you get the chance. I nearly went for the kit you have so interested to see what I am missing op2:
Thanks EricHolm, it is starting to get there now a flicker of light at the end of the tunnel has appeared
I think you are actually not that far away from me, you're in the MK area? I am based up in Wellingborough if you are passing you are more than welcome to pop in and have a proper look.
Well Paul we spoke to soon and again I was thwarted by the continual presence of precipitation, oh and a distinct lack of parts I am awaiting for from CBS...
With regards to the age old quest for symmetry and straight lines etc. I was going through some really old threads to see if I could learn from others solutions to a few questions and I came across the sneaky pictures Seanick had taken of Stirlings 250 GTO. It is one of my favourite cars:
It was nice to see if you focus at the vent line they too struggled to get it perfectly straight and crisp where it blends into the body on the trailing edge... phewwww I'm not the only one and good company to be in.
The weather forecast is not looking any better for tomorrow in fact the week looks a write off for us outdoor types. Lets hope my missing package turns up at least!
So today was intermittent progress to say the least.
So this morning after getting on with a few other non car related projects I jumped into the car with two of my not so recently purchased rear wheels to see a man about some tyres... we were originally going to try a number of sizes to see what fits. Turns out when I got there he'd had some further thoughts over night and met me with a plan. He has a racing Mazda kicking out over 300bhp! he runs it through his garage, he donated to the cause his less than 200 miles run tyres and they I think are perfect. We did one wheel I drove home to offer it up and yep spot on, now I only need a small spacer (20mm) as opposed to huge 38mm ones I was getting too so that's a result. (the arches sit a little further out in the pictures as not yet bonded on to the car.
*** note that the car is sat on new (albeit lowering) springs and the tank is dry as a bone so sitting very high. If this doesn't settle down then I will have to bring forward the purchase of adjustable coilovers ***
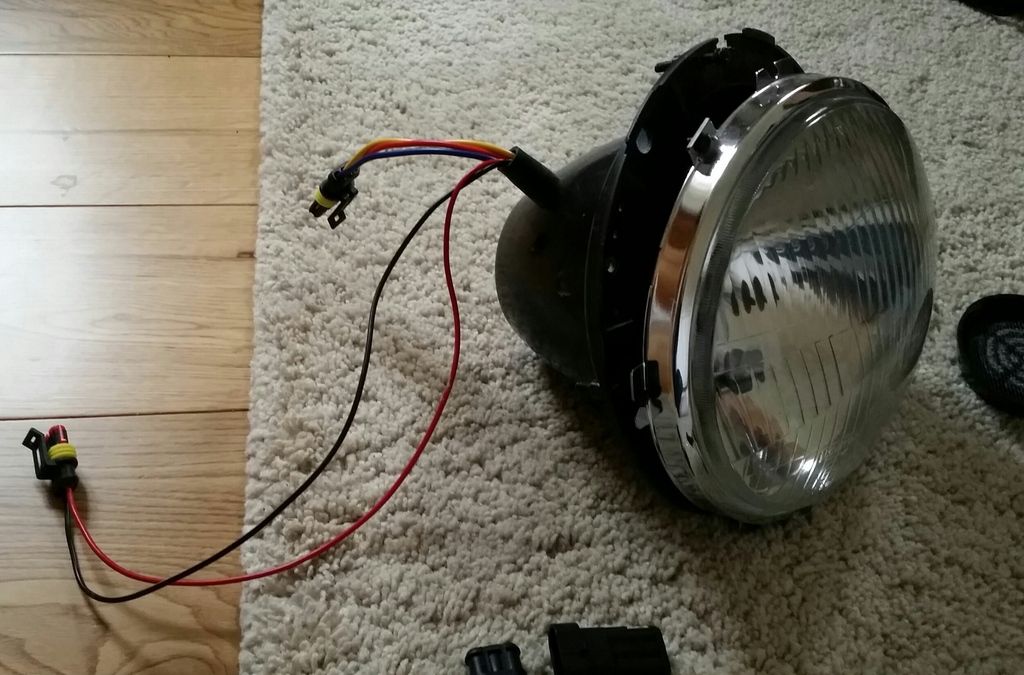
Now the rain came so I was chased inside, during which time the postman came with my missing package. This was a great timing as it contained the new H4 connectors I wanted and this could be done in the warmth and dryness of the house. After the picture was taken I taped up the wires accordingly. (I had forgotten to mention in a previous post that I had replaced the the flat faced original headlights for what I feel are more retro looking domed ones)
A pause in the rain allowed me to fit the new light and wiring.
Then the rain came again, heaver and for longer this time, so when I got back out this time there weren't any pictures to be taken just cracked on. I fitted the two new hoses for the fuel - CBS sent the wrong size but after a hell of a lot of swearing managed to get the too small breather hose on and secured the too large by a few millimetres main fuel hose attached. Then back onto sorting the one thing I have been ignoring and that was the headlining. I am having a removable headlining to give access to the heated window wiring and possible future upgrade with roof mounted lighting. I had an epiphany the night before and wanted to check that this KISS solution was feasible with a good visual outcome. Well proof will come in success or failure but only time will tell.
With all this jumping up and down I forgot to hit confirm on an Amazon order for a couple of bits to the point I realised this when I switched the computer back on and it was still on the screen asking me to confirm the delivery address! DOH! All ordered now but too late for delivery tomorrow.
So today was disjointed, firstly took the front wheels to my buddy to have the new tyres fitted, unfortunately what would have been a quick 15mins round the corner ended up being 45 minutes and just one wheel to show for it. The second tyre would not pop the bead into place. We soaked it and soaped it in an attempt to fit it but alas no cigar. I left the wheel with them and headed home, my next door neighbours son was out trying to fit lowering springs on his car using a scissor jack and no stands. This was a small error on my part to give a lending hand and trolley jack etc for the cause. I stayed close and gave him a hand as and when needed but stayed well back so he could learn and have pride in doing it himself.
So I managed to get on and tackle my headlining project which I am pleased to say i have finally seen the light and it will work well I hope both in looks and serviceability.
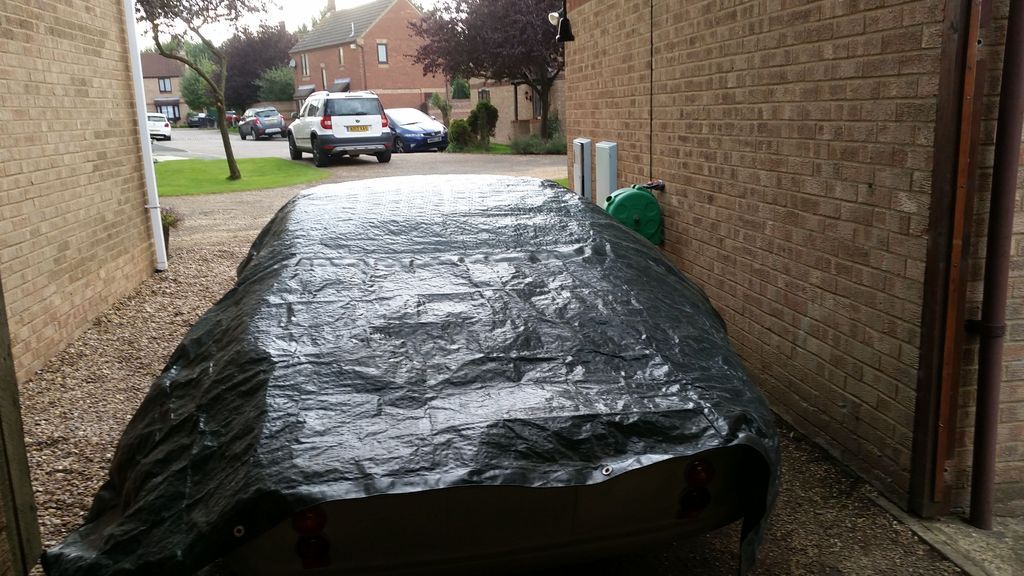
This next bit is a public service warning... Be careful as to how you store your shell over the course of a build. as you may have seen from previous posts I tuck my car away under a tarp and tied down with ratchet straps. This in itself is not an error, however how tightly I strapped it down was, over the months this has warped the body a little out of shape. The good news after a very helpful phone conversation with Chris I went out and got some long bolts and large washers, this enabled me to gently torque them up bit by bit and pull the rear of the body back into line. Phewwwww!
no pictures today but if the weather is good tomorrow I will post some.
So today I had to do some actual work this morning, so I started at midday and having looked at the weather forecast of what was meant to be rainy showers off and on. First step then was to clear out some space in the garage to at least be able to get the rear section in. I was ruthless in my clear out - apparently not ruthless enough as it just looked like I moved stuff from one side to the other.
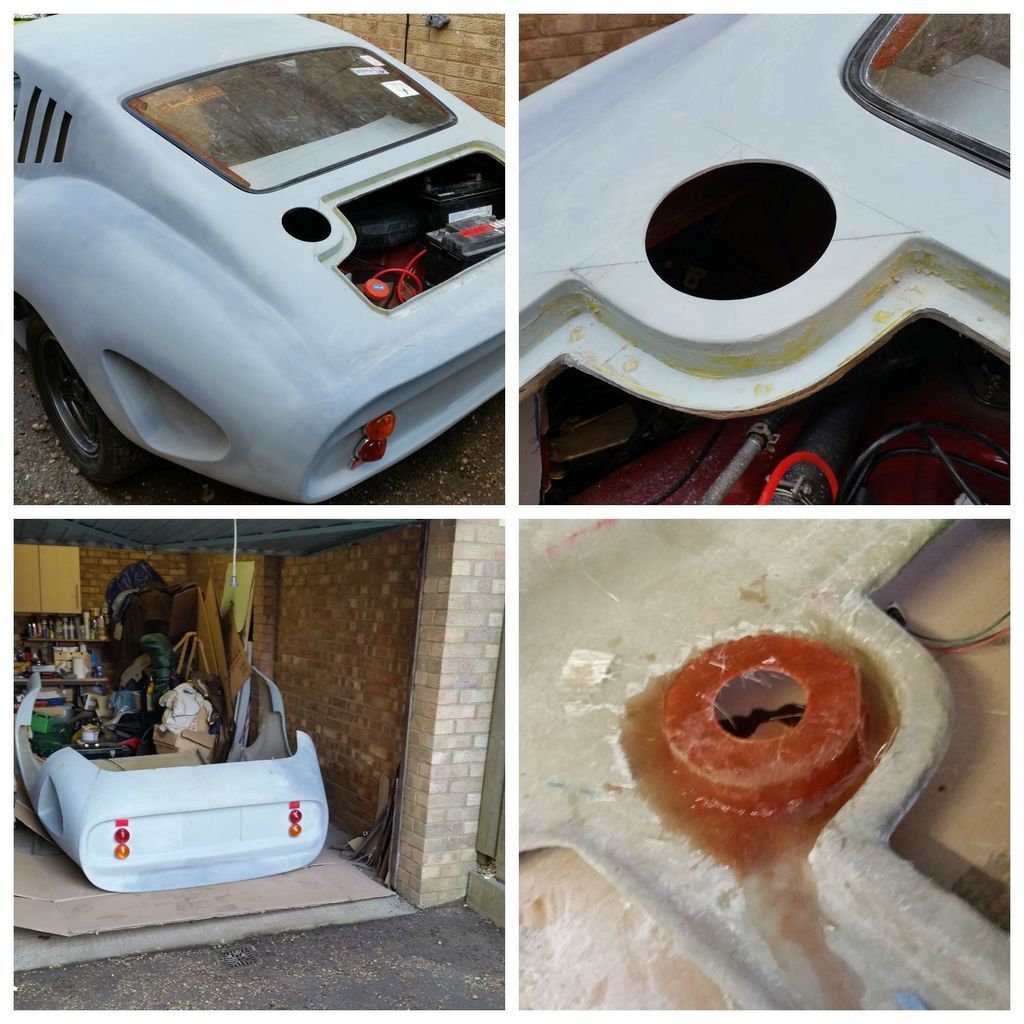
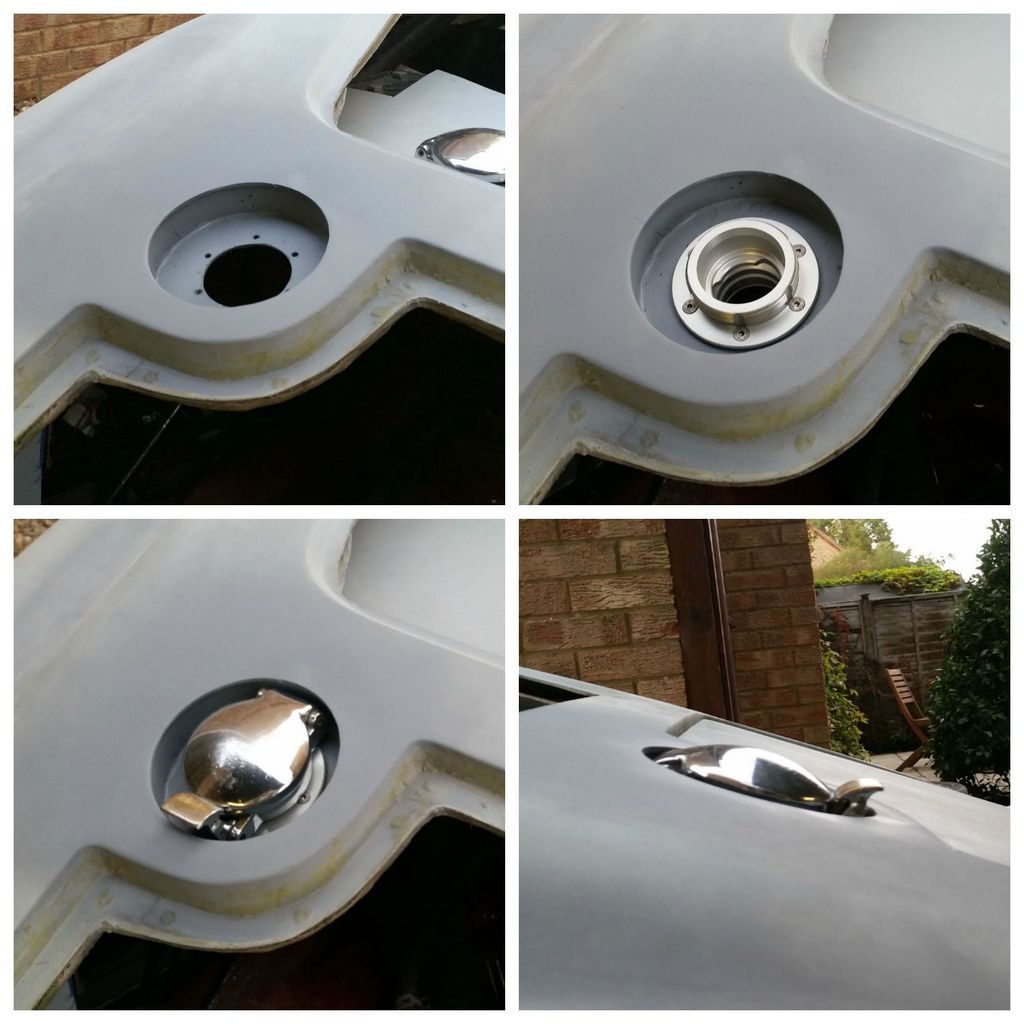
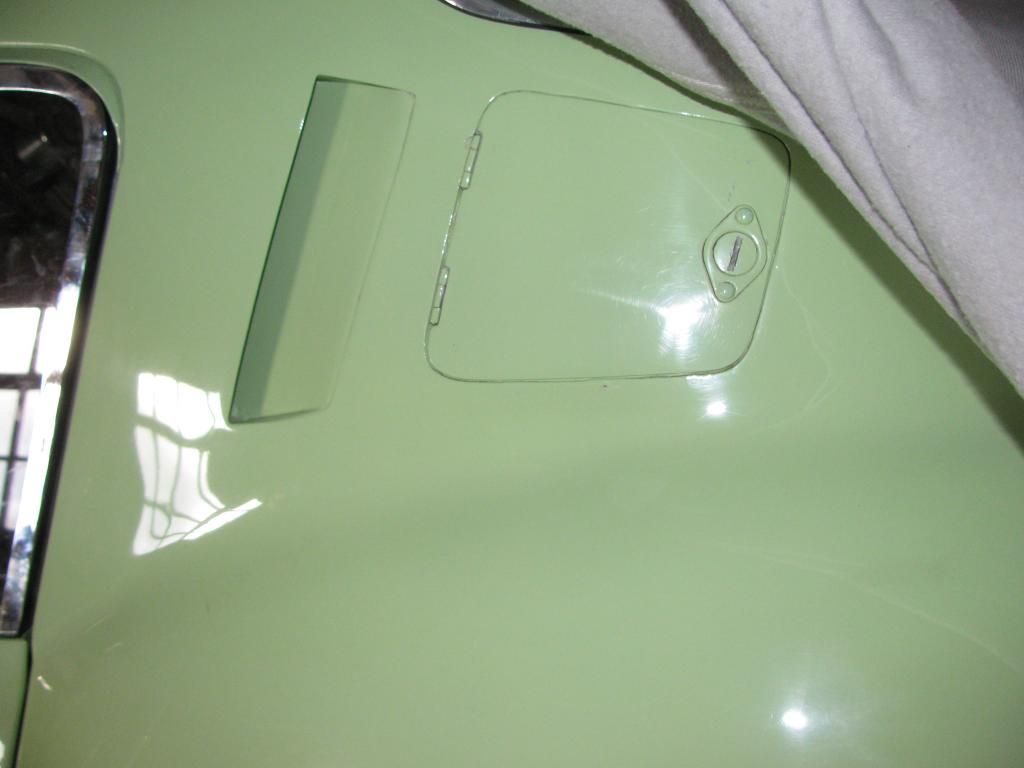
So the project for the day was to do the recessed fuel filler work and some more on the headlining.
The package I had patiently awaited for yesterday was to complete a job that lasted literally minutes. The thing was it was two specific size hole saws that I wanted and to buy them separately was over £30 at B&Q or under £10 on Amazon for a whole kit of 16 pieces - happy days. Following that I was able to offer up and double check the recess I had Blue Peter esque made earlier and pre drilled the whole for the filler neck. I then had to remove the back end, this is where I regretted using such long bolts yesterday, having jacked up and removed the rear wheels it took an age to unscrew the 4 body bolts! Removal of the rear glass followed and the back end was swiftly lifted off and placed into the prepared space in the garage. Having flipped it over I proceeded to do the glassing.
Having got the body back on the car I then re-drilled the filler neck hole by clamping a piece of wood behind for the drill bit to bite down and keep it central and proceeded to screw it down.
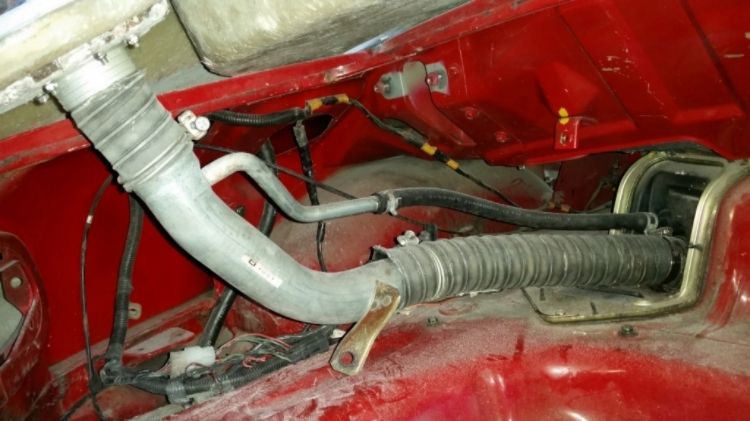
As you can see from the pictures it does sit low and it is a close call but just high enough to work.
Then I had to move quickly - as rain was about to stop play, AGAIN!
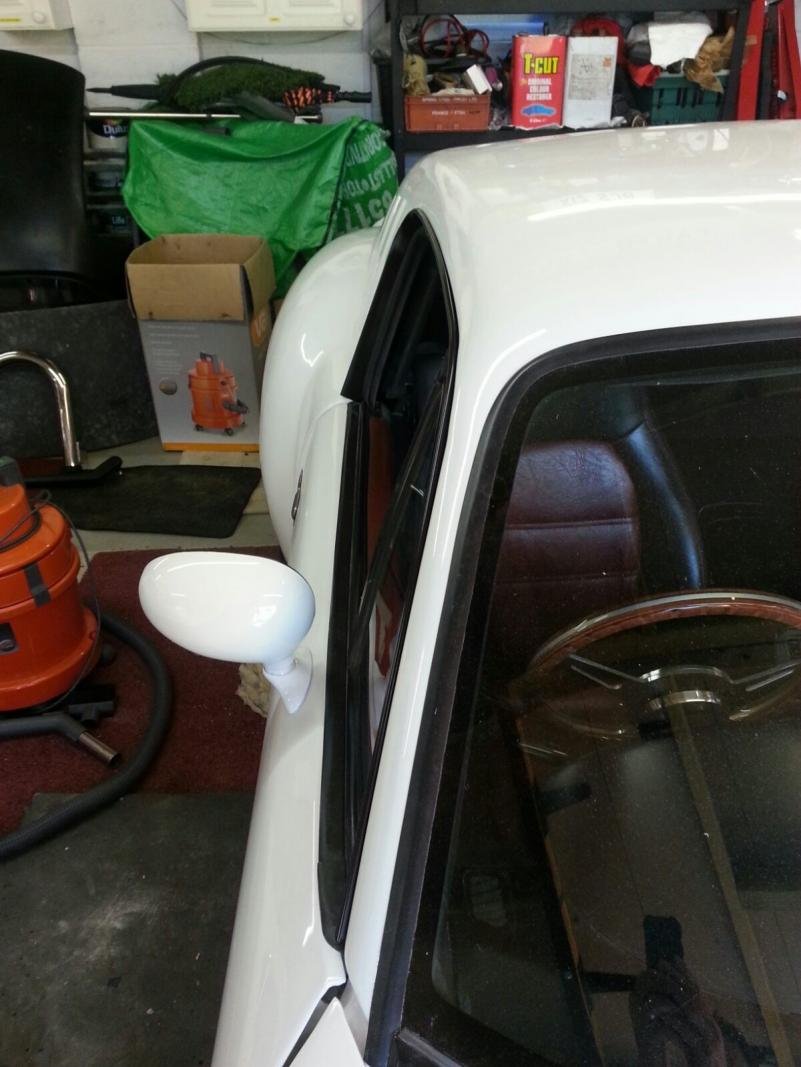
hi Jones you are making good progress now . I have just fitted rain gutters to the top edges of the door apertures on mine and blended them in . They are ally and came from Woolies and bend quite easily with a bit of heat ,if you are thinking of using them best do it now while your in primer , i will post some pics when the IT dept comes in
Thanks Ned, thats exactly what I would like to do too. Seeing yours will massively help. This next week is going to be the last week for a while that I can do some work on it.
Jones if you are going to bend the ally then its good to anneal the ally first, you may already be familiar with this process so ignore if you are but if not then to make it act like putty (very easy to bend in your fingers) try this.
The annealing is easy to do with an acetylene torch first light the acetylene to give a sooty flame don't use the oxygen just yet, run the sooty flame over the ally surface covering in soot but not too thick as it takes longer to burn off now turn on the oxygen to give a blue flame and run this over the sooty surface about six inches off and don't stop the flame moving as the ally will melt very quickly, once the soot has burned off the ally will be at the correct temperature for annealing which i believe to be 700 degrees which is virtually the temperature ally melts, then leave to cool to room temperature don't quench as you will undo the annealing process.
If you don't have acetylene at hand then a gas torch will do with some liquid soap smeared over the ally surface, heat the soap until it turns black at which point the ally should be at 700 degrees and the annealing process is complete and allow to cool.
Good look and i look forward to seeing the finished gutter profile.
Swifty thanks for that, going to have a bit more of a look into it once I have cut the window aperture down a bit to see what depth I have remaining.
Ned that looks great thanks for sharing, how are getting on with the headlining? you mentioned at the Stoneleigh it was on your list of jobs
Thanks Paul, I have to admit every time I think I am close I find something else on my better to do now than later list.
So no work on the car today, I'm having a day off. However thought I would post some pictures from yesterdays quite slow and frustrating day.
First off was to complete the fuel filler cap and hoses. I don't have any pictures of the doing bit - I had a few days earlier removed the the factory fitted neck flange but carefully grinding to slits down the sides followed by grinding out the spot welds to remove it. This left me with just the main pipe and breather hose section. I connected them via the appropriate hoses. I am one jubilee clip short however, I will get this on my next trip out for supplies.
I have decided to take a different approach to bonding the car and do away with the Polyester based resin and go for what should be a stronger longer lasting if not more expensive option methacrylate based adhesive. We shall see if this was the right choice in due course. The setback to this choice is that I made a stupid assumption that dual applicator guns would be readily available and didn't order it with the glue - this is not the case and had to place an order on Friday that won't be dispatched until Monday so looking at the back end of the week for bonding me thinks.
So with that in mind I looked at a few other jobs, mainly preparing the doors and removing the swage line. I found this the most frustrating task to date on the build and accumulated to make it the first non fun day on the car - removing the underseal paint on the lower half of the door. I also wanted to cover over the wing's dark etch & red primer I had used to help me see the curve of the headlight bowl better. I powdered on with the lighter grey primer to help give me a truer vision with it sitting in one colour. I still have work to do on the blending but I truly had enough at the end of teh day and didn't want to over do it and save it for another day.


 op2:
op2:


 Lets hope my missing package turns up at least!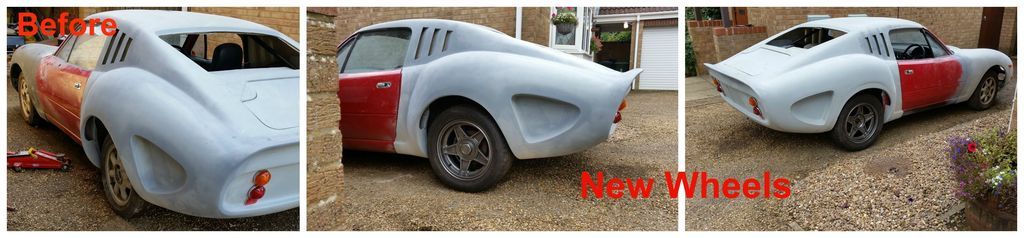
 All ordered now but too late for delivery tomorrow.