This is a read-only archive of the old Madabout Kitcars forum. New posts and replies are no longer possible, but every thread is still here to browse and read.
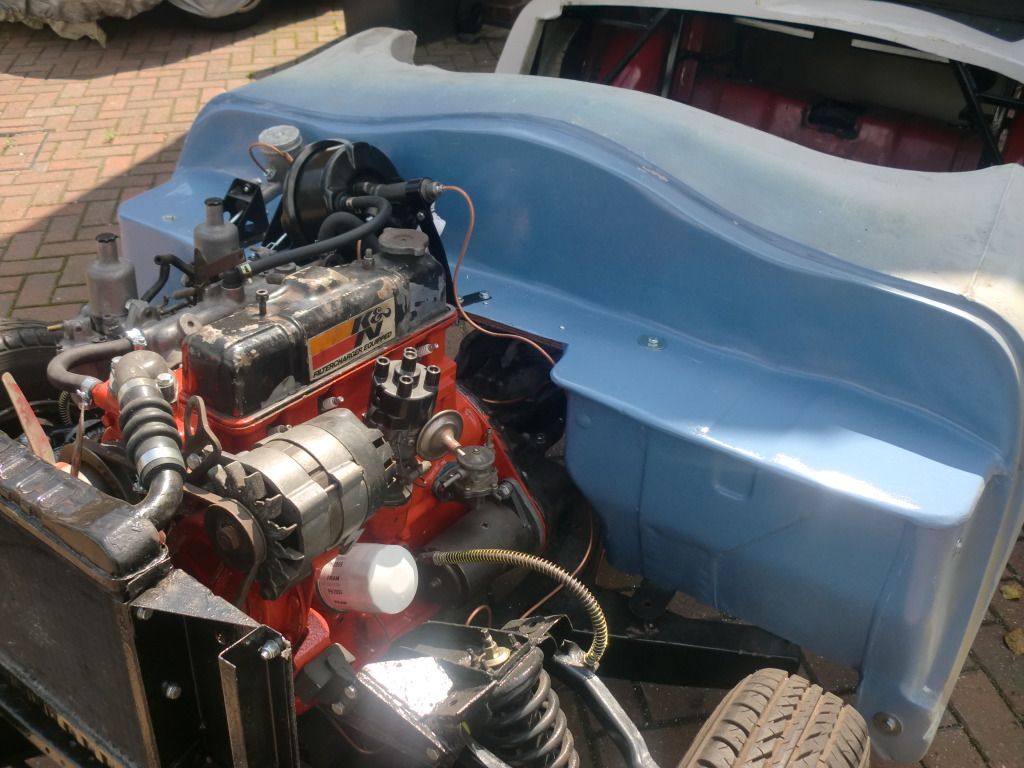
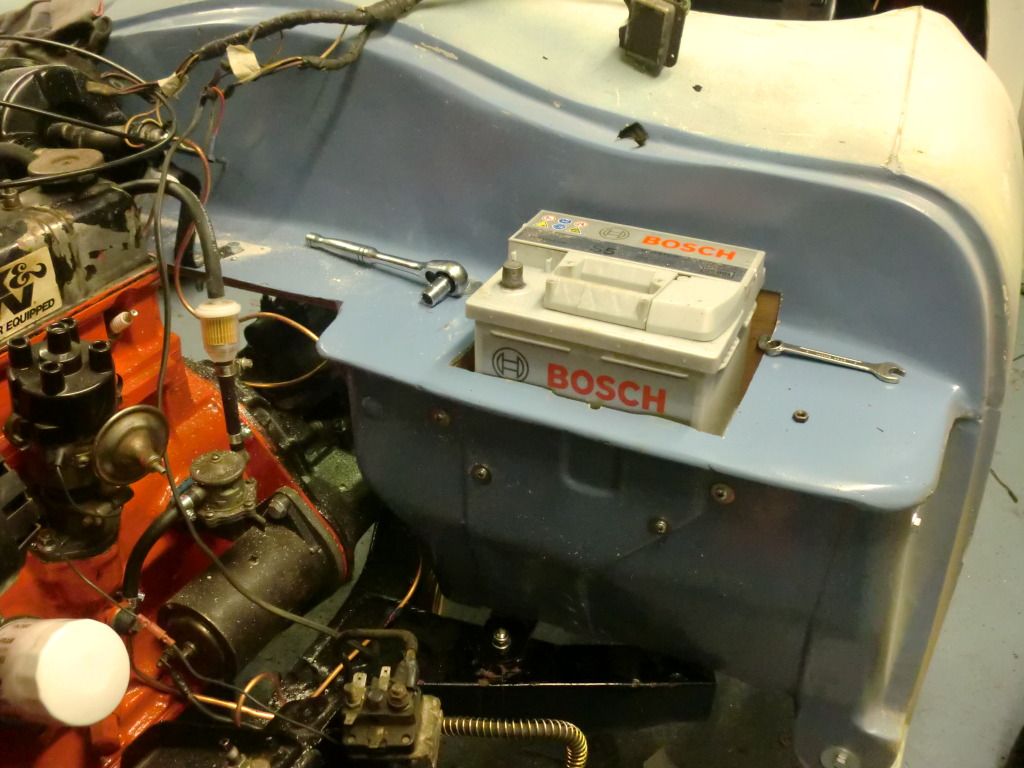
The location of the battery *is* in the normal position, using the recessed battery tray from the accessories page of the Sammio website here.
A good guide on how it works is here on my Spyder blog.
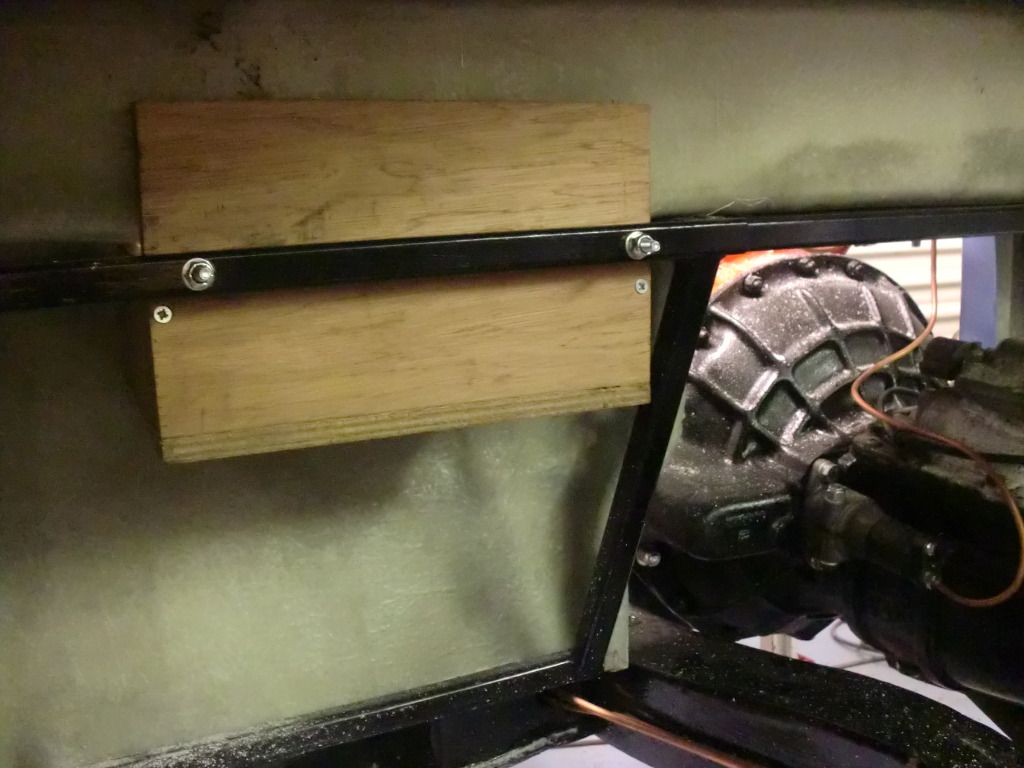
You will also notice that the frame in the photo a few posts up has been modified so the battery will fit, on the opposite site (passengers side) of the same bar of the frame where the brake and clutch master cylinders bolt on.
Hope you had a good holiday & that the water feature is progressing too.
( I managed to get sunburnt yesterday whilst working in our garden )
Even though my kit has arrived, I still need to remove my Spitfire body shell.
However, now I can see & measure things, some of your previous posts make more sense.
... pondering where to fit the battery. spit battery is on the bulkhead but the Cordite bulkhead has no place for it. might have to chop this out as there are few other options...
I also want to keep the battery in its original position, so I will have to do something similar.
If you get the chance, I'd love to see some photos of some of the work you have already done:
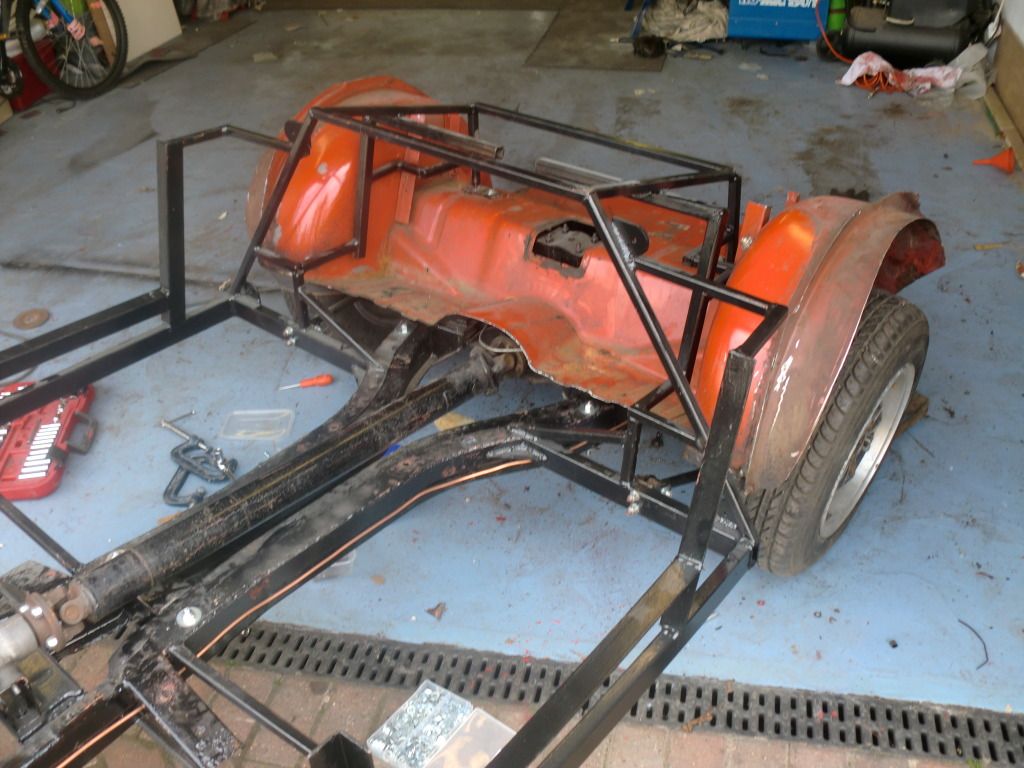
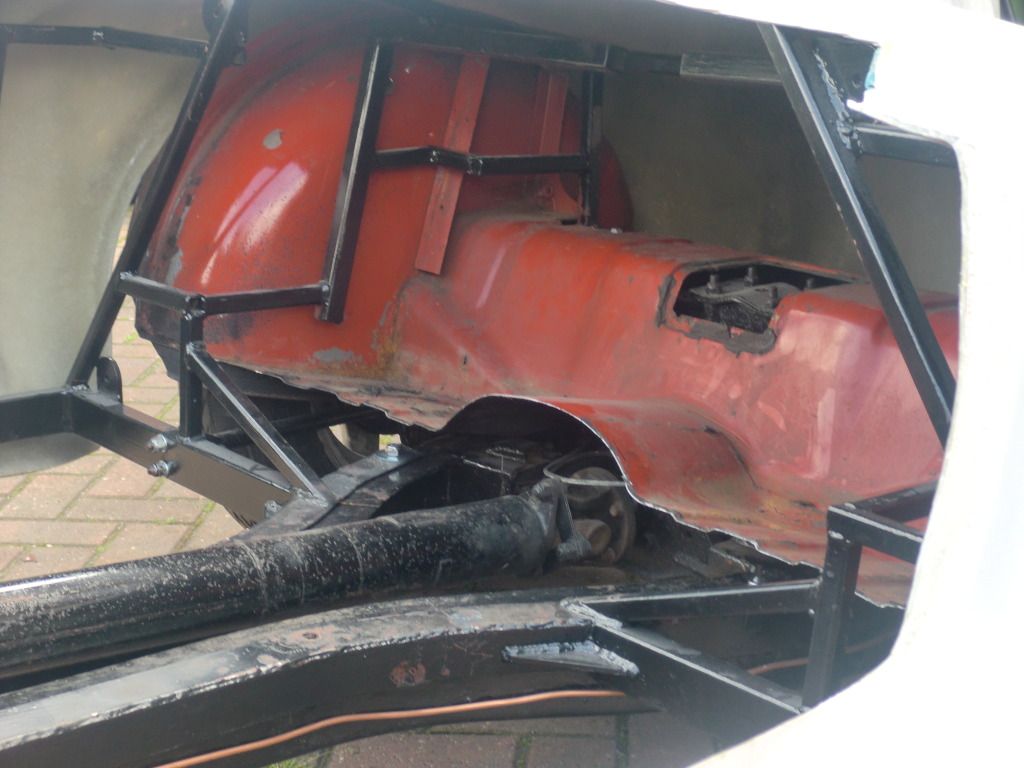
... Donor wheel arches and boot floor have been chopped out and fitted beneath the frame...
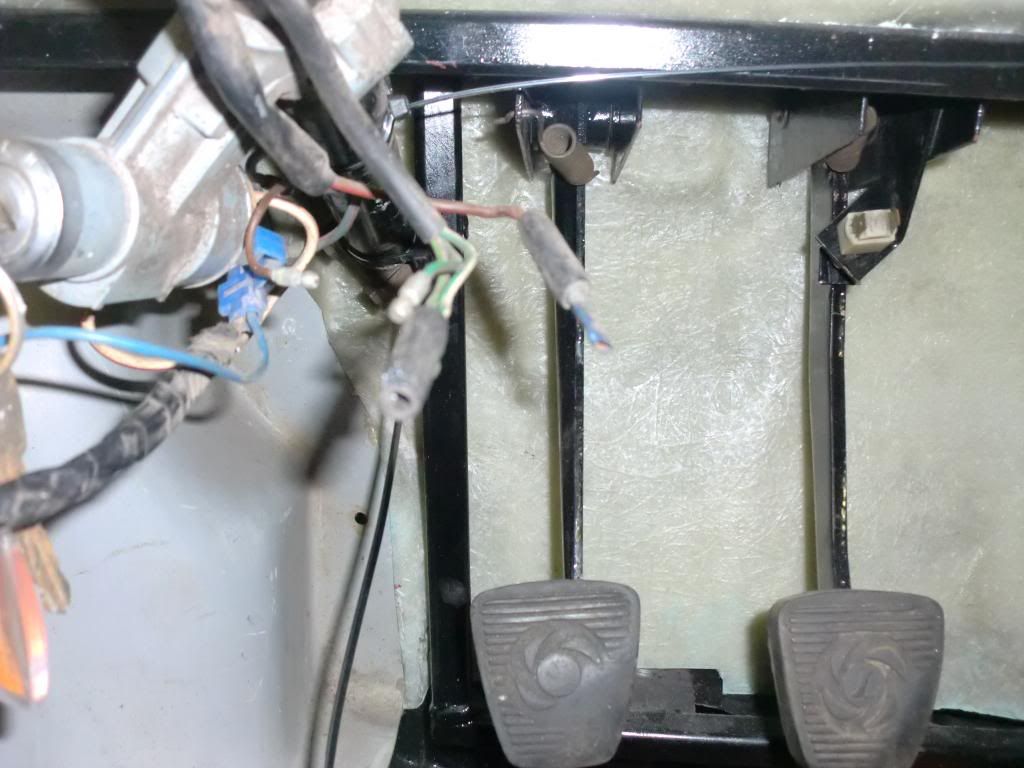
... brake and clutch pedals fitted ... had to modify the mounting brackets ... my brackets now shorter and in two halves...
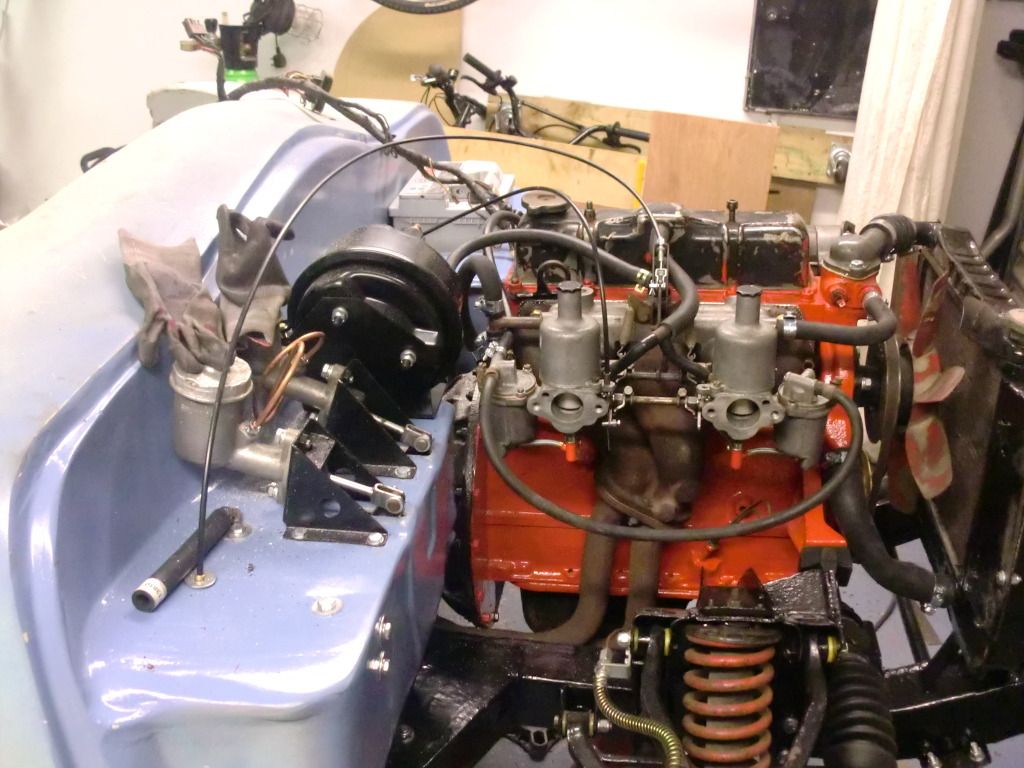
... new servos fitted to bulkhead, sideways on right next to master cylinders. will go under the bonnet here...
At first glance, it doesn't look like the brake master cylinder will fit under the bonnet.
Or does the fibre glass need to be cut away to allow bolting straight to supporting plate
Hopefully as more of us tackle the build, there will be some common solutions.
Cheers, Paul.
Still on holiday, will take some pics next weekend and post, hopefully, all will become clear!
Modified pedal bracket (front cut away otherwise won't fit). Doesn't bolt into bulkhead but the frame is easily sturdy enough. Ignore brake and clutch pedals fitted wrong way round!
Wheelarch clearance prior to lowering (and yes, it was way harder to do with the body on, but now done). Picture of 'after' to follow. Also wheel will be an inch bigger diameter...
And finally, an idea of what it might look like at the end...
Btw, what do you think of the proposed colour, as painted onto the bulkhead??
Over thw weekend, I have fitted the fuel tank (scary drilling the hole in the body work!), fitted the lowering block for suspension, stripped down the calipers for refurbing (new pistons required). More phots to follow sooner than the last lot I promise!
Fitted the fuel tank loosely as it will have to come out again for bonding (oops sorry no photo, will follow).
Fitted the battery in a home made wooden box. Cut the rear of the bulkhead, then found I didn't need to!
Finished off the braking system by refurbing and replacing the front calipers then bleeding. They work (well a bit at least)! Will need a better bleed before hitting the road.
Finished off the carbs (again completely refurbed) and new choke and throttle cable fitted. Then I found the old ones!
Got all the pedals now! And gearstick (again, linkages and bushes refurbed)
So now I have brakes, fuel, carbs, clutch. Steering and electrics to go. Just got new coil through the post so hopefully can get the vital wiring done in next week or so.
Going to have to go to see Gary at Spitfire Graveyard again. Need to measure exactly where to cut the hole in the bulkhead for the steering column, and see how this fits (as my donor was in bits when I got it).
Also need alternator connection as this is missing on my loom. Fortunately I have two looms and making one good one hopefully. Not as ambitious as those of you making a new loom, perhaps I'll regret that later.
More to follow, depending on how much time I get this week. Target is engine running by mid August.
Shiny new sports exhaust on order, should arrive this week too! My wife thinks it's sad that I get so excited about such things. I thought the same when she order a Karen Millen jacket.
I'd be grateful for any more details / photos of your lowering block in place.
( I've already got mine from Rimmer Bros. for when I eventually get to that stage.)
donnysoutherner wrote:
... Going to have to go to see Gary at Spitfire Graveyard again. Need to measure exactly where to cut the hole in the bulkhead for the steering column, and see how this fits (as my donor was in bits when I got it)...
Just had a quick look at my downloaded photos and don't know if this helps...
I could take some more photos tomorrow night / Saturday if you want.
Sorry, can't really do picture of lowering block, it's buried under e floor! Remember I did it the hard way, much easier if you do it before putting the frame on!
Thanks for the photo, there is a mark on the bulkhead where it needs to go, just didn't look quite right to me!
Not posted for a while and as usual pictures will follow but a bit of news:
Big news is that I got the engine started tonight for the first time! More luck than judgement possibly and a surprise for the neighbours as well at 10.30 pm. Oops!
Now has a steering column, then found that the steering wheel boss didn't fit from my eBay purchase. Now boss on order, still a bargain for a nice retro wheel.
Bought a set of MGF 8 spoke wheels for 70 quid. Very happy with them. Got a set of studs and nuts from my old friend Gary at Spitfire Graveyard for a tenner. Need to get the new studs in but will need spacers to place the wheel at the correct offset at the front. This is both to fit with the line of the car but also to prevent the brake hose possibly rubbing on the wheel. Again sounded from t'internet but yet to be fitted.
Loads of home type stuff to do this week but will try to find time to mess about with the wheels and take some photos.
Now looking enviously at your Master Cylinder layout... Beware buying a late 1500 donor as it comes with a tandem brake system as a default. Just as well we don't have to IVA as I'm going to have to downgrade the system to a single cylinder to get it to fit
Hi, I'm back, didn't realise it had been so long since my last update. here's the news...
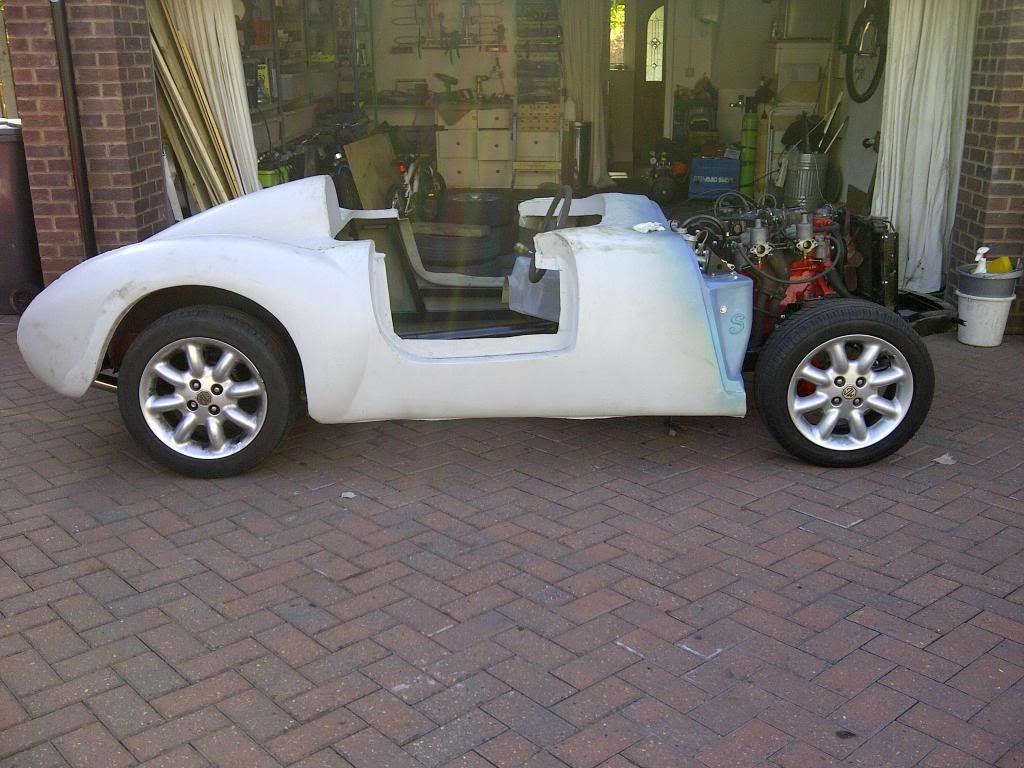
Got MGF wheels off ebay (bargain at £100 for 4)and fitted them....
Had to fit MGF wheel studs which needed cutting down to size but spline fits into spitfire hubs which was good news. Needed 37mm of spacers at the front which were sourced from ebay (thanks to Mtec for that, what a great supplier, even sent me extra 5mm spacers for free when i realised the 32mm wasn't quite enough)....
It does now mean that the brake pipes are well clear of the wheel and the wheels lines up nicely with the body...
The tyres need to be wider walled, then I think they will fit the arch pretty well. I have used a 25mm spacer to lower, with a 60 or 65 wall rather than a 55 shown this will be right I'm sure.
Next was to losely fit the bonnet...
Loop and hinge home made, not quite right as the bonnet does not really open far enough, but is at least adjustable for length and height....
I have decided to lower the radiator which was fouling on the bonnet, I am also removing the mechanical fan which dangerously became the highets thing and the point of contact with the bonnet. Again, back to the 'bay for an electric fan and heat switch, yet to be fitted....
Radiator filler cap is not now the highest point so will need a header tank Now the point of contact is the top of the carb, but once properly adjusted i think will clear. if not it will be a 'bonnet bump'...
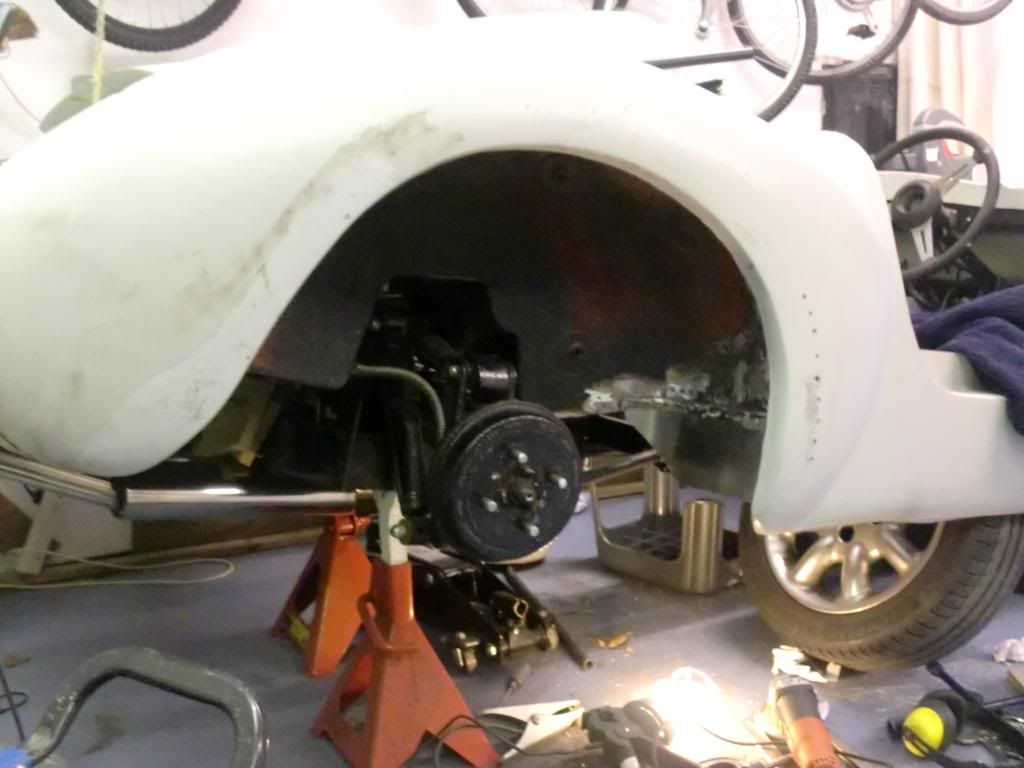
Have completed the first rear wheel arch by welding new metal to the old spitfire floor I put in and then using Sikaflex to 'glue to the Sammio body....
Pretty pleased with the result so far, not bad for a learner welder! Because I also have a boot floor I think I will end up putting a boot in my cordite as well. It is time consuming when you're a slow welder like me, but worth it in the end to have proper wheelarches and a boot.
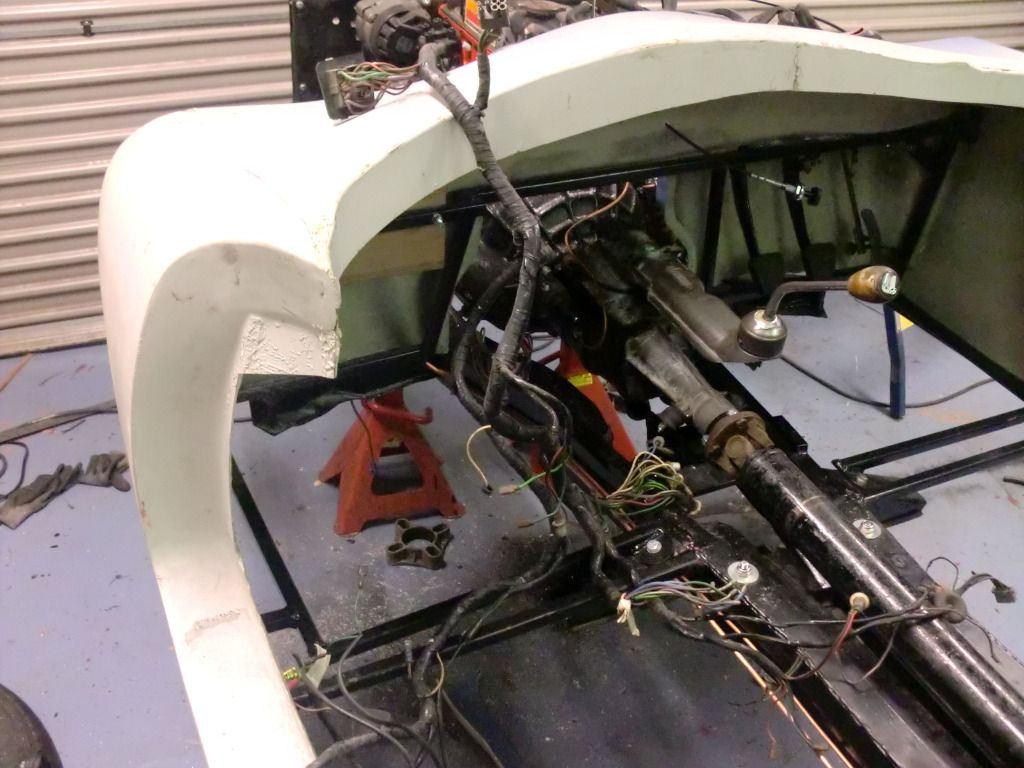
Like Paul, i'm waiting for floor pans to arrive (thanks Andy for your work on this) but before then I am going to have to adapt the frame to move the upright which is next to the clutch pedal. It's position means that teh gearstick almost fouls the steering wheel...
...and is very close to the clutch pedal itself.
I think I will move it to be between the brake and clutch pedals which will allow the steering wheel to come further across and will revent the pedals fouling on the upright.
As you can see the fitting of the steering column is temporary, I will need to make some kind of bracket for final fitting.
I have also loosely fitted one of the doors, but pictures yet to coem as that side is currently next to the wall of the garage. I have sold my TVR so that means more funds and more space in the garage.
The bad news is that I'm temporarily moving house for a few months (long story) so i probably won't get much time to work on the Sammio for a while.
I have however applied for the registration which looks like it might be an interesting experience at the Sheffield DVLA office. Sent the form off over a week ago and also sent an email to the guy, but absolutely no reply as yet.
 )
)





 eep:
eep: