MadaboutKitcars

This is a read-only archive of the old Madabout Kitcars forum. New posts and replies are no longer possible, but every thread is still here to browse and read.

Mister Towed's Tai Chi build

28 Oct 2011, 3:13pm
Just dropped one of my seats down to take a pic:


Dimensions are:

Height - 560mm (recline set almost upright).

Length - 680mm from a line drawn down from the top of the backrest to the front of the seat cushion (variable with different recline settings).

Width 1 - 530mm (across widest part of backrest).

Width 2 - 480mm (across widest part of seat base).

Spookily similar to Davecymru's bucket seats I believe. :whistle:
28 Oct 2011, 3:18pm
These are MG as well.

66cm h x 53cm w approx overall with a seat depth of 46cm:idea:
28 Oct 2011, 3:28pm
i like these

What do you think... who was fitting seats from a boat?:eusa_shifty:
28 Oct 2011, 4:08pm
im fittin boat seats,,,,,just in case we get RAIN....but im sure we wont..
28 Oct 2011, 4:12pm
are they in yet?

Any pics, or are they in the front room with your steering wheel, and you pretending to drive...:faint2:
28 Oct 2011, 4:20pm
no there in the LOUNGE, "but im still pretending to drive" wot wot old chap
28 Oct 2011, 5:10pm
Mister Towed wrote:
Just dropped one of my seats down to take a pic:
<img>
Dimensions are:

Height - 560mm (recline set almost upright).

Length - 680mm from a line drawn down from the top of the backrest to the front of the seat cushion (variable with different recline settings).

Width 1 - 530mm (across widest part of backrest).

Width 2 - 480mm (across widest part of seat base).

Spookily similar to Davecymru's bucket seats I believe. :whistle:


Nice! and in those you don't have to go on a diet in order to fit in them unlike mine which are.... snug :)
28 Oct 2011, 5:38pm
Guys, I got my bum in the version Gary's doing, (pic's on Skippy)..PAT
29 Oct 2011, 9:04am
garyh wrote:
66cm h x 53cm w approx overall with a seat depth of 46cm:idea:


Beautiful seats, really 50's. Might be a slight issue with the depth of the seat cushion though: you'd probably need to wear a steel mesh vest to stop flies getting trapped in your belly button. :becky:
29 Oct 2011, 9:23am
I really love those old MG seats on GaryH's entry. Trouble is they all look a bit too tall in the seat base. You could cut down the mounting frame of course but the squabs still look really thick.

The thinnest seats I managed to find are made by Intatrim and if money was no object I'd have gone for a pair of these from Europaspares:


Couldn't justify the £300+ each price though once the vat and p&p is added so I'll be sticking with my sub forty quid a pair ebay specials.

Out of interest, I was actually looking for a pair of early Spitfire seats but they kept getting bid into three figures for absolute basket cases that needed £££ spending on them before they could possibly be used.

I couldn't believe the price I got the MGB seats for and ebay often have them for a buy-it-now price of around £60 to £80 a pair. Harry bargain. :becky:
29 Oct 2011, 1:13pm
Out of curiosity what is the outside width and the height of the seat back that would be ideal for the Sammio? At what angle should the seat be mounted?

When I started to build my own cars I couldn't find a seat that fit me or the low position that I was looking for. So, I took a mold of my bottom and lower back from expanding foam then made a fiberglass plug and made my own seats. I made mine with a 20 degree lay back. I had covers made so that the center section on the bottom of the seat hinged in the back and hooked to the front with velcro. There is a small pull tag. Most of my cars don't have doors either. I can pull up the upholstery and step into the fiberglass seat then slide down into the cockpit. This keeps me from having to step on the upholstery.

The seat ended up very comfortable. I have driven across country several times and in one of my cars drove 33,000 miles in 18 months.
29 Oct 2011, 4:57pm
jmc14 wrote:
Out of curiosity what is the outside width and the height of the seat back that would be ideal for the Sammio? At what angle should the seat be mounted?


Good question. My answer would be whatever you can get to fit in the cockpit and find comfortable. Personally I like quite a high, upright driving position so I'll not be lowering my floors and I'm just crossing my fingers that the MGB seats won't stick out the top above the body.

I'm impressed that you make your own seats, very forrmula one. I also like the idea of loose covers, one of the options I was considering was beach buggy seats from flatlands engineering:

http://www.flatlandsengineering.co.uk/fle/fle_bgkp.htm


That's the great thing about building a Sammio, the only limits are your imagination and mechanical skill.
29 Oct 2011, 5:17pm
While we're on the subject of imagination I've been thinking about the stance I want my car to have.

I reckon '66 looked very 50's on 15" wires with tall tyres but the Spyders that've really caught my eye are the low ones like Trevor's and Phil Jacklin's.

So, I want mine to be not just low, but 'king low. The plan is to go with 175/70/14's and a 90mm cut on the front springs.

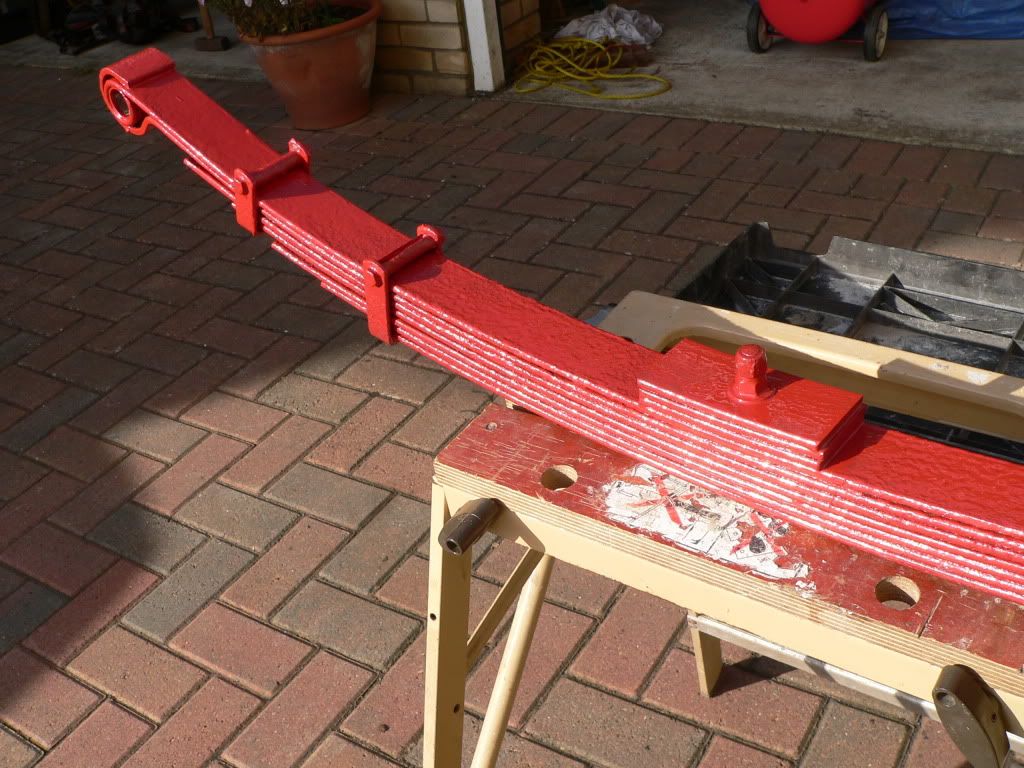
Today, in addition to continuing the renovation of my holy chassis, I took three of the redundant leaf springs, cut them down and bolted thim into the leaf spring to make an additional lowering spacer:


Each leaf is about 6mm giving a total extra drop of about 18mm and probably some positive camber on the back wheels once it's all rebuilt.

One question though, I'm going to need some extra length bolts over and above the 6" ones Gary provided with the lowering block: anyone know what thread size the six studs are that clamp the springs onto the differential?

I know they're 3/8" and I know they're not unf ('cause I've tried a 3/8" unf nut on one of the original studs and it don't fit), but what size are they?

:noidea: :noidea: :noidea:
29 Oct 2011, 7:28pm
Don't know the size but these fitted a 1inch block without additional washers,

Canley classics

DIFFERENTIAL STUD - EXTENDED FOR SPACER APPLICATIONS
Part Number : 131008X

£3.10 inc VAT (£2.58 ex VAT) EACH
Availability : IN STOCK

ORDER QUANTITY :
31 Oct 2011, 5:25pm
try 3/8 unc.....im sure that was the threaded bar i bought for my lowering block. but it was a little while back
31 Oct 2011, 7:42pm
mulberry wrote:
try 3/8 unc.....im sure that was the threaded bar i bought for my lowering block. but it was a little while back


Thanks Mulberry, I'll give it a go.

And today the excuses finally ran out.

After lots of deep breathing and finding other things to do I finally took my cheapo 100 amp 'Silverline' arc welding machine out of its box and plugged it in...

Now, all the received wisdom suggests that I should've spent more on a mig welder.

And that I should practice for ages 'n' ages on bits of old angle iron until I could weld like a pro.

But that wouldn't really be in the pioneering spirit of Sammio ownership so I bought the cheapest (new) rig I could find and decided to practice on my shoddy chassis, partly because the only rusty bits of angle iron I have are Vitesse chassis shaped, and partly because I'm too mean to waste the box of welding rods I bought from Screwfix.

So, I figured I'd start with one of the rear chassis extensions, reasoning being: 1/ it's really rotten; 2; it's not going to be structural and 3/ most of it will get cut off and thrown away once the body is on and inspected by dvla anyway.

If you're a pro welder please bear in mind I've never welded anything in my life before so please forgive my absolutely amateur approach as follows:

First I engaged the services of my 9" angle grinder to cut out the rusty holes on the top surface until I had a clean metal and reasonably oblong hole.


Next I cut a length of 25mm x 3mm steel to fit said hole, using a couple of self tappers and G clamps to hold it in place.


And finally, after donning flame retardant overalls, leather boots, welders' gauntlets and my arc activated head shield I struck my first ever arc...

I CAN WELD! I CAN ACTUALLY BLOODY WELD!!

Well, I'm never going to win any prizes for the World's most beautiful welds, but I'm pleased with the results I achieved today.

OK, so I blew a few holes in the thinner metal surrounding my belt'n'braces repair section while trying to be clever by moving the weld along in zig zaggy stylee.

And I now know to make sure repair sections fit exactly because if the gap's too big you can't just fill it with welding rod.

But after a bit of trial and error I worked out that the most effective method was to do spot welds half an inch apart, then clean up with the slag hammer (sounds like something Peter Sutcliffe might have used) before joining the dots so to speak.

As for the too-large-gaps I'd left at the end of the repair section, I first spent about two hours fabricating carefully shaped steel fillets using needle files and working to the 1 thou' tolerances I was taught in the RAF School of Technical Training at Halton in the seventies. These all then evaporated when confronted with 100 amps of Silverline power, so I tried sacrificing a couple of 4" steel screws offered up with a plastic clamp at the point of arc. I don't know if this is allowed or advisable, but it sure as hell worked, filling the gaps quickly and easily.

Once I'd ground off all the lumpy bits I was left with a seamless join that looks good enough and is certainly better than a lot of the welding that had already been done on the chassis.


So, that's another box ticked and I'm now happy that I'll be able to repair my rotten chassis myself and do a good enough job.

ALL HAIL THE CHEAP WELDING RIG!

OK, so the last pic looks like there's a load of holes along the side of the chassis extension, that's just a trick of the light. Here's another shot taken from the side which shows there's no holes along the side but it looks like there's a big hole on the top. Again, that's just a trick of the light.

31 Oct 2011, 8:45pm
Mister Towed wrote:

Well, I'm never going to win any prizes for the World's most beautiful welds,


ME NEITHER ....Well done Mate ....as longs it sticks well and is structurally sound - it can be cleaned up , ground , filed , added to etc. even a little body filler if you are going mad ....Good Job..
31 Oct 2011, 8:52pm
Thanks Gary, I'm dead chuffed with the results. Seems like welding's not such a dark art after all. :flame:
31 Oct 2011, 9:00pm
:biggrin: COOL!

Isn't it amazing how satisfying it is simply sticking two bits of metal together! :)

As long as it's structurally sound and you're getting good penetration (fanaarr) then who gives a stuff what people say you 'should' be doing. I'll be the first to admit that the way i learn is to read everything everyone says, but then just give it a go with what i have and find out what works for me! :)

Keep up the good work!
31 Oct 2011, 9:18pm
Cheers Dave.

Yes, although I took all day to effect a pretty small repair I found it very satisfying indeed just sticking a couple of bits of metal together using electrickery. Now I've had a go I know it won't take me so long next time.

That's the whole point of building this car for me though, it's a chance to dust off my old engineering skills and learn a few new ones along the way. So far the sandblasting and welding have both proved to be a challenge but not as difficult as some folk would have you believe.

Roll on the spraying! :biggrin:
31 Oct 2011, 11:19pm
i was raised around an arc welder as its was dads pocket money welding up rusty cars ...nothing wrong with an arc welder
1 Nov 2011, 5:13am
It's all I use a very old Oxford stick welder (MMA), wasn't out off a skip but some chap was moving and was about to go in a skip, keep your conections clean...PAT
1 Nov 2011, 4:46pm
T, will you bother repairing the bit right at the end

on that rear extension?
1 Nov 2011, 6:56pm
garyh wrote:
on that rear extension?


No, probably not.

It's going to get cut off anyway and I'm happy enough with my first go at welding to tackle the structural bits of the chassis with confidence.

Erm, more confidence than I had yesterday morning anyway.

I'm thinking the next really tough challenge is going to be welding in the new floorpan on the dirver's side as the metal is much thinner than the chassis.

The plan is to sandblast the front tub then bolt it back to the chassis before cutting out the old floorpan and welding the new one in in situ so I know it'll all fit.

Gonna stick with the 'join the dots' spot welding technique as it seems to work for me and I'm in no hurry. :laser: