This is a read-only archive of the old Madabout Kitcars forum. New posts and replies are no longer possible, but every thread is still here to browse and read.
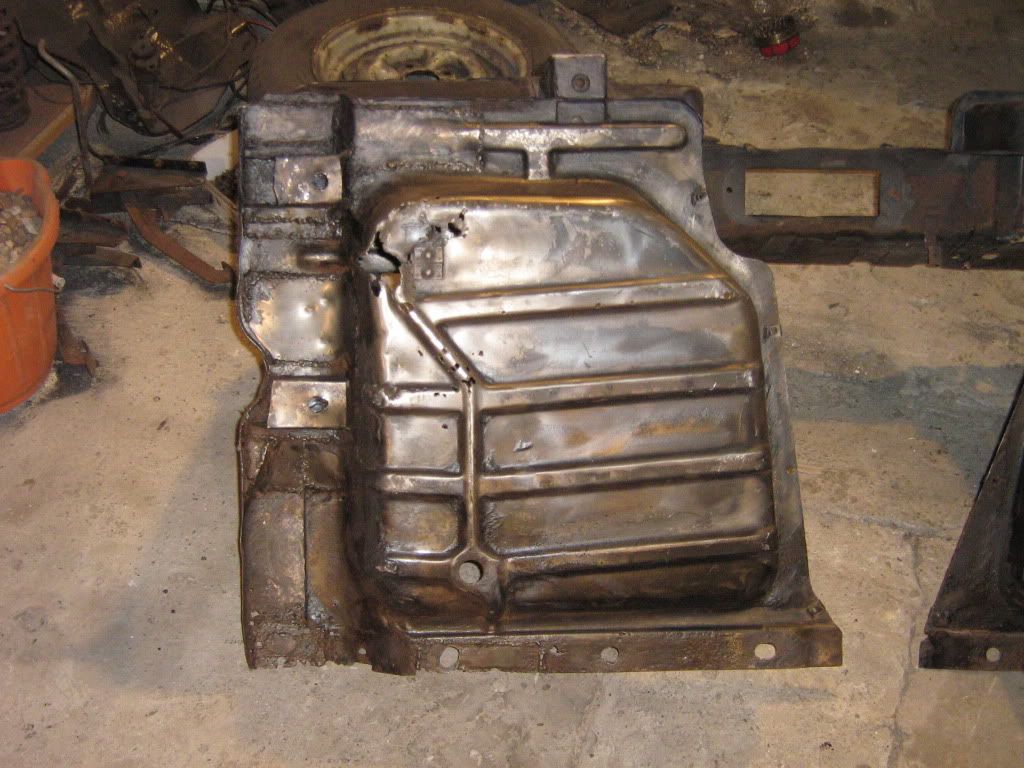
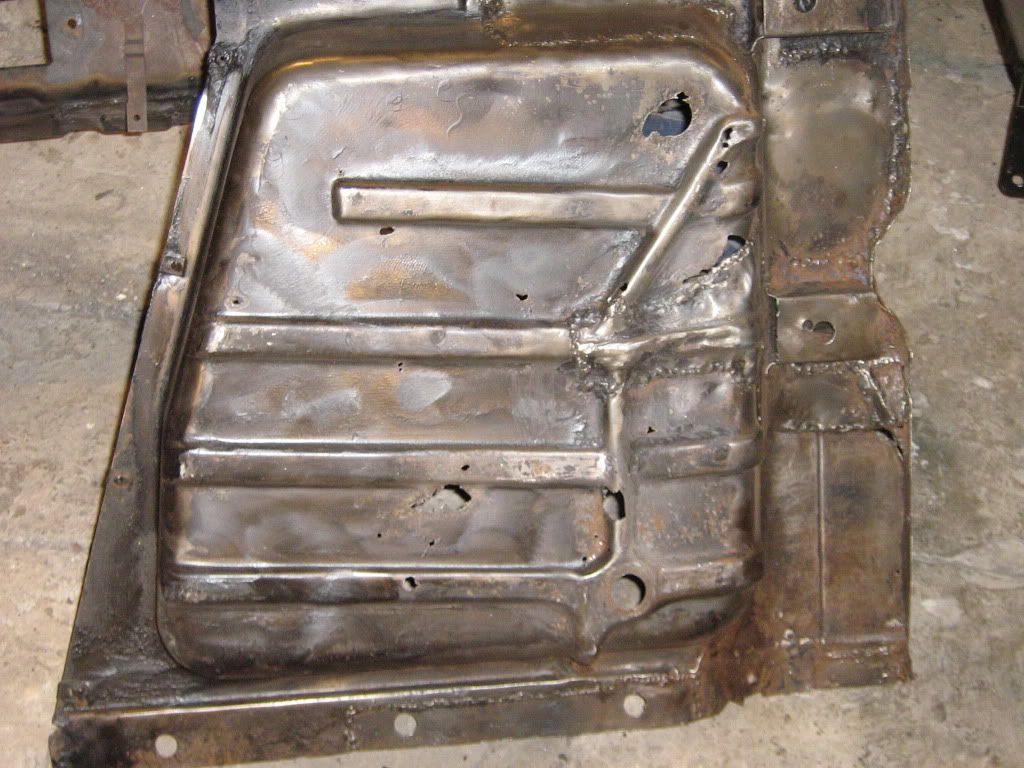
I think my bulkhead was a collander in a previous life!
Well still plodding but at least I have got the rolling chassis done
Once I got through the layers of underseal and filler I was a bit surprised with the condition seeing I got away with the chassis.
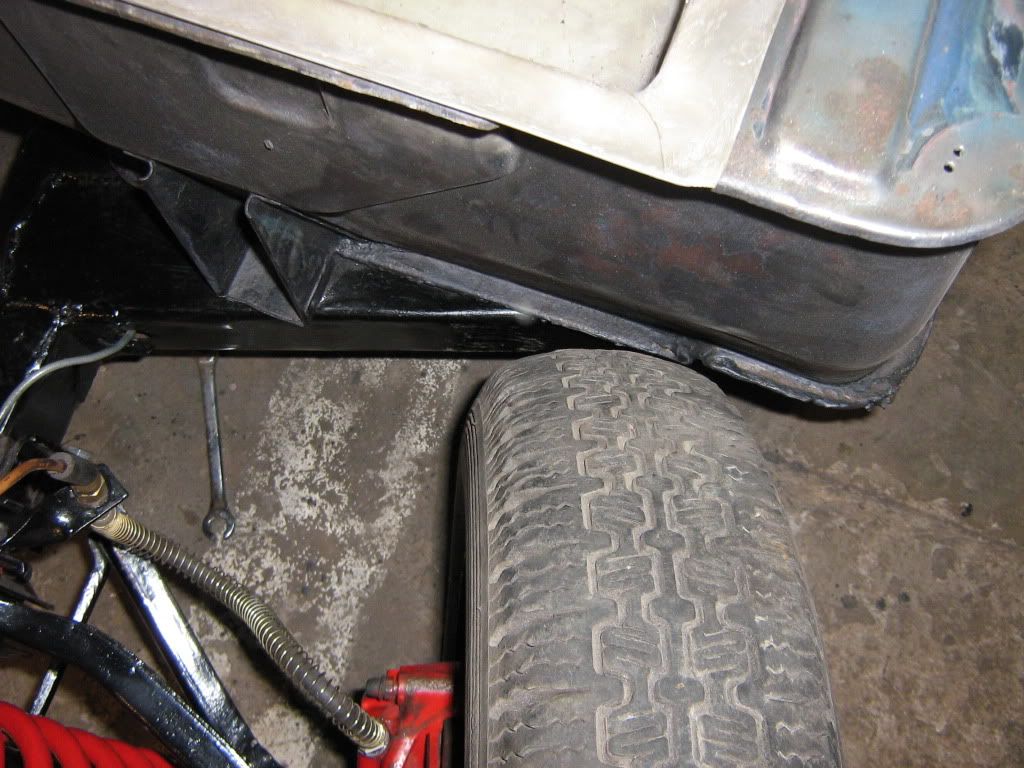
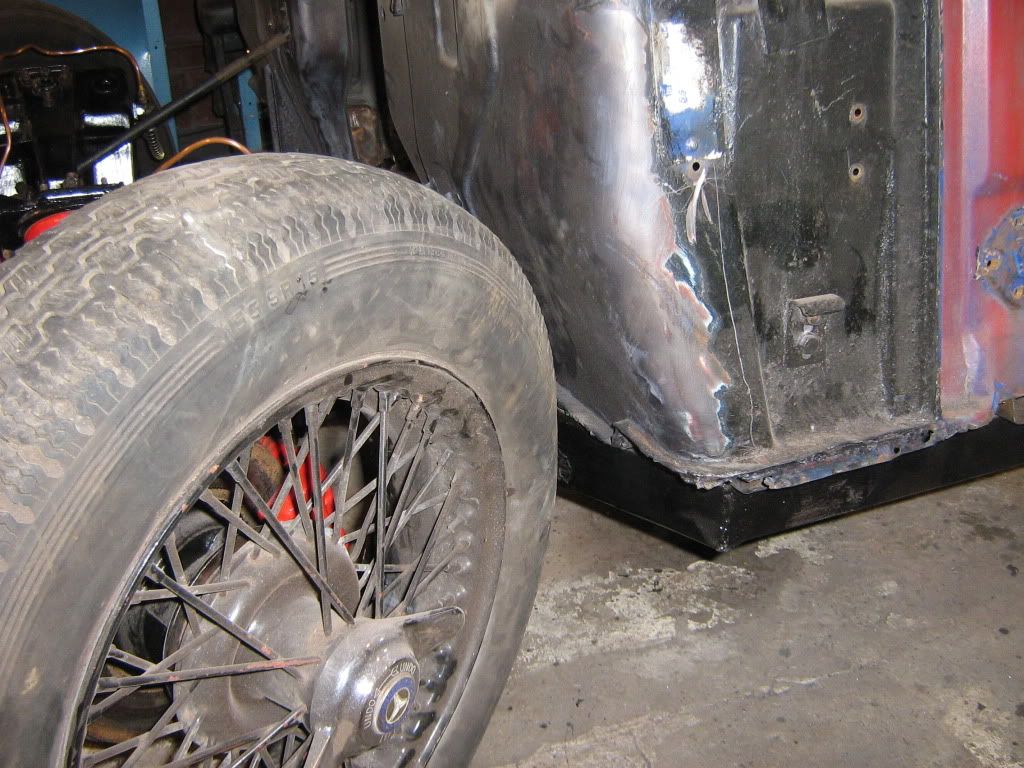
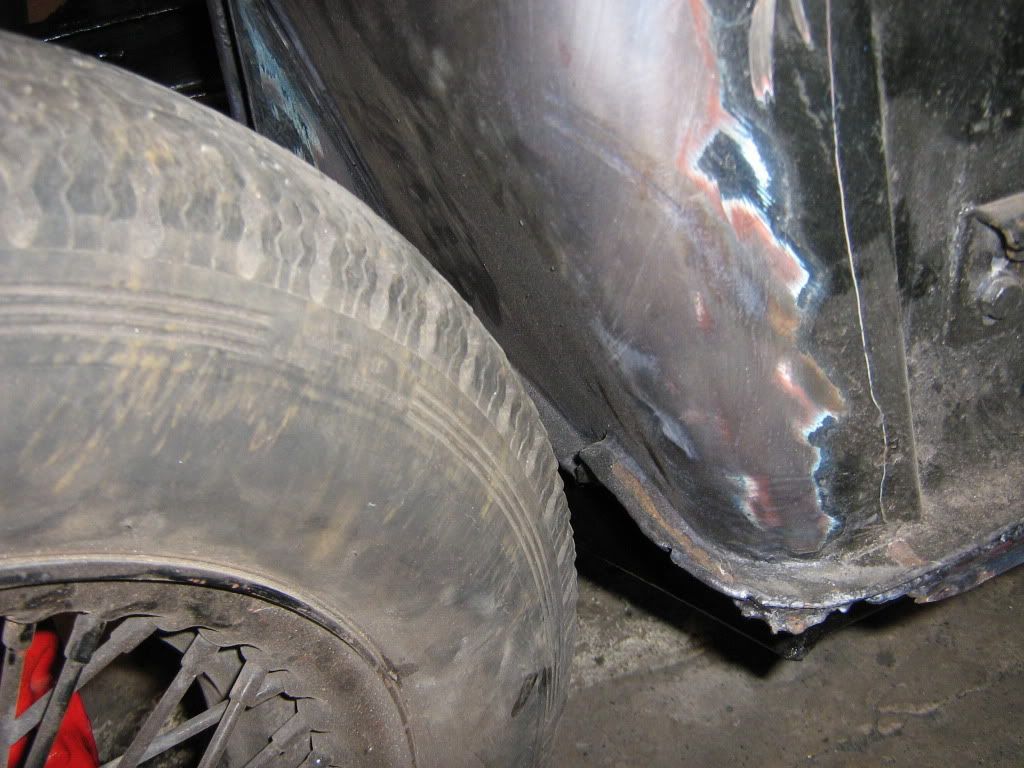
I also thought I had better look at the wheel tyre bulkhead conflict....looks like I might have to review the tyre choice...its not too bad but a bit close for comfort on full lock...I am going to de-seam to give me anothe half inch and a few clouts with the enforcer to re-shape a bit.
Think I might be getting a bit carried away...I have managed to spray a sample strip of the Aston Dubonnet red and have had it scanned and have now got a litre of red to paint the underside of the floor (15mm marine ply) I am toying with primer, undercoat and gloss to the bulkhead floor and lower section...would appreciate any comments on this...rubbed down I can`t see a problem with this?....So with any luck I might be going for rear tub weekend after next
If you are not going to put it on mirrors in the car park so everyone can see underneath, then it is a lot of effort to go to just for the MOT man!
The trouble is that you will risk it looking crap unless it is prepped properly! I like a gloss back chassis paint myself as it looks nice, it extra thick and fills all the weld and grind marks!
Sir, methinks you have been round to my "gaff" and been spying on my chassis. I was unsure between black or red, but went for good old black. Like you say, if you are not the worlds greatest welder, then black is more forgiving. That's why ladies choose it! Oooooooh, good job the other half isn't reading this.
I understand what you are saying with the prep-work but I am only going to paint the ply floors on the underside with body colour but in u/c and gloss, then probably finish with some hard varnish....I am not too keen on using jollops of underseal on the bulkhead pan floors as you end up with what has happened to mine....it rots from the inside! I obviously need to protect the ply and certainly the edges having seen enough de-laminating plywood in the construction industry in the last 35odd years.
I thought I would apply the same principle to the bulkhead floor pans and paint with a decent rust inhibiting primer and undercoat and gloss to match......I suppose the proof is in the pudding so I will carry on and let others be the judge.....as long as it doesnt look like a bodge up I will be happy.
Nick,
I completely agree with you. It's all very well, but when I was younger we always slapped on a hefty coat of underseal, and that was that. Trouble was it was only as good as the prep underneath, and as it was usually trowelled on it looked solid and adhering from outside, but actually was rotting like mad between the lifting underseal and the metal panel especially once the damp crept in. Suddenly two or three years down the line you find you have a paper thin chassis. With all the modern materials available it is possible to do a strong, long lasting job at reasonable money. As to the level of finish, no one can judge another person's car, as they would be judging by their criteria and not that of the builder. That is the beauty of the Sammio, we are all building to our own tastes, budgets and requirements. As for the "mirror under the car brigade" I used to restore Jaguars years ago, and was on the area commitee of the Herts, Beds and Bucks Jaguar Drivers Club. Wehad some people like that there, and to be fair we all took the mickey, but that was their pride and joy, and fair play to them. After all what is wrong with someone wanting their car to look the best, and be proud of it. Like you say, we've all seen botched up cars, drives, houses etc. so who really has the right to judge another? (A Judge I suppose!)
Lighter note, I am finally going to finish painting my chassis this week end, and apart from popping round to see AshJ and beat him into starting his Cordite build, "I know where you live!!!" will hopefully have some photos to put on here.
Well seem to have made a bit of progress this weekend and another day to go
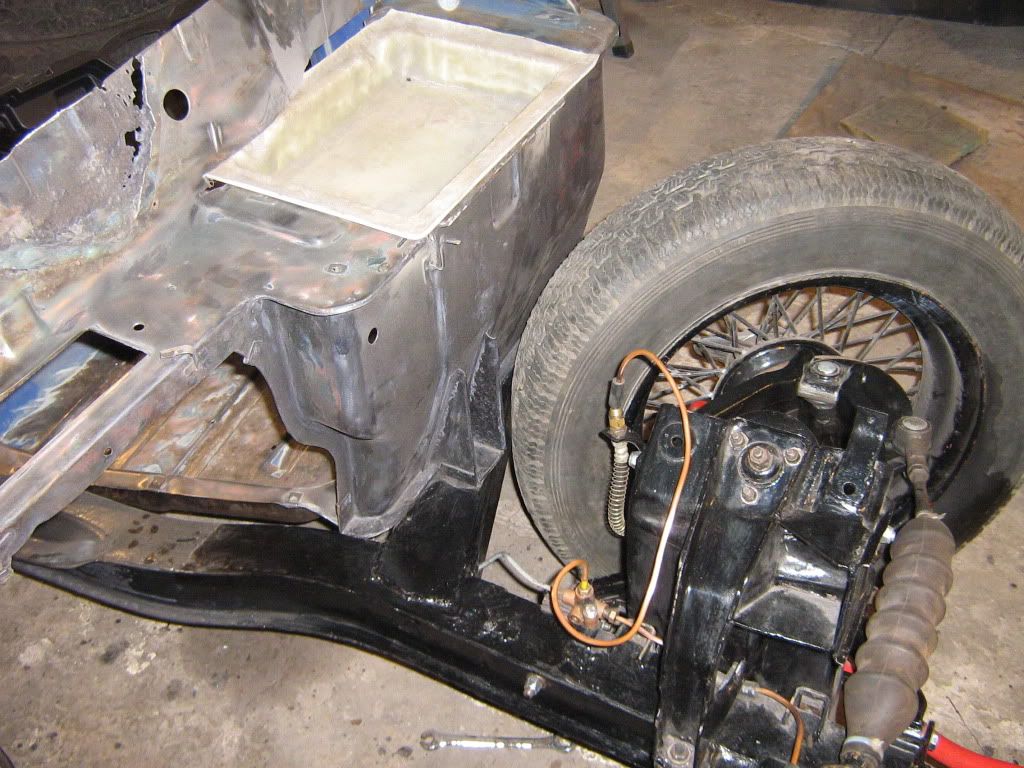
Floor pans are all repaired and a bit of seam welding to give me another half inch on the tyre clearance, rust treated and primed.
before
Also got the petrol tank bolted in and connected, bolted the rear frame and corners....not a bad fit at all
Also thought I would drop the engine and gearbox back in to settle the suspension prior to bolting it all up....put the brake lines in and ran fuel pipe through....facet electric pump to come
Also got a BMW mini 1 handbrake for a fiver on ebay....thinking I am going to mount the plate on the underside as low as I can go...it seems to have a centre pull so hoping I can connect in a straight pull without the fulcrum thingy?
Floorboards cut ,sealed and primed
...think I deserve a bottle of wine or two as I am now knackered
Can`t believe that nearly three weeks on from last post I have not got much further on....mind you I did manage to sneak to Barcelona for the Grand Prix Everything is now ready for the body bonding to begin Gravicol is ordered for Friday delivery and NOTHING is going to stop me getting it bonded on whilst Queenie paddles the Thames apart from all the beer festivals that appear to be on! Hopefully next pic will be with the tub on! then to attempt the first DVLA inspection in Kent! quickly followed by a trip to Gary and his inspector inspector when ive upset my local one !
Ho Hum.....having watched others doing their cuting and shutting...its now my turn.......here is a little picture montage of where I am at....currently scratching my head as to whether I am just about there, or whether to cut and shut abit?
Didn`t think it looked too bad...but not sure on a couple of things......
Not sure I can do anything about this? I measured the centre of suspension to bulkhead and they are parallel....strangely one wheel is tighter to the bulkhead than the other and you will note the bottom cill projects further one side than tother....The tub is tight back against the frame member (note G clamp.
On the inside the frame is about 6mm from the tub lip whilst the other is about 50mm? The front trays has about 80mm gap behind..... so I am thinking it might be a bit high although I have cut the corners off the frame and the centre tub sits down tight on the bulkhead......So whilst the rear wheels sit in the same position both sides I would have liked to set the body further back to centralize a bit better? can`t do this as the tub is tight against the hump frame rail. Cills tuck under chassis on passenger side and "most" of drivers side although I might have a further tweak as its not tucking under at the front?
Something is out on the suspension chassis although the frame was a bloody good fit with little to alter.
Like the look of the wheel line in the arches.....just need to weld some knives onto the spinners
Comments greatly appreciated....as this bit has me most worried about whether I am on track?
DOESN'T LOOK TOO BAD TO ME NICK....You are definitely getting there....
The bodies aren't totally universal due to 'peculiarities' on each car....you say the wheel is closer to the bulkhead one side compared to the other ...have you checked your wheelbase measurement ? We built a car for a customer last year and couldn't get it right , after hours of going crazy , trying to work out what we had done wrong , I measured the wheelbase and it was about 3/4'' out !!
You may need to cut that cill overhang off , if you can tease the body back a bit more even better ...we have clamped one side before and pulled the other because the bodies have parallelogrammed whilst sitting about ...if you do that make sure you fix or clamp the rear in place and then re-centre the front to avoid the body being too far over one side...
Thanks Gary, yep I am pretty pleased so far, just wish i could spend more time on it.
I will have a further little tweak before I commit to the bonding paste. The rear dimensions all sit pretty square and the rear wheel dims in the arches are about a match with each other....so if it looks about right I will bond it....Still tempted with the chrome wrap.....Also now realize that the 15" wheels make a difference.....Its quite a leg over!!! Cordite for me before too long
Just make the wheels as centred in the arches as you can make them and be happy with that!
I'm an IT bod by day and used to things being right or wrong, and it wasn't until I talked to Gary on my inspection trip that i realized that there is a third state of "near enough"
my experiences of talking to others over the last year, no 2 of these donors are anywhere near identical so just get yours right for you.
Well as others have said, you can only look long enough before the big decision to bond and having thought I had got it just about there....the day of bonding cometh!
Straps ready and ratcheted? and paste and glass in hand and this is where I got
Was generally quite happy with my work.....Until realization took hold....that little alignment that I thought would be just a trim back on the cill lineout:
All looks fine
Other side
Not only serious bulkhead bashing to do (yes it is sitting square) but there is no way the wheel is going to run past that shutline.....Unless someone would like to tel me otherwise I am in for cutting the panel and shunting it all back?
Then I looked at the top
not sure if you can see it but the far end kicks right forward! so I have definately got an alignment problem.
Nick,
What about cutting through your glass and bonding down the left hand side and pulling the body back into position, now the right hand side is fixed you may get enough flex to align it all?
Would be better id have thought than cutting a section out from the front.
Pops
Ooh, bad luck. Did both sides line up on your trial fits? Is the rear face of the cockpit straight across the top of the frame or has it slipped forward on the nearside? I hope you find a simple fix for this one.
NICK , CLEARLY SOMETHING IS WRONG ....Its very difficult to say what the issue is without seeing the car ....our bodies do run out a bit on the pass. side , but it doesn't normally create an issue like that ...all the bodies are from the same moulds , so they cannot change , all the cars are slightly out one side , but yours is puzzling ....
Sometimes an unfitted body can parallelogram a bit whilst sat around , depending on how it is stored.....we fit one side , clamp it and then tug the other into place when we do ours ...
I think you may have to do a bit of corrective surgery like tlrtone did on his body , but you may want to check your bonnet alignment first ...
You can cut and fix this area even though its bonded on if you haven't fitted the end caps yet....
It all looked sort of right everywhere, although the difference between the suspension and wheel to the bulkhead is concerning, as driver side plenty of clearance, passenger side tyre is rubbing the bulkhead? The bulkhead is square to the chassis and if I had moved it back to clear the tyre, it would have made my current situation worse!
I trial fitted the bonnet for alignment and I rekon passenger side needs to come back a good 2".
I know I am not sitting square with the frame rail at the hump....hump is tight against the frame and runs out about 1" so need more than that. Can`t go any further back driver side as I am already sitting tight against the frame rail?
Looking at the rear arches, if I pulled the body any further forward the wheels would touch the rear of the arches
From the rear, all looks like it is sitting square and I am happy with the body sitting where it is.
Am thinking this car will be good at going round left hand corners!
Think I will need to sit and ponder a while before I start any cutting as with the amount of bonding paste I used I dont relish cutting through it!!!
It may be the angle the picture's been taken at, but to me it looks like your nearside rear wheel is too far back in the arch. That would explain the front of the body being too close to the nearside wheel. How set is your bonding paste? I'm aware that it can take a few days to go off fully, depending on how much catalyst you add (if any in my case!) and it might be worth seeing if you can separate the body from the chassis now and have another go if it isn't aligned properly. Good luck.
Nick, it sounds exactly like mine, so I would say that you may not have anything wrong with your body or your chassis.
The side rails on mine needed widening at the rear to sit under the body (and have space to put the ply side panels under the lip), and the rear frame was not square with the back of the cockpit on the body.
The first bit was rectified by cutting and re-welding the side rails. I did mine with the body off though which did make life easier. You could try and do it with the body on, or even cut the rail and then make up a bracket that can be bolted in - it is purely a strengthening rail so bolting it would be fine.
the rear frame was a minor issue in my mind as I just cut and trimmed the plywood panel at the rear to fit and then made adjustments with the final filler and bonding paste, so no major trauma.
The front wheel arch looks exactly as mine did and I too pondered a while over a few evenings. The outcome was my cut and shut story, that is on my thread, and actually I think it turned out better for it! You can get the bonnet to line up and fit, so don't panic over that. I am still not sure why the body fitted like it did, I took many measurements and diagonals and in the end decided that I would fit MY body to MY frame and MY chassis and this meant minor adjustments to all of them! The overall results is very good and even though things are not 100% square or a mirror image from side to side, it doesn't really matter in the overall scheme of things, people WILL NOT notice!
So don't pull you hair out trying to decide where the error is, just satisfy yourself that you have no major chassis twisting by taking diagonal measurements and the bulkhead is fitted correctly ( you can't really get this wrong if the bolt holes line up!) and then just make a plan to adjust the body to fit.
Take a deep beath and get your marker pens out and plan your cuts. Remember that it is only fibreglass and the worst that can happen is that you make a wrong cut and have to add more fibreglass or cut it and do it again!
You're not the first to need to make "adjustments" after things were bonded in place! Tips from my experiences would be to do a lot of thinking befpre making any cuts but as soon as you know what needs doing then get the 1mm cutting discs and just go for it!
Best of luck matey, it is worth it in the long run!
Nick, it sounds exactly like mine, so I would say that you may not have anything wrong with your body or your chassis.
The side rails on mine needed widening at the rear to sit under the body (and have space to put the ply side panels under the lip), and the rear frame was not square with the back of the cockpit on the body.
The first bit was rectified by cutting and re-welding the side rails. I did mine with the body off though which did make life easier. You could try and do it with the body on, or even cut the rail and then make up a bracket that can be bolted in - it is purely a strengthening rail so bolting it would be fine.
the rear frame was a minor issue in my mind as I just cut and trimmed the plywood panel at the rear to fit and then made adjustments with the final filler and bonding paste, so no major trauma.
The front wheel arch looks exactly as mine did and I too pondered a while over a few evenings. The outcome was my cut and shut story, that is on my thread, and actually I think it turned out better for it! You can get the bonnet to line up and fit, so don't panic over that. I am still not sure why the body fitted like it did, I took many measurements and diagonals and in the end decided that I would fit MY body to MY frame and MY chassis and this meant minor adjustments to all of them! The overall results is very good and even though things are not 100% square or a mirror image from side to side, it doesn't really matter in the overall scheme of things, people WILL NOT notice!
So don't pull you hair out trying to decide where the error is, just satisfy yourself that you have no major chassis twisting by taking diagonal measurements and the bulkhead is fitted correctly ( you can't really get this wrong if the bolt holes line up!) and then just make a plan to adjust the body to fit.
Take a deep beath and get your marker pens out and plan your cuts. Remember that it is only fibreglass and the worst that can happen is that you make a wrong cut and have to add more fibreglass or cut it and do it again!
Good luck!
Thanks for the comments: I think it is the thought that I am missing (or screwed up) something obvious, as I could not believe my luck (or Garys spot on frame) that everything lined up even to the extent of bolt holes into the original door hinges...I have studied your thread and will now attempt corrective surgery....watch this space
Perhaps that's the problem - if your chassis lines up with one of Gary's frames without loads of hammering, levering and swearing, then your chassis must be out of alignment.
My frame was a nightmare to fit and yet the body looks like it's going to go on relatively easily, with the only mismatch being where the body doesn't quite fold under the outrigger at the very front of the driver's side.
I do hope you find a simple solution to the issue.
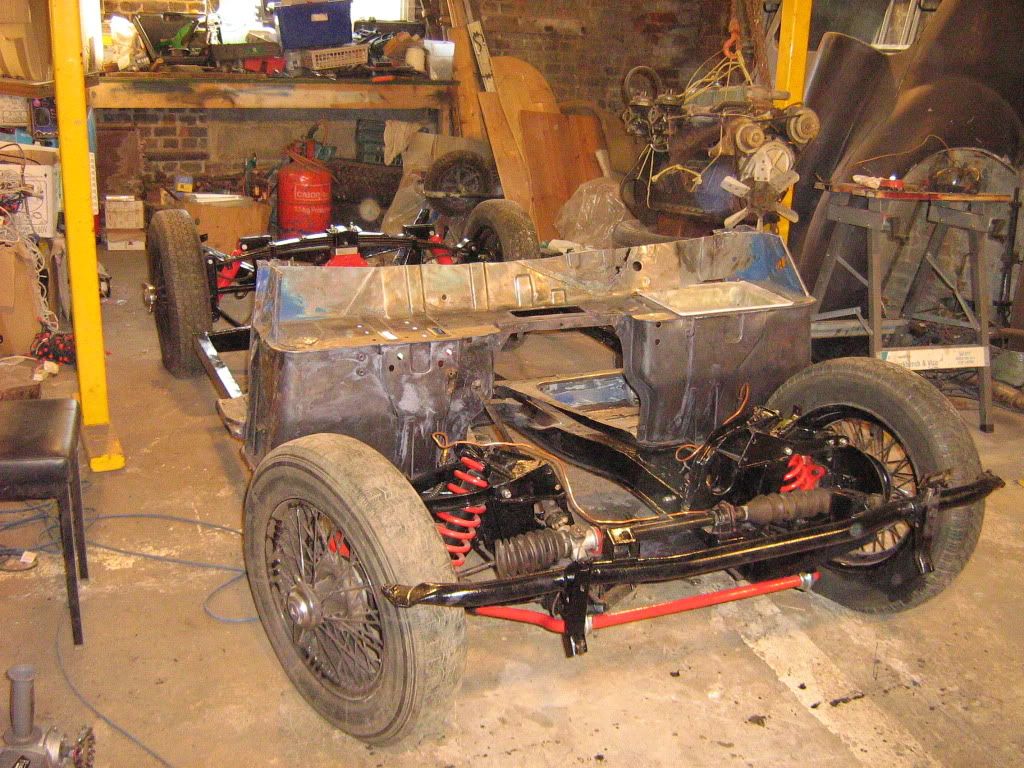
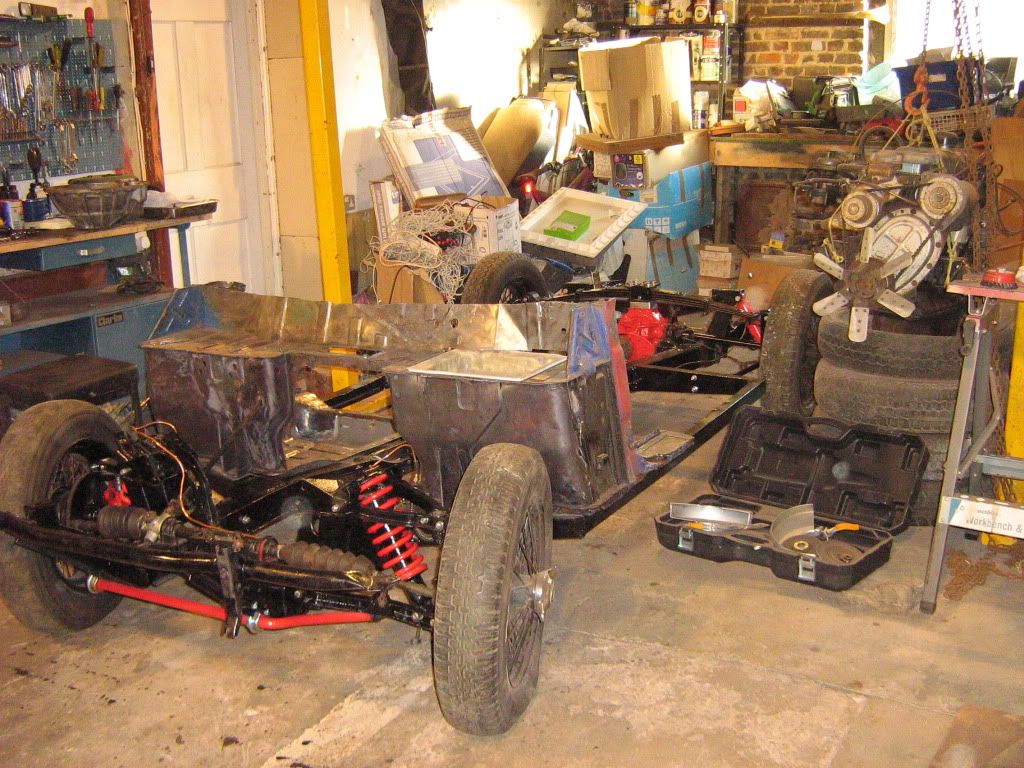


 Everything is now ready for the body bonding to begin Gravicol is ordered for Friday delivery and NOTHING is going to stop me getting it bonded on whilst Queenie paddles the Thames
  apart from all the beer festivals that appear to be on!
  Hopefully next pic will be with the tub on! then to attempt the first DVLA inspection in Kent! quickly followed by a trip to Gary and his inspector inspector when ive upset my local one !


 out:
out: 


 I think it is the thought that I am missing (or screwed up) something obvious, as I could not believe my luck (or Garys spot on frame) that everything lined up even to the extent of bolt holes into the original door hinges...I have studied your thread and will now attempt corrective surgery....watch this space