MadaboutKitcars

This is a read-only archive of the old Madabout Kitcars forum. New posts and replies are no longer possible, but every thread is still here to browse and read.

Mister Towed's Tai Chi build

19 Oct 2012, 3:27pm
Leave Micha out of it
19 Oct 2012, 6:18pm
Hi Mr Towed,

Re: your possible front ride height issue, have you seen the following items for sale on Canleys website under 'New and featured products'?

Front Spring Spacers

Nylon spacer blocks to fine tune the front ride height of your car. Place a block between the top plate and chassis mount to raise the ride height.

Fits any small chassis Triumph: Spitfire/Herald/GT6/Vitesse etc.

Avaliable in 3/8" (9.5mm) and 11/16" (17.5mm) thickness.


http://www.canleyclassics.com/thumbnail.asp?src=/images/products/spring_spacers.jpg&width=400

BUY ONLINE

PART DESCRIPTION PRICE
125441 FRONT SPRING SPACER - 3/8" £12.20 add to basket
125441X FRONT SPRING SPACER - 11/16" £12.45 add to basket
122137 SPRING TOP PLATE £7.99 add to basket
WP7 PLAIN WASHER - 1/4 £0.20 add to basket
YN2907 NYLOC NUT - 1/4 £0.20 add to

They look good value and I am thinking of trying them myself. We have fitted bespoke soft springs and the ground clearance is now similar to yours. We only have a 13/60 engine though and have already uprated to the later thicker anti-roll bar.

Hope this might help,

Paul D.
19 Oct 2012, 7:22pm
Thanks for all the info on raising the ride height guys. But I'm going to wait until I've driven it before changing anything. I've measured the difference between the inboard and outboard ends of the steering arms today and I'd have to raise the front ride height by 80mm to get them level. That would leave the car looking like a harrier jump-jet on a ski jump take off unless I raise the back 80mm to match. Then I'd have the first big-foot Sammio. :(
20 Oct 2012, 10:38am
I'm currently listing my last few bits of Vitesse on ebay, the dash panel and wheels, and, so long as both buyers pay, I'VE MADE A PROFIT ON MY DONOR!

http://www.ebay.co.uk/itm/140867187068?ssPageName=STRK:MESELX:IT&_trksid=p3984.m1555.l2649

http://www.ebay.co.uk/itm/140867170402?ssPageName=STRK:MESELX:IT&_trksid=p3984.m1555.l2649

I had recovered all but £28 of what I paid for the Vitesse, so, as it stands right at this moment, I'm looking at a profit of a massive three pounds.

Who knows, if I get a couple more bids I might be able to retire early...

So, for any lurkers out there, just bear in mind that a Sammio is based on a donor that'll likely make you money. Harry bargain. :)
20 Oct 2012, 12:13pm
As you say Towed theres not many who havent at least broken even with the parts they sell off, I too was lucky to make a profit on my donor spares and complete my wifes Herald Project, Happy Days
21 Oct 2012, 11:24am
T, are you doing much today? Can you work in the garage. Do you know roughly how much leather they used for your seats?
21 Oct 2012, 2:08pm
garyh wrote:
T, are you doing much today? Can you work in the garage. Do you know roughly how much leather they used for your seats?


Having a rest today as I'm shattered after a pretty hectic set of shifts -

I got involved in the world's shortest Police chase at about 1am on Friday night/Saturday morning. Without giving away any details I got behind a young drink driver who narrowly missed having a head-on with an artic, then thought it'd be a good idea to make a run for it into the woods, together with her front seat passenger, when I lit their car up with the blues.

They got about three feet away from the car in the dark, fell headlong into a water filled ditch then got tangled up in Britain's biggest bramble bush while I stood at the roadside watching with my hands on my hips.

I had no intention of chasing them as there was a dog unit about two minutes away and I didn't want the dog to miss out on the opportunity of tracking a couple of idiots through a dark wood at night and biting them. Dogs love that sort of thing, you see, and I do love animals.

Unable to run any further due to being tangled in the brambles and their feet bleeding too painfully, they started whimpering for me to help them find their shoes, which were stuck in the mud at the bottom of the ditch. The dog looked disappointed when it arrived.

Anyway, once we'd extracted them from the bramble bush and given first-aid to the rear seat passenger, who'd drunk so much she lost consciousness and started having convulsions, it took me until 6am to deal with the matter, which meant I did a thirteen hour shift before going back in for another ten hours last night. Hey ho, that's what I get paid for. :ballchain:

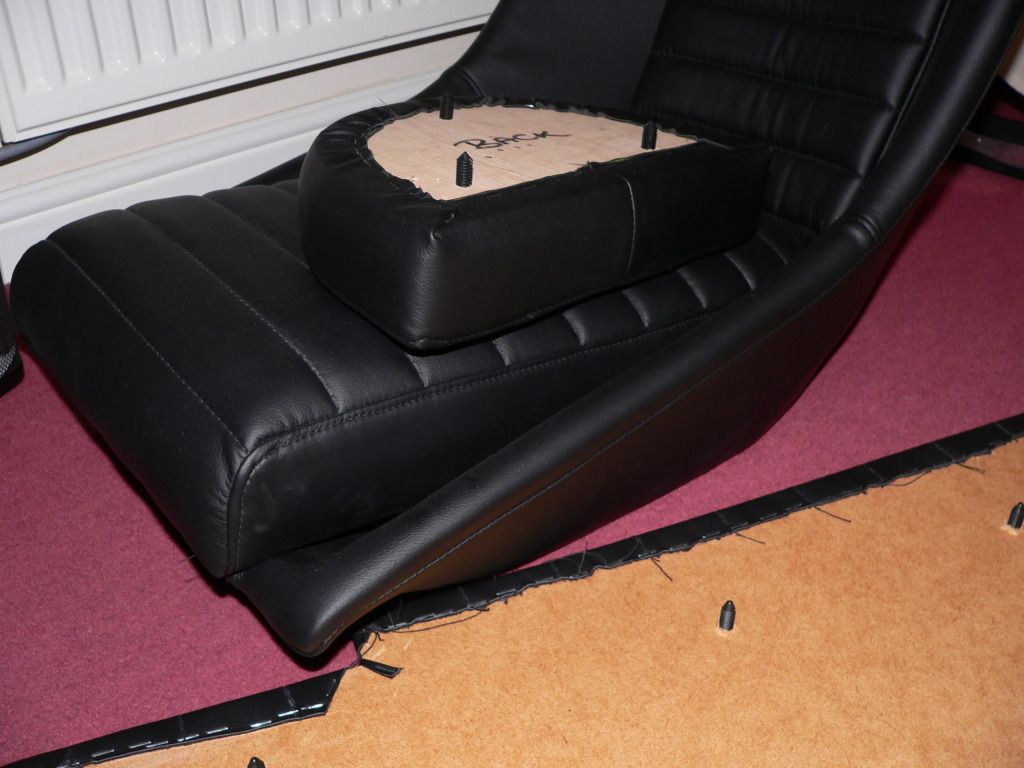
As for the quantity of leather that went into my seats, I'm really not sure on the exact amount. I was expecting them to use leather for the face and vinyl for the backs to keep the cost down, but they said there'd be virtually no difference in price. They also did my side panels in leather for about the same as it would've cost me to do them myself in vinyl.
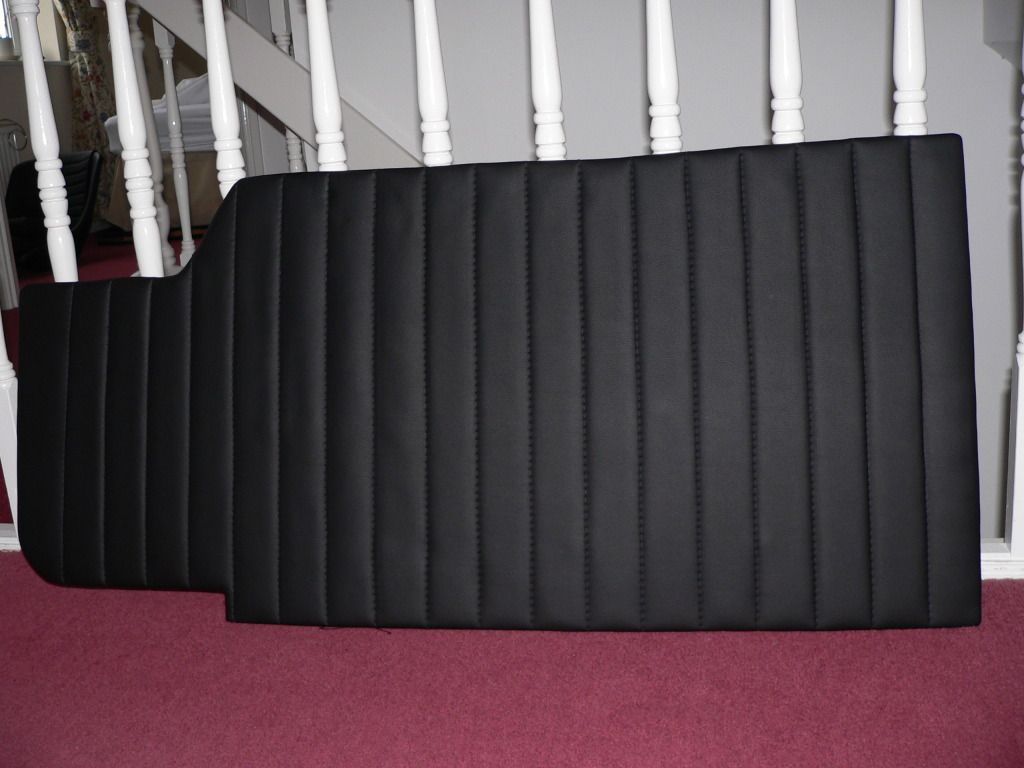


Are you thinking of doing your trimming yourself? I'd considered it, and was looking at leather sofas on ebay for the materials, but, to be honest, it was the one job that I just knew I needed to pay someone else to do properly. I'm really pleased with the quality of the job the Brockwell brothers did on my interior and I'd recommend them to anyone.

So, there should be a bit more progress tomorrow, although I've ordered some more 50mm x 5mm steel bar as I want to make a better hinge mechanism for my bonnet as the basic arrangement I'd put in place doesn't allow it to open far enough before fouling the front of the radiator.
21 Oct 2012, 2:50pm
It must be nice to do something completely different from your actual job. A bit of peace and quiet in the garage. I will keep a look out for emails telling me theirs an up date.
21 Oct 2012, 4:00pm
Mr T - Panel looks good. 8)

If I decide to fit a padded head rest on my "hump" I will give them a shout.

Did you supply the head rest for them to cover, or did they make the whole thing for you?

Cheers, Paul. :)
21 Oct 2012, 4:28pm
Paul L wrote:
Mr T - Panel looks good. 8)

If I decide to fit a padded head rest on my "hump" I will give them a shout.

Did you supply the head rest for them to cover, or did they make the whole thing for you?

Cheers, Paul. :)


Hi Paul, yes, the leather side panels look, feel and even smell really good.

The head fairing pad came with my Spyder body and was trimmed in vinyl. I decided I'd rather have leather so I asked them to retrim it for me. They could easily have made me one from scratch, though, and it would've been about the same price. I'd recommend some kind of pad for the head fairing as my wife has already banged her head on the hump while trying to get out.
21 Oct 2012, 5:24pm
Cheers Mr T.

I didn't order one with my kit because they were having some issues with the trimmer at the time.

So I will keep this in mind.

I'll also keep an eye on how you fit it when the time comes.

Thanks again, Paul. :)
21 Oct 2012, 7:15pm
Paul L wrote:

I'll also keep an eye on how you fit it when the time comes.


The trim is fitted using 'fir tree' clips. They'll go into a 7mm hole, but the Brockwells recommend a 17/64" bit for a slightly tighter fit, so that's what I've bought. Once I'd made the side panels I put them in place then drilled small pilot holes through the panels into the sides of the car.

Brockwells fitted the fir tree clips into the panels before trimming them, and they'll match the holes in the sides when I come to install them after paint. Simple. :)


28 Oct 2012, 2:48pm
T, nice but cold today... Looking forward to seeing what you've done today? Can you also Hoover up any toenail clippings... Can't get you out of that car!
28 Oct 2012, 3:37pm
Ha ha. Spent an hour working on my new bonnet bracket this morning, but it was just too cold - I picked up a piece of metal that was red hot and because my hands were so cold I didn't realise until I heard the sizzling :(

I'm off to work in a minute, but there'll be some progress in a few days time...
31 Oct 2012, 4:55pm
Plan for today was to finish off my mkII bonnet brackets. That was based on me finishing my shift at midnight last night. Anyway, circumstances dictated that I actually finished at 6a.m. after a fifteen hour shift catering to the needs of those for whom a hearty breakfast of super strength supermarket cider is the norm.

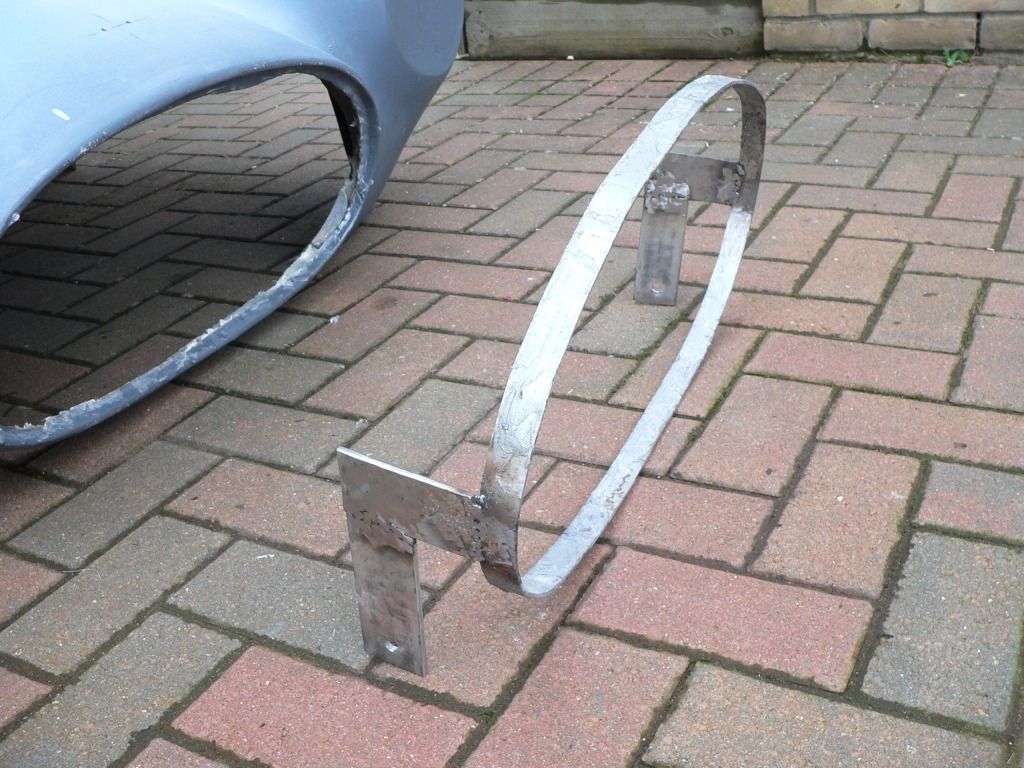
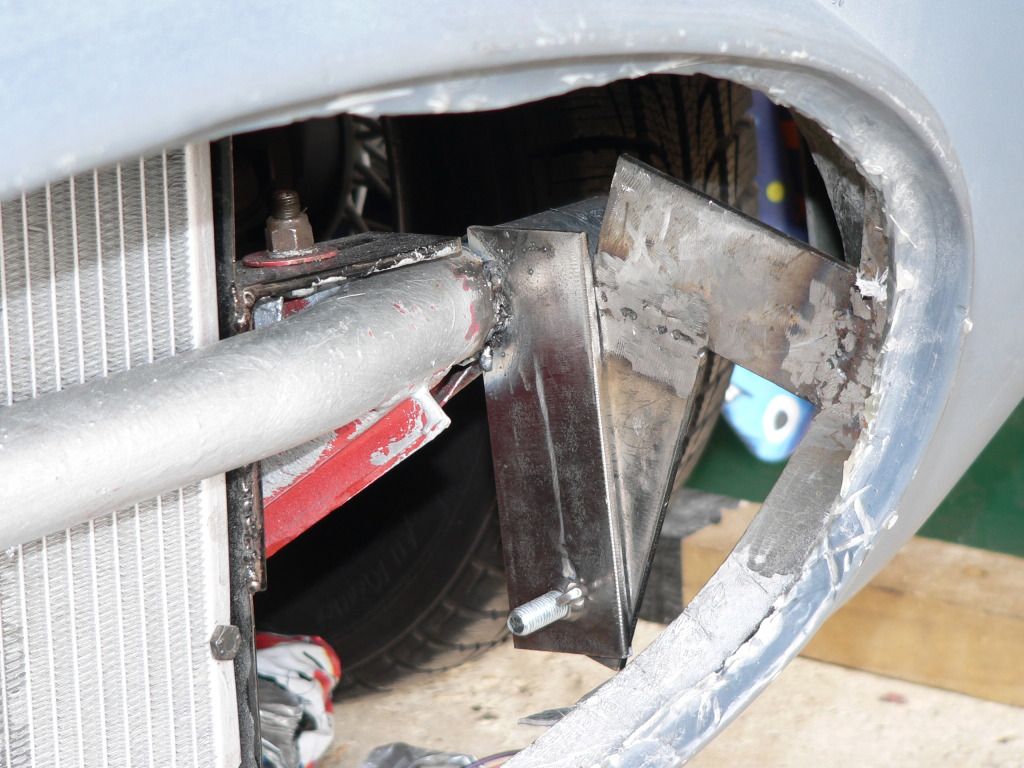
So, instead of working on my Spyder I've spent half the day sleeping and the rest of it grumpily surfing the 'net. I did get an hour here and there between shifts to make a start, though. I've cut the hoop out of the bonnet (which briefly caught fire while I was trying to weld a new bracket to it in situ) and welded on some 'L' brackets to move the pivot point down to the bottom edge of the bonnet. I've tack welded matching ones in place on the front cross-member, but I need to fully weld them in place and bond the hoop back into the nose permanently. I'll see how I feel tomorrow.


31 Oct 2012, 5:38pm
Bloody hell, that looks mean from the front.
31 Oct 2012, 5:51pm
That is starting to come together very nicely! I like the height of your rad, that looks just right.
31 Oct 2012, 6:16pm
Thanks guys, the Honda Civic radiator is a perfect size and the stance makes it look pretty menacing from dead ahead. With the brackets now pivoting from the bottom edge I can reinstate the rectangular section I cut out of the bottom to give it a bit more clearance when it was pivoted in the middle. I'm toying with the idea of another scoop under there for a sort of additional oil cooler look. Hmm...
31 Oct 2012, 6:19pm
yes looking very nice
3 Nov 2012, 9:12pm
Just a little progress today due to family commitments. Having moved my bonnet down an inch and back an inch to get the front wheels centred properly in the arches, and cut an inch off the back edge of the bonnet to compensate, I decided I'd got too much filler on the bulkhead and not enough bonnet left :(

So, today I've glassed the inch wide strip back onto the bonnet and chipped all the filler off the bulkhead -


I had worried that the filler would just crack off anyway, but it'd bonded so well with the body that it took lumps of gel-coat and fibreglass with it when it went. I'll be sorting that when I redo the bonnet shut line in a couple of days time.

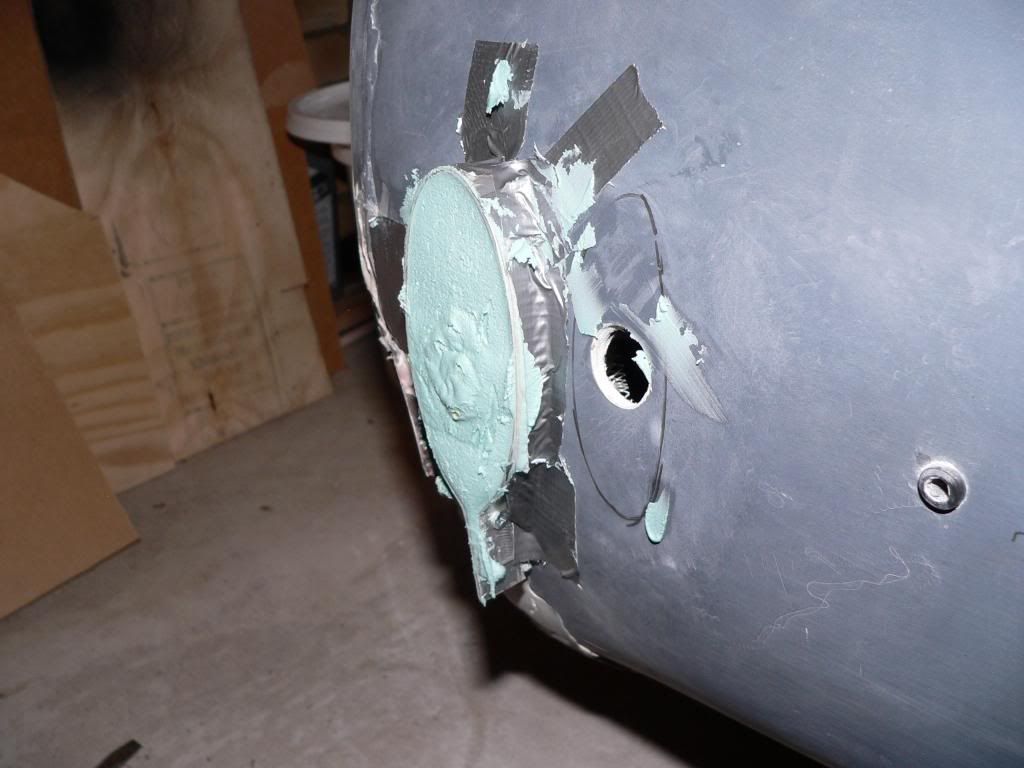
I also wasn't happy with the mounts for the rear lights and indicators. To be honest I'd just offered them up with cling-film over them and spread a bit of filler under them to see whether I liked the positioning or not. Although they weren't perfect I liked the positions, so today I made aluminium moulds to make some proper plinths -


I've been plugging away building my Spyder for about eighteen months now and my wife says I'm spending too much time in the garage and not enough time looking after my health.

OK, so I'm not eating properly and instead of sleeping I constantly scour the internet for ideas to make my Spyder unique, but I can handle it...


3 Nov 2012, 9:35pm
And I thought the photos of WorldClassAccident's foot were bad!

:icon_twisted:

I know you have had to re-do a few bits, but it will be well worth it, as you are going to have a stand out car at the end.

And that end will not be too far away either.

Good Luck, Paul. :)
4 Nov 2012, 6:43am
Morning Fester, I mean Towed, With you resetting the bonnet will that compromise the wheel arch alignment that you were after?
As I posted before I have moved my bonnet and bulk head shut line forward about 2" this gives me the flowing line from bulkhead and over the wings that I want, clearance is good over the rad hoses even though the nose is very low. I am going to wait and see how the arches look sat over the 14" wheels once done and if necessary thinking of cutting above the return lip of the arch from the front to the midpoint then pulling it into the radius I want, then glassing in the infill. (if that makes any sense I don't know but its clear in my mind).

I have the same issue that in order to keep the bonnet in line left to right the gap at the cross member is different each side but I can live with that.
Keep going and keep posting we are at a similar stage in the builds and its good to compare issues and fixes and I admit I have borrowed a few of your ideas..
4 Nov 2012, 8:22am
Scary Towed

We know what you mean cutting, shutting, bonding, wheel arch bulkhead alignments and a flowing lines. Its all worth it and looking at your ideas on the rear light is a step above "yoghurt pots" I saw mentioned last week.

Pops
We have been struggling with the wheel arch returns for ages ours have all been cut out, Gaz on No 1 looks as if he has bonded in a right angle return.
Our solution is to take a length of stainless steel bendy plasterers angle bead and bond it to the inside giving a perfect curve this will give a round lip along the car edge with can be feathered into the body work giving a delicate rolled edge to the wheel arch (we hope)

Haven't actually done this yet but we think it will work
4 Nov 2012, 8:49am
Charman
I know the stuff you mean, I am hoping not to remove the edge but will consider that if I do, picked up a good tip on Tribute builds re making the edges by laying up the strands on a sheet of glass to produce a smooth faced flexible edge,
Pops
4 Nov 2012, 9:06am
Sounds like you're going through the same as i did with mine, so good luck to you as i know exactly what you're going through!

At least you hadn't painted yours before you decided to change it all :)