This is a read-only archive of the old Madabout Kitcars forum. New posts and replies are no longer possible, but every thread is still here to browse and read.
Hi TynopPrime. Thanks for the pictures. I do like the GT lights, so am tempted. What are you going to do for a fog lamp - given that it is a legal requirement? Also - how did you cut the holes for the lights?
Also, I assume you have bought the lights? Can you place them in and take another picture. That would really help to see what they look like on the MX250. Thank-you.
Hi TynopPrime. Thanks for the pictures. I do like the GT lights, so am tempted. What are you going to do for a fog lamp - given that it is a legal requirement? Also - how did you cut the holes for the lights?
On my 250 SWB the rear fog is inside the car in the back window. The MOT tester checked the requirements and it's perfectly legal. As it shows as clear LEDs when not lit, you can hardly see it.
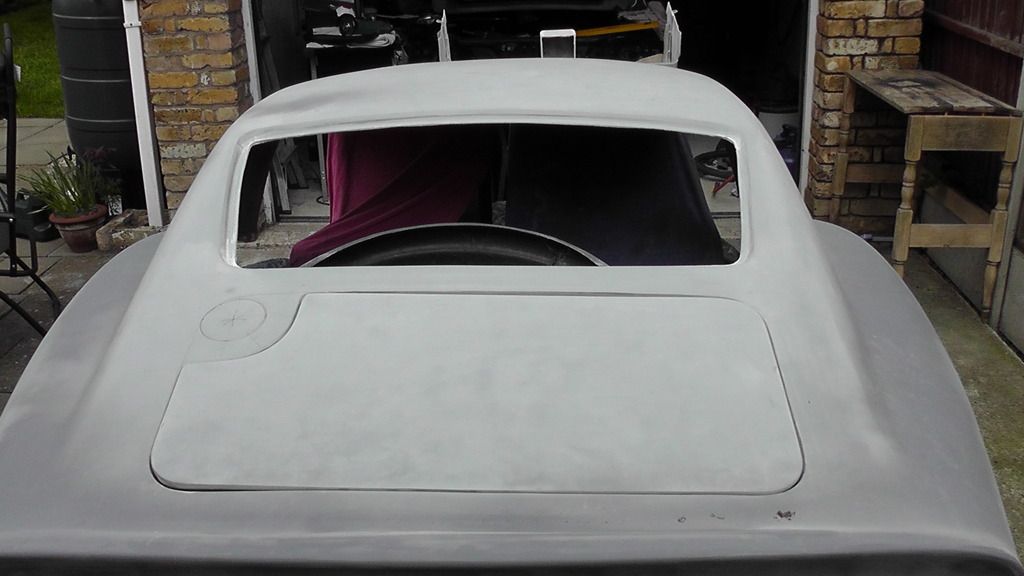
It's been a while since I last posted, I'm slowly working my way through all the items I need to do to before fitting the rear clamshell.
I've made a list which may or not be of interest to others.
• Clamshell
○ Rub down all mould lines and get shape correct
○ Area between doors and rear wheel arch
- Trim profile to allow enough distance to blend filler
- Consider how to get uniform both sides
• Rear Window
○ Trim flange edges for rear window glass to 5mm smaller than glass
○ Fit window
○ (paint flanges first as appropriate)
• Parcel Shelf
○ Repair, Fill and sand
○ Paint
○ Rivet and bond to rear boot area
○ Cover with fabric as appropriate
• Boot Extender
○ Ensure fits Correctly to allow rear clamshell to sit at correct height
○ Repair, Fill and sand
○ MK2 - fabricate pieces to close corner gaps in corners
○ Glass fibre large gaps to avoid water leaks
○ Tiger Seal seams and smaller gaps
○ Paint
• Vents behind rear wheels
○ Cut holes and sand
○ Fabricate and Glue mesh
• Area between doors and rear wheel arch
○ Trim profile to allow enough distance to blend filler
• Wiring & Lights
○ Route rear lamp wiring
- Cut Holes in body
- Fit lights
- MK2 can use rear light jumper / sealing grommets / connector
- Join light pigtails to vehicle lighting wiring
- Consider how to connect wires when body is fitted
○ Number plate lights
- Need to re-route Mx5 wiring from rear boot lid to rear area
- Fit number plate lights
- Join light pigtails to vehicle circuit
- Consider how to connect wires when body is fitted
• Aerial
○ Re-locate aerial (inside boot?)
○ Re-route wiring
○ Fit booster if needed
• Heated Screen
○ Route and glue wires around edge of window aperture
○ Ensure connection route path to body wiring
• Headliner
○ Glue headliner to body
○ Leave extra at edges to trim later
• Fuel Pipe
○ Cut hole in clamshell
○ Create recess as appropriate (from glass fibre matt) & bond
○ Fabricate longer fuel pipe and breather from 2nd MX5 fuel pipe
○ Mount fuel pipe to body
○ Fit petrol cap
• Exhaust Pipe
○ Need to lower to clear lower valence of clamshell
○ Temporarily cut and fit 90 degree bend
• Boot Lid
○ Fit hinges - ensure gap is uniform
○ Fit boot rubber
• Boot Latch
○ Fit latch to boot extender box section
○ Route remote release as appropriate
○ Fit striker to boot lid
○ Fit Lock to boot lid or use original lock as appropriate
• Drain Tubes
○ Fit spiggots in boot trough
○ Drill holes in rear boot extender
○ Fit tube between two
• Trim
○ Re-fit any trim pieces that will be hard to access afterwards
Its hard to say from the photo but a few things to consider.
Is it the boot lid that needs adjusting or the surrounding areas that it sits in.
Does it sit better with the rubbers removed. Bear in mind that they will compress a little one time.
Can the lip be trimmed to allow the boot corner to be lowered.
With my bonnet, I put some slices into the strengtheners underneath, curved the bonnet and glassed it back up. You could do the same, screw the boot lid to the car to get it flat and then glass it up from underneath. Screw holes are easily filled afterwards.
With the ariel, I bought a sharks fin ariel from Ebay for about £10, it has some kind of circuit board inside and a lead with an eyelet on the end. The eyelet screws to the old ariel base and the sharks fin sits under the fibreglass shell with double sided tape. It actually has better reception than the original ariel, this was on the Z3, the fitting may be different on he MX5.
TAZ - Remember you are trying to fit this without mounting it to the car, the body does flex a lot at this stage and I would recommend only using this time to fix hinges and drill hoes for lights etc and not the final fit.
You need to trim the boot flange down as it's too high for the original seal and once you get the catch on you will find a better fit.
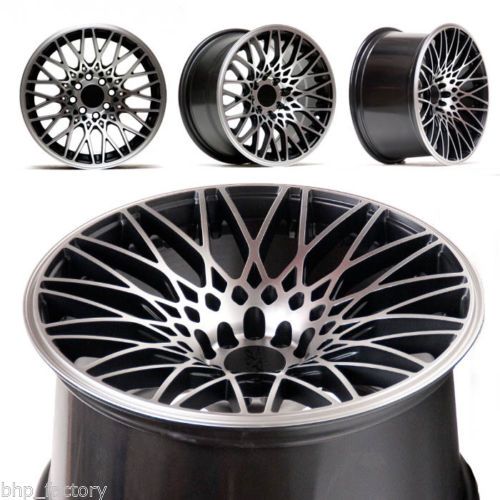
To start discussion, I quite like these from XXR (553). However, they are quite wide and not sure they will fit in the front wheel arch?
If I calculate correctly , they will protrude 81mm from the hub (8" = 203/2 mm - 21mm offset = 81mm) and most other builds are around 70mm. So is it too much?
Should I go 15" or 16"? I think 16" will look better but am worried about a harsh ride as I have lowered the car.
At the rear I calculate I would still need a 45mm spacer.
Or what else could you suggest? Are there any good designs with staggered offsets?
Finally managed to get rear section bonded and riveted over the Christmas hols!
My thoughts are now turning to the front end. Anyone have any tips on cutting out the three front vents and headlight sockets?
Also, I'm thinking of adding slots to the front wings - GTO style - but given the fibreglass bonds to the cut metal wing in that area, it seems a little tricky. Any tips? Is there a way to simulate it without cutting the whole right through?
I did the vents and headlights by roughly cutting out using a hole saw and then enlarging the holes using a dremel with one of those little sanding tube things. They get through the fibreglass pretty easily.