This is a read-only archive of the old Madabout Kitcars forum. New posts and replies are no longer possible, but every thread is still here to browse and read.
I drilled and inserted two riv nuts into the door skin for the handle to bolt to. If you do not have one of these tools a a self taping screw and spire nut will do. Then I drilled through the pre-drilled holes in the panel into the door skin making six holes. Then used stainless steel cups and self tapers to screw the door panel to the door.
So I am going to customise the clocks now. If you did not think I’m mad already this should convince you. First remove the speedo/tacho binnacle.
Then turn it over and remove the five torx screws in the back. This will separate the two halves. (second picture) Now BMW in their ultimate wisdom decided to permamently glue the clear plastic cover to the binnacle. On most vehicles you just lever each tab around the outside till it comes off, giving you perfect access to the clock faces. Not on Z3’s. I googled removing the speedo head from the cluster and they all say it can’t be done. Now I’m a persistence little **** so I got and old set of clocks from my wifes Z3 with a non working speedo. I reverse engineered (ie: smashed it apart) to see how it had been assembled and found a solution.(first picture)
There are three black, round posts with a white revolving collar. If you get a pair of nose pliers and rotate the white collar to the position where the base is free from the clear casing, the whole part lifts out. You have to be brave and go past the thin ‘stop’ plastic line to get there.
Carefully lift out the clocks paying attention NOT to touch the needles on the two outside gauges. I bought off ebay some chrome Ferrari modelling metal decal transfers. These are much classier than vinyl wording. I then carefully with the tip of a scalpel and a pair of tweesers positioned the lettering where I wanted them. Use the back of your nail to press them down, not your fingertips as these can leave fingerprints (not a good look). Peel off the outer clear coating.
Reassemble in reverse order. This took me a silly amount of time but should be quicker now for you. Sometimes the smallest (but important) details take the most time. Total cost £2.99.
Thanks for the helpful advice. As you're using the OEM instrument assembly, I wonder how the bezel surround would look painted in body colour to reinforce the period look?
And vinyl or letraset lettering to add the veglia brand name?
Good idea, but im not sure i would of doubled up the 'ferrari' logo, it doesnt look right underneath the MPH for me as there is a bit of a white '-' still showing. Good work non the less but doesnt look right to me.
Good idea, but im not sure i would of doubled up the 'ferrari' logo, it doesnt look right underneath the MPH for me as there is a bit of a white '-' still showing
From looking at cars and photos it seems that Ferrari added their logo to both speedo and tacho.
O'Rourke have always been the industry standard but ridiculously expensive. One chap from the Daytona replica club ([url]www.daytonareplica.co.uk[/url]) had a quote of just under £10000 for an interior. That just carpets, seats and panels! I got a local contact to do it for £4000 to the same standard.
However that's not the point of this thread. Most people on this forum do not have £4000+ to spend on an interior. I'm showing an alternative at a 10th of the cost including steering wheel, gauges, gaiters, gear knob, seats, etc, etc. That's a challenge! I personally love finding solutions that are cheap but effective.
It was the same in my twenties when I was Drag racing against teams with massive budgets. My times were as good and sometimes better with a 10th of the budget.
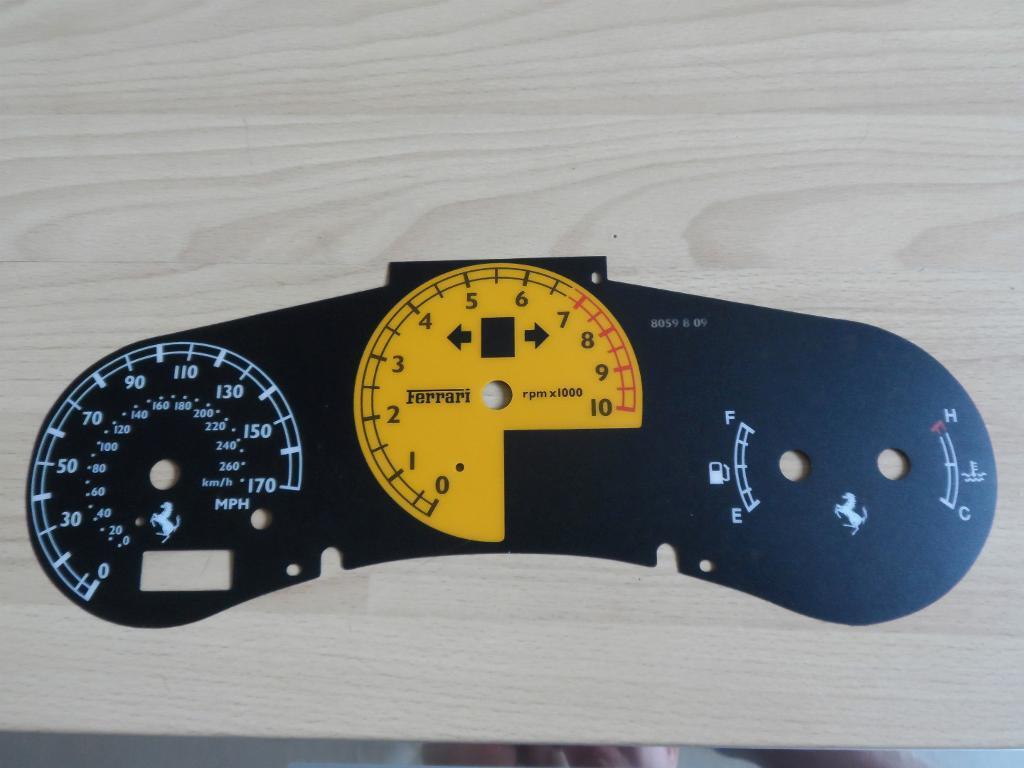
Another cheap and cheerful trick just one stage further is to take out the entire dial background plate, scan it, then photo shop original style F gauges and fonts on.
I did this for the Italian replica Facebook group when I had a 355 rep. made a whole set of dials for the MR2 that aped the 355 originals. Some of the guys just literally printed them out, laminated them and used them like that!
Here's an example that someone else did for F430 although this guy had them professionally produced (I think by Lockwood).
If anyone can send me a scan of the Z3 gauage backplate I'll have a go at producing one in 250 swb gauge style. I've still got the F355 psd files somewhere with all the Veglia logos etc.
I had them for my 360 replica. The owner of the dna automotive ownersclub ordered a fair few of them and they worked out at around £25 a set if i remember rightly.
If you have a look at my MX250 build thread, I was going to make them myself for my mx5 but never got round to it. There is a helpful link on how to do it very easily.
The passenger airbag has an embossed logo on it which is a dead giveaway. I have been searching for the right badge to cover it up. It has to be appropriate and the correct size. I think I have the perfect one now.
I wanted to start disguising the dashboard. The ‘ears’ that stick out from the dashboard that house the centre vents are a characteristic of the breed so I cut them off. If thy ears affend thee....